I completed 4 towels on my floor loom for the April #weaveforme challenge, but considering they were for a class as well, I did feel like I had cheated just a little.
*This post contains some affiliate links, which means that if you click and purchase, I receive a small commission at no extra cost to you.
So, I decided that I needed another project that was exclusively for me. I’ve been keen to start another project on my tapestry loom and thought it could be fun to weave a necklace or two. This is entirely different from my usual, often very practical projects.
I had a few hiccups to begin with. I wanted to use up some Appleton’s Crewel Embroidery Wool in a lovely range of colours that I had leftover from a crewel project long ago. This is a very thin and light wool.


I warped at 18epi with the same Ashford Tapestry Warp thread I have been using for all my tapestry work. Warping all went according to plan and I was ready to weave.
When I started weaving, however, I did not like what I saw! The wool is so thin that even though I beat down very hard, the warp thread still showed. It looked ugly! Now I had to put my thinking cap on and make some decisions. If I used a thicker weft, I was concerned that the 18epi would end up being too close. I wondered if I would be able to change the spring at the top of the loom that spaces the warp, in order to change the epi.

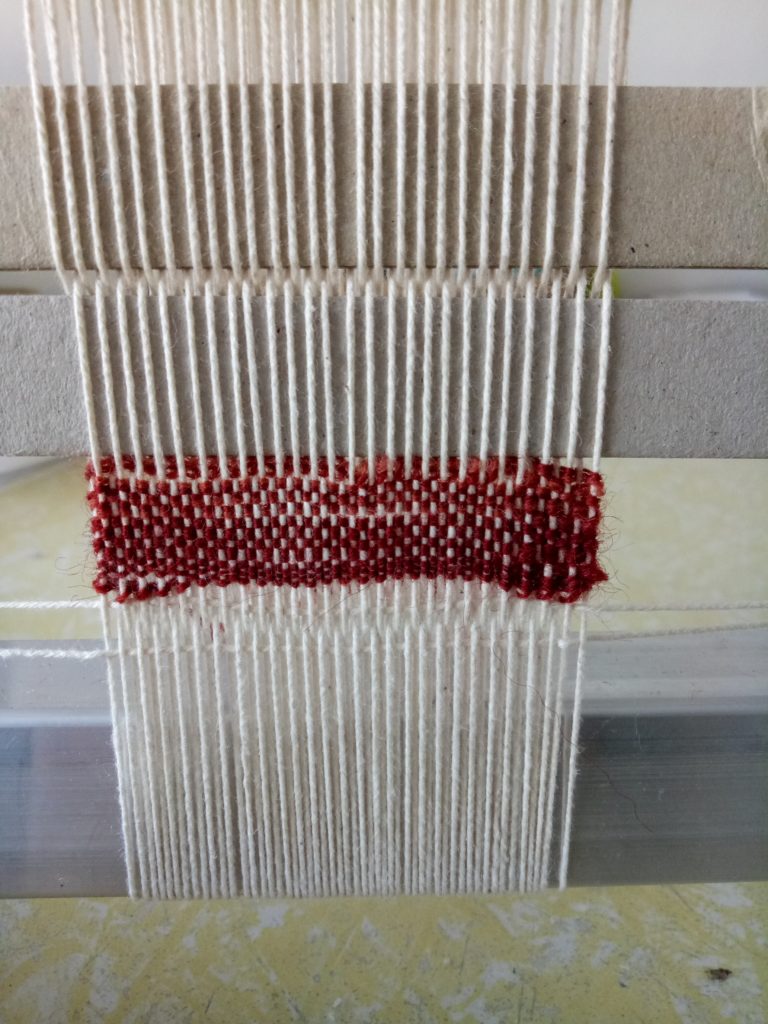
I loosened off the tension and went for it. I took off the 18epi spring and placed a 12epi spring on instead. Then I carefully rearranged all of those warp threads into their new spaces. This presented me with a new problem. My warp, now that the threads were space further apart was way too wide for the necklace project I wanted to weave!
Out came the thinking cap again (it received more use than normal on this particular day). I found that if I divided the warp in half, that would be just the right width for a necklace. Plus, that would allow me to weave 2 necklace panels simultaneously. Bingo!
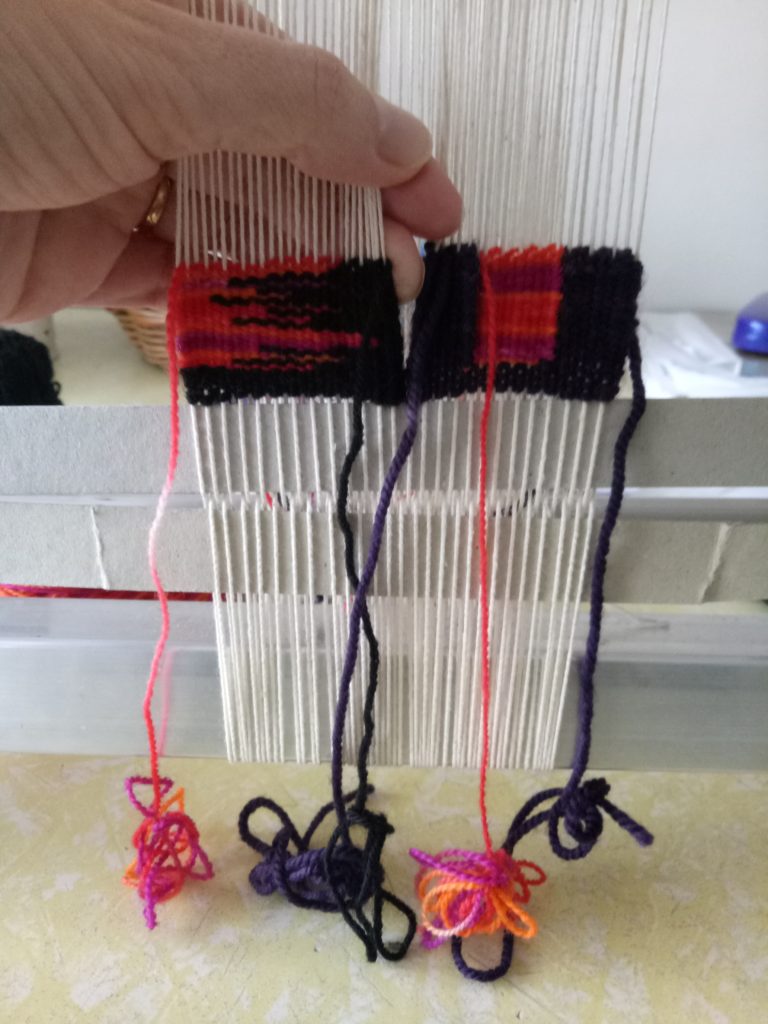
On one panel (left in the photo above) I used hatching with 2 contrasting wools – one solid black and the other a hand dyed variegated of similar weights.
The second panel used a worsted weight wool in dark purple and the same hand dyed as the other. The purple yarn was quite a bit heavier than the hand dyed, I dealt with that problem by doing extra rows on the middle panel to build it up at the same rate as the dark purple. These rectangular shapes are not joined, I used this technique because I wanted clean lines.
I was able to weave both panels at once, which worked out really well. My original intention was to continue to weave additional panels for extra necklaces, but I really wanted to complete the April challenge before too much of May had passed, plus I had other projects mounting up that needed to be started, so I decided to finish up and just do the two.
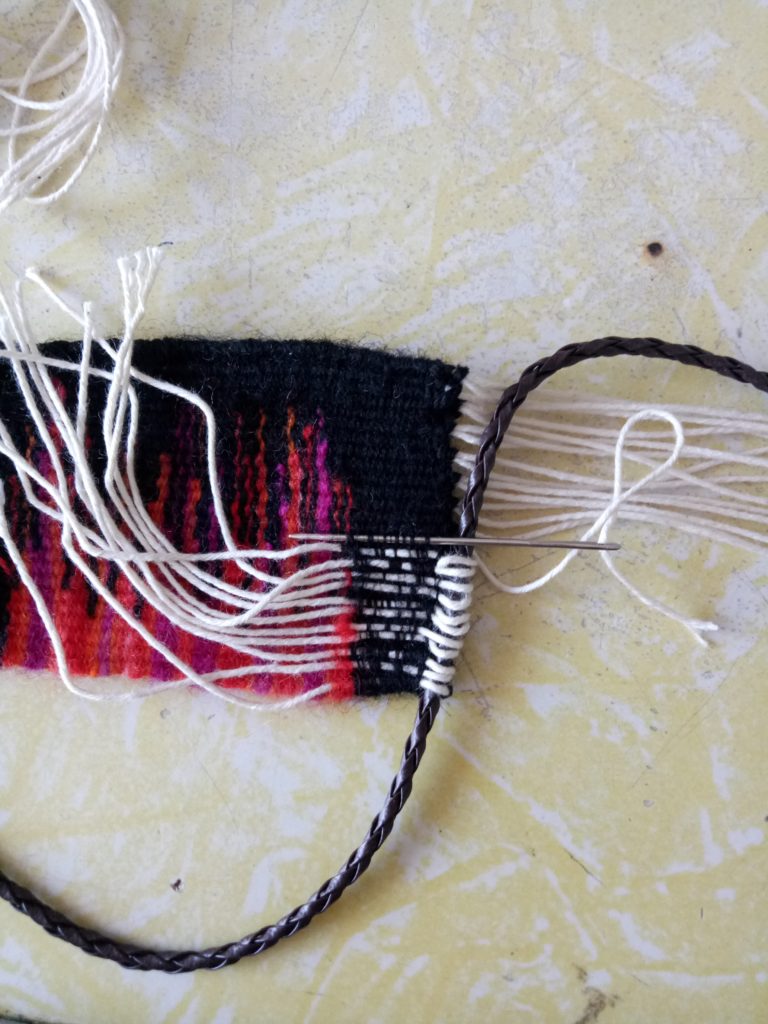
Finishing the fringes and making into a necklace.
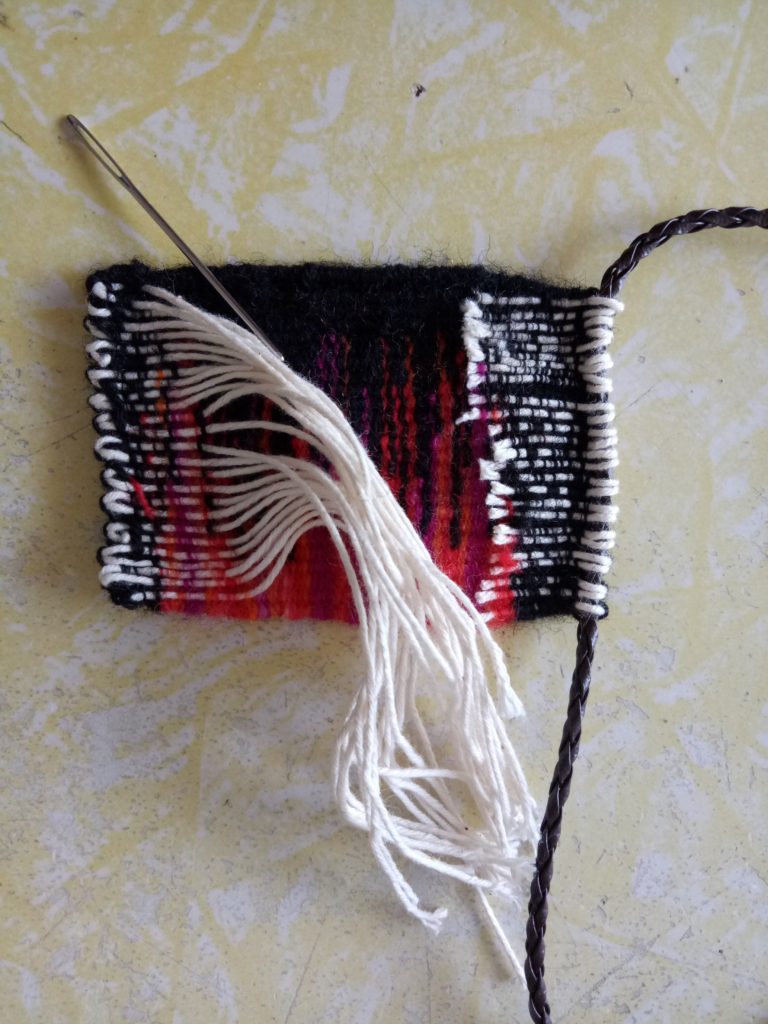
I decided to use hemstitching and a tapestry braiding finish (I’ll have a video tutorial for that soon) to finish the fringes. At the bottom of the hemstitched hatched panel, I wove the fringe back into the work. I took the fringe at the top, placed my faux leather necklace on top, and began weaving the fringes individually back into the work, looping the fringe threads around and encasing the necklace band as I went.
I wasn’t sure if this would secure the panel onto the band with enough strength, but now that I’m finished it is surprisingly hardy and doesn’t move.
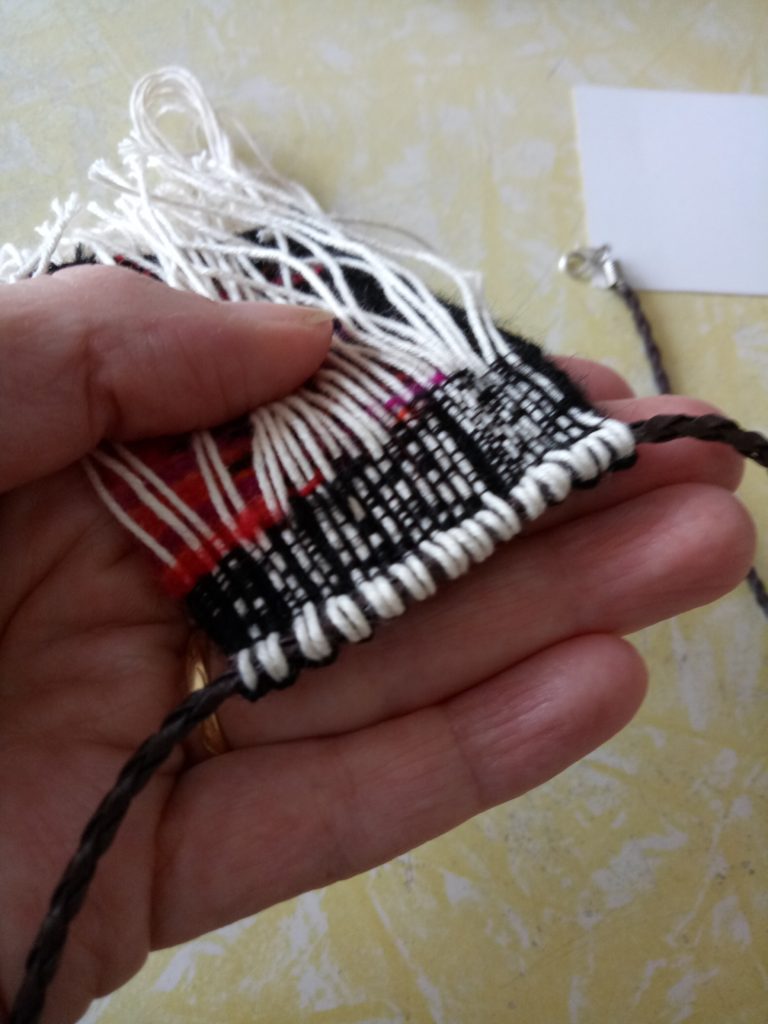
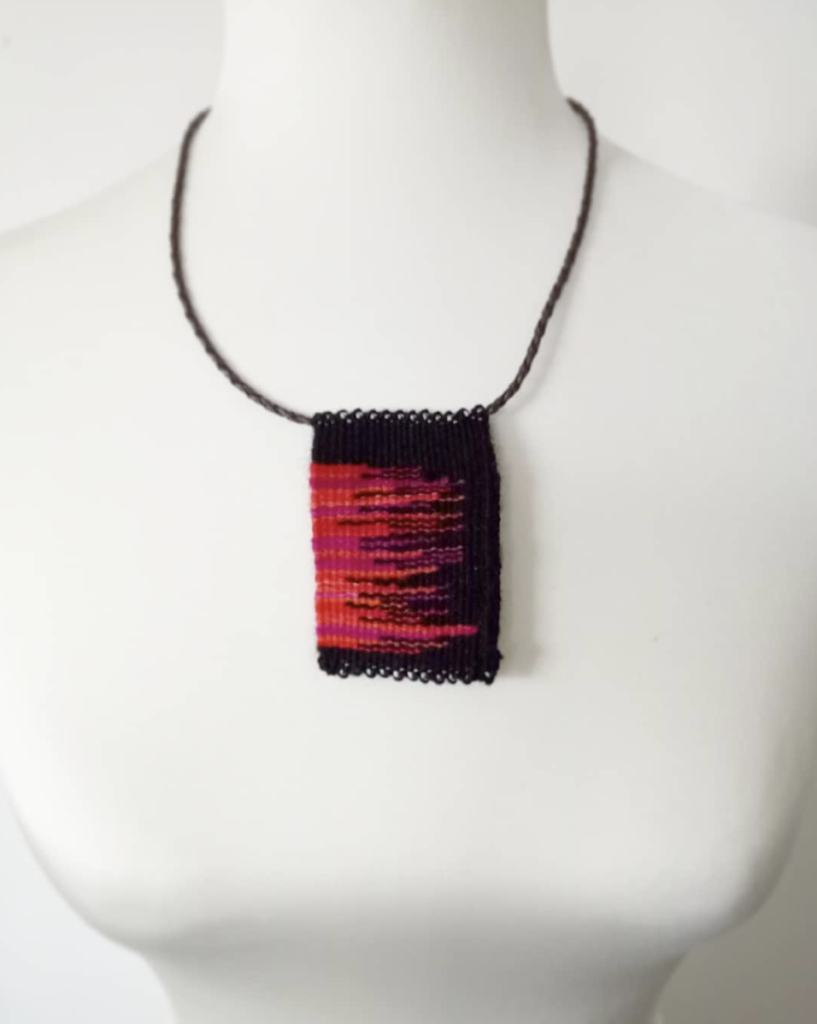
Once all the fringes were woven in securely, I snipped them off close to the fabric. The back of the necklace doesn’t show, but if I was worried about it, I could have sewn on a piece of felt the same size as the panel to cover the back.

I have not yet finished the other panel, but I’m so glad to have completed another project for the April #weaveforme challenge. The challenge was so popular that I would love to run it again next year. What do you think?
If you would prefer to watch this post and see a bit of a demonstration of the actual weaving, here you go!

And, if you have an interest in learning more about tapestry weaving on a rigid heddle loom, I have a class that will teach you all the basics and get you on your way.
I hope you all enjoyed following along with this project and reading and watching about it.
Until next time…
Happy Weaving!