• Skip to main content
  • Skip to primary sidebar

Kelly Casanova Weaving Lessons

  • Hi! I’m Kelly!
    • Disclosure
  • Online Weaving School Class Index
    • Common account issues
    • Common technical issues
    • What do I get with a membership?
  • New to rigid heddle weaving? Start here!
    • Never heard of the rigid heddle loom?
    • How to weave neat edges on the rigid heddle loom
    • Rigid heddle weaving
    • Rigid Heddle Weaving Patterns
  • Patterns
  • Subscribe

Tapestry Weaving

Ask Kelly – Is a rigid heddle loom ok for tapestry?

by Kelly Leave a Comment

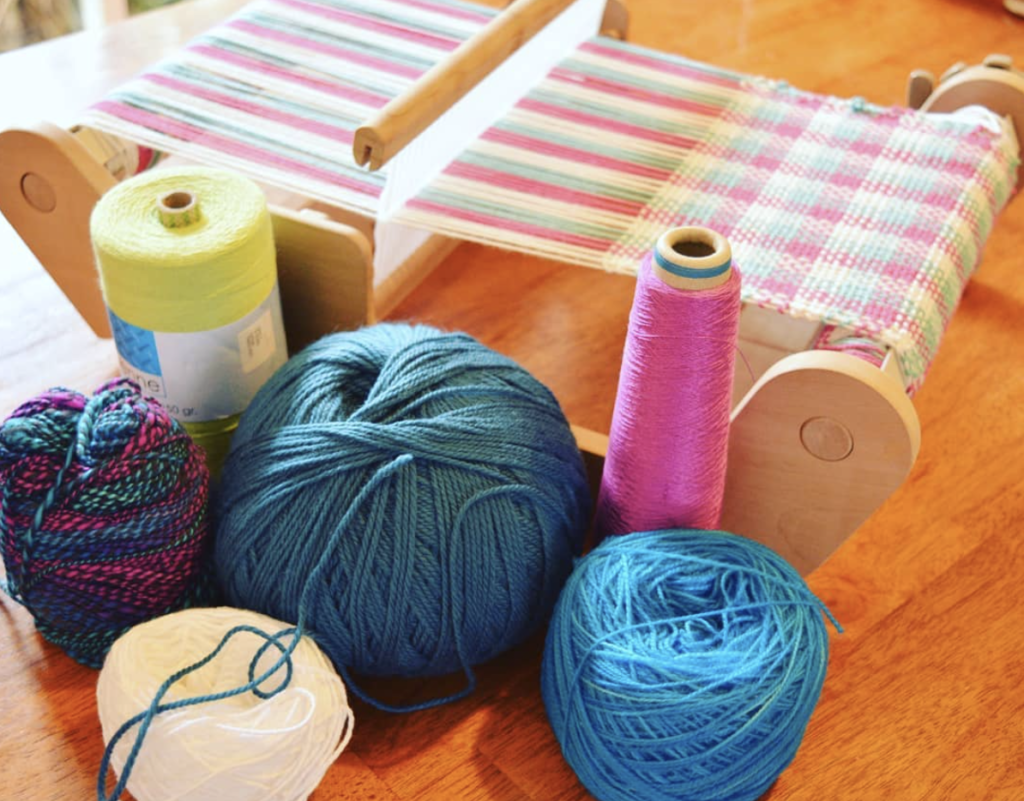
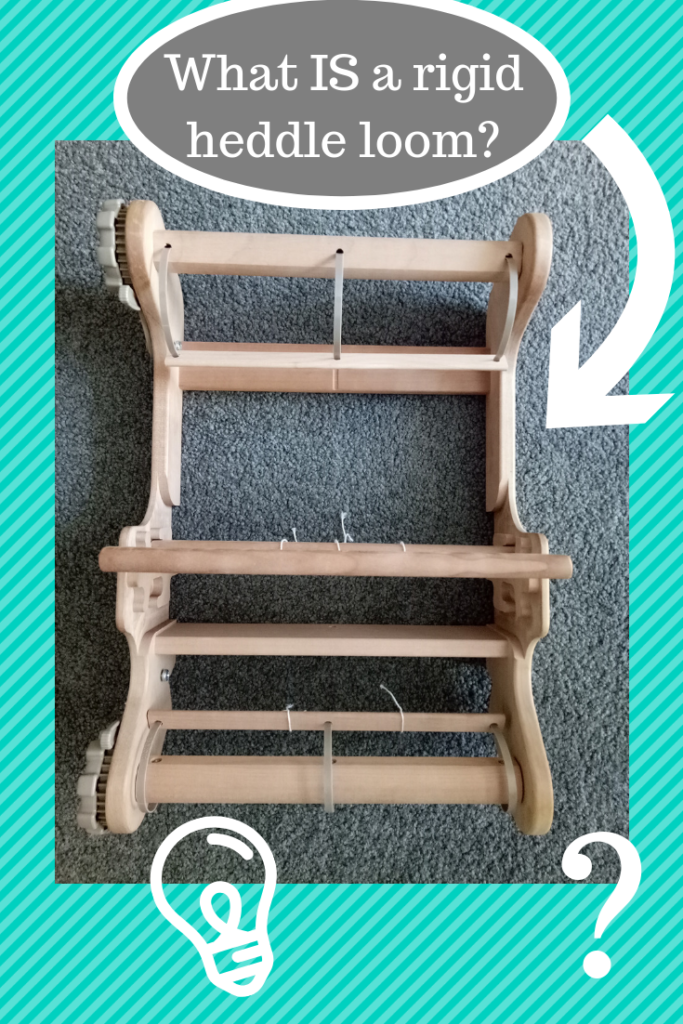
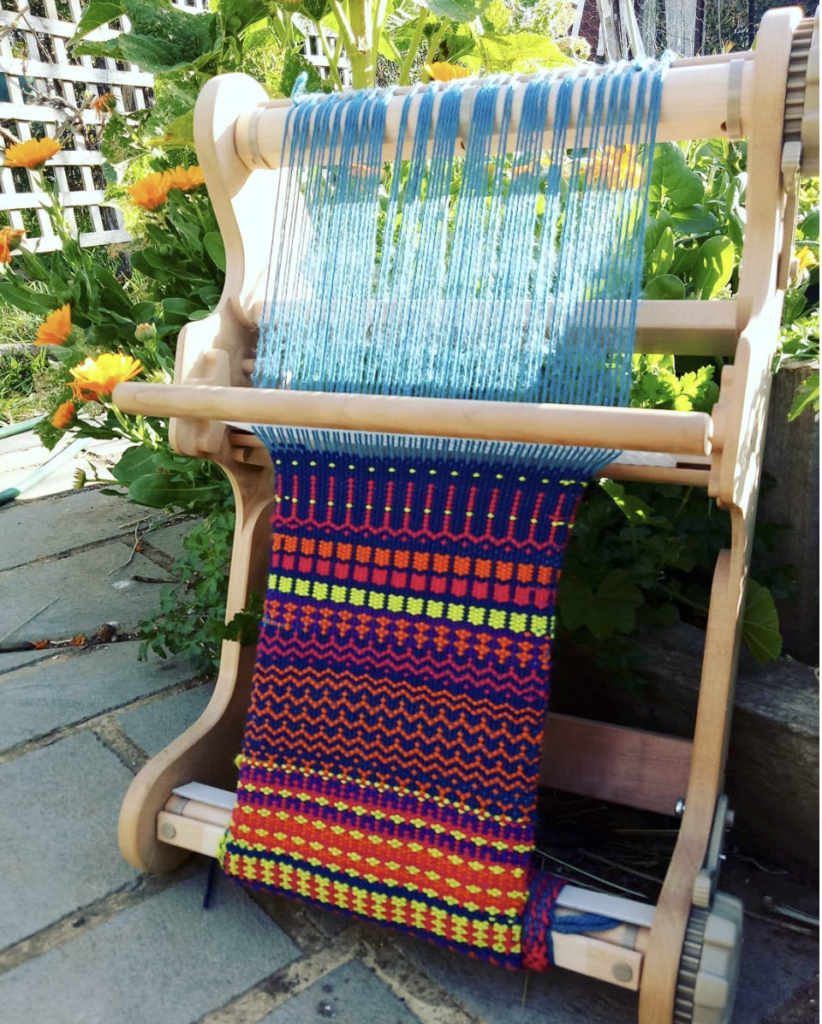
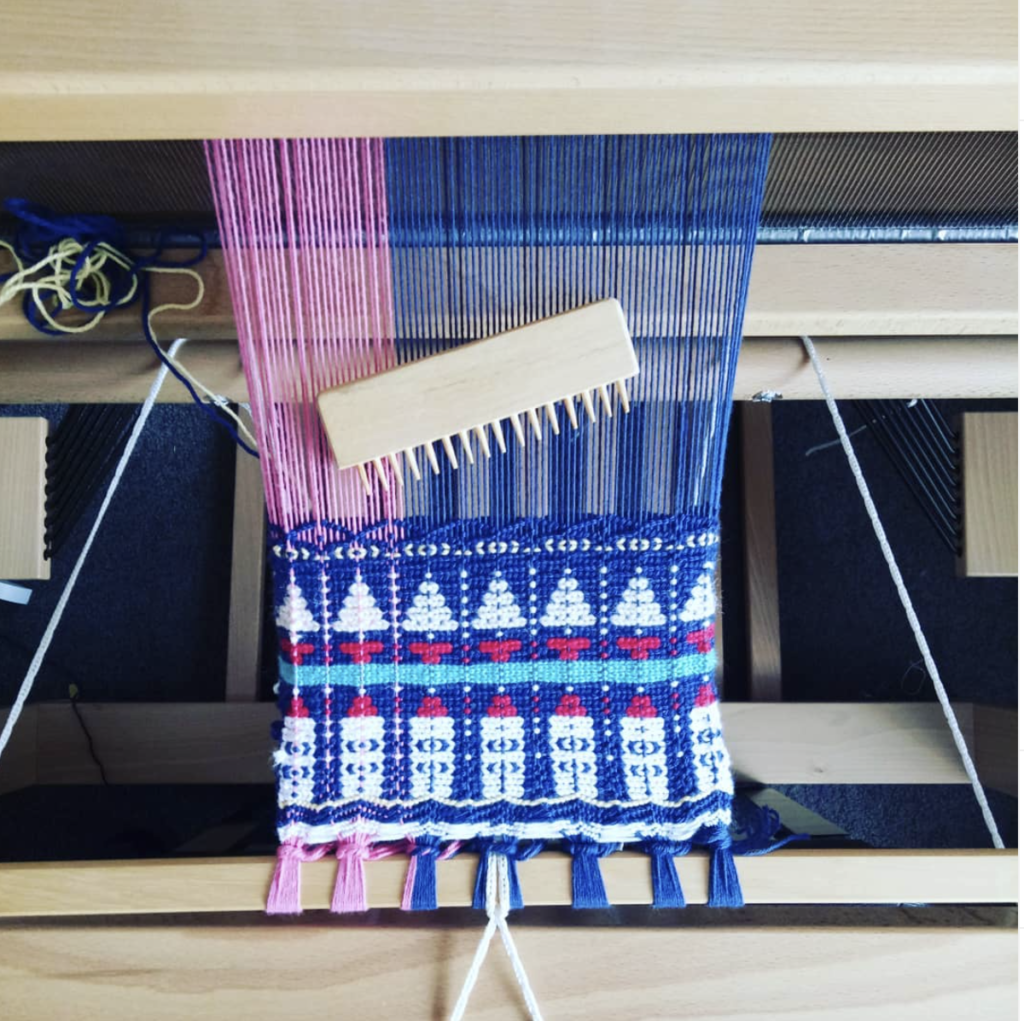
One of the marvellous things about owning a rigid heddle loom is the ability to try out so many weave structures without having to upgrade looms if you don’t want to.

It’s a great way to try out a structure to test whether you enjoy it and want to pursue it further. This can help you to make future weaving and loom decisions.

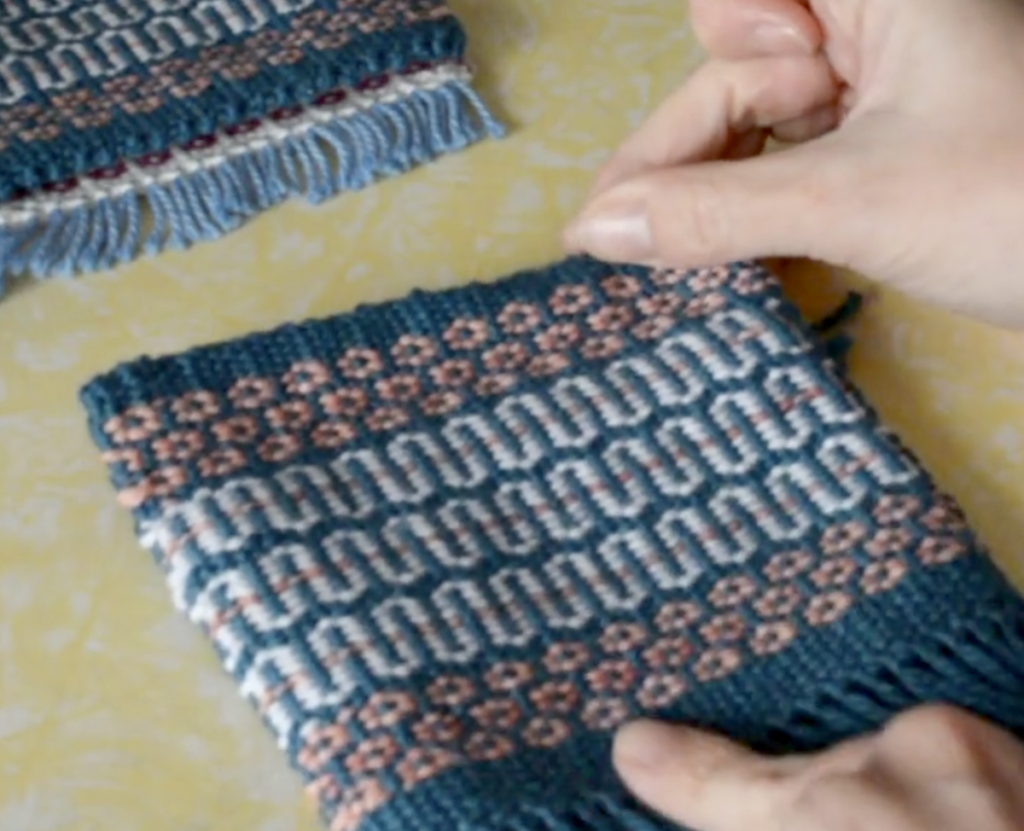
One structure you may be interested in trying out is tapestry and that is what today’s Ask Kelly question all about. I apologise to the original author of the question, I have misplaced your name!

“I have a question about rigid heddle looms used for tapestry.

It is my understanding that the downside of using the rigid heddle is the fact that the use of the heddle causes the warp threads on the outside to be too loose and the threads in general are also too loose for tapestry weaving. If you wanted to use the loom without the heddle, would that be possible?  And / or ok to work better.”

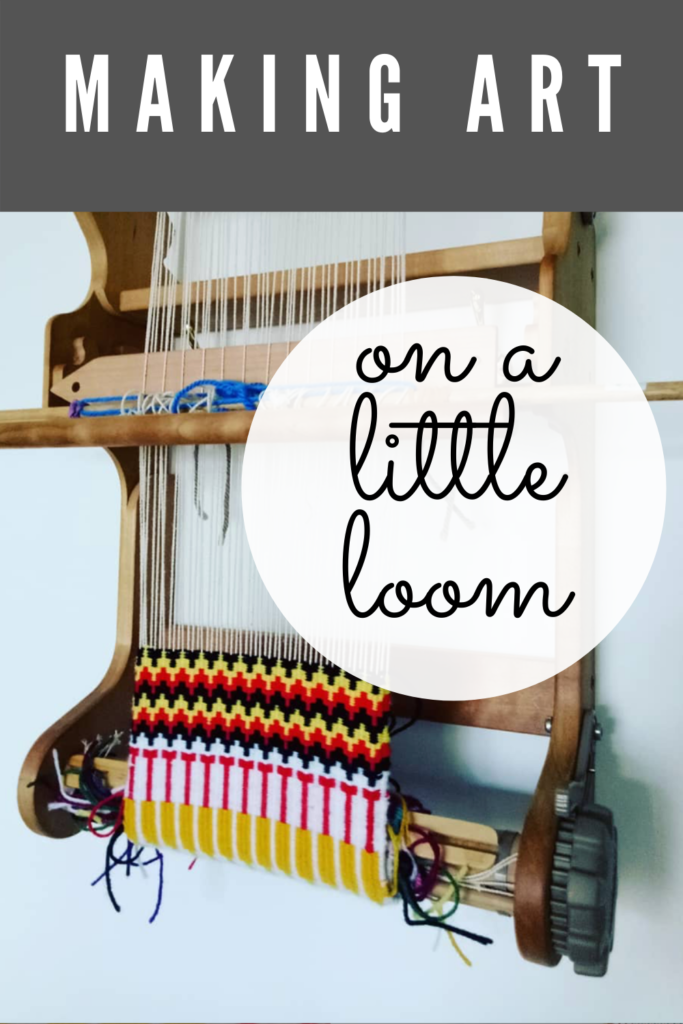
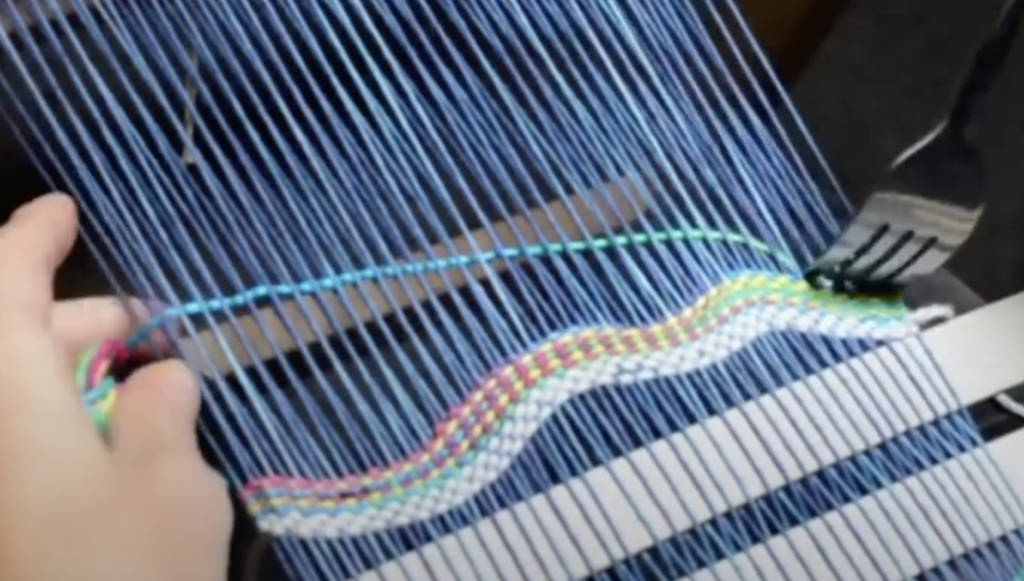
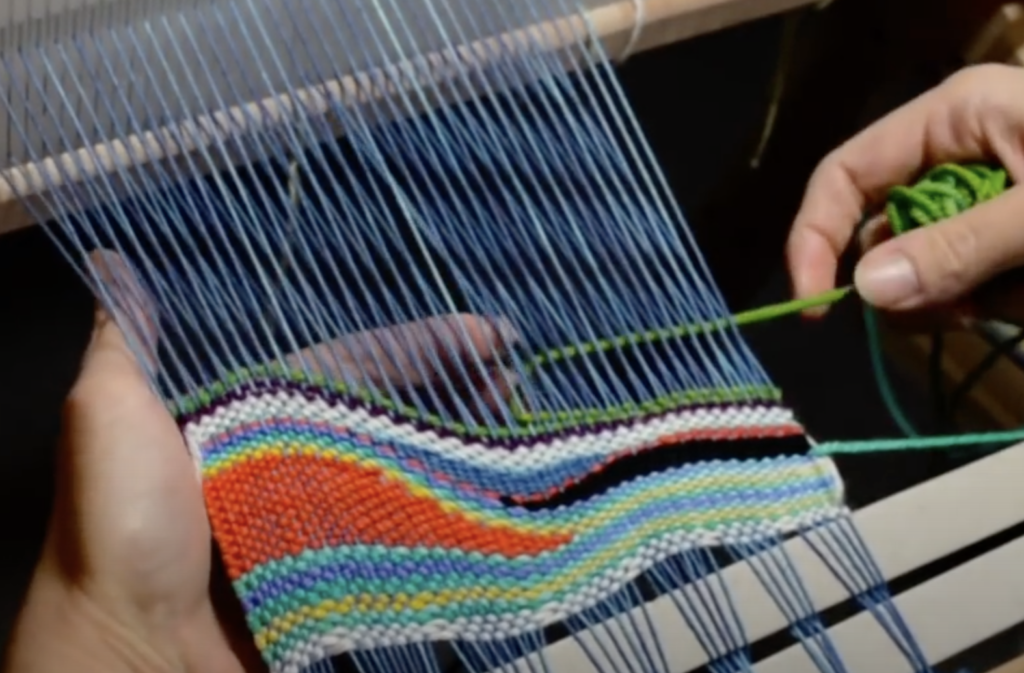
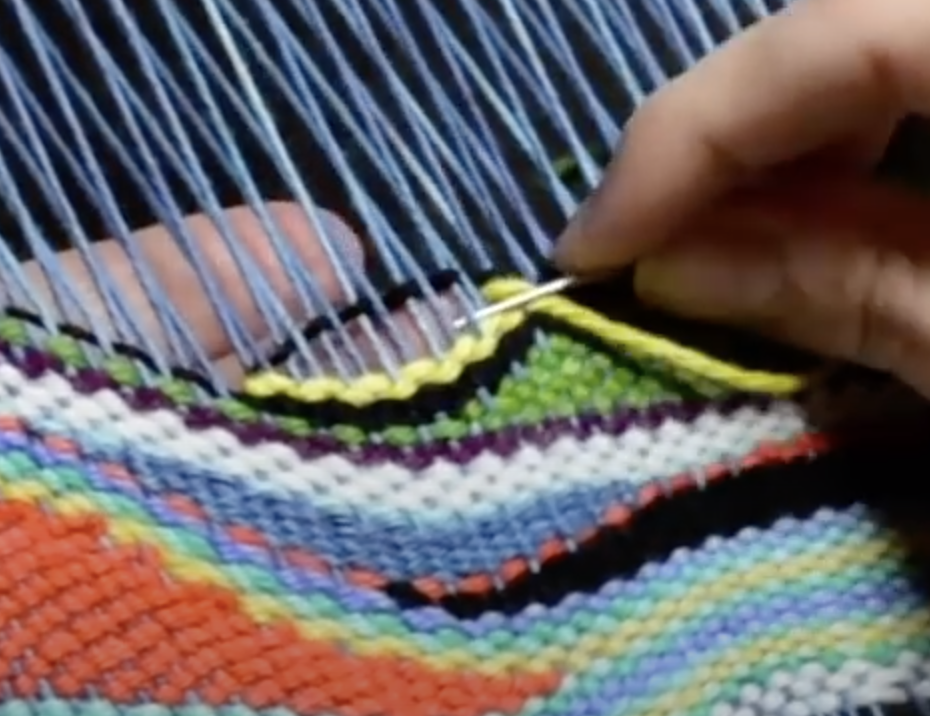
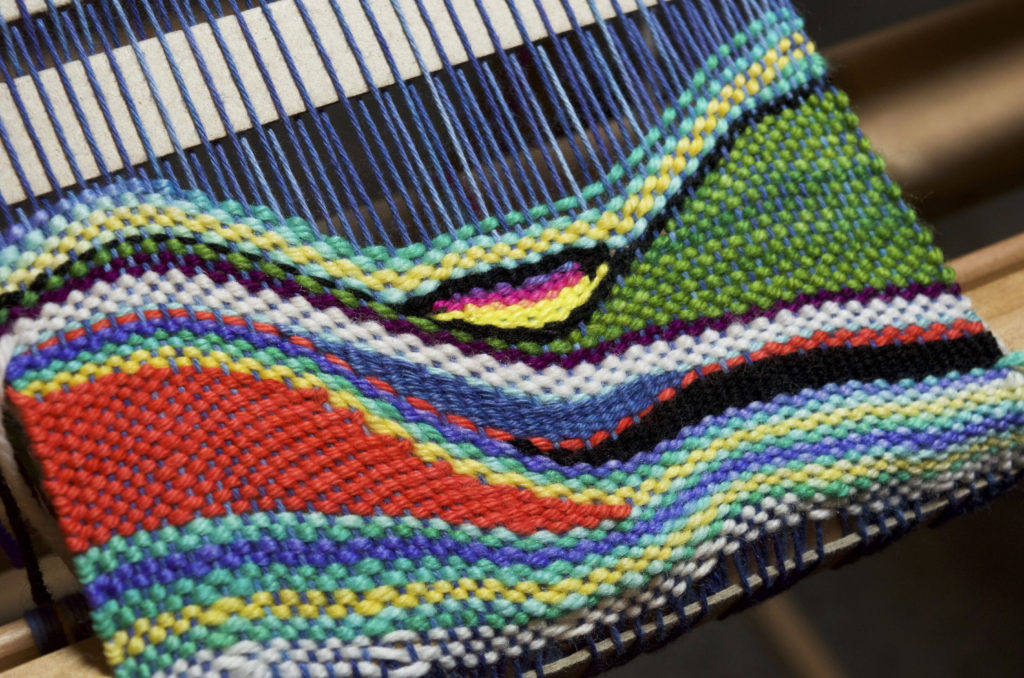
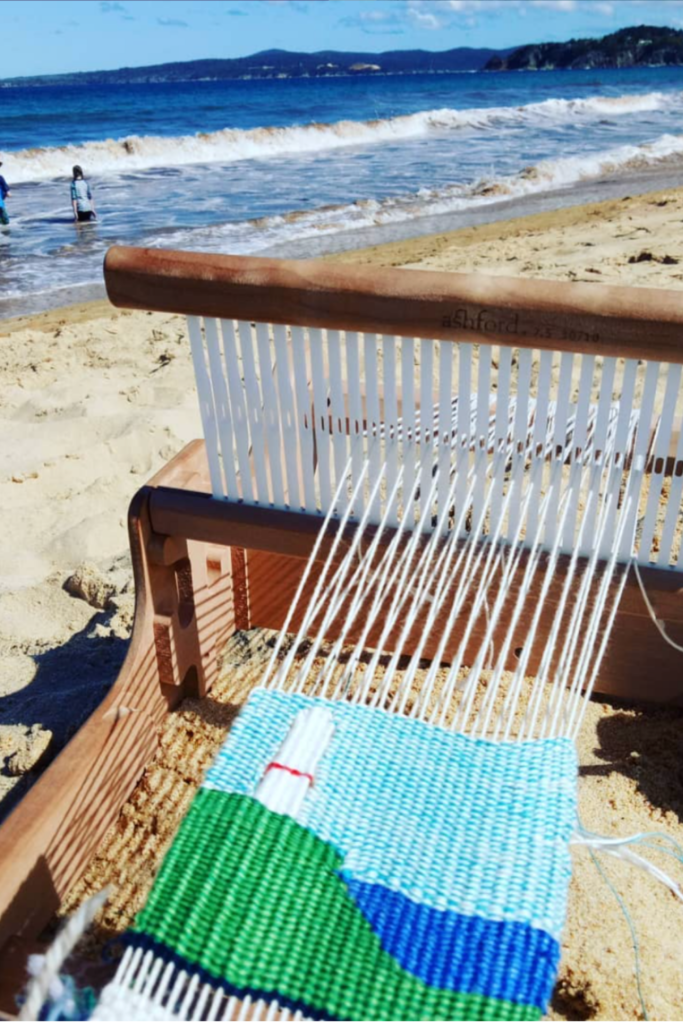
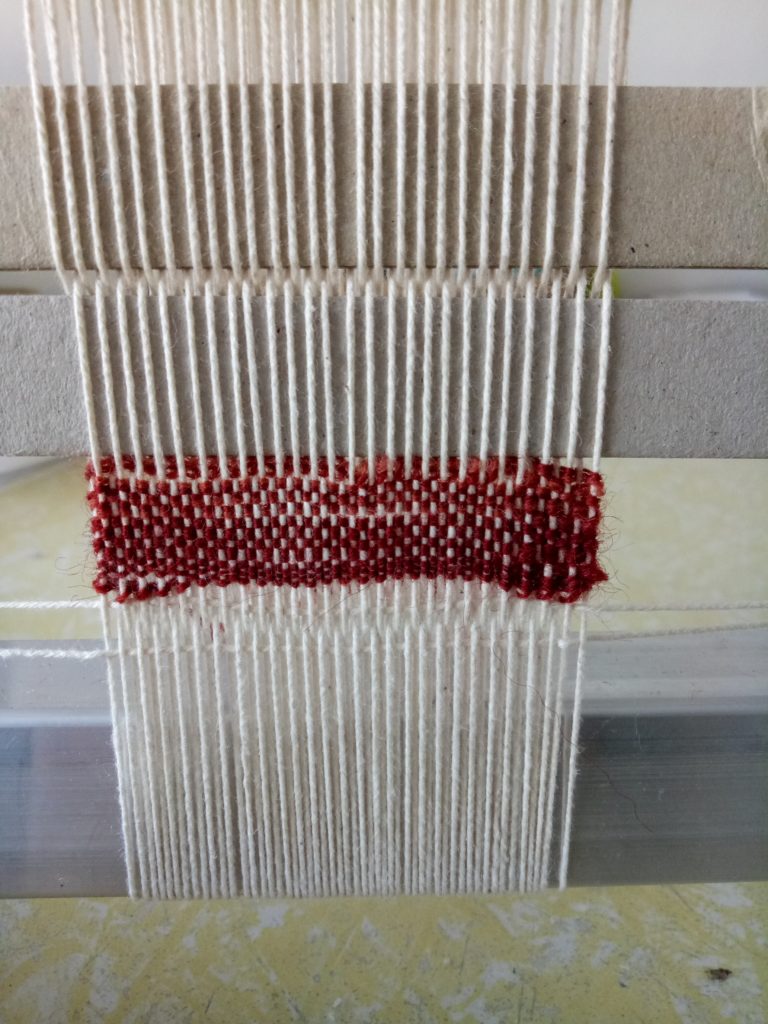
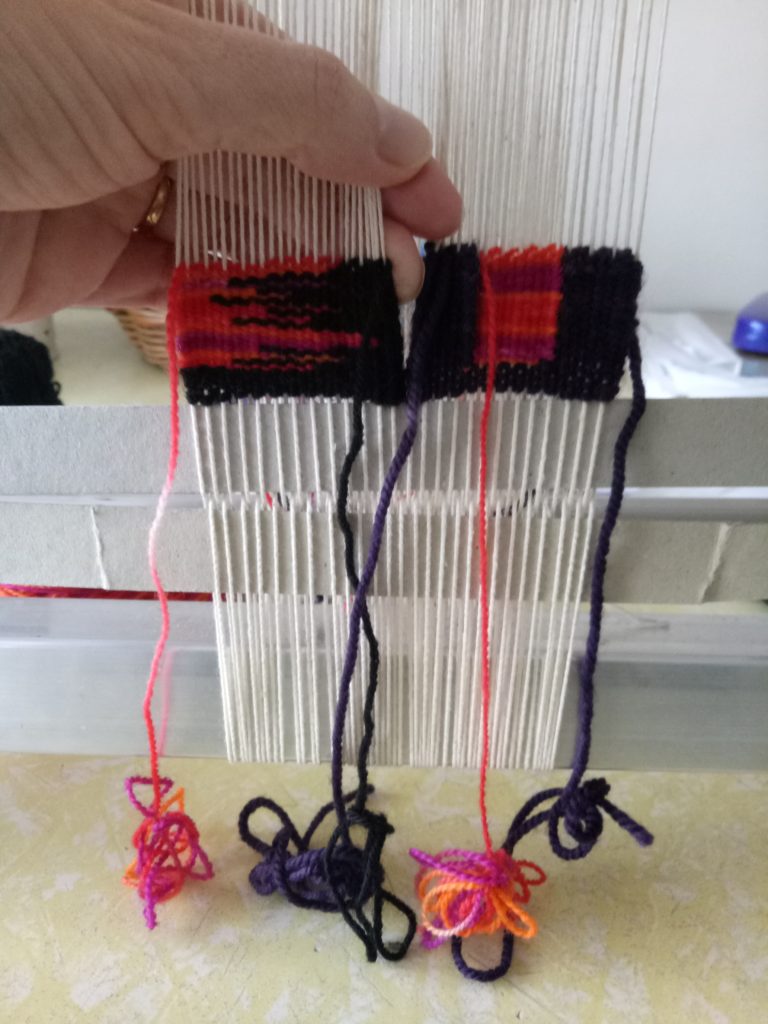
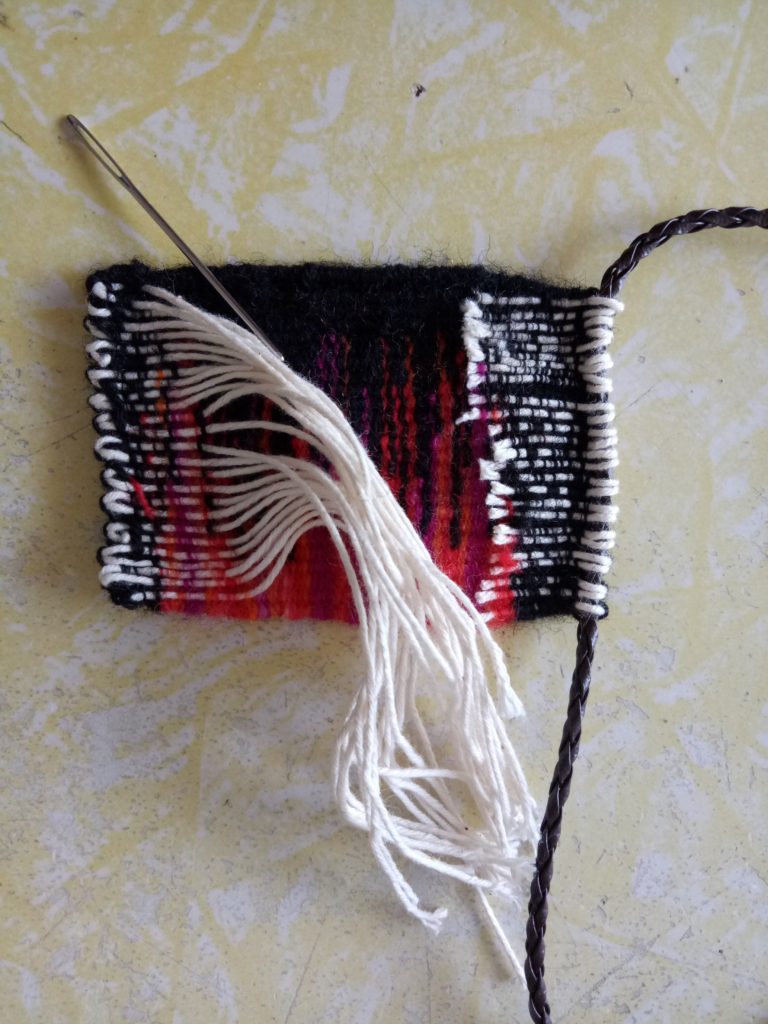
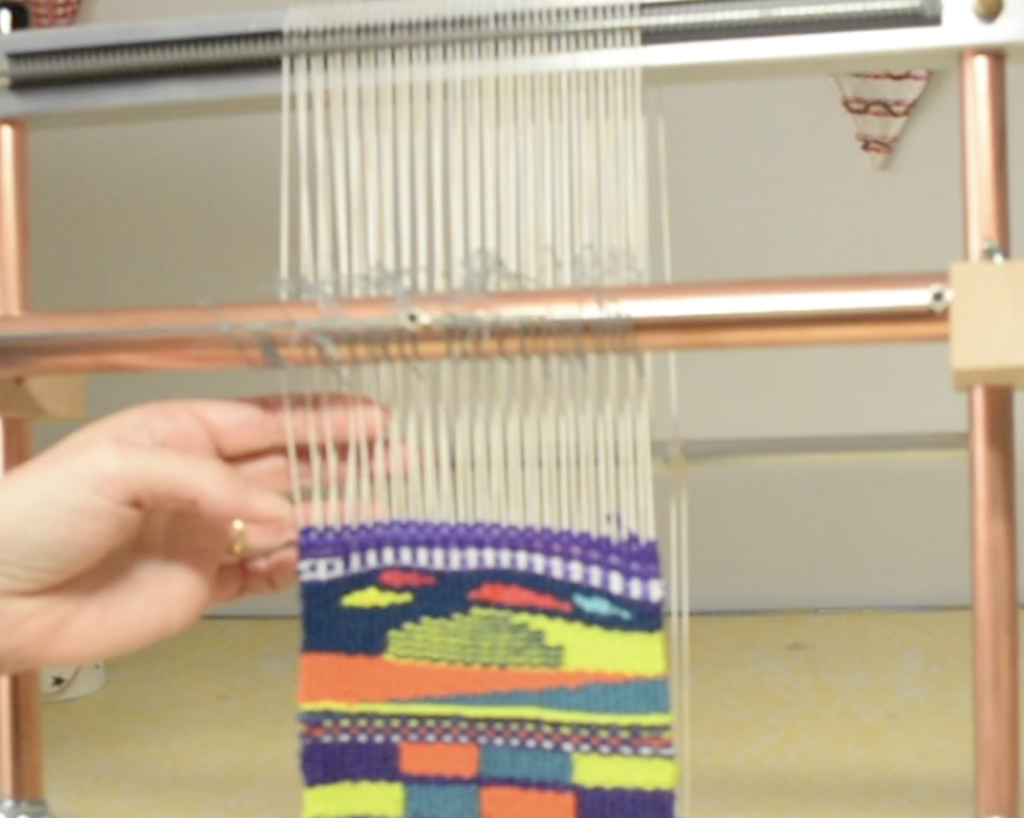
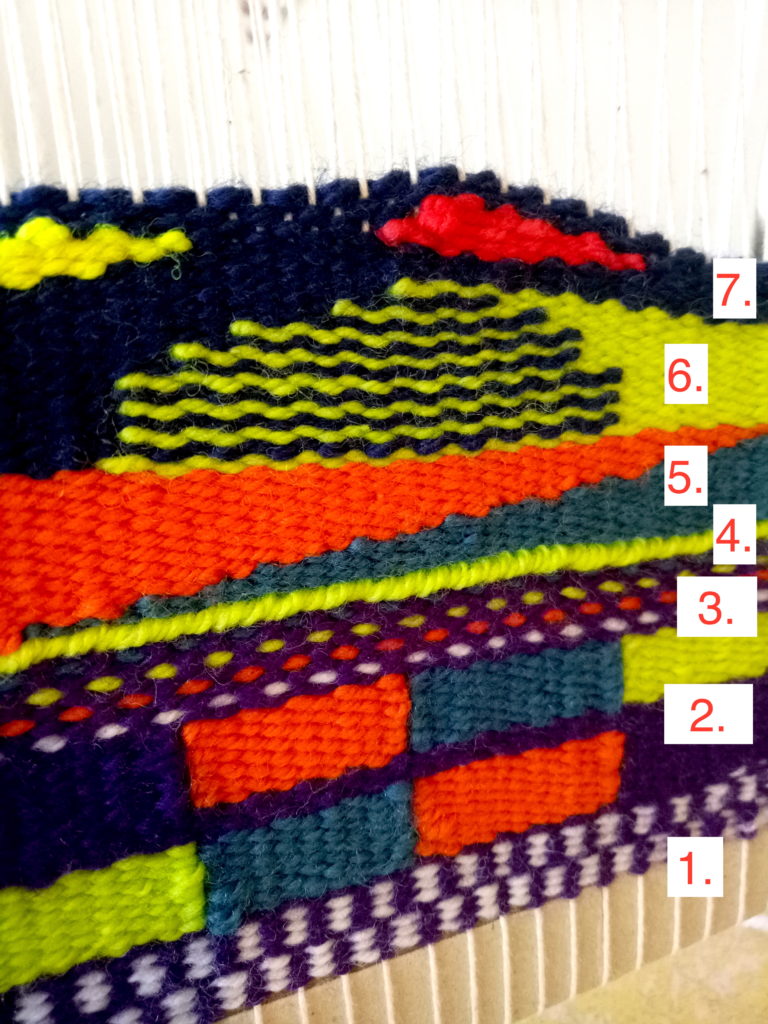
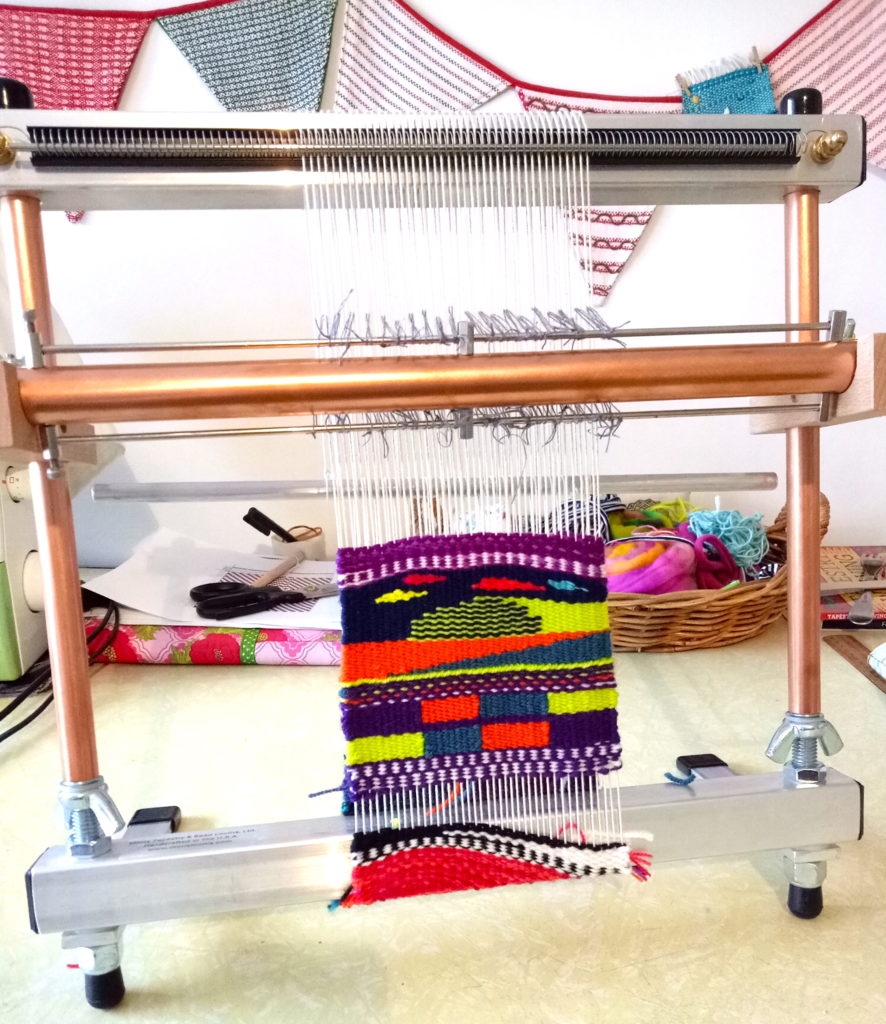
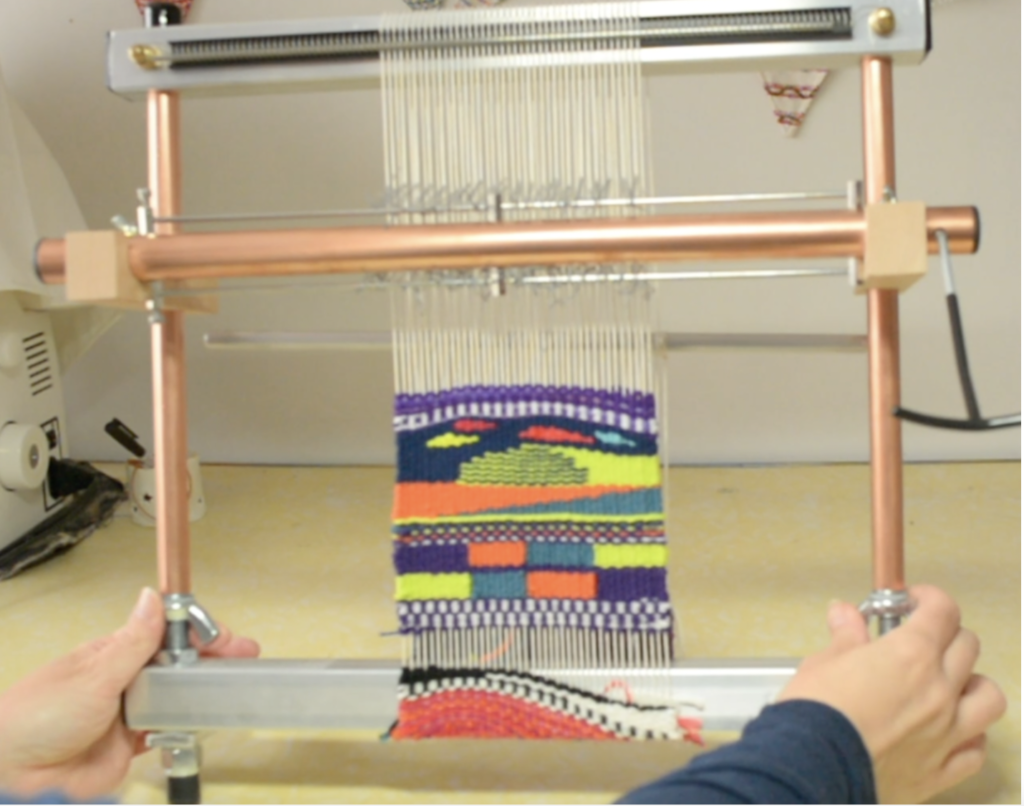
When I got started with tapestry weaving, it was on a rigid heddle loom. It was a great experience, as I was able to learn the basic tapestry techniques and it also taught me that tapestry was something I wanted to pursue, so I eventually bought a dedicated tapestry loom.

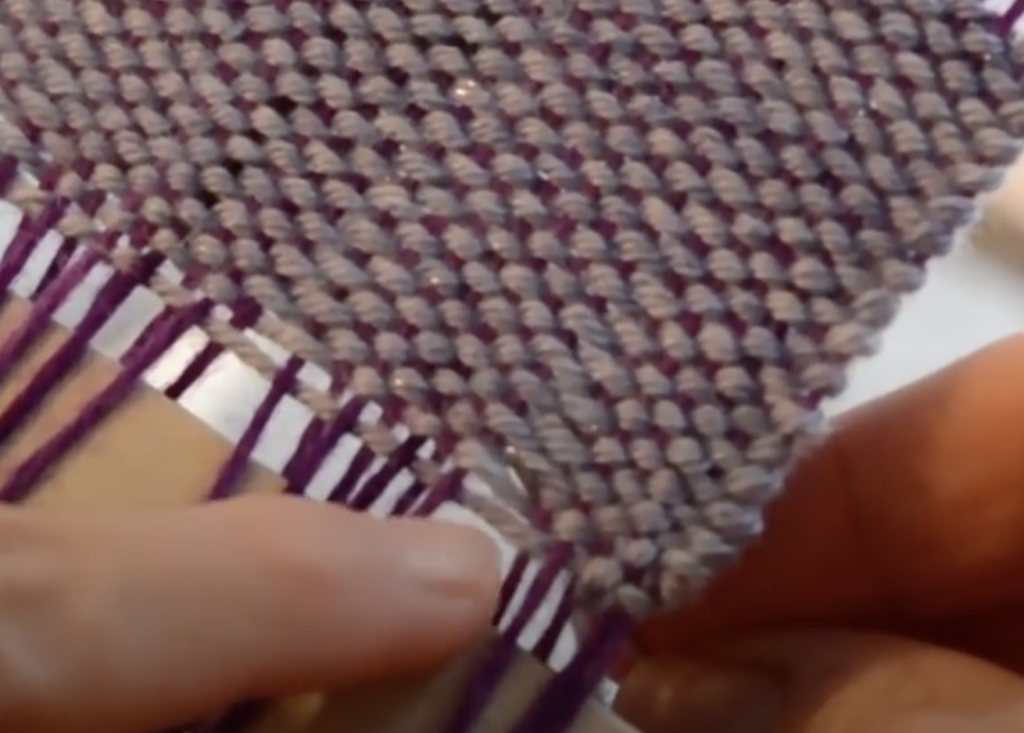
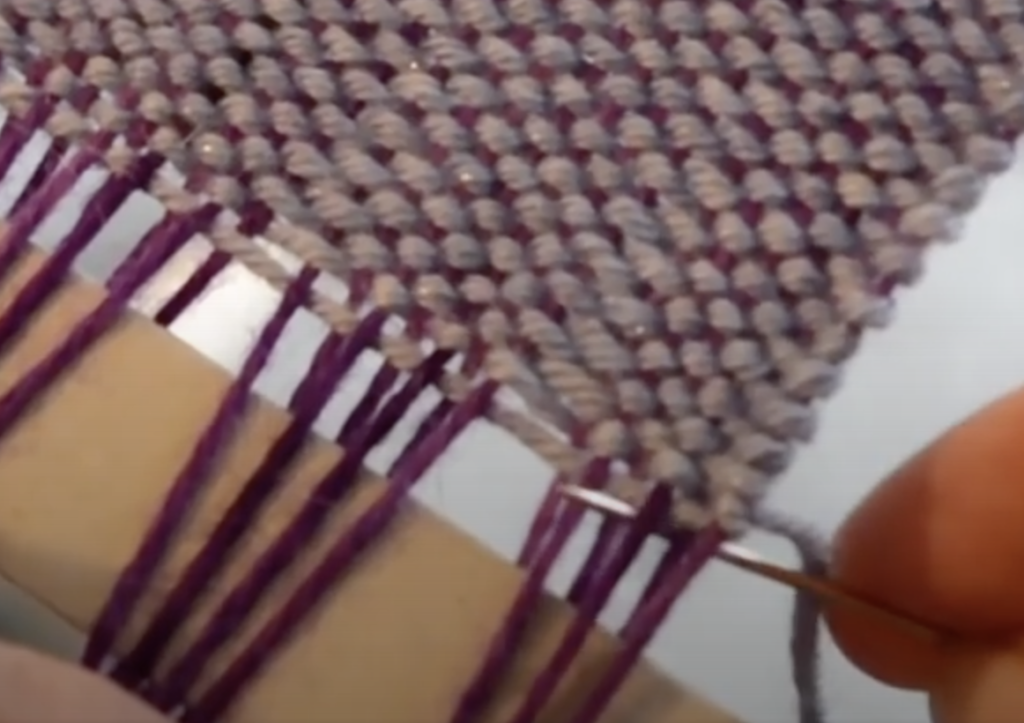
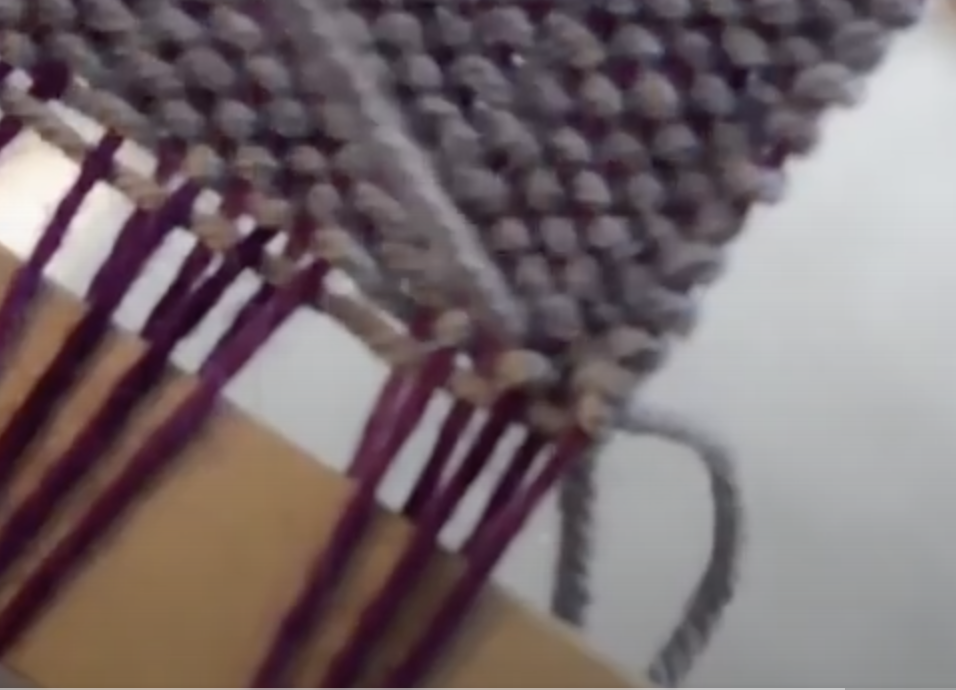
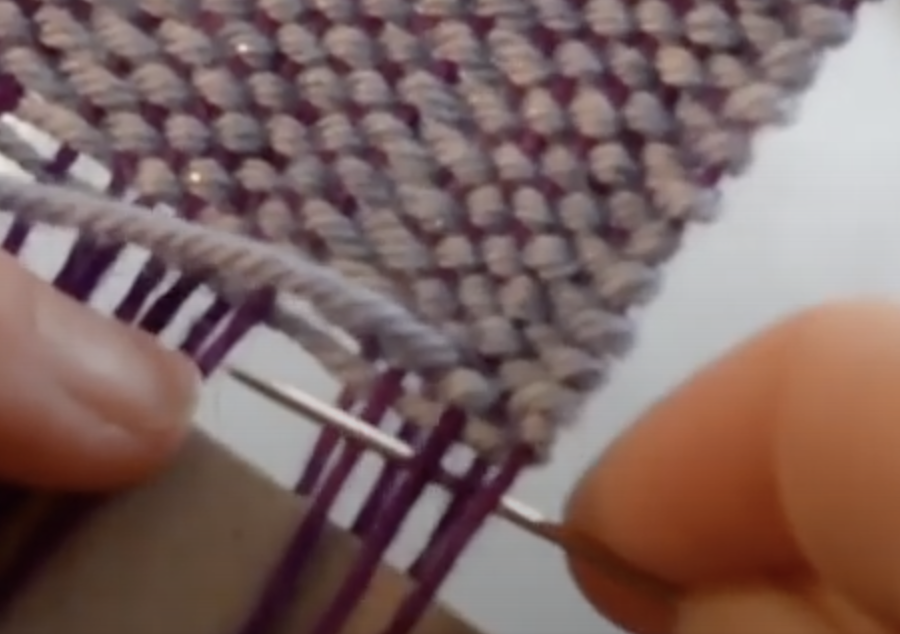
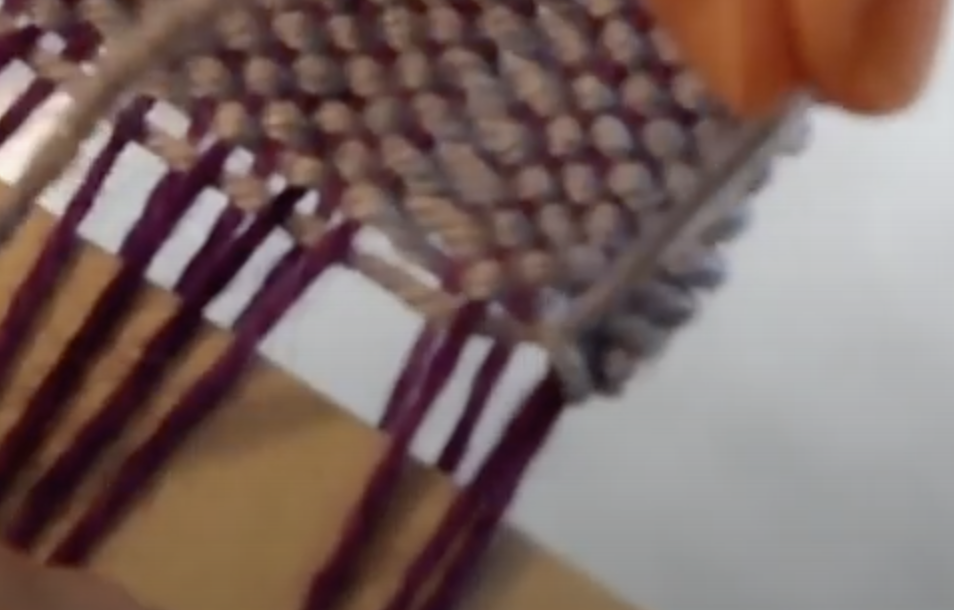
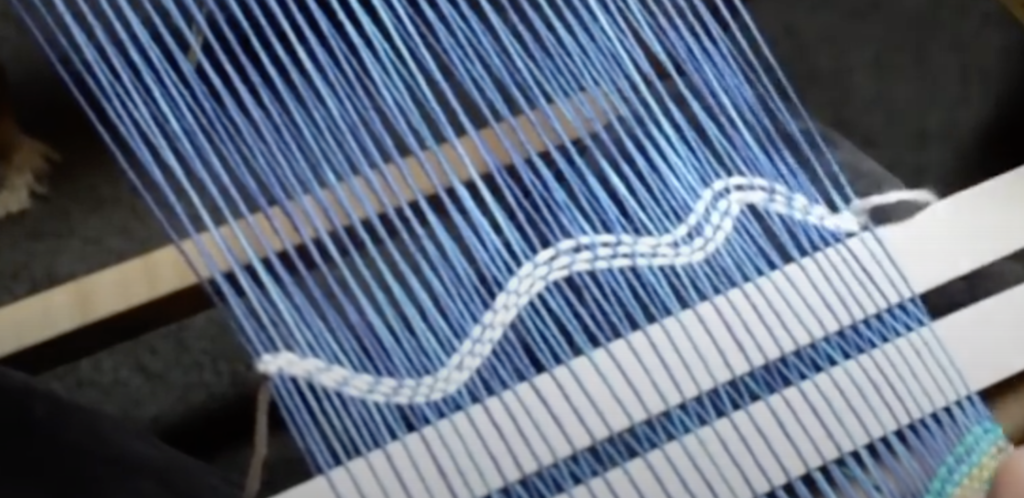
Regarding the possibility of looser outside threads, there is a trick you can use to ensure that your edge warp threads on your RH loom are under the same tension, I have a video on that here-

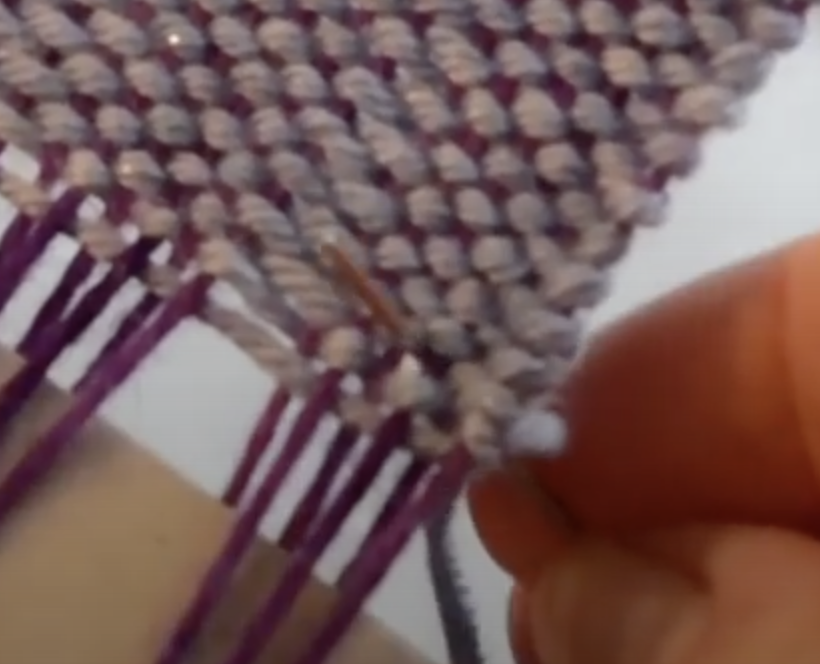
I guess the answer to your question about warping without a heddle is yes, you can. I haven’t done that myself, and I would use the heddle initially to warp, in order to space the warp to the sett I wanted.

Having said that, it is very handy to be able to change sheds quickly with a heddle.

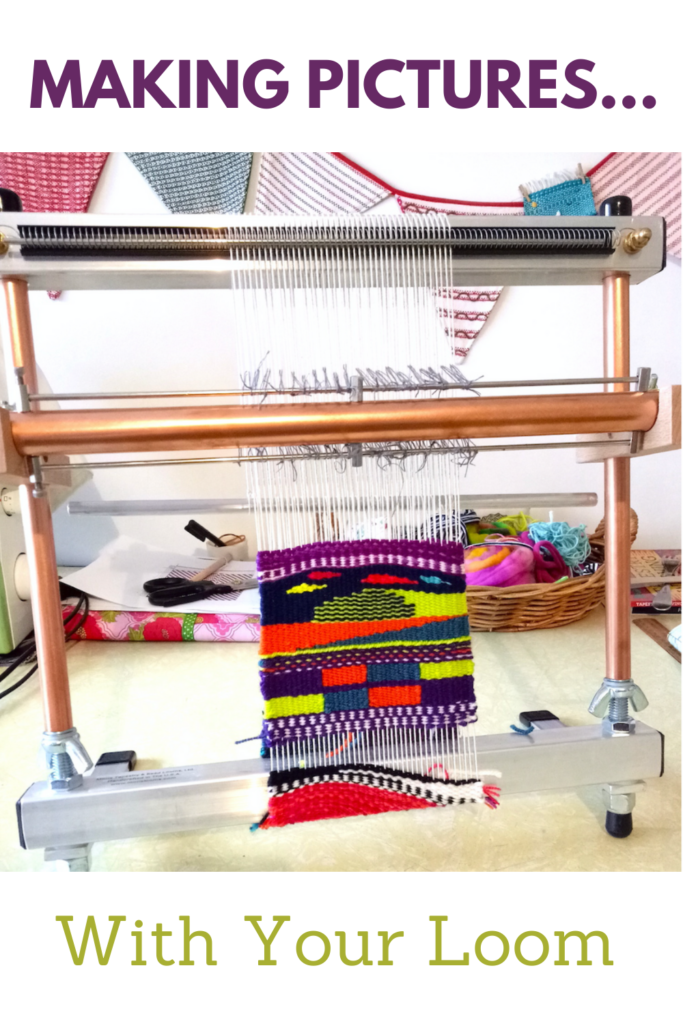
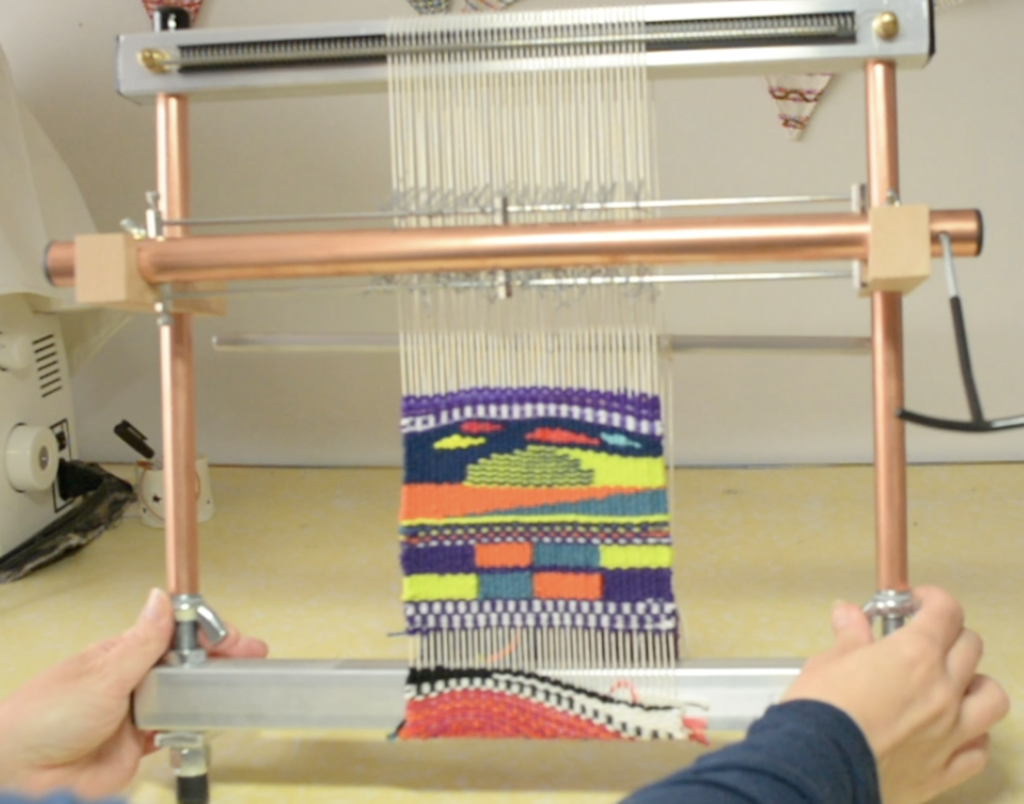
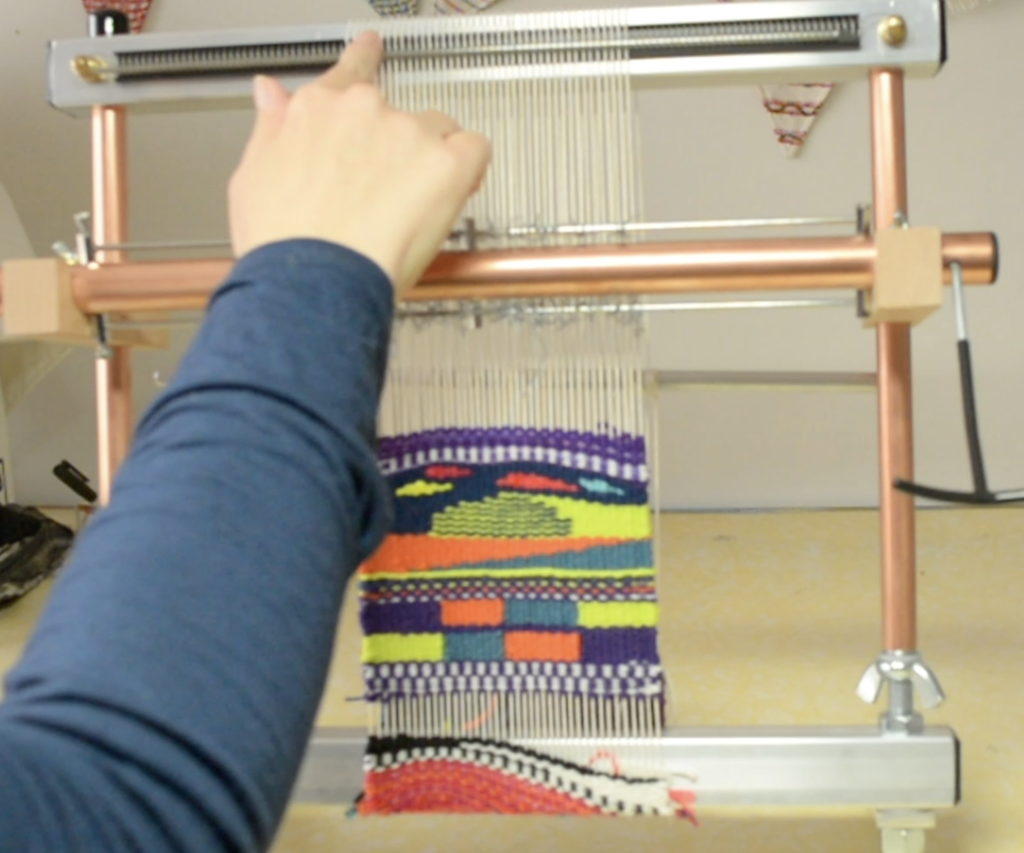
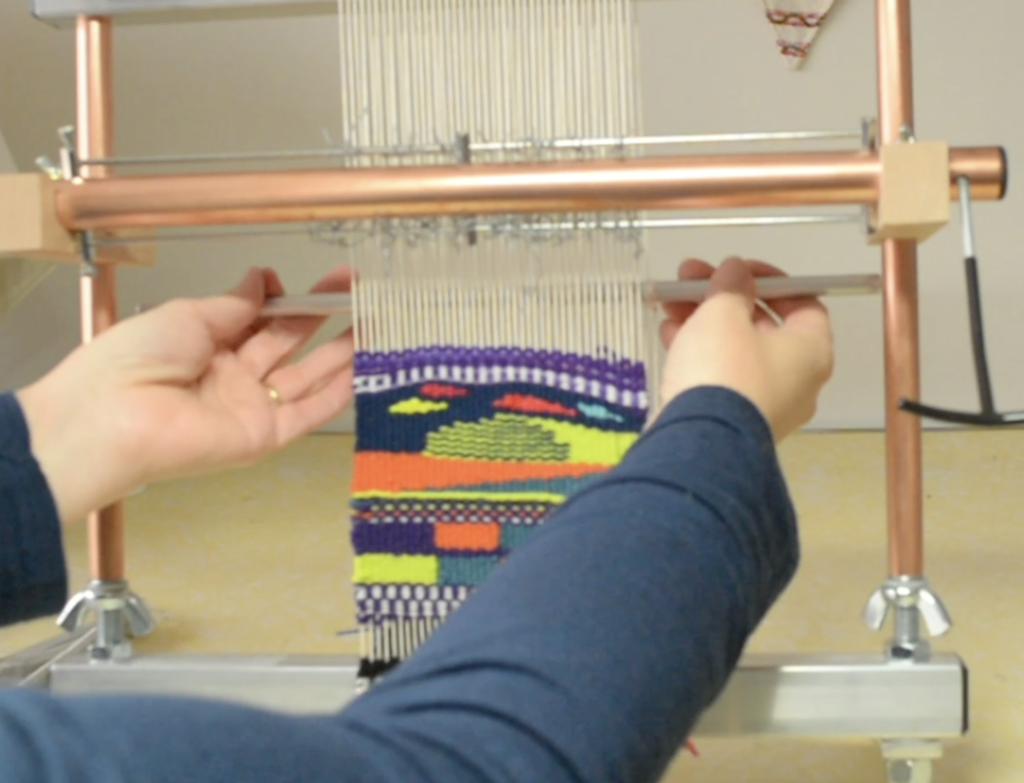
I do have a tapestry class for rigid heddle weavers, if you’re interested in checking that out-

Tapestry Weaving on a rigid heddle loom…

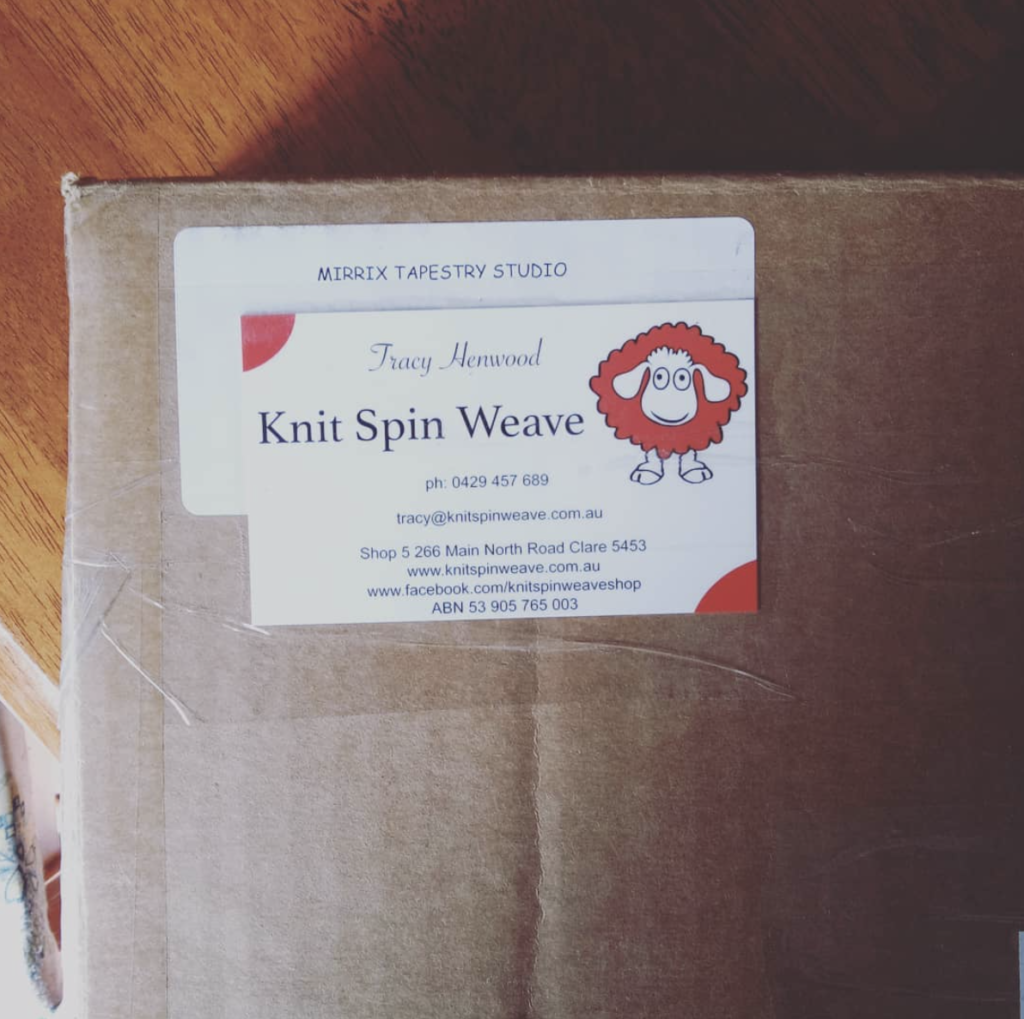
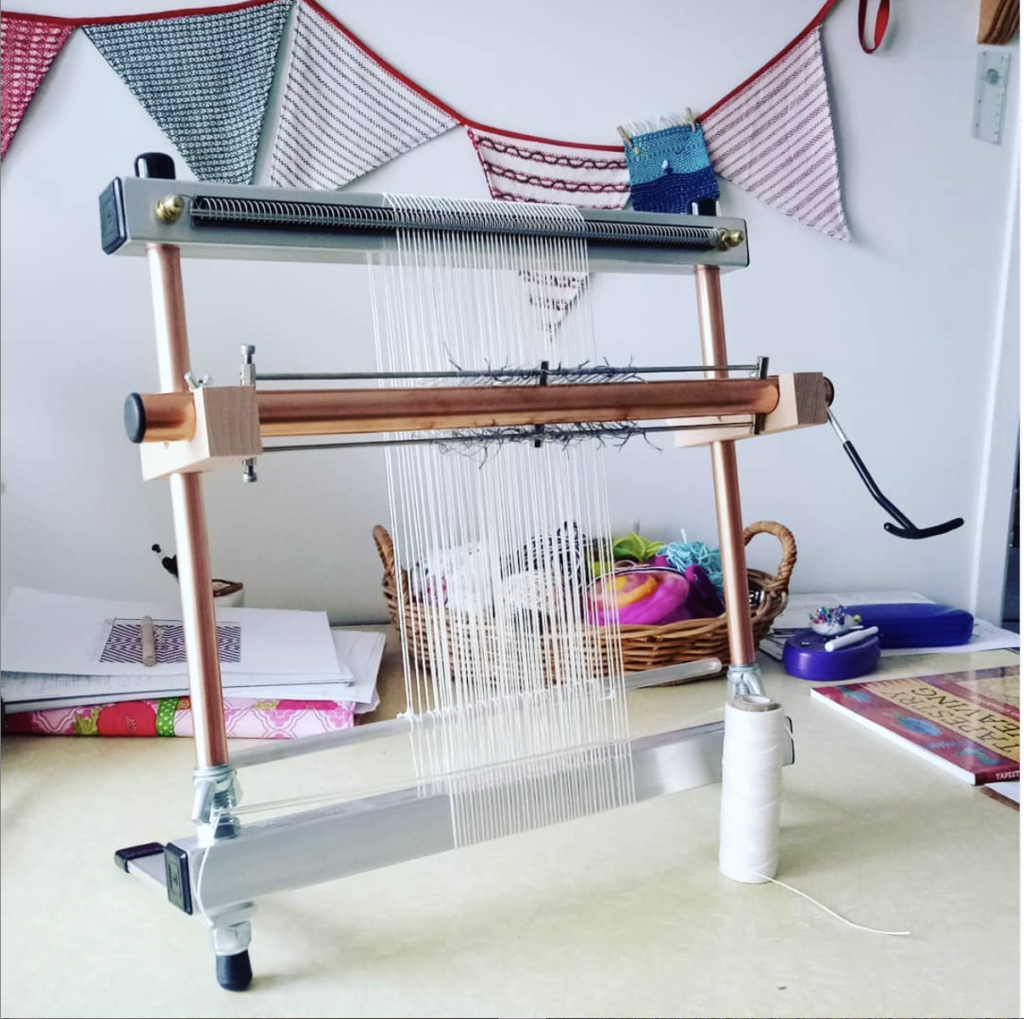
I chose the Big Sister Tapestry loom from Mirrix because of their reputation for quality, the sizing options and the ease of set up and use. I have a review of the Big Sister Loom here and an interview with the CEO and founder of Mirrix Looms here.

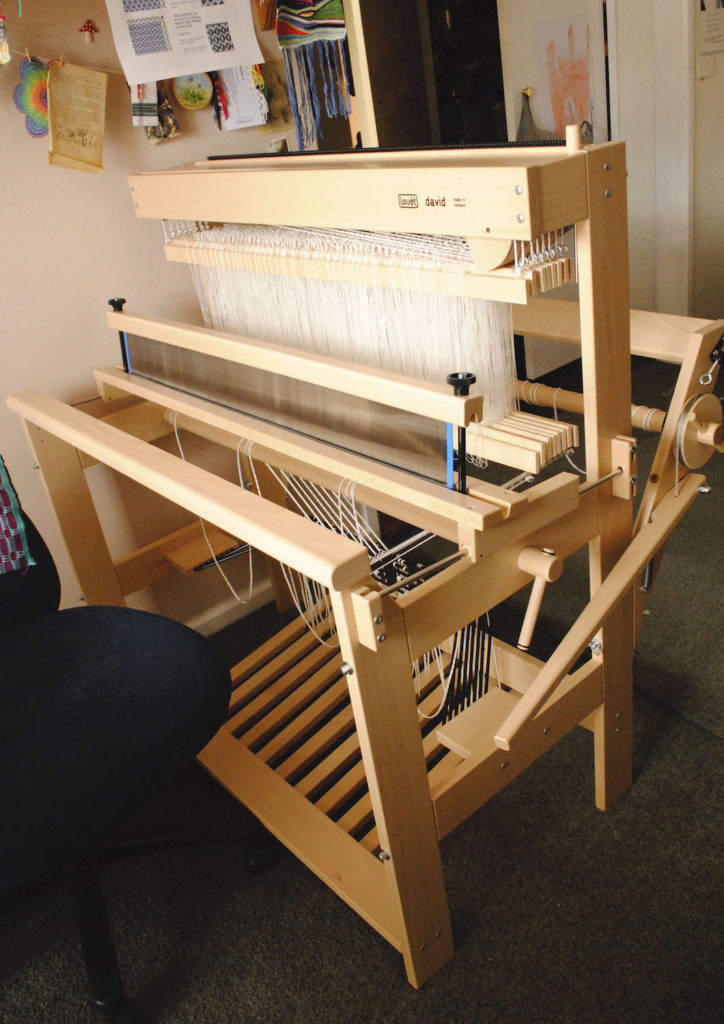
So, you may wonder what the main reasons would be for a rigid heddle weaver to upgrade to a tapestry loom?

  • A dedicated tapestry loom means you are not taking up precious loom space. Tapestry is a slow process, and you may want to use your rigid heddle loom for other projects rather than wait until the tapestry is finished.

  • A tapestry loom has far superior tension to a rigid heddle, which gives a better result for tapestry weaving.

  • Most tapestry looms are upright, which is more suitable for working tapestry.

  • Tapestry looms are strong and suitable for holding high tension, whereas a rigid heddle loom is not designed for super tensioning.

I hope you enjoyed this article and until next time…

Happy Weaving!

This post contains affiliate links. For further information, please see my disclosure policy.

Filed Under: Tapestry Weaving, Weaving Tagged With: rigid heddle loom, tapestry weaving

What can I weave on a small loom?

by Kelly 15 Comments

There are many looms that could fall into the “little loom” category.

Today I’m going to be talking specifically about the smallest rigid heddle looms available.

There are many reasons why weavers opt for a smaller loom. Some of these may include:

  • Affordability – a small loom is also a smaller financial investment to get started with.
  • Portability – you can literally pick these little looms up with one hand and take them with you
  • Space – some people have very limited space for storing a loom.
  • Testing it out – a small loom is a great way to test out weaving to see if it’s something you really want to pursue.
Ashford Sampleit 10″ rigid heddle loom

*This post contains affiliate links. For further information, please see my disclosure policy.

Many small loom weavers will later upgrade to a larger loom. Or some, (like myself!) will purchase a smaller loom later on, in order to have an extra loom on hand or just for sampling new ideas and designs.

Let’s have a look at the small rigid heddle looms currently available for purchase:

Ashford Sampleit 10″ (also comes in a 16″ weaving width)

Kromski Presto 10″ (also comes in a 16″ weaving width)

Schacht Cricket 10″ (also comes in a 15″ weaving width)

Beka beginners rigid heddle loom, available in 4″ and 10″ weaving width

I’ve come up with a list of finished items you can weave on a little loom as some ideas for getting started:

Samples

The number one function that a smaller loom serves is to make samples. If you are one of those people who think that sampling is a waste of time and yarn, I get it – I used to be exactly the same. But, throughout my weaving journey I have learned the true value of sampling before committing to a project.

In some cases, its actually a false economy to not sample and that is because the sample teaches you what you should and shouldn’t do for that project. In short, it guarantees the success of your project!

Clothing

You can make garments, even with a small loom, with a bit of creative design. Strips of woven cloth can be seamed together in order to make larger pieces of fabric, which can then be cut and sewn into garments. People often have the idea that only large, drapey garments (like a ruana) can be sewn with hand woven fabric, but that is not so. All kinds of clothing, including fitted pieces can be made, with a bit of planning ahead of time to ensure you are weaving an appropriate weight of fabric, with appropriate yarns for the garment you want to make.

In my Rigid Heddle Garment making class, we weave and then sew a loose fitting, open front cardigan. The class is not specifically for small looms, but it is easy to see how you can build a garment by building panels to seam together. A woven fabric with vertical stripes incorporated into the design would be perfect for camouflaging seams.

The Clasped Warp Quechquemitl class is another example of panels sewn together to construct a beautiful garment. Again, the class is not specific to small looms but the weaver could opt to weave 4 panels to join rather than the 2 demonstrated in the class.

The most obvious garment choice for a little loom would have to be a scarf, as you don’t need a wide width and you can wind on a warp that is long enough for one or two scarves.

Art

I have created a variety of art pieces on my 10″ Sampleit loom. A small loom is perfect for a petite sized wall hanging, tapestry or framed piece. I discovered an added bonus to my Sampleit for weaving art recently. When not in use, I store this loom by hanging it on the wall. I was working on some krokbragd recently and noticed when I hung the loom up for the day, that it was a perfect way to display the work on the wall while it’s being completed!

Another thing I have not yet done, but desperately want to, is to frame some of my smaller woven pieces. I love the way krokbragd looks in a beautiful frame.

Tapestry can also be woven on a little loom. You can see a few of my small tapestries in this post. I will freely admit that nowadays I weave tapestries almost exclusively on my Big Sister, but prior to the purchase of that loom I honed my tapestry weaving skills on my Sampleit. I even made a class about weaving Tapestry on a Rigid Heddle Loom!

Freestyle tapestries are great on a small rigid heddle, as they are more of an “anything goes” project. They can be very planned or completely unplanned. My Freestyle Tapestry series and Van Gogh Inspired Tapestry series are both great starting points for some inspiration.

Accessories and jewellery

You can weave some awesome gifts on your little loom. A bookmark is a quick project and a fantastic way to use up leftover yarn.

I wove a tapestry necklace on my tapestry loom, but the same could be done on a rigid heddle loom. A wrist cuff is a great small loom project and very straightforward to make.

I’m often asked if inkle bands can be woven on a rigid heddle. I have not done it myself, but I have seen bands woven by others. My advice would be – if you want to weave a lot of bands, make the investment in an inkle loom. They are quite affordable and they hold the amount of tension required for weaving really neat bands. Click here if you want to find out more about inkle weaving.

Notebook covers are fun and useful to weave. You can make them to fit your notebook, like I did for my Stashbuster Notebook tutorial series. You can also view that series here:

Some more accessory ideas could include:

A clutch, a purse or small bag, a phone case or wallet, glasses case, gadget case, pouches, or a drawstring bag.

Homewares

The range of projects you could complete in this category really narrow down to how comfortable you are with seams in your finished piece (though I will mention double width weaving shortly!)

Small items could include kitchen cloths, drink coasters, mug rugs, small placemats, teapot rests, and napkins and pot plant or coffee mug holders.

If you don’t mind the idea of seaming pieces together, you can expand on this list of projects to include:

Cushions and pillows, kitchen towels, table runners, throws and blankets. My Rainbow Blanket project is the perfect of example of how seaming panels together to make a larger project can really work. It was woven entirely on my 10″ Sampleit loom. It is lap blanket sized, but could easily be expanded to become bed sized! I woven panels and hand seamed them together.

Children

Options for woven items for children could include little hats, vests, pants, baby blankets, toys and plushies.

Double width

I couldn’t possibly finish up without mentioning that you have the ability to weave double width on your rigid heddle loom. For my 10″ Sampleit, this means that instead of the 10″ weaving width available, I would have 20″ instead! Just to temper that statement, this doesn’t include draw in, so the actual finished piece would be narrower than 20″ – but you get the idea. Weaving double width is just that – you increase the width of your finished item to twice the size it would have been.

This is a great option to small loom weavers who do not have the option of upgrading to a larger loom but would love to weave larger items. Does double width weaving sound like some kind of sorcery to you? Well, it’s actually very practical and with the right steps, is very doable. I have some resources that can help you get started:

Weaving with Two Heddles Online Class

Doubleweave Baby Blanket Online Class

I’m sure I haven’t covered all the ideas that are possible on a smaller loom, so if you have any other thoughts for projects, please share with other readers in the comments below.

Until next time…

Happy Weaving!

Filed Under: Inspiration, Rigid heddle weaving, Rigid Heddle Weaving Patterns, Tapestry Weaving, Weaving Tagged With: little loom, small loom

All about hemstitching

by Kelly 10 Comments

I learned how to hemstitch early on in my weaving journey and use it now in most of my hand woven pieces.

I love that it is so decorative but entirely practical as well – that suits my tastes perfectly!

There are many things to love about the humble hemstitch, it is easy to learn, it looks lovely, it allows your woven piece to sit really flat once off the loom (great for table linens), it is very strong and secure and it can be used as a feature within your weaving, not exclusively at the start and end of your piece.

This post contains affiliate links. Please see my disclosure policy for further details.

So, what is hemstitching?

It is a way to secure your warp ends in order to remove your weaving from the loom. It is worked by hand, with a tapestry needle and while your piece is still on the loom (not absolutely necessary, but boy, does it make life easier!)

When you remove your piece from the loom, the weaving will naturally begin to unravel (at different rates, according to the yarn and the project). You need to either secure those warp ends on the loom or promptly after removing from the loom.

Do I have to leave a fringe if I hemstitch?

Not necessarily. It is most common to leave some sort of a fringe when you have hemstitched your ends. A twisted fringe looks stunning with hemstitch but a medium to short fringe is also lovely.

But if you don’t want a fringe at all, don’t have a sewing machine and want those ends secure you can hemstitch on the loom, then needle weave the warp ends (or fringe) back up and into the work. I have used this approach for some of my tapestry projects and on these mug rugs. It gives a very neat and attractive finish – it takes a while to weave all those ends in with a needle though!

Let’s get down to the nitty gritty and have a look at how hemstitch works.

You begin by choosing the number of warp ends you want in each bunch and how far into your weaving (how many weft picks) you want each stitch to go.

My go to is a 4/1 hemstitch, which means that there are 4 warp threads in each bunch and I stitch in 1 weft thread deep. There are all different number configurations you can do depending on the effect you want, the project and the thickness of yarn you have used.

In this picture I am working a 3/2 hemstitch. I count off 3 warp threads at a time, and bring the needle up 2 weft picks deep.

Here is a breakdown for how to work hemstitch, step by step. Heddle is in neutral. Ideally, you have left a long tail of weft yarn (around 4 x the width of the project) on the right hand side (left side if you are left handed). Thread this yarn in a tapestry needle.

Remember, in this demonstration I’m doing a 3/2 hemstitch.

  1. Take the tapestry needle underneath the first 3 warp threads.

2. Count up 2 weft threads and bring your needle through the space that aligns with the 3 warp threads you counted in.

3. Pull the full length of the yarn through.

4. Take the needle back to the start of the initial 3 warp threads and underneath, coming up on the left hand side of the 3rd thread.

5. Pull the yarn through, making sure that the needle goes under the tail yarn on the left so that a loop is created. Pull the loop firmly to make your first bunch.

6. Take the needle down in between the first bunch and the next group of 3 warp threads and repeat the steps.

You can see a video of this tutorial here-

I mentioned that hemstitch can also be used decoratively within your weaving, not just as a hem securer.

In this image I have worked adjacent rows of hemstitch on bands on plain weave, leaving a gap between the bands. I’ve then woven in some ric rac and ribbon as a feature. This can give a very pretty and unique look to your woven piece. This demonstration is available in a member’s only class – Hemstitching as a Feature.

Do I hemstitch both ends of the piece in the same way?

Yes and no. You are still using the same hemstitching technique, but when you hemstitch the first end you are stitching underneath the weaving and when you stitch the final end, you stitch on top of the weaving.

In my earlier days of weaving, I would take my loom off the stand, turn it around to face the other direction and then replace it on the stand. That way, I had the weaving facing me in the same way that it does at the start of the piece and I didn’t have to change the way I stitched at all.

These days, I have a different technique for hemstitching the other end that means I don’t have to rotate the loom and is just as fast and easy as the beginning of the piece hemstitch.

I’ve made a video to share with you how I do this. You will see that its not difficult and just as effective:

Does hemstitching only work on certain types of weaving?

I have used hemstitching on all different types of weaving, even tapestry. I’ve used it on my rigid heddle loom, table loom, floor loom and tapestry loom. I haven’t used it with my inkle loom but inkle bands don’t unravel in the same way and the warp threads are so close together that hemstitching would be quite difficult!

Does the type of tapestry needle matter?

You can use any ordinary tapestry needle. A larger one is easier to thread and use. I recently bought some of these Clover bent tip jumbo tapestry needles, and they have been a game changer! They are large and smooth plus the bent tip is just perfect for hemstitching. Plus they are gold, so hopefully I’m less likely to lose them!

I think a lot of new weavers and a bit overwhelmed by the thought of hemstitching, I mean, it does look quite intricate and complicated on the piece.

Hopefully, by breaking the steps down and making these videos, I will convince you to have a go at hemstitching. Maybe you will find that you love it just as much as I do!

Oh, and by the way, I’ve talked today about basic hemstitch but there are variations that are even more decorative. A great resource for this is The Weaver’s Idea Book, which has a whole section dedicated to hemstitch and it’s variations and possible applications.

All this information plus an extra page of tips and links to 3 hemstitching videos is now available in one convenient e-booklet. The Hemstitch Basics Guide can be purchased in my Etsy shop.

Be sure to leave any questions or comments below, I love to hear from you!

Until next time…

Happy Weaving!

Filed Under: Books, Floor Loom Weaving, Free tutorial, Inkle Weaving, Online Weaving School, Rigid heddle weaving, Table loom weaving, Tapestry Weaving, Tutorials, Weaving Tagged With: hemstitch, how to hemstitch

My loom just arrived. Now what?

by Kelly 5 Comments

You have made the big leap and purchased your very first loom! You can hardly contain your excitement and you start to wonder whether it’s normal to have been stalking the delivery guy like you have been!

You are well prepared, you’ve done your research, watched a ton of Youtube videos and read a heap of weaving related articles. You just cannot wait to get your hands on that loom!

*This post contains affiliate links. Please see my disclosure policy for further information.

Am I over exaggerating here? Well, this was me waiting for my first loom to arrive so I’m sure many of you have felt the same.

Depending on the loom that you purchase, it can arrive to your door in any number of ways. I’ll discuss each of the main loom categories so that you know what to expect when your order arrives.

Inkle Loom

My Ashford Inkle Loom arrived with some assembly required. The assembly was very basic and did not require complicated tools to put together.

You need to glue and tap the pegs into place. That glue then needs to be left for 24 hours to completely dry, which is an important step in the future stability of your loom.

Then it’s a simple matter of installing the small pieces of hardware provided (the rubber feet, the tension peg etc).

Ashford do recommend to use a wax or other sealant on the wood of the loom once you have assembled to protect the wood from sun and moisture damage or other stains.

Rigid Heddle Loom

A rigid heddle loom will arrive flat packed in a box. Depending on the company, the loom pieces that are wood may or may not be finished. Ashford rigid heddle looms are not finished, so if you want to wax or lacquer your loom you will need to do that, then let the pieces dry before beginning to assemble.

The knitter’s loom, which I wrote about here, comes with the wood finished and ready to assemble, so that is something to bear in mind.

The length of time to assemble will vary and may depend on your aptitude to follow written instructions. I noticed that Ashford did recently upload this rigid heddle assembly video, which should be a good help to many.

A rigid heddle loom is not too difficult to put together and depending on the size you have purchased, should take 1 – 3 hours (not allowing for glue drying times where applicable).

Tapestry Loom

It’s more difficult to talk about a tapestry loom as there are many different types – some are made of wood and some of metal.

The assembly of my Mirrix Big Sister was a very simple affair as there really are not that many parts. There was no screwing wooden sections together, it was more just placing pipes within other parts and tightening up. So, even if you were challenged by written instructions, you could easily have this type of loom put together in under an hour.

If you are interested in this type of loom, I’ve written a review here.

Table Loom

Table looms will also mostly come flat packed in boxes and the pieces are all finished and ready to assemble. There are a lot more parts to a table loom than a rigid heddle. I remember the first time I bought a table loom, those boxes were very exciting but quite confronting as well!

Luckily for you, if you have purchased or intend to purchase an Ashford table loom, my husband and I have put together two detailed videos that take you step by step through the assembly process.

I have loved to have a video like this for my first table loom assembly, but I’m very happy to think so many new weavers don’t have that same headache and can instead follow our instructions to get it done.

You can watch the first video here:

I recommend that if your table loom has just arrived, set aside a day where you don’t have much happening to put it together. With drying times, you may find it easier to work on it over several days, getting a few steps done on each day.

That makes the process not too overwhelming and tiring. Don’t worry if it takes you a bit of extra time to put together, you will get it done and it will be worth it.

Floor Loom

This is a biggie. Literally! The size of a floor loom means that the pieces are plentiful and large. Floor loom pieces should come finished and ready to assemble. Most of the time they will be flat packed, but not always.

Of course, if you purchase second hand, or are lucky enough to get a floor stock loom from a shop, it will be either fully or partly assembled.

If your floor loom is new and in pieces, it is super helpful to lay out all the pieces in the approximate correct shape of the frame of the loom on the floor. This helps you get a good look at how and where the pieces will go.

Don’t expect to get assembly done quickly, it can easy take several days and you will need a good amount of space where you can leave partly assembled parts and non assembled parts laid out where they won’t be disturbed.

My Louet David was laid out on a carpeted floor in a non foot traffic area of our home, which made it all so much easier and meant that none of that beautiful, smooth wood got scratched or damaged in any way.

General Assembly Tips

  • When your loom arrives and you unbox it, keep all like pieces together (screws of a certain size etc).
  • Using the instructions provided, go through every piece to ensure it is there. Factories can make mistakes, it happens occasionally that a piece will be missing. If that happens, you want to know about it before you begin assembly rather than half way through.

It also means you can contact the company right away and tell them a piece was missing in the beginning. If you find a piece is missing part way through assembly, you can’t be absolutely sure whether you may have lost a small piece yourself. Trust me, it’s worth checking!

  • Lay all the pieces out in a space, if you have the space. This helps you to visualise how the loom will look and gain an understanding of what the parts do.
  • Teamwork is awesome! If you have a spouse or someone else who can assemble the loom with you, that is very helpful. Not only are four hands better than two, two brains are much better than one! It can make all the difference to have another mind at work beside you, to see things from a different angle to you.
  • Take your time. You will only need to put the loom together once, so it’s worth doing it properly and not to rush. You will get to weave on it, you just have to be patient!

Are there any other tips you would add to these? Please share them in the comments for the benefit of other readers. Thank you for your contribution!

Until next time…

Happy Weaving!

Filed Under: All about looms, Inkle Weaving, Rigid heddle weaving, Table loom weaving, Tapestry Weaving, Weaving Tagged With: inkle loom, loom assembly, rigid heddle loom, table loom weaving, tapestry loom, weaving

Free Style Tapestry Weaving on a Rigid Heddle Loom

by Kelly 8 Comments

You know sometimes you do something with absolutely no notion of the possible future repercussions?

That is what happened when I made this freestyle tapestry series. I was really doing it for me, but I decided to turn the camera on and bring my Youtube audience along for the ride.

Since then, the 4 video series has gone viral on Youtube, with one of the videos winging it’s way towards 1 million views! Crazy!

These videos were recorded pre professional lighting and sound equipment. I was using my son’s camera.

This video series on Youtube began after a busy morning, a tired me and a desire to weave something that would be rewarding and yet didn’t take too much brain power.

I was too tired to sit down and calculate a project or go through my stash to see whether I had enough yarn to complete a project.

So instead, I found some bits and pieces of yarns left over from other projects, put a short warp of a fingering weight cotton, hand dyed and left over from a previous project, on my rigid heddle loom (which only took around 20 minutes to do), sat down with my bag of left overs, and just started weaving.

How often do we gift ourselves with this kind of luxury? To weave with no set plan, to invest in the process more so than in the expected outcome? I know that I definitely don’t do this enough!

This kind of weaving is so relaxing and free-ing. It is not a fast way to weave, but when you get in the groove it doesn’t seem to matter how long it takes.

With this kind of weaving we use the basic rules but we bend and stretch them. We say, “I want to do this!”, and we do it. We push the weaving around, we beat it up and down, we put in colour as we go, we use all kinds of yarns. And we love the process.

So, what do you need to get started?

*A rigid heddle loom

Well, a rigid heddle loom is really perfect. It will take care of our 2 sheds and our tension beautifully, so that once warped all we have to think about is the weaving. The heddle goes up, the heddle goes down. Repeat. Simple.

You could do this on a Sampleit or Cricket loom with no problems as you don’t need a wide width – you can make the piece whatever size you wish.

I used a 10 dent heddle for my piece.

You can also weave a piece like this on a simple frame loom or tapestry loom, but using a loom that has the ability to change sheds is really helpful. My Mirrix Big Sister is an example of a tapestry loom with a shedding device.

*A stick shuttle or two.

Using a lot of colours in one project doesn’t lend itself well to stick shuttles, as you would need a lot of them. Therefore, I usually use a couple of stick shuttles and for the rest of the colours I just pass them through with my hands and keep the weft yarn in either butterflies or little balls. Butterflies are neater though. I have a video tutorial on how to make them!

*A threading and reed hook

The reed hook is for pulling threads through the slots of the heddle/reed when you’re warping. The threading hook is to pull the threads through the holes in the heddle/reed when threading the loom after warping. I love and use these Ashford Double Ended Hooks, I have a bunch of them in case I lose any and use them constantly.

*A Tapestry Needle

This is really handy for if you intend to hemstitch your piece and also for needle weaving extra yarn into gappy sections if you want to. A tapestry needle with a bent tip is even better!

*Additional beater

You will need this because we are creating a weft faced weave here, meaning that we want the weft to totally cover the warp. The heddle/reed that we normally use for beating does not push the weft down enough as it is designed more for a balanced weave.

There are a number of options for an additional beater. A large fork works really well. I also have a little tapestry beater that I use. There are “proper” tapestry beaters available as well, but I would only purchase one if I was going to be doing this type of weaving a lot.

What about the warp calculations?

Well, as I pointed out, I didn’t calculate at all, but my warp was around 8 inches wide and 40 inches long.

And the yarns?

A variety of yarns were used, but I did use quite a lot of wool in light worsted/dk weight and also in an aran weight. Some were fingering weight. Some were hand dyed, some were commercial.

I also used some cottons in various weights.

Techniques used:

Mostly this type of weaving is just plain weave (1 pick in the up shed, 1 pick in the down shed, and so on) that is packed down tight.

In some areas I would build up mounds or shapes by taking the weft part of the way through in one shed, change the shed and then take the yarn back the same way I just came in.

For example, I brought the green in from my right in the down shed. Roughly half way across I stopped and took the yarn down through the warp at the back rather than continuing it to the left hand side for a full pick.

I changed into the up shed and took the green back to the left.

This is a classic tapestry technique that allows the weaver to begin building up areas of colour, usually to make shapes.

If you keep ceasing the weft yarn and turning back in the same place each time, you will build a block or straight edged shape. Or, by varying the place in the warp where you turn back the weft, you can taper the shape to make it rounded.

The first and second videos of the series show in detail how this technique is used.

In a number of areas I have used outlining. This is basically putting in a darker weft that either outlines a shape you’ve made or just provides a good contrast between one colour and the outline colour. You can see here that I’ve used some black to outline a green section, and the contrast is very effective:

In some places I combined outlining with needle weaving. Needle weaving allows you get weft yarn into tricky spots. I had created a valley in the middle of my piece, but then I wanted to fill it with a small, highlighted section. I started by outlining a “jewel” shape with my black yarn and a tapestry needle:

Next, I brought in a brightly coloured and highly contrasting hand dyed wool with the needle, and wove that into the space that I had outlined with the black wool:

Needle weaving isn’t the only way to do this, but it’s easy to get exact smaller shapes and sizes within the piece.

If you’re interested to know how the piece actually starts out and how you achieve all those cool curves, the 3rd video restarts another piece in order to show just how it’s done.

And then finally the 4th video has an added bonus of demonstrating how to weave a circle within your piece using a simple template. You can also embellish with embroidery, which I did in some sections of my finished piece. This is easier to do while your weaving is still on the loom.

Due to the huge response from this video series, I decided to make a second freestyle tapestry series for Youtube. This one was inspired by the Van Gogh painting, Starry Night. The video series is filmed mostly in real time and is at a very relaxed, step by step pace.

And, of course you will want to check out the original 4 part video series beginning with part 1:

If you want to get a little more serious or delve into some more traditional techniques for weaving tapestry on your rigid heddle loom, I have an online course that will be just the thing for you.

Some of the topics covered in Tapestry on a rigid heddle Loom include soumak, interlocking, straight lines and how to use a tapestry cartoon. I’m sure you will love it!

Do you have any questions? Have you tried this type of freestyle tapestry weaving? Or do you intend to?

Let me know in the comments below, I love to hear from you!

Until next time…

Happy Weaving!

Filed Under: Free Pattern, Free tutorial, Rigid heddle weaving, Rigid Heddle Weaving Patterns, Tapestry Weaving, Tutorials, Weaving Tagged With: freestyle tapestry, rigid heddle loom, rigid heddle weaving, rigid heddle weaving patterns, rigid heddle weaving tutorial, tapestry weaving

Van Gogh inspired freestyle tapestry!

by Kelly 5 Comments

It’s hard to know what to say about the present world situation. Strange. Unprecedented. Uncertain. At times, scary.

Many people throughout the world are in isolation or quarantine – some self imposed, others enforced. Countries in lockdown.

My mind can’t help thinking that it all feels very much like a suspense movie or novel. But no, this is the reality of 2020 and coronavirus for all of us. Strange times indeed!

Beyond the feeling of bewilderment though, is one of hope and unique opportunity. We may be isolated in our homes, but we live in the age of the internet, where it easy to stay connected to others and share burdens. Many people have more time than they usually would, to explore interests and hobbies. My Youtube channel and Online Weaving School are great places to be right now!

With that in mind, I have a new Youtube project that is long, slow and relaxing. We could all use a bit of that right now!

The project is inspired by the wonderful Van Gogh painting, The Starry Night. I have long admired this art work for it’s colours, movement and mood. I thought it would translate really well to a tapestry, not as a replica but as inspiration.

I thought this would be a great, calming project because it is adaptable, doesn’t require much planning, is relaxing and free flowing. Oh, and the idea is to use stash yarns so you don’t need to go out to buy more!

All the materials plus the warp calculations are provided in this printable PDF-

Van-Gogh-inspired-tapestryDownload

Some of my stash yarns included wool, cotton, silk, acrylic and handspun, tencel and metallic. Weights included 8/2, lace weight, fingering, light worsted/dk and aran. My favourite weight ended up being the fingering.

The video/s are mostly in real time, something I have not done before. It means long videos, but I was figuring some people might appreciate sitting and weaving with me at this time – step by step and no hurry. And I know how some of you love to know all the details.

Begin with video one, which explains my aims for the tapestry and shows you the yarns I used:

Some additional resources that are relevant and helpful are:

My first freestyle tapestry series for Youtube –

You may be interested in my online course, Tapestry on a Rigid Heddle Loom to learn traditional tapestry techniques.

Then there is my review of the Mirrix Big Sister Tapestry Loom –

And my Tapestry Necklace project –

Filed Under: Free tutorial, Inspiration, Rigid heddle weaving, Tapestry Weaving, Tutorials, Weaving Tagged With: freestyle tapestry, tapestry weaving, tutorial, van gogh

Making pictures with your loom

by Kelly 10 Comments

Something that really captivated me before I even started weaving, was the idea of using artistic creativity in weaving.

When I was younger I loved to draw and paint. In my adult life, I have not made a lot of time to devote to making art, but I have been happy to discover that there is a huge crossover with art and weaving.

This post contains affiliate links.

One of the most obvious forms of weaving that this crossover takes place in is tapestry weaving. In tapestry, the weaver can have total artistic licence through the use of colours and shapes. The shapes can be basic or complex. Colours can be blended on the loom. And, tapestry can be woven on many different types of looms.

I purchased a Mirrix Big Sister last year, as I wanted to develop my tapestry techniques and also have a dedicated tapestry loom. It is an excellent loom for tapestry, as even though it’s small, I find the available weaving room quite spacious and the tension is awesome.

Before I bought the Mirrix, I wove tapestries on my rigid heddle loom.

I had a lot of fun using different yarns and styles. My most popular Youtube series details how to weave in a free and unplanned style with a variety of yarns and colours.

I’ve also explored more tradition tapestry techniques on the rigid heddle loom. I particularly enjoyed taking my Sampleit on vacation, which enabled me to sit on the beach, watch the kids enjoy the waves and weave. What bliss!

My adventures with tapestry on the rigid heddle loom gained so much interest on social media, that I developed a course to show others how to do it! The course includes all the basic tapestry techniques you need to know, plus how to use all of these techniques to weave a finished project. If that sounds interesting to you, the course is available here.

Another way to get started in tapestry without breaking the budget, is with a more affordable tapestry loom. Depending on your budget, you could opt for something like the Schacht Tapestry Loom, or even just an el cheapo like a Melissa and Doug simple frame loom. Some people choose to make their own by building a simple frame or repurposing a wooden picture frame or similar. Just be aware that the more tension the loom holds, the better it is for tapestry and if you go down the cheap route, well, you tend to get what you pay for.

A resource that I found to be great when starting out with tapestry, and still use for inspiration, is Kirsten Glasbrook’s book, The Art of Tapestry Weaving.

Aside from tapestry, are there other ways to make pictures with your loom. Oh, yes indeed!

If I haven’t already gushed about krokbragd on this blog enough times, here I go again! If you’re interested in going down my blog rabbit hole on this topic, start with this post. Krokbragd is a weft based, most of the time but not always 3 shaft, weft faced weave. You repeat the same order of treadling over and over, but can vary your yarn colour combinations to produce simple and complex shapes and images. It is seriously cool, and that is why I’m always gushing about it.

Many of the shapes are open to interpretation, as they can be slightly non specific, but there is really so much to explore. One of my goals for this year is to weave a striking krokbragd wall hanging using my floor loom. Can’t wait for that one! Debby Greenlaw has written a terrific book, Krokbragd: How to Design and Weave.

I have a number of Youtube lessons on krokbragd using my rigid heddle loom, but if it’s new to you, start with the above video.

Boundweave is another weft faced weave that is very adaptable and versatile. It can be woven on 4 or more shafts (so it’s possible on a rigid heddle loom). The picture possibilities are endless. I have been playing around with bound weave on rose path threading and 6 shafts recently on my floor loom.

I’m using Nancy Arthur Hoskins’ Weft Faced Pattern Weaves book for guidance. My goodness, what an extensive book – so much to learn! This was my first attempt and I’ve now branched out with some more random designs, which is all very interesting. Slow, but interesting.

There is a lot more to be said about making pictures on your loom, but I hope this post has inspired you with some of the possibilities. Have you tried any of these techniques? Which is your favourite? Let me know in the comments!

Until next time…

Happy Weaving!

Filed Under: 4 shaft weaving, 8 shaft weaving, Floor Loom Weaving, Krokbragd, Rigid heddle weaving, Tapestry Weaving, Weaving Tagged With: boundweave, pictures, tapestry

Hand Woven Tapestry Necklace

by Kelly 8 Comments

I completed 4 towels on my floor loom for the April #weaveforme challenge, but considering they were for a class as well, I did feel like I had cheated just a little.

*This post contains some affiliate links, which means that if you click and purchase, I receive a small commission at no extra cost to you.

So, I decided that I needed another project that was exclusively for me. I’ve been keen to start another project on my tapestry loom and thought it could be fun to weave a necklace or two. This is entirely different from my usual, often very practical projects.

I had a few hiccups to begin with. I wanted to use up some Appleton’s Crewel Embroidery Wool in a lovely range of colours that I had leftover from a crewel project long ago. This is a very thin and light wool.

I warped at 18epi with the same Ashford Tapestry Warp thread I have been using for all my tapestry work. Warping all went according to plan and I was ready to weave.

When I started weaving, however, I did not like what I saw! The wool is so thin that even though I beat down very hard, the warp thread still showed. It looked ugly! Now I had to put my thinking cap on and make some decisions. If I used a thicker weft, I was concerned that the 18epi would end up being too close. I wondered if I would be able to change the spring at the top of the loom that spaces the warp, in order to change the epi.

The Appleton wool. This was after beating really hard!

I loosened off the tension and went for it. I took off the 18epi spring and placed a 12epi spring on instead. Then I carefully rearranged all of those warp threads into their new spaces. This presented me with a new problem. My warp, now that the threads were space further apart was way too wide for the necklace project I wanted to weave!

Out came the thinking cap again (it received more use than normal on this particular day). I found that if I divided the warp in half, that would be just the right width for a necklace. Plus, that would allow me to weave 2 necklace panels simultaneously. Bingo!

The warp divided in half.

On one panel (left in the photo above) I used hatching with 2 contrasting wools – one solid black and the other a hand dyed variegated of similar weights.

The second panel used a worsted weight wool in dark purple and the same hand dyed as the other. The purple yarn was quite a bit heavier than the hand dyed, I dealt with that problem by doing extra rows on the middle panel to build it up at the same rate as the dark purple. These rectangular shapes are not joined, I used this technique because I wanted clean lines.

I was able to weave both panels at once, which worked out really well. My original intention was to continue to weave additional panels for extra necklaces, but I really wanted to complete the April challenge before too much of May had passed, plus I had other projects mounting up that needed to be started, so I decided to finish up and just do the two.

Finishing the fringes and making into a necklace.

I decided to use hemstitching and a tapestry braiding finish (I’ll have a video tutorial for that soon) to finish the fringes. At the bottom of the hemstitched hatched panel, I wove the fringe back into the work. I took the fringe at the top, placed my faux leather necklace on top, and began weaving the fringes individually back into the work, looping the fringe threads around and encasing the necklace band as I went.

I wasn’t sure if this would secure the panel onto the band with enough strength, but now that I’m finished it is surprisingly hardy and doesn’t move.

The fringe looped over the necklace and woven back in to the fabric.


Once all the fringes were woven in securely, I snipped them off close to the fabric. The back of the necklace doesn’t show, but if I was worried about it, I could have sewn on a piece of felt the same size as the panel to cover the back.

I have not yet finished the other panel, but I’m so glad to have completed another project for the April #weaveforme challenge. The challenge was so popular that I would love to run it again next year. What do you think?

If you would prefer to watch this post and see a bit of a demonstration of the actual weaving, here you go!

And, if you have an interest in learning more about tapestry weaving on a rigid heddle loom, I have a class that will teach you all the basics and get you on your way.

I hope you all enjoyed following along with this project and reading and watching about it.

Until next time…

Happy Weaving!

Filed Under: #weaveforme challenge, Tapestry Weaving, Tutorials, Weaving Tagged With: #weaveforme, mirrixlooms, tapestry necklace, tapestry weaving

Mirrix Big Sister Review

by Kelly 9 Comments

In my last post, I talked about my excitement at purchasing a Mirrix tapestry loom.

Now that I’ve had a chance to get to know the loom a little through completing a couple of projects, I’m doing a review for those of you who are interested in purchasing one. Please note, this is not a sponsored post and I have not received any financial compensation or incentive from Mirrix. I just love to talk about things I love! *This post does contain some affiliate links, meaning that if you click on the link and purchase, I receive a small commission at no extra cost to you.

*If you prefer to watch the video of this post, hop over to Youtube-

I purchased the 16″ Big Sister with the shedding device (you can choose a loom with or without the shedding device.) Having one certainly speeds up and simplifies your weaving, so to me, it was worth paying the extra for this feature.

I was undecided as to whether I would buy the Little Guy (12″) or this one, but I was leaning towards the larger size. When I contacted Tracy from Knit Spin Weave, she said she had a Big Sister in stock. That sealed the deal!

Firstly, I will go through the things I really love about the loom, then I’ll mention the things that were not quite what I expected or that will take some getting used to. Considering I’ve never owned or used a tapestry loom before, the latter list is relatively small.

What I LOVE!

Well, I love the way it looks! It’s a beautiful loom. I have always favoured wood over metal, but the addition of the copper, plus the clean and fresh design, makes it very pleasing aesthetically.

The design is very clever. Obviously a very smart lady designed this loom – a weaver who knew what she wanted out of a loom and figured out the best way to make one. The loom is simple to use. You can read more about her here.

Tensioning is controlled with two wing nuts, which you simply wind one way or the other to loosen and tighten. These make the loom extendable as well, so I can actually make the loom taller than it appears here, giving me a longer warp. You can achieve a VERY tight tension on this loom, which is great for tapestry.

The shedding device is controlled with a lever that attaches to the heddle bar. You place the lever up or down to alternate sheds, similar to a rigid heddle. The lever rotates the heddle bar very easily and I love this way of changing sheds.

Spacing for weaving at various setts is provided by a spring that you attach to the top bar. When I talk about the cleverness of designs, this is the kind of thing I mean! The loom comes with 8, 12, 14 and 18 dent springs that stretch across from one side to the other, and it works perfectly.

Advancing the warp is amazingly easy, using a tensioning rod that is installed as part of the warping process. Just loosen the tension, adjust the bar upwards, and your warp advances beautifully. I wasn’t sure before I used the loom how advancing was going to work, but it seriously only takes a few seconds to do it!

What was UNEXPECTED.

The heddles. I didn’t really consider that it would take me quite some time to make all the heddles I needed (and it did take a LONG time!) and I also thought that making them with 8/2 linen would be fine. Linen is super strong, right? Ha ha, well, I learned my lesson. Because the warp is under such high tension, so are the heddles each time you change the shed. I’m being a bit dramatic, because I only broke 1 heddle during the weaving process, and I was able to replace it without too much fuss, but it was enough for me to realise that my thin little linen heddles will not last. And I don’t want to have to make a heap of heddles each time! I found out that Mirrix actually sell a roll of texsolv heddles . Awesome, I’m going to get grab a roll of those ASAP!

The sheds. As a rigid heddle and floor loom weaver, I’m pretty used to large sheds, making it very easy to get a shuttle through. A tapestry loom is different. The sheds are very small and it can be difficult, particularly if you’re near the end of the warp and can’t advance any further, to fit your fingers and yarn through. I imagine this could be challenging when I start warping wider widths, but it’s not really a negative, just something different.

The shedding device lever. The bolt that holds the lever on to the heddle bar kept coming loose. I’m not sure if this is common or whether I need to tighten it with a little wrench or something? Perhaps one of you know?

Not a lap loom. I had the idea that I might be able to use this loom on my lap, but the weight and design makes this not favourable for me. I actually do like using it upright, but often in the evenings, when I’m tired but my busy hands won’t let me rest, I like to have a project I can do while sitting in my comfy recliner. I think the smaller versions would be fine for this, but this one is not the right size or weight for my lap.

OK, so how much did it cost?

Sometimes people are a little taken aback by the price of Mirrix Looms, but you have to consider that they are quality, American made and as I’ve already discussed, the design is excellent. They are assembled by disabled people, and I love that aspect as well. The business is family owned and run. I bought the loom from an Australia supplier, who is also a small business woman I like to support.

So, my Big Sister cost just over $400AUD and that price included the extras I’ve discussed in this post. I patiently waited and saved the money until I felt I could afford it, and I have no regrets. To me, it is well worth the price I paid.

Some of you may wish to look into making your own copper pipe loom, if you are so inclined and wish to save quite a bit of money. A quick google search showed me this page with plans and I’m sure there are more.

So there you have it, my thoughts so far.

I can’t wait to get my next warp on and start my next project, oh! The possibilities!

Do you enjoy tapestry weaving? What sort of a loom do you use? If you have a Mirrix loom, what are your thoughts on it? Let me know by leaving a comment!

Until next time…

Happy Weaving!

Filed Under: Reviews, Tapestry Weaving Tagged With: mirrix looms, review, tapestry weaving

Weaving on my new tapestry loom!

by Kelly 18 Comments

You may recall from this blog post or video that I have been quietly longing for a dedicated tapestry loom for some time. 
The Mirrix looms were appealing to me for many reasons, so my dream tapestry loom was a Mirrix. 
After interviewing the CEO of Mirrix, Claudia Chase on my blog recently, I was even more convinced that this was the right type of tapestry loom for me.
So, I started saving!
 
 
Then, a few days ago, this box arrived. A “Knit Spin Weave” card plus a “Mirrix Tapestry Studio” sticker on the front of the box was just the kind of mail I love!
 
 
I followed the Mirrix Youtube instructions for warping the loom, which was pretty straightforward. My mind was so focused on getting it warped that I hadn’t really considered what exactly I was going to weave!
 
So, instead of having a grand plan, I drew some rough lines onto the warp and started weaving with some of my handspun. Then I introduced some hand dyed wool from my stash.
 
 
The end result is OK, not brilliant, but it was more about getting to know the loom than weaving a masterpiece. And I certainly did learn a lot, particularly about the kind of tapestry I want to weave in the future.
 
I still had room on this warp, so I decided to weave a planned sample, following Kirsten Glasbrook’s book Tapestry Weaving. 
*Affiliate link
 
 
This is a great book if you’re interested in getting started in tapestry weaving, it covers all the basic techniques and includes detailed information on completing the finished piece, including mounting options. I used Kirsten’s sampler on page 40 as inspiration – though her sampler is much more detailed than mine.
 
 
I used some very bright and colourful wool and focused on achieving clean, straight lines. No lumps and bumps this time!  
 
Starting from the bottom and working up, these are the techniques I used (these are all listed in fabulous step by step demonstrations in the book).
1. Pick and pick
2. Vertical slits
3. Pick and pick
4. Soumak
5. Diagonal shapes
6. Hatching
7. Distorted weft


And here is the finished piece! I had some challenges with uneven draw in (you can see that my edges have a slight curve rather than just straight lines), but all things considered, I’m pretty pleased. It’s almost a shame to contemplate removing the warp from the loom, the beautiful luminosity of the copper pieces adds to the overall aesthetic!

Update: If you’re interested in learning more about this loom, watch my review here-

In the meantime, if you’re interested in Mirrix Looms, you can read more about them in my interview with CEO Claudia Chase and visit their website for more details.

And, just to let you know, this post is not sponsored by Mirrix in any way, I’m just sharing the love.

Filed Under: #weaveforme challenge, Tapestry Weaving Tagged With: mirrix looms, tapestry weaving

  • Page 1
  • Page 2
  • Go to Next Page »

Primary Sidebar

Categories

Archives

Meta

  • Log in
  • Entries feed
  • Comments feed
  • WordPress.org

Copyright © 2025 Kelly Casanova Weaving Lessons on the Foodie Pro Theme