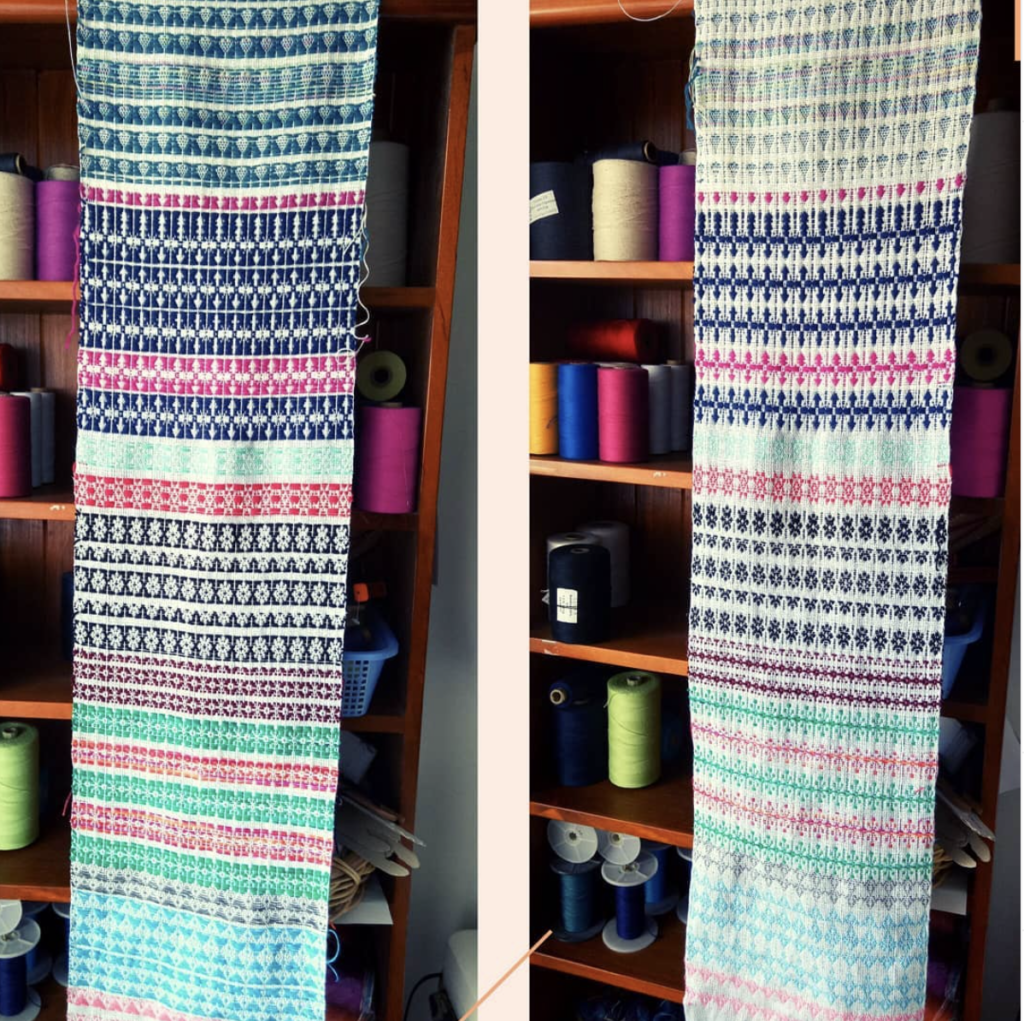
If you follow me on Instagram you will have been viewing the progress I’ve made on my 8 shaft sampler.
*This post contains affiliate links, meaning that if you click and purchase, I will receive a small commission at no extra cost to you.
I didn’t have any specific plan for this sampler other than to explore some 8 shaft drafts on a rose path threading from Carol Strickler’s 8 Shaft Pattern Book.


If you’re not familiar with rose path threading, it is a point twill variation and can be used for both 8 and 4 shaft patterns. An example of rose path threading for 4 shafts would be 1,2,3,4,1,4,3,2,1 and for 8 shafts 1,2,3,4,5,6,7,8,1,8,7,6,5,4,3,2,1.

Something I really love about having an 8 shaft loom is the range of patterns or motifs that can be woven. I wanted to explore:
- Which combinations of yarns would be most effective for the designs I wanted to weave.
- How many different patterns I could weave on 8 shafts by changing my tie up often.
Once you have threaded a multi shaft loom, there is no going back, no changing the order of threading (unless you want to go back and start again and no one wants to do that!) By changing the tie up though, you can vary the combinations of shafts as you’re weaving, therefore changing the pattern without having to change the threading.
By “tie up” I’m talking about attaching my treadles to various shafts with texsolv cording. Different types of looms have different ways to tie up the treadles and one thing I love about my Louet David is how simple it is to tie up. This means that if I want to change the tie up to alter the pattern, it doesn’t take long and isn’t hard to do.
My loom is a sinking shed loom, so I was aware that the actual pattern would be woven on the underside. I didn’t mind that (in other words, I couldn’t be bothered messing around with the treadling to make sure the pattern would weave the right way up). Interestingly, I discovered that I often preferred the weaving on the underside to the right side anyway.
I started with 8/2 unmercerised cotton for the warp in white and warped at 20 ends per inch. I made my warp around 10 inches wide on the loom, as I like to have plenty of space to see my pattern. A narrow warp doesn’t always give enough pattern repetitions to give a good representation.
Beginning on page 30 of the book, I randomly picked motifs to weave according to the number of treadles required. My loom has 10 treadles, so 8 were tied up for the pattern weft and 2 were tied up for tabby.


I initially started weaving with some dk weight cotton (pink) and Bambu 7 (blue) and changed to 8/2 Cottolin (grey). For these designs I used tabby throughout (which means that following every pattern weft row is a row of plain weave) in an 8/2 mercerised cotton in a very light blue which looks mostly like white in these photos.
I wasn’t too thrilled with the initial results but it showed me something valuable. For the designs to have more impact I needed to use a heavier weight of yarn for the pattern weft and to choose my colours with intention. I wanted bold, not “meh” designs!

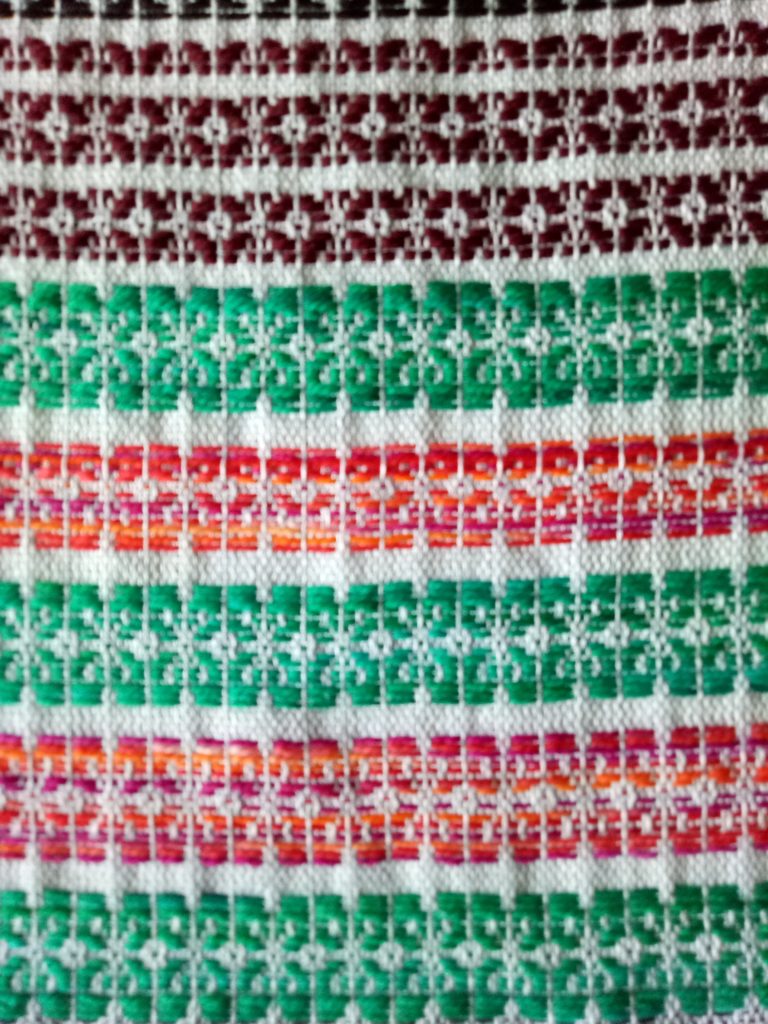

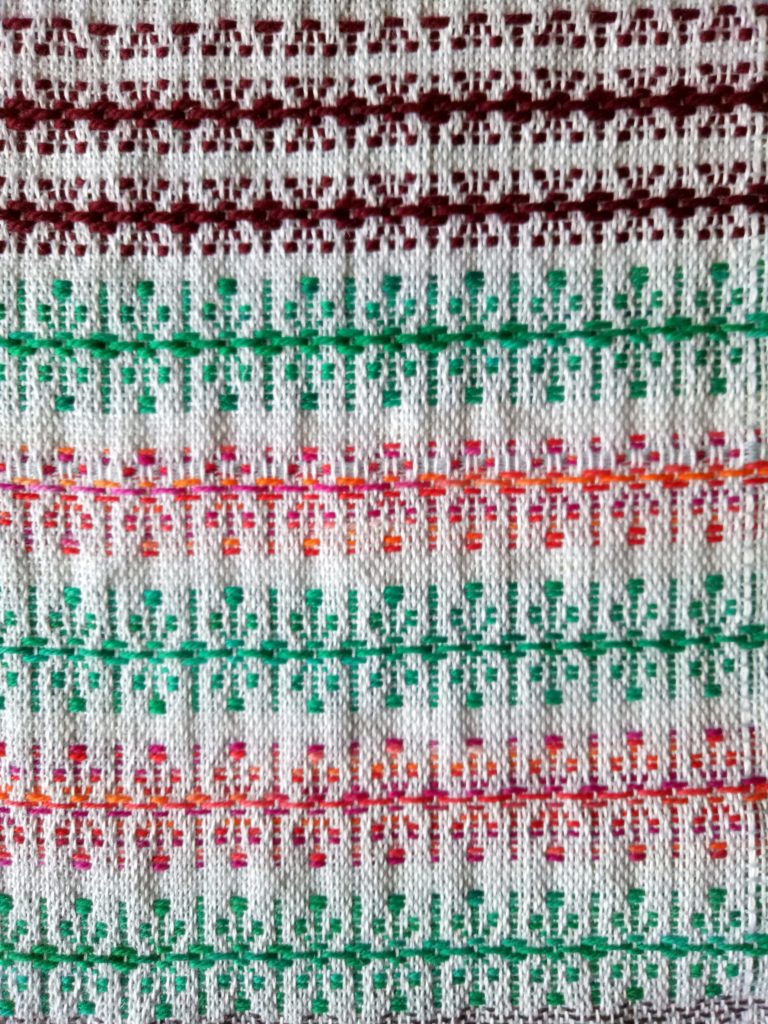
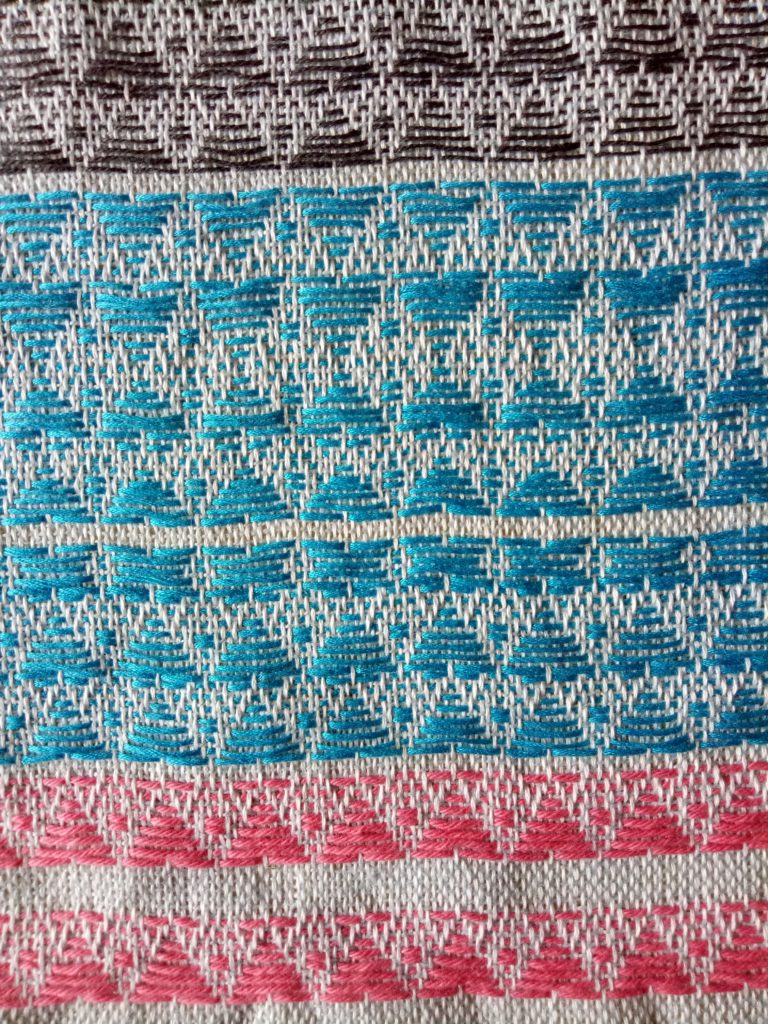
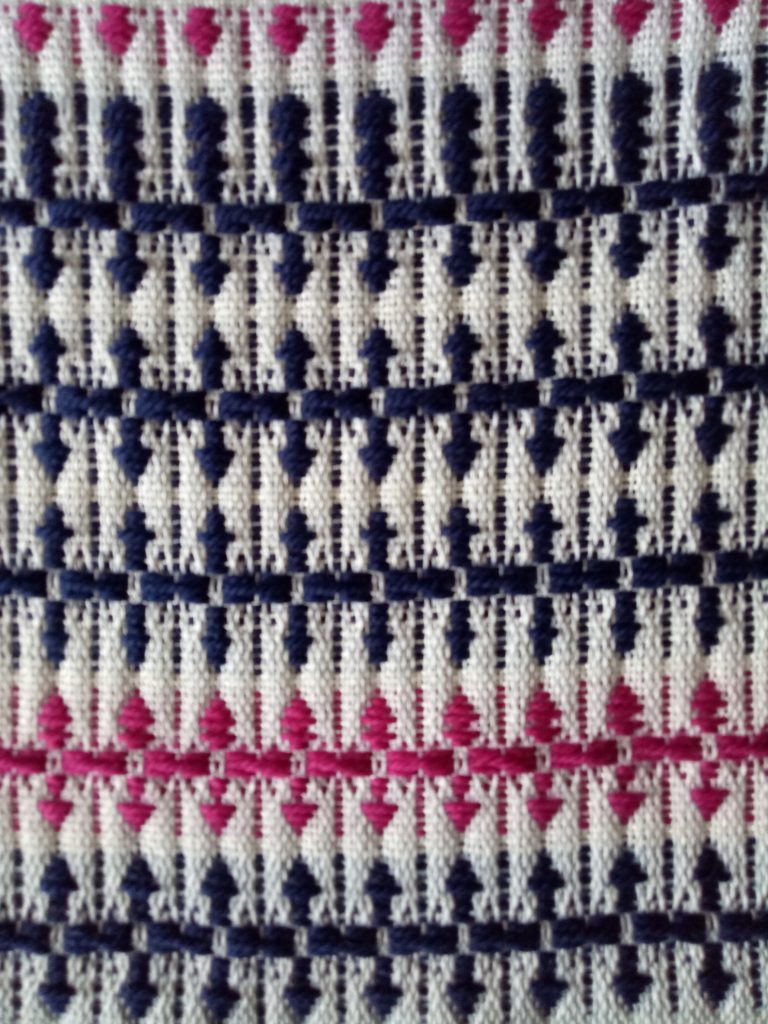
I switched the tie up and the yarn, and presto! Much better result this time. I alternated between a variegated orange/pink and teal fingering weight hand dyed wool, keeping my pale blue 8/2 cotton tabby. The top design is a burgundy dk/light worsted wool. I find both sides of this design equally pleasing. Between the hand dyed and burgundy you can see that the design looks slightly different – this is as a result of changing the treadling around but keeping the same tie up. So many variations are possible! If you’re looking for this design in the book, it is number 132 on page 32.

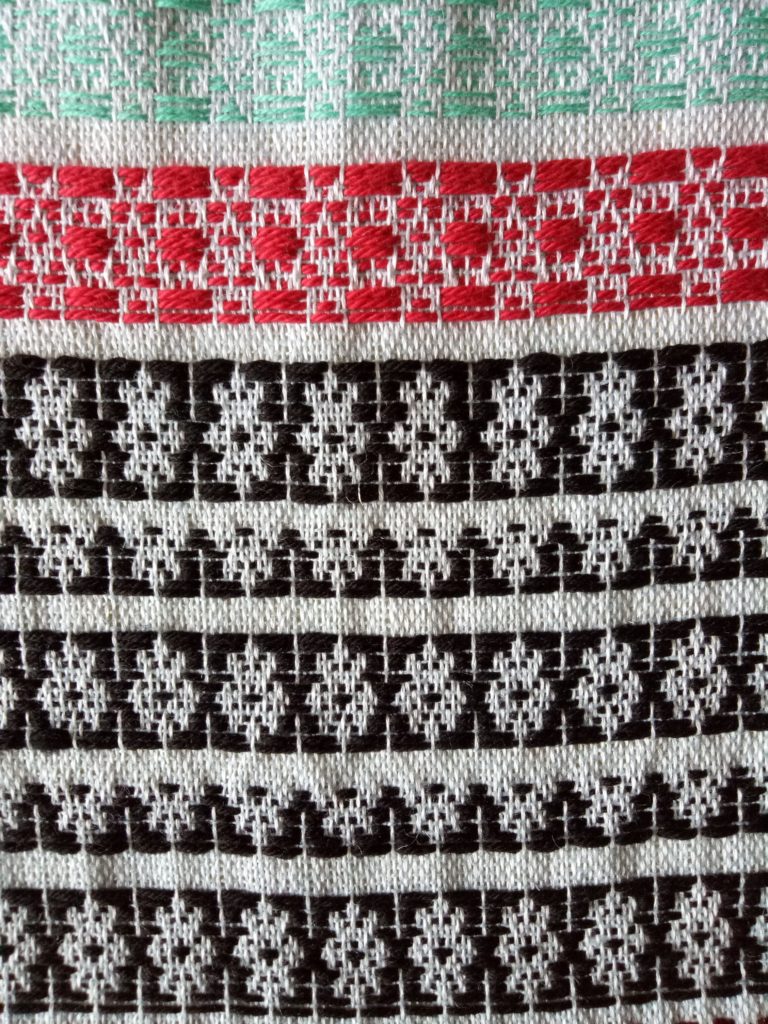

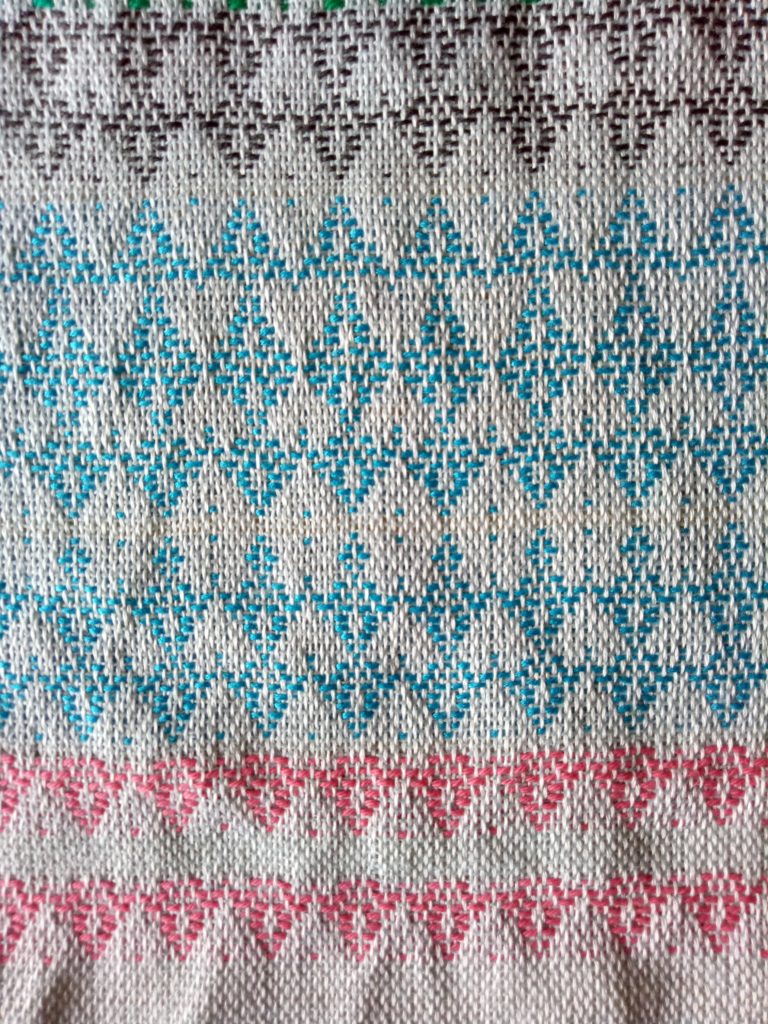
For this design I once again changed the tie up and swapped to a black fingering weight wool. This design is number 133 on page 32. The red design is number 128 and was worked in a dk/light worsted weight cotton. You can see how different this one looks on each side! I also tried it in a lighter weight and colour of cotton, which sort of just shrunk into the background.

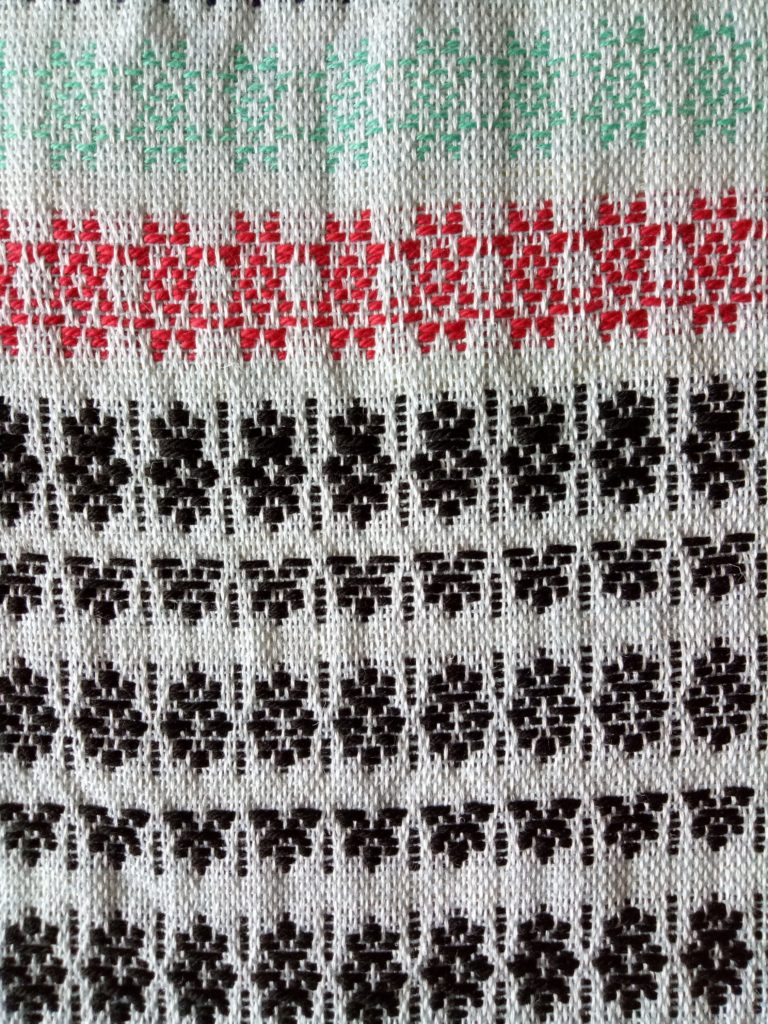
This design is one of my favourites – number 139 on page 33. I changed treadling and yarn again for this one, using dk/light worsted weight wool (I had figured out by now that a heavier weight wool gave the kind of effect I liked).

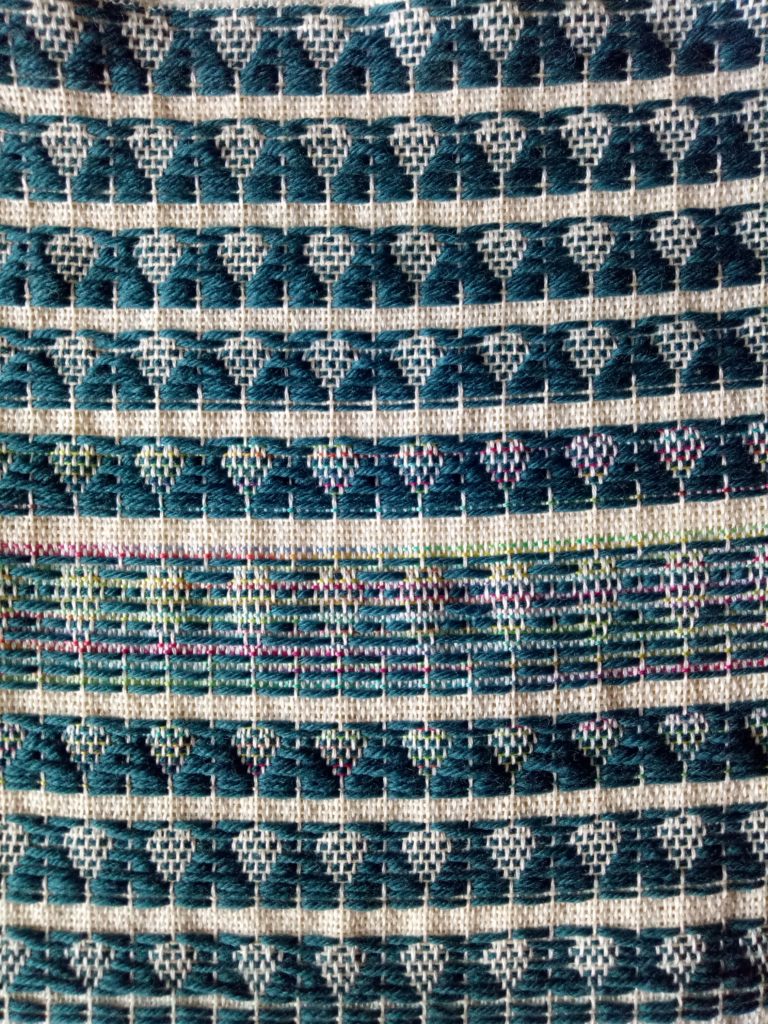
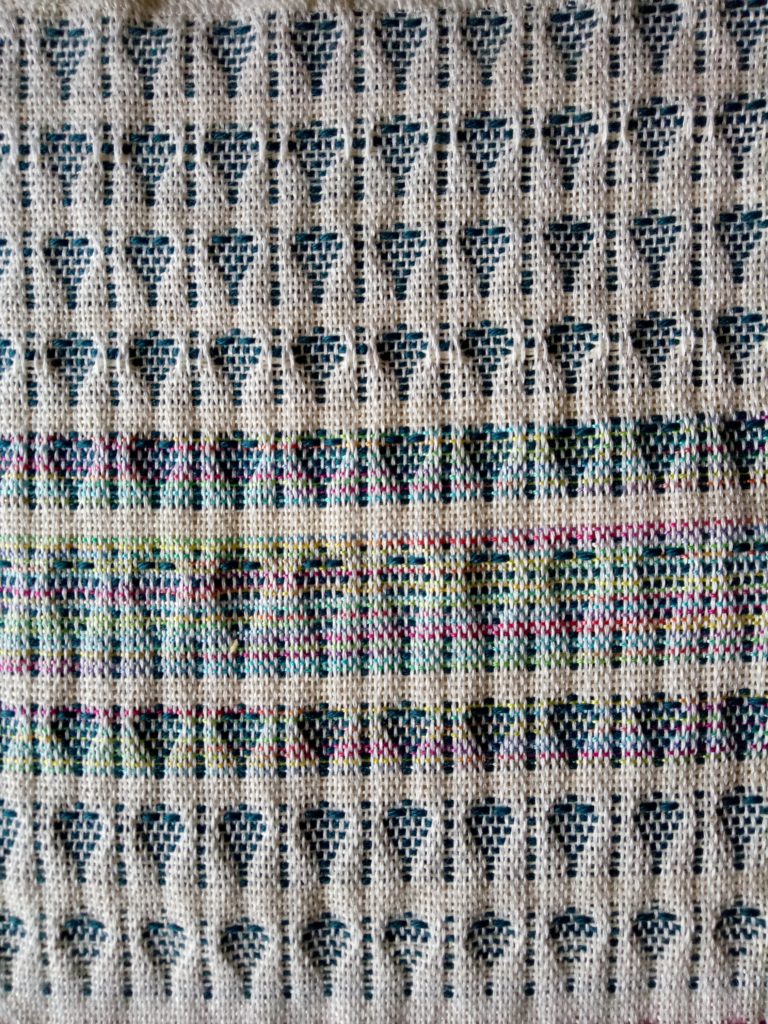
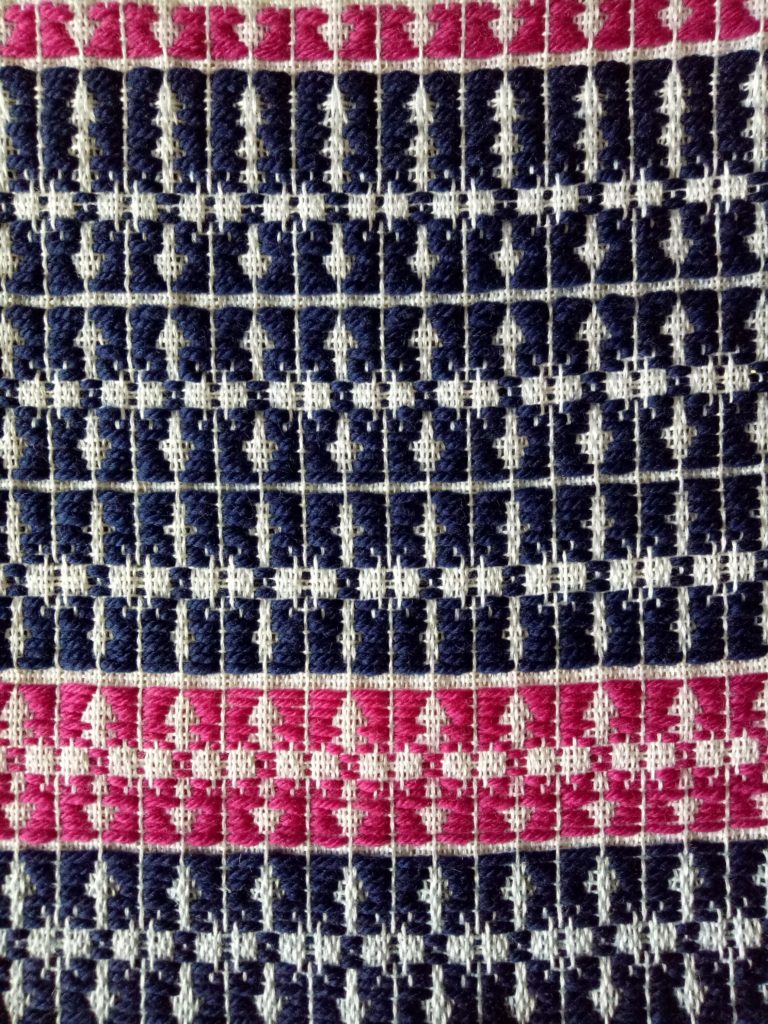
I finished up with design 120 on page 31. The Strickler design looks like little trees, but mine are upside down and look more like balloons, which I find quite cute. I experimented with my tabby yarn by using a hand dyed, variegated tencel against the blue wool. I quite liked the effect (you can see the rainbow-ish colours in the middle of the panel.
This was a really fun project. I loved having something on the loom that had no particular commitment and didn’t need finishing quickly – it was purely for my own enjoyment and learning. That’s the kind of weaving I like!
I may just keep this as a sample or I may cut it up and use it for a small project. For now, I like the way it looks just hanging off my studio shelf.
If you are intrigued by multi shaft or floor loom weaving, I have a very popular class for beginners, the Introduction to Floor Loom Weaving. It takes you through all the step by step basics of getting started on your loom and weaving a beautiful cowl project. There is also a follow up class to go onto afterwards. You can even purchase the two classes together for a special price.
If you take out a Yearly Membership or Monthly Membership to my Online Weaving School, the floor loom classes are included.
I hope you found this post interesting and inspiring!
If you have any questions about this post or my Online Weaving School, please leave me a comment below.
Until next time…
Happy Weaving!