

Making patterns on your rigid heddle loom is a very popular topic, particularly among newer weavers who are experimenting to see just what they can achieve on a rigid heddle loom.
*This post contains affiliate links. Please see my disclosure for further information.
Last week I made a tutorial that demonstrated 3 ways to jazz up your plain weave.
This is part two of a tutorial on how to jazz up your plain weave. Part one showed you how to use stripes, dots and dashes, loop pile and butterflies to add some extra pizazz. If you missed part one, please start here and progress on to tutorial two afterwards.
You will need a rigid heddle loom to weave this sampler. In the video, you can see that I’ve used my Sampleit loom.
This downloadable PDF has all the information you need to follow this tutorial in conjunction with the video:
For instructions to part one of the tutorial, don’t forget to check out the first article here.
There are so many simple ways to push past plain weave. As I was weaving the sampler I found it hard to limit the number of techniques so that I didn’t end up making this series a year long!
Part two of the tutorial covers and additional 3 techniques that you can use to make your plain weave more exciting or just for fun to explore.
All of these pattern techniques can be worked on a rigid heddle loom that is already set up for plain weave – that is, every hole and slot is threaded.
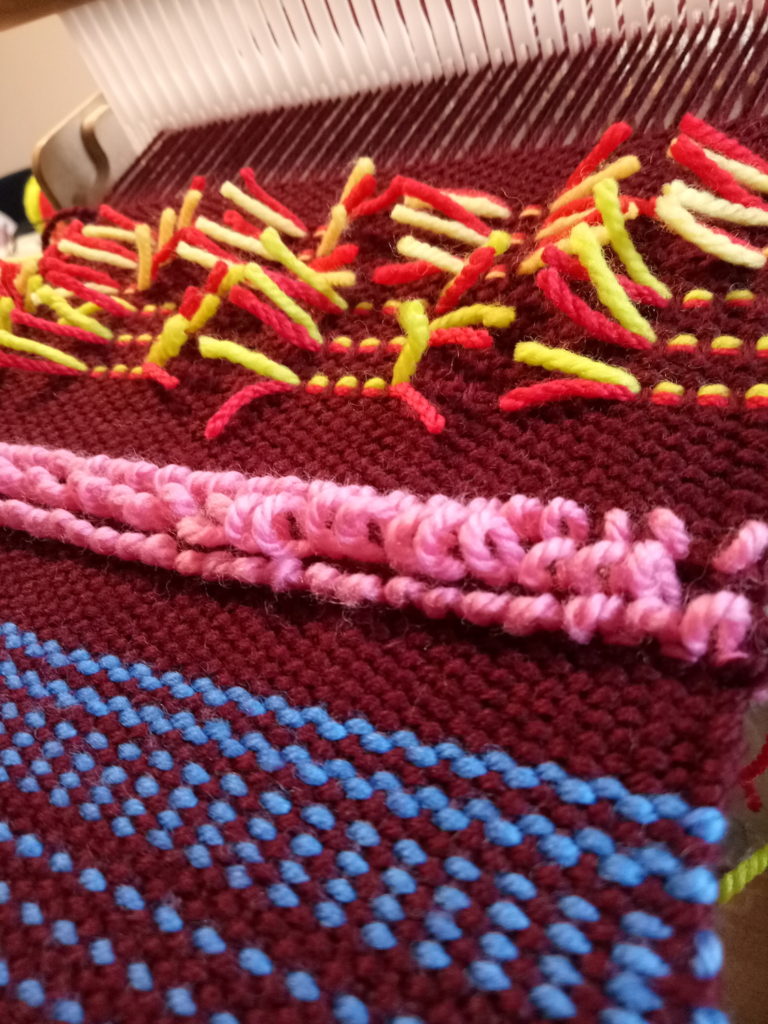
- Doubled Weft (pictured above).
The first technique is straightforward and simple but gives a very cool effect that really pops against the background, contrast colour.
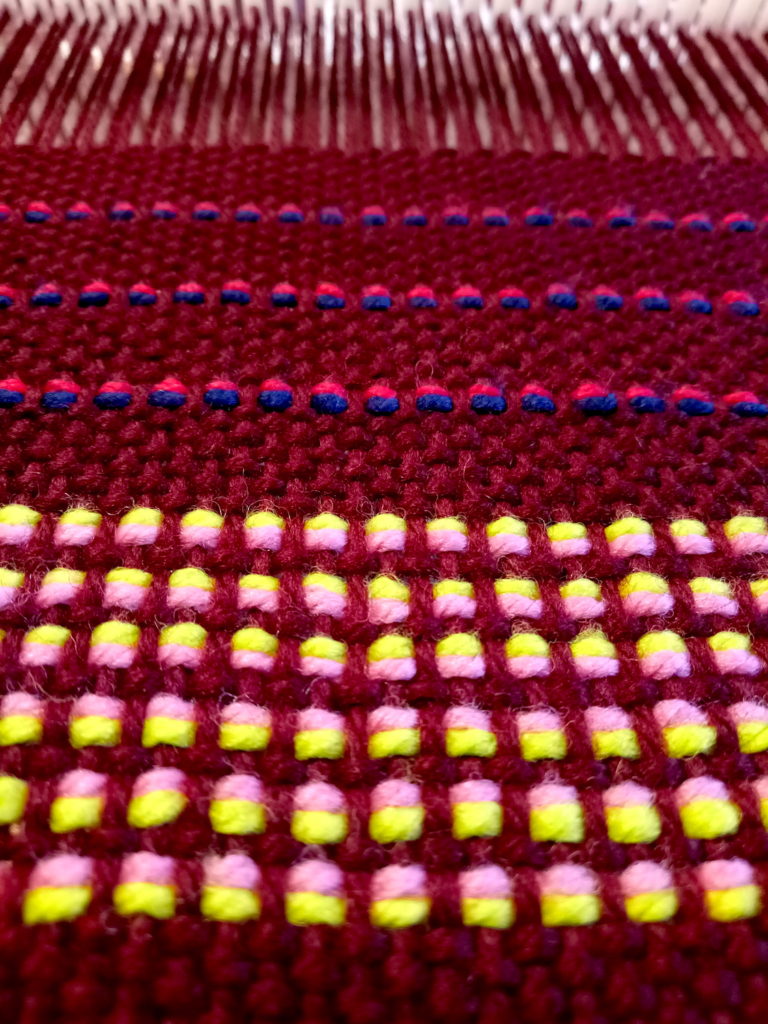
2. Pick Up Rows (the blue blocks below)
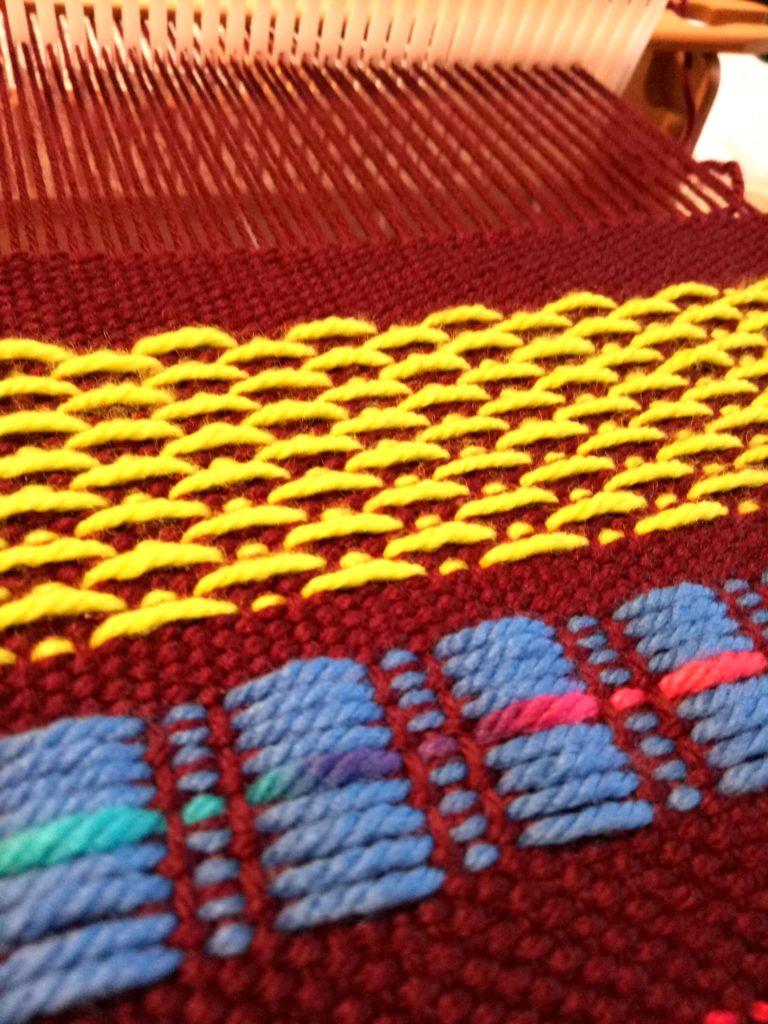
This is such a simple concept. I made a pick up pattern and repeated it over and over (with the blue yarn) and only one pick of plain weave (maroon) in between). What you end up with is towers and dots. I had a very small amount of hand dyed rainbow yarn left, so I threw in just one pick in the middle of all the blue, to break it up and create more interest.
3. Staggered Pick Up (the bright green that actually looks like yellow, pictured above).
This is a 2 pick up stick pattern. In the video, I used just one stick and took it out each time I wanted to pick up the other pattern. But, I wouldn’t recommend that unless you’re only weaving a couple of rows, it’s way too tedious. If you want to weave a larger amount of the staggered pickup, a heddle rod is definitely the way to go! Check out this video for how to do that:
And of course, don’t forget to watch video two so that you can see exactly how I worked these techniques:
If you enjoyed this two part series, you will love my Online Weaving School! With over 60 classes currently available, there really is something for everyone. I would love to see you there!
Until next time…
Happy weaving!
Hi Kelly, I donde speak english, but I love Krokbragd, I madera same simple proyecto from Debby Books.
I World like to much lean how to make 4 pick up stick, I can weave Just 3,
I día not find any video about it. May you hello me please, peleas.
Im forma Chile
Thanks a lot
Hi Jeannette,
I hope you can understand me with google translate.
I have a class that shows how to convert a 4 shaft draft to a rigid heddle loom, it’s not necessarily with 4 pick up sticks though.
It may help you.
http://kelly-casanova-weaving-lessons.teachable.com/p/converting-pattern-drafts-to-the-rigid-heddle-loom/?preview=logged_out
Kelly, first let me say your videos are awesome! You inspire me to keep weaving on my Ridge Heddle!
My question is: I want to weave some kitchen towels for gifts this Christmas. I am having trouble figuring out whether to use just linen, just cotton or a combination of the two Cotolin.
I want the towels to not be just for wiping hands but also for drying dishes. What would you suggest?
Thanks so much for your help,
Fey
Cottolin is wonderful! After a few washes, a cottolin towel softens up beautifully. it’s my fave for kitchen towels 😊
Hi Kelly: I am going to attempt to make curtains for my three dining area windows. They are each about 27″ wide and 60″ long. I would like to use some lacy like patterns and I’m wondering if US #10 Crochet cotton would work for the warp and weft. I know this sound ambitious but I thought if I could use some patterns that advance more quickly than plain weave (like Brooks Bouquet) It would take less time. Do you offer a class with those kinds of patterns demonstrated? I have an ashford 32″ RH loom. Thanks, Charlotte
That does sound ambitious but how rewarding it would be!
I don’t know crochet yarn at all, so I’m not sure of the thickness of #10. Weavers do use crochet cotton though, so there is no problem there.
Yes, Brooks Bouquet and Leno do advance faster HOWEVER (big disclaimer here! 😆) they are finger controlled weaves, so they are not fast to implement. Each row takes a lot longer than straight plain weave.
Most weavers who do curtains will opt for either of these two weave structures for their light, open texture and they also look really pretty as curtains!
For Leno I have this free tutorial-
http://kellycasanovaweavinglessons.com/2020/10/how-to-weave-leno-on-a-rigid-heddle-loom.html
For Brook’s Bouquet, I don’t have a class, but this pattern uses the technique and can be adapted to different sizes:
http://www.etsy.com/listing/583215157/the-garden-path-scarf-pdf-pattern-for?ref=shop_home_feat_1&bes=1
I hope that is helpful to you 😊
Excited to try these in the future!
Fabulous! 😊