
You all know that I love hemstitching, right?
I have quite a lot of resources available on the topic, including articles and videos, some of which you can find in this post.
In addition to the basic hemstitch we all know and love, there are variations for an even more visually decorative, but still functional hemstitch.

*This post contains affiliate links. For more information, please see my disclosure policy.
The hemstitch doesn’t have to just be a way to secure your warp threads so that the weft doesn’t unravel when you remove your weaving from the loom. It can also be used within the weaving as a feature.
In the member’s only “How to Hemstitch” series, I have a separate class just to highlight and demonstrate how you can use hemstitch as a feature in your woven piece.
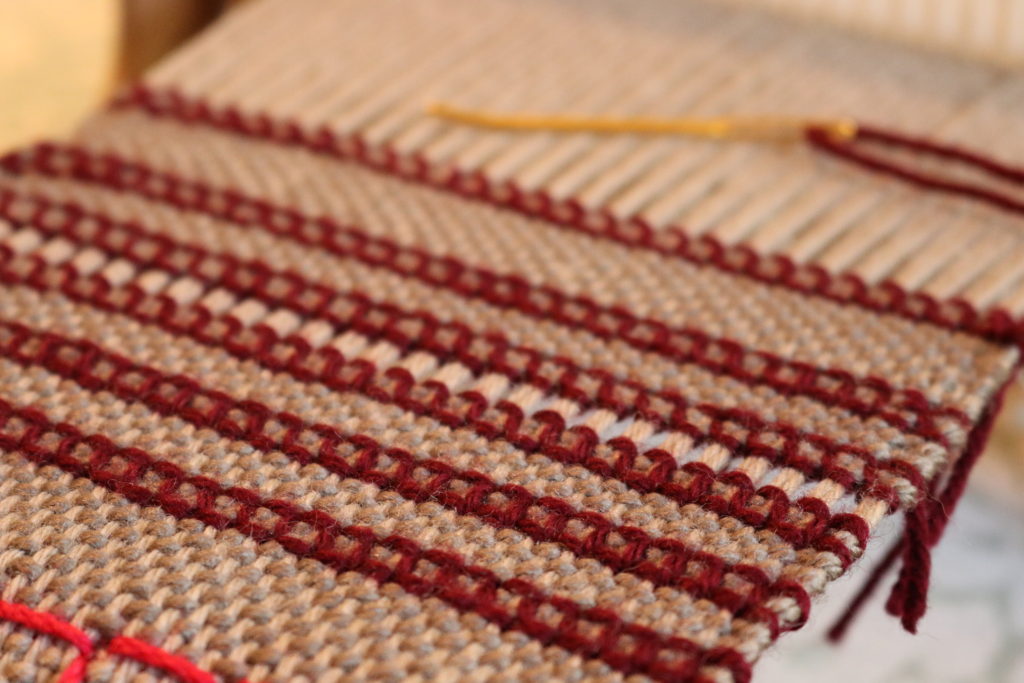
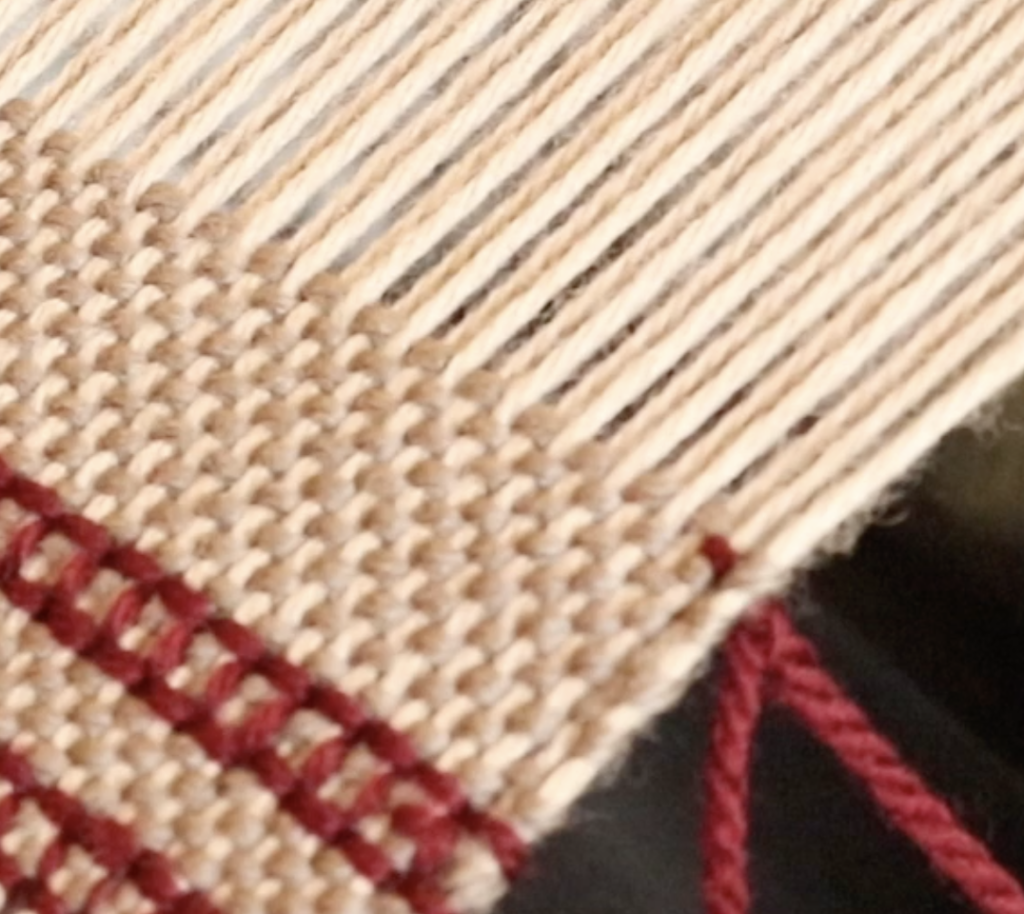
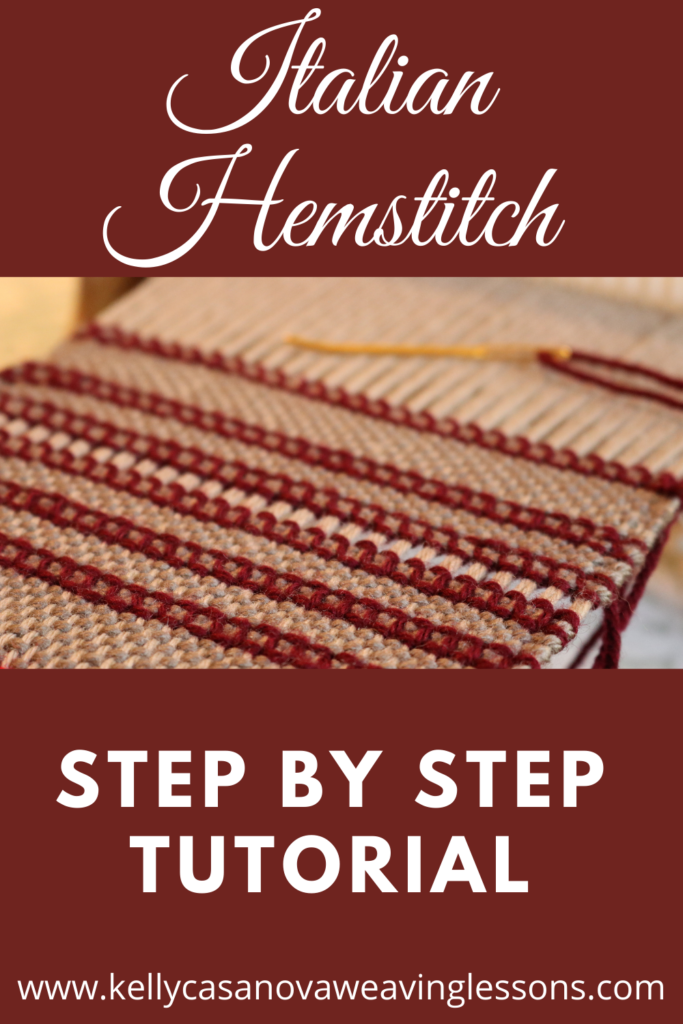
That brings me to today’s topic – the Italian Hemstitch. This is a gorgeous, decorative and functional stitch. It secures your warp ends just like an ordinary hemstitch does, but it stands out as a real feature. Embroidery lovers, this one is right up your alley!

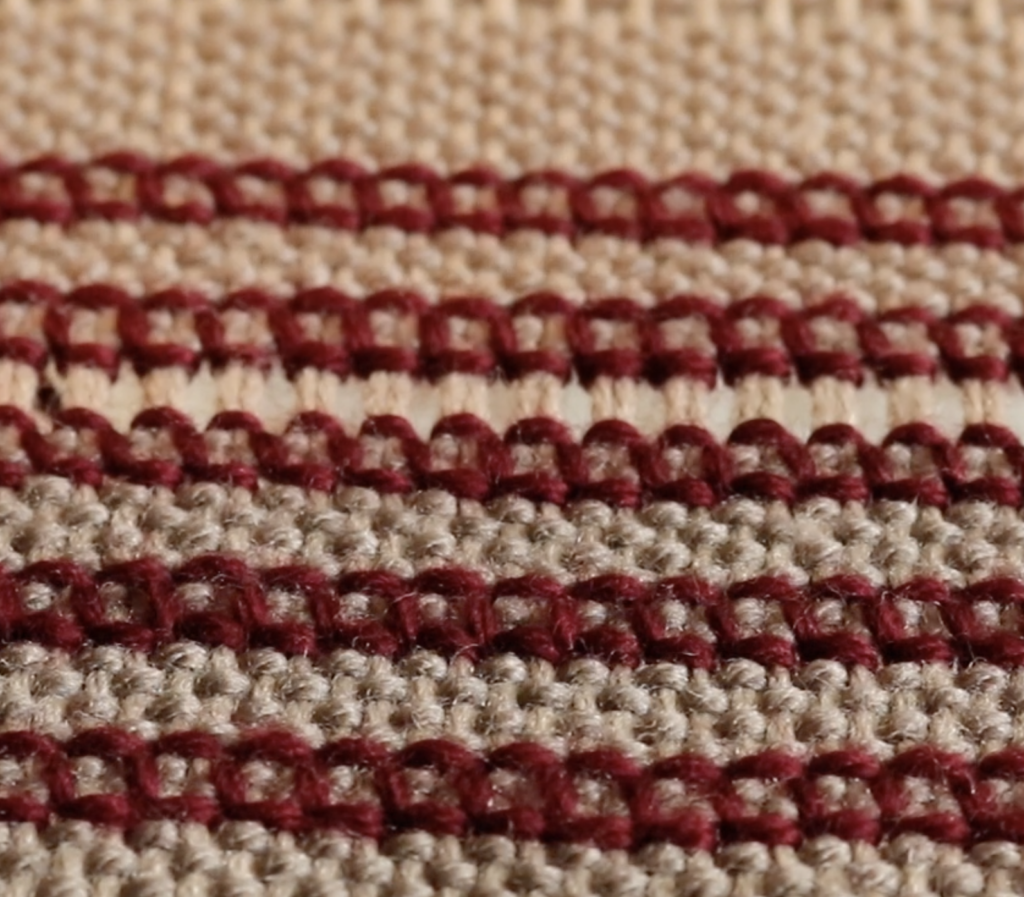
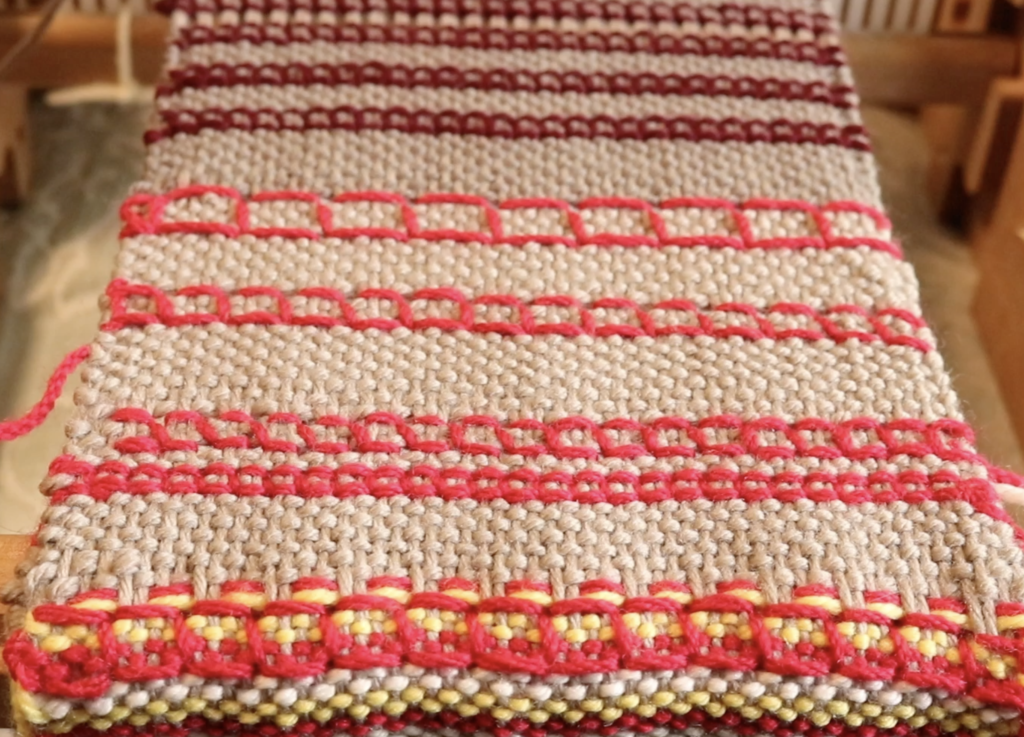
Italian hemstitch looks great either as a single row at each end of your weaving or as rows within the weaving. It can be stitched in a variety of sizes, depending on how large you want it to look. It looks wonderful both from the front and from the back.
I love the way Italian hemstitch looks on a plain weave background, using a contrasting yarn so that it stands out and takes centre stage. You could choose to use a weight of yarn that matches the weight of your warp and weft, or something thicker, or something thinner. Experiment and see what your own preferences are!
For this tutorial I’ve used a light worsted wool for warp, weft and hemstitch, just in different colours. I’m going to be working a 2 x 2 Italian hemstitch.

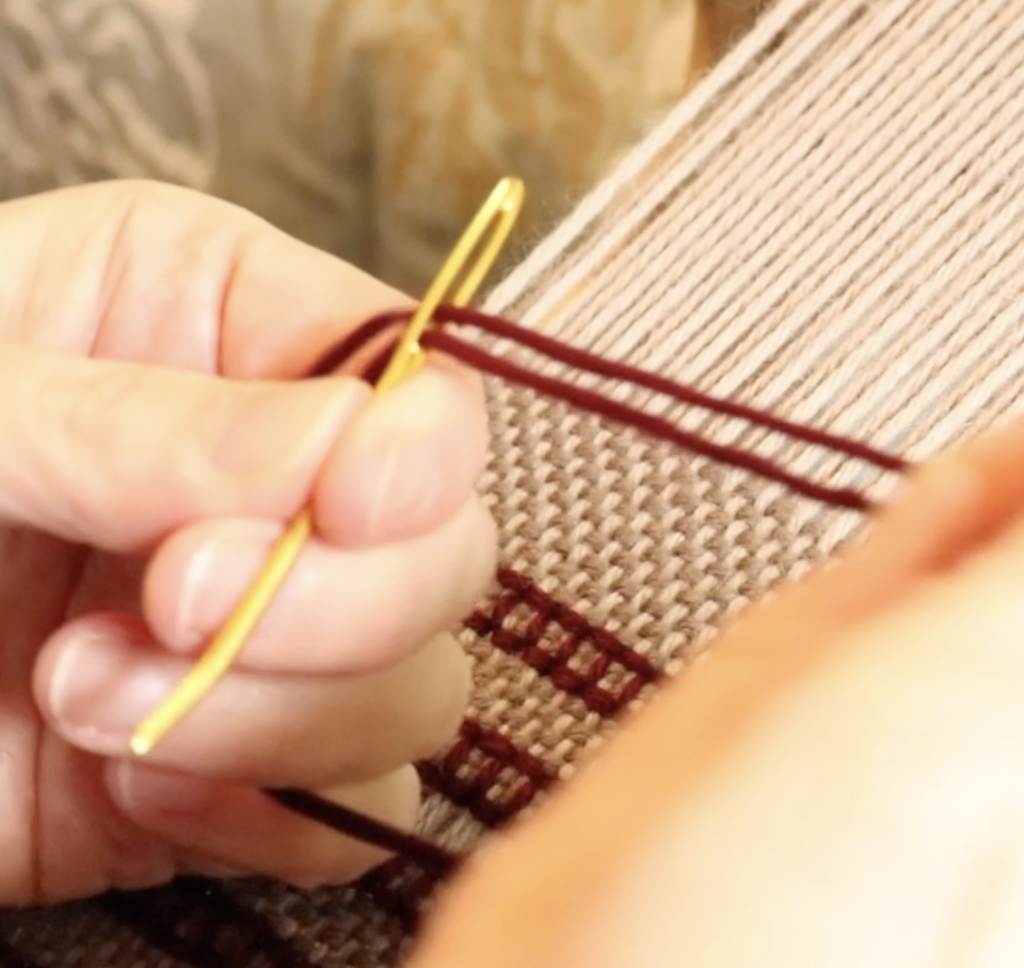
Start by threading up a tapestry needle with the yarn you want to stitch with. Make the length around 5 times the width of your warp (I like to have a little more rather than run the risk of running out part way through).
I have to take a moment to extoll the virtues of this Clover Jumbo Bent Tip Needle. I used a regular tapestry needle for a long time before I purchased a pair of these needles, and wow, what a world of difference it’s made to my hemstitching! The large size, the coating that slips through your weaving just beautifully, and the bent tip all come together to make it a perfect tool to hemstitch with.

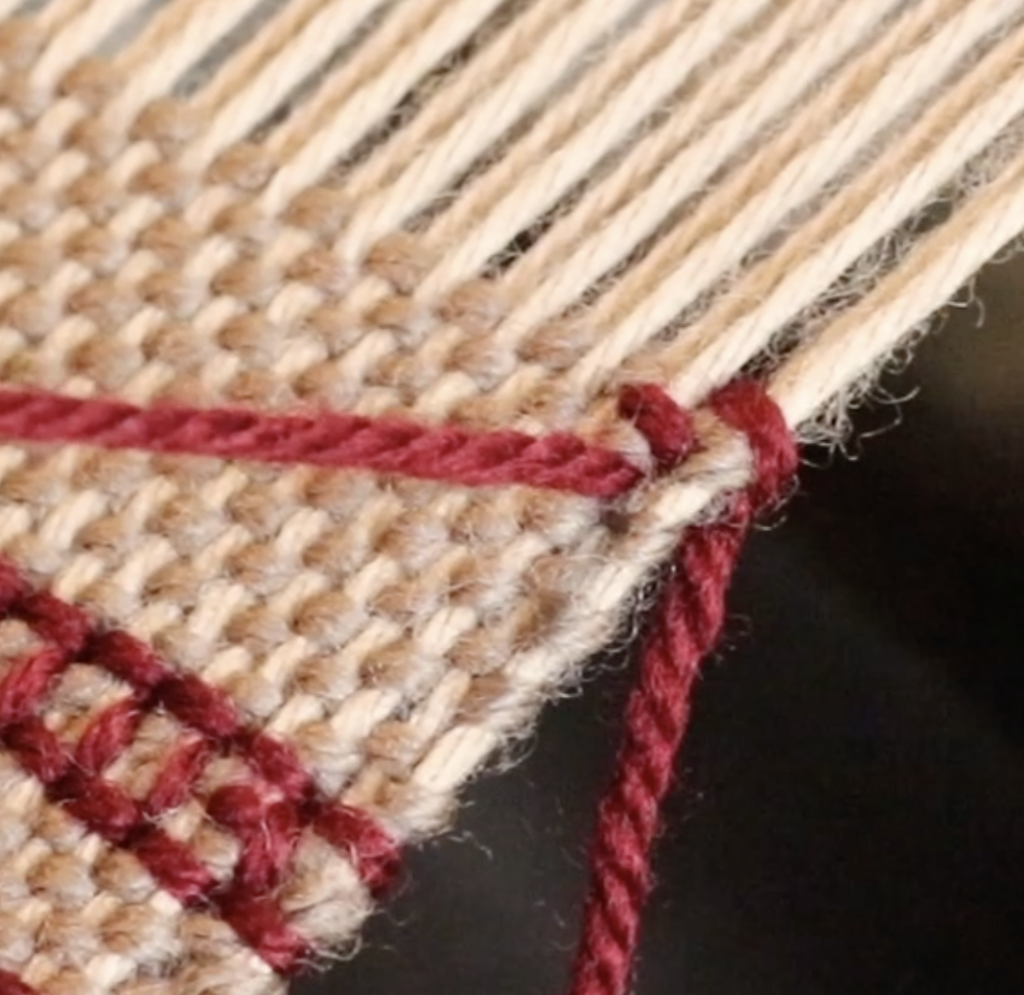
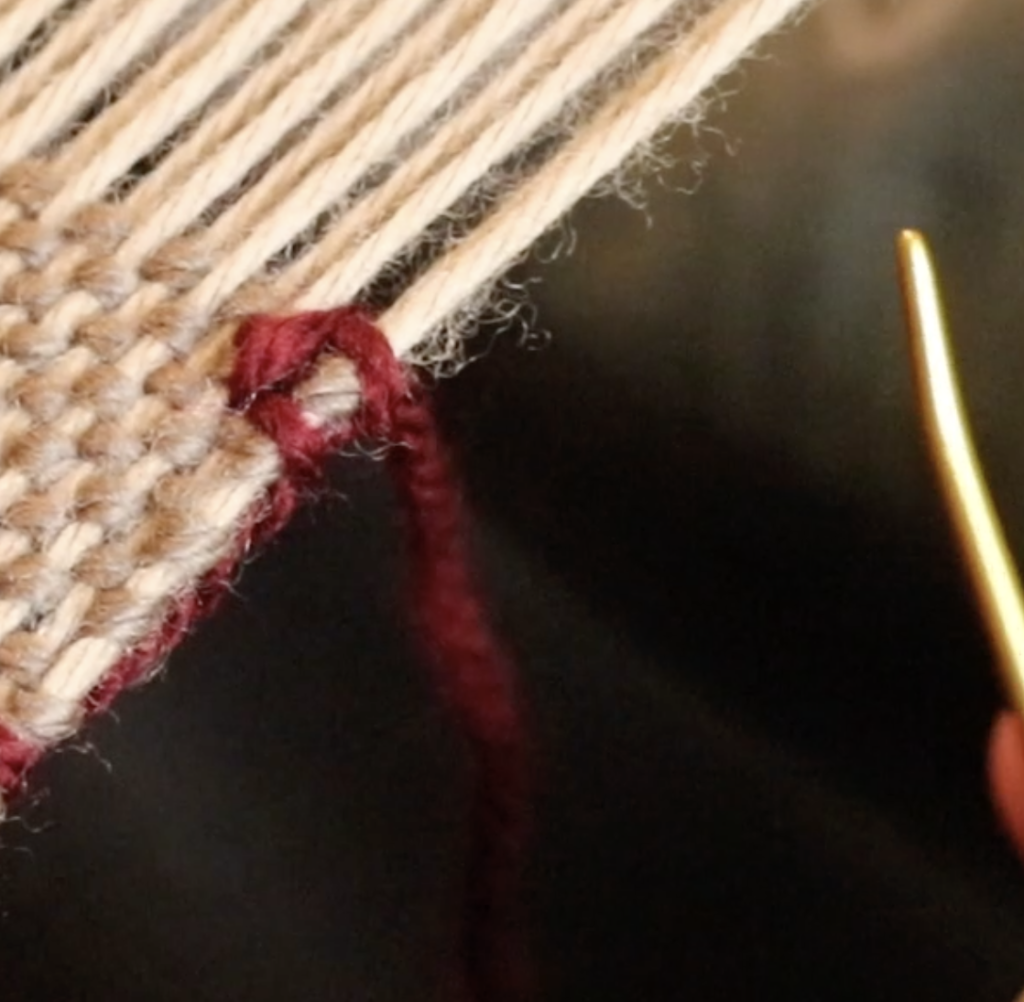
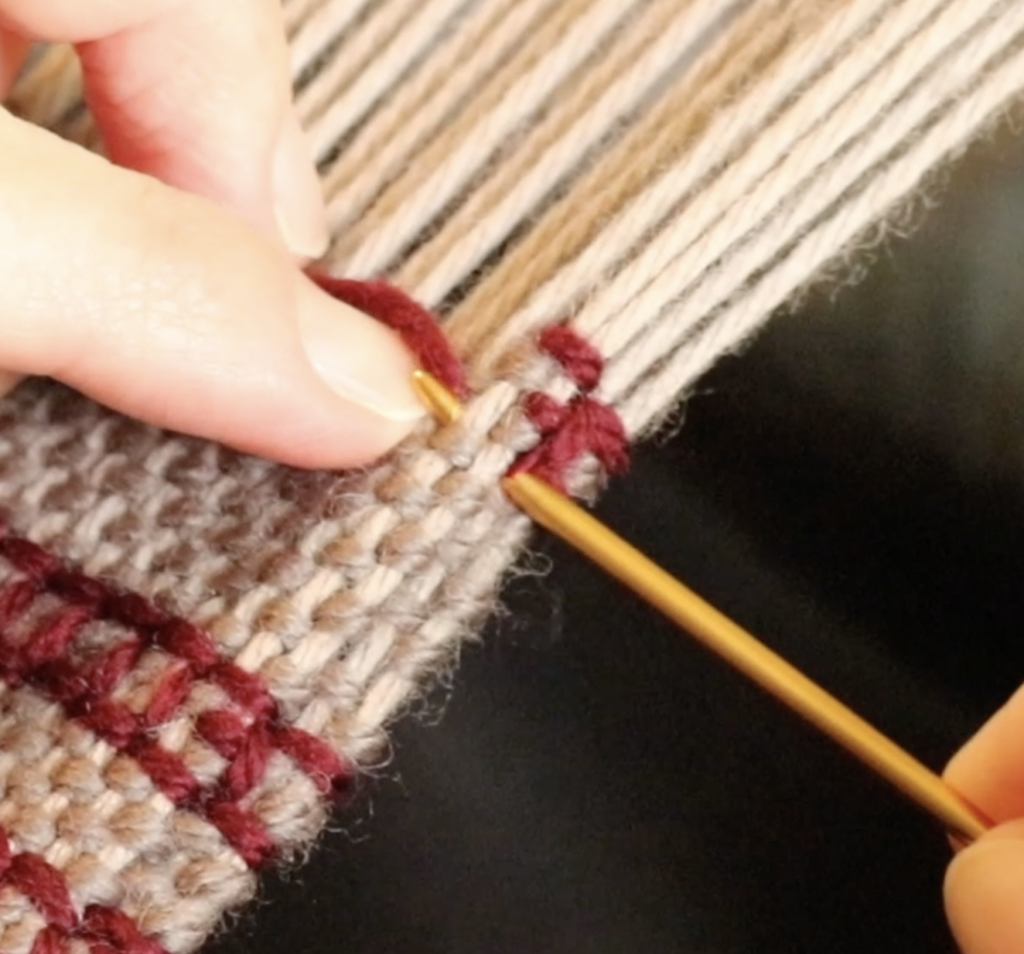
Secure the hemstitch yarn in your weaving, bringing the needle through to the front from the back. You can see one way that I work lock stitch in this free video. I work this about 2 – 3 warp threads in from the edge on the right hand side.

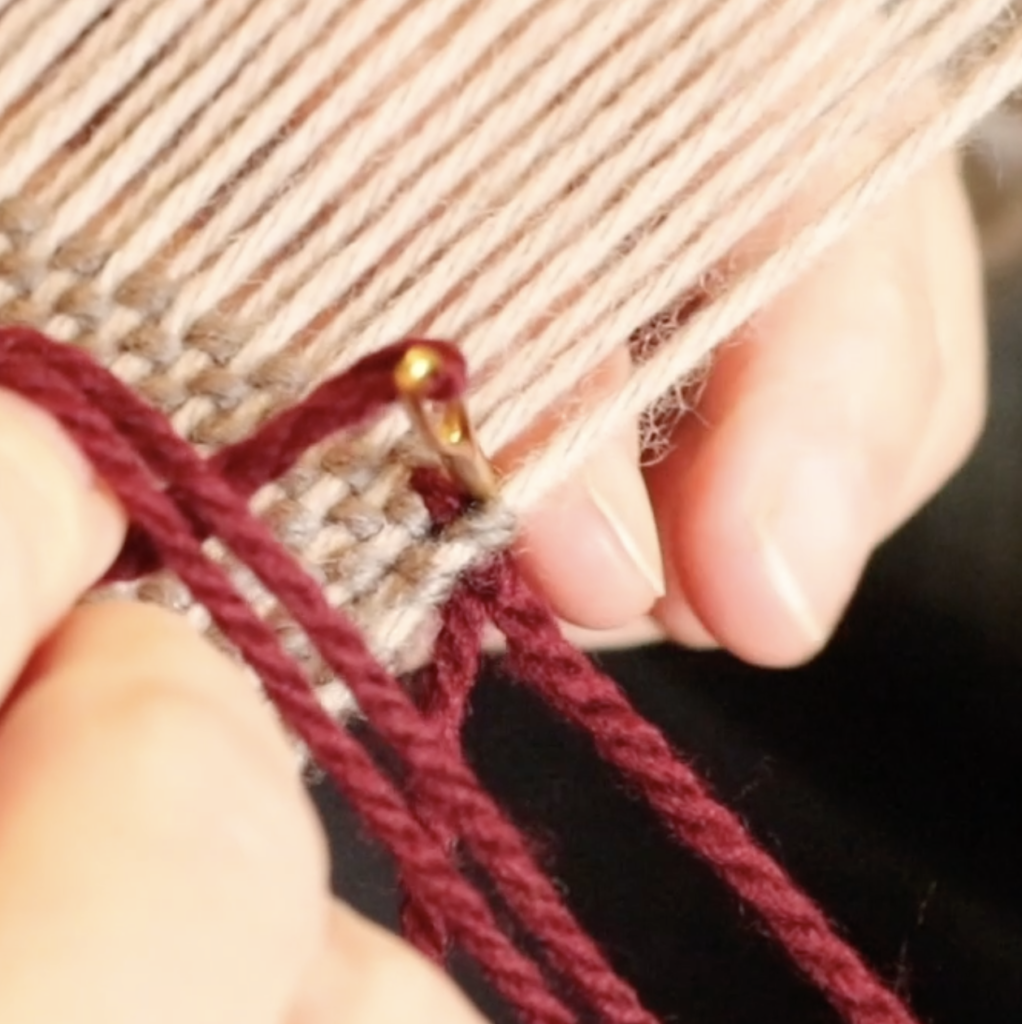
Count 2 warp threads in from the edge (above your last woven pick) and take the needle down through the gap to the back of your weaving.

When you pull the yarn through, there will be a loop around those first two warp threads, right at the top of the fell (where you last wove your weft).

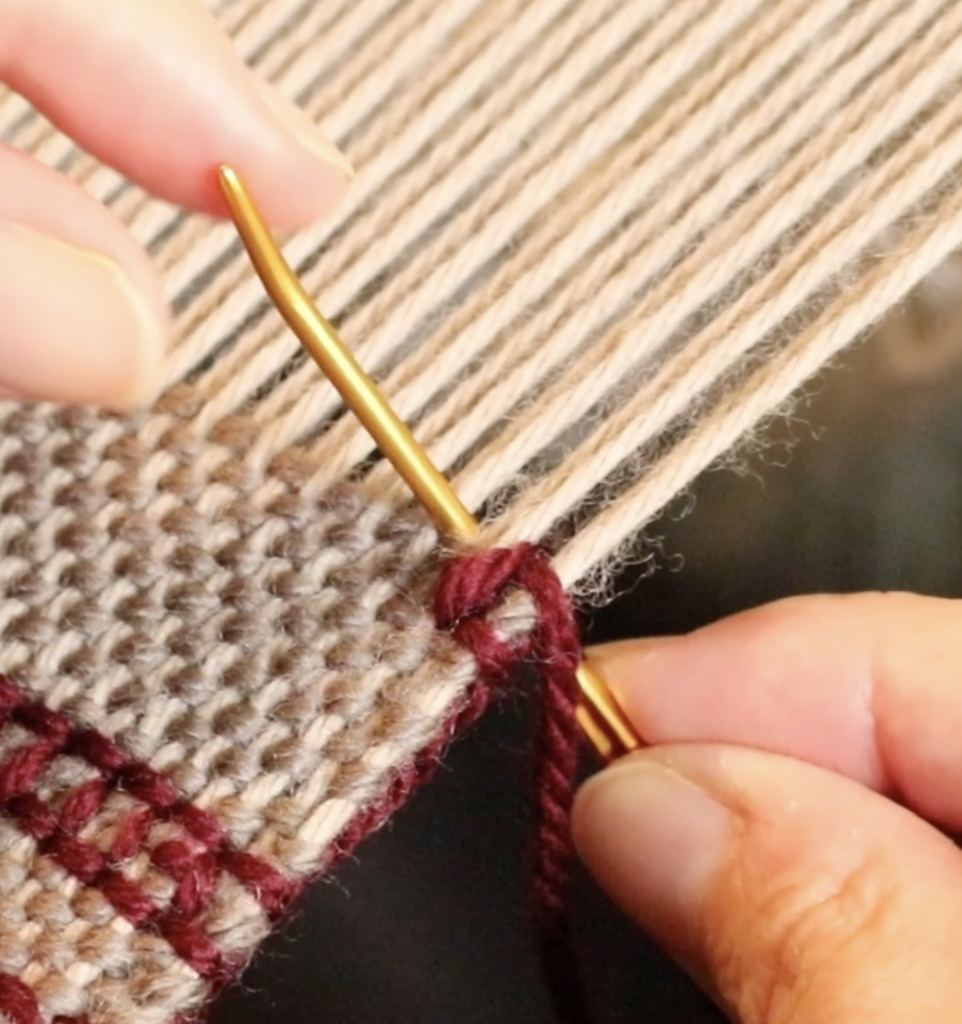
Count across 2 warp threads again, but this time count down 2 weft threads. Bring the needle up from the back through that space.

Here is how this step looks once the needle and thread have been pulled through.

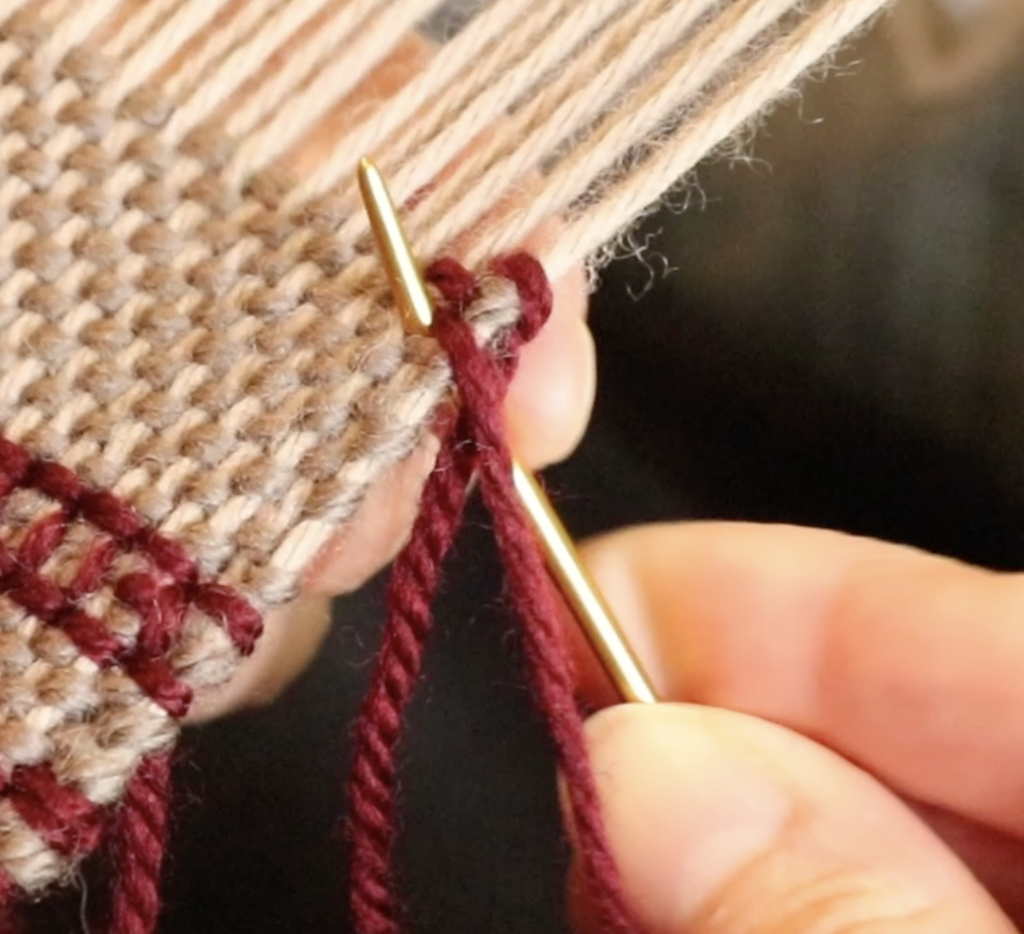
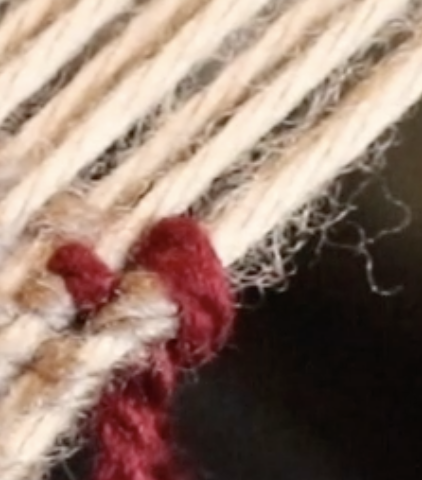
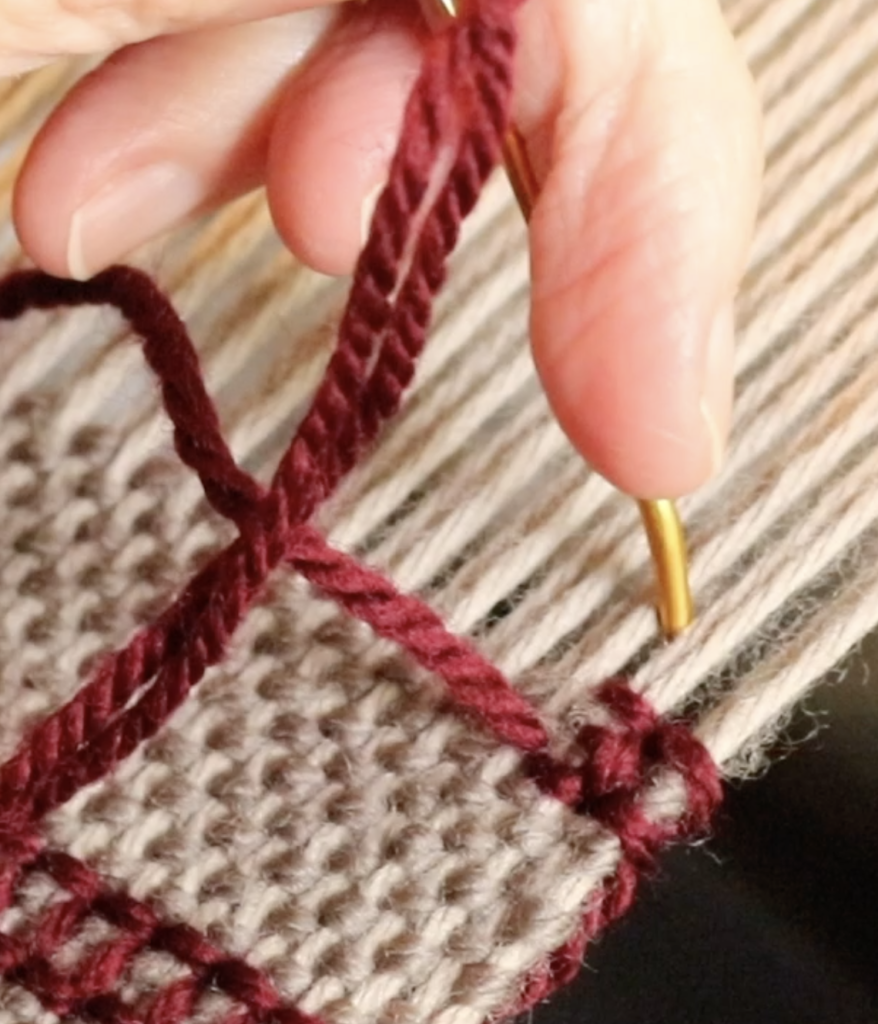
Take the needle and yarn back to the right edge. Now bring the needle up from behind, through the exact same hole that your last stitch came out of. This will make a new loop as you pull the needle through once more.

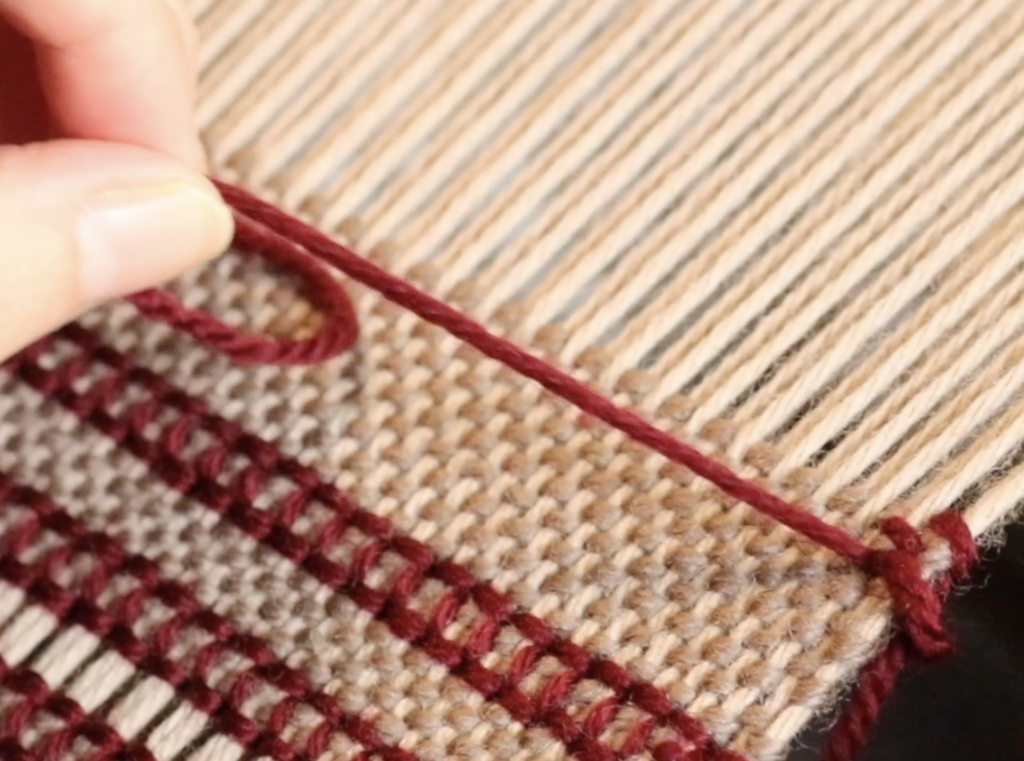
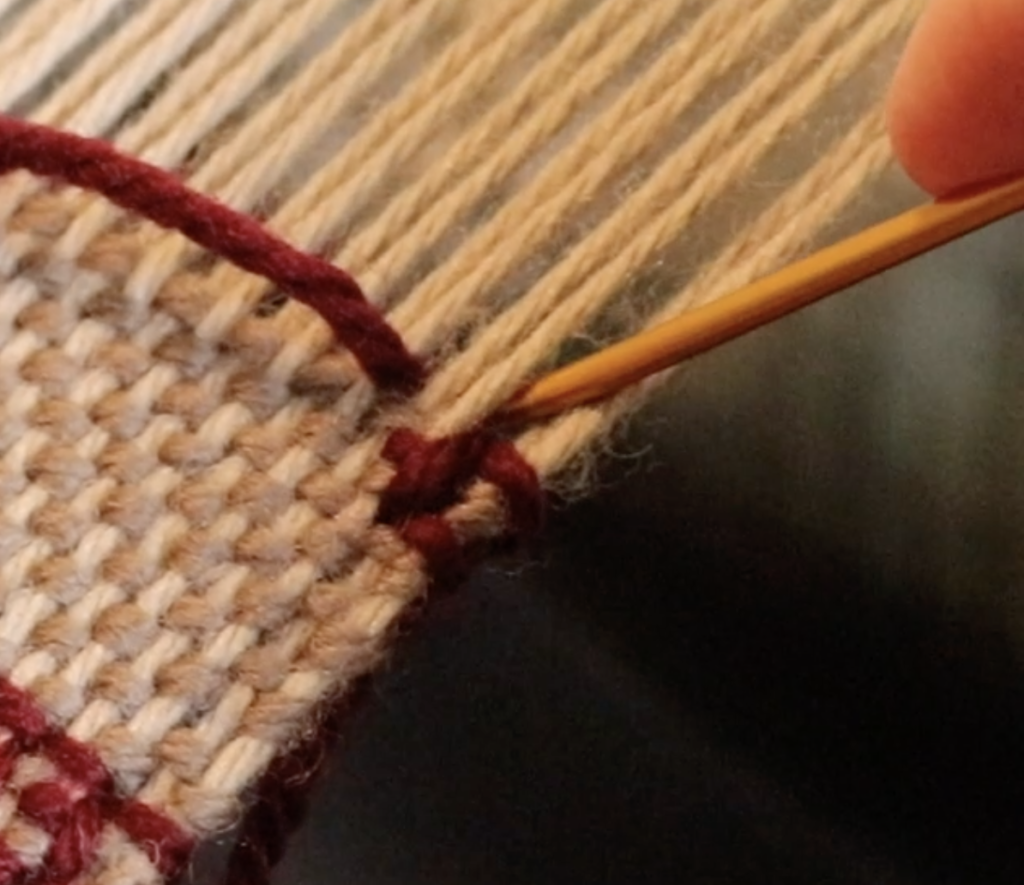
Pull on this loop to tighten it up a little. That gives us 2 horizontal lines – 2 sides of our box shape. Now we need to make the 3rd line as a vertical to close the box shape.

To get the vertical stroke of thread, we take the needle straight up to the left of those first 2 warp threads and pull through.

Now you can see your first block/box shape. Each box at the very edges of your weaving will be open ended on one side, the rest will be closed.

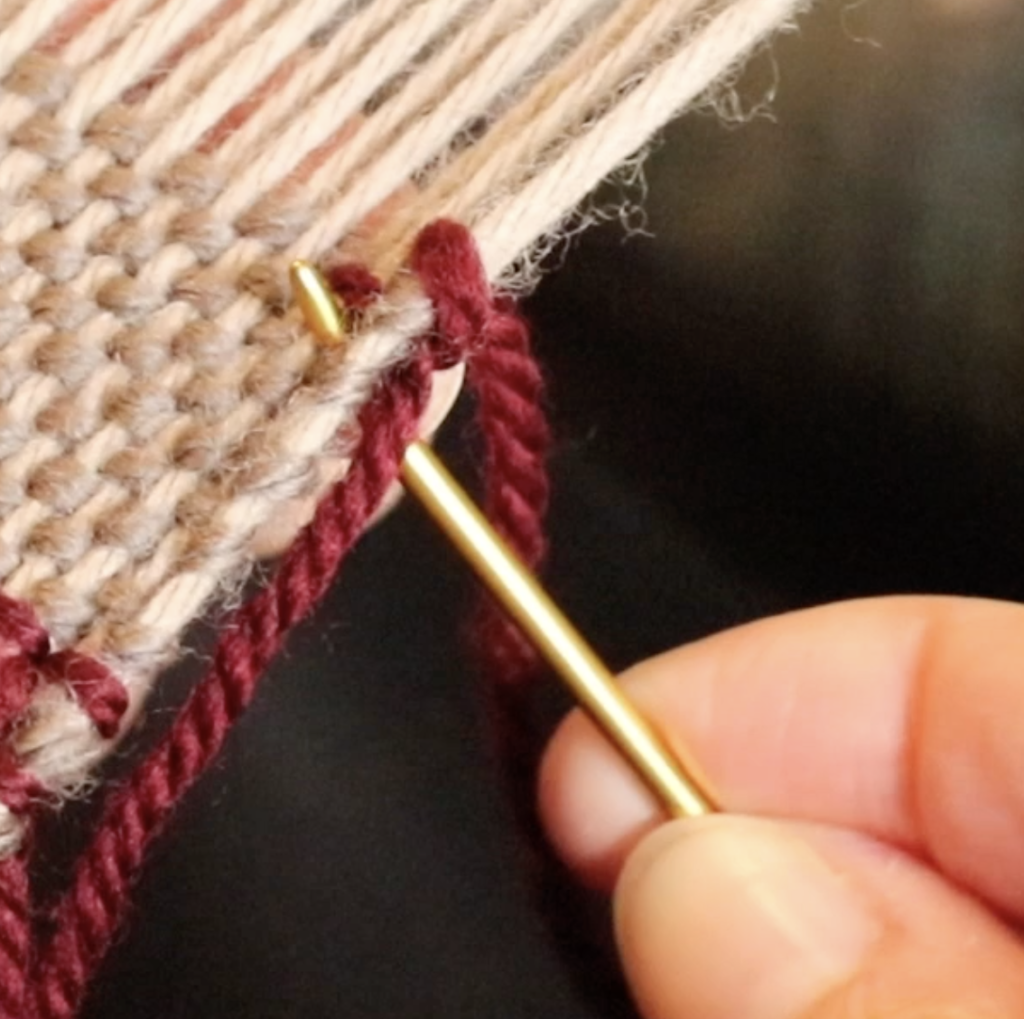
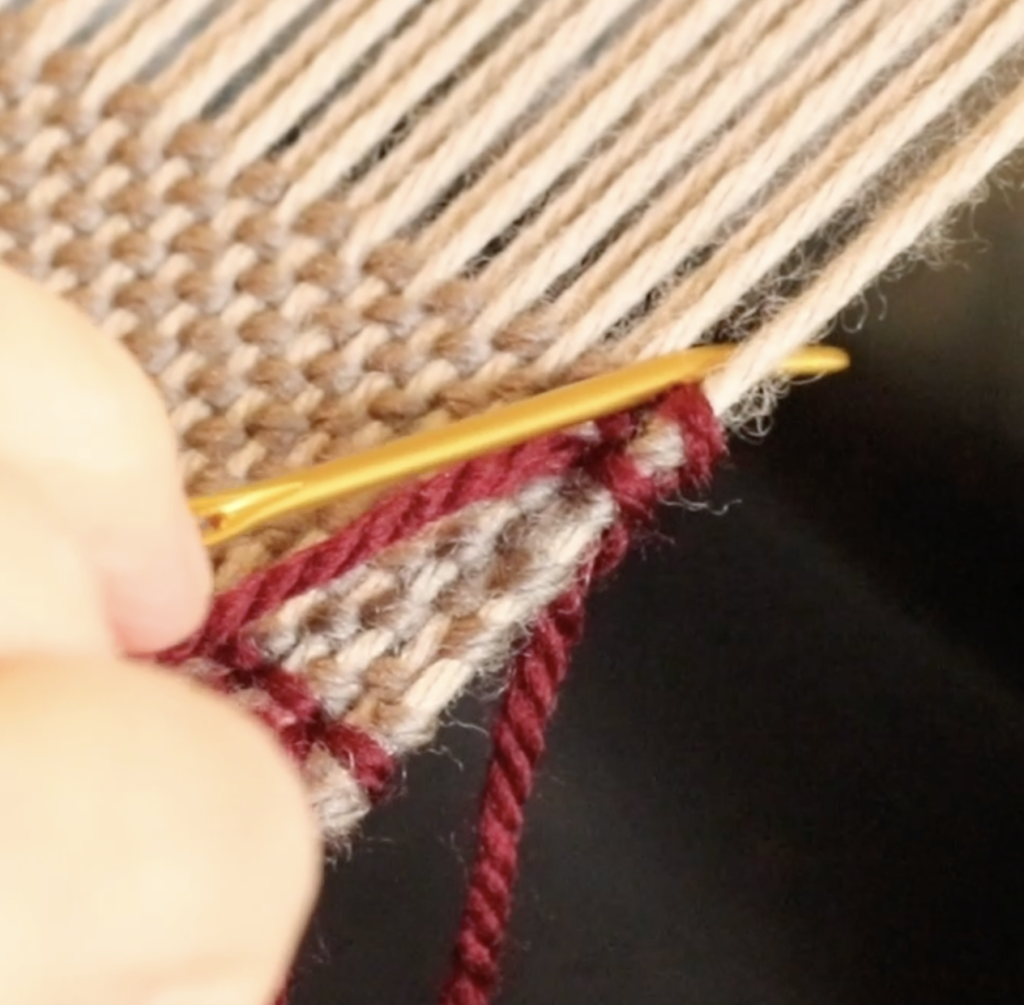
To continue working the boxes, count off the next 2 warp threads, bring the needle up and pull the needle and yarn through.

Take the needle back to the start of the second set of 2 warp threads and underneath.

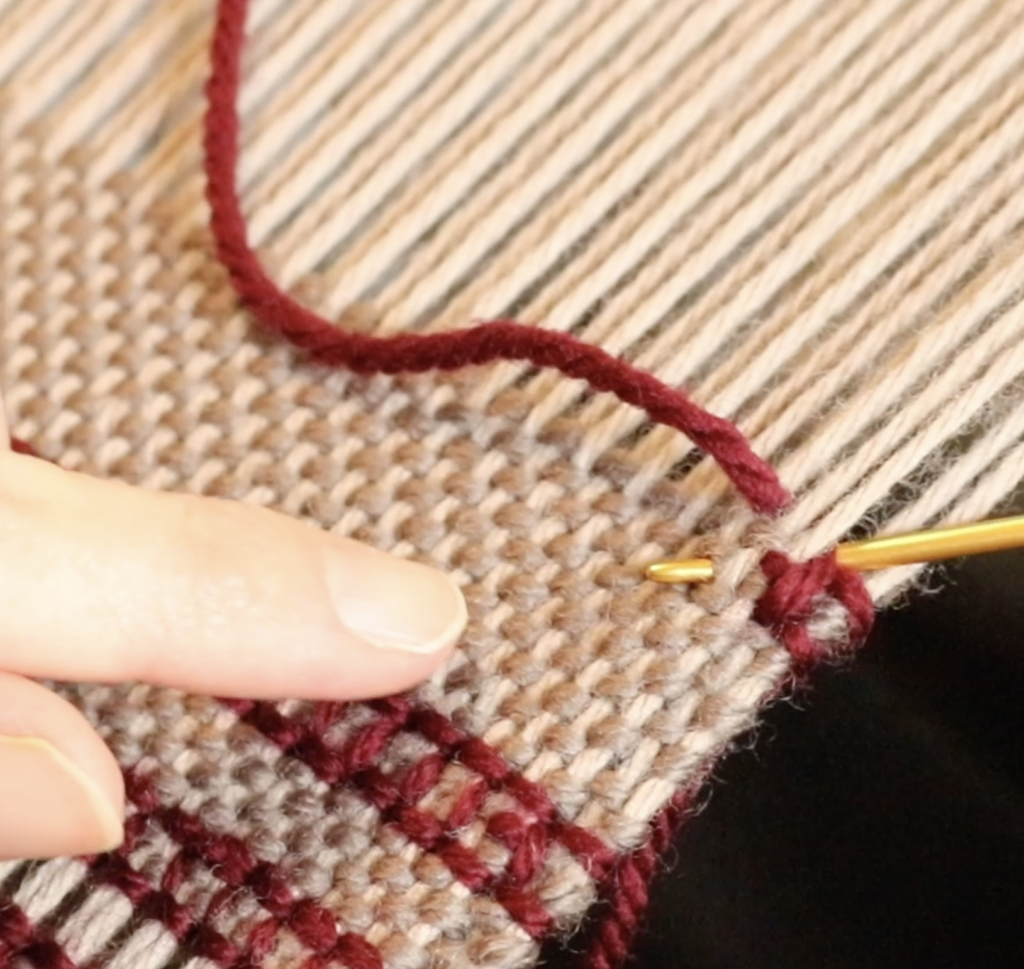
Bring the tip of the needle (this is where that bent tip makes your life a whole lot easier!) up 2 weft threads down, in line with the 2 warp threads you have counted off.

Pull yarn through and tighten the loop. Take the needle back to the start of the pair of warp threads and down into the previous stitch’s hole.

Now bring the needle back up (thank you again bent tip needle!) through the hole that the working thread is in and pull through.

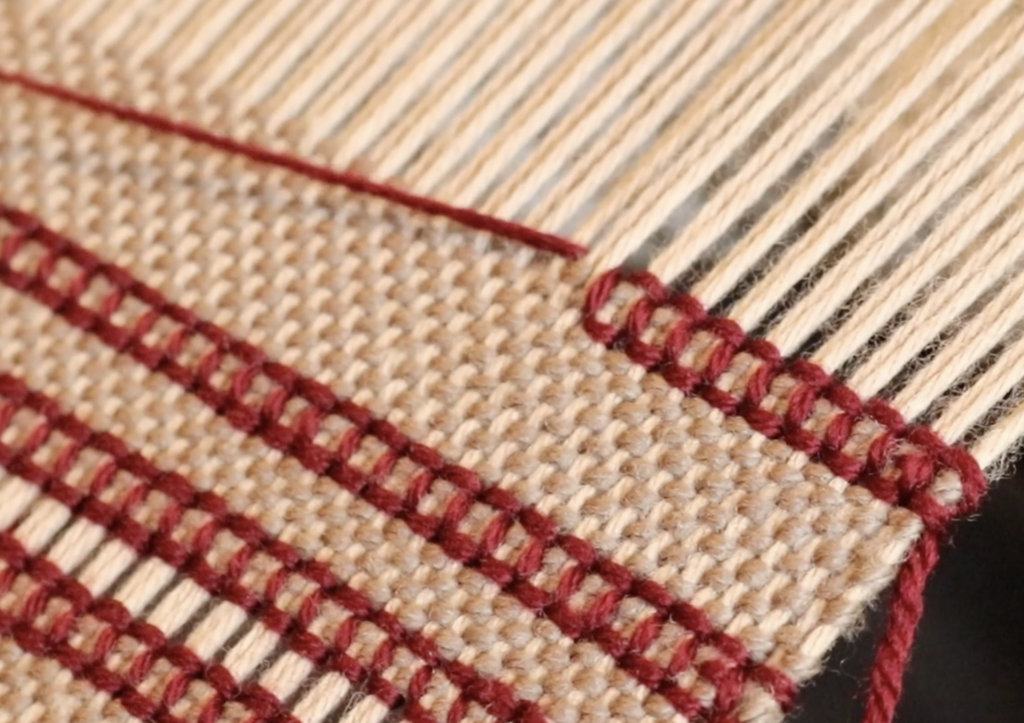
Finish off the box shape with a vertical thread again, by taking the needle down to the left of the warp threads just worked. Continue on across the warp and before long you will have something that looks like this:

It may seem a little complicated at first, but it’s really only a couple of steps more to complete than the regular hemstitch, and once you’ve “got it” your needle will fly!
If you would like a detailed, step by step video on how to work the Italian hemstitch, you may want to consider signing up for a membership at my Online Weaving School to access this and other great tutorials and classes.

The Italian Hemstitch class is available to all members of the Online Weaving School. It is a bite sized, technique focused class to further your learning in the wonderful world of weaving!
Thanks for stopping in for a visit today, if you have any questions or comments, please leave them below, I always love to hear from you!
Until next time…
Happy Weaving!