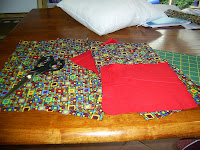
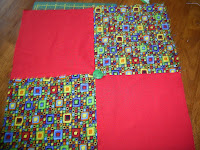
This lovely bright cushion was my son’s (8 years old) first sewing project recently. We had the idea of posting a tutorial for other kids who might want an easy project. Adult help and supervision is needed unless you are an experienced sewer. The cushion cover fits a cushion 37cmx 35cm.
You will need 2 contrasting fabrics of your choice.
Start by marking and cutting out 2 20 x 20 cm squares from one fabric. Then do the same from the contrasting fabric. This gives you 4 squares of the same size.
For the back of the cushion cut out 1 piece that is 54cm x 39cm.
Now you need to join 2 contrasting squares together. Lay them on top of each other with right sides together, pin along the edge and sew a straight seam. Do the same for the other 2 squares. Then iron the seams out flat. (Get help with the iron if you need it)
This is what 2 pieces joined together will look like with the seam in the middle ironed out flat.
Lay your joined squares on top of one another and pin together near the edge. Sew a straight seam to join them all up, then iron the whole thing and the seams out flat. This is the front of your cushion. It looks good if you sew a button in the middle. We covered our own button using a little button kit from Spotlight that is really easy to use.
Now you need to make up the back of your cushion. Using the back piece you’ve cut out, fold it in half widthways. Make hems along 2 sides of these pieces, these will overlap each other at the back of your cushion.
Lay the back pieces on top of your front piece with the right sides facing. Pin around all the edges. Stitch together with straight seams right around the edges of the square. Trim off the pointy corners.
Turn your cover the right way out, pushing out the corners so they are nice and pointy. Iron again if you like, then pop your cusion insert in.
Now you can admire your work and start planning your next project!
This is what the back should look like.


