
If you have spent any time at the loom, you know that weaving is as much about rhythm as it is about yarn.
When I first started weaving, I relied mostly on “feel” until I started designing weaving patterns to sell. I soon realised that my “regular beat” was someone else’s “light tap,” and that you can’t always put actions into words.
As I continued to design and teach I started to receive magazine project and article opportunities. Projects need to be written using a predictable formula to ensure readers can obtain results close to my own.
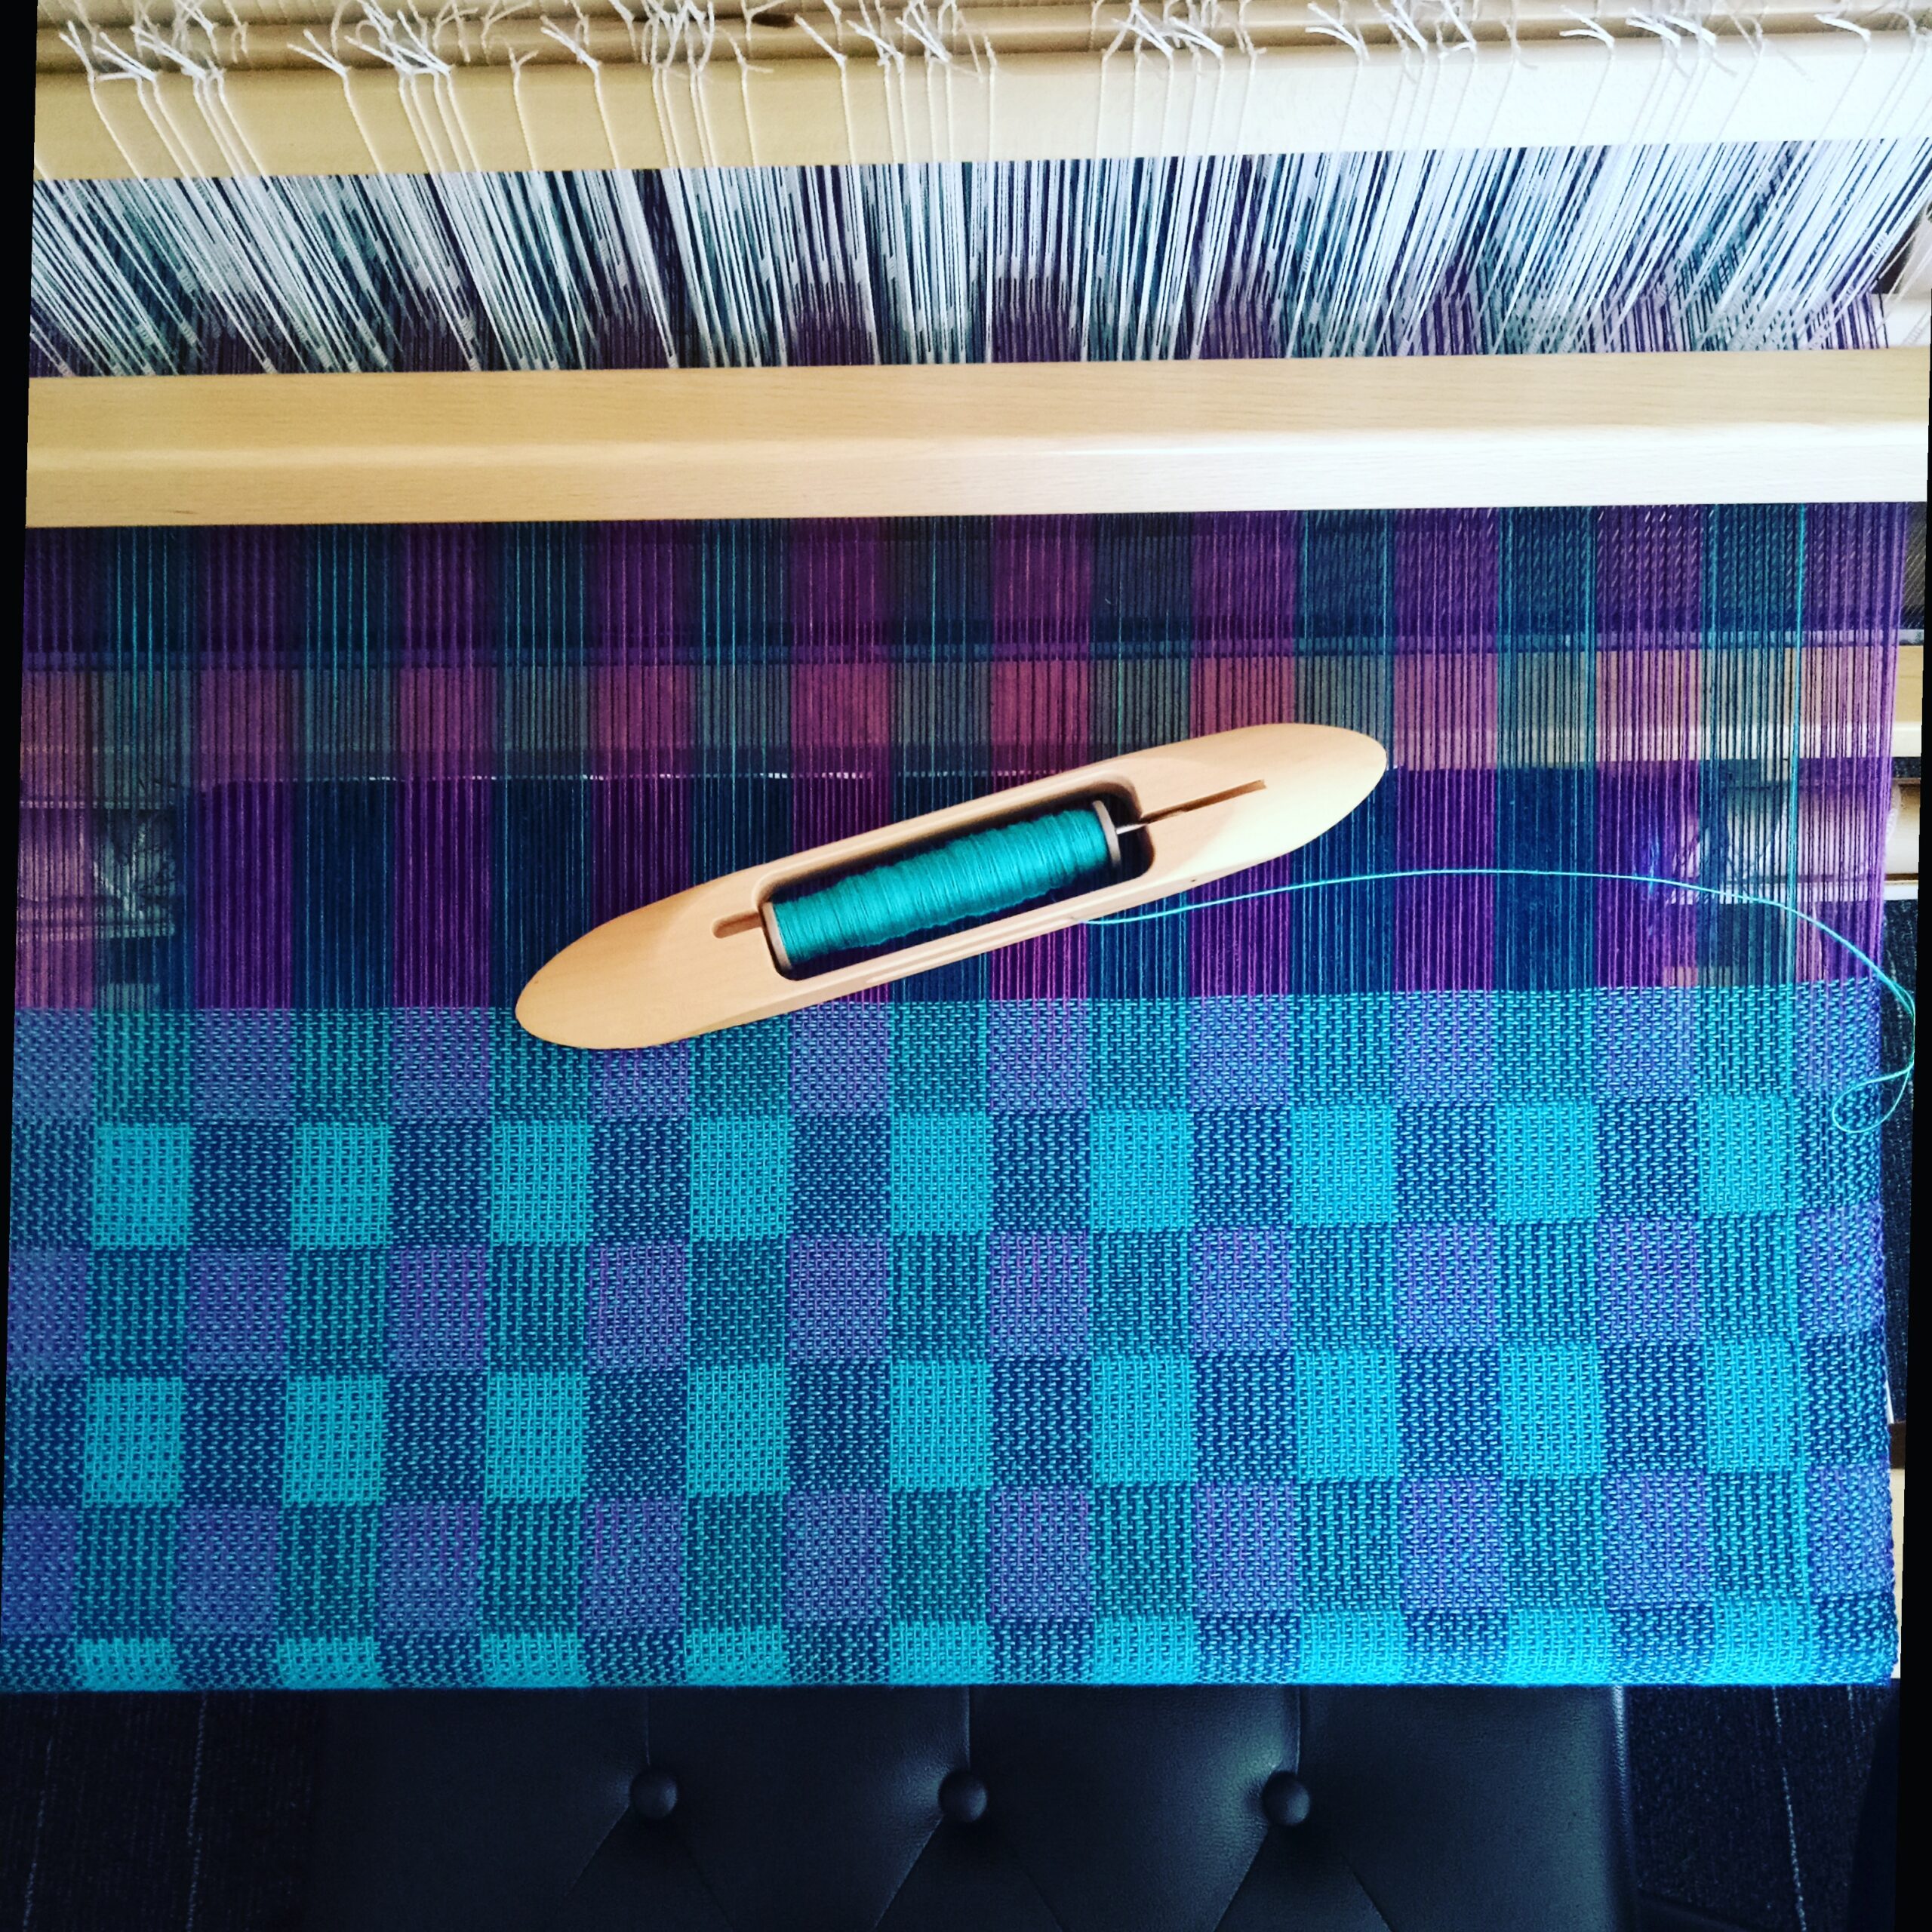
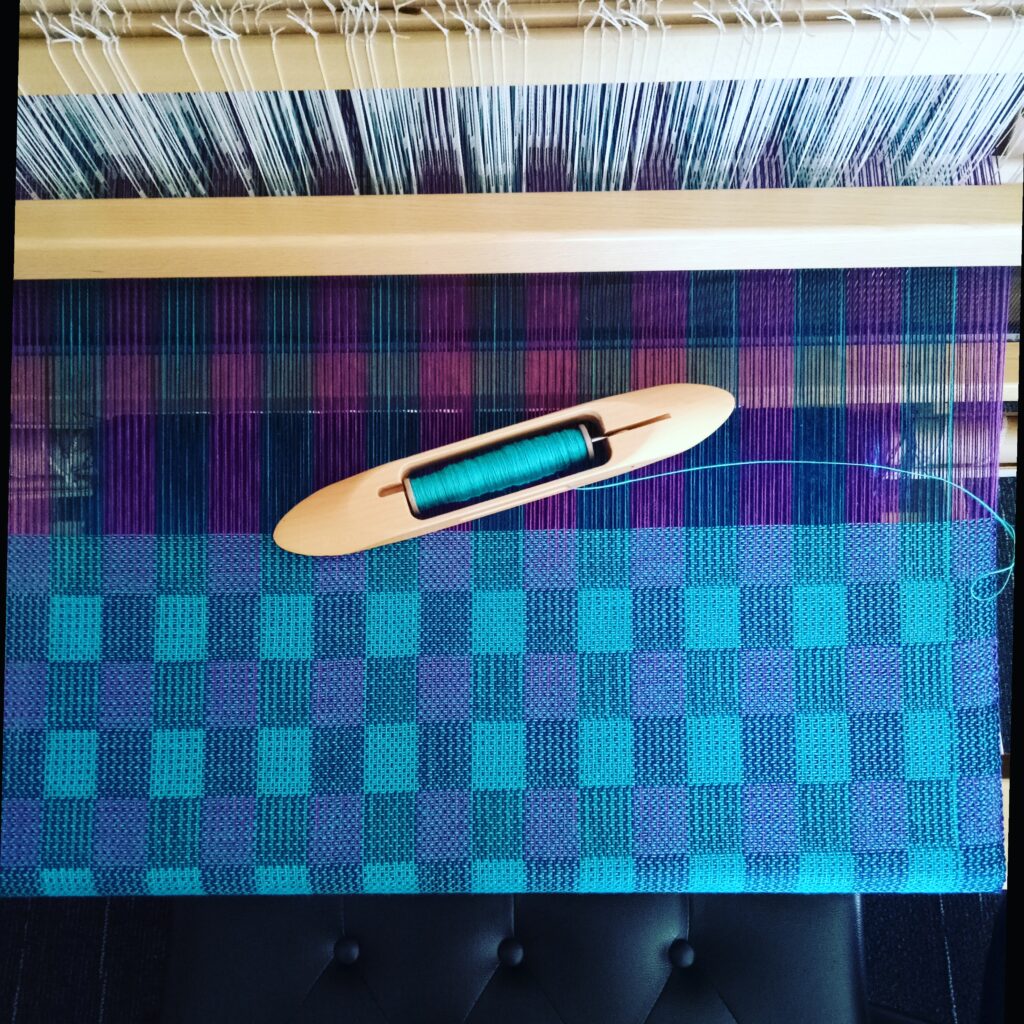
That is when I started thinking about the Picks Per Inch (PPI).
PPI refers to the number of weft threads (picks) packed into one inch of woven fabric. While Ends Per Inch (EPI) is determined by the spacing of threads in your reed, PPI is determined by you – the weaver.
Common Questions about Picks Per Inch
Do I Have to Measure The Picks Per Inch?
Actually, no. And I didn’t bother about it for a long time because I didn’t have a specific reason to. I still don’t bother measuring or worrying about my PPI unless I have a specific reason.
There are many weavers who would disagree with me and say that considering the PPI is absolutely essential for your weaving projects.
It’s just another example of finding your own way in weaving by practicing and discovering what works well for you and is important to you as a weaver.
Do I Need Special Tools?
No, just a measuring tape or inch ruler.
How Do I Measure the Picks Per Inch?
Simply use your tape measure as you weave and count how many weft picks you’ve woven within an inch of weaving.
Measure under active weaving tension.
How Often Should I Measure the Picks Per Inch?
You don’t need to overdo it and measure every inch you weave. Every few inches is fine.
Why Should You Track Your PPI?
Monitoring your PPI isn’t just about being meticulous; it is a practical tool that solves several common weaving frustrations and gives you more information to record for future projects and your own learning.
1. Matching Panels Perfectly
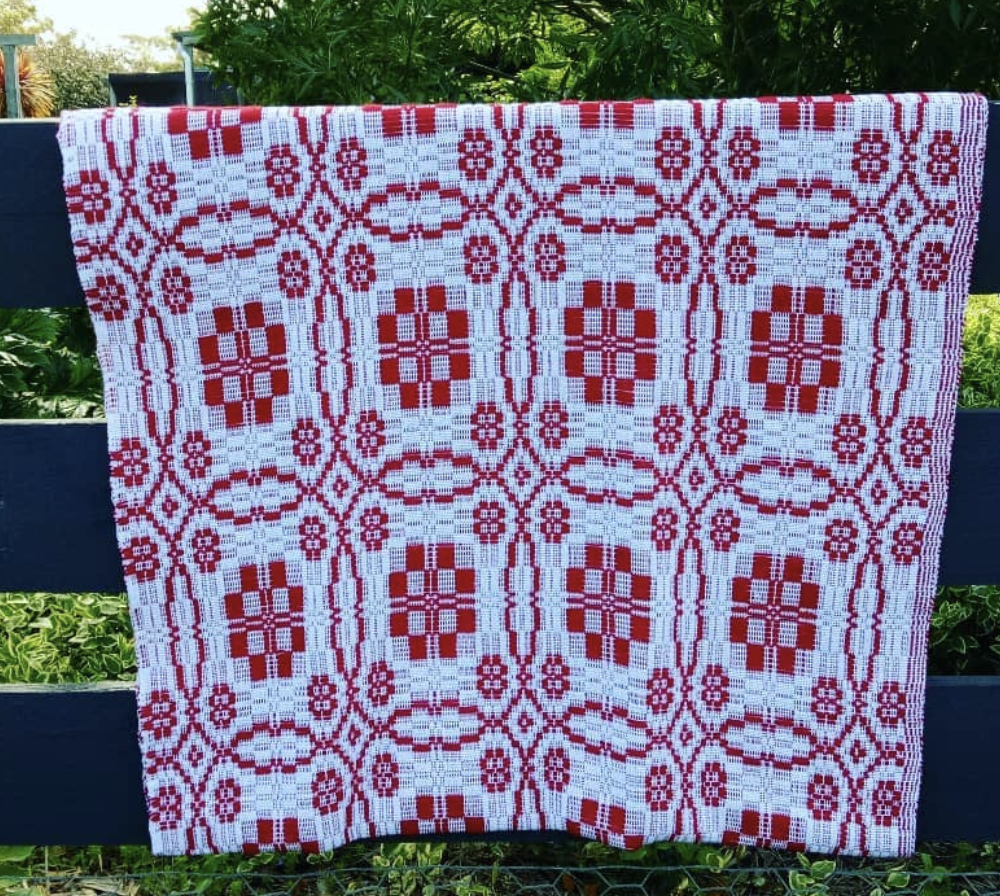
If you are weaving a project in multiple pieces – such as two panels for a wide blanket, coverlet or a set of matching cushions, PPI can become your best friend. Even a slight variation in your beat between Monday morning and Friday afternoon can result in panels of different lengths and altered pattern size. By ensuring your PPI is identical on both, your panels will sew together seamlessly.
2. Getting “Designer Results”
When you follow a pattern, the designer often provides a specific PPI to help you achieve the intended look. Even with the exact same materials, you cannot truly measure your physical beat against theirs. A light beat on a heavy floor loom exerts much more force than a light beat on a lightweight rigid heddle loom. Measuring the PPI allows you to calibrate your personal touch to match the project’s requirements.
3. Maintaining Visual Proportions
If your PPI is lower than recommended, your patterns (especially in structural weaves like Overshot) will appear “long” or elongated. Keeping a consistent PPI ensures that a square stays a square and a circle doesn’t turn into an oval. Just as a disclaimer – especially for overshot, sometimes further methods will be required to obtain a more squared design, this is discussed further in the “expert tips” section.
4. Beat Consistency Over Time
Our rhythm changes as we weave. As you get comfortable with a project, you often speed up, which can lead to an inadvertently harder beat. Similar to warming up before exercise. By checking your PPI periodically, you catch these shifts before they become visible in the finished cloth.
5. Fabric Density
If you are weaving a balanced weave, you want the picks per inch to match the ends per inch. But if you’re wanting to weave a weft faced or warp faced fabric, measuring the PPI will ensure you weave the cloth you sett out to weave (see what I did there? 🤭)
Estimating Weft Yarn Requirements
One of the most powerful uses for PPI is calculating exactly how much weft yarn you need before you even start throwing the shuttle.
To find your total weft yardage, you can use this standard formula:
Total Weft=36 (to convert to yards)Width in Reed×PPI×Woven Length
Add a 10% buffer to this total to account for loom waste and take-up.
Or you can use this free, interactive calculator to simplify.
Expert Tips for “Squaring Up” Your Design
If you find that your pattern is still looking too elongated even after you’ve tried to adjust your beat, here are two professional tricks to help “square” your shapes:
- Adjust the Pattern Repeats: If you are weaving structures like overshot, crackle, or summer and winter, you can simply reduce the number of pattern picks in each block. If a block calls for four picks but looks too tall, try reducing it to three.
- Swap Your Tabby Weft: In many structured weaves, you use a “tabby” or ground thread between pattern picks. If the design is too long, try using a thinner tabby yarn. A lighter tabby takes up less vertical space, allowing the pattern picks to sit closer together and compressing the design vertically.
By mastering your PPI, you move from “hoping” a project goes according to plan to “knowing” it will.
Until next time…
Leave a Reply