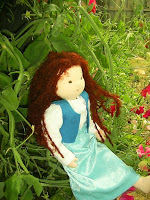
What a blurry photo! I just finished this little doll tonight, she is so cute! She is a pouch doll with a knitted body and hat. I used some beautiful organic Victorian wool for the knitting, it is so good to use. I’m giving her to 18 month old daughter (no hair, so she can’t pull it all out!)
Uncategorized
Little Theresa
Here she is as promised. She is the first doll I’ve given a fringe (bangs if you’re not an Aussie) and it looks quite cute. I gave her freckles too. She is 9 inches tall and going to reside in my Etsy shop today.
Baby news!
Yes, we are expecting baby no. 4 sometime in August next year! I’m very excited but have also been terribly sick, hence my continual absence here. Feel free to leave your pregnancy nausea tips here, there may be one I haven’t tried yet!
I’d also love to hear from anyone who has had repeat caesarians as is unfortunately the case with me.
Today we are trying to make preparations for Christmas which has been seriously hampered by my condition this year, but we’ve managed to make decorations, do the tree and are making marshmallows. The lunchtime bread is made and cooling. We’re keeping our food fairly simple this year too, my dear husband has to work Christmas day but there are prawns in the freezer and a lasagne (kid’s request) in the works. Husband will make his famous truffles as usual. We will attend the vigil mass tomorrow evening.
What a lovely time of year, I hope yours is too.
Rain, glorious rain!!!
Meg
I always love finishing a doll and moving on to a new one. Meg is going in the Etsy shop.
Hannah!
Cloth doll making tips
Needle case tutorial
I can’t believe I put off making this for so long, thinking it would be difficult. It was easy! So here it is for all of you……
You’ll need:
Cotton fabric for cover measuring 12 x 6 inches. Also a piece of this fabric measuring 5.5 x 4.5 inches for the pocket
Contrasting fabric measuring 12 x 6 inches
Wadding measuring the same
Piece of felt or doctors flannel measuring 4 x 5 inches
Fold the two large pieces of fabric in half widthways and press, open out again.
Overlock (serge) all edges of the pocket piece. Fold all these edges in once and press them down. Pin the pocket to the right side of the contrast fabric (for the inside of the needle case) to the left of the middle fold ( see where I’m pointing). Pin the piece of felt to the right of the fold.
Pin the wadding piece to the wrong side of the cover fabric.
Sew around all sides, then sew 2 parallel lines down the middle, either side of the middle fold.
On the inside piece, sew 3 sides of the pocket, leaving the top open (it won’t be a pocket if you sew it closed!) Then sew (I’ve used a machine blanket stitch) across the top of the felt.
Lay the cover piece on top of the interior piece with right sides facing. Sew around 3 sides, leaving one end open for turning. Snip off all the corners and turn right way out, poking out the corners (use a knitting needle if needed). Now, fold in the raw edges of the end and press. Topstitch around the outside of the case, stopping when you come to the middle rows of stitching, skip over these, then keep sewing around. Give the whole thing a good press and you’re done!!
Here is the finished outside which would look lovely with a ribbon tied in the middle. I don’t have one handy, but if you do you may want to use it!
And here is the interior. Now you won’t have to go searching and growling for your needles!
I hope you like this tutorial and find it easy, but if not, please let me know if changes would be beneficial. Thankyou!