
A friend recently very generously gifted me a vintage Hobby Girl Weaving loom by Tomy that she had kept from when she was a girl.
At first I was intimidated by the seeming complexity of the loom but I think it’s the unfamiliar set up that threw me a little. I had never seen a weaving loom quite like this before! I quickly realised that it’s a very simple (but very clever!) loom.
What Is the Hobby Girl Weaving Loom? 🤔
The Hobby Girl loom is Japanese made and this particular model seems to have been manufactured in 1984. It is constructed of heavy duty plastic in cute white and pink girl colours 💕
Tomy have released a range of functional hobby toys that are really interesting. There are other looms, knitting machines and sewing machines! They even have a more recent toy weaving loom with an LCD screen and voice commands.
For a toy, this loom is very clever. I think an average child would need a bit of adult help to get started setting up and weaving on a loom like this.

I have only been able to find information on the Japanese site and they don’t really seem to distribute their toys to other countries anymore.
Very occasionally these looms come up for sale in thrift stores. I was able to purchase one here in Australia and have it shipped to me on behalf of a Canadian weaver who really wanted one. I was then able to ship it on to her, which she was really thrilled about.
How Does the Hobby Girl Weaving Loom Work?
The Hobby Girl loom has a central cylinder that determines your patterning for your project which somewhat reminiscent of tablet weaving. It’s the specific arrangement of the discs on the cylinder prior to weaving that allows you to create the super cool patterns.

Each disc has its own set of numbers and then the cylinder itself is also numbered. A metal rod runs through the middle of the cylinder and all the discs to hold them in place once you have programmed in your pattern.
You set the pattern prior to actually warping the loom, so that when you warp into the slotted parts of the discs, each warp thread is held according to your set pattern. Sounds really complicated, but is actually pretty simple!

The pattern books that came with this loom include a lot of variations. You follow the chart for the pattern you want to weave. The first thing to do is remove the metal rod that holds the discs rigid.
Then, according to the pattern chart, you rotate each disc to the correct position, according the the number (represented on the discs by little bumps) on the pattern chart. When all the discs are positioned, you reinsert the metal rod so that your pattern is locked in.
Warping the Hobby Girl Weaving Loom

When it’s time to warp the loom, the yarn end is tied onto a hook at the bottom of the loom, then placed on the corresponding disc slot (or indentation, if you like) on the cylinder.

At the back of the loom there is also a row of hooks, just like at the front beam. The first warp thread goes around that hook.

On the way back to the front of the loom, the warp goes into the second disc indentation before going around another front hook. The only thing to note here is that you only use every other hook. These same actions are repeated for the rest of the warp, moving across the loom until all the hooks are filled.
Naturally, if you wanted a narrower warp you could start at a different hook and finish early to make a smaller warp.
How To Weave on the Hobby Girl Weaving Loom

To begin weaving, follow the same pattern chart you chose to thread by. It will give you a number that your cylinder should align with and you simply turn your cylinder so that particular number aligns with the makers on the side of the loom. My first weft row is the number 3.
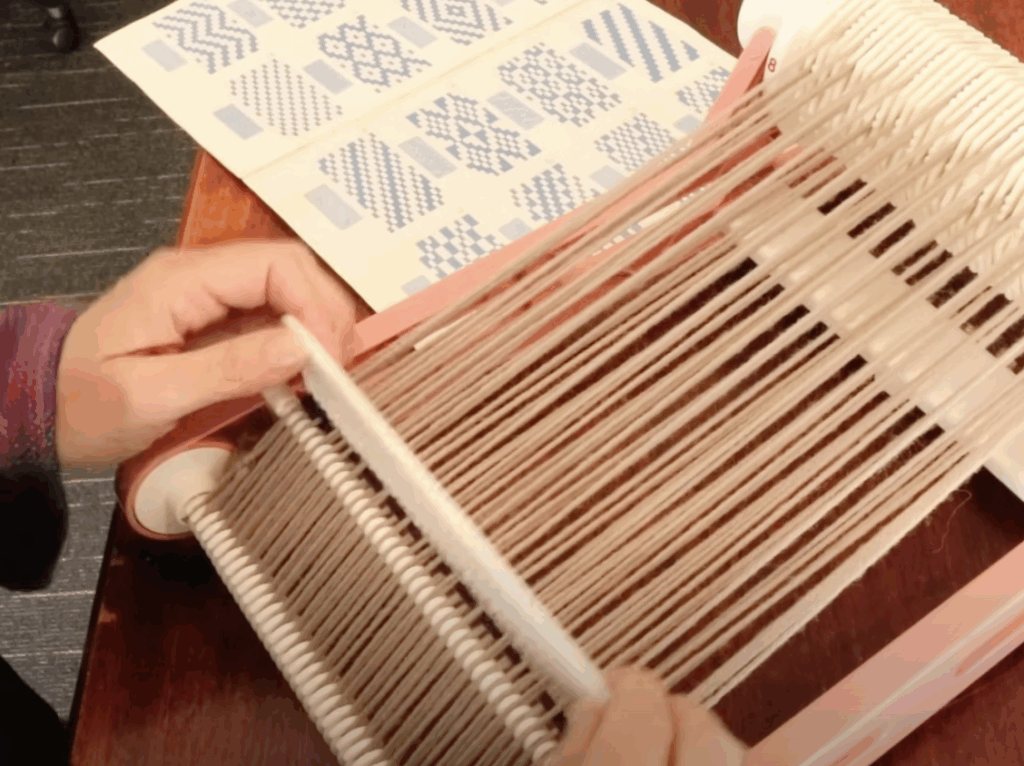
After changing to the next shed by again turning my cylinder (which according to my chosen pattern is the number 8) you then bring in the weaving comb supplied with the loom. This is the beater and is very effective!
- TIP: Use the pinching technique at the edge warp as you weave and allow an angle on the weft to avoid too much draw in.

For some of the patterns in the booklets there are multiple variations you can weave on the same warp just by using different numbers on the cylinder. For some other patterns you need to re-warp as that is when all your disc numbers are set up.
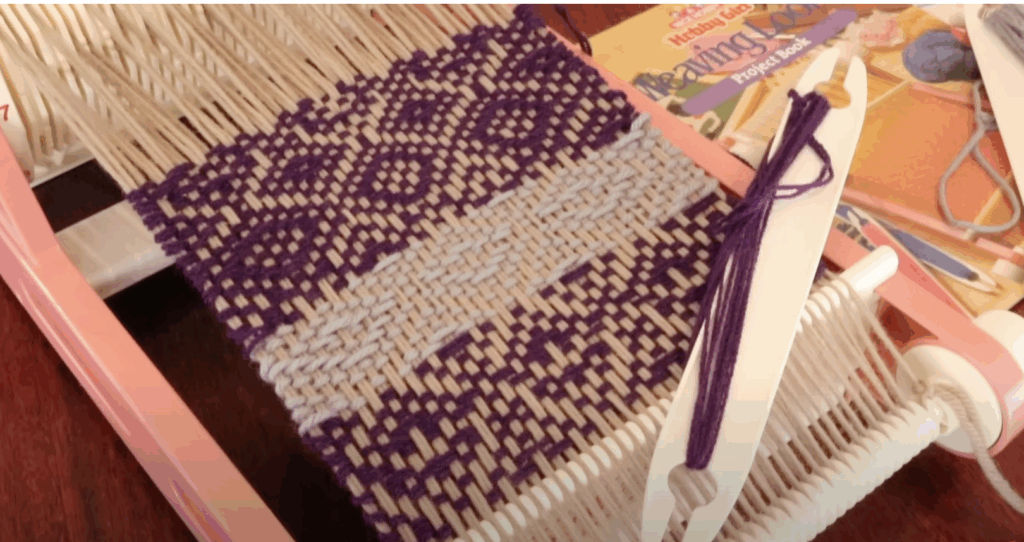
This is such a fun little loom to weave on and if you manage to be one of the lucky people to find one for sale in good condition, I hope you can grab it!
To see this loom in action, check out this video tutorial I made:
Further Learning
One of the booklets that comes with the loom is all about “tatami” weaving. I spent some time googling this term. Google translate came up with this:
“a rush-covered straw mat forming a traditional Japanese floor covering.”
Initially I was confused by this, as the booklet is not about weaving mats or floor coverings. I figured that, if there were to be a more literal translation it just means a “weft faced” weave structure, because that is what the instruction booklet is about.
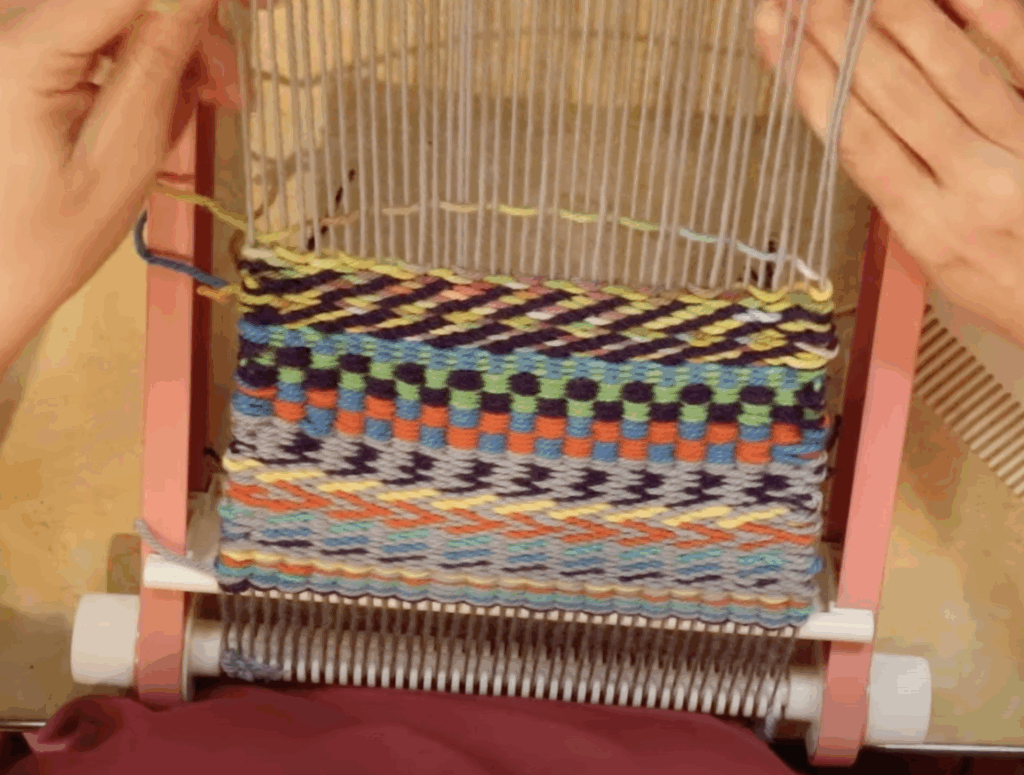
I was keen to try this tatami method as outlined in the booklet, and I also made a video to share with anyone who may be interested. The patterns are really striking, especially when you incorporate plenty of bold weft colours.
If you are interested in toy loom weaving (yes, it’s a thing!) or even just small scale weaving with a difference, check out these resources I have for you:
I Wove a Blanket on a Toy Loom!
I Bought a Toy Loom! Was it Worth It?
The Best Weaving Looms for Small Spaces…
How to Make a Potholder Loom Tutorial…
I hope you found this article fun and informative!
Until next time…
Happy Weaving!
*This post may contain affiliate links. For further information, please see my disclosure policy.