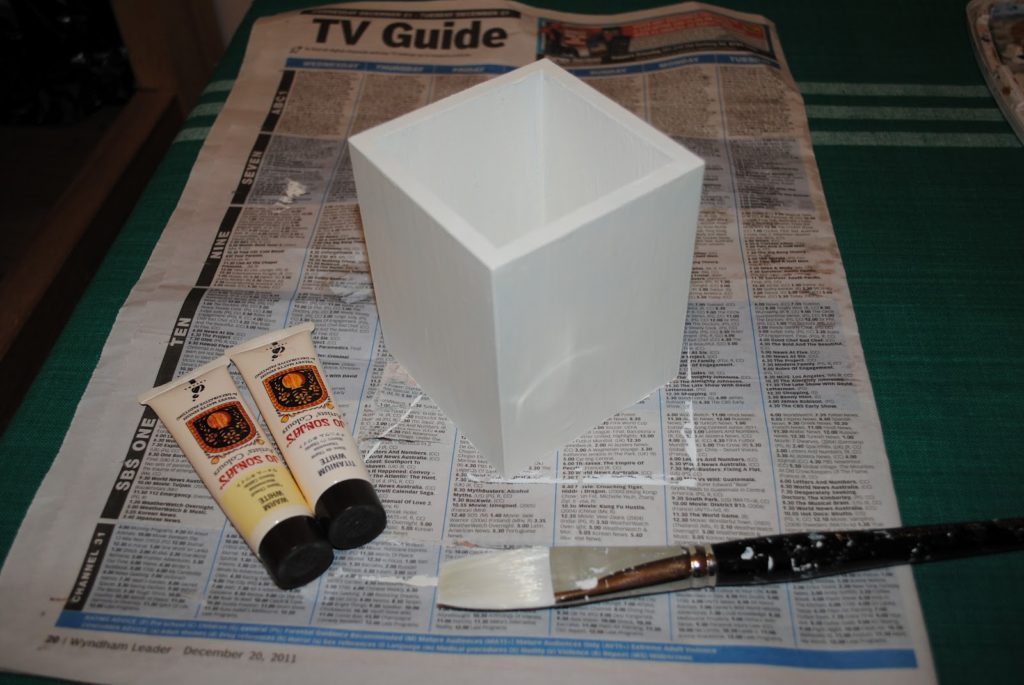
I tried to paint this wooden container ages ago and never liked how it turned out. It’s been holding my paint brushes and knitting needles. Not one to be fond of being reminded of crafty failures I thought I’d try something different. I gave it a couple of coats of Jo Sonja in white…..
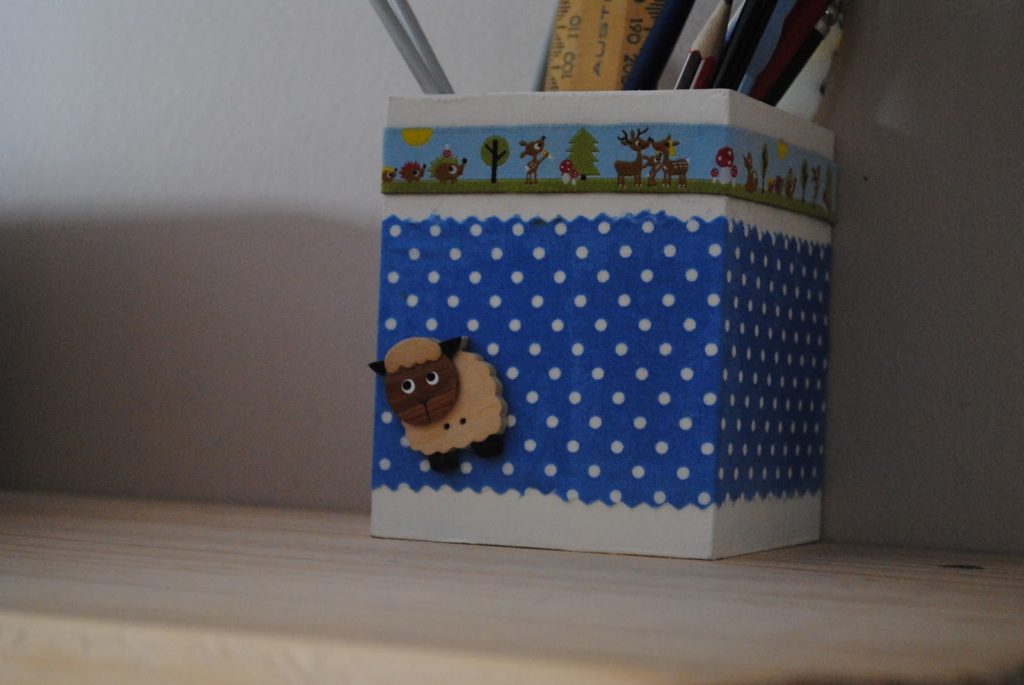
Measured out a cute blue spotty fabric (that I’ve also had for ages), slapped on some Mod Podge, wrapped the fabric around, slapped on some more Mod Podge….

Added some Farbenmix ribbon that I’ve been harbouring for way too long, and glued on a little quirky sheep button. Now I don’t mind seeing it on my shelf!

Mmmm, chocolate cake…
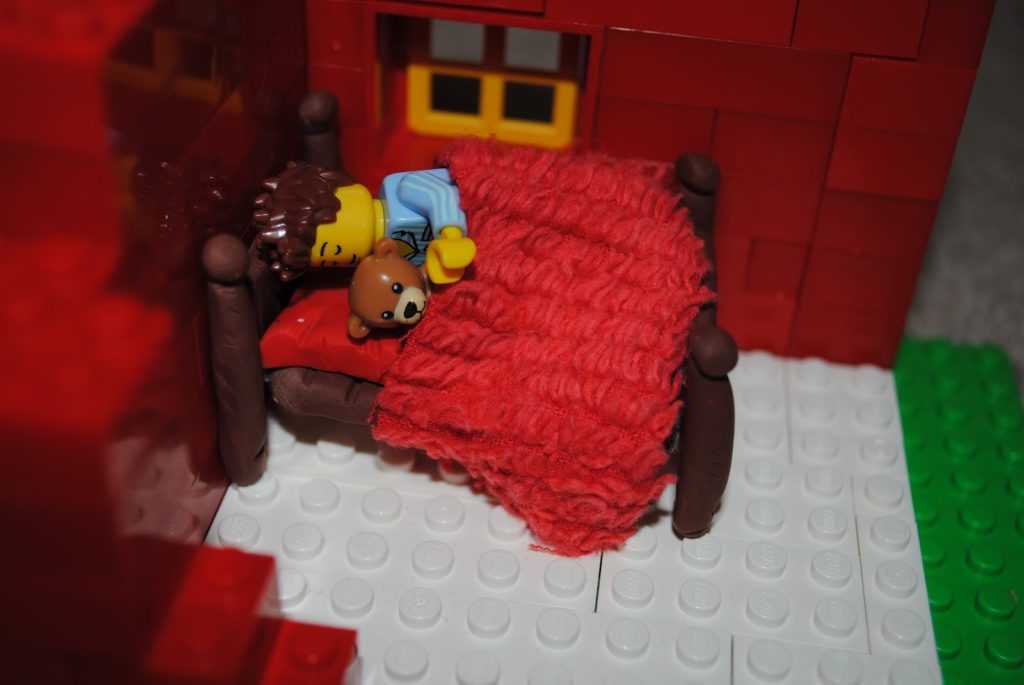
I’ve been enlisted as chief photographer and editor for my boy’s latest Lego project. Sleepyhead needed a bed for this scene, so I made one out of polymer clay and a fabric scrap. The things we do for love.
Hope you’re having a great week, God bless.