• Skip to main content
  • Skip to primary sidebar

Kelly Casanova Weaving Lessons

  • Hi! I’m Kelly!
    • Disclosure
  • Online Weaving School Class Index
    • Common account issues
    • Common technical issues
    • What do I get with a membership?
  • New to rigid heddle weaving? Start here!
    • Never heard of the rigid heddle loom?
    • How to weave neat edges on the rigid heddle loom
    • Rigid heddle weaving
    • Rigid Heddle Weaving Patterns
  • Patterns
  • Subscribe

dollmaking tutorial

Waldorf softie doll tutorial part 2.

by Kelly 3 Comments

I’m a little embarassed at how long it has taken me to complete part 2, but I’m terrible at finishing what I start! Part 1 of the tutorial can be found here.

The pattern can be downloaded and printed from here.
For the body you will need  2  9x 9 inch pieces of knit fabric. Use a good quality knit with a percentage of elastane for a good result. If the knit is too stretchy, your doll will stretch out of shape.
You will also need clean carded wool for stuffing.
For the pixie hat you will need approx. 11 x 11 inch piece of knit to be folded.
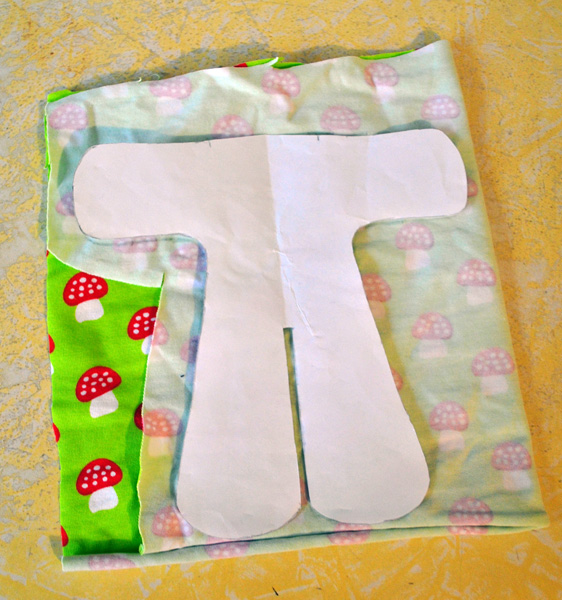
Place your knit pieces together, right sides facing. Pin the body pattern on with the most stretch running horizontally and trace around it onto the fabric.

Place a few pins to stop the fabric moving. With a ballpoint needle and matching thread, stitch on the lines you traced, leaving a gap where indicated. Use small stitches to make strong seams. If you’re concerned about seams parting during stuffing, stitch right around the body piece again, leaving the gap open.

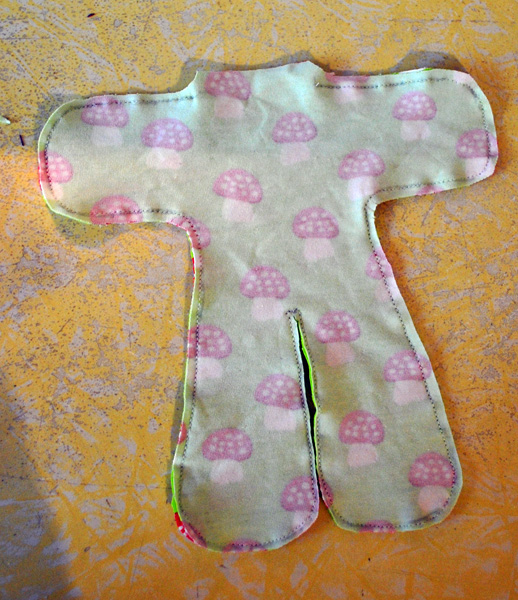
Cut around close to the seam lines being careful not to snip the stitches! Snip the curves. Be very careful when cutting between the legs, go slowly.

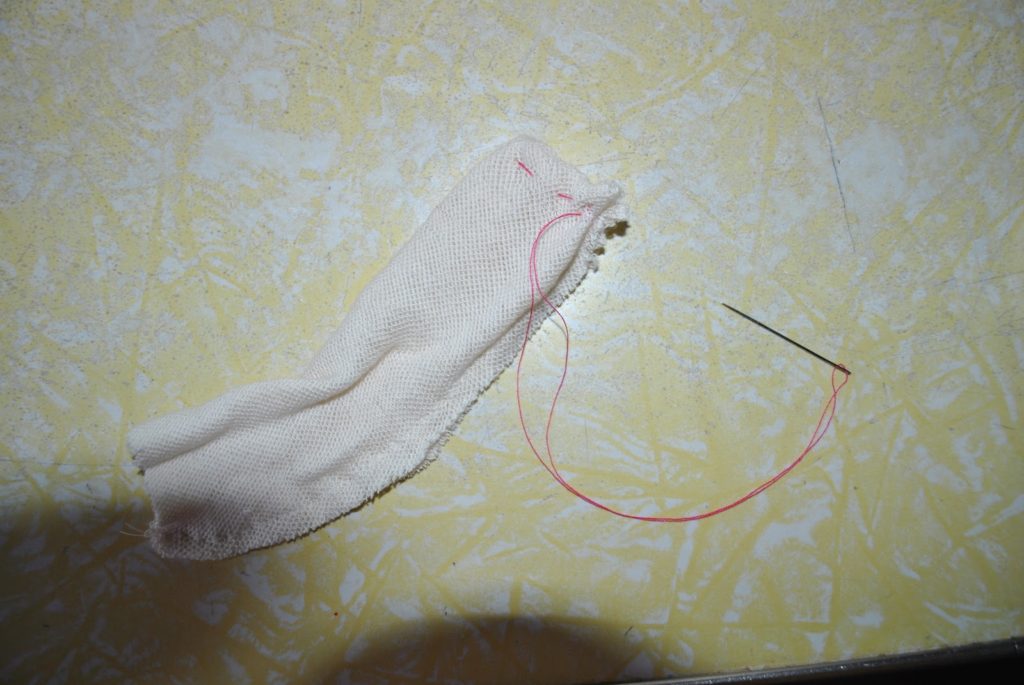
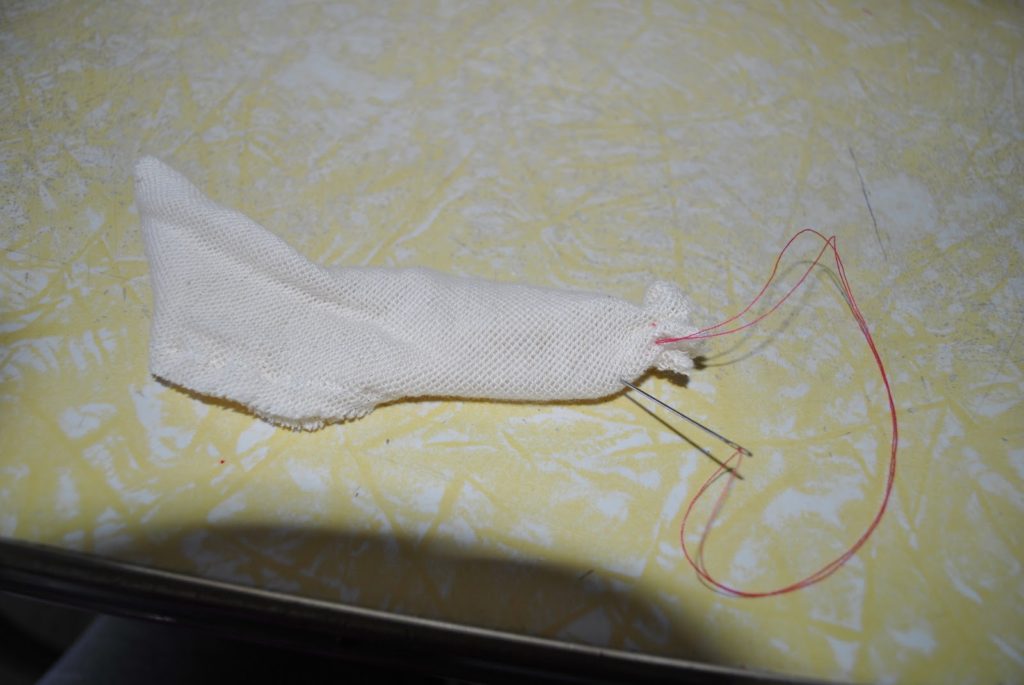
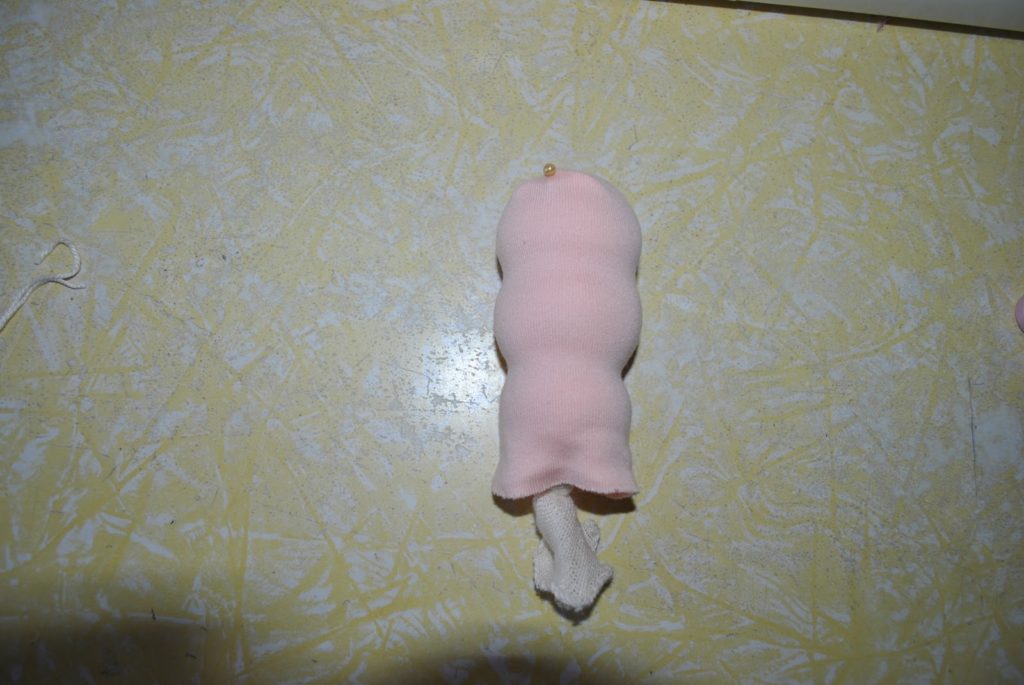
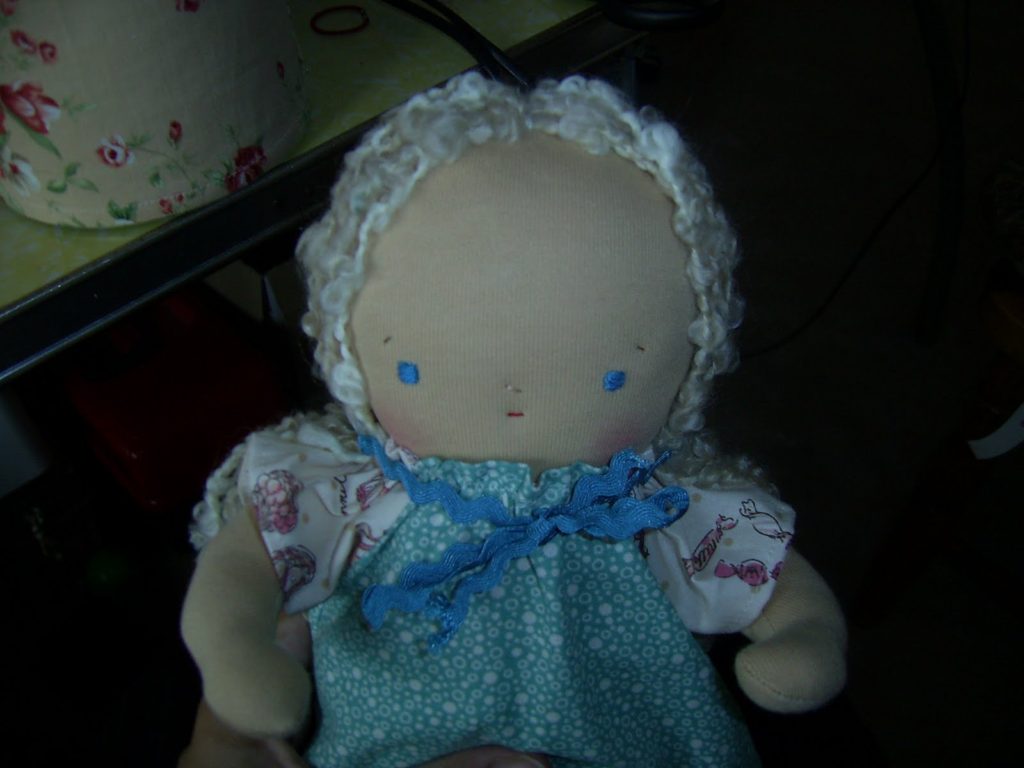
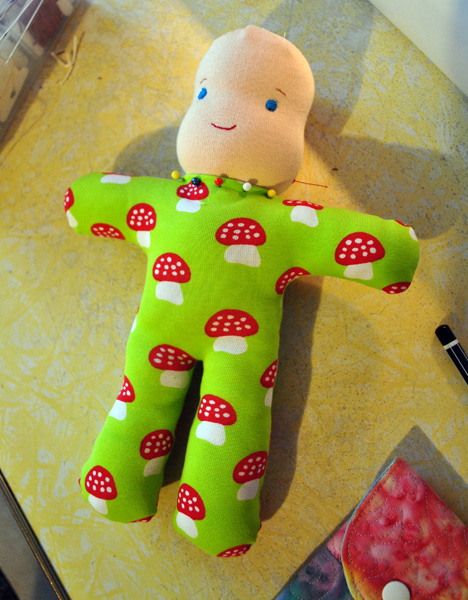
Turn the body piece right side out, running your finger around the inside seams to turn all the pieces properly. Ain’t that cute!

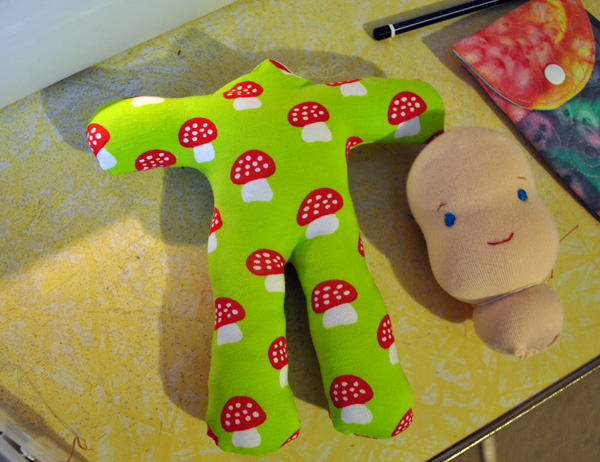
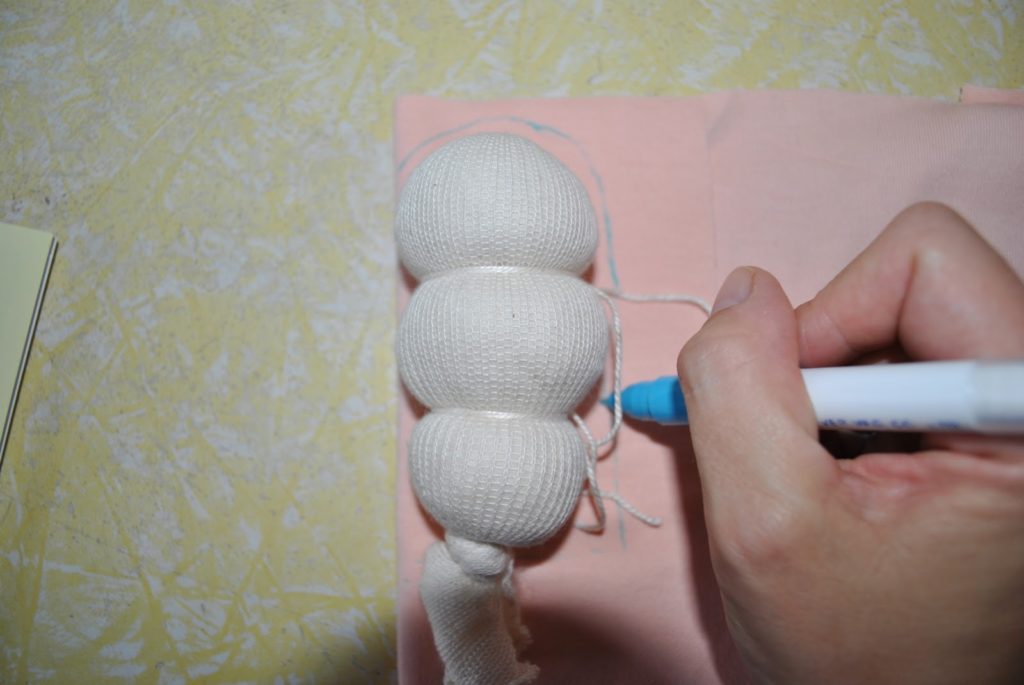
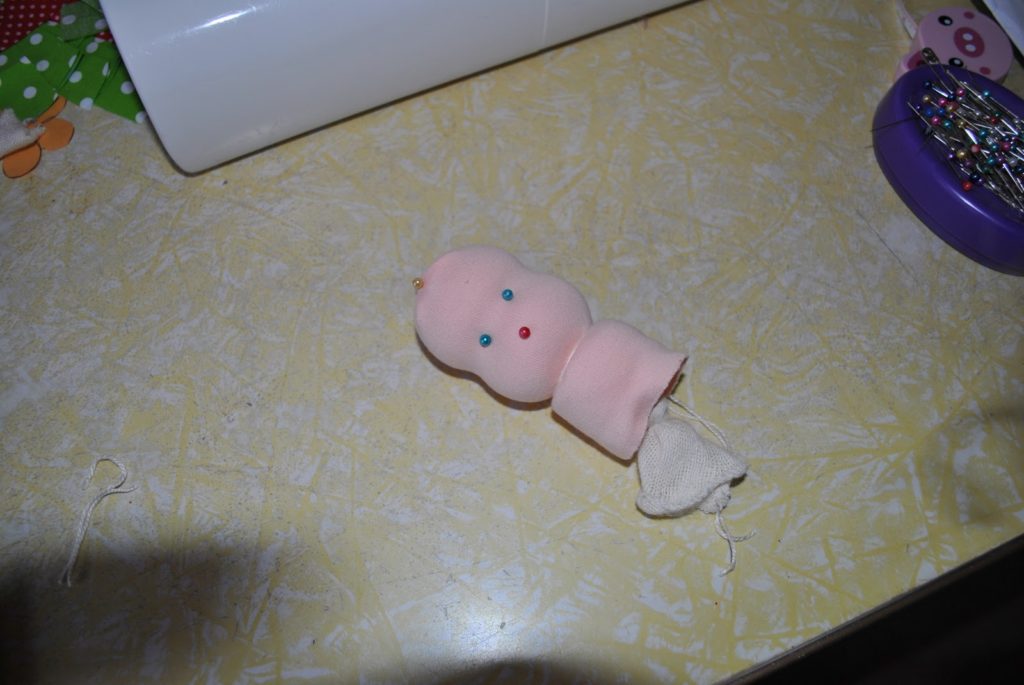
Stuff the body with clean carded wool. It is up to you how firmly you stuff, but keep in mind that the wool stuffing will relax over time. When stuffing, try to leave a hollow space where you will insert the neck.

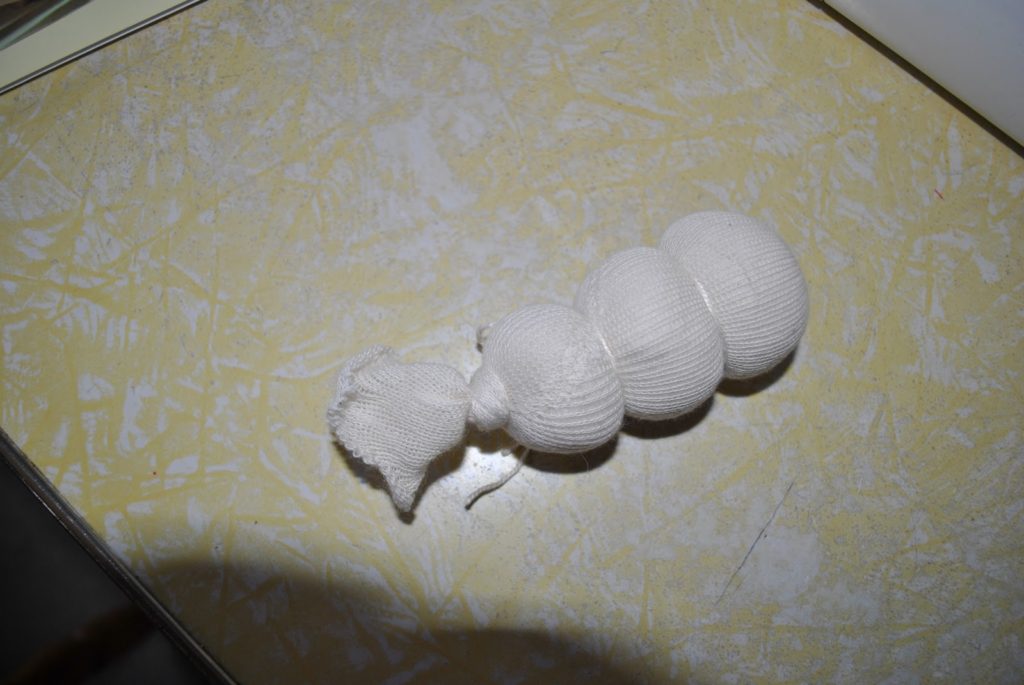
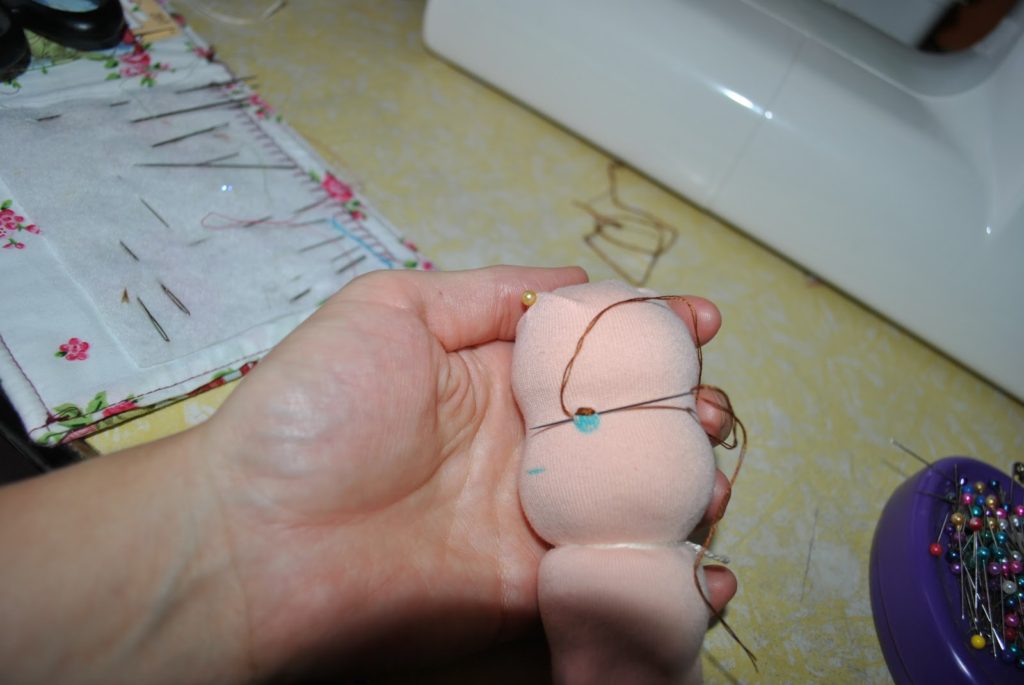
Pop the head into the opening and stick pins into the “muff” that you created when making the head. Make sure the raw edges of knit are folded in around the neck – the great thing about knit fabric in this case is it tends to naturally roll inward, so it makes it easy to get those raw edges in.
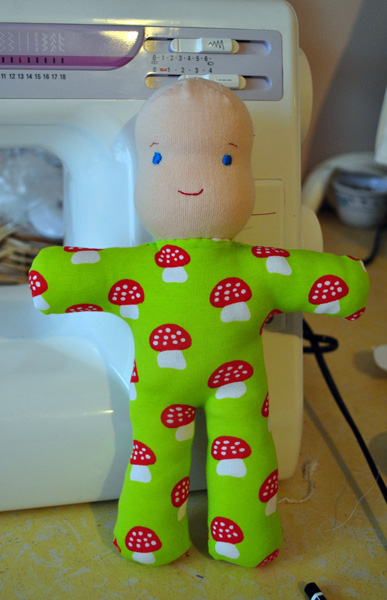
Now, beginning at the back of the neck, hand stitch all the way around the neck, catching the head and body together. I use a little “catch stitch” which is almost invisible. I use a doubled thread in a complimentary colour. Stitch the little shoulder seams as you go. I stitch around the neck twice to ensure it’s really secure.

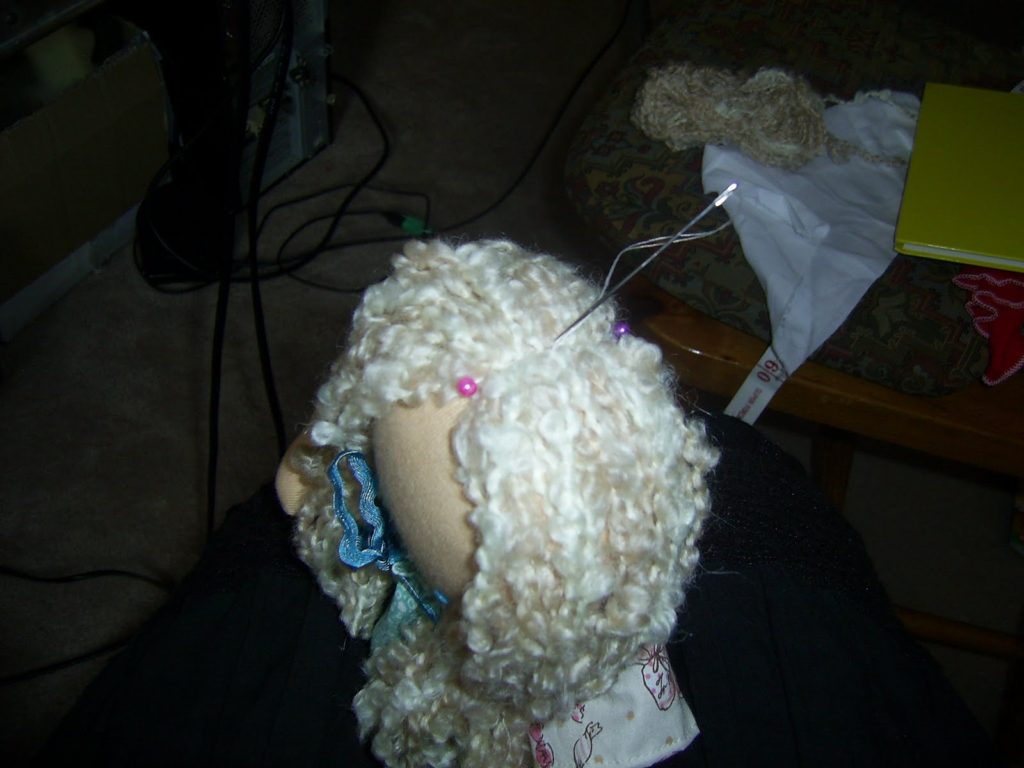
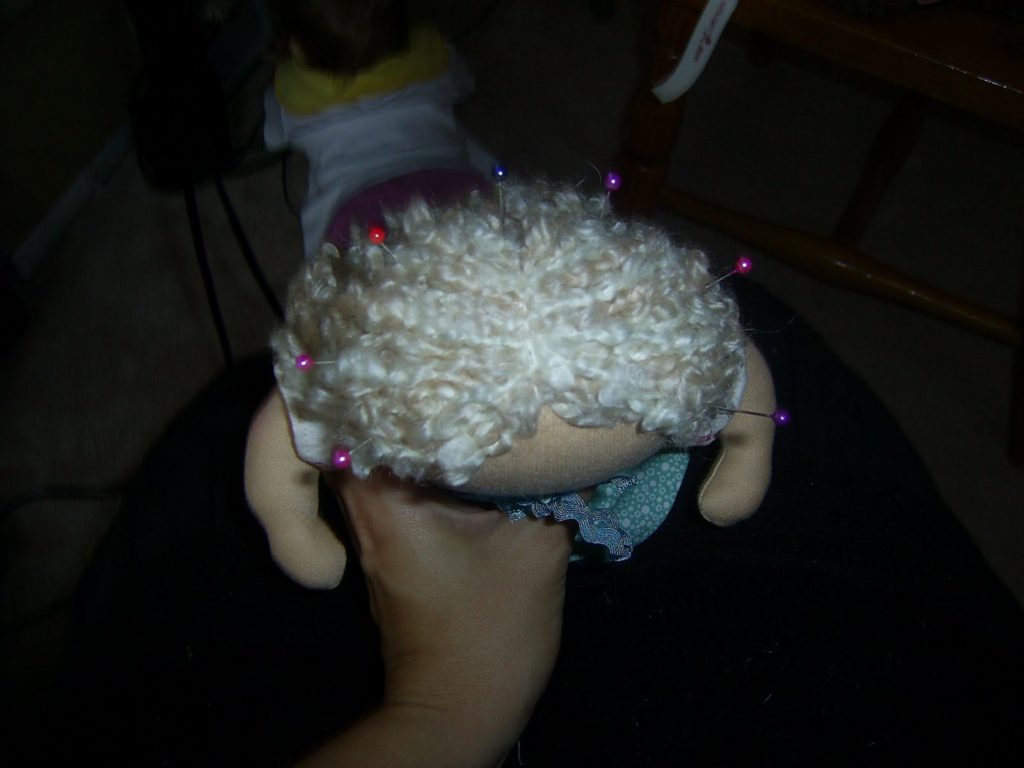
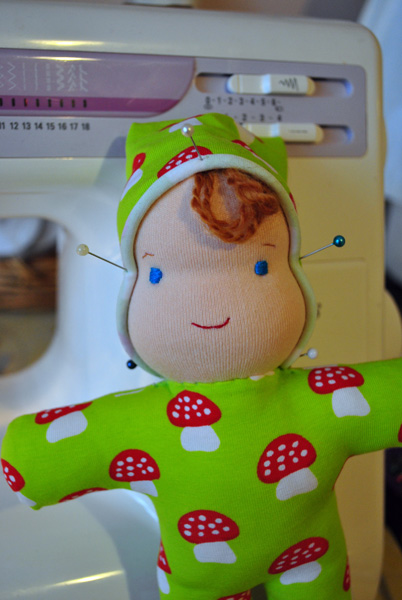
You can do a full head of hair if you wish but here I will show you how to do a pixie hat with a little hair tuft peeking out. Using a lovely, natural yarn make 3 – 4 loops. Pin these to the top of the head so that the cut end is poking towards the back of the head and all the nice loops are at the front, over the forehead. Stitch across the loops in a place that won’t show once the hat is on to secure them to the head.

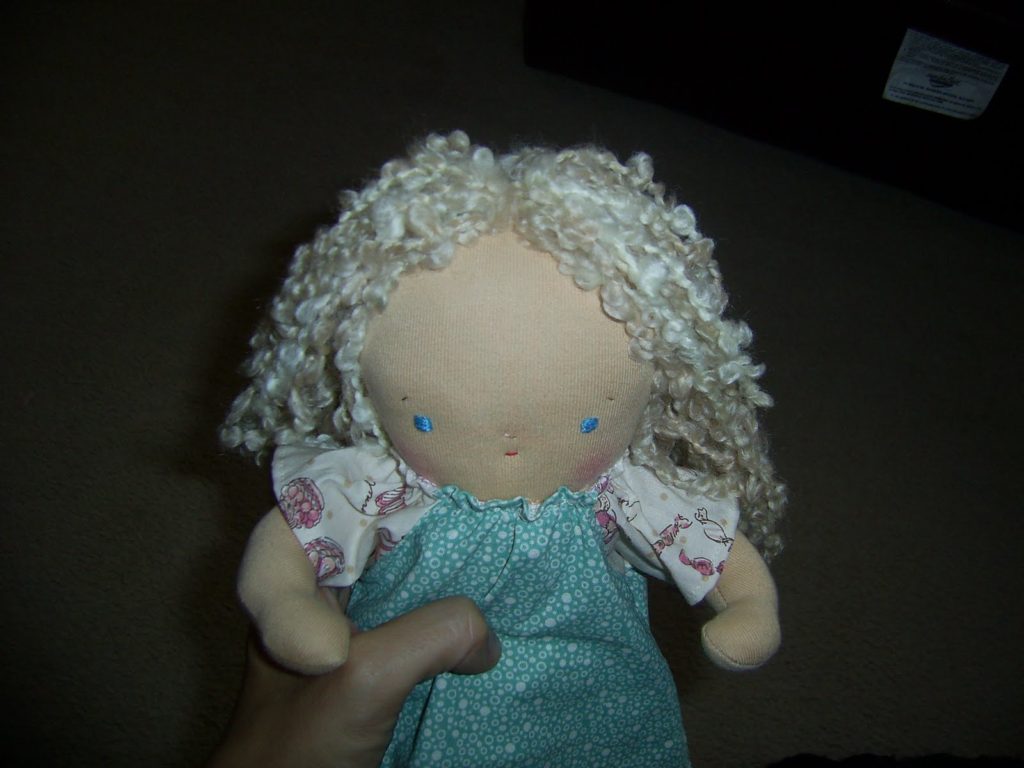
Now the hat! Fold your second piece of knit with right sides together. Place the pixie hat pattern (triangle) onto your fabric against the fold where indicated and with the most stretch running horizontally. Stitch along the long, straight side, up to the point, leaving the bottom edge open.
Turn right side out and poke out the point of the hat with a knitting needle or similar. Placing the hat seam at the back of the doll’s head, pin in place.  See how the knit has rolled up at the front to make a rim?

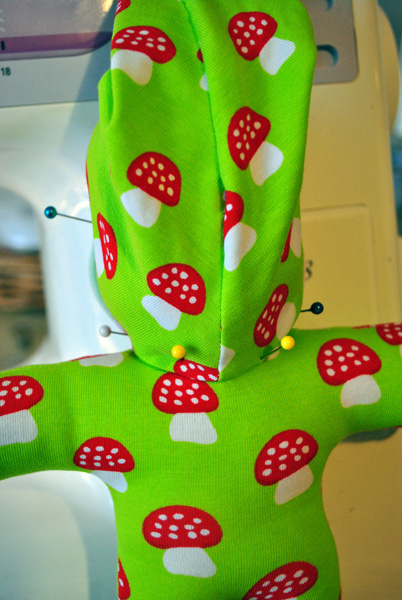
You may have to tuck up the hat at the back, which is easy to do. Using a catch stitch and matching thread, sew all the way around the hat, catching it to the head. 
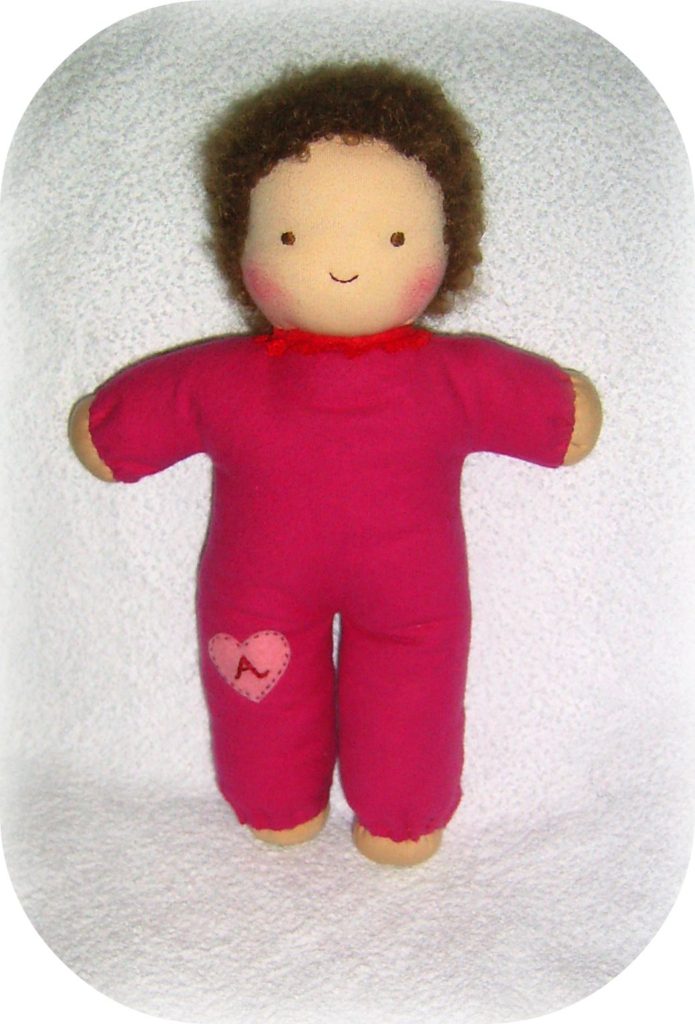
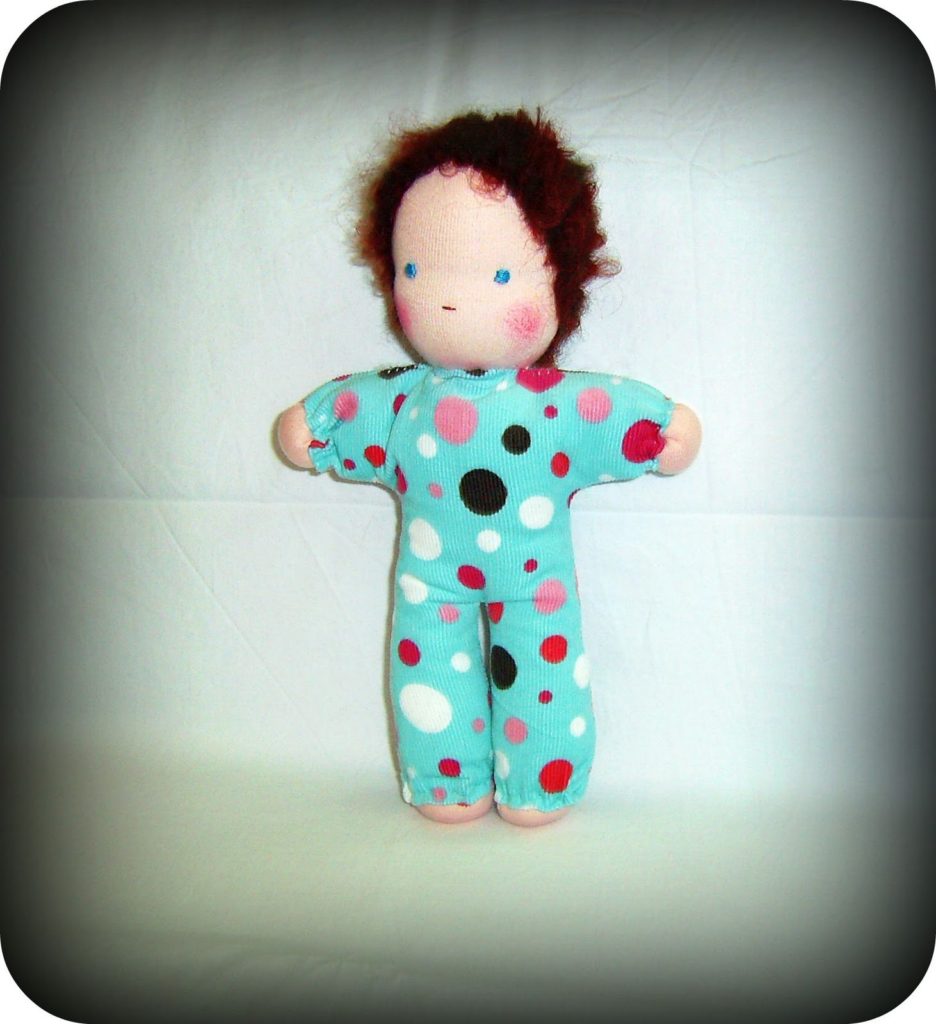
How does your doll look? I’d love to see it!
I’d also love your input (i.e. let me know if there are any mistakes in the tute!)

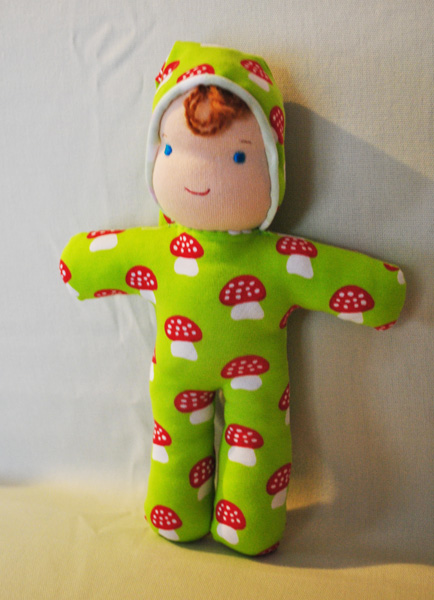
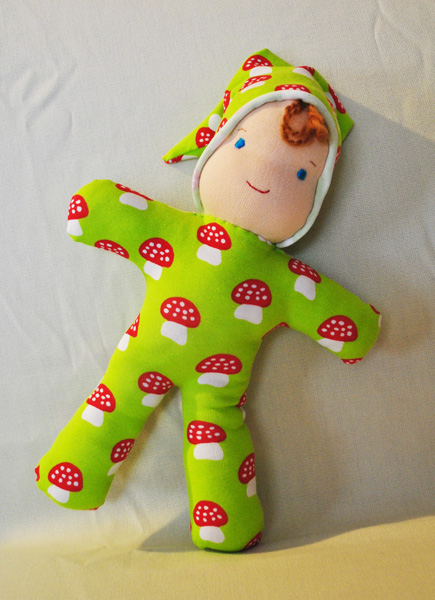
 Just a little heads up. I’m approaching 800 blog posts and am in the mood to celebrate with a little giveaway. I’m thinking this mushroom doll may be featuring. Ssshhh!

Filed Under: Uncategorized Tagged With: dollmaking tutorial

Waldorf softie doll tutorial – Part 1

by Kelly 8 Comments

It’s high time for a tutorial here so I’ll teach you one of the things I know best – dolls! This tutorial is for the style of doll you see above in a small size (9 – 10 inches). You can scale things up for a larger doll or just make a little one. They are great as a first doll for a younger child because there are no small bits as choking hazards. Please use this tutorial and pattern for personal use only 🙂
Today we make the head. I have a lot of pictures for beginners who want to have a go.

Materials list for head –
Finger bandage (or other bandage you can sew to size) approx 4 inches long x 1 & 3/4 inch wide
Approx 8 x 8 inch piece of cotton tricot
Clean, carded wool
Strong tying thread
Basic sewing kit and machine.

Your piece of bandage should fit comfortably over your index finger (to give an idea of width). Run a gathering stitch around one end with needle and thread, gather up tightly and knot.

Turn right side out (RSO)

Stuff very firmly until the head measures about 4 inches from the top and tie into a knot to prevent the stuffing from slipping back down.

Now tie about 3/4 of the way down with some of your strong cotton or linen thread. I find it easiest to tie  doubly around to get it super tight. You may find it easier to get someone else to hold the knot initially.

Now with the same thread tie half way between the top of the head and the first tie.

Lay the head with knotted ties to the back on your piece of tricot doubled over. Trace a rough outline around the shape of the head, allowing a bit of extra room. Use a disappearing or water soluble pen for best results.

Place a couple of pins to hold the layers together. Don’t cut this out! With your sewing machine set to a small stitch, using matching thread and with a ballpoint needle (important!) sew on the line you have drawn. Don’t sew up the bottom as you’ll need to fit this over the inner head. Cut out close to the stitches and turn RSO.

Fit over the inner head like so. A little peak of tricot will stick up at the top, pin it back.
Using your strong thread as before tie tightly around the neck with the knot to the back.
Using a few pins, play around with the placement of the facial features. See how close set eyes differ to….
..widely set eyes. Your choice.
Using the pins as your guide, draw some small circles at the eyes and mouth. Use a disappearing or water soluble pen, it makes life much easier when mistakes can be removed!
 Using 2 strands of embroidery floss (knotted end) and entering from the back of the head come out at the top of one eye. Work sating stitch to fill in eye. Let the stitches float on the surface of the skin rather than pulling tight.
Here’s a tip for needlework facial features: Use a larger (doll) needle to take the thread through the head. Once through, switch to a normal embroidery needle with a smallish eye. This works in 2 ways – you don’t make too many larger holes in the skin so your stitches look neater and you never lose a needle inside the head!
For the mouth you really only need one straight stitch. Using matching thread, sew down that little peak at the top of the head I mentioned earlier, just some small, neat stitches to hold it down.
Well, there is your part 1, I really appreciate feedback for tutorials – even if it’s just pointing out mistakes! So, let me know what you think.
Part 2 is now available!

Filed Under: Uncategorized Tagged With: dollmaking tutorial, Tutorials

Doll hair tutorial

by Kelly 7 Comments

 After a number of requests for help with stitching on doll hair I’ve finally made this tutorial.

Start by winding lengths of your yarn around a stiff book. If you want long hair your book will need to be larger than if you want shorter hair. Cut the yarn along one end of the book. This will leave you with long, even lengths. Place a plastic headed pin at the front of the forehead of the doll (see the pink pin above?) and another towards the back of the top of the head (see the purple pin?)
Lay your lengths of yarn across this section of the head (between the pins) so that the length is the same on each side of the head. Tie a piece of string or ribbon around the doll’s neck to help hold the hair in place. With a doll needle and doubled thread, stitch down the middle of the head back and forth between the pins. I usually stitch back and forth at least 3 times with a good strong backstitch.

This is how you tie around the neck to hold the hair in place. Take off the tie and spread the hair around the back of the head, if you can get the head evenly covered then you have stitches on enough hair, if not, you may need to stitch on more. The purpose of this first layer is to cover the head, so you don’t want any baldy patches showing through!

After stitching down the middle, place marking pins all around the head (as above) – about 2 inches down from middle stitching. Once again, use doll needle and doubled thread to stitch the hair down from one side of the head to the other. Remove pins. 
Do the same again, about another 2 inches down from where you just stitched, very close to the neck.

Using your book and pin trick from step one, place another lot of yarn lengths across the top of the head between the pins. Tie with string or ribbon again. Stitch down once again, between the pins, back and forth. Remove the tie and pins.
Fluff the hair with your fingers so that it falls naturally around the back and sits nicely on top of your initial layer. 


                                                                   A full head of hair!

*If you have a large doll you may want to do 3 layers of hair, depending on the thickness required.

* I mostly use boucle wool for hair as it gives a really full and quite natural look. If you want straight hair and are using straight yarn, you will need to use more to give good coverage.

I hope this is helpful 🙂

Filed Under: Uncategorized Tagged With: dollmaking tutorial, Tutorials

PEG DOLL TUTORIAL

by Kelly 3 Comments

To make your own peg dolls you will need:
* Wooden pegs, unpainted, unvarnished (available from craft stores)
* Acrylic paints (I used Jo Sonjas)
* Wood varnish (I used a satin coating)
* 12 inch (30cm) chenille sticks, various colours
* Yarn or wool felt for clothing.
* Pigma pens (optional)
* Craft glue

The first step is to paint your pegs, as you can see I mixed up a variety of pinks, browns and whites for the skin colour. Wait until the first coat is completely dry before painting again. Once again, allow to dry.

Now paint the legs, from the centre slit down to the tips. Allow each coat to dry before doing the next. You can make the legs spotty, stripey, plain, whatever you like. Then paint the tips with a darker colour for the shoes (I used black). Paint on hair in different styles. You can paint on the face if you have a fine paintbrush, but I drew mine on with Pigma pens. A word of warning – the varnish seems to smear the pen, so avoid varnishing the face, or leave to dry for 48 hours first (I don’t like to wait!)

When completely dry, coat the pegs with varnish and stand to dry. Coat again. You can use either a matt, satin or gloss varnish depending on the effect you want. Allow to completely dry.

Push a chenille stick to the top of the split in the peg. It should have fairly equal amounts on each side, but you can trim them later so don’t worry too much.

Taking the chenille stick from the front, wrap it around the body of the doll twice, winding up towards the head. The last wrap should go around the back of the head and stick out at a 90 degree angle to the doll. You can see I’ve also bent the other stick at an angle so it doesn’t get caught in the first wrapping.

Now take the chenille stick from the back and wind in the opposite direction, around the body twice again, and around the back of the neck as before. Trim the arms if they are not equal or readjust your winding.

Put a small dob of craft glue at the back, just underneath where the arms cross. This is not essential, but helps to hold them in place.
Now for the clothing. To make a knitted dress: Cast on 12 stitches (4 ply) on size 4 needles. Garter stitch (you can do stockinette stitch if you prefer) until the dress is the length you want, I think one of mine was 10 rows for a short dress, 15 for a longer one. Cast off. Wrap the dress around the doll, letting the arms stick through. Sew up at the back.
For a wool felt dress: Cut a piece of wool felt 2.5 inches x 3 inches. Holding this up to the doll, mark where you want the arms to come through. Make holes on the marked places with a seam ripper or metal skewer. Pull the arms through, wrap dress around and sew up at the back. There are lots of little embellishments you can do to make really pretty little dresses.
Another idea is to wrap the arms with embroidery floss, I might do that next time.


Now, I think every pretty girl needs a place to rest her head, watch this space for the next installment!
P.S. I would appreciate any suggestions for improvements for this tute, or any errors. Thanks!

Filed Under: Uncategorized Tagged With: dollmaking tutorial, Tutorials

Primary Sidebar

Categories

Archives

Meta

  • Log in
  • Entries feed
  • Comments feed
  • WordPress.org

Copyright © 2025 Kelly Casanova Weaving Lessons on the Foodie Pro Theme