
Are you really caring for your loom?
Think about it. As weavers we often make a substantial investment in our weaving loom and tools. But there is more to just assembling a loom and then using it indefinitely.
It’s easy to forget, because our looms are such steady workhorses. For the most part hey just do their job… until suddenly something squeaks, sticks, loosens, dare I say it – breaks or behaves in a way that leaves us frustrated.
A tiny bit of regular care and thoughtful use not only helps your loom last for decades and in many cases, into the next generation, it gives you a smoother, more enjoyable weaving experience. And honestly, it feels good to honour and value the tools that help us create beauty.
This is your gentle reminder: your loom might need a little attention.
Let’s walk through what that looks like.
Why Loom Care Matters
The majority of commercially available weaving looms these days are still constructed from some kind of wood. Wood responds to its environment. Metal gathers oils from our hands. Lint builds up in surprising places. Over time, even the best-made looms can show signs of wear, not because they’re poorly made, but because we use them a lot.
Regular care:
- prevents small issues from becoming big ones
- keeps your weaving experience smoother and more consistent
- ensures your loom ages gracefully
- saves you money on repairs and replacements

A Simple Frequent Care Routine (Just 5 – 10 Minutes)
You don’t need a whole afternoon. Five minutes at the end of a weaving session or at the start of the weekend makes a big difference.
Here’s a quick routine to try:
1. End of project clean routine
At the end of a project is a perfect time to do a little loom maintenance. A lot of fibres can be displaced when weaving and most of them will end up on the loom, stuck in the reed, or on the floor. Tiny pieces of cut yarn will end up in the most interesting places!
A quick vacuum goes a long way to resetting your work space and cleaning your loom. Use a soft or brush attachment to avoid any damage to your loom.
Then I like to wipe down the loom itself. A very slightly damp, clean cloth is enough for everyday care. Don’t use any cleaning chemicals on the wood of your loom, it’s not necessary and may corrupt the integrity of any finish used on the loom.
2. Clear out heddles and the reed
Lint and tiny fiber fragments love to hide in here. A quick sweep with a clean cloth or soft brush is generally enough to displace anything left behind.
3. Check for loose screws or bolts
If any loom parts have loosened, you will generally feel that when you’re actually weaving and may want to deal with it there and then. Looms naturally loosen over time with movement and vibration. A simple tighten keeps everything feeling solid – that goes for your stands too!
4. Care of metal parts
This is very loom dependent, but in thinking of my Louet David floor loom, I very frequently treat the sliding beater rods, as they become stiff with use. I use a non silicon lubricant spray and a clean cloth. Spray the cloth (not the rods) and rub the rods in a back and forth motion, all over.
You don’t even need to remove the beater to do this if you don’t want to. Just slide the beater back, rub the front parts of the rods, then slide the beater forward and rub the back parts. You will be amazed at the difference this can make.
This can be a useful tip for an overhung beater that feels a little stiff or has started to squeak. You shouldn’t need to treat them every time you weave, just occasionally and if you feel it’s needed.
Look out for rust. This is a tell tale sign that your loom room is moist and you may need to do something about it. If you have every purchased a floor or table loom used and it has a chequered past, you probably have experience with rusty reeds!
A rusty reed can be so difficult to clean that many weavers will opt to replace it with a new one. While effective, this is expensive, so it makes sense to care for your reeds!
5. Take a moment to inspect the loom components
Are cords, apron rods, ties, and brakes looking healthy? Small wear-and-tear is easier to catch early. If your loom has some plastic components, these will usually show more wear than metal.
For example, Ashford rigid heddle looms have plastic ties on the apron rods. While my 24″ Ashford rigid heddle is still going strong after 12+ years of use, I have heard of these rod ties breaking for some weavers.
Likewise, the plastic “holes and slots” component of the rigid heddle can break (this has never happened to me). Typically, you can avoid these breakages with proper use and care, some of which I will go over in a later part of this article.
Taking this time for small inspections keeps you in touch with your loom and can catch little problems before they bite.

Common Problems and What They Usually Mean
Here are a few symptoms you might recognise:
“My loom squeaks!”
This can point to dry joints or parts that needs a light oiling. Depending on where the squeaking is coming from, it may be a simple matter of loosening, then tightening some nuts and bolts – try that first!
“I can’t achieve decent tension.”
Look at your brake, apron cords, and the integrity of your rods and ties. Make sure shafts are hanging properly and not sticking on each other as they are raised and lowered. Has any of your hardware come loose? Particularly check your wheels and cogs that operate the tension on the front and back beam of the loom.
Also, ensure that your loom parts are correctly placed and that when warping you took your front and back apron rods OVER the cloth and breast beam. This is a very common error!
“My heddles/shafts feel sticky.”
Dust, oils, humidity, or the beginnings of rust can cause drag. A good clean usually fixes it.
“My reed is grabbing the threads.”
Often caused by lint build-up. Occasionally by tiny rust spots or other roughness in the metal if it’s an older reed that has not been cared for. Clean the reed (can be as simple as running a light, thin piece of clean cloth horizontally and vertically in the dents, or spaces in the reed.
Planning your loom room or creative space
If you are looking at getting a loom for the first time, you have the advantage of deciding where it will be placed and kept for you to work at.
If you have such a space available, try to ensure that the room is not moist, prone to leaks or flooding and that your loom is not going to sit in direct sunlight permanently.
All of these things will cause potential damage to a loom. I even heard a story of a weaver who kept her floor loom in an upstairs room near a large window. One day when she went into the room for a weaving session, she found that a large part of her loom had been badly scorched.
The sun through the window onto the loom was an oversight that could have caused the loss of their entire home if it had actually caught on fire, which it very nearly did!
I have also heard of weavers who have dealt with flooded studios or creative spaces, usually following an extreme weather event. This is a sad occasion, as often looms are destroyed by flood waters. When exposed to water for a period of time, wood will swell, warp and potentially crack and pry apart at the joints.
Depending on the severity, some looms can be saved and restored, others are destroyed beyond repair. So, if you’re considering making a loom room out of your basement, consider that it may not be flood proof!
Storing Your Loom Properly
There are many reasons why weavers may have to store a loom for a period of time. Good storage is part of good care. Here are a few simple tips:
- Keep the loom out of direct sunlight.
- Avoid highly humid or very dry environments.
- Cover it with a cloth or sheet when not in use to keep dust away.
- Avoid storing a warp under tension for long periods.
- Don’t store in an area prone to leakages or flooding
- Check your loom regularly. This is especially important to ensure there is no wood borer infestation. Wood borers love damp and dark conditions.
Different Loom Types, Different Needs
While the basics are true for all looms, here are a few quick notes:
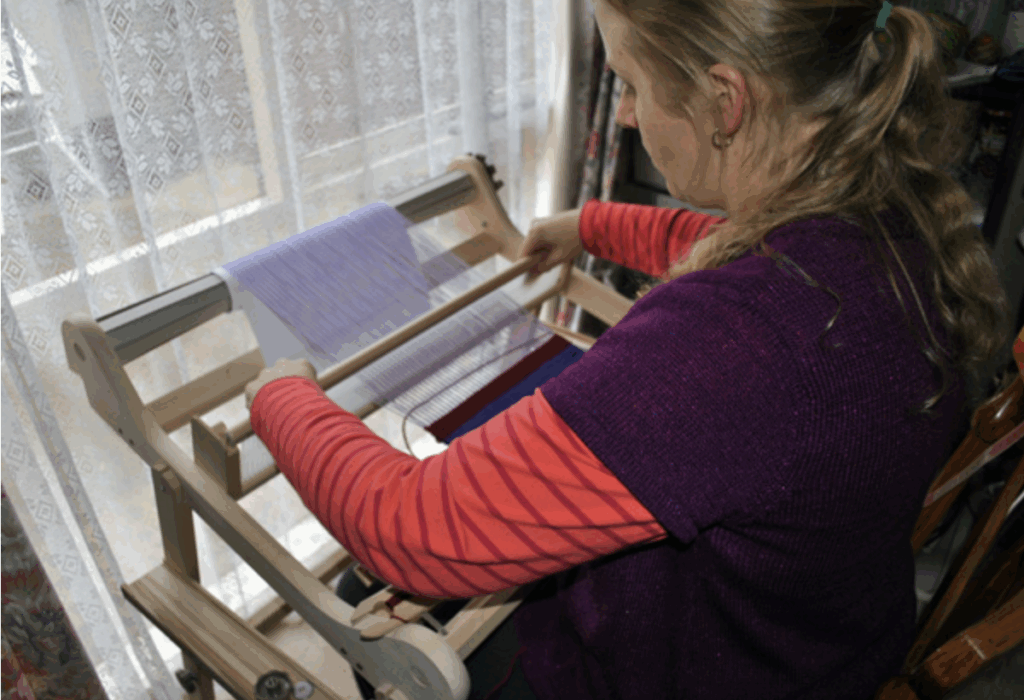
- Rigid heddle looms: Go easy on your loom! Rigid heddle looms are not designed to weave under super high tension. They typically include a number of plastic components. These pieces are strong but not invincible.
- Relax the tension on your warp in between weaving sessions. This is kind to the loom and the warp.
- Be careful when threading, particularly the closer sett heddles. A 15″ heddle needs more care when threading as the plastic is thinner and more vulnerable.
- Don’t leave your rigid heddles in the sun or near any heat source – the heddle can melt or be compromised and become brittle.
- Jack looms: Extra attention to moving parts, brake systems, and treadle cords is helpful.
- Counterbalance + countermarche: More moving parts = more spots for dust. Clean regularly.
- There are typically a lot of tie up cords at the top and bottom lamms that may wear over time.
- Inkle looms: Check for splinters on ends of pegs and keep tensioning mechanisms smooth.
- Occasionally tensioning knobs or bolts may need replacing, as they can become bent out of shape from holding the warp under high tension.
- Table looms: Dust settles everywhere – keep it covered when possible. The tie up cords do a lot of work raising and lowering shafts and may need replacing occasionally.
- Go easy on the levers – try not to let them drop without control, lower them gently. If you find it difficult to raise the shafts, your cord length may need adjusting.
- Some table looms have a back apron rod made of wood rather than a metal rod. I have found with the Ashford table looms, this rod can bow significantly when warped and under tension. While I’ve never had a wooden rod break, a metal rod can be preferable to use.
To Finish or not to Finish?
I started to write about all the pros and cons of purchasing either a lacquered/varnished loom as opposed to an unfinished one. I realised very quickly that this article would be way too long if I included that section, so it has become it’s own independent article, which you can read here.
A Moment of Appreciation
There’s something beautiful about caring for the tools that help us create.
It’s a practice of stewardship, gratitude, and truly valuing your possessions.
A well cared for loom will not only give you many years of weaving happiness, it can even become a useful family heirloom that passes the gift of weaving onto the next generation.
That is something special indeed!
Until next time…
Happy Weaving!
*This post may contain affiliate links. For further information, please see my disclosure policy here.