• Skip to main content
  • Skip to primary sidebar

Kelly Casanova Weaving Lessons

  • Hi! I’m Kelly!
    • Disclosure
  • Online Weaving School Class Index
    • Common account issues
    • Common technical issues
    • What do I get with a membership?
  • New to rigid heddle weaving? Start here!
    • Never heard of the rigid heddle loom?
    • How to weave neat edges on the rigid heddle loom
    • Rigid heddle weaving
    • Rigid Heddle Weaving Patterns
  • Patterns
  • Subscribe

Uncategorized

Simple photography backdrop

by Kelly 2 Comments

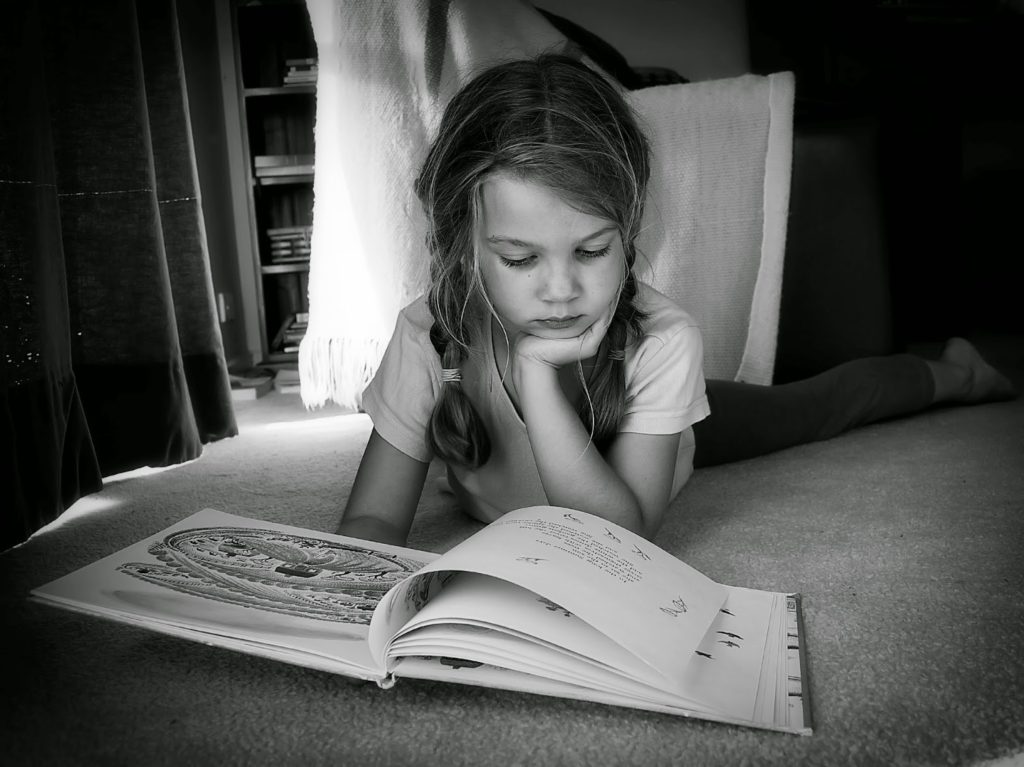
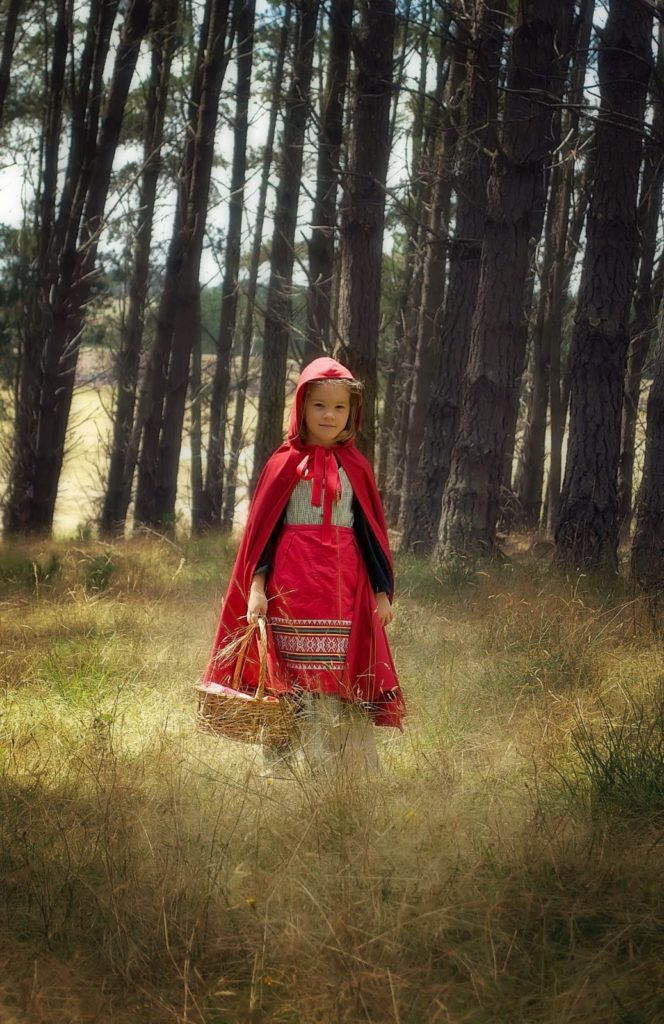
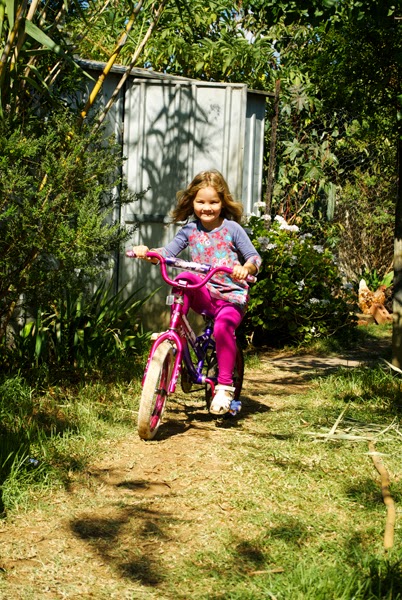
Our garden is a great location for photography portraits, but, having just arrived at Autumn, it’s a little dry and not looking it’s best. Being a natural light photographer, I wanted to head outside but I was also wanting something a little different for a portrait session with my littlest sweetie pie and her fluffy friend.
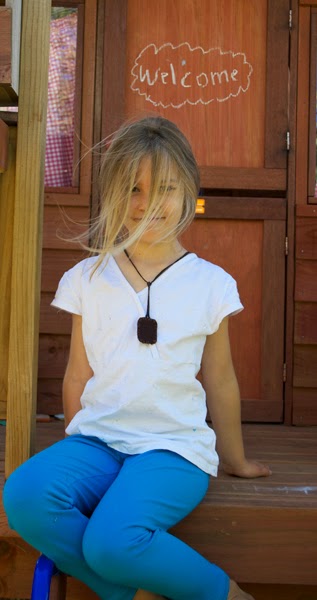
I grabbed my favourite bed sheet, pegged it on the clothes line and we were in business! If it’s a breezy day you will have the challenge of the sheet moving (which you can see in the right corner here) in which case you could possibly weight it down with something at the bottom. I kind of like the feeling that the blowing sheet gives to this photo though.


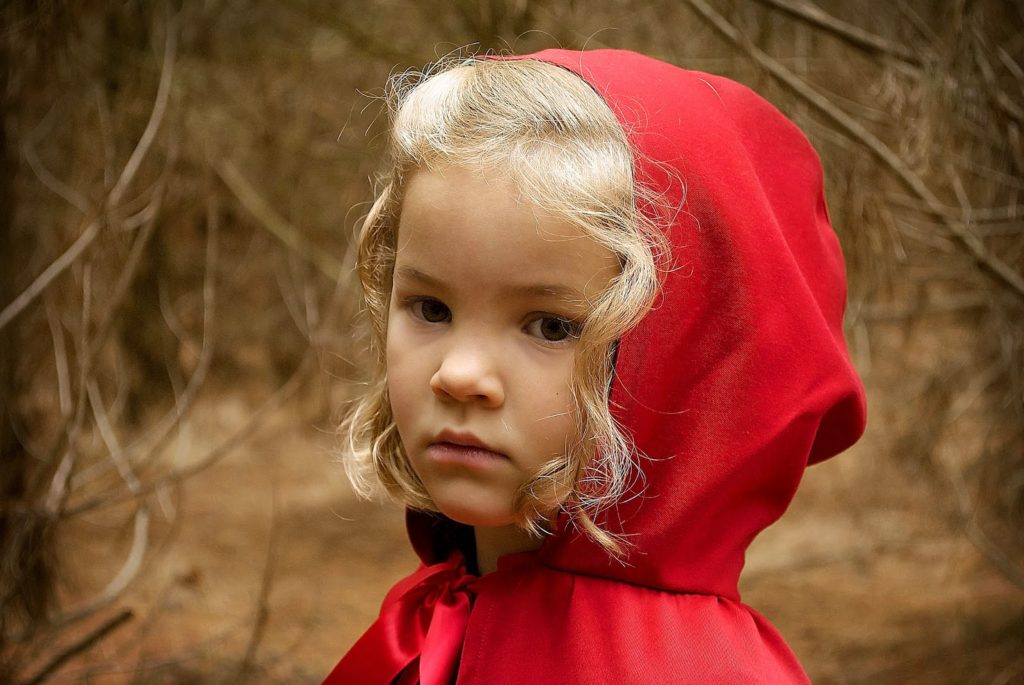
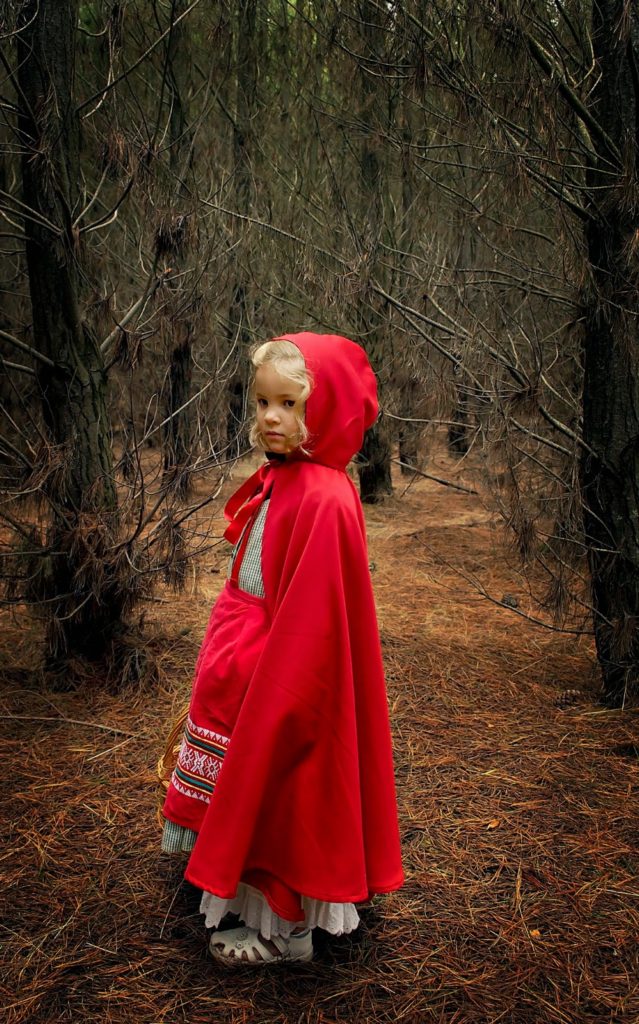
Next, your editing program can be used to achieve a variety of looks still using the same backdrop and different poses.


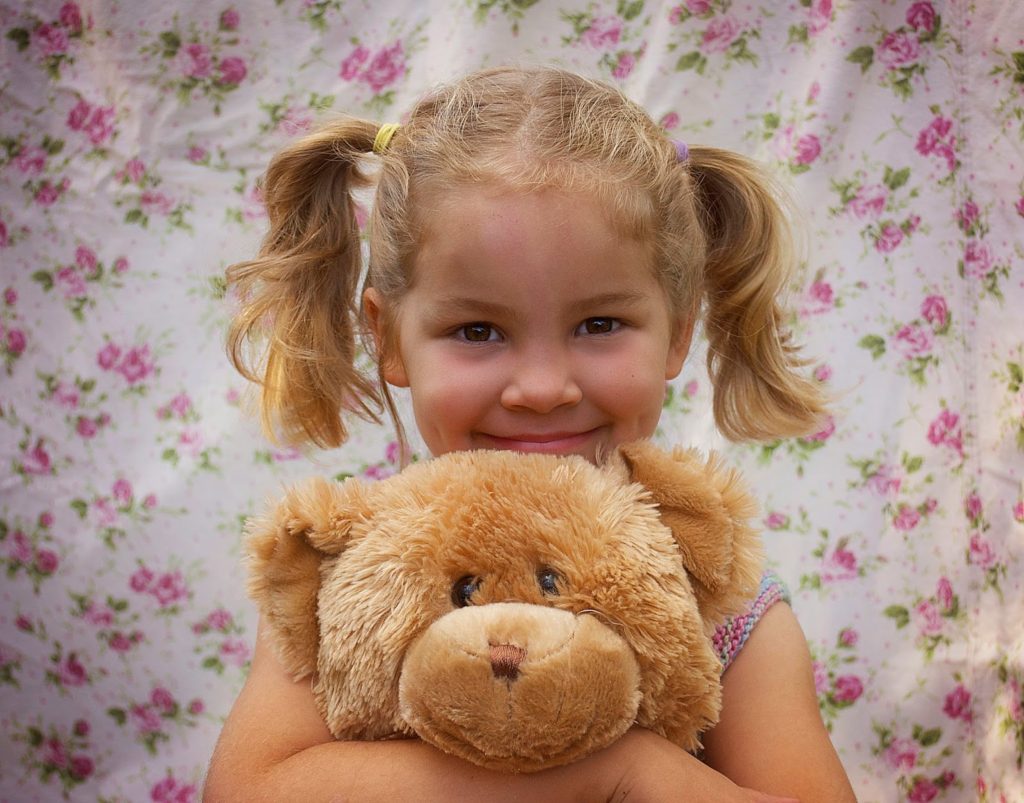
A plain sheet would also work well if you were looking for a plain backdrop with natural light, but I think the pretty floral one suits my little sweetie just fine, don’t you?

Filed Under: Uncategorized Tagged With: photography, Tutorials

African Red Butterfly

by Kelly 3 Comments

I love the feeling of finishing a long term project – something challenging that has required a lot of time and care. I bought this Red African Butterfly kit from Trish Burr last year but other projects took over.

I made the commitment to finish and completed it last night. Phew! The technique used is thread painting and involved one piece embroidery floss at a time with a very fine needle. 
I’m pretty pleased with how it came out, though I can obviously use a lot more practice with thread painting as it’s far from perfect.

Now, what to do with it? I’d like to put it in a nice frame, I spent too long working on it to put it to practical use. 

Have you seen Trish Burr’s designs? There are a lot of beautiful pieces to choose from and the instructions are detailed. I would love to do more of her designs in the future.

Filed Under: Uncategorized Tagged With: embroidery

Everyday Life Photo Challenge

by Kelly 1 Comment

I’ve entered the I Heart Faces photo challenge for the first time. The theme is “Everyday Life”. Our every day life involves a lot of reading and this scene of a child lying on the floor, engrossed in a book is a very common one. If you’re interested in entering the challenge or just viewing all the wonderful entries, follow this link.

Filed Under: Uncategorized Tagged With: photography

The Red Riding Hood project

by Kelly 4 Comments


I’ve had this project in mind for a while now. I got the cape made (if you want to make your own, I found the instructions here very helpful. For free hand drawing the hood, I used one of my daughter’s hoodies and roughly traced the outline. Make it big!) got the rest of the costume together, then just had to wait for a suitable day to travel to the location.

The weather conditions weren’t the best but I managed to get a lot of shots I could use.


My little model was a trooper but did wear out fairly quickly (actually she just wanted to play and explore the forest, fair enough I guess!)

At least one of these photos will be used in the final 6 that I need for a portfolio building assignment. 
I feel that I’ve found my photography niche, now I just need to keep building my skills and hopefully getting some exposure (pun not intended!)

In case you’re wondering what my next creative photography project might be, don’t worry, I’ve been planning it for weeks and will start on the costume very soon šŸ™‚

Filed Under: Uncategorized Tagged With: photography

Home made peanut butter

by Kelly 6 Comments

We go through plenty of peanut butter here and our youngest daughter in particular is mad about it on toast for breakfast. She is also a huge Nutella devotee.
I had heard that peanut butter is really easy to make and I don’t know why I’ve never tried, but yesterday I was gripped with the thought this was something I needed to do!

I’m glad I did! It is different to store bought peanut butter (it tastes more nutty, more natural, more REAL!) 

Why don’t you try it too? Here is how I made it:

* 500g roasted, salted peanuts 
1 teaspoon of salt
2 teaspoons of honey
 ** 2 tablespoons of peanut oil

Place your nuts in a food processor. Blend until they are coarsely ground. At this point, if you want chunky peanut butter (like I did) take about 1/3 of the ground nuts out and set aside.
Add the salt and honey. Continue to blend until your mix is smooth or starts to look like a paste. Times really vary depending on your food processor, but it’s generally a couple of minutes to get to the paste stage. Now, drizzle your oil in and blend until it’s a smooth paste. Add your coarse nuts back in and mix through. Put your paste into a jar or sealed container. Drizzle a little more oil over the top as a seal.
I’ve been told that in needs to be kept in the fridge – I’m not sure if this is totally necessary, I think I will experiment by leaving some out to see how it goes.

* If you want to use peanuts from the shell or raw peanuts you can roast them yourself. Then just follow the steps from the beginning.
** If you find your paste is dry try adjusting the oil amount.

Isn’t that simple? Next up I want to try doing Nutella and almond butter would be fun too. Let me know if you give it a go!

Filed Under: Uncategorized Tagged With: frugal living, home made peanut butter, Recipes and food

Frugal February in the kitchen

by Kelly 4 Comments

The months of December through to March are our most challenging financially. Christmas, followed by holidays, plus bills and insurance mean that we really have to pull in the reigns and make an extra effort to save money. I thought I would share with you a few of the thrifty things I’ve been doing in the kitchen. 


Last month I set myself a water challenge. It’s Summer here in Australia and we’re using a lot of water on the garden (we have a tank for the garden, but without rain there is no tank water). 


*Place a container in the sink and use the water from rinsing fruit, vegetables and eggs on the garden.
* Run water into a jug while waiting for hot water – I get heaps of water this way, which either goes into our purification jug or onto the garden.
*Halve the amount of water you normally wash up with. There is no need to fill the sink with hot water to do the dishes! I’ve been really surprised by how little I can use for this purpose. This goes for floor washing too – you don’t need that much (not that I wash my floors all that often, ahem..)
Next up is the use of appliances and utilities (gas, electricity) in the kitchen.

*If steaming vegetables, boil until steaming is underway, turn off the gas and keep the lid on. I find this is enough to steam the veggies without having to use another 5 – 10 minutes of gas.
*The oven can also be turned off early. When I make bread, I turn off the oven 5 minutes before the bread is done and let it sit with the door closed. It stays hot enough to cook and it saves 5 minutes of cooking time. Add that up over a year and it would be a lot of time!
*Bake your own bread. I’ve been doing this for a long time and it saves us a lot of money. The whole family prefers homemade loaves too. I bake 4 at a time to get the most out of the oven.
*Think about the appliance before you use it. Is it really necessary to plug into the electricity if you can do it by hand? For example, we sweep hard floors instead of vacuuming, our cooking ingredients are often mixed by hand and all our dishes are done in the sink with no dishwasher.

I’d love to hear your frugal tips for February too!

Filed Under: Uncategorized Tagged With: bread, frugal living, Recipes and food

365 project

by Kelly 1 Comment

 Last week I joined the 365 project. I thought it would be a good way to form the habit of picking up the camera every day and challenging myself to make the photo interesting. I’m on day 8 and loving it so far! Here are some of my photos from the week: 

Night Beach – my first proper attempt at long exposure for a landscape.

Rainbow Lorikeet – A pair of them have been enjoying our plums. Fortunately we have a bumper crop this year, so plenty to share.

Tomatoes – they are ripening by the dozens each day and make a delightful mouthful.


One of our beautiful girls – I love this portrait!

If you are interested in the 365 project or want to follow my project, you can find it here.

Filed Under: Uncategorized Tagged With: photography

Happy NOT back to school day!

by Kelly 4 Comments

Today was an awesome day.


We got up early. Not because we had to, but because we wanted to.


The girls did lots of bike riding. They’re practically obsessed with riding – horse riding as a first choice, but when there are no horses around the bikes will do just fine, thank you.


We visited the library.


We spent time in our garden, soaking in the warmth of the sun.


We read.


We studied. A little šŸ˜‰

We followed our own interests. 

Oh, and there was plenty of fun thrown in for good measure!


Yes, it was a great day. And the best part is that we can do it all again tomorrow. Lord, I am so grateful that you opened our hearts to homeschooling. I am so grateful that you have given me the privilege of being with our children all day, every day. And I am so thankful to be able to learn and grow right alongside them.

Filed Under: Uncategorized Tagged With: Homeschooling

Hand woven dish cloths

by Kelly 9 Comments

Over the weekend I wove some dish cloths with some beautiful Australian 10ply cotton that I rainbow dyed. I’ve been wanting to try out waffle weave and thought that kitchen cloths would be perfect.
All of these were woven on the same warp on my rigid heddle loom. Did you know you can do that? Warp once, weave many, much easier! Just leave a gap of 5 – 6 inches between each cloth, towel or whatever item you’re weaving. I hemstitched each one on the loom and left a short fringe at each end.

They sold like hot cakes with an order for more and I’m not surprised. If you’ve never tried a handmade cotton kitchen cloth (either woven, knitted or crocheted) you really should, they are far superior to any commercial cloth. I use mine as a multi purpose kitchen cloth for wiping and washing. They last a long time and can be thrown in the wash and line dried. My next order is for re-usable baby wipes – another great idea.


These are some other cloths I wove last year in plain weave so the baby wipes will be similar – fairly thin and very soft for baby skin.
The next thing for me to look at is tea towels. I really wasn’t happy with my last lot – I think the cotton was too thick, I need specific weaving cotton. 

If you’re interested in trying waffle weave on your own rigid heddle, there is a great pattern sequence HERE, look specifically in the comments section for the sequence.
You need one pick up stick but it’s very easy to master.

Specifications for my cloths: 
10 ply cotton (warp & weft)
7.5 dpi
60cm rigid heddle loom
Hemstitched on loom.
Wet finished, laid flat to dry.

Linking up with Creative Friday on Natural Suburbia.

Filed Under: Uncategorized Tagged With: frugal living, hand dyed yarn, weaving

Encouragement

by Kelly 3 Comments

A few days ago I received a letter from my beautiful Nanna who is now in her late 80’s. Nanna raised 5 children under financially and emotionally challenging circumstances as her husband went off to war. 
When we began our homeschooling journey 10 years ago she didn’t understand and was very skeptical. But over the years, seeing the “proof in the pudding” she has become a great supporter. Her frequent letters never fail to tell me what a marvellous job I’m doing as a wife and mother. This means so much to me.


About the same time as the arrival of Nanna’s letter I also received my copy of Above Rubies, an American evangelical magazine I’ve been subscribed to for many years. When my girls were babies and toddlers and things were really tough, this magazine gave me great encouragement. I only had my husband for support during these years and he had to work a good deal to meet our mortgage and living expenses. Many family members (not all) and other associates looked down on our decision to homeschool and raise our children in our faith, so we were essentially left alone to figure it out for ourselves without support.


Above Rubies is written by mothers, for mothers. It’s a sharing of knowledge and experience and although it’s not a Catholic magazine I find a lot in common with the mothers featured. Homeschooling, contraception free, faith filled and home grown. Aiming for Heaven and taking others with us. Good stuff. 


The last few issues I hadn’t appreciated so much and though I made time to read I didn’t feel that I came away with much. But reading this recent edition made me realise something major. I need encouragement. Desperately. When my Nanna – mother to 5 during a depression and war times says that she “really admires me for what I do” it brings tears to my eyes. It means that much.


If you see a Mum struggling in the supermarket or trying to keep her kids quiet during Mass or looking completely frazzled with more kids hanging off her than you can count, ENCOURAGE HER! And if you are a Mum in this situation and no one encourages you, ENCOURAGE OTHERS all the more! You can completely turn a mother’s day around with a simple smile and “you’re doing a great job” or “keep up the good work”. 


Mothers do such an essential and important job that at times can be desperately hard. All it take to help is a little encouragement.

Filed Under: Uncategorized Tagged With: encouragement

  • « Go to Previous Page
  • Page 1
  • Interim pages omitted …
  • Page 7
  • Page 8
  • Page 9
  • Page 10
  • Page 11
  • Interim pages omitted …
  • Page 83
  • Go to Next Page »

Primary Sidebar

Categories

Archives

Meta

  • Log in
  • Entries feed
  • Comments feed
  • WordPress.org

Copyright © 2025 Kelly Casanova Weaving Lessons on the Foodie Pro Theme