• Skip to main content
  • Skip to primary sidebar

Kelly Casanova Weaving Lessons

  • Hi! I’m Kelly!
    • Disclosure
  • Online Weaving School Class Index
    • Common account issues
    • Common technical issues
    • What do I get with a membership?
  • New to rigid heddle weaving? Start here!
    • Never heard of the rigid heddle loom?
    • How to weave neat edges on the rigid heddle loom
    • Rigid heddle weaving
    • Rigid Heddle Weaving Patterns
  • Patterns
  • Subscribe

frugal living

Back to basics, frugality revisited.

by Kelly 4 Comments

Christmas, interstate holidays and unfortunately timed car repairs and insurance bills have left things a little tight for us of late. Very little is being saved and the bills and expenses just keep rolling in. 
I spent a bit of time having a sook about our own little economic downturn but when I got tired of feeling sorry for myself I decided to get over it and take on a frugal challenge. 
It’s amazing that even when you live a frugal lifestyle you can always find little areas where money is not being used as wisely as it could. So, here are a few things I’m doing this month to make positive changes.
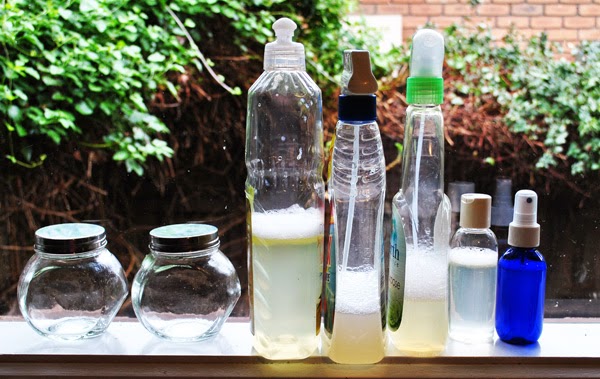
I’ve been making my own laundry gel for ages (great stuff!) and also my own cleaning spray (I add some lavender or tea tree essential oil to make cleaning more bearable!) for a few months.  As I’ve mentioned before, the recipes I use are from the excellent book “Saving Mum”. 

Recently I found that I could make an excellent toilet spray simply by placing water and essential oils in an old spray bottle. I’d tried it in the past and wasn’t thrilled with the results, but I’ve found that the essential oils needed to be stronger. I also make up a really small batch at a time (say about 100ml)  to keep it fresh.
For my 3 long haired girls I squirt a little hair conditioner into an old spray bottle, top it up with water and use it as a de-tangler. This morning I also made up a batch of dish liquid and will be trying that out. I’m nearly due to do a big batch of soap too. Sometimes I use my soap to wash the girl’s hair.

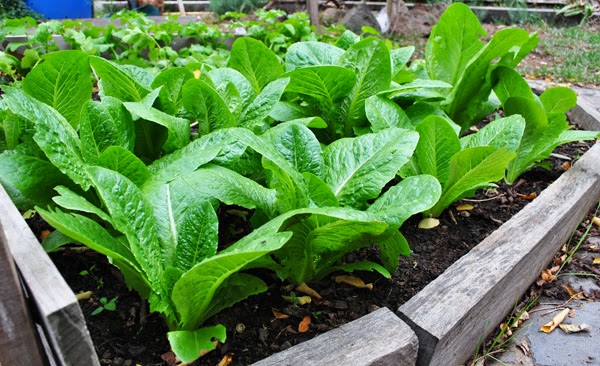
After the hot and dry summer our garden has been re-planted with vegetables and the kids each have their own plot. Here are my husband’s cos lettuces. I still can’t work in the garden much because of my back issues but I live in hope that I’ll be able to return soon.

I have been wanting to replace our large side gate for 9 years now (ever since we moved in) as it is broken and very difficult to open, not to mention old and unattractive. We never seem to have enough spare cash to complete this job! So, new tactics. We have a money jar in our bedroom as husband often chucks a handful of coins from his pockets in there when getting undressed. The coins are used for small shopping trips and the rest goes into our charity jar in the kitchen. I’ve placed a little box beside the bedroom jar and place the gold coins in the box, with the silver change going to the charity jar as before. Gold coins can add up quickly and I have $15 in my “replace side gate” box already. Who knows how long it will take to save the required amount but at least I feel better because I’m moving towards the goal šŸ™‚


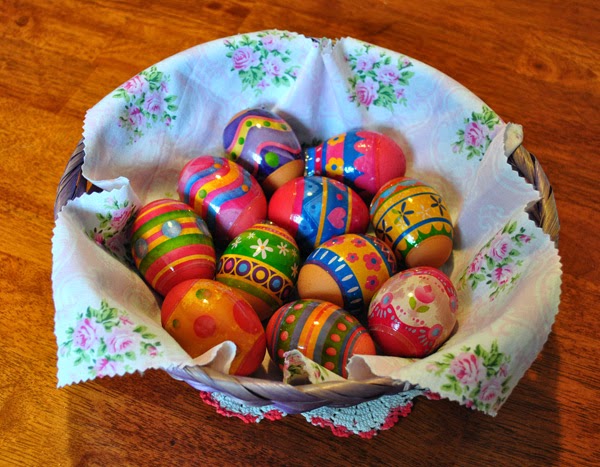
We found a way to do cheap and beautiful eggs for our table display. We dyed cheap supermarket cage eggs with egg dye, then used these super cool “Happy Wraps” to decorate with. I picked up the wraps and dye at a continental grocer very cheaply. They were so easy to make and look fantastic.

For Easter eggs my husband found a warehouse outlet that sells good brands (Red Tulip, Cadbury) eggs at heavily discounted prices. We also intend not to go overboard with chocolate for the kids as we tend to – they really don’t need bucket loads!

There are plenty more things I’m doing to be more frugal at the moment, but this post is getting rather long, so maybe next time.

How about you? Feeling the pinch? Taking any positive steps to help?

Filed Under: Uncategorized Tagged With: Celebrations, frugal living, Gardening

Shaving cream marbling on paper

by Kelly 1 Comment

This has to be one of the easiest (and messiest!) ways for children to produce a unique art piece.
All you need is paper (160gsm is good), poster paints and shaving cream (the cheapest brand works fine).
Make a layer of shaving cream on a tray. Make dots or lines of paint. Swirl with a chopstick or similar. The more you swirl, the more intricate patterns you will get, however if you overdo it you might muddy your colours.

When you have a pattern you like, carefully place your paper on top and lightly press all over (lightly!) Peel the paper off and use a paint scraper of similar to scrape the excess shaving cream and paint off to re-use. Put you paper somewhere to dry.

Keep re-using the shaving cream, reapplying the paint if desired, until it’s too coloured to use. Then have some messy fun with the leftovers! (Good for making hand or foot prints on paper too).

This is messy. The easiest wash up for hands is to stick them in a bucket of water outside (the hands, not the children). The trays and tools wash up in warm water.

Here are some of our masterpieces.

They can be framed and hung.

Or used as wrapping paper or even for the basis of another project (collage, background for a picture etc).

Filed Under: Uncategorized Tagged With: art for children, creativity, frugal living, hand dyed yarn, Homeschooling, Tutorials

Making great compost

by Kelly Leave a Comment

This time last year I was a complete flop at making compost. We have always had plenty of material to make compost with, but for some reason it just wasn’t happening. I read about compost from a variety of sources and it seemed complicated. Then I got a Don Burke book from the library and after reading the section on compost something clicked. Since then, I’ve been making great compost and I’m happy to share what I know with you.
Here is some of my compost from the ready to use heap.

And this is what the working compost heap looks like – lets call it a work in progress!

The ready to use heap. My husband and a friend made this with star pickets, old lattice, bamboo and black plastic. It’s about 1.5 metres high and has an opening door at the front for easy access.

I find that compost performs better if it’s contained rather than just a heap, but it’s fine to start out with a heap if you need to.

This is my working pile – an old heavy duty plastic drum with holes drilled in the sides near to the bottom. I swap between the 2 heaps. So, when this blue one (my current “working” compost) is full enough I will leave it to sit and stop adding to it. By that time, the black heap will be all used up on the garden and ready to start working and being added to again.
So, here are my key elements to good compost:
* Balance ingredients. If you only put in kitchen scraps your heap won’t be happy. Lets looks at what I have in my working pile at the moment. Kitchen scraps (veg peelings, tea leaves, coffee grounds, paper towel, shredded newspaper, grass clippings, leaves in Autumn (brilliant!) straw, garden soil and any organic matter. No meat or bread scraps unless you want some visitors of the rodent variety!)
*Moisture. This is important. I’ve discovered that my compost used to be too dry/too wet – I didn’t have the balance right. It should be moist and if you get the right balance of ingredients it’s easy to control the moisture content. If it’s too wet, add a little dirt, straw or shredded newspaper. If it’s too dry, water it or add more wet ingredients (leftover tea from the pot, more veg scraps).
*Cut up ingredients. All the veg scraps or garden cuttings should be chopped up to maximise the breaking down process. I used to put in huge chunks of old vegetables or big sticks thinking they would break down – it doesn’t work. I only use the more fleshy garden cuttings, all woody cuttings go into our green council bin, which is taken away and mulched. If you have your own mulched you can do this yourself.
*Turn regularly. Also really important! I use a pitchfork and turn both composts every 2 days or so. You don’t have to do it this often but at least once a week this should be done.
What have I left out? Any questions, ask away!

Filed Under: Uncategorized Tagged With: compost, frugal living, Gardening

Beneficial beetroot

by Kelly 1 Comment

Easy to grow, highly nutritious and absolutely delicious – you haven’t really lived until you’ve eaten a freshly harvested, home grown beetroot!
Beetroot are high in folic acid, fibre, manganese and potassium. That’s just the root, the leaves are also edible (I think it would be a waste not to eat them!). The leaves are high in calcium, vitamins A and C and iron. They are also delicious! There are many other reported health benefits from beetroot consumption too.

Beetroot are easy to grow and take up little space in the garden as the leaves grow quite upright. They require minimal care and don’t seem vulnerable to many garden pests, so it is simple to grow them organically as we do.  
You can even dye yarn with beetroot – not something I’ve tried, but if you were lucky enough to have a bumper crop….
How to eat them?
Roasted, steamed, boiled, raw (grated into salad etc), juiced!
I have a tray roasting right now in the oven with olive oil, salt and pepper, so easy.
The leaves can be used like silverbeet or spinach. My favourite way to eat them is either tossed and chopped into a stirfry or steamed lightly and served with extra virgin olive oil, organic apple cider vinegar and salt and pepper.

Filed Under: Uncategorized Tagged With: frugal living, Gardening, Recipes and food

3 ways to save money today – Volume 6

by Kelly Leave a Comment

Today I’m focusing on grocery shopping and how to make more savings on your regular shop. This is all about thinking outside the square.

1. Shop around. Oh no, what a pain! I hear you say, but if you’re serious about saving it can be done without too much trouble. For example, today I did a large shop at Coles – where I look for specials and clearances. Not many of the items I buy there are full price. Then I walked over to the Indian grocers in the same shopping complex, and instead of buying 1kg of natural yoghurt at Coles for $6+, I bought a 2kg bucket of good quality natural yoghurt for $6.  Indian or Asian grocers also have bulk spices at excellent prices.

Image credit

2. Share the burden. Following on from the first point, shopping for a family is much easier if the burden can be shared. Although I do the regular supermarket shop, my husband’s work is in an area with many Asian fresh food markets and ethnic stores. Most of our fruit and vegetables come from these markets (he shops during his lunch break or when he gets a spare minute) at roughly half the cost of the supermarket! The added benefit of this is that the markets have a massive turnover and produce is so incredibly fresh that it puts the supermarket fruit & veg sections to shame.

Image credit

3. Meat is so expensive. And don’t even get me started on fish (I could write a whole other post about the terrible waste and inflated prices within the commercial fishing industry). Meat is generally cheaper and fresher from the butcher. There have been times we have had the opportunity to buy very affordable meat through buying a whole sheep slaughtered, cut up and packaged and then sharing the cost with someone else and dividing the meat between us.
We also at one time had our own cows that were kept at my husband’s family farm and had some fabulous fresh and economical meat that way.
If you have a deep freeze, you can always ask a butcher whether there would be a discount for bulk meat.
It goes without saying that meat consumption on a budget comes down to the cuts you choose. We choose the cheapest cuts and cook accordingly, steak is a special treat.
We also have at least a few meat free days each week. Doing this allows us to afford organic free range chicken and pork (we refuse to eat caged animals pumped full of hormones or intensely farmed animals – in my opinion it’s not natural and not what God intended by providing animals for our food).

                                                                    Image credit


So what do you think? Could any of these points save you some money on regular grocery shopping? There are so many other points to make, but perhaps I’ll save them for another post šŸ™‚

Filed Under: Uncategorized Tagged With: frugal living

3 ways to save money today – volume 5

by Kelly 1 Comment

1. Menstrual products
Perhaps not a topic that many want to discuss publicly, yet something that many (dare I say most?) women waste money on every single month. A couple of years ago I switched from tampons (cringe!) and commercial pads to menstrual cups and cloth pads. Wow, what a difference! The cloth pads I make myself and they are easy to wash, comfortable, customisable according to your flow needs and last a really long time. They don’t go into landfill either.
If you’ve never tried or even heard of a menstrual cup (like me a couple of years ago) I recommend you start researching! At $40 – $70 each they might seem expensive but with proper care 1 cup can last years. If the idea of using one seems strange to you, might I suggest it is far less strange and much more hygienic and practical than a soggy old tampon. Sorry, I know that’s gross, but that’s exactly my point! Some brands of cup are DivaCup, The Keeper, Lunette and there is even an Australian made one called Juju.

2. Loyalty rewards
If you tend to frequent the same places for shopping, check out their loyalty reward programs. I do our grocery shopping predominantly at Coles, so I use the Flybuys program. Basically, I get points just for shopping at Coles and the points I convert into gift cards. It’s really worth doing and costs nothing.

3. Eliminate use of dryer
It’s a bit of extra work and organisation to live without a dryer, but unless you live in a very cold and wet climate, you can live without a dryer. And save lots of money in electricity šŸ™‚

*Disclaimer – These posts are based on my own personal opinions. I do not receive any payment for these opinions and it is not my intention to promote any particular product.

Filed Under: Uncategorized Tagged With: frugal living

If it’s not useful or beautiful….

by Kelly 2 Comments

…get rid of it!

When we bought our first home 8 years ago it came with a dishwasher. No house I ever lived in up until this point had a functional dishwasher, so it was quite a novelty when we moved in. But it never really worked that well. I’d find myself re-washing many of the dishes and ended up only using it very occasionally. And in my present frugal state of mind I think a dishwasher uses far too much water.

Besides, our kitchen is small and space is a premium, so even though some people may think we have taken leave of our senses (hey, it’s not the first time, I’m sure it won’t be the last!) the dishwasher had to go!

Before

After

What a lot of space a dishwasher takes up! I made a little curtain with some bright and happy fabric and I now have a storage space for bins, the dustpan and whatever else I end up storing there.

Filed Under: Uncategorized Tagged With: frugal living, home making

Easy coconut rice pudding in the slow cooker

by Kelly Leave a Comment

In my current enthusiasm for frugal living I’ve been making an extra effort to use up ingredients, either leftover in the fridge or pantry. Today’s perusal of the fridge found a cup of coconut milk leftover from a previous meal, then a brief hunt in the pantry gave me a choice of 3 opened packets of arborio rice (why oh why?!!)

And so, this easy recipe was born!

Not the best photo, sorry about that.

5 handfuls of arborio rice
1/3 cup sugar (optional for sweetness)
1 teaspoon vanilla extract
1 tablespoon butter
250ml cup coconut milk
700ml milk
Cinnamon and nutmeg to taste
Sultanas (optional)
Place all ingredients except sultanas in the slow cooker, stir and turn on low. Check every half hour or so and give it a stir. If it seems to have absorbed a lot of liquid, stir in a little more milk at a time. I didn’t need to do this, but it’s possible your slow cooker is different to mine. Leave it cook, testing the rice for doneness (I think mine took about 2 hours). When it seems nearly done, add the sultanas.
Serve warm to hot with ice-cream.
So easy!

Filed Under: Uncategorized Tagged With: frugal living, Recipes and food

Back to frugality

by Kelly 4 Comments

It’s over a year since we paid off our mortgage and although we declared nothing would change for us financially I have felt recently that my former frugality has slipped in some areas. So, off to the library I went (costs nothing!) and borrowed some of my favourite frugal books to re-read. “Down to Earth” by Rhonda Hetzel is just a fantastically encouraging read and I’ve also found “Saving Mum” by Amy Pleydon and Tiana Johannis to be very helpful.

I’m making getting back to frugal living one of my top priorities and really thinking about what I do and how I do it. As a wife and mother always trying to improve my ways, I relish the challenge. So here are  the things I have done this week to reclaim a little frugality:

* Made laundry gel. I’ve used the recipe from “Saving Mum”, and it seems to work well. The gloopiness makes it a little difficult to get out of the bottle so I may have to tweak it. It is extremely cheap to make and uses easily obtainable ingredients.

* Made cleaning spray. Recipe from the same book and once again, very easy to make and works well, even in the shower.

* Shorter showers. I admit my morning showers have become a bit of a luxury but water prices keep going up so our usage needs to go down. I’m trying to cut about 1 minute off each shower for a start and not stay in for any longer than necessary.

* No water down the drain. I’ve started running water from the kitchen hot tap into a big jug while waiting for it to warm up. I’ve been amazed to find that sometimes 2 litres of water has run before it warms up! By running the water into the jug I can then repurpose it somewhere else and it isn’t wasted.

* Library overdue fees. Oh boy, I’ve become slack with this one. With 4 children each borrowing their own items ( and a Mum who is a bit of a library junkie too!) it’s hard to keep track and before I know it, I’m racking up fines for something that should be free. I’m paying extra attention to this now by keeping all library items in one place and checking my account on the internet to make sure I either renew or return books before they become overdue.

* Bread, revisited. I’m doing my best to keep up our bread requirements, another area that had fallen to the wayside a little. I need to bake 2 loaves every second to third day, so it requires planning but I feel it is well worth the effort for both health and savings.

So that’s my week of getting back to frugality and I pray that I have the time and energy to continue to build on what I’ve started. I’ll keep sharing my thoughts so that perhaps we can all get inspired together and help each other to live frugally.

Filed Under: Uncategorized Tagged With: frugal living

Making yoghurt with from a culture with an Easiyo

by Kelly 4 Comments

Some time ago I wrote this post about making your own yoghurt using store bought natural yoghurt. I do things a little differently these days by using a freeze dried yoghurt culture and an Easiyo maker. Here is what I do:
Measure out a litre of milk into the Easiyo inner container (the one on the left).

Heat the milk on the stove to 90 degrees (C), then let it cool to 45 degrees (C).

This is what the freeze dried culture looks like. A little lasts a long time as you use about 1/10th of a teaspoon per litre of milk. You can buy it from Cheeslinks. So, the next step is to whisk the culture into the warm milk.

Fill the Easiyo white container with hot water to the level recommended (you get full instructions with the maker when you buy it). Pop on the lid and let it sit for at least 8 hours, but for a nice firm set leave it longer, overnight is good. Take the yoghurt out and keeping it in the Easiyo container let it chill in the fridge.
*Variations: 
– I have successfully varied plain natural yoghurt by adding a tablespoon of honey and 1/2 teaspoon of cinnamon. Add them in at the same time as the culture.
– Add a little vanilla extract with some honey or sugar for a sweeter vanilla flavour.
-After the yoghurt is set, add fruit of your choice.
-If you like a thick yoghurt, add 1-2 tablespoons of milk powder as the milk is heating.
– I also wrote this post on making your own yoghurt cheese or spread.

Filed Under: Uncategorized Tagged With: frugal living, Recipes and food, yoghurt making

  • « Go to Previous Page
  • Page 1
  • Page 2
  • Page 3
  • Page 4
  • Page 5
  • Go to Next Page »

Primary Sidebar

Categories

Archives

Meta

  • Log in
  • Entries feed
  • Comments feed
  • WordPress.org

Copyright © 2025 Kelly Casanova Weaving Lessons on the Foodie Pro Theme