• Skip to main content
  • Skip to primary sidebar

Kelly Casanova Weaving Lessons

  • Hi! I’m Kelly!
    • Disclosure
  • Online Weaving School Class Index
    • Common account issues
    • Common technical issues
    • What do I get with a membership?
  • New to rigid heddle weaving? Start here!
    • Never heard of the rigid heddle loom?
    • How to weave neat edges on the rigid heddle loom
    • Rigid heddle weaving
    • Rigid Heddle Weaving Patterns
  • Patterns
  • Subscribe

frugal living

3 ways to save money today – volume 4

by Kelly 6 Comments

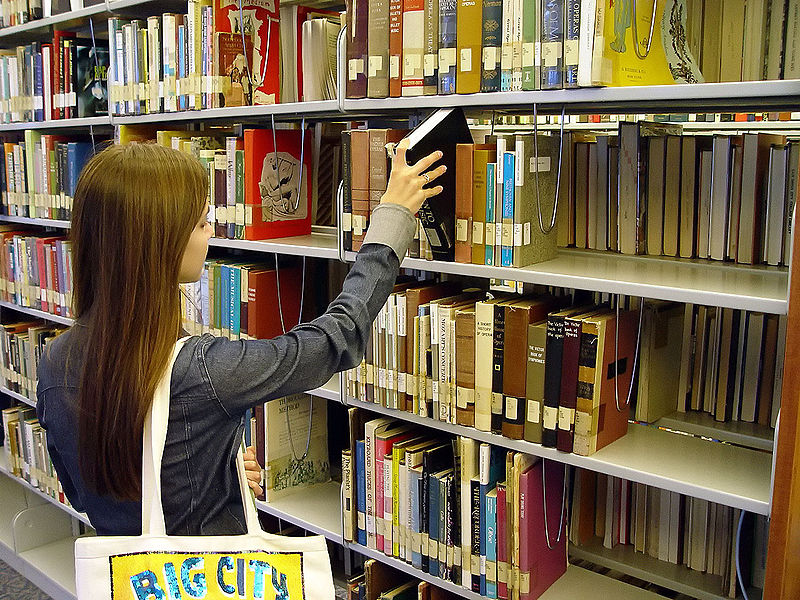
1. Become a library member.
It costs nothing but can save you thousands! Instead of buying magazines I borrow them. If I’m interested in a book I often “try it out” from the library to know whether it’s worth buying. Some are real gems but most I’m glad I didn’t shell out cash for. Oh, and don’t let your items get overdue and undo all your good savings by having to pay late fees.

                                                                                            Image credit

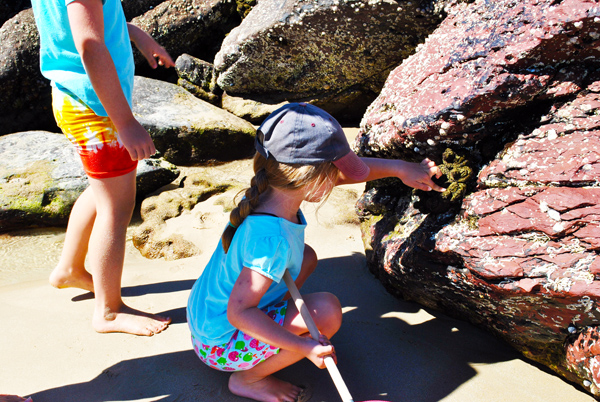
2. Find free activities for the kids.
There are so many free places to take your kids, the list is endless. Once again, our library has many activities that are free. Check your local council for events. Ask people for recommendations. Search online. And if you decide on a day trip, pack food and water so you don’t have to pay a fortune for unhealthy food.

3. Pay your mortgage fortnightly. You may have heard this before, but it really does save you more in the long run. When we had a mortgage I found it satisfying to know our debt was going down fortnightly rather than monthly too, plus it’s not so much to pay all in one hit so you’re not as likely to miss it.

Don’t forget to enter the giveaway, which ends Friday!

Filed Under: Uncategorized Tagged With: Finances, frugal living

3 ways to save money today – volume 3

by Kelly 4 Comments

1. Make your own deodorant:
 I’ve been using this for 9 months and it’s absolutely fantastic. I was a total skeptic that this would work as I’ve always felt I “needed” an anti-perspirant. I’ve been very pleasantly surprised that the body odour I was masking with those freaky chemicals simply does not exist with the natural deodorant.

1/4 cup bicarb soda (baking soda)
1/4 cup cornflour
4 tablespoons organic virgin cold pressed coconut oil (I use the Melrose brand, available in the health food section at Coles).
10 drops essential oil (optional)

Mix all ingredients together until creamy. If the oil is solid it can be melted with heat to combine with the dry ingredients more readily. After your daily shower, just rub about a choc dot sized amount of paste onto the armpit area. In hot weather, your deodorant will melt unless kept in a cool spot, I keep mine at the bottom of the cupboard in the ensuite which is a very cool room so mine only melts on really hot days. If it does melt, it won’t affect the quality, just give it a stir and pop it in the fridge until solid again.

*A note about the coconut oil. The stuff ain’t cheap ($10) a jar. Don’t let that turn you off. One jar will make several quantities of deodorant and each quantity will last ages. Compared to roughly $6 a pop for a can of anti-perspirant (if I remember correctly!) you will definitely save money using natural deodorant not to mention the huge benefit to your health.

2. Shop around for insurance.
If you’ve been with one provider for some time see if they can do a better deal. When comparing companies, write figures down and present them to possible providers (who are keen to go one better than their competitors).

3. Give regularly to charity.
What? I hear you say – aren’t we talking about saving money? You can take or leave this advice but in my experience God will provide for those who provide for others.

My wool felt order has arrived and I hope to have the wool felt donut tutorial up within the next few days. Until then, God bless you 🙂

Filed Under: Uncategorized Tagged With: Finances, frugal living, natural living

3 ways to save money today – volume 2

by Kelly Leave a Comment

1. Make food from scratch. Not only will this save you a lot of money but it will be healthier for you and your family. How often do you use a packet mix to make a meal? Or heat something from a jar? Yes, it will take extra time to cook from scratch but it is worth it for our family.

Here are some things I make from scratch rather than buy pre packaged.
Yoghurt
Bread and rolls
Pasta sauce
Casseroles or stew
Beans and lentils
Cakes and biscuits
Pizza
Hot chips

2. Buy in bulk
If there is a food item (say flour) that you use constantly and fairly quickly, see what the bulk prices are like – for most things the savings are significant.

3. Make ahead and freeze.
If you manage to get your hands on some cheap minced beef, why not buy a few kilograms and cook it all up at once, divide into freezer bags and freeze. You only have to deal with the meat once and all at one time. This means you don’t have to do the dishes for that particular meal over and over, you don’t have to turn the gas or electricity on and off as you would if cooking each meal separately and best of all your freezer is stocked with some heat and serve meals! (By the way – I’m not suggesting you eat this meal repeatedly, stretch it out over a couple of months so that you don’t all get tired of eating the same thing).

Wishing you all a happy and holy weekend, God bless you!

Filed Under: Uncategorized Tagged With: frugal living

Silkies and soap making

by Kelly 4 Comments

I have to show off Mary’s new silkies, they are so gorgeous! If you have ever considered having them, I do recommend them, especially as children’s pets. Don’t those feathers look soft, they’re more like hair than feathers. Look at those comical hair styles 🙂

I’m not sure how old they are (forgot to ask!) but they’re not laying yet, so still young.

These two are classic, they’re totally inseparable, even though the dark black one is much younger. They spend their days roaming our backyard and the best part is they don’t scratch up the garden and make a mess like the Isa browns do!

Soap making revisited. My second attempt – a different recipe this time. While the last batch of soap was nice it was nowhere near what I expect in a bar of soap. Too slimy and soft. This time I’ve opted for a castile recipe using beeswax and palm oil (sustainable of course!) to hopefully make harder, long lasting bars.

Looks like custard, the beeswax gives a beautiful golden glow and a really lovely, honeyish scent.

And finished! After resting overnight I’ll be cutting bars tomorrow, then curing for 4 weeks (that’s the worst part – waiting).

Filed Under: Uncategorized Tagged With: frugal living, hand dyed yarn, pets, soap making, Tutorials

3 ways to save money today!

by Kelly 2 Comments

1. Credit Cards.

I’ll keep saying it. Credit cards make people poor and stressed. Cut up your card now. Save for purchases instead of using credit. It’s a big trap!
Image source
2. Shopping.

Don’t go shopping without a plan. This goes for groceries, clothes, appliances – whatever you are going shopping for. Have a plan, write it down if necessary. Decide before you go how much you’re prepared to spend and stick to it. Don’t impulse buy!
File:Bundesarchiv Bild 183-28437-0002, Präsentation von Einkaufstaschen.jpg
Image source
3. Wait and reconsider.

You want to buy something. You really waaaaaant it! But do you need it? We are used to getting what we want, when we want it, right? If you decide you must have something, and particularly if it’s expensive and not a necessity, I dare you to wait (a week, a month?) See how you go without it. After the waiting period, do you still really waaaaant it? It can be worth the wait, especially if you decide you don’t actually need the item and can save the money instead.
Image source

Filed Under: Uncategorized Tagged With: frugal living

First soap batch :)

by Kelly 6 Comments

Woohoo, I finally did it! Something I’ve wanted to do but put off for years (too expensive an outlay for equipment, too scary!) Those were my excuses anyway.
After chatting with Julie I realise this was something I could do on a really tight budget. I got a cheap stockpot that was missing a lid, inexpensive silicon mould and stick blender, husband fashioned a curing rack for me out of bamboo from our backyard and probably the most expensive ingredient was the coconut oil, which I had to order online.
I used this basic recipe and found the whole process very easy (how cool to watch that beautiful saponification process!) Using lye is not fun but entirely manageable when you follow the safety precautions really carefully.
Now for the really hard part – waiting 4 weeks for the soap to cure!

Filed Under: Uncategorized Tagged With: frugal living, soap making

Cornflake slice recipe (very,very easy!)

by Kelly 10 Comments

Mother in Law’s recipes are great – these ladies who cooked on wood stoves (and my MIL still does) and fed the hungry hoards (my MIL had 10 little ones to feed) really knew what they were doing.
 
We “modern” homemakers can learn so much from their ways. This corn flake slice recipe is from my Mum in law 🙂
 
Another aspect of older recipes that I love is they were built around ingredients every Aussie housewife would have in the pantry – no special shopping trip for fancy ingredients.
 You may not have Corn Flakes in your pantry but they are readily available and one of the more affordable cereals.


Corn Flake Slice (very, very easy!)

Print Recipe Pin Recipe
Ingredients Method

Ingredients
  

  • 125 grams butter
  • 1 tablespoon honey
  • 1 cup rolled oats
  • 1/2 cup white sugar
  • 1 cup cornflakes
  • 1 cup desiccated coconut

Method
 

  1. Preheat oven to a moderate (around 180 degrees celsius or 170 fan forced).
  2. Melt butter and honey together.
  3. Add to mixed dry ingredients.
  4. Place in a shallow slice tin, press to even and flatten out a little.
  5. Bake in the oven until golden brown (about 15 minutes) and leave in tin to cool.
  6. Turn out and cut into squares.
 
Easy?
*Affiliate link
 

Filed Under: Recipes Tagged With: frugal living, Recipes and food

My bread

by Kelly 1 Comment

I’m often asked about the bread I make and I’m more than happy to share my loose recipe (from my head!) and methods. My bread is a culmination of trying a myriad of recipes over the years and finding that this way is the fastest, easiest and tastiest way to make good bread. I make all of our family loaves now and this is how:

These quantities will give you 2 small loaves.

1 cup wholemeal plain flour
3 cups unbleached plain flour (I use Wallaby)
1 tablespoon dried yeast
1 tablespoon salt
1& 1/2 tablespoons sugar (honey can also be used)
2 cups warm water
extra flour

I use the mixmaster with dough hooks because I have trouble with my wrists, but it can be mixed by hand also, which is what I used to do.
Place all dry ingredients in bowl and add water. Mix until you have a uniform wet and sticky dough. Now add the extra flour (usually 1/2 to 1 cup) and mix in. You want your dough at this point to be still a little sticky. Turn out onto a floured area and knead lightly. This part is not absolutely necessary but I find it gives me a better feel for how the dough should feel and how it will perform. I also just like the feel of it on my hands!
Oil your bowl lightly on the bottom and sides. Place dough back in and rub a little oil on top. Cover with gladwrap. Leave for 30 minutes to 1 hour, depending on your room temperature. When the dough has increased to twice it’s size remove from the bowl and knead lightly. Cut in half with a serrated knife and shape each piece into a rough ball or oblong loaf.
Place a dish of cool water in the bottom of the oven. Grease a biscuit tray and place both loaves (or you can use 2 trays if you wish). Slash the loaves 3 times on top with the serrated knife and sprinkle a little flour on top if you like the look.
Place tray in oven and turn on to 210 degrees celscius. That’s right – I don’t preheat!
On the top rack of the oven your loaf should be done in 30 minutes – you basically want it looking nice and brown and crusty.
Remove from oven and cool on a backing rack. If, like my family, you cannot resist the amazing aroma, just cut and eat with butter while it’s hot!
These loaves freeze very well. I make 4 at a time so I don’t have to bake every day.

If you try my recipe let me know what you think. Enjoy!

Filed Under: Uncategorized Tagged With: frugal living, my bread recipe, Recipes and food

Rock Cakes

by Kelly Leave a Comment

These are so simple and quick – I often make them for morning tea for the children.

2 cups SR flour
pinch salt
1/2 teaspoon mixed spice
90g butter
1/3 cup sugar
1/4 – 1/2 cup sultanas
1 egg
milk to mix

Preheat oven to 190 degrees (C) (375F). Prepare a muffin or cupcake tin with cupcake patties.

Sift flour, salt and spices, add the butter and rub with fingers until the mix resembles breadcrumbs. Mix sugar in.

Mix together sultanas and lightly beaten egg and add to flour mixture. Stir in milk until you have a thick but not dry consistency. Fill cupcake patties about 3/4 full. Sprinkle with raw sugar and put in the oven.

Bake for about 15 minutes until risen and golden brown, cool on cake racks. My kids love these hot with melted butter. Using the top of the cupcake patty pan as a guide, cut the top off your cake (as for a muffin) and spread both sides with butter. Another delicious way to have them is cooled and split with jam and whipped cream on top.

Filed Under: Uncategorized Tagged With: frugal living, Recipes and food, rock cakes

Roasted Pumpkin Soup

by Kelly 1 Comment

We have a beautiful harvest of various types of pumpkins this year so I’ve been making soup. Here is my recipe that has evolved over years of soup making! It is simple and makes a big batch.
2.8 kg pumpkin
3 potatoes (medium)
1 leek
2 onions
garlic cloves to taste (as a guide use 4ish)
2 smoked bacon bones
5 – 8 cups chicken stock

Weigh out about 1.8 kg of the pumpkin and chop into large pieces (leave skin on). Put into a roasting dish and into the oven at 180 degrees (C) for approximately 40 minutes, turning once.

Meanwhile, chop your onions and fry in a stock pot in a little olive oil and butter. Add chopped leek and garlic and stir until sweating. Throw in the chopped and peeled potato and raw, peeled pumpkin. Now remove the skin from your roasted pieces and put them in the pot too.

Add the bacon bones, stock and season to your preference with salt and pepper. The stock should be about level with the vegetables for a nice thick soup.

Allow to simmer until vegetables are very soft. Turn off and leave until the soup is warm but not boiling hot! Puree in a food processor. Serve with a dob of cream and extra pepper if you wish.

Did I mention it’s perfect with homemade bread hot from the oven?

Filed Under: Uncategorized Tagged With: frugal living, Recipes and food, roasted pumpkin soup

  • « Go to Previous Page
  • Page 1
  • Page 2
  • Page 3
  • Page 4
  • Page 5
  • Go to Next Page »

Primary Sidebar

Hand crafted boat shuttles

Categories

Archives

Meta

  • Log in
  • Entries feed
  • Comments feed
  • WordPress.org

Copyright © 2025 Kelly Casanova Weaving Lessons on the Foodie Pro Theme