• Skip to main content
  • Skip to primary sidebar

Kelly Casanova Weaving Lessons

  • Hi! I’m Kelly!
    • Disclosure
  • Online Weaving School Class Index
    • Common account issues
    • Common technical issues
    • What do I get with a membership?
  • New to rigid heddle weaving? Start here!
    • Never heard of the rigid heddle loom?
    • How to weave neat edges on the rigid heddle loom
    • Rigid heddle weaving
    • Rigid Heddle Weaving Patterns
  • Patterns
  • Subscribe

Recipes and food

Easy Cheese and Bacon Scrolls (Better than the Bakery!)

by Kelly 20 Comments

If you love soft, fluffy scrolls packed with melted cheese and crispy bacon, you’re going to love this easy cheese and bacon scrolls recipe. These savoury scrolls are perfect for lunchboxes, picnics, or a hearty afternoon snack—and yes, they taste even better than the ones from the bakery!

These homemade scrolls are made from a soft yeast dough, rolled up with layers of cheese and bacon, and baked until golden and bubbling. They’re simple to make, freeze beautifully, and are always a family favourite.

This recipe was born after my husband came home raving about a fancy bakery scroll—only to say that mine were even better! Flattered and inspired, I created this version, and they’ve been a hit ever since.

Why You’ll Love This Recipe

  • ✅ Better than bakery scrolls – soft, cheesy, and full of flavour and no preservatives or weird stuff!
  • ✅ Freezer-friendly – perfect for make-ahead lunches or snacks
  • ✅ Kid-approved – great for lunchboxes or after-school bites
  • ✅ Customisable – try adding herbs, different cheeses, or even a pizza version

Ingredients You’ll Need

  • Plain flour (or strong bread flour)
  • Yeast
  • Bacon (diced)
  • Cheese (cheddar or tasty cheese works well and parmesan adds extra flavor)
  • Butter or oil
  • Milk or water (depending on your preference)

Tips for the Best Cheese and Bacon Scrolls

  • Roll the dough tightly for defined swirls and even baking.
  • For a golden crust, brush the tops with a little milk or egg wash before baking.
  • Freeze in zip-lock bags once cooled and reheat in the oven or air fryer.
  • These are absolutely delicious when eaten warm

Storage and Freezing

  • Store scrolls in an airtight container for up to 2 days (they’re best fresh!) If eating the next day, rewarm the scrolls in the microwave or oven to soften them up.
  • Freeze for up to 3 months.

Cheese and Bacon Scrolls

Print Recipe Pin Recipe
Ingredients Method

Ingredients
  

  • 800 grams White Bread Flour
  • 1 tablespoon Dry Instant Yeast
  • 2 tablespoons White sugar or raw honey
  • 2 tsp Salt
  • 3 tablespoons Vegetable oil or butter
  • 2 cups Warm water
  • 50 grams melted butter
  • 6 rashers Bacon, chopped
  • 100 grams Grated tasty cheddar cheese
  • 35 grams Parmesan cheese

Method
 

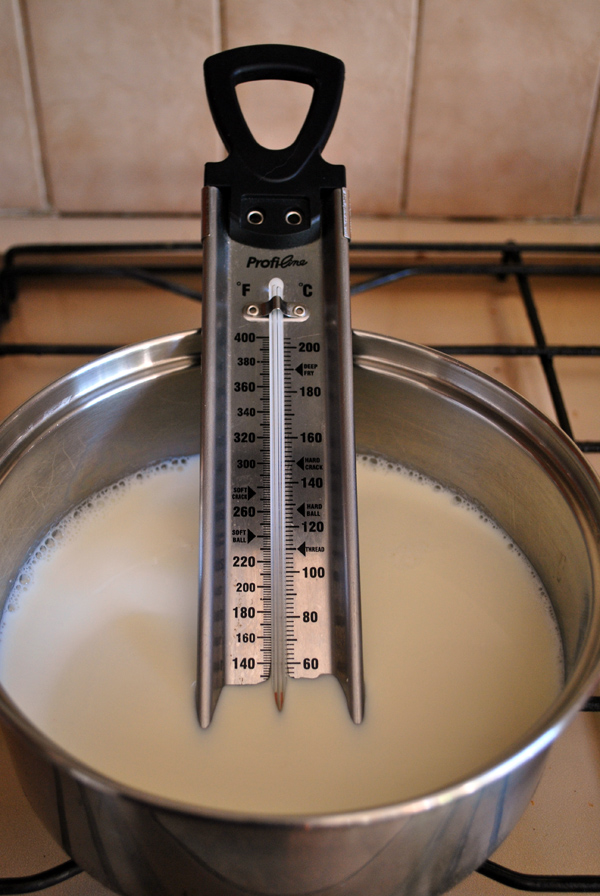
  1. Mix all dry dough ingredients and using the dough hook on your mixer, run on low for 5 minutes. If you don't have a mixer, mix ingredients with a wooden spoon and knead for 5 minutes.
  2. Place into an oiled bowl and cover with plastic wrap. Leave for about an hour to rise.
  3. Preheat oven to 220 degrees (C).
  4.  When risen, roll out dough in a rectangle (approx 45 x 35cm) on an oiled bench. Brush liberally with melted butter, sprinkle evenly with cheeses and bacon.
  5. Roll up the dough from short end to short end. Push each end in with your fingers. Cut the roll into slices with a bread knife. Each slice should be about 3cm in width. Place the pieces, cut side up in a tray lined with baking paper. Sit each slice next to another with a little space for spreading. Brush with any remaining butter and allow to sit for 10 minutes.
  6. Bake in oven until golden brown (approx. 20 - 30 minutes)
  7. Turn out onto a cooling rack. They're really delicious when eaten warm!

 More Savoury Baking Recipes You’ll Love:

  • Soft and Sweet Bread Rolls

  • Easy Flat Bread

  • Light Rye Sourdough Artisan Bread

 Over to You!

Whether you’re making these easy cheese and bacon scrolls for the family, lunchboxes, or just because you’re craving something warm and satisfying, this yummy recipe is sure to become a regular in your baking rotation. Give it a go—and let me know how yours turn out in the comments below 👇

Happy Baking!


Filed Under: Recipes Tagged With: cheese and bacon scrolls, Recipes and food

Apple choc cake recipe

by Kelly 2 Comments

This is my 8 year old daughter’s first recipe and she wanted to share it with you all. It is a seriously delicious and moist cake!
1 cup of SR flour, sifted
120 grams butter, melted
1/2 cup white sugar
1 cup whole milk
2 eggs, whisked
1 teaspoon vanilla extract
2 teaspoons desiccated coconut
1/4 cup choc dots (white or brown)
1/2 apple, diced
Pre heat oven to 170 degrees (C). Place flour, sugar and coconut in a bowl. Add milk, eggs and vanilla, whisk until smooth. Place rest of ingredients in the same bowl and stir. Place in a greased cake tin (use baking paper on the bottom to prevent sticking). Put in oven for about 40 minutes, check the middle with a skewer for doneness.
 Gem says you can eat it either iced or un-iced, we have had it both ways and it’s great with or without! Enjoy!

Filed Under: Uncategorized Tagged With: Homeschooling, recipes, Recipes and food

Fig balls paleo style

by Kelly 1 Comment

I really don’t subscribe to any particular style of eating or diet, but these balls I made today seemed best described as “Paleo style”.
I’m constantly endeavouring to come up with healthy treats for the kids (and for their sweet tooth Mum too!) The more lollies that make their way into our home, the more determined I become to steer away from them in favour of REAL food! 
For this recipe I have used nearly 100% organic ingredients and with a family of 6 this sort of food is a real treat, as it’s not cheap. However, if eating more treats like these sees you eliminating unhealthy treats, perhaps it will work out economically anyway?
12 organic dried figs
2 tablespoons honey
2 tablespoons organic, raw, cold pressed coconut oil
2 teaspoons organic cacao powder
4 tablespoons organic desiccated coconut, with extra for rolling.
Chop figs into slices and place into food processor with all the other ingredients. Process until smooth, roll into balls and roll in coconut. Hide them in the fridge, as once discovered they won’t last long!
*As many people ask where these ingredients can be obtained I am happy to share my supplier. I am not affiliated with this company and receive no payment or benefits for recommendation. I buy from Bulk Whole Foods and find their products and service very good.

Filed Under: Uncategorized Tagged With: Recipes and food

Easy Homemade Healthy Chocolate (3 Ingredients!)

by Kelly 1 Comment

Looking for a quick, clean, and delicious chocolate fix? This 3-ingredient healthy chocolate recipe is rich, satisfying, and made with simple pantry staples. It’s naturally sweetened, dairy-free, and perfect for anyone trying to reduce refined sugar without giving up dessert.

You get to choose exactly what goes into your healthy chocolate without having to read a label to find hidden nasties!

This recipe will literally take you 5 minutes and provides you with a whole batch to last.

And here’s another reason to make your own: the price of dark chocolate has more than doubled in the past couple of years! By making it at home, you not only control the ingredients—you also save money.

Whether you follow a clean eating lifestyle or just want a healthier sweet treat, this version of homemade chocolate is a must-try.

✨ Ingredients:

  • 3 tablespoons virgin organic, cold-pressed coconut oil

  • 1 – 2 tablespoons (according to taste)  unsweetened cocoa powder 

  • 2 teaspoons raw honey 

  • 2 teaspoons desiccated coconut (optional for texture and added flavor)

👩‍🍳 Instructions:

  1. In a small saucepan or microwave-safe bowl, gently melt the coconut oil and honey together, stirring to combine thoroughly.

  2. Stir in the cocoa powder until smooth and fully incorporated.

  3. Add the desiccated coconut (if using) and mix well.

  4. Pour the mixture into chocolate moulds.
    No moulds? Use a small, lined container with sides—once set, simply cut into bite-sized chunks.

  5. Place in the freezer until completely set (around 20–30 minutes).

  6. Unmould and store in an airtight container in the fridge or freezer.
    Tip: I like to keep mine in the freezer so I can grab one in the evening when my tastebuds are crying out for something sweet!

💰 Budget Bonus:

A block of dark chocolate can now cost upwards of $8 😳 —making your own with pantry ingredients is not only healthier, but also more affordable.

*This post contains affiliate links. For further information, please see my disclosure policy.

📝 Notes:

  • Customize your chocolate by adding a sprinkle of sea salt, chopped nuts, or a drop of natural peppermint or orange extract.

  • These chocolates melt quickly at room temperature if it’s warm enough —best kept cold until you’re ready to indulge.

Would you like this recipe as a printable recipe card? Simply click the link and download 😀

Homemade Healthy Chocolate Recipe Card

Filed Under: Animal Based Diet, Recipes, Uncategorized Tagged With: healthy chocolate, healthy treat, homemade healthy chocolate, Recipes and food

Beneficial beetroot

by Kelly 1 Comment

Easy to grow, highly nutritious and absolutely delicious – you haven’t really lived until you’ve eaten a freshly harvested, home grown beetroot!
Beetroot are high in folic acid, fibre, manganese and potassium. That’s just the root, the leaves are also edible (I think it would be a waste not to eat them!). The leaves are high in calcium, vitamins A and C and iron. They are also delicious! There are many other reported health benefits from beetroot consumption too.

Beetroot are easy to grow and take up little space in the garden as the leaves grow quite upright. They require minimal care and don’t seem vulnerable to many garden pests, so it is simple to grow them organically as we do.  
You can even dye yarn with beetroot – not something I’ve tried, but if you were lucky enough to have a bumper crop….
How to eat them?
Roasted, steamed, boiled, raw (grated into salad etc), juiced!
I have a tray roasting right now in the oven with olive oil, salt and pepper, so easy.
The leaves can be used like silverbeet or spinach. My favourite way to eat them is either tossed and chopped into a stirfry or steamed lightly and served with extra virgin olive oil, organic apple cider vinegar and salt and pepper.

Filed Under: Uncategorized Tagged With: frugal living, Gardening, Recipes and food

Apricot balls

by Kelly 5 Comments

I’ve been trying to make healthier treats for the kids with quality ingredients. I’m glad they are adventurous when it comes to food and are always willing to try out my experiments!
These little balls were inspired by the Apricot Bites recipe on Wholefood Simply.

Ingredients:

1 cup organic dried apricots (soak in very hot water for 20 minutes, drain, then chop into smaller pieces. If your apricots are very moist you may be able to skip the soaking part)
2 cups dessicated coconut, plus extra for rolling
1 tablespoon of raw organic cold pressed coconut oil
1 teaspoon honey
2 tablespoons of LSA mix (This is a mixture of ground linseeds (flax seed), sunflower seeds and almonds). 


Place all ingredients together in a food processor and process until smooth and the mixture is coming together. Roll into little balls, roll into extra coconut and you’re done! Keep in the fridge and try not to eat too many 😀

*A lot of people have been asking me where to buy ingredients for the healthy snack recipes I’ve been posting lately. One place is the health food section of Coles – this is ok if you just want smallish quantities to try, otherwise it can be very expensive.
Another option is Bulk Whole Foods – they have reasonable prices and post is free if your order is over $100. If you don’t want to spend that much at once, you could pool with one or several others to take advantage of the free post, this is what I did with my last order 🙂

Filed Under: Uncategorized Tagged With: Recipes and food

Healthier pikelets

by Kelly 2 Comments

1 cup SR white flour
1 cup SR wholemeal flour
1/2 cup of LSA mix *
1 egg
1/3 cup sugar
2.5 – 3 cups of milk kefir (if you don’t have kefir, then plain milk will work fine)
Whisk all ingredients together. Heat a frying pan, add some rice bran oil or coconut oil. You want the pan nice and hot (not smoking!) Place spoonfuls of the batter in the pan and cook each side until done. 
Serving suggestions:
There are so many, but here are a few family favourites.
Fresh lemon juice and raw sugar
Butter and cinnamon sugar (just mix cinnamon and sugar together in a jar)
Jam and cream
Maple syrup or honey and cream
Raspberries dusted with icing sugar
Sliced banana and honey or brown sugar
Even just plain butter is nice!
These will disappear very quickly if there are small mouths around, enjoy!
They freeze very well if you want to make extras.
*LSA mix is linseed, sunflower seed and almond meal. It is available in health shops, health food section of the supermarket or at online whole food stockists like this.

Filed Under: Uncategorized Tagged With: recipes, Recipes and food

Apple cinnamon porridge

by Kelly Leave a Comment

Soak the oats overnight in water. I always soak extra so I have leftovers, so soak as many as you want according to the number of people you’re cooking for. When ready to cook, add enough milk so that your oats look like this, almost covered. You can go mad like my husband does and add, like a litre of milk, but this means you’ll be stirring a long time. I prefer the shortcut method!
Cook over a low heat, stirring to prevent sticking.
In a separate saucepan, melt 1 tablespoon of coconut oil and throw in 1 chopped apple (any type really). Stir, then put on the lid over a low heat. Keep checking and stirring intermittently. When the apple has softened, add a sprinkle of cinnamon and a tablespoon of brown sugar (optional). The apple doesn’t have to be stewed, just softened – it takes under 10 minutes.
When the porridge is cooked, spoon into a bowl and drizzle with honey (once again – optional). Top with the apple and a little cold milk.
Enjoy!

Filed Under: Uncategorized Tagged With: Recipes and food

Easy coconut rice pudding in the slow cooker

by Kelly Leave a Comment

In my current enthusiasm for frugal living I’ve been making an extra effort to use up ingredients, either leftover in the fridge or pantry. Today’s perusal of the fridge found a cup of coconut milk leftover from a previous meal, then a brief hunt in the pantry gave me a choice of 3 opened packets of arborio rice (why oh why?!!)

And so, this easy recipe was born!

Not the best photo, sorry about that.

5 handfuls of arborio rice
1/3 cup sugar (optional for sweetness)
1 teaspoon vanilla extract
1 tablespoon butter
250ml cup coconut milk
700ml milk
Cinnamon and nutmeg to taste
Sultanas (optional)
Place all ingredients except sultanas in the slow cooker, stir and turn on low. Check every half hour or so and give it a stir. If it seems to have absorbed a lot of liquid, stir in a little more milk at a time. I didn’t need to do this, but it’s possible your slow cooker is different to mine. Leave it cook, testing the rice for doneness (I think mine took about 2 hours). When it seems nearly done, add the sultanas.
Serve warm to hot with ice-cream.
So easy!

Filed Under: Uncategorized Tagged With: frugal living, Recipes and food

Making yoghurt with from a culture with an Easiyo

by Kelly 4 Comments

Some time ago I wrote this post about making your own yoghurt using store bought natural yoghurt. I do things a little differently these days by using a freeze dried yoghurt culture and an Easiyo maker. Here is what I do:
Measure out a litre of milk into the Easiyo inner container (the one on the left).

Heat the milk on the stove to 90 degrees (C), then let it cool to 45 degrees (C).

This is what the freeze dried culture looks like. A little lasts a long time as you use about 1/10th of a teaspoon per litre of milk. You can buy it from Cheeslinks. So, the next step is to whisk the culture into the warm milk.

Fill the Easiyo white container with hot water to the level recommended (you get full instructions with the maker when you buy it). Pop on the lid and let it sit for at least 8 hours, but for a nice firm set leave it longer, overnight is good. Take the yoghurt out and keeping it in the Easiyo container let it chill in the fridge.
*Variations: 
– I have successfully varied plain natural yoghurt by adding a tablespoon of honey and 1/2 teaspoon of cinnamon. Add them in at the same time as the culture.
– Add a little vanilla extract with some honey or sugar for a sweeter vanilla flavour.
-After the yoghurt is set, add fruit of your choice.
-If you like a thick yoghurt, add 1-2 tablespoons of milk powder as the milk is heating.
– I also wrote this post on making your own yoghurt cheese or spread.

Filed Under: Uncategorized Tagged With: frugal living, Recipes and food, yoghurt making

  • « Go to Previous Page
  • Page 1
  • Page 2
  • Page 3
  • Page 4
  • Page 5
  • Page 6
  • Interim pages omitted …
  • Page 11
  • Go to Next Page »

Primary Sidebar

About Kelly Casanova

Hand crafted boat shuttles

Categories

Archives

Meta

  • Log in
  • Entries feed
  • Comments feed
  • WordPress.org

Copyright © 2026 Kelly Casanova Weaving Lessons on the Foodie Pro Theme