• Skip to main content
  • Skip to primary sidebar

Kelly Casanova Weaving Lessons

  • Hi! I’m Kelly!
    • Disclosure
  • Online Weaving School Class Index
    • Common account issues
    • Common technical issues
    • What do I get with a membership?
  • New to rigid heddle weaving? Start here!
    • Never heard of the rigid heddle loom?
    • How to weave neat edges on the rigid heddle loom
    • Rigid heddle weaving
    • Rigid Heddle Weaving Patterns
  • Patterns
  • Subscribe

Rigid heddle weaving

“Seasonal Weaving Projects: Welcome Spring with Colorful Home Décor”

by Kelly Leave a Comment

Spring is such a wonderful season, bringing with it a sense of renewal and fresh inspiration! It’s the perfect time to breathe new life into your home décor with seasonal weaving projects that celebrate the colors and lightness of the season.

Whether you’re just beginning your weaving journey or have been creating for years, weaving for spring offers endless opportunities to play with vibrant hues, pretty fabrics, and cheerful designs. From brightening up your living spaces to adding handmade touches to your décor, these projects are a wonderful way to welcome the season in style.

Let’s explore how you can bring the beauty of spring into your home with a few simple yet stunning weaving project ideas!

Spring-Inspired Color Palettes: Pastels, Floral Tones, and Fresh Greens

Spring provides weavers with so much inspiration when it comes to color – it feels like all of a sudden color is all around us, bursting to life! Here are some ideas for getting started:

  1. Pastels: Soft and Serene
    Pastels are a hallmark of spring, offering a gentle yet uplifting aesthetic. Shades like lavender, blush pink, baby blue, and buttery yellow evoke the softness of new blooms and fresh mornings. These colors work beautifully in projects where you want a light, airy feel. Pair pastel hues with white or cream for a classic springtime look, or blend multiple pastels for a dreamy, watercolor effect.
  2. Floral Tones: Bright and Cheerful
    For a bolder take, draw inspiration from the vivid colors of spring flowers. Tulip red, daffodil yellow, hyacinth purple, and rose pink can infuse your weaving projects with joyful energy. These colors work well as accents or focal points, especially when paired with more subdued tones like gray or beige to balance their brightness.
  3. Fresh Greens: A Nod to Nature
    Nothing says spring quite like green! From soft sage to vibrant emerald, green hues symbolize growth and renewal. Incorporating fresh greens into your weaving not only mirrors the season’s natural beauty but also adds a grounding element to your designs. Pair greens with floral tones for a garden-inspired look or mix them with neutrals for a calm, earthy feel.

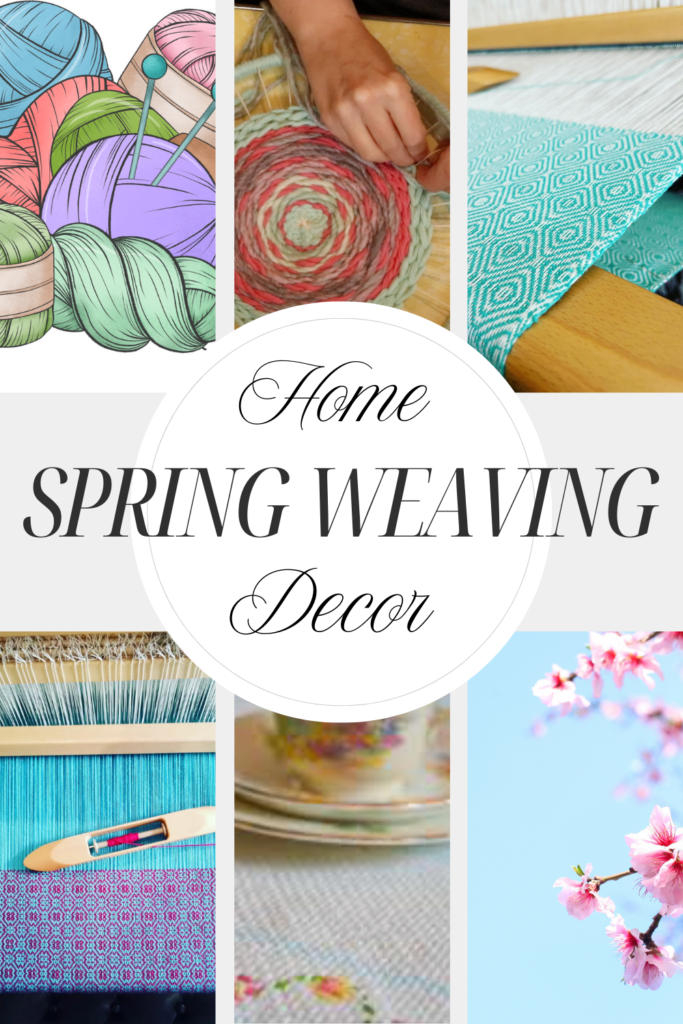
Project Ideas for Spring Home Décor

Many of us dive into spring cleaning with a strong urge to refresh our spaces and embrace the opportunities of a new season. Why not channel that same spirit into weaving projects that enhance your home with clean, airy, and light-filled aesthetics? From soft textiles to cheerful pops of color, weaving offers endless ways to complement the fresh start spring inspires.

  1. Handwoven Table Runners
    • Perfect for springtime gatherings or brunches or just to show off your shiny clean dining table!
    • Try a beautiful, light cotton or cottolin.
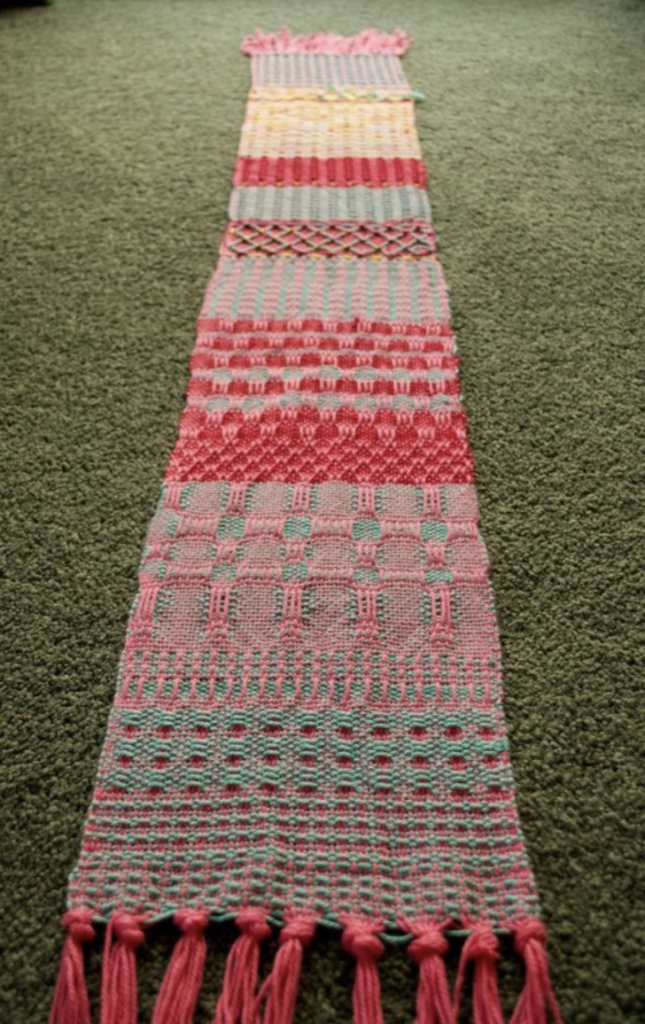
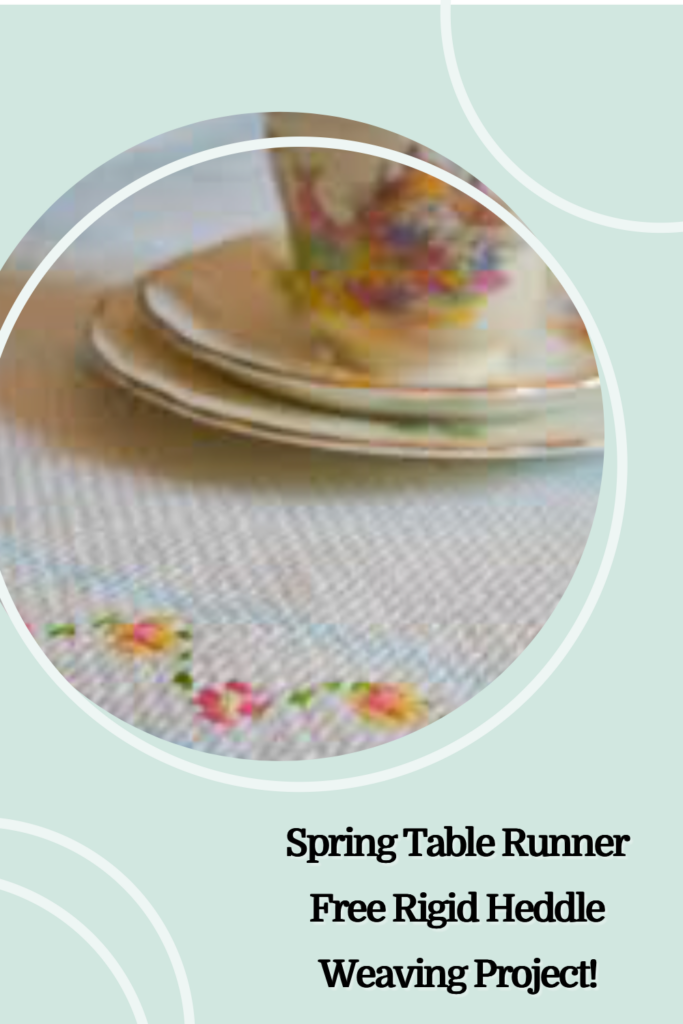
    • My free rigid heddle weaving project, The Spring Table Runner incorporates soft cottons in light colors with floral embroidered embellishments.
    • The Log Cabin Table Runner is also a great project for this time of year with a bold design and customisable colors.
  2. Wall Hangings with Floral or Abstract Pastel Themes
    • A pop of colour or harmonious artistic piece to adorn your wall.
    • There is so much licence for creativity when you weave a wall hanging. It can be completely understated to blend with your surroundings or it can be a bold stand out piece.
    • The Art Cloth Workshop is the perfect starting point for a truly unique project that could easily become a wall hanging.
    • If you’re interested in circle weaving, a round hoop also makes a unique decor piece.
  3. Lightweight Throw Blankets
    • Ideal for chilly spring evenings. You might feel it’s too soon to be thinking about blankets, but as the season moves towards winter those evenings can be quite cool. How lovely to think of cosying up with a blanket that is light and soft.
    • Use breathable fibers like bamboo or cotton blends that are lovely and soft.
    • Here are some project ideas to inspire:
    • Overshot Floor Loom Throw
    • Double Width Baby Blanket
    • Double Width Plaid Blanket
    • Double Width Floor Loom Blanket
  4. Weaving Cushion Covers
    • Create textured or patterned cushions with bright pops of color. This is such a fantastic way to bring splashes of color that draw the eye but don’t overwhelm.
    • There are many possibilities for design, from a simple and classic plain weave to a more busy twill to a show stopping overshot.
    • The Pick Up Perfection Class project is a gorgeously contrasted cushion cover using thick and bold cottons.
  5. Light Spring Scarf
    • You may not be ready to rug up with a wooly winter scarf just yet but how about transitional garments?
    • The Garden Path Scarf is great for this time of year as the design has a very light, airy and open texture.

Quick Spring Weaving Tips

  • Move outdoors! If you have a loom that is portable, try taking it outside when the weather is pleasant. Weaving outdoors is a wonderful way to relax, enjoy the fresh air and birdsong.
  • Try something new! Experiment with patterns like stripes, plaids, color and weave and so much more.
  • Clean and organise your weaving space! Nothing makes you feel more motivated than a well arranged space where you can find what you need and know what materials you have to work with.

Find your Style

  • Make a Spring Inspired board on Pinterest. Check out what other weavers or interior designers are working on and be inspired by them.
  • Take photographs, especially outdoors. Then you can use an app to generate a color palette for you based on your photo!
  • Get familiar with the basics of color theory.
  • Use online resources like color generators or spring color palette choosers to help you choose colors you love.
For this color palette I used the app Palette Cam and one of my photos from our garden.

As the days grow warmer and nature comes to life, there’s no better time to embrace the season with your own handmade creations. Spring is all about renewal, and weaving allows you to infuse your home with fresh colors, light textures, and a touch of personal artistry. A change in the season is a wonderful opportunity to recharge and reassess. So gather your materials, let your creativity flow, and welcome spring with the beauty of your handmade décor!

Until next time…

Happy Weaving!

Filed Under: Art cloth, Rigid heddle weaving, Spring Weaving, Weaving Tagged With: home decor, seasonal weaving projects, spring weaving, weaving project ideas

How to Use Pick-Up Sticks: Unlock New Possibilities on Your Rigid Heddle Loom

by Kelly Leave a Comment

Pick-up sticks are a game-changer for rigid heddle weaving. These simple tools expand your loom’s capabilities, allowing you to create intricate patterns beyond plain weave. Whether you’re a beginner or looking to elevate your skills, this guide will help you understand how to use pick-up sticks effectively.

What Are Pick-Up Sticks?

Pick-up sticks are flat, smooth lengths of wood designed to manipulate warp threads on your loom. They allow you to create patterns that mimic the capabilities of multi-shaft looms without adding complex equipment.

On a rigid heddle loom, the warp is divided into two “shafts”—slot threads and hole threads. By incorporating pick-up sticks, you can manipulate the slot threads to create additional “shafts,” opening up a world of pattern possibilities.

Why Use Pick-Up Sticks?

  1. Expand Your Weaving Capabilities:
    • One pick-up stick = 3 shafts.
    • Two pick-up sticks = 4 shafts.
    • Add more for even greater complexity!
  2. Create Beautiful Patterns:
    From simple designs to intricate motifs, pick-up sticks make it possible to weave beyond plain weave.
  3. Learn, Experiment and have Fun:
    They’re an excellent way to play, experiment, and grow as a weaver.

How to Use Pick-Up Sticks

Tools You’ll Need:

  • Pick-up sticks: Slightly longer than the width of your warp.
  • Rigid heddle loom: Set up for plain weave.

Step-by-Step Guide:

  1. Start with the Heddle in the Down Position:
    • This raises the slot threads (shaft 2), making them easier to pick up.
    • The hole threads (shaft 1) remain fixed and cannot be manipulated.
  2. Pick Up Warp Threads:
    • Slide your pick-up stick under the threads you want to manipulate.
    • For basic patterns, follow a “1 up, 1 down” sequence (alternate threads over and under the stick).
  3. Position the Pick-Up Stick:
    • Push the stick to the back of your loom when not in use. It will rest flat between the warp threads without interfering with your weaving.
  4. Engage the Pick-Up Stick:
    • When ready to weave a pick-up pattern, bring the stick forward, turn it on its edge, and pass your shuttle through the shed.

Here is a simple weaving sequence as an example:

  1. Up (heddle up)
  2. Down (heddle down)
  3. Up, pick up stick (heddle up and slide pick up stick behind the heddle, leaving flat).

Tips for Beginners

  • Experiment Freely: Don’t worry about understanding all the technical details at first. Play with different sequences and see how the patterns emerge.
  • Follow Patterns: Written instructions like “1 up, 1 down” are straightforward and a great way to learn.
  • Start with Simple Projects: Try my Wash Your Hands Towel Set Project or Lux Hand Towels pattern for guided practice.

Explore More Pick-Up Stick Resources

  • Free Patterns: Sign up for my email list and receive the beginner-friendly Moroccan Dream Scarf pattern.
  • Video Tutorials: Watch my Pick-Up Stick Playlist on YouTube for step-by-step instructions.
  • Courses: Dive deeper with my Pick Up Perfection course, included free with an Online Weaving School membership or available as a single purchase class.

Why You’ll Love Pick-Up Stick Weaving

Pick-up sticks let you unlock the full potential of your rigid heddle loom. Whether you’re weaving a simple scarf or an intricate towel, these tools are a must-have for any weaver.

If this guide has been helpful or if you have questions, leave a comment below—I’d love to hear from you!

Until next time…

Happy Weaving!

*This post contains affiliate links. For further information please view my disclosure policy.

Filed Under: Rigid heddle weaving, Rigid Heddle Weaving Patterns, Weaving Tagged With: how to use pick up sticks, pick up sticks, rigid heddle weaving

Troubleshooting Common Rigid Heddle Weaving Issues

by Kelly Leave a Comment

Weaving on a rigid heddle loom is an incredibly rewarding craft, but it’s not without its challenges.

Like learning anything new, time and patience are necessary to achieve your goals.

Something I have observed in my years as a weaving teacher is that most new weavers will experience the same issues that require troubleshooting. This is actually a good thing!

From a teaching perspective, I can identify problems that weavers are having very quickly by just looking at their work. And from a learning perspective, many weavers have gone before you with the same mistakes cropping up and there are many resources available to learn from to figure out where you went wrong.

Weaving should be relaxing, but common issues can unravel your peace.

Whether it’s uneven edges or frustrating warp tension issues, these common hurdles can leave weavers scratching their heads and feeling a bit disillusioned with the whole thing! The good news is that many of these problems are preventable with a little extra care, preparation and experience.

In this guide, we’ll explore why starting with a well-tensioned warp is essential, how patience in the setup process can save you from headaches later, and why taking the time to learn and reflect will make you a more confident and skilled weaver. Let’s turn those troubleshooting moments into learning opportunities!

1. Why a Well-Tensioned Warp is Non-Negotiable

I have no data to qualify this statement, but I feel confident is saying that at least 90% of negative issues encountered in the weaving process are due to something being off with the warp.

Consistency is more important than firmness of tension.

By this I mean that in the warping process you should aim to have all of your warp threads under approximately the same amount of tension, or as near as you can get it.

It’s no good achieving great tension on your edge threads and poor tension in the middle. Or vice versa. The idea being that if your tension is consistent while warping you can then focus on the tightness of the tension afterwards and all the warp threads will be under the same amount of tension.

Uneven tension causes a huge range of headaches to the weaver. Skipped threads, inconsistent edges, uneven or wavy weft picks, snagged or diving shuttles, heddle positions not holding correctly… I could go on!

  • How to achieve great warp tension: 

There are so many methods for warping your rigid heddle loom and it’s definitely not a “one size fits all” process. In my last article I discussed the importance of great warp tension in more detail, so be sure to check that out.

I also recommend that you check out this playlist on Youtube for a variety of methods to consider:

  • Quick tips for achieving good tension:
    • Adjust tension gradually and evenly.
    • Test warp tension by bouncing your hand across the warp once it’s tied on.
    • Separate your warp prior to weaving
    • Take your time and explore different methods to find one that works well for you.

2. The Virtue of Patience in Setting Up Your Loom – Don’t Rush!

There are many things in life that can be rushed and completed quickly. Weaving is not one of them 😆 Rushing will inevitably cause mistakes due to overlooking an important step or process, trust me on this one!

There is so much more to weaving than simply throwing a shuttle back and forth.

There is the planning of the project, sampling if necessary to ensure appropriate yarns and setts. There is the careful warping, threading and readying of the loom prior to weaving. There is the double checking to ensure correctness of threading and steps (especially important for newer weavers!) And that is all before we actually get to the weaving!

Embrace the process:

  • If you feel impatient initially, try to let the process envelop you and teach you to go slowly.
  • Setting up the loom is an integral part of the craft, enjoy it!
  • Take breaks if you feel frustrated—it helps avoid costly errors and gives you a breather.
  • Try to do your warping in a space where you can leave the loom if needed.

  • Tips for setup success:
  • Create a checklist for each setup stage so you don’t miss any steps.
  • It can be great to have a helper for your first project at least. They can hold the warp for you so you don’t have to focus on more than one thing at once. Another set of eyes can also help to pick up errors you may overlook.

3. Giving Yourself Time to Learn and Reflect

This ties in very closely with the last point on patience, but is less about the physical weaving and more about your learning journey.

We all learn in different ways and to be effective we need to give ourselves a lot of grace when learning something new. Perhaps you are the type of learner who just “get’s it” right away or perhaps you are more like me and need more time.

One thing that I do frequently, and have since I started weaving, is to grab one of my weaving books off the shelf and quietly flick through to see what strikes me that day.

Repetition is so good and necessary for learning. There have been many concepts that I had convinced myself I was not smart enough to learn, but it just takes persistence and not giving up on yourself.

Weaving is a journey, not a race:

  • Learning takes practice; each project builds skills. Start small and grow as you go.
  • Mistakes are opportunities to learn and grow.

Tips for cultivating a learning mindset:

  • Keep a weaving journal to note challenges and solutions.
  • Reflect on what worked and what didn’t after each project, and why.
  • Seek out advice and resources from weaving communities.
  • Have good quality books in your weaving library to refer to over and over.

4. Troubleshooting Common Issues (and How to Avoid Them)

These are what I see to be the most common issues that new rigid heddle weavers will encounter:

  • Uneven edges (selvedges):
    • Causes: inconsistent tension, improper beating, fraying edge threads, inappropriate warp threads used.
    • Solutions: Ensure proper warp tension to begin with, try to beat evenly, be sure to use a yarn that is suitable for warping. If edge threads are too loose, try using weights on those threads over the back of the loom. If they are too tight and middle threads are looser, try some wedging techniques as demonstrated in this video.
  • Broken warp threads:
    • Causes: tension too tight or uneven (so some threads end up super tight while others are loose), friction from the heddle (some yarns are more susceptible to this than others).
    • Warp yarn is not strong enough to be suitable for warping.
    • Solutions: choose a suitable warping yarn, ensure warp tension is not exceedingly tight, angle your weft before beating so it has room to settle rather than drawing in too much at the edges.
  • Skipped threads:
    • Causes: threading errors, uneven tension, incorrect angling of a stick shuttle as it travels through the thread. These problems will create floats and imperfections in your work.
    • Solutions: check threading, rethread problem areas if needed. Be vigilant with how you use your shuttle so it’s not inadvertently picking up warp threads it shouldn’t.
  • Gaps, uneven and slightly scrapping weaving:
    • Causes: uneven beat, inappropriate sett, slippery yarns.
    • Solutions: Getting a feel for a correct beat takes time and practice. For a balanced weave, you want a balanced beat. Try to think of pressing your weft into place, we are not whacking here! Hop up and view your work from a few different angles every now and then. Take photos of your progress and review. (Why? For some reason, mistakes stick out like a sore thumb when viewed as a photo! 🤷‍♀️) Again, an uneven warp will impact how your weaving appears. An incorrect sett will have a big effect on your finished weaving, so make sure you figure out the ideal sett before commencing.

It’s good to remember that challenges are part of the weaving journey. I have never personally made a weaving mistake that I couldn’t fix, which is very encouraging!

Having a community to turn to when your weaving is not going so well is invaluable. If you can’t meet with other weavers in person, online groups like my free Facebook group are wonderful for networking and inspiration.

Perhaps you’re ready to level up your weaving in a really supportive atmosphere with a library of online classes at your fingertips? Check out the Online Weaving School!

I hope these tips have been helpful to you, feel free to share your favourites in the comments below.

I have also put together a downloadable Rigid Heddle Loom Setup Checklist as a free resource just for you, enjoy!

Rigid Heddle Loom Setup ChecklistDownload

Until next time…

Happy Weaving!

Filed Under: Free tutorial, Online Weaving School, Rigid heddle weaving, Weaving Tagged With: rigid heddle loom setup checklist, rigid heddle troubleshooting, rigid heddle weaving

Why Rigid Heddle Looms Are Perfect for Creative Souls

by Kelly Leave a Comment

For those with a passion for creativity, the rigid heddle loom can be a tool that bridges the gap between artistry and craft. Whether you’re a fibre art novice or an experienced weaver looking for freedom, this versatile loom opens up endless possibilities for expression.

Here’s why rigid heddle looms are the perfect companion for creative souls:

1. Simplicity Meets Flexibility

Rigid heddle looms are delightfully simple. They’re approachable for beginners with minimal setup, yet they offer flexibility for more complex weaves. This combination gives creative minds the freedom to experiment without getting overwhelmed.

Once you have the basics down you can choose to either keep your rigid heddle weaving simple or expand in a multitude of ways.

  • Perfect for Play: Quickly try new yarns, colors, and patterns. Many weavers will use a rigid heddle loom like a Sampleit to weave either small items (it’s wide enough to weave a scarf!) or just to try out new yarns, setts and patterns by simply sampling.
  • Faster Gratification: Small projects can be finished in a day, sparking momentum for your next idea. A rigid heddle loom is super fast to warp and thread, letting you get to the weaving quickly!

2. Portable Weaving Freedom

For those who see creativity as a lifestyle, portability is key. Rigid heddle looms come in a great variety of sizes and the smaller ones are compact and lightweight, making them ideal for:

  • Creating at home (even if you’re lacking space), on vacation, or during creative retreats.
  • Weaving wherever inspiration strikes—your studio, living room, or garden.
  • Taking your loom out to guild or weaving group meet ups

3. A Canvas for Color and Texture

Rigid heddle looms provide so much opportunity for experimentation with colour, texture, and yarn. They’re a dream for fibre artists who:

  • Love mixing hand-dyed yarns, textures, or even unconventional materials.
  • Enjoy colorwork techniques like stripes, gradients, and clasped weft weaving.
  • Love the idea of weaving with their handspun yarn

Your loom becomes a blank canvas ready to showcase your artistic flair, however that may look for you!

4. Affordable and Accessible

Rigid heddle looms are among the most budget-friendly looms available, making them perfect for creatives who want to dip their toes into weaving without a hefty investment. With only a starter rigid heddle loom, shuttle, and some yarn, you’re ready to create.

Rigid heddle looms are used by many weavers who have mental or physical disabilities as they are so accessible.

Rigid heddle looms have great resale value. If you find that weaving is not for you, you decide to upgrade or your circumstances change, it is not hard to find a keen buyer.

5. Endless Room for Growth

Creative souls crave new challenges. The rigid heddle loom grows with you:

  • Simple Techniques: Start with plain weave. You can begin with solid coloured yarn or switch it up with different colours or variegated yarn.
  • Building Skills: Explore colour and weave. Add pick-up sticks, hand-manipulated lace, or tapestry-style accents.
  • Advanced Exploration: Try double heddle weaving for more complex patterns. You can even weave with three or more heddles or make extra shafts with pick up sticks and/or heddle rods.

6. Mindful Creativity

Weaving on a rigid heddle loom is a soothing, meditative process. The rhythmic movement of the heddle and shuttle creates a sense of peace and relaxation. Many weavers find that weaving helps them through difficult life periods as it switches their focus as they become immersed in the process.

  • Calm your mind and relax after a busy day.
  • Find joy in slowing down and savoring each thread you weave.

7. Small Loom, Big Potential

Rigid heddle looms encourage small projects that inspire big ideas. Scarves, wall hangings, table runners, or even fabric yardage—every project becomes a mini-experiment in design.

A huge variety of yarns can be used with a rigid heddle loom. I usually recommend that new weavers start out with some inexpensive and simple knitting wool around a dk weight, which is perfect for the 7.5 or 8 dent heddle that comes with your loom.

Knitting yarns are very accessible, whether you purchase online or in a physical store and the choices for colour and style are massive.

Unleash Your Inner Artist

Whether you’re a painter, knitter, a maker of all kinds, or don’t even consider yourself to be creative, rigid heddle weaving invites you to think outside the box and inside the loom. Let your creativity flow as you blend fibers, colors, and techniques into one-of-a-kind masterpieces.


Ready to try weaving? A rigid heddle loom might just become your next favourite creative tool. I have so many resources to get you started!

Check out my best selling Beginner Rigid Heddle Weaving Online Course to learn all about your rigid heddle loom and weave a beautiful placemats project from start to finish.

“Kelly, thank you very much for this course. I watched a trillion of free youtube tutorials before deciding to take your course. All is in the details! For so many little problems a beginner can meet you are giving explanations and solutions. Much worth its money.”

Frieda

_________________________________________________________________________________________

You will also find many helpful articles to explore right here.

And don’t forget to check out my Youtube channel for hundreds of rigid heddle beginner friendly videos:

Until next time…

Happy Weaving!

Filed Under: Rigid heddle weaving, Weaving Tagged With: beginner rigid heddle weaving, creative souls

5 easy rigid heddle weaving projects for beginners

by Kelly Leave a Comment

Getting your very first rigid heddle loom is such an exciting experience! There are so many possibilities but at the same time, so much to learn.

It’s important to choose projects that are going to be suitable for your weaving level. Be realistic, we all start as absolute beginners and it makes sense to start with an easy project.

This will help you to start to get to know your loom without the stress and pressure of needing to weave at an advanced level.

Here is a list of 5 easy rigid heddle weaving projects for beginners to get you started.

  1. A SAMPLER

A sampler is not necessarily a finished, functional object but it will teach you so very much! Not only does it give you a chance to get familiar with your new loom, it also allows you to try out yarns, practice your weaving and get a better idea of what to expect.

Yes, you do need to use a bit of yarn to warp up a sampler, but I look at it the same way I would look at purchasing a weaving book or class. It’s an investment in my own weaving journey.

Very early on in my rigid heddle weaving journey, I warped a fairly long warp (for a sampler), grabbed my copy of Jane Patrick’s The Weaver’s Idea Book, flipped through until I found something I wanted to try and just went for it!

This was such a valuable project for me, just look at the variety of designs, yarns and colours I got to try! Many from the book, many were my own experiments. I still think of this project, all these years later, as one of the most fun I’ve undertaken.

A sampler can also become a useable item if you wish – a small purse, a mug rug, a notebook cover, there are lots of possibilities.

2. PLACEMATS

Placemats are such a perfect beginner’s project. They look great in plain weave and if you want to jazz them up you can always use a fun variegated yarn. Placemats are also a great opportunity to practice finishing techniques, whether that is by knotting, hemstitching or hand hemming and machine stitching.

In my beginner rigid heddle class we complete some simple but beautiful placemats. This is my most popular class as it shows you how to take a bare rigid heddle loom and complete a woven project. You are guided through, step by step on warping, threading, weaving and completing the project as well plenty of tips and encouragement along the way.

3. TOWELS

Towels can be a little like an overgrown placemat, and can be a simple project for newer rigid heddle weavers. I do have some advice though, as not all towels are created equal!

As a beginner, I do not recommend that you try to launch into your first towels with a thin and light yarn, like 8/2 cotton. It is better to get some experience and practice under your belt first, as generally a lighter yarn is more challenging to use with a rigid heddle loom.

However, weaving towels with a thicker cotton yarn can be a wonderful experience. Again, you can make it as simple as plain weave or you could incorporate either warp or weft stripes (or both!)

A thicker cotton will result in a light hand towels rather than a kitchen/dish towel.

My free project, the Wash Your Hands Towels pattern could be just what you’ve looking for. While some of the techniques may be considered a little more advance (like pick up sticks and colour placement) the weaver has the option of weaving both towels in plain weave if not ready for other techniques.

Some of the cottons that are suitable for this kind of towel would be:

Bendigo Woollen Mills 10ply cotton

I Love This Cotton

Sugar n Cream

Knit Picks Dishie

4. NOTEBOOK COVERS

Notebook covers in their most simple, low sew format are just a rectangle. The fun thing about a project like this is it can really be customised to reflect your own tastes. You can use a variety of yarns in plain weave and it just looks fantastic.

If you wove a sampler that was large enough, you could repurpose that as a notebook cover too!

If the thought of sewing with your hand woven fabric is a bit scary to you, rest assured that it can be a very simple process. If you have a needle and thread, that is enough!

Check out my free Notebook Covers project which guides you through the full process, from weaving the fabric to fitting and sewing it to an existing notebook, all the information is there for you.

5. FREESTYLE TAPESTRY

Oh boy, is this fun! The idea is similar to weaving a sampler, but this time you are weaving a weft faced item.

What on earth does that mean?

It just means that you’re going to use an additional beater (a household fork works just fine!) to beat your weft down to cover all the warp threads.

So, all the colour, texture and excitement happens in the weft threads.

What I really love about this kind of project is you need very little pre-planning and all the designing can be done on the loom, if you want to.

You get to use a variety of yarns from your stash and you have pretty free reign, as long as the weft packs down and stays down, you’re good to go!

Your design could be planned and pictorial or completely abstract and “made up on the spot”.

My free Freestyle Tapestry series was designed on the loom, just by building colour, bit by bit. My Van Gogh inspired tapestry was a little more planned but followed very similar principles.

I even have a Tapestry on a Rigid Heddle Loom online class that shows you basic tapestry techniques to get you started.

I hope you feel super inspired by these 5 easy rigid heddle weaving projects for beginners!

Until next time…

Happy Weaving!

This post contains affiliate links. Please see my disclosure policy for further information.

Filed Under: Rigid heddle weaving, Rigid Heddle Weaving Patterns, Weaving Tagged With: rigid heddle loom, rigid heddle weaving, rigid heddle weaving patterns, rigid heddle weaving tutorial

3 ways to level up your rigid heddle weaving

by Kelly 8 Comments

We all know that the humble rigid heddle loom is capable of a lot more than first meets the eye. That is why it’s such a wonderful loom for beginners – you can use it for it’s most basic function (plain weave) to begin with and increase your skills and exploration from there.

Many newer weavers though, are unsure of exactly what they can do with a rigid heddle loom. Or, on the other hand, there seems so much you can do but they are unsure of what to choose?

A bit of fear comes creeping in from a lack of confidence. “What if my skill level isn’t ready for the next step?” “What if I mess it up and lose my confidence entirely?”

These are really valid concerns that are common to many newer weavers. That is why I encourage new rigid heddle weavers to build skills in steps rather than leaps. Some weavers are ready to leap – many are not.

So, how does the fledgling weaver get his/her wings?

By taking off slowly. First the steps, building up, quickening as you go until you’re finally ready to stretch out those wings and fly.

If you feel like you’re in a bit of a rut with your weaving or you’re unsure of what to try next, here are a few suggestions to get those creative juices flowing!

Pick up sticks

Grab a pick up stick and hop to it! Pick up sticks are so easy to use but can totally transform your weaving. For my first foray into the pick up stick world I just put on a warp (not too long, not too wide) and just explored.

At its most basic level, pick up stick weaving can be started by placing your heddle in down and picking up whatever threads you like behind the heddle. I suggest starting with every second thread, so 1 up, 1 down. Next you can try 2 up, 1 down. Then 2 up, 2 down, and so on.

Once your stick is installed, place your heddle in neutral, slide the pick up stick forward and then place it on edge. Weave that pick and then change to a plain weave shed (up or down). Repeat, alternating between the plain weave sheds. An example of a repeating sequence could look like:

  1. Heddle up
  2. Heddle neutral, stick on edge
  3. Heddle down
  4. Heddle neutral, stick on edge

Then repeat the sequence from the top as many times as you would like. The variations on these theme are enormous, for example you could do a pick up stick row as a pop in between a few plain weave rows.

Next up with your pick up stick installed you can place the heddle in the up position and slide the stick forward (behind the heddle). Weave that row and note how it’s different to the other heddle/stick position.

Now you could try out the same 4 step weaving sequence I detailed above but this time use the heddle up/stick forward combination.

Once you’ve played around with those ideas, you can then start combining techniques. Here is a quick example for ideas:

  1. Heddle up
  2. Heddle neutral, stick on edge
  3. Heddle down
  4. Heddle up, stick forward

And then go back to the top and repeat. Are you starting to see how many variations you could come up with here?

Colour

Colour is one of the simplest and most effective ways to branch out in weaving. Again, it can be a bit of stumbling point for some who feel they have no talent when it comes to selecting colours. But I don’t think you need to be a colour expert to use colour effectively in weaving.

Most people are able to select 2 contrasting colours that they like and think go well together. That is a great starting point – one colour for the warp and one for the weft. Subtle, but classy!

Or if you’re looking to make a bolder statement, do blocks of colour in the warp and blocks of colour in the weft for Colour and Weave techniques.

If you’re not confident yet with changing colours in the warp, just change them in the weft. An example might be that you warp with a grey yarn. You use that same grey yarn in the weft but you add in a red. You alternate blocks of grey weft with blocks of red weft and voila! You have stripes!

You may feel ready to explore houndstooth or other colour and weave techniques.

What about variegated yarn? I love these yarns, as they do the colour work for you. You can choose to use it in either the warp or the weft (or even both – though the results may get messy!) One of my favourite ways to use variegated yarn is to warp with it and then weave with a solid colour. A more open weave (like one you might achieve with a pick up stick) can be the perfect pairing for a variegated yarn as it lets the range of colours really shine.

The scarf above was woven with fingering weight wool. For the warp I dyed a gradient, using the rainbow as a guide. In the weft I sed the same weight and type of yarn, but in a solid and commercially dyed grey.

Another example of a similar project is my free The Heart Scarf project.

Luxury yarns or special yarns

It’s true that not all yarns are going to be ideal for weaving, especially for the newer weaver. But there is a huge range of yarns available to today’s weaver, plus knitting yarns are often great to use with a rigid heddle loom.

A special or luxury yarn can really transform a weaving project. Think silk, or silk blends, tencel, cashmere and so many more.

For the pictured scarf I used a dk weight silk that I hand dyed. The end result was rather like a waterfall!

Luxury yarns can give your project new dimensions in a few ways:

  • Iridescence – silks, tencels and bamboos in particular create a wonderful gleam to your weaving.
  • Touch – All of the yarns mentioned are pleasing to the touch. They are soft, often slightly slippery and in the case of cashmere or a blend the softness factor can be next level!
  • Luxury/high end value – naturally more expensive yarns are going to be considered high end products. A luxurious gift or a higher ticket item to sell.

I hope these ideas are just what you needed to go to the next level with your rigid heddle weaving!

Until next time…

Happy Weaving!

Filed Under: Rigid heddle weaving, Selling, Weaving Tagged With: level up your weaving, rigid heddle weaving, selling your weaving

42 Rigid Heddle Loom Tips

by Kelly 10 Comments

My Youtube channel is packed full of helpful videos for weavers of all levels. But today I wanted to share a list of 42 rigid heddle loom tips that will make a difference.

Most of these videos are short and to the point and are all related to the rigid heddle loom! I want you to gain confidence and become the weaver you want to be. My hope is that gathering all these tips into one place means you have fast and easy access to a wealth of knowledge and information.

Whether you want to delve more into warping, threading, fixing mistakes or optimal weaving, you should find some help here:

Warping a different way…

What to do with weft tails…

How to fix wrong heddle size…

Packing the front beam…

Insert paper for warp packing…

Clamping hack for rigid heddle weaving…

Clearing the shed…

Strumming the warp…

5 rigid heddle warping tips…

Finding the sweet spot…

Lashing on technique…

Three heddles tips and tricks…

Independent warping…

Surgeon’s knots tie on trick…

Neater tie on trick…

2 tips for easier RH weaving…

Multiple heddle workflow…

Doubling your warp the easy way…

Targeted wedging for better tension…

Troubleshooting sticky threads…

What to do when you accidentally warp backwards…

Fix weaving floats…

How to read a RH weaving draft…

Try this trick for neater edges…

3 tips for weaving with finer threads…

How to use pick up sticks…

Heddle positioning…

Another neat edges tutorial…

Lifeline selvedge technique…

How to fix doubled up warp threads…

Calculating warp for the rigid heddle loom…

Rigid heddle book recommendations…

How to repair a broken warp thread…

Neat edges no matter what…

Weaving a slit or hole…

Hemstitch explained and demonstrated…

Rigid heddle threading tips…

How to determine sett…

RH weaving tools…

How to wind a stick shuttle…

How to make a heddle rod for RH loom…

Weave neat edges…

I hope this list is helpful to you.

Until next time…

Happy Weaving!

Filed Under: Rigid heddle weaving, Weaving Tagged With: rigid heddle weaving

How to weave krokbragd crosses

by Kelly Leave a Comment

Here we are with yet another krokbragd weaving tutorial! It is close to Easter and so the design I chose to weave is in honour of our Lord Jesus Christ ❤️

I won’t explain what krokbragd is, because I have done that already, many times! Instead, if you want to know more, check out some of these links below:

How to weave krokbragd…

Krokbragd 101 Online Course…

Krokbragd Youtube Playlist…

In this tutorial I am weaving krokbragd with two heddles, but you can absolutely use another setup such as a single heddle, pick up stick and heddle rod. Both of these methods are outlined in detail in my Krokbragd 101 course.

What you need for this tutorial

  • A rigid heddle loom (I’m using my Ashford Sampleit)
  • Two heddles of the same size
  • Additional beater, such as a tapestry beater or fork
  • Two shuttles (or use little yarn balls or butterflies if you prefer)
  • Two contrasting weft yarns

There are all kinds of tapestry or additional beaters, and yes, a household fork works just fine. An additional beater is really essential for krokbragd though, as it is a weft faced weave structure and a regular rigid heddle/reed is not sufficient to beat the weft right down.

I beat the weft down every 3 weft rows – it saves time and is just as effective. Use your heddle to “place” the weft but use the additional beater to pack it down.

We only need 2 weft colours for weaving, so choose one colour that you would like your crosses to be and the other as the background. Make sure your colours have enough contrast to ensure boldness of the design.

You can place your weft yarns on stick shuttles, roll little balls or use yarn butterflies – all these methods work just fine.

Here is how the weft looks after weaving 3 weft rows and prior to packing the weft down.

And here is how it looks once packed down. You want to aim to cover the warp completely.

Now, how to weave.

If using two heddles, your heddle positions will be:

  1. Heddles 1 & 2 up
  2. Heddle 1 down
  3. Heddle 2 down

The colour sequences will be as follows (check colour key for abbreviations):

Colour key: Yellow (Y), Navy (N)

  1. Y,N,N x 5
  2. Y,N,Y x 2
  3. Y,N,N x 2
  4. N,N,N x 3

Exactly how you use the design is up to you – You can weave bands of crosses or repeats of crosses or a row of crosses embedded in strategically, there are so many options!

If you would like to see this sequence in action, check out the following video on Youtube:

I hope you enjoy weaving this design, if you have any questions or comments please leave them down below ⬇️

Until next time…

Happy Weaving!

Filed Under: Krokbragd, Rigid heddle weaving, Rigid Heddle Weaving Patterns, Weaving Tagged With: easter, krokbragd, rigidheddleweaving, rigidheddleweavingtutorial

Essential tools for rigid heddle weaving

by Kelly Leave a Comment

When you buy a rigid heddle loom, it will come with a few standard tools to get you started. Exactly what you get will depend on the manufacturer of your loom, but here are a few of the basics:

*A heddle/reed (usually 7.5 or 8 dent)
* A warping peg and clamp for direct warping
* A clamp for holding the loom to a table while warping
* A stick shuttle
* It may include a threading and reed hook
* Cardboard warp separators (may not come with all looms)
** Some looms now come with a double heddle block built in

Apart from the standard tools, there are extra things that are either essential or come in handy.

Other essentials:

*Scissors – A good pair of dressmaking shears will save you a lot of frustration

*Tape measure

*Something to separate your warp when rolling on (I like to use brown craft paper on a roll and cut it to size)

*Yarn

*Inch ruler (for figuring out the sett of your yarn)

*Project journal for recording all your project information

*A big mug of tea or coffee (hey, I don’t judge!)

   Handy optional extras:

* Tapestry needle
* Extra heddles
* Fringe twister
* Sewing machine 
* Serger
* Loom stand
* Tapestry beater, comb or household fork
* “S” hooks or other weights
* Calculator
*Instructional books –  this post will help you to determine which book/s might be right for you).
*Online lessons are an awesome tool to get started. You can check out my Youtube channel and my Online Weaving School for further help. 

Check out the video below where I discuss these tools in depth:

I also have an additional video that talks about affordable tools here:


Something to remember when you’re just starting out with rigid heddle weaving is that you don’t need All.The.Things right away! The tools that come with a newly purchased loom are sufficient to get you started, and you can gradually build from there as you begin to explore the wonderful world of rigid heddle weaving.

*This post contains affiliate links. Please see my disclosure policy for further information.

Until next time…

Happy Weaving!

Filed Under: Rigid heddle weaving, Weaving, Weaving Tools Tagged With: rigid heddle weaving tools, rigidheddleweaving, weaving tools

Never heard of the rigid heddle loom?

by Kelly 1 Comment

Then you might be wondering what exactly IS a rigid heddle loom?

The wonderful rigid heddle loom has gained considerable popularity in recent years due to it’s affordability, portability and versatility as a weaving loom.

The rigid heddle loom is essentially a rectangular, wooden frame loom. However, it differs from the simple frame looms that are now readily available and often used for simple tapestry, as it has a space for a heddle/reed, making it capable of producing sheds (gaps or spaces) to weave through.

It can be called a 2 shaft loom (though some argue that this is not technically true because it doesn’t have traditional shafts – whatever the case, 2 sheds are possible), but has further reaching capabilities with a healthy dose of inquisitiveness and exploration!

The “rigid heddle” that the loom gets it’s name from is an ingenious device typically made from a wooden frame and plastic vertical pieces. A single heddle/reed gives your loom holes and slots (these are what allow you to create the sheds) plus it doubles as a beater.

The more of these heddles/reeds you use, the greater the possibility and range of sheds, and therefore patterns, become available. Another benefit of using 2 heddle/reeds at a time is the ability to weave double width cloth, which is ultra cool and can be seen in my Double Weave Baby Blanket class or Weaving with Two Heddles technique class.

Some rigid heddle looms now come with a built in double heddle block, which means it is easy to have 2 heddle/reeds positioned on your loom.
In it’s most basic, 2 shed format, you place the heddle/reed in either an up or down position, creating a different shed each time. Using these 2 sheds will give you a plain weave interlacement.

This same heddle/reed will have a predetermined size or sett, which means that once you have established the sett for your project, you choose a heddle/reed that matches. As you thread the heddle/reed, the rigid plastic slots keep the threads at a certain spacing, and that is what makes your sett.

The rigid heddle loom, similar to table/floor looms, has a front and back roller, meaning that you can put on a long warp and you advance the warp as you go so that the cloth will roll around the front beam as you weave. Some looms will have the option of buying an additional warp beam that attaches to the loom and allows you to put on extra long warps. It also has a tensioning system, which varies from loom to loom, but usually involves winding a pawl or a crank at the side of the loom to achieve good tension. 

In addition to your loom, you can purchase a stand, which, in my opinion is a really good option. Buying a loom and stand combo can work out more economically. I talk more about that in this video.

*This post contains affiliate links. For more information, please see my disclosure policy.

If you purchase a rigid heddle loom new, it will come with everything you need to get started (except the yarn!)

I hope this has helped you to begin to wrap your head around what a rigid heddle loom is.

If you’re confused as to which loom is the right one for you I have a comprehensive First Loom Buyers Guide that covers a range of looms to help you make an educated decision.

Until next time…

Happy Weaving!

Filed Under: Rigid heddle weaving, Weaving Tagged With: rigid heddle loom, rigid heddle weaving

  • « Go to Previous Page
  • Page 1
  • Page 2
  • Page 3
  • Page 4
  • Interim pages omitted …
  • Page 15
  • Go to Next Page »

Primary Sidebar

Hand crafted boat shuttles

Categories

Archives

Meta

  • Log in
  • Entries feed
  • Comments feed
  • WordPress.org

Copyright © 2025 Kelly Casanova Weaving Lessons on the Foodie Pro Theme