• Skip to main content
  • Skip to primary sidebar

Kelly Casanova Weaving Lessons

  • Hi! I’m Kelly!
    • Disclosure
  • Online Weaving School Class Index
    • Common account issues
    • Common technical issues
    • What do I get with a membership?
  • New to rigid heddle weaving? Start here!
    • Never heard of the rigid heddle loom?
    • How to weave neat edges on the rigid heddle loom
    • Rigid heddle weaving
    • Rigid Heddle Weaving Patterns
  • Patterns
  • Subscribe

Rigid heddle weaving

Ask Kelly – Are two heddles worth it?

by Kelly Leave a Comment

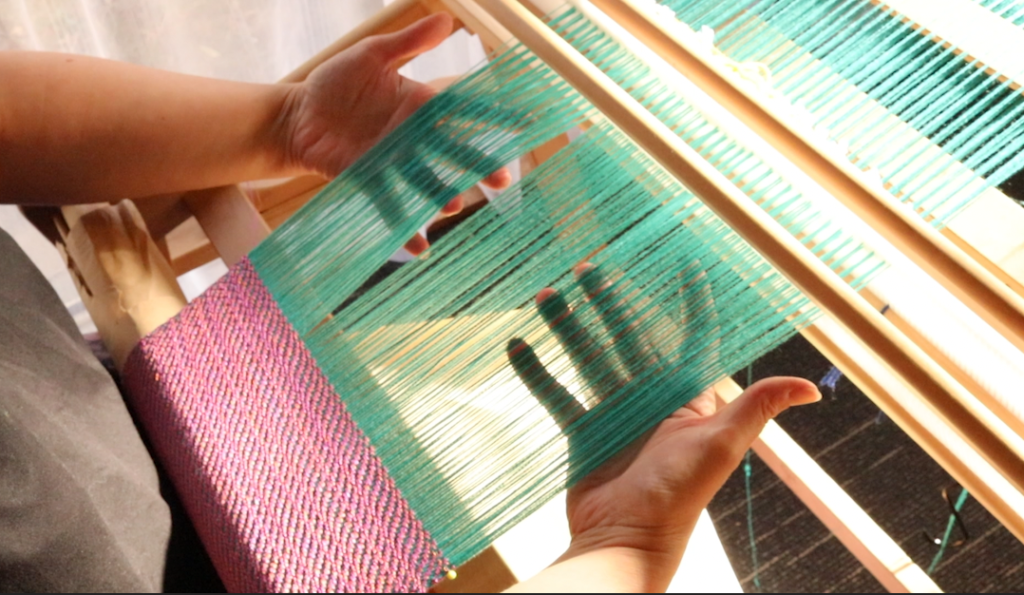
One of the major challenges when you’re new to weaving is knowing exactly what tools you need. If you’re particularly budget conscious (and most of us need to be!) you don’t want to spend money only to find that you didn’t actually need or use the new tool.

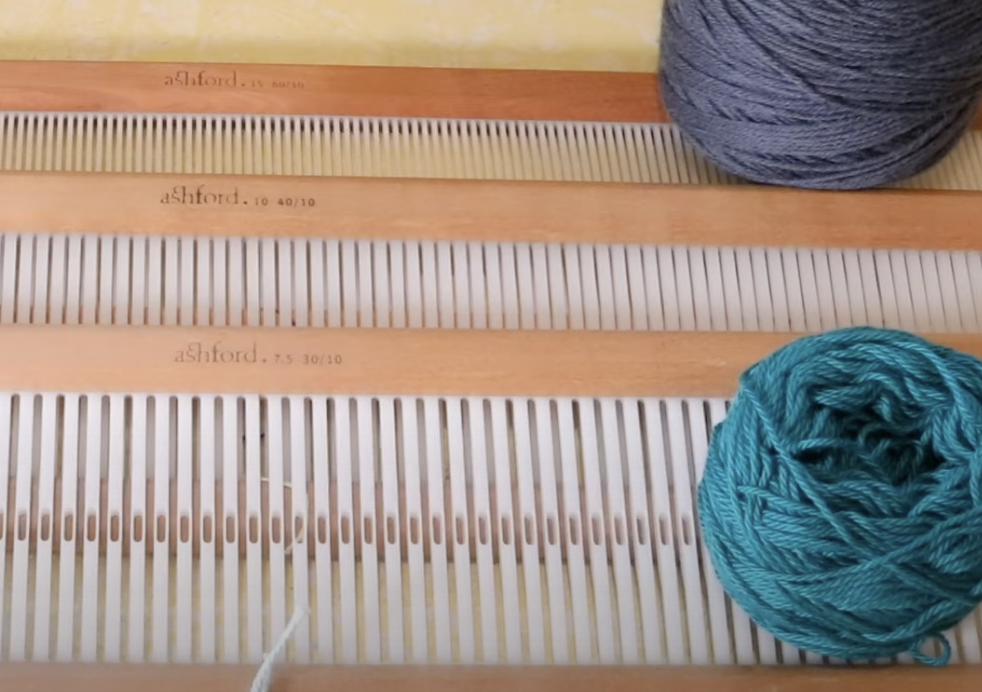
Today’s Ask Kelly question is one about two heddles and whether it is worth the investment to purchase an additional heddle in the same size as an existing heddle. At first glance you might think, well I already have one 10 dent heddle, why on earth would I buy a second 10 dent heddle – isn’t that a complete waste of money?

Let’s delve into this discussion so you can find out why two heddles might be a worthwhile investment for you (or not!)


“Could you please suggest where I would get some information on why I would want to weave with two heddles on the flip. I am not new to rigid heddles but far from advanced. Some people have suggested two heddles is a waste and I should just leap to a 4 shaft. I want to make an informed decision about whether to invest in additional heddles for the flip. I appreciate your guidance. I have not yet done your classes on doing two heddles. Thanks so much.”

Marla

Hi Marla,

That is a very loaded question with a lot to unpack, but I’ll try to keep it brief and to the point. 

I guess one of the main reasons a rigid heddle weaver would buy additional heddles is to increase shaft capability without having to invest in another loom.

Yes, new heddles are costly, but if you compare that cost to a brand new 4 shaft table or floor loom it is a small investment.

I wouldn’t ever say that additional heddles for a RH loom are a waste, they are just another way to achieve a desired outcome. 

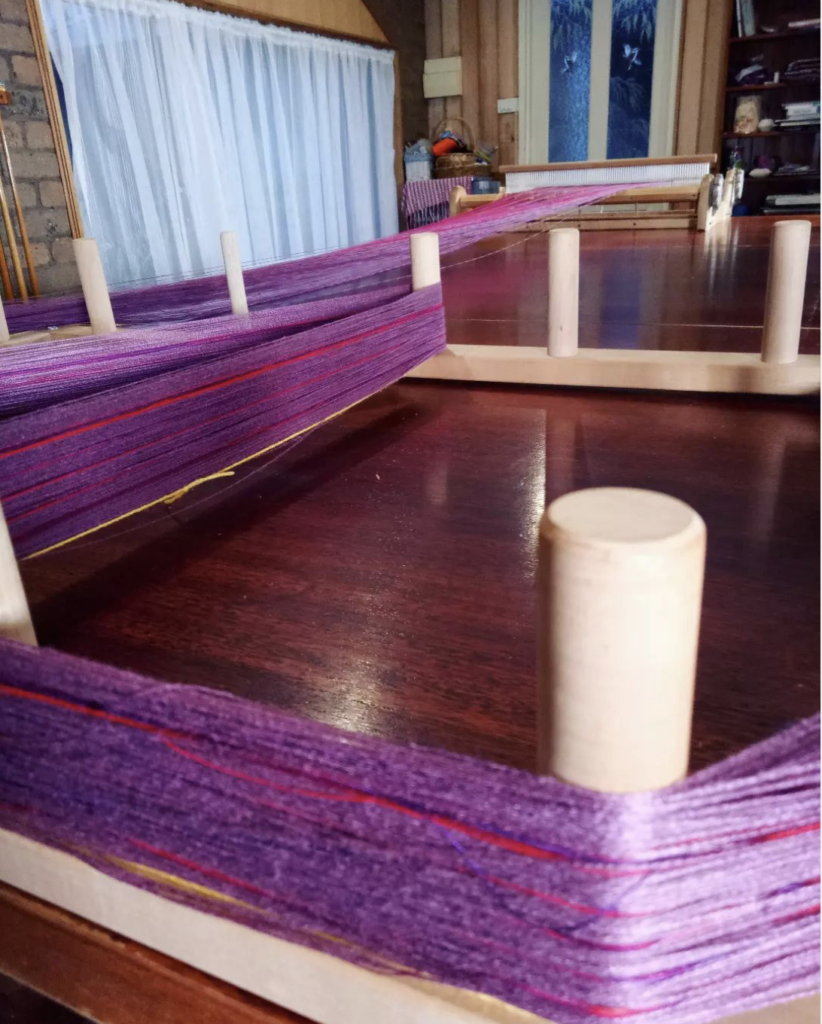
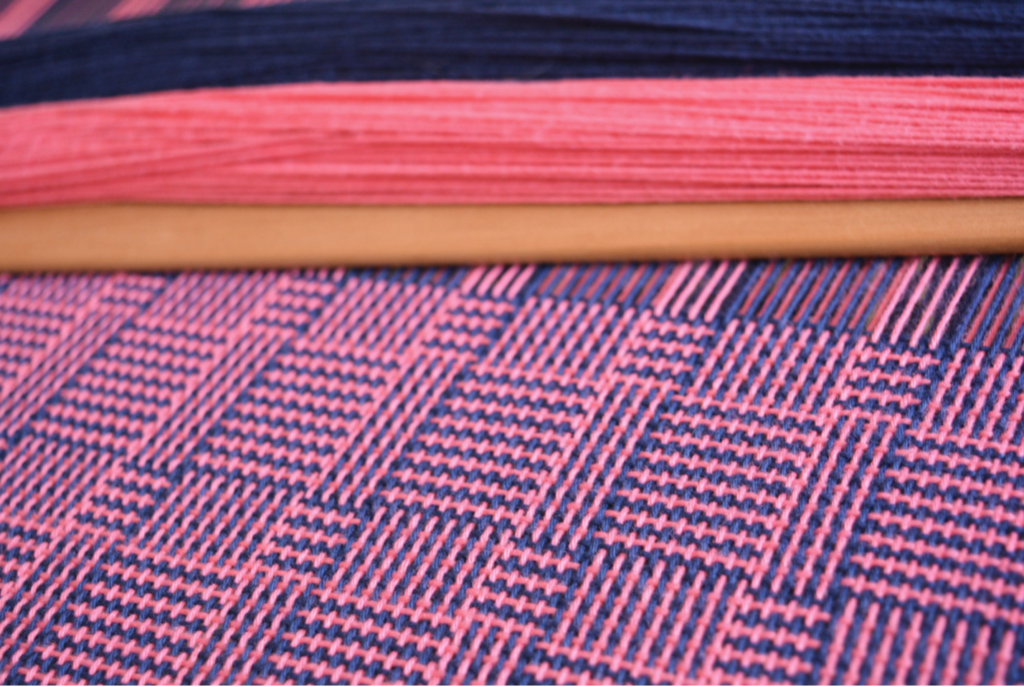
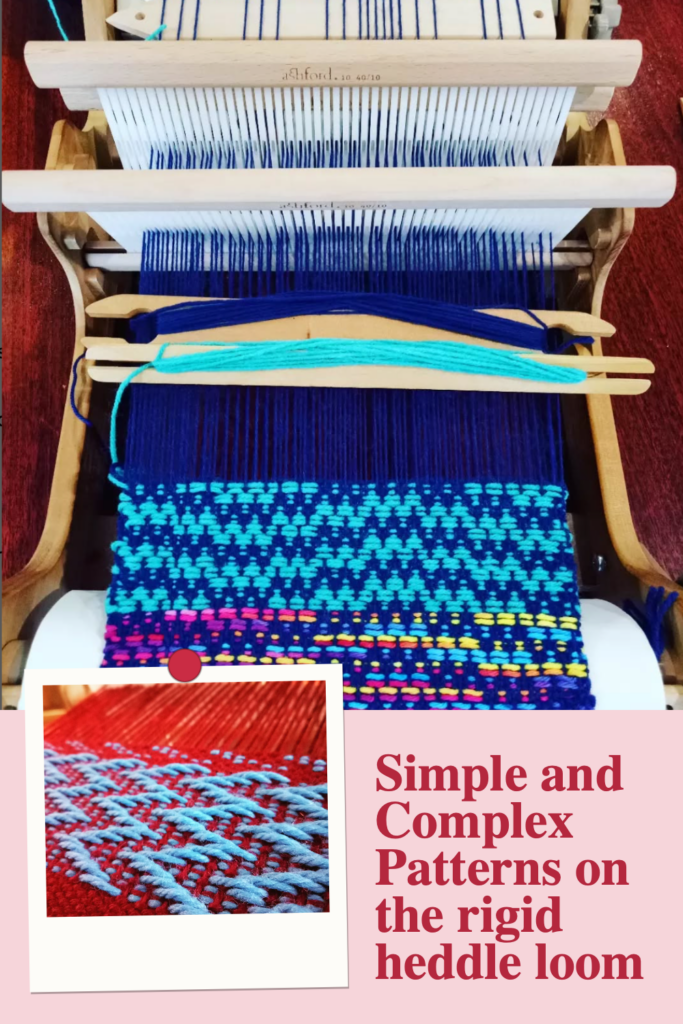
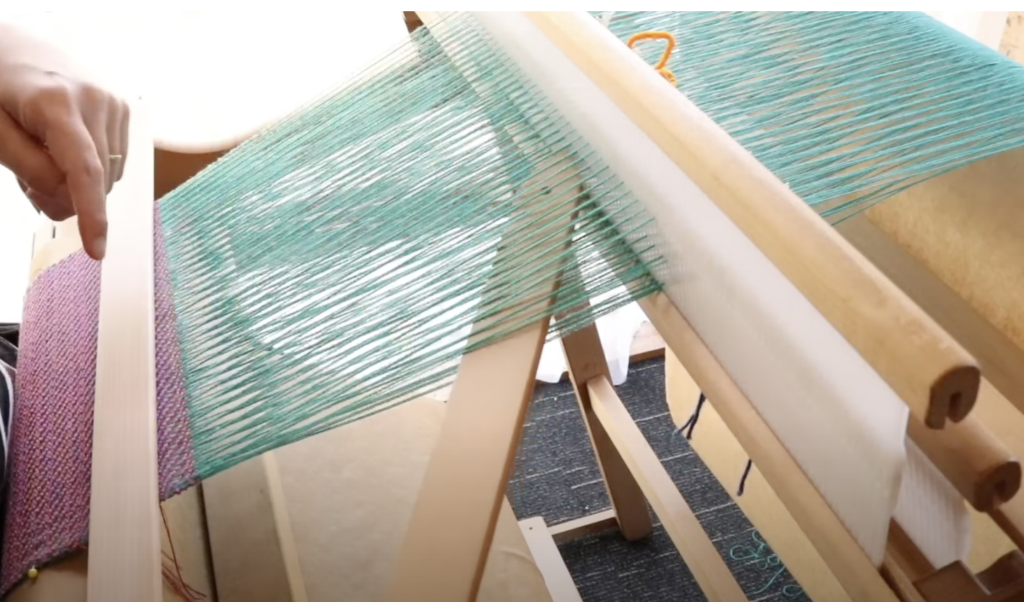
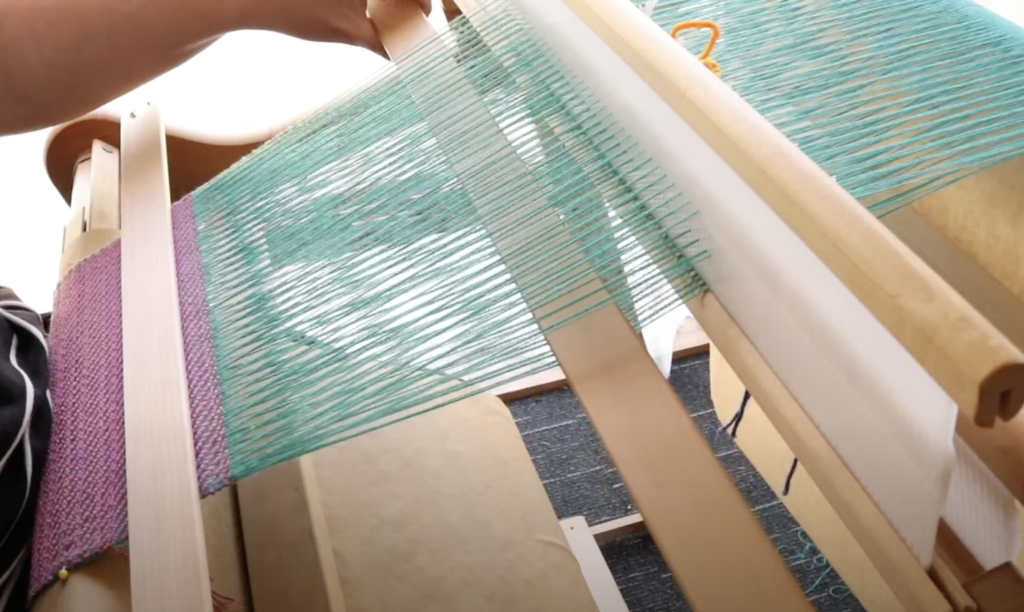
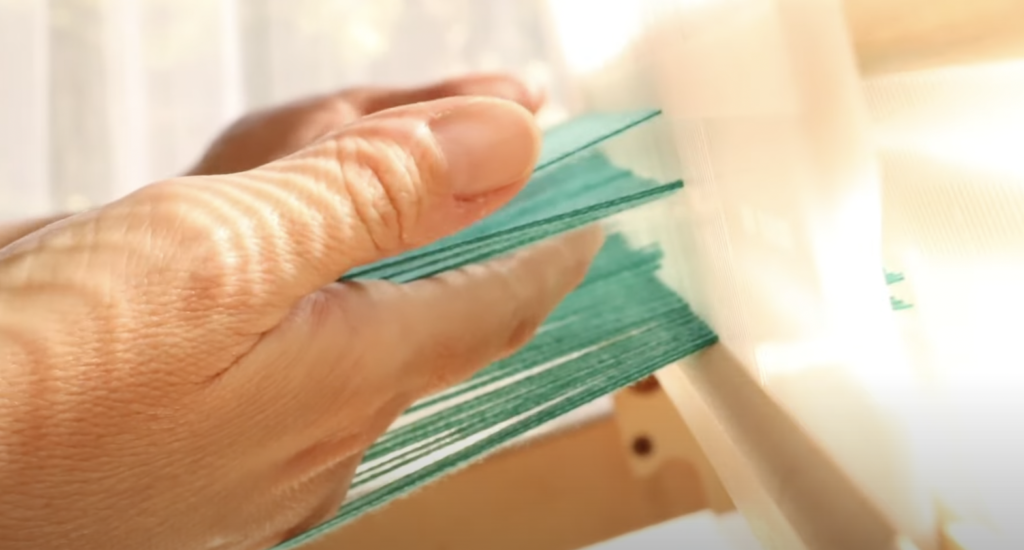
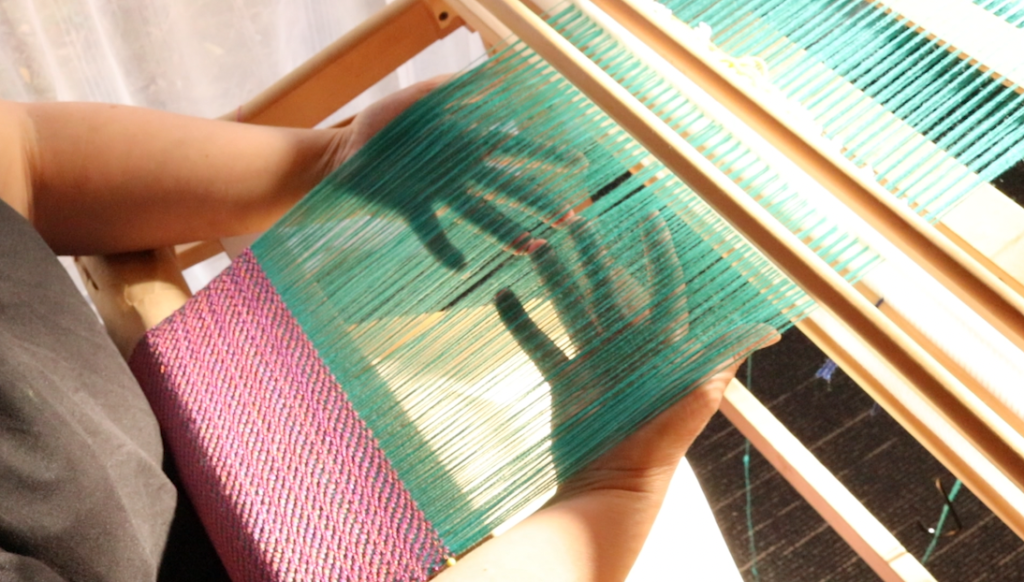
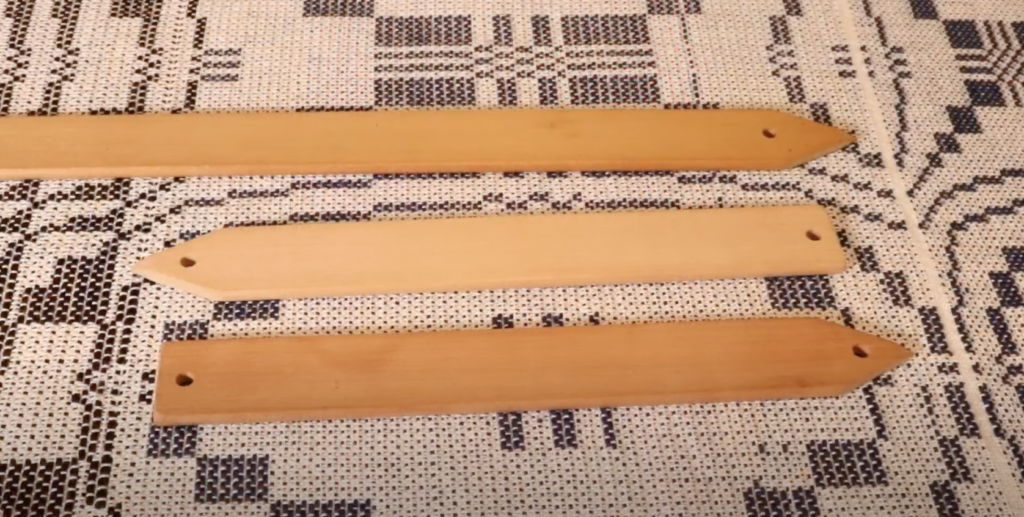
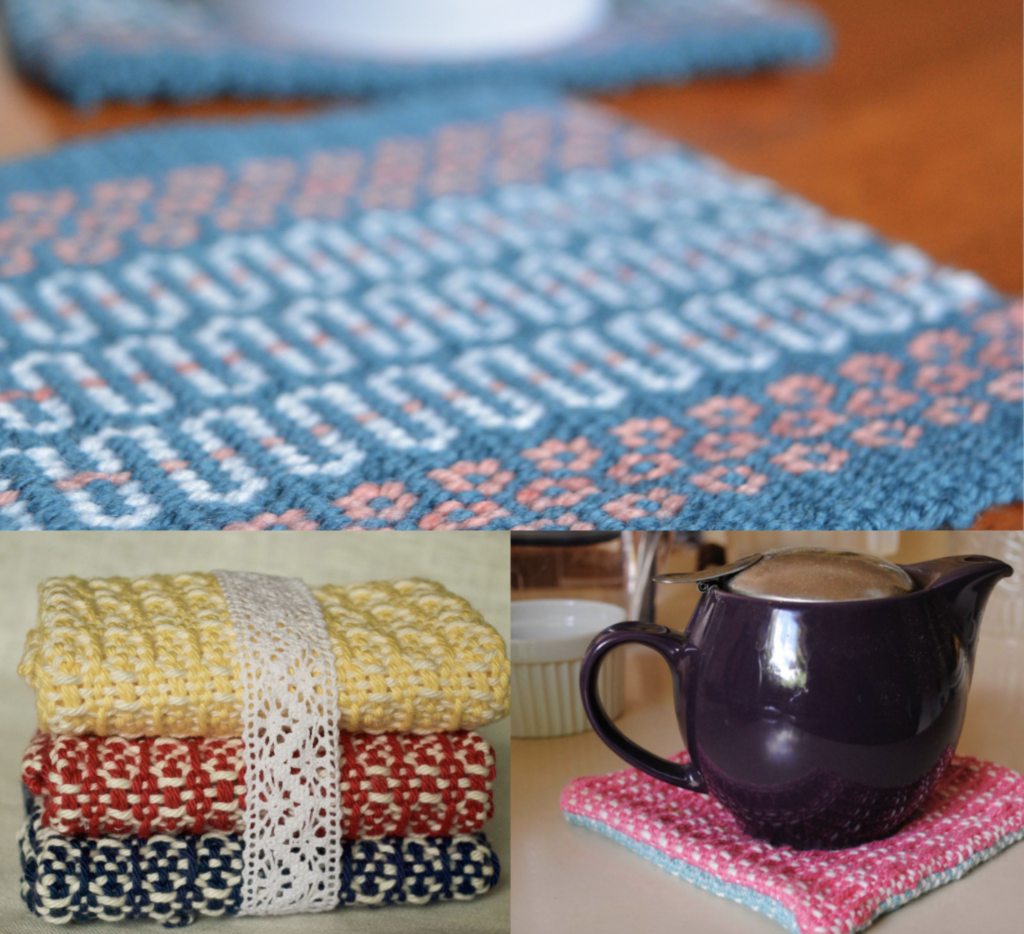
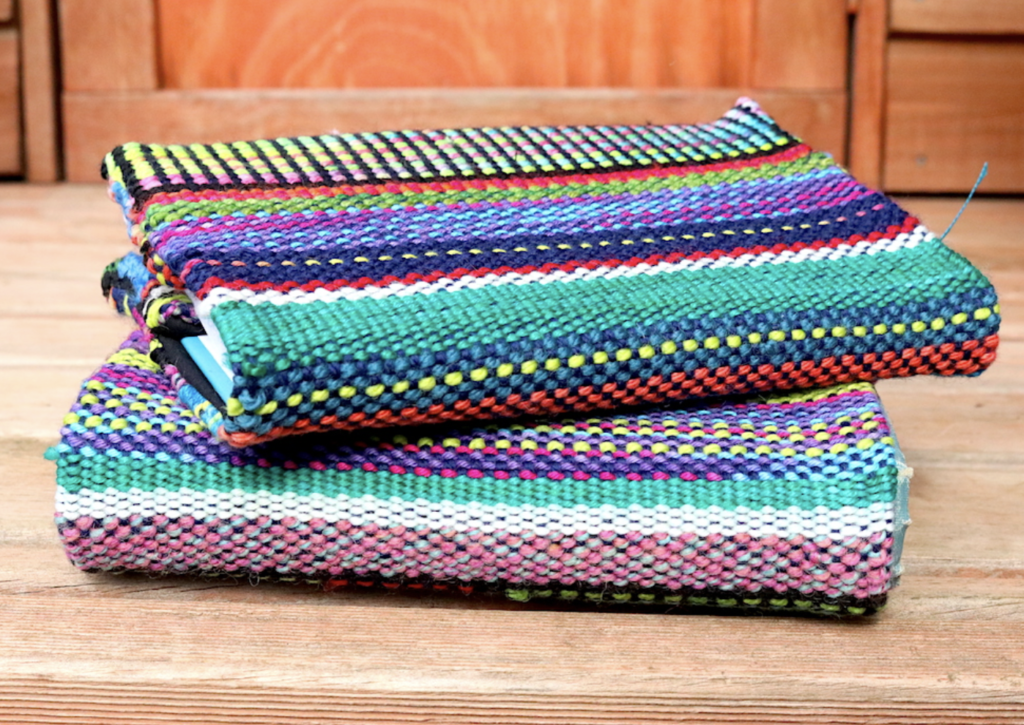
As demonstrated in my Weaving With Two Heddles online class, there are a lot of possibilities by adding just one extra heddle. You can weave a variety of 3 and 4 shaft (with the addition of heddle rods/pick up sticks) patterns, you can double your sett or you can weave double width or tubular.

Some of the questions I would be asking you are: Do you want a new loom? Are you interested in weaving on more shafts? Would it help you to have more than one loom so you can more projects going at once? Do you have the space for another loom? The budget?

The Schacht Flip rigid heddle loom differs a little to the Ashford rigid heddle looms in that the heddle positioning is not the same when using more than one heddle and some weavers are confused by that. But, as with everything in weaving, there are workarounds and you can find some more information about that on the Schacht website here.

You might also find these articles of interest:

Why would you weave with two heddles or more?

Doubling sett in rigid heddle weaving…

I hope this article has been helpful to you, feel free to share it with others so more can benefit. Leave your comments or questions underneath this article and

Until next time…

Happy Weaving!

*This post contains affiliate links. For more information, please see my disclosure policy.

Filed Under: Rigid heddle weaving, Weaving Tagged With: ask kelly, rigid heddle weaving, two heddles

Krokbragd Reindeer Tutorial

by Kelly 2 Comments

It’s that wonderful time of year again, when thoughts start turning to festive project and gift ideas.

A number of years ago I released a How to weave Reindeer on a rigid heddle loom on Youtube and it has proved to be very popular! In that video we use pick up sticks in front of the heddle to achieve the shapes we need to build some little reindeer.

For my Christmas video this year, I decided to again weave reindeer but use a different weave structure for a different look. I already had my Sampleit loom warped for a krokbragd sampler so I set about designing some cute reindeer ensconced in a lovely Fair Isle inspired border.

This tutorial uses 4 colours for the weft – navy, white, red and beige. I used Bendigo Woollen Mills Luxury 4 play, which is a fingering weight wool. The warp should be a strong and thinner than the weft, I use a #12 seine twine.

Krokbragd-Reindeer-tutorial-PDFDownload

Be sure to watch the free Youtube tutorial so that you can follow the weaving sequence along with the printable PDF.

If you’re looking for further krokbragd learning resources, check these out:

Krokbragd 101 Online Course…

Krokbragd Youtube Playlist…

All About Krokbragd…

*This post contains affiliate links. For further information, please see my disclosure policy

Until next time…

Happy Weaving!

Filed Under: Krokbragd, Rigid heddle weaving, Rigid Heddle Weaving Patterns, Weaving Tagged With: Celebrations, christmas, krokbragd, reindeer, rigidheddleweaving, tutorial

Ask Kelly – Doubling sett in rigid heddle weaving

by Kelly 6 Comments

Doubling sett in rigid heddle weaving is relatively straightforward, but you might wonder whether there is more than one method for doing so. You might also wonder which projects or circumstances would call for doubling the sett?

Today’s Ask Kelly question is all about how to double the sett on your rigid heddle loom and which heddle size might be most useful.

Hi there,

“I just finished watching the what do all the numbers mean video and I have two questions for you- you suggest using a 10 dent heddle for 8/2 cottolin and indicated you should double the ends- when you said 2x 10 dent- do you mean use two ten dent reeds? I think I just figured it out! You mean use two 10 dent reed or double up the ends on one 10 dent reed- did I get that right? Also- I only have the one 7.5 reed that came with my rigid heddle loom (Ashford) would you suggest purchasing a 10 dent read next? Have a great day thanks!“

Cindy

****************************************************************

Hi Cindy,

Yes, you are correct that 2 x 10 dent means two separate heddles of the same size (in this case 10 dent). When you want to double your sett you have 2 options – you can simply double the number of ends in a single 10 dent heddle OR you can use 2 x 10 dent heddles to double the sett.

Whichever way you decide to go, you still need to double your total number of ends to double your sett.

For the second part of your question, I would ask what you weave the most or what you would like to. If you want to weave a lot of kitchen towels, a 10 or 12-12.5 dent heddle would be a very worthwhile investment. A 10 dent is also great for fingering weight yarn which can be lovely for scarves, runners etc.

*************************************************************************

Now that I’ve answered Cindy’s questions, I want to go a little more in depth on the idea of doubling sett for a rigid heddle loom.

The two methods I mentioned for doubling sett are:

  • Using a single heddle and doubling all warp threads.
  • Using two heddles to double and space warp threads.

The next thing you might wonder is which method to choose and what the differences are.

Well, the single heddle is really advantageous because not everyone who wants to double their sett has a second heddle of the exact same size in their weaving toolkit. It is quick and easy to learn and means that when you get to the weaving, you just weave as normal with the one heddle. When doubling your sett with one heddle, you thread holes and slots at the same time as direct warping, completely negating the usual requirement to thread holes separately.

Why would you opt to use two heddles then, if one heddle is cheaper and (some will find) easier? If you’re more of a particular kind of weaver (that is SO not me! 😆) it might be more important to you that all the doubled warp threads are correctly and evenly spaced. I’ve also heard that some weavers actually like holding the two heddles together or banding them together. Again, that is not for me!

Another difference between the two methods is the threading. With one heddle, you will have 2 ends in every hole and 2 ends in every slot. With the two heddle method, you will have a single end in the hole on each heddle and 3 threads in the slots.

The single heddle method is presented in this video tutorial:

Some weavers prefer the look of the cloth that is woven by the two heddle method, as it gives more of a basketweave effect.

Another question that someone is bound to ask after reading this (because someone always does!) is whether to also use a doubled weft when using a doubled warp.

If you want to be technical, then technically you should double your weft for a balanced weave. But who says you always have to have a balanced weave? You certainly don’t!

For most of my projects I use a single weft. Why? Because I like the resulting fabric. It’s soft, it’s substantial but not too thick, it looks good to me. But I encourage you to experiment and find your own personal preference.

*This post contains affiliate links. For further information, please see my disclosure policy.

If you find you do prefer a doubled weft, then check out this video for an easy weft doubling method:

I hope you enjoyed this edition of Ask Kelly and until next time…

Happy Weaving!

Filed Under: Ask Kelly, Rigid heddle weaving, Weaving Tagged With: ask kelly, doubled sett, rigid heddle weaving

Ask Kelly – Independent warping issues

by Kelly 14 Comments

Today’s question is in two parts, but both are related to direct warping a rigid heddle loom.

Personally, I love direct warping, it’s one thing that makes the rigid heddle loom so attractive to me. Direct warping is fast and efficient and I just love it.

Starting out direct warping can be made more painless when someone has shared the best tips and tricks with you, and that is where I come in!

This post contains affiliate links. For further information, please see my disclosure policy.

Read on to find out some of my tips for more successful direct warping.

“Hi Kelly!

Can you help me with two problems I had with warping for a baby blanket when the warp has to be 62 inches?  I’m working on a Ashford rigid heddle – 24 inch with acrylic worsted yarn and 7.5 10/30 shaft/heddle.

  1. When winding the yarn, the peg can’t hold the yarn – I have to start overlapping it to get it all on the peg, plus I’m having great difficulty in not pulling too hard on each strand so it doesn’t pull the peg off the table. If I go loose, then I have terribly loose first warp thread that I have to tighten and the next and the next….so I lose a lot of yarn and time.

2. When taking the yarn off the peg and winding on to the back bar,  I tried to  hold the yarn myself – which I have done successfully for shorted warp length (I’m single and there’s no one else in the house)…didn’t work well because the middle yarns became too loose.  Do I just need to get someone else to hold the yarn while I wind the back bar?   How else to do this?

Greatly appreciate your help…“

Elizabeth

Hi Elizabeth,

From what you describe, I’m seeing a few potential issues:

1. Acrylic yarn. Acrylics are so varied that sometimes you don’t know what you’re going to get. I’ve heard of some weaver’s warping disasters where the acrylic actually stretches as they’re trying to tension and they end up with a saggy mess no matter what they try.

I have used a few acrylics but not a lot. It has mostly been a positive experience for me, but admittedly they are not my yarn of choice for a bunch of reasons. I think the key to using acrylics successfully is to know your yarn before warping a project with it. The only way you can really know a yarn you’re not familiar with is by sampling. You only need to do this once for a new yarn, then you can determine whether it’s really going to be suitable for your project or not.

2. The weight of your yarn. It sounds to me like the weight is going to be too heavy for a 10 dent reed. Did you do a sett test before starting? 

3. Single peg. If your yarn is overlapping on the peg, a second peg would be ideal. Then you can place half of the warp on one peg and the second half on another. This helps distribute all of those threads and will also help to alleviate the other problem you were having – loose middle yarns as you’re warping. 

Additional tips:

When warping by yourself, you do need to pay particular attention to that mid section of warp because you are clenching the warp threads all together and the outer threads will naturally be more tensioned than the threads all buried in the middle of your hand. Take your time with the warp, roll a little bit and then go back to the front of the loom, finger comb and re-tension the warp before going to the back to roll again. If you just roll and roll, you don’t have time to nurture the warp with good tension.

Make sure you use good separation at the back beam, a roll of thick brown craft paper is ideal but use cardboard warping sticks or whatever you have on hand. The key here is to not have the warp rolling onto itself, threads on threads that slip in amongst each other as you rotate. By using separators, you’re providing a hard surface for the threads to face against as they roll on and you’re also providing resistance as you roll, which means better tension!

OK, I could go on because there are just so many little nuances that improve a warping experience but I think these are the main things that will help you at this point.

Don’t look at you independent warping as a disadvantage because it absolutely does not have to be, I warp exclusively on my own and have done for many years. 

Until next time…

Happy Weaving!

Filed Under: Ask Kelly, Rigid heddle weaving, Weaving Tagged With: ask kelly, direct warping, rigid heddle weaving, warping

Rigid heddle warping tips

by Kelly 2 Comments

  1. Don’t over complicate it

Warping a rigid heddle loom using the direct warping method is really very simple. Yes, it will take you a couple of warps to start to feel more comfortable with the “newness” of it all (like anything!).

But something I’ve realised, especially after using the more complicated and time consuming table and floor looms, is that direct warping a rigid heddle loom is fast and easy.

Get the key ingredients for warping right and you will be well on your way to being a happy warper (if that’s a thing!)

Over complicating the warping process will lead to frustration, it is so much better to narrow it down and take baby steps without the worry.

2. Use a calculations sheet

A calculations sheet will take all the guess work out of the project for you. It will give you a step by step process to follow and prevent you from accidentally forgetting an important step in the warp.

If you struggle with the mathematical side of weaving, you don’t have to worry, as I think you only need a fairly basic maths level for weaving (hello calculator!) but the sheet will also help with ordering the numbers so that they make sense to you.

I have a free rigid heddle calculations sheet for you to download and use, plus a free video on how to use it available here.

3. Taking threads to the warping peg

When you bring your threads through the slots in the warping process, keep everything straight and open. Keep the loop open and don’t twist your loop as you place it on the peg.

4. Keep threads in order on the warping peg

Place your loops on the warping peg one at a time and in order. Don’t just shove them on there willy nilly – there is a benefit to preserving order as when you come to rolling on the warp you will find a lovely, laid out warp that is well behaved!

Each loop sits just above the last one on the peg, there is no need for bunching. Keep the loops loose enough that you have space to get a finger in behind them, this will make lifting the warp off the peg easy and trouble free.

5. If you’re not enjoying warping, look at the reasons why

This will help you to determine steps to take to make it better and easier.

Try to make it a relaxing process, have a hot beverage or put on some music. If you make a mistake, it’s ok, mistakes are fixable! Take your time, no need to rush.

Perhaps you need some help in the form of an online class? My best selling class is my Woe to Go Beginner’s Rigid Heddle course. This class will take the mystery out of the rigid heddle loom with simple and achievable steps.

If you would like to view this post in video format, please watch here:

The photos you can see in this post are from The Weekend Scarf project. This is a great beginner’s or newer weaver’s project and is also great for anyone who wants a fast and fun project.

If you’re new to rigid heddle weaving, check out my free list of resources here.

I hope this article was helpful to you and until next time…

Happy Weaving!

*This post contains affiliate links. For further information, please see my disclosure policy.

Filed Under: Rigid heddle weaving, Warping, Weaving Tagged With: rigid heddle weaving, warping, warping tips

Simple and Complex Patterns on the rigid heddle loom

by Kelly 9 Comments

The rigid heddle loom is an incredibly versatile tool for weavers of all levels. While its construction is simple, it opens the door to endless weaving possibilities, from basic plain weave to intricate patterns that rival those created on multi-shaft looms.

In this guide, we’ll explore options for weaving simple and complex pattern on the rigid heddle loom. Whether you’re sticking with simple patterns or diving into more complex techniques, there’s a world of creative opportunities waiting for you.

Weaving on a Rigid Heddle Loom: Choose Your Own Adventure

Remember the “Choose your own adventure” books from the early 1980’s? Gosh, I loved those books as a kid! Being given the ability to choose to keep the story small and simple or keep the fun going by selecting a longer and more adventurous continuation.

You could start out as a student on a regular school day, going to classes and planning to meet friends later and end the day by having fought and defeated incredible beasts and monsters! So much fun 😊

The beauty of the humble rigid heddle loom is that you, as the weaver, can choose your own adventure!

You can start out with the very beautiful plain weave, at some point introduce a pick up stick or two and before you know it, you’re wrangling multiple heddles, sticks and rods!

Maybe you just enjoy the plain weave so much that you choose to stay in that groove.

Or maybe you find that you need more of a challenge, and so you start looking at multi shaft patterns and how you might adapt some of them to the 2 shaft rigid heddle loom.

Whichever ways suits you is the best way, remember, we all choose our own adventures.

Today we’re going to discuss simple and more complex patterns you can achieve weaving on a rigid heddle loom – what is involved in the set up for each and the considerations you need to make before embarking on different patterns. I have so many resources and tutorials to get you started on either the simple or more complex path, and I’ll be sharing these with you too.

We’ll begin with the most simple patterns and work our way up to the more complex.

Start Simple: Mastering Plain Weave

The most simple pattern you can weave on your rigid heddle loom is plain weave. This is what the rigid heddle loom was built for, and excels at. To weave plain weave, you need only 2 shafts. This is made possible on a RH loom with just one heddle because of the unique design of the reed or heddle.

When we thread a rigid heddle loom, we thread both the slots and the holes. Then, once we’ve tied the warp onto the loom, we create 2 different sheds or spaces in which our shuttle can pass through. It’s these sheds, or more specifically, what the warp threads are doing in those sheds, that determine the pattern.

Plain weave is achieved by placing the heddle in the “up” position, passing the shuttle through the shed, then beating the weft down into place (the heddle is also used as a beater). For the next shed, the heddle is placed in the “down” position, the shuttle is passed through and the weft beaten down. Then back to “up” again, and so on. Doing this gives you an over, under interlacement that is both lovely to look at and also a very stable fabric.

This fabric can be used for a huge array of purposes, from a scarf to kitchen towels, to fabric to sew clothing with.

Starting out on a rigid heddle loom can be a bit of a learning curve, but is made so much easier if someone with a wee bit of experience shows you how. In my From Woe to Go! online beginner’s course, I share everything you need to know to get up and weaving on your rigid heddle loom, plus I show you all the helpful things you didn’t know you needed to know!

Some weavers will find that they tire of only weaving plain weave, but there are techniques that can easily be introduced without the need to learn more specialist skills or purchase any extra equipment (let’s face it, that particular rabbit hole goes very deep!)

The first that comes to mind is the wonderful technique of colour and weave. In it’s most basic form, this is simply the introduction of colour, strategically placed in your warp and weft. You don’t need any additional tools, just a little bit of patience as the warping takes extra time. Boy, is it worth the effort when you get to the weaving though!

Log Cabin and Houndstooth are gorgeous examples of colour and weave. And yes, it’s still just plain weave!

Another option for taking your plain weave setup further is finger controlled (FC) techniques. These are just SO fun because again, you don’t need extra tools, just extra patience, you weave them on a plain weave set up, so you can introduce them to your plain weave warp at any time (use as a border feature within the plain weave piece, OR combine the plain weave and FC technique, OR weave the entire piece using the FC technique).

Some examples of finger controlled techniques include Brook’s Bouquet, Danish Medallions and Leno. I have a free tutorial for how to weave Leno here if you’re interested in checking that out.

Take It Up a Notch: Adding Pickup Sticks

Pick up sticks are a really natural progression from plain weave because, again, you can use pick up techniques on a plain weave warp. You do need extra tools this time, in the form of a pick up stick or two, but these are very affordable and some weavers will make their own from scrap wood or paint stirring sticks.

This humble length of timber can open up your design possibilities like you wouldn’t believe! And you don’t even need to understand what you’re doing to get started!

Basically, you use slot threads and a pick up stick to create extra sheds (spaces) through which your shuttle can pass. These spaces will be different to your regular plain weave sheds and will give you different weave interlacements. I know some weavers feel intimidated by the idea of using pick up sticks but really, it’s so simple and easy.

If you want to see how non scary it really is, check out my free tutorial here. I also have an online class, Pick Up Perfection.

As I pointed out before, you don’t need to understand exactly what is happening on the loom when you use pick up sticks, just follow the instructions you have to get the results. The understanding can come later, if you want it to, or if you’re happy to keep following directions, do that!

But if you are interested in understanding the why, I can give a simple explanation. You know that the rigid heddle loom has 2 shafts available (holes and slots). By using a pick up stick, you are creating an extra shaft (shed/space). The slot threads that are already threaded in your heddle are free to move up and down, the hole threads are not. So, we can make use of those slot threads by placing some of them onto a pick up stick. When operate the pick up stick, I’m giving the loom a chance to make new interlacements beyond plain weave. This creates pattern.

Think of it like this:

Hole threads – shaft 1 (shed 1)

Slot threads – shaft 2 (shed 2)

Pick up stick threads (shed 3)

Now you have turned your 2 shaft loom temporarily into a 3 shaft loom! What if you add another pick up stick? Hello 4 shafts! 😀

Advanced Techniques: Multiple Heddles and Multi-Shaft Patterns

Now we come to the more complex component of this post, weaving 3,4 or more shafts on a rigid heddle loom. Is it possible? Yes, of course! Just like in the previous section on pick up sticks, we just need to make more shafts (sheds).

Let’s look at the 2 main ways we can do this:

  • Heddle, rods and sticks

Besides the 2 shafts available with a single heddle (holes and slots), if you want extra shafts, you’re going to have to make them! A simple and economical way to do this is with pick up sticks. However, after inserting one pick up stick, you will often find that the sheds you have created will not allow the pick up sticks to slide past one another to open up the new sheds you need to create your pattern. How frustrating!

But not to fear, this is where the heddle rod steps in to save the day. A heddle rod is just another way of creating an extra shaft by placing the threads from a pick up stick onto a rod with string heddles. The only materials you need to do this is some wooden dowel and extra yarns suitable for making string heddles. I have a lot of resources for making heddle rods but I recommend you start here. It can be used in combination with a pick up stick, as it will allow the pick up stick to slide freely back and forth.

Here is just one example for how a 4 shaft pattern set up might look on your rigid heddle loom:

  • Shaft 1 – heddle holes
  • Shaft 2 – heddle slots
  • Shaft 3 – heddle rod
  • Shaft 4 – pick up stick

Let’s look at another method for weaving complex patterns:

  • Additional heddles

Most rigid heddle looms can accommodate three heddles (there won’t usually be space for more than that) and many 4 shaft patterns can be woven with just those three heddles. Some 4 shaft patterns need to include tabby (plain weave), such as overshot, and for these patterns it can be easier to use a combination of heddles and a pick up stick to make the lift combinations or weaving sequences more possible.

Purchasing extra heddles if obviously not the cheapest option and one of the rules to weaving this way is that ALL the heddles need to be the same dent. So, 3 x 10 dent heddles or 3 x 7.5 dent heddles, depending on your individual project.

Here is an example of how a 4 shaft pattern might be set up on the rigid heddle loom with 3 heddles (keep in mind that there are many ways to setup so this is just one example 😉):

  • Shaft 1 – heddle 1, holes
  • Shaft 2 – heddle 2, holes
  • Shaft 3 – heddle 3, holes
  • Shaft 4 – heddle 1,2 &3, slots

One of the challenges with rigid heddles is that they are, well… rigid! When you’re using them as multiple shafts, you as the weaver have to decide on warp thread placement. Rather than flexible heddles that are fixed to shafts (like on a table or floor loom) we have to make our threads fit within a fixed space. We also have to make sure that they don’t space too close together or too far apart. All these decisions will impact on the finished look of your pattern.

If you are interested in beginning to weave like this on your rigid heddle loom, I have made specific resources to help with that:

Converting Drafts to the rigid heddle loom, online course

Weaving 3 and 4 shaft patterns on a rigid heddle loom, ebook

Your next question may be, “well, how many shafts exactly can I weave on a rigid heddle loom?” I can’t give a definitive answer, but I’ve seen weavers set up for 8 shaft patterns. Have I done it? No.

I am spoiled with loom choices, so for anything over 4 shafts I always choose my table loom or one of my floor looms, after all, they are set up with 8-10 shafts already and are purpose built for that.

I keep saying that one day I will see how far I can challenge myself on the rigid heddle loom, but whether it’s moving up to 6, 8 or 10 shafts remains to be seen!

Choosing Your Weaving Adventure

Whether you stick with the simplicity of plain weave or dive into advanced techniques, the rigid heddle loom lets you weave your way. The best part? There’s no right or wrong path—just the joy of creating something beautiful with your own hands.

Until next time…

Happy Weaving!

*This post contains affiliate links. For more information please see my disclosure policy.

Filed Under: Rigid heddle weaving, Rigid Heddle Weaving Patterns, Weaving Tagged With: rigid heddle weaving, rigid heddle weaving patterns, weaving patterns

2 Hacks for Clear Sheds on a rigid heddle loom

by Kelly 10 Comments

Threads that tend to stick to one another when you change sheds can be so frustrating!

Some yarns are prone to doing this more than others, and it also commonly occurs when you’re weaving with more than one heddle or are using additional aids (like pick up sticks and heddle rods) to create extra shafts on your rigid heddle loom.

For more information on threads that are notoriously sticky, visit this post.

*This post contains affiliate links. For further information, please see my disclosure policy.

Why is it a big deal if not every thread is exactly where it should be?

Well, it’s going to mess up your pattern. Your weaving pattern is created by the interlacement of threads – the weft going over some warp threads and under others. Now, if the weft ends up going over one or more threads that it should be travelling under, and vice versa, then you have a problem.

Floats will be created where they are not meant to be and this will show as a mistake in your pattern. If you have already checked that your threading and weaving sequences are correct, you don’t have crossed threads or anything else weird going on, the problem is very likely to be caused by unclear sheds and sticking threads.

Before looking at using clearing methods, ensure you have adequate warp tension. If your tension is too loose, threads may sag and interfere with your sheds. If your threads are loose on just some sections, you may need to try some wedging techniques to help your warp tension to be more consistent.

There are 2 main methods I use to ensure a clear shed when sticky threads are proving to be an issue.

The first method involves the use of a pick up stick, extra stick shuttle or even a paint stirring stick will do the trick! Basically, a flat, smooth stick.

Before inserting the stick into the shed, ensure that all of your threads are in their correct places. The easiest way to do this is to understand where all threads should be at all times according to your threading and heddle/weaving sequence. For example, in this picture my first heddle is up and my pick up stick is forward. For the way that I threaded, this means that all the hole threads on heddle one should be up, and all the threads on top of the pick up stick will also be up. The rest of the threads will be down, forming the bottom layer of the shed.

Once you understand where all the threads should be and you are sure they are correct, you can insert your pick up stick into the shed. Be sure to insert close to your heddle, where the shed space is at it’s widest.

Once the stick is in the shed, hold it on either side.

Pull the stick towards you, and towards the fell (edge) of your weaving and bounce it off the woven edge.

This action is firm and decisive, but doesn’t have to be a super hard whack. If there were any threads that were sagging or tending to want to stick together, this will shock them back into place.

If you prefer to see a video of this technique in action, you can view that here-

Now let’s have a look at the second shed clearing technique I mentioned.

This technique is so simple and easy. No extra tools are needed, just your trusty hands and fingers. I call this “strumming the warp”, but it doesn’t have anything to do with playing the guitar!

Again, the first step is to ascertain whether the problem lies with your threading, sequence or tension.

Next up, place your heddles/rods/sticks in the correct position for the shed you want to weave. Once again, I’m using the front heddle up, pick up stick forward combination as this combination frequently has sticking threads.

Place both hands, from either side of the warp, into the shed so that your fingers roughly meet around the middle of the warp.

Tilt your fingers slightly upwards as you pull your hands apart and out of the shed. You want your fingertips to “strum” the threads on the way out.

This is such a great technique for snapping threads into place with no ill effects on your warp. Give it a try!

If you would like to see this technique in action, check out this video:

You may have noticed the beautiful piece of weaving I have on the loom in these examples. You can find the PDF pattern for The Ripple Scarf in my Etsy shop. It’s a wonderfully luxurious scarf for rigid heddle weavers, you will love it!

I hope this article has been helpful to you, be sure to leave comments or questions down below, I love to hear from you.

Until next time…

Happy Weaving!

Filed Under: Free tutorial, Rigid heddle weaving, Tutorials, Weaving Tagged With: clear sheds, rigid heddle weaving, weaving hacks, weaving tips

Affordable weaving tools I use every day

by Kelly 7 Comments

When you start a brand new hobby, it is easy to feel that you need to buy “all the tools” before you can begin and weaving is certainly no different.

But, once you have your loom (and the tools that come with the loom) there is not actually too much more you need to make a start.

And really, why overwhelm yourself by having to learn every new gadget and gizmo available when you can minimise your tools, stay within your budget and focus on using your loom?

*This post contains affiliate links. For more information, please see my disclosure policy.

Today I want to share with you the affordable tools I own and use constantly in my weaving studio.

  1. Clover Bent Tip Jumbo Tapestry Needle

I have talked about these needles frequently (ok, perhaps a little too often!) but I can’t really sing their praises highly enough.

If you do hemstitching with any amount of regularity, you need these needles in your life. They are smooth but not slippery to hold, they have a large eye for easy threading, they slide through hand woven cloth like butter, they are gold (so they are hard to lose!) and the bent tip makes the angling of the needle for hemstitching just right.

2. Ashford Double Ended Threading Hook

I was so happy when I first discovered these double purpose hooks. I abandoned my former metal threading hook and separate reed hook very quickly and have not used them since!

These double ended hooks are made of flat, durable, flexible plastic, which makes them perfect for manoeuvring through holes and slots on your rigid heddle loom. I also use them for floor loom and table loom weaving, the hole threading end is just right for threading string heddles.

Rather than having to use two different tools, you simple switch the end of the hook with a quick hand swivel to swap between threading holes and slots or string heddles and reed dents.

Their flat design makes them easy to store (I even use them as bookmarks in a pinch!) I suggest that you have several in order to have spares for the times you, ahem… can’t quite locate one when you need it! 🤭

3. Pick up Sticks

Pick up sticks are one of the most economical ways to drastically increase the possibilities of weaving patterns on your rigid heddle loom.

A multi shaft loom can be quite a financial investment, but with your rigid heddle loom and a couple of pick up sticks, maybe a heddle rod or two, you can increase your shafts from two to three, four or more!

Using pick up sticks can be completely planned or quite random, depending on what you want to do. I think the really cool part for newer weavers is that you don’t really need to know what you’re doing to get some awesome results.

They are low cost to purchase new, or if you or someone you know are crafty with wood, you can make your own.

4. Boat Shuttle

This is a bit of a luxury item, but something that you may want to consider purchasing eventually. You can certainly just use your stick shuttles with no problems, but if you’re going to be weaving with finer yarns very often, a boat shuttle is really useful for quick weft winding and smooth weaving.

One thing to be aware of is the price difference in boat shuttles, depending on the company of manufacture, size and function, the wood used and whether it’s hand or machine crafted. My Ashford boat shuttles have served me very well for many years and were very affordable.

One day I may splash out on a special shuttle, but I’m very happy with these for now.

5. Dressmaker’s Shears

I love my dressmaker’s shears and have been using them for around 15 years. In that time, I’ve only had them sharpened a few times, so they have been a great deal for me.

My shears are the Stag brand, which unfortunately does not seem readily available now.

What I recommend is to not buy the cheapest, nor the dearest pair of shears, but go for the middle ground. Something similar to these looks good.

So, why dressmakers shears as opposed to regular or smaller scissors? Adaptability!

I can use my shears to snip yarn at the loom, make my warp, cut across my warp to take it off the loom AND cut through my handwoven fabric when I want to do that for a project. All of these things can be done with the one pair of shears, making them a very economical tool.

Well friends, although I do use other weaving tools, these 5 tools are the ones that are on regular standby and that I use almost daily in my weaving studio.

I hope this has been an informative and interesting post for you! If you would like to see this in video format you can do that right here:

Until next time…

Happy Weaving!

Filed Under: Rigid heddle weaving, Weaving Tagged With: budget weaving tools, weaving tools

49 Weaving Project Ideas

by Kelly 10 Comments

Feeling a little stuck for ideas for your next weaving project?

The options are almost unlimited, but here are 49 weaving project ideas to get you started!

Whether you’re weaving on a rigid heddle loom, a table loom or a floor loom you are sure to find these weaving project ideas super helpful.

Weaving a scarf is the perfect starting point for the new weaver.

It’s a narrow piece, which makes it easy to tension. It’s a long warp, but not so long as to be likely to cause any real issues. And once you’re done weaving and wet finishing, you have a completed woven piece, ready to wear.

That is so rewarding and empowering to the beginner weaver!

Once you’ve completed your first scarf, you may want to build on that success and hone the skills you learned by weaving another. Great! Another beautiful scarf to wear!

What is next? Another scarf? Well, I guess you could either add to your scarf collection or start giving them as gifts. Some weavers will continue weaving scarves until they have so many they’re not sure what to do with them. That could be a time to start selling for some extra income, if that is something you are interested in.

But not everyone wants to continue just weaving scarves for the rest of their weaving lives.

I often see weavers chatting and asking questions online, wondering if there is anything beyond the humble scarf.

Well, rest assured, there are SO many things you can make as a weaver!

Once you take up weaving, you become a maker of cloth. In quite a magical way, you are able to produce your own fabric.

You can either choose to weave an item that is basically finished when it comes off the loom, or you can use your hand woven cloth as a stepping stone or starting point for something else.

If you have, or can learn basic sewing skills, you are well on your way to creating unlimited projects with your handwoven fabric.

Here is a list of ideas to get you started:

Scarves (obviously! 😉)

Shawls

Bags (totes, handbags, shopping bags, carry bags)

Rugs

Wallhangings and tapestries

Blankets

Pillows/cushions

Purses/ pouches

Kitchen, bath and hand towels

Face washers

Apron

Book covers

The free Stashbuster Notebook Covers class can be found here.

Bookmarks

Kitchen cloths

Soft toys

Ponchos

Jackets

Tops

Read about my hand woven tunic project here

Skirts

Dresses

Pants

Coats

Framed art

Lampshade covers

Loom covers/bags

Upholstery fabric for unique furniture pieces

Historical re-enactment costuming

Hats

Jewelery

Wallhanging from the Krokbragd 101 Online Class

Baby wraps, carriers and blankets

Drink coasters or mug rugs

Curtains

Patchwork and quilting projects

Hair accessories/ head wraps

Saddle blankets for horses

Dog beds, coats

Potholders/trivets/oven gloves

Dining table ware – table runners, place mat sets

Bedding – throws, coverlets, pillow covers, blankets, quilts

Well, what do you think, have I convinced you that you can weave more than just scarves with your loom?

If you’re looking for some free projects to get you started, check out my Free Projects list and be sure to check out my Youtube channel for even more ideas and tutorials. My design store contains my original project designs as digital downloads as well as my ebooks.

At the Online Weaving School you will find many classes to choose from, and as most of my lessons are project based, you can often complete a finished woven item.

So, as you can see, the possibilities for woven projects is really unlimited! Please add your own ideas in the comments to share with other readers.

Until next time…

Happy Weaving!

Filed Under: Rigid heddle weaving, Weaving Tagged With: rigid heddle weaving, weaving, weaving projects, whattoweave

Do I need to pack the front beam?

by Kelly 17 Comments

When warping our rigid heddle looms, we are careful to pack the back beam as we wind on the warp. This may be done with a variety of materials, and some are more effective than others. It can be a personal preference too!

What a lot of weavers don’t seem to be so familiar with is the idea of packing the front beam. Quite often, when I’m troubleshooting with a student and I ask if they’ve packed the front beam, they seem surprised by the question. Packing the front beam? I’ve never heard of that!

*This post may contain affiliate links. For more information, please see my disclosure policy.

So, why would you want or need to pack the front beam? And what exactly do I mean by that?

Let’s start with the definition so we’re all on the same page!

Packing the front beam is simply introducing something extra to separate the warp as you weave and it begins to roll around the front beam.

Now we can look at the why. There are a couple of reasons as to why packing the front beam is a really good idea.

When you have finished warping and threading, you then need to tie or lash on your warp onto the front apron rod. Doing this results in knots or bumps on the apron rod.

As you begin to weave and advance your warp, you will reach the point where your warp is rolling around the front roller beam and onto itself. As this advancing of the warp happens, the knots, plus the apron rod ties can begin to have a detrimental effect on your weaving.

Firstly, you will likely begin to see some lumpiness at the bottom of your weaving (note that the white line of weaving that was previously straight is now a bit wavy!)

This is caused by the knots or apron ties pushing against your weaving from the underside. There are two problems with this happening:

  • The raised and lowered parts cause a change in the warp tension. The bumps tighten the tension and the dents lower the tension, so you end up with slightly uneven tension.
  • The worse case scenario is that your weaving is irreparably damaged because the knots or ties push the weaving apart. This can be more likely to happen when using a slippery thread like tencel, silk or bamboo, where your woven threads can move more easily, rather than something like wool, which is more “grabby” and unlikely to move out of place.

Fortunately there is a really simple solution to the problem, and that is to pack the front beam, or insert something that will separate those layers of fabric and act as a barrier between your weaving and the knots and ties.

Weavers use a variety of materials for packing, and it can really be a personal preference or what you find most effective. Initially I used the cardboard separators that came with the loom, and while they do work well, I find that the brown craft paper on a roll that I now use to be the superior choice.

What I love about the paper on a roll is that it’s thick and sturdy (a thinner paper will not work in the same way as it tends to crumple while you’re trying to advance your warp), you can purchase it to the width of your loom (or if the same width is unavailable, it’s easy to cut pieces to size) and you can use it over and over, so it’s very economical.

The roll that I bought years ago is still going strong and there is still a huge amount left.

An additional benefit of packing your front beam as you advance the warp is that your overall tension will vastly improve, and will continue to do so as you continue to weave.

I pack the front beam, whether I’m weaving on my rigid heddle, table or floor loom, it is beneficial for many types of weaving.

If you would like to see how I insert the paper roll at the front beam of my rigid heddle loom, please watch this video-

Until next time…

Happy Weaving!

Filed Under: Rigid heddle weaving, Weaving Tagged With: pack front beam, rigid heddle weaving, weaving, weaving tips

  • « Go to Previous Page
  • Page 1
  • Page 2
  • Page 3
  • Page 4
  • Page 5
  • Interim pages omitted …
  • Page 15
  • Go to Next Page »

Primary Sidebar

Hand crafted boat shuttles

Categories

Archives

Meta

  • Log in
  • Entries feed
  • Comments feed
  • WordPress.org

Copyright © 2025 Kelly Casanova Weaving Lessons on the Foodie Pro Theme