• Skip to main content
  • Skip to primary sidebar

Kelly Casanova Weaving Lessons

  • Hi! I’m Kelly!
    • Disclosure
  • Online Weaving School Class Index
    • Common account issues
    • Common technical issues
    • What do I get with a membership?
  • New to rigid heddle weaving? Start here!
    • Never heard of the rigid heddle loom?
    • How to weave neat edges on the rigid heddle loom
    • Rigid heddle weaving
    • Rigid Heddle Weaving Patterns
  • Patterns
  • Subscribe

Uncategorized

New weave along series!

by Kelly Leave a Comment

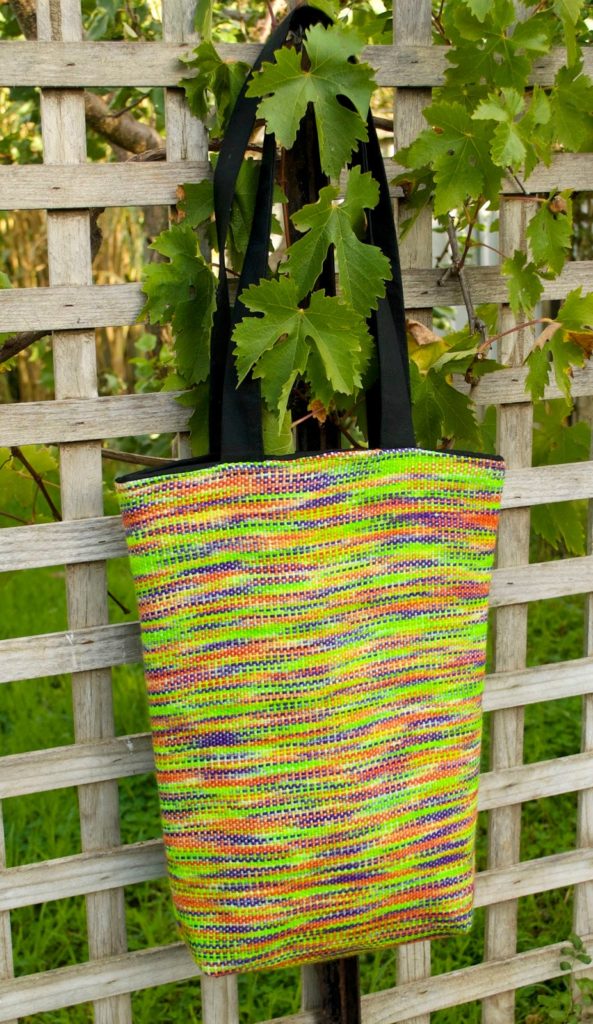
I’m so excited to be announcing my very first weave along! Officially it started a couple of days ago but participants are welcome to join in anytime. We will be making a lovely tote bag and instructions will be given from start to finish. I’ve been wanting to do this for ages and considering the response I’ve had on Facebook, lots of other enthusiastic weavers are loving the idea.


The introductory video can be found here and if you subscribe to my channel you can keep up with all the other videos as we go along.

There is also a very active Facebook group you can join to discuss the weave along, share photos and trouble shoot as necessary.

Hope you can join in the fun!

Filed Under: Uncategorized Tagged With: my youtube channel, rigid heddle weaving, tote bag weave along, weave along, weaving

Life and Learning at home

by Kelly 1 Comment

This last week, the little one has had a nasty cold which means we have spent a bit more time at home than usual. This is a good thing! To wake up and have the day just waiting and full of potential.


Every now and then I write down some of the things we’ve done in a day. Especially if I’m feeling the kids haven’t focused enough on academics or, the ever gnawing feeling at many a homeschool Mum, that they haven’t learned enough.


Today it was challenging to write that list, there was too much! I thought I’d share with you some of what we did to give an idea of an average day and to show you that even if you don’t feel like you’ve done a lot, it’s pretty amazing when you reflect back.

Slip knots. The little one learned to make a slip knot from her sister and is now happily slip knotting everything in sight!

The list is randomly arranged and outlines activities that have happened at home today.

Knitting project, piano practice, music reading (the 2 older girls are teaching themselves from a book), baking, garden work and planning, animal care and lots of animal hugs, pats and trick teaching, World War II history, Ancient history, writing practice, Kahn academy, online physics game, singing practice, reading novels in bed, English, spelling and phonics, science – a lesson on reptiles and a fun activity that involved the taping of fingers to create webbed feet, prayer and religious education, library visit, grocery shopping where the girls used the self checkout to purchase, free play, drawing, movie watching, and chores.

And how could I not mention standing on your head? There are some in our family who must be upside down for at least a part of the day!


Filed Under: Uncategorized Tagged With: home education, home making, Homeschooling, unschooling

Youtube channel update

by Kelly 3 Comments

I think I forgot to mention that I have some new videos on my Youtube channel! Firstly I have an overview of tools used in rigid heddle weaving. 


Another is an explanation of sett, which can be confusing to new weavers. The next is how to determine sett for your project. And then, just for fun I have a slideshow of some of my weaving to inspire you!


I have so many ideas for more videos, but there are limiting factors – chiefly lack of time and money! I’ll keep building where I can and I do have what I hope will be a really exciting series of videos planned, so stay tuned for more information!

Filed Under: Uncategorized Tagged With: my youtube channel, rigid heddle weaving, rigid heddle weaving tutorial

Whey, sourdough, yeasted – what should I call this bread recipe!

by Kelly 1 Comment

I’ve been playing around a lot in the kitchen lately. Grinding grain, making lots of good food from scratch, preserving, culturing, what fun!


I made this bread as an experiment today and it was a success. It’s a little unconventional in the combination of ingredients, but it works, so here is the recipe!


Whey Loaf (I decided on a simple title!)

Makes 2 loaves


Ingredients
450 grams wholemeal flour (freshly ground if possible)
50 grams rye flour
500 grams white plain flour
2 teaspoons yeast
1/4 cup sourdough starter
200ml whey, room temperature
2 teaspoons salt
2 tablespoons of honey
3 tablespoons sunflower oil
500ml warm water


Method

Place all dry ingredients in a large mixing bowl. Add sourdough starter and whey. Start up your mixer with a dough hook (or mix with wooden spoon if mixing by hand). Mix honey and oil with warm water and gradually add to mix. Continue to mix on low for 10 minutes, or mix by hand until combined and then knead for 10 minutes or until elastic.


Place dough in an oiled bowl and cover with glad wrap. Allow to double in size (usually an hour depending on the weather).


Divide dough into 2 loaves and shape either into bread tins or into rounds on a tray. If using tins, be sure to oil them or for trays, use good quality baking paper to avoid any sticking. Cover with glad wrap once again and allow to sit for another 45 minutes – 1 hour.


In the meantime, preheat oven to 250 degrees (C).
Slash tops of loaves with a sharp knife or razor blade and place in oven. Set the timer for 5 minutes. 
Turn oven down to 220 deg (C) and bake for a further 30 minutes*.
Turn out and cool on wire rack.


* Due to the wholemeal flour, your loaves may brown more than you would like. If they start to brown too much, cover with a large piece of foil for the remainder of the baking time.


Filed Under: Uncategorized Tagged With: bread, my recipes, Recipes and food

Labneh

by Kelly 6 Comments

I may have a new addiction. Labneh. I made some from my homemade yoghurt and all I can say is wow. If you’ve never tried it you really should!

I started with 1 kg homemade yoghurt. I’ve detailed one method here and my current preferred method here for making your own yoghurt.
I have written instructions for labneh in the past but I like this way of doing it more, it’s easier and it makes more sense to use a colander.

So, you have your large square of muslin lining the colander and just dump your yoghurt in the middle. Have the colander set over a bowl or container to catch the whey.

To keep the muslin tidy and to let gravity work for you, tie the corners of the cloth loosely around a wooden spoon handle so that it is slightly suspended. 

Place in the fridge and leave for 24 hours. Make sure your bowl or container is big enough to collect the whey, or pour off the whey occasionally so it doesn’t overflow (don’t get rid of it though, it’s precious! More of that in a future post.)
Unwrap the labneh. Stir in half a teaspoon of good salt and whip it up a bit with a fork. Now it’s ready to store in an airtight container in the fridge. There are so many ways to use it – my favourite is to spread generously on a slab of homemade bread drizzled with some extra virgin olive oil or to place globs of it in a yummy salad. You can roll balls of it in herbs and place in olive oil. Just digging a spoon into it is a major temptation! 

With homemade yoghurt, labneh is a mild, creamy, healthy delight that you may well find as addictive as I do!

Filed Under: Uncategorized Tagged With: my recipes, recipes, Recipes and food

Whole wheat raspberry and banana hot cakes

by Kelly 3 Comments


I got a grain mill! Yes, the 10 year wait was worth it, it is a Hawos Billy 100 and it’s really wonderful. It was a huge toss up between electric and hand operated, but I’m so glad I went with electric as I think having to hand grind would put me off wanting to use it.

Today I have a recipe to share that I made with my first batch of freshly ground wheat. Wow, what a blessing to have food that nutritious and delicious!


This was my healthy lunch experiment for the kids and they turned out so beautifully! The children quickly became like lions to the prey, they absolutely loved them. Moist, fluffy and so healthy!

Ingredients

4 cups of freshly ground whole wheat flour (or packaged whole wheat flour)
2 tablespoons LSA mix (ground linseed, sunflower and almond)
4 teaspoons baking powder
1 teaspoon cinnamon
5 egg whites, beaten until stiff
1 egg yolk
1/4 cup of date syrup or honey
1 over ripe banana, mashed
3 cups milk (full fat, low fat or skim are fine)
2 tablespoons natural yoghurt
1/2 cup raspberries (I used frozen)

Method

Place all dry ingredients together in a large bowl. 
Beat egg whites until stiff.
Whisk together egg yolk, syrup (or honey), banana, milk and yoghurt. 
Pour these wet ingredients into the dry and mix thoroughly. Fold in the beaten egg whites along with the raspberries.
Fry in a hot, non stick pan or a regular pan with a little rice bran oil to prevent sticking. 

Serve warm. I served with a dollop of yoghurt, dusting of icing sugar, raspberries and drizzled with maple syrup.
For a special dessert these would be awesome with whipped cream or ice-cream and raspberry coulis. 

Filed Under: Uncategorized Tagged With: healthy eating, my recipes, Recipes and food, weight loss and health

Surface embroidery on 5/1 Spot Lace for a Rigid Heddle Loom

by Kelly Leave a Comment


This is the companion video to the one on spot lace. It shows how you can take your weaving further by using surface embroidery techniques. Easy to follow, easy to do but visually stunning!

Filed Under: Uncategorized Tagged With: embroidery, rigid heddle weaving, rigid heddle weaving tutorial, tutorial, video tutorial

5/1 spot lace on a rigid heddle loom

by Kelly Leave a Comment

I’m doing well with the videos this week! This one is for 5/1 spot lace and is a companion video for another new one on surface embroidery.  Enjoy!

Filed Under: Uncategorized Tagged With: rigid heddle weaving, rigid heddle weaving tutorial, weaving

Krokbragd waves video tutorial

by Kelly 1 Comment

My newest video is now live! 

Filed Under: Uncategorized

Prickly Pear syrup recipe

by Kelly 2 Comments


I’ve been doing some research into Navajo natural dyeing techniques – prickly pear fruit with it’s fabulous, vivid magenta to strong pink colour would be an obvious choice. 


I was afraid of the possible, painful consequences of harvesting the fruit, but following some instruction from my somewhat experienced husband, I went ahead and I’m so glad I did. Harvesting and preparation instructions are here.


Not only did I pick and prepare enough fruit to start my yarn dyeing experiment, I also came up with a delicious syrup! Here is the recipe for you:


Ingredients:
1.1kg ripe prickly pear fruit
500grams white sugar
1 teaspoon citric acid


Method:
When the fruit is prepared and peeled (see harvesting and preparation method here) chop each fruit into 3 and blend in a food processor. No food processor? Place in a bowl and mash really well with a potato masher. Place a strainer or colander over a large saucepan. Strain the juice, leaving the seeds in the strainer. Use a spoon to push through all that goodness. 
Once you have your juice, add the sugar and citric acid. Warm over a low heat until sugar in dissolved, then increase heat to medium until the liquid comes to a light boil. Boil for no more than 5 minutes.
Allow to cool, poor into a glass bottle or similar and keep in the fridge.


Uses:
Can be used as a cordial, just mix with water, mix with mineral water and ice for a refreshing drink, drizzle over ice-cream, yoghurt, pancakes, waffles or fruit salad. Anything you would use a fruit syrup for, this syrup can be used.


Hope you enjoy it!

Filed Under: Uncategorized Tagged With: Gardening, my recipes, Recipes and food

  • « Go to Previous Page
  • Page 1
  • Page 2
  • Page 3
  • Page 4
  • Page 5
  • Interim pages omitted …
  • Page 83
  • Go to Next Page »

Primary Sidebar

Categories

Archives

Meta

  • Log in
  • Entries feed
  • Comments feed
  • WordPress.org

Copyright © 2025 Kelly Casanova Weaving Lessons on the Foodie Pro Theme