• Skip to main content
  • Skip to primary sidebar

Kelly Casanova Weaving Lessons

  • Hi! I’m Kelly!
    • Disclosure
  • Online Weaving School Class Index
    • Common account issues
    • Common technical issues
    • What do I get with a membership?
  • New to rigid heddle weaving? Start here!
    • Never heard of the rigid heddle loom?
    • How to weave neat edges on the rigid heddle loom
    • Rigid heddle weaving
    • Rigid Heddle Weaving Patterns
  • Patterns
  • Subscribe

Weaving

The Joy of Rigid Heddle Weaving: A Beginner’s Adventure

by Kelly 2 Comments

I still remember the thrill of waiting for my very first rigid heddle loom to arrive. The idea that I could create my own handwoven fabric felt like magic. I’d seen weaving videos online, mostly featuring floor looms, and dreamed of starting my own weaving journey, imagining the joy of weaving.

When the box finally arrived, I was filled with excitement—and a little bit of trepidation. I didn’t know any other weavers, and back then, online resources were scarce. Thankfully, that’s no longer the case! Today, rigid heddle weaving is more accessible than ever, and I’m here to help you get started.

Why Rigid Heddle Weaving?

Rigid heddle weaving is perfect for beginners and experienced crafters alike. Its accessibility and versatility make it a great choice for anyone eager to explore the art of weaving. Whether you’re looking for a creative outlet or a way to relax, the rigid heddle loom is a wonderful companion and excellent starting point.

What Is Rigid Heddle Weaving?

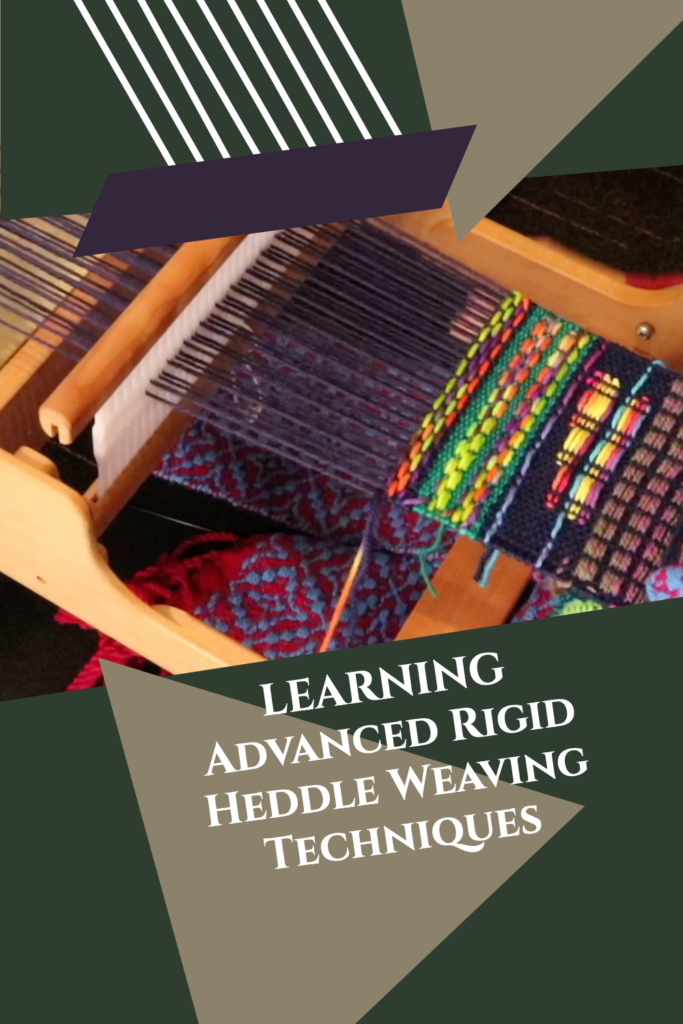
A rigid heddle loom is a simple, portable loom with a rigid heddle (a frame with slots and holes) that serves as both a beater and a shed maker. It allows you to weave fabrics quickly and easily without the complexity of a large multi shaft loom.

Compared to Other Looms:

  • Rigid Heddle Loom: Affordable, compact, and beginner-friendly.
  • Floor Loom: Larger and more complex, designed for advanced weavers and larger projects.
  • Inkle Loom: Ideal for narrow projects like belts and straps.

Why It’s Fun and Accessible

Simple Setup and Use
One of the best things about a rigid heddle loom is its simplicity. The setup is straightforward, making it easy to get started even if you’re completely new to weaving. With a bit of practice most weavers find that they improve very quickly.

Quick Results
Weaving on a rigid heddle loom allows you to see progress quickly, which is incredibly motivating for beginners. Imagine weaving your first scarf or table runner in just a few hours to a day or two!

Creative Freedom
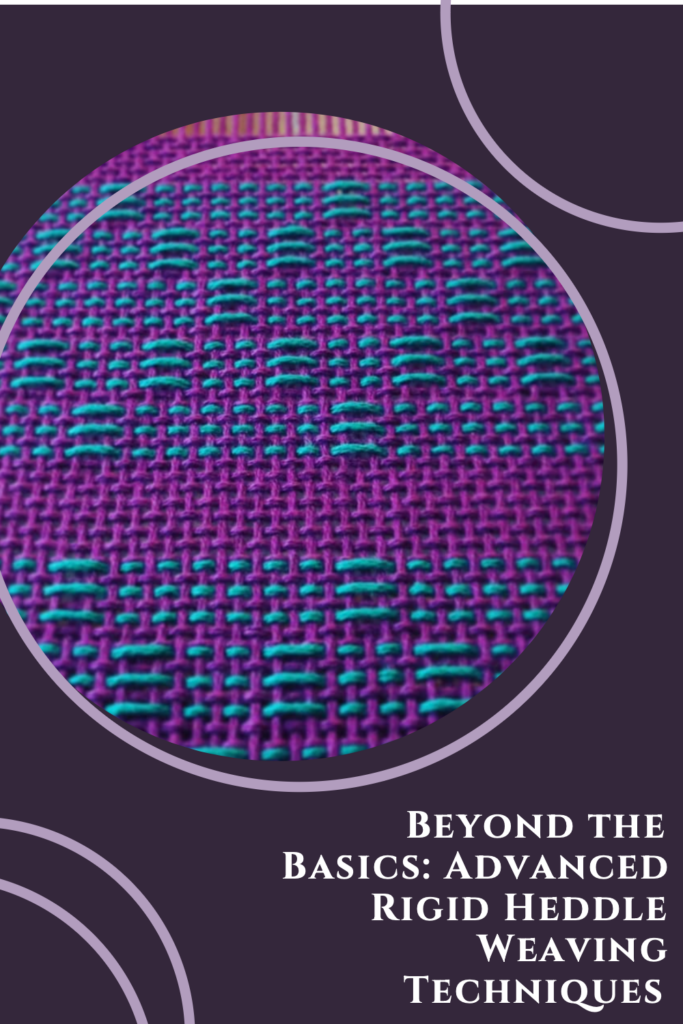
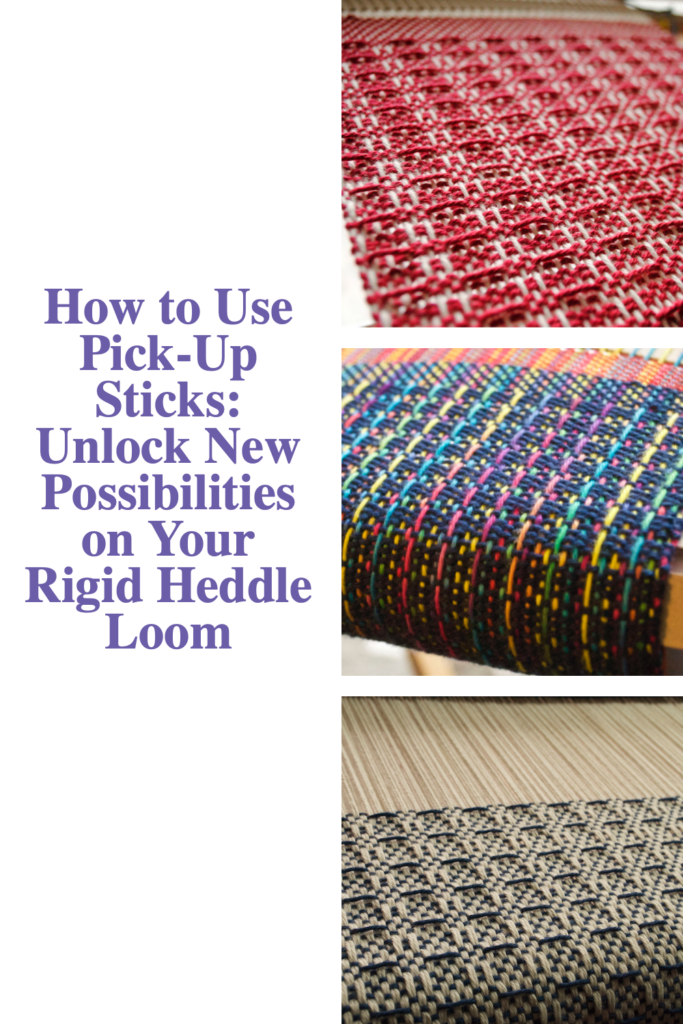
The rigid heddle loom is versatile enough to let your creativity shine. You can experiment with different yarns, textures, and patterns without needing advanced techniques. Even if you just learn plain weave and decide to mostly stick with that, there are other techniques, such as Color and Weave or Clasped Weft to jazz up your plain weave.

Hands-On Satisfaction
There’s something deeply satisfying about working with your hands. Watching your project take shape on the loom is a tangible reminder of your creativity and effort. Weaving is calming and therapeutic.

Creative Possibilities

Rigid heddle weaving opens up a world of possibilities. You can create:

  • Scarves: Perfect for trying out new yarns and color combinations.
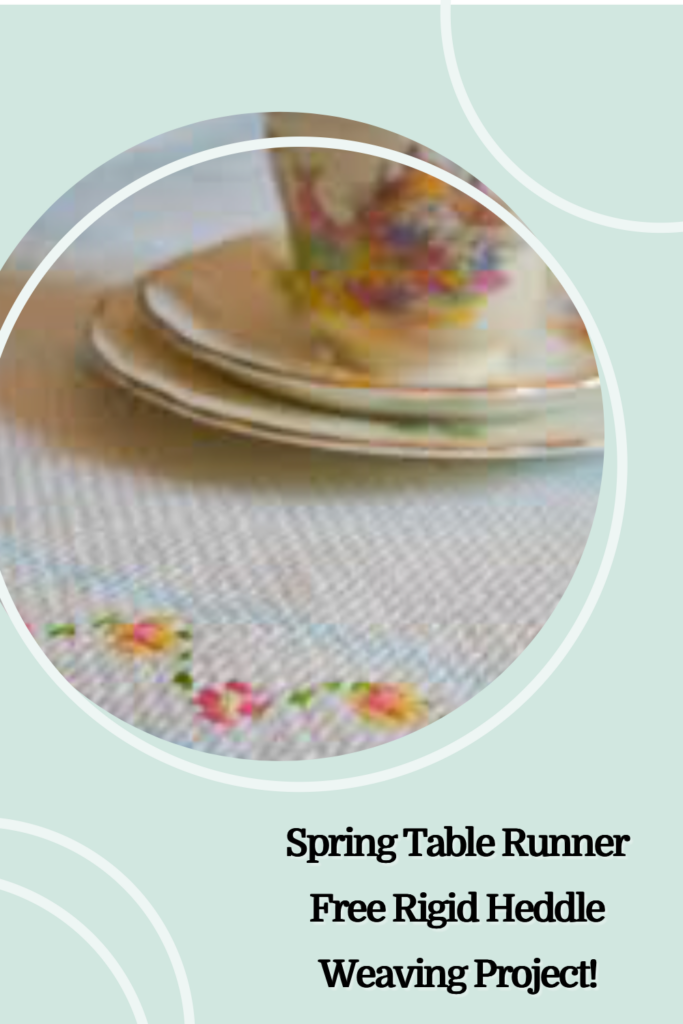
  • Table Runners: Add a handmade touch to your home décor.
  • Wall Hangings: Combine textures and patterns for stunning art pieces.
  • Dish Towels: Practical and beautiful gifts for family and friends.
  • Blankets: Cosy up on cold winter evenings with a bespoke handwoven blanket 🖤

You can also experiment with specialty yarns, hand-dyed fibers, and weaving patterns to make each piece uniquely yours.

A Social Craft

Weaving doesn’t have to be a solitary activity—it’s a way to connect. Many online weaving communities and local guilds welcome weavers of all skill levels. Sharing your progress and learning from others can make your weaving journey even more rewarding.

At the Online Weaving School we have a private member’s group where students share and troubleshoot. It’s a wonderfully supportive and safe space for weavers!
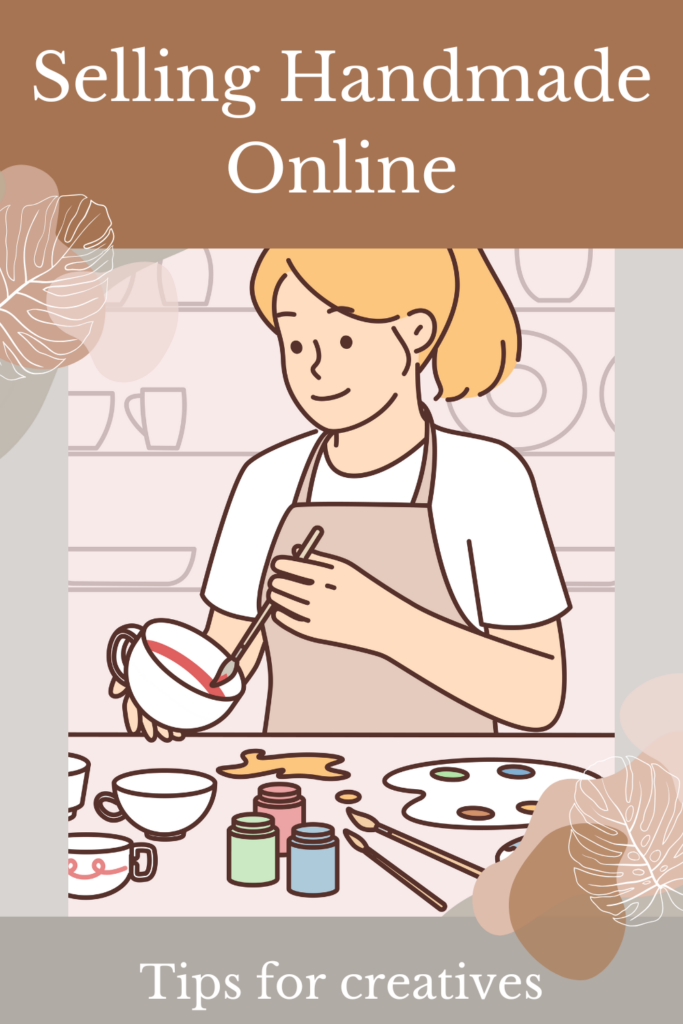
A Source of Income

Yes, you really can make money from your weaving if that is something that interests you. Check out these posts to get you started:

Do you want to start selling your weaving?

3 ways to start selling online for free

Etsy vs Shopify – which is best for selling online?

Getting Started

Ready to dive in? Here’s what you’ll need:

  • Rigid Heddle Loom: Start with a size that fits your space and budget
  • Yarn: I recommend starting out with a woollen or cotton knitting yarn for first projects
  • Shuttle: For passing your weft yarn through the shed.
  • Double ended threading hook: Makes warping and threading your loom simple with just one tool.

Check out this article for all the basic essential tools I use frequently.

Budget-Friendly Tip: Many weaving stores offer beginner kits or sometimes secondhand looms. Check online marketplaces or local weaving groups and guilds for deals.

Rigid heddle weaving is more than a craft—it’s a way to express your creativity, make beautifully unique items, and connect with a vibrant community of makers. If you’ve ever dreamed of creating your own fabric, there’s no better time to start.

Until next time…

Happy weaving!

*This post contains affiliate links. For further information, please see my disclosure policy.

Filed Under: Rigid heddle weaving, Weaving Tagged With: rigid heddle loom, rigid heddle weaving, weaving

Beyond the Basics: Advanced Rigid Heddle Weaving Techniques

by Kelly 2 Comments

The rigid heddle loom is often celebrated as a beginner-friendly weaving tool, but don’t let its simplicity fool you—it’s a versatile loom capable of producing intricate and advanced designs. In this article, we’ll dive into advanced rigid heddle weaving techniques that will elevate your weaving skills and inspire your next project.

Double Heddle Weaving

What It Is:

Double heddle weaving allows you to expand the capabilities of your rigid heddle loom, enabling you to weave with finer threads, create double-width fabrics, or experiment with more complex patterns.

How It Works:

  • Add a second heddle to your loom and thread your warp through both heddles. The exact threading will depend on what you want to do.
  • With two heddles, you can weave a fabric with a doubled sett. Or you can use the extra heddle for additional patterning possibilities. Or you can weave double width, even tubular! There are so many options!

Possible Applications:

  • Patterned scarves or shawls.
  • Double width blankets or throws.
  • Table linens with finer threads.

Tips for Success:

  • Practice warping with two heddles on a small project before tackling larger designs. Consider making just a sample to start with using inexpensive yarn.
  • Follow a quality class or PDF instructions to ensure correct threading and to give you a roadmap.

Resources:

Weaving with Two Heddles (online class)

Plaid Blanket Double Width Ebook

Diamond Stripe Towels PDF Pattern

Pickup Stick Patterns

What It Is:

Pickup sticks allow you to create intricate patterns like lace, floats, and supplemental weft designs by selectively raising warp threads.

How It Works:

  • Insert a pickup stick behind the heddle, with the heddle in the down position and lift specific threads to form a pattern.
  • Combine pickup patterns with plain weave for added texture.
  • As you become familiar with the pick up stick you may want to add more. You can then learn to use heddle rods to enable multiple pick up stick configurations.
  • You can also use a pick up stick with your heddle in neutral to pick up warp threads in front of the heddle for branoe/overshot style weaving.

Possible Applications:

  • Table runners with decorative borders.
  • Wall hangings featuring geometric designs.

Tips for Success:

  • Experiment with a sampler to understand how different pickup patterns work. There are so many different arrangements and patterns to explore. All you need is a plain weave sample and a pick up stick to get started.
  • Keep notes on the sequence of your designs and take photos for future projects.

Resources:

How to use Pick Up Sticks

Converting Pattern Drafts to the Rigid Heddle Loom online class

The Branoe Collection

Pick Up Perfection online class

Supplementary Weft and Warp Techniques

What It Is:

Supplementary techniques involve adding extra threads to the warp or weft to create designs that stand out against the background weave.

How It Works:

  • Use a shuttle or yarn butterfly to weave additional threads into specific sections of the fabric.
  • These threads can be in contrasting colors or textures for added dimension.
  • For the warp, you can plan the supplementary threads as part of the warping process, but they are frequently added after the loom is warped. They can be threaded where desired and weighted over the back of the loom, making them independent of the warp and easy to manipulate.

Possible Applications:

  • Embellished shawls or scarves.
  • Highlighting specific motifs in larger textiles.
  • Making unique designs.

Tips for Success:

  • Keep the supplementary threads loose enough to avoid puckering the fabric.
  • Experiment with different weights and types of yarns (ribbon can be beautiful!)
  • If you need to weight supplementary warps at the back of the loom, these “S” hooks are perfect.

Resources:

Supplementary Weft Tutorial

The Maria Scarf

Exploring Lace Weaves

What It Is:

Lace weaving techniques like leno or Brooks Bouquet create open, airy patterns that are perfect for lightweight, decorative fabrics.

How It Works:

  • Most lace techniques are finger controlled and worked on a plain weave background. Some also use a pick up stick.

Possible Applications:

  • Curtains, scarves, or table linens.
  • Projects that benefit from a delicate, decorative touch.
  • Lace weaves make wonderful scarves and shawls.

Tips for Success:

  • Many lace weaves have a large amount of draw in so be sure to factor that in before starting your project.
  • Lace can be slow to weave up, as much of the manipulation is manual. Don’t let that put you off though, the results are worth the effort!

Resources:

Lovely and Lacy online workshop

The Garden Path Scarf PDF pattern

The Farmer’s Market Bag PDF pattern

All about finger controlled techniques

More Than Two Heddles

What It Is:

Most rigid heddle looms have enough space to fit 3 heddles, enabling the weaver to weave 4 shaft patterns.

How It Works:

  • Use a double heddle block to hold the first 2 heddles. Use a single heddle block along with spring clamps to hold the 3rd heddle for threading. The 3rd heddle can then be suspended by the warp after tie on.

Tips for Success:

  • This is an advanced technique so be patient with your learning journey. Understand that the threading for the 3 heddles can be configured to your own preferences and according to the weaving draft – there is not just one way to go about it.
  • Sometimes a pick up stick will also need to be added to allow for a flow of the weaving.
  • Your 3 heddles must all be the same size (dent).

Resources:

Three Heddle Adventures online course

Weaving 3 & 4 Shaft Patterns on a Rigid Heddle Loom

Combining Techniques for Unique Results

Weaving becomes really exciting when you start to combine techniques you have learned.

  • Use color and weave to create pattern or highlight areas of your weaving
  • Pair lace weaves with supplementary weft for a blend of texture and openness.
  • Add a pickup stick to 3 heddles for even more patterning possibilities
  • Pair a twill pattern with clasped weft

With these advanced techniques, your rigid heddle loom can become a powerful tool for crafting really unique and exciting woven pieces. Whether you’re creating wider fabrics, experimenting with lace, using a 3 or 4 shaft draft, or exploring color and texture, the possibilities are endless. Push your creative boundaries and take your weaving to the next level!

Until next time…

Happy Weaving!

*This post contains affiliate links. For more information please see my disclosure policy.

Filed Under: Rigid heddle weaving, Rigid Heddle Weaving Patterns, Weaving Tagged With: advanced rigid heddle weaving, rigid heddle loom, rigid heddle weaving patterns

Etsy vs. Shopify: Which Platform Is Best for Selling Handmade and Digital Products?

by Kelly Leave a Comment

Opening your first online shop is such an exciting experience! When I started as an Etsy seller in 2008, the options for handmade sellers were limited. Etsy was the standout choice then—and it’s still an option in 2025—but today, there are so many ways to sell your creations online. With so many choices, it can be challenging to decide which platform suits your products, budget, and goals.

I sold handmade goods on Etsy for years, but over the past five years, I’ve transitioned almost entirely to selling digital products like weaving PDF patterns and eBooks. Last year, I decided to open a Shopify store, offering the same products as my Etsy shop. In this post, I’ll share my experiences with both platforms, the pros and cons, and my advice for choosing the best platform for your needs.

Should I Start with Etsy or Shopify?

Both platforms have unique advantages and challenges, so let’s break them down to help you decide.

Etsy Pros

  1. Beginner-Friendly Setup:
    Starting a shop on Etsy is incredibly easy. Creating an account, listing products, and processing payments requires little technical knowledge and takes very little time.
  2. Low Upfront Costs:
    Etsy’s listing fees are just $0.20 per item, and if you don’t make a sale, that’s all you pay. This makes Etsy a low-risk option for beginners.
  3. Built-In Marketplace:
    Etsy attracts millions of buyers, giving you instant access to a marketplace that helps you build a customer base without needing a website or extensive marketing. This is invaluable if you are just starting out and don’t have an audience.

Etsy Cons

  1. High Fees on Sales:
    While the $0.20 listing fee is affordable, Etsy’s transaction fee of 6.5% (on the item price and shipping) and payment processing fees can add up quickly.
  2. Intense Competition:
    Etsy’s marketplace is crowded. While buyers may find your shop, they’ll also see competing listings—sometimes directly on your product pages!
  3. Limited Control:
    You don’t own your Etsy shop, meaning you’re subject to their rules. Sellers can be suspended or removed without warning, often due to accidental copyright issues.
  4. No Customer Email Collection:
    Building a mailing list is essential for growing your business, but Etsy doesn’t allow automated email collection from customers.
  5. The Future Doesn’t Look so Bright: There is a growing level of discontent with Etsy from shop owners. There are too many reasons to list here, but if you Google or Youtube it, you will find plenty of explanations. Personally, I feel glad to be moving away from Etsy and towards Shopify at this point.

Shopify Pros

  1. You Own It:
    With Shopify, you have complete control over your store, branding, and customer data. It’s your shop, not a rented space.
  2. Customizable and Professional:
    Shopify stores are clean, professional, and customizable. Even with the default templates, your shop will look great.
  3. Email Collection:
    Shopify allows you to collect customer emails, making it easier to build relationships and drive repeat sales.
  4. Your Own Domain:
    You can choose a custom domain name, making your shop easier to find and more memorable.
  5. It is More Affordable: Now, this is somewhat dependent on how much you customise your shop. I have fairly basic level paid customisations (like apps for collecting shop and product reviews) but how much you do is up to you.

Shopify Cons

  1. You Drive the Traffic:
    Unlike Etsy, Shopify isn’t a marketplace, so you’ll need to bring traffic to your shop. This can be a challenge if you’re starting from scratch.
  2. Monthly Costs:
    Shopify charges a monthly hosting fee (starting at $42 for my setup) regardless of sales. You may also need paid apps for customization, as I mentioned in the previous section, adding to the costs. Although there is the monthly fee, you can start for as little as $1. Scroll to the end to see this special Shopify offer.
  3. A Little Trickier to Learn: I found that it was more complex setting up a shop. Again, this can depend on your level of customisation and needs for your specific business. I found I needed to do some research regarding some aspects of opening my shop, but information and instructions are readily available online.

Cost Comparison: Etsy vs. Shopify

Here’s a breakdown of my typical monthly expenses for each platform:

  • Etsy Fees: $50–$1600/month, depending on sales.
  • Shopify Fees: $42/month for hosting + $20 for apps = $62/month.

For me, Shopify’s flat fees are more predictable and affordable. I love that the fees don’t increase based on my level of sales. But as an established seller with over 12,000 Etsy sales, I already have a strong customer base to direct to my Shopify store, which has given me a considerable advantage.

Final Thoughts on Etsy vs. Shopify

If you’re just starting, Etsy is still a good choice. The low upfront cost and built-in marketplace make it ideal for beginners. However, as you grow, you might want more control over your shop, branding, and customer relationships—this is where Shopify shines.

While my Shopify sales were slower than I’d hoped initially, it’s now picking up as customers become aware of my newer shop and accustomed to using it. Over time, I hope my Shopify store becomes the primary home for my digital products.

Want to Start Your Own Shopify Store?

Try a 3 day Shopify trial, then start seeing for $1 a month for your first 3 months! Click here to start your free trial.

If you’re still exploring options for selling online, check out these helpful resources:

  • 3 Ways to Start Selling Online for Free
  • Do You Want to Start Selling Your Weaving?
  • Etsy Essentials for Beginners

I hope this article helps you choose the best platform for your business. Have questions? Drop them in the comments—I’d love to hear from you!

This post contains affiliate links. See my disclosure policy for details.

Filed Under: Online business, Weaving Tagged With: Etsy, handmade selling, selling online, shopify

“Seasonal Weaving Projects: Welcome Spring with Colorful Home Décor”

by Kelly Leave a Comment

Spring is such a wonderful season, bringing with it a sense of renewal and fresh inspiration! It’s the perfect time to breathe new life into your home décor with seasonal weaving projects that celebrate the colors and lightness of the season.

Whether you’re just beginning your weaving journey or have been creating for years, weaving for spring offers endless opportunities to play with vibrant hues, pretty fabrics, and cheerful designs. From brightening up your living spaces to adding handmade touches to your décor, these projects are a wonderful way to welcome the season in style.

Let’s explore how you can bring the beauty of spring into your home with a few simple yet stunning weaving project ideas!

Spring-Inspired Color Palettes: Pastels, Floral Tones, and Fresh Greens

Spring provides weavers with so much inspiration when it comes to color – it feels like all of a sudden color is all around us, bursting to life! Here are some ideas for getting started:

  1. Pastels: Soft and Serene
    Pastels are a hallmark of spring, offering a gentle yet uplifting aesthetic. Shades like lavender, blush pink, baby blue, and buttery yellow evoke the softness of new blooms and fresh mornings. These colors work beautifully in projects where you want a light, airy feel. Pair pastel hues with white or cream for a classic springtime look, or blend multiple pastels for a dreamy, watercolor effect.
  2. Floral Tones: Bright and Cheerful
    For a bolder take, draw inspiration from the vivid colors of spring flowers. Tulip red, daffodil yellow, hyacinth purple, and rose pink can infuse your weaving projects with joyful energy. These colors work well as accents or focal points, especially when paired with more subdued tones like gray or beige to balance their brightness.
  3. Fresh Greens: A Nod to Nature
    Nothing says spring quite like green! From soft sage to vibrant emerald, green hues symbolize growth and renewal. Incorporating fresh greens into your weaving not only mirrors the season’s natural beauty but also adds a grounding element to your designs. Pair greens with floral tones for a garden-inspired look or mix them with neutrals for a calm, earthy feel.

Project Ideas for Spring Home Décor

Many of us dive into spring cleaning with a strong urge to refresh our spaces and embrace the opportunities of a new season. Why not channel that same spirit into weaving projects that enhance your home with clean, airy, and light-filled aesthetics? From soft textiles to cheerful pops of color, weaving offers endless ways to complement the fresh start spring inspires.

  1. Handwoven Table Runners
    • Perfect for springtime gatherings or brunches or just to show off your shiny clean dining table!
    • Try a beautiful, light cotton or cottolin.
    • My free rigid heddle weaving project, The Spring Table Runner incorporates soft cottons in light colors with floral embroidered embellishments.
    • The Log Cabin Table Runner is also a great project for this time of year with a bold design and customisable colors.
  2. Wall Hangings with Floral or Abstract Pastel Themes
    • A pop of colour or harmonious artistic piece to adorn your wall.
    • There is so much licence for creativity when you weave a wall hanging. It can be completely understated to blend with your surroundings or it can be a bold stand out piece.
    • The Art Cloth Workshop is the perfect starting point for a truly unique project that could easily become a wall hanging.
    • If you’re interested in circle weaving, a round hoop also makes a unique decor piece.
  3. Lightweight Throw Blankets
    • Ideal for chilly spring evenings. You might feel it’s too soon to be thinking about blankets, but as the season moves towards winter those evenings can be quite cool. How lovely to think of cosying up with a blanket that is light and soft.
    • Use breathable fibers like bamboo or cotton blends that are lovely and soft.
    • Here are some project ideas to inspire:
    • Overshot Floor Loom Throw
    • Double Width Baby Blanket
    • Double Width Plaid Blanket
    • Double Width Floor Loom Blanket
  4. Weaving Cushion Covers
    • Create textured or patterned cushions with bright pops of color. This is such a fantastic way to bring splashes of color that draw the eye but don’t overwhelm.
    • There are many possibilities for design, from a simple and classic plain weave to a more busy twill to a show stopping overshot.
    • The Pick Up Perfection Class project is a gorgeously contrasted cushion cover using thick and bold cottons.
  5. Light Spring Scarf
    • You may not be ready to rug up with a wooly winter scarf just yet but how about transitional garments?
    • The Garden Path Scarf is great for this time of year as the design has a very light, airy and open texture.

Quick Spring Weaving Tips

  • Move outdoors! If you have a loom that is portable, try taking it outside when the weather is pleasant. Weaving outdoors is a wonderful way to relax, enjoy the fresh air and birdsong.
  • Try something new! Experiment with patterns like stripes, plaids, color and weave and so much more.
  • Clean and organise your weaving space! Nothing makes you feel more motivated than a well arranged space where you can find what you need and know what materials you have to work with.

Find your Style

  • Make a Spring Inspired board on Pinterest. Check out what other weavers or interior designers are working on and be inspired by them.
  • Take photographs, especially outdoors. Then you can use an app to generate a color palette for you based on your photo!
  • Get familiar with the basics of color theory.
  • Use online resources like color generators or spring color palette choosers to help you choose colors you love.
For this color palette I used the app Palette Cam and one of my photos from our garden.

As the days grow warmer and nature comes to life, there’s no better time to embrace the season with your own handmade creations. Spring is all about renewal, and weaving allows you to infuse your home with fresh colors, light textures, and a touch of personal artistry. A change in the season is a wonderful opportunity to recharge and reassess. So gather your materials, let your creativity flow, and welcome spring with the beauty of your handmade décor!

Until next time…

Happy Weaving!

Filed Under: Art cloth, Rigid heddle weaving, Spring Weaving, Weaving Tagged With: home decor, seasonal weaving projects, spring weaving, weaving project ideas

Choosing the Perfect Cotton Yarn: A Guide for Your Weaving Projects

by Kelly Leave a Comment

Choosing the Best Cotton for Your Weaving Projects: A Guide for Beginners and Beyond

Cotton is one of the most versatile and commonly used fibers in weaving projects. Whether you’re creating hand or kitchen towels, table runners, or baby blankets, the right cotton can make a world of difference in your final result. In this guide, we’ll explore various cotton yarns, from locally sourced options to globally available alternatives, with practical tips to help you choose the best yarn for your weaving needs.

Why I Love Bendigo Woollen Mills Cotton

My go-to cotton is Bendigo Woollen Mills cotton. Here’s why it’s such a fantastic option:

  1. Locally Made: As an Australian, I love supporting local manufacturers.
  2. Economical: Bendigo cotton comes in large 200g balls, making it affordable for bigger projects.
  3. Versatile Weight Options: Available in 4-ply (fingering weight), 8-ply (DK weight), and 10-ply (aran weight).
  4. Color Variety: Bendigo offers a vast range of colors, with new seasonal blends frequently added.

I’ve used Bendigo cotton in many of my weaving projects, including:

  • Log Cabin Table Runner (available as a digital download and online class).
  • Wash Your Hands Towels (a free project).
  • Pinwheel Table Topper (rigid heddle loom class).
  • Lux Hand Towels (digital download).
  • Double-Width Baby Blanket (online class).

Alternatives for Non-Australian Weavers

If you’re outside Australia, shipping Bendigo cotton may not be cost-effective. Thankfully, there are excellent alternatives:

1. I Love This Cotton (Hobby Lobby)

  • Weight: DK.
  • Pros: Affordable, widely available in the U.S., and comes in large balls with a great color selection.
  • Best For: Towels, dishcloths, and lightweight projects.

2. Sugar ‘n Cream (Lily Yarn)

  • Weight: Aran.
  • Pros: Durable yet soft, perfect for hardwearing items like placemats and hand towels.
  • Best For: Place mats (used in my Woe to Go! Beginners Class), dishcloths, and hand towels.
  • Tip: Works best with a 7.5-dent heddle.

3. Knit Picks Dishie

  • Weight: DK.
  • Pros: Hardwearing but soft, suitable for kitchen use or even baby blankets.
  • Best For: Baby blankets, dishcloths, and towels.

4. Lion Brand 24/7 Cotton

  • Weight: DK.
  • Pros: Readily available in most countries, affordable, and versatile.
  • Best For: General weaving projects.

5. Yarn and Colors Epic Cotton

  • Weight: Slightly heavier than DK.
  • Pros: Exceptionally soft, available in unique pastel shades.
  • Best For: Baby blankets, small-scale projects like dishcloths.
  • Consideration: Comes in smaller 50g balls, which can increase the cost for larger projects.

6. Maurice Brassard 8/8 Cotton

  • Weight: Thick (equivalent to aran).
  • Pros: Durable and excellent for projects requiring structure.
  • Best For: Table runners, cushion covers, or experimental projects.

Choosing the Right Cotton for Your Project

When selecting cotton for your project, consider:

  • Thickness: Thicker cottons are great for hand towels and placemats but may not be suitable for tea towels or other lightweight items.
  • Softness: Some cottons, like Bendigo and Epic, are soft and lofty, while others, like Sugar ‘n Cream, are sturdier.
  • Cost and Availability: Opt for locally available options where possible to save on shipping.

Projects That Pair Perfectly with Thicker Cotton

Thicker knitting-style cottons work well for:

  • Hand Towels: Like my Wash Your Hands Towels or Lux Hand Towels.
  • Table Runners and Placemats: Add structure and durability to your tableware.
  • Dishcloths: Try my Members-Only Dishcloth Class at the Online Weaving School.

However, these thicker yarns aren’t ideal for:

  • Tea Towels: Thicker cotton tends to leave lint on dishes and isn’t as absorbent for drying.
  • Delicate Fabrics: Consider thinner cottons like 8/2 weaving yarns for finer projects.

Check out this video to see some of the mentioned yarns in action ⤵️

*This post contains affiliate links. For more information please see my disclosure policy.

Exploring different cotton yarns can open up endless possibilities for your weaving. If you’re unsure, start with small samplers or projects like dishcloths to test how a particular cotton works on your loom. For more guidance, visit my Online Weaving School or check out my project downloads in my Design Store.

Until next time…

Happy weaving! 😊

Filed Under: Weaving, Yarn Tagged With: best weaving cotton, choosing cotton yarn, choosing yarn for weaving

How to Use Pick-Up Sticks: Unlock New Possibilities on Your Rigid Heddle Loom

by Kelly Leave a Comment

Pick-up sticks are a game-changer for rigid heddle weaving. These simple tools expand your loom’s capabilities, allowing you to create intricate patterns beyond plain weave. Whether you’re a beginner or looking to elevate your skills, this guide will help you understand how to use pick-up sticks effectively.

What Are Pick-Up Sticks?

Pick-up sticks are flat, smooth lengths of wood designed to manipulate warp threads on your loom. They allow you to create patterns that mimic the capabilities of multi-shaft looms without adding complex equipment.

On a rigid heddle loom, the warp is divided into two “shafts”—slot threads and hole threads. By incorporating pick-up sticks, you can manipulate the slot threads to create additional “shafts,” opening up a world of pattern possibilities.

Why Use Pick-Up Sticks?

  1. Expand Your Weaving Capabilities:
    • One pick-up stick = 3 shafts.
    • Two pick-up sticks = 4 shafts.
    • Add more for even greater complexity!
  2. Create Beautiful Patterns:
    From simple designs to intricate motifs, pick-up sticks make it possible to weave beyond plain weave.
  3. Learn, Experiment and have Fun:
    They’re an excellent way to play, experiment, and grow as a weaver.

How to Use Pick-Up Sticks

Tools You’ll Need:

  • Pick-up sticks: Slightly longer than the width of your warp.
  • Rigid heddle loom: Set up for plain weave.

Step-by-Step Guide:

  1. Start with the Heddle in the Down Position:
    • This raises the slot threads (shaft 2), making them easier to pick up.
    • The hole threads (shaft 1) remain fixed and cannot be manipulated.
  2. Pick Up Warp Threads:
    • Slide your pick-up stick under the threads you want to manipulate.
    • For basic patterns, follow a “1 up, 1 down” sequence (alternate threads over and under the stick).
  3. Position the Pick-Up Stick:
    • Push the stick to the back of your loom when not in use. It will rest flat between the warp threads without interfering with your weaving.
  4. Engage the Pick-Up Stick:
    • When ready to weave a pick-up pattern, bring the stick forward, turn it on its edge, and pass your shuttle through the shed.

Here is a simple weaving sequence as an example:

  1. Up (heddle up)
  2. Down (heddle down)
  3. Up, pick up stick (heddle up and slide pick up stick behind the heddle, leaving flat).

Tips for Beginners

  • Experiment Freely: Don’t worry about understanding all the technical details at first. Play with different sequences and see how the patterns emerge.
  • Follow Patterns: Written instructions like “1 up, 1 down” are straightforward and a great way to learn.
  • Start with Simple Projects: Try my Wash Your Hands Towel Set Project or Lux Hand Towels pattern for guided practice.

Explore More Pick-Up Stick Resources

  • Free Patterns: Sign up for my email list and receive the beginner-friendly Moroccan Dream Scarf pattern.
  • Video Tutorials: Watch my Pick-Up Stick Playlist on YouTube for step-by-step instructions.
  • Courses: Dive deeper with my Pick Up Perfection course, included free with an Online Weaving School membership or available as a single purchase class.

Why You’ll Love Pick-Up Stick Weaving

Pick-up sticks let you unlock the full potential of your rigid heddle loom. Whether you’re weaving a simple scarf or an intricate towel, these tools are a must-have for any weaver.

If this guide has been helpful or if you have questions, leave a comment below—I’d love to hear from you!

Until next time…

Happy Weaving!

*This post contains affiliate links. For further information please view my disclosure policy.

Filed Under: Rigid heddle weaving, Rigid Heddle Weaving Patterns, Weaving Tagged With: how to use pick up sticks, pick up sticks, rigid heddle weaving

Color Theory for Weaving: Choosing Harmonious Palettes

by Kelly 2 Comments

Color choices are at the heart of every weaving project, shaping more than just the surface of your creation. They have the power to influence mood, define a style, and amplify the visual impact of a piece. Whether you’re aiming for a bold statement or a subtle harmony, the colors you choose will determine the final product and color theory can aid your decision making.

Selecting colours for weaving does not come naturally to everyone, in fact it is something that I am consulted about frequently.

In this article, we’ll explore why color matters in weaving, how you can use it to elevate your designs and look at tools that are available to help.

The Basics of Color Theory

  • The Color Wheel:

The color wheel is a great tool for any weaver looking to make intentional and impactful color choices. It visually organizes colors in a way that highlights their relationships, making it easier to create harmonious or contrasting combinations. This is so beneficial as a starting point for someone who feels hesitant about choosing colors.

Primary Colors

At the heart of the color wheel are the primary colors: red, blue, and yellow. These are the building blocks of all other colors, as they cannot be created by mixing other hues. When used in weaving, primary colors can create bold, eye-catching designs or serve as anchors for more complex color palettes.

Secondary Colors

Secondary colors—orange, green, and purple—are created by mixing equal parts of two primary colors. For example, mixing red and yellow creates orange, while blue and yellow make green. These colors often serve as bridges, adding balance and versatility to your weaving projects.

Tertiary Colors

Tertiary colors result from blending a primary color with a neighboring secondary color on the wheel. Examples include red-orange, yellow-green, and blue-violet. These nuanced hues are perfect for adding depth and sophistication to your woven designs, allowing you to move beyond basic color combinations.

  • Color Relationships:

By understanding complementary, analogous, and triadic color schemes, you can design pieces that evoke specific moods and achieve a polished look.

Complementary Color Schemes

Complementary colors sit opposite each other on the color wheel, such as blue and orange, red and green, or yellow and purple. These pairings create a high-contrast, dynamic effect that makes each color stand out. In weaving, complementary colors are ideal for bold, attention-grabbing designs.

Analogous Color Schemes

Analogous colors are neighbors on the color wheel, like blue, blue-green, and green or red, red-orange, and orange. These schemes create a harmonious, soothing effect because the colors share a similar base. Analogous palettes are perfect for weaving projects with a natural or calming vibe.

Triadic Color Schemes

Triadic color schemes use three colors evenly spaced around the color wheel, such as red, yellow, and blue or purple, green, and orange. These combinations are vibrant and balanced, offering plenty of contrast while maintaining harmony. Triadic schemes work well in playful or artistic weaving projects where bold and cheerful designs are the goal.

  • Warm vs. Cool Colors:

he choice between warm and cool colors can dramatically influence the mood and atmosphere of your woven pieces.

Warm Colors: Energizing and Inviting

Warm colors include hues like red, orange, and yellow. These colors are often associated with energy, warmth, and enthusiasm.

Warm colors tend to “advance,” meaning they appear closer to the viewer, which can make a woven piece feel more dynamic and engaging. If you’re creating a focal point in your weaving, incorporating warm colors can draw attention and create a vibrant centerpiece.

Cool Colors: Calming and Serene

Cool colors include shades like blue, green, and purple. These hues can evoke feelings of calm, tranquility, and relaxation.

Cool colors tend to “recede,” giving an impression of depth and spaciousness. This quality makes them great for weaving projects where you want to emphasize subtlety and create a serene visual flow.

Blending Warm and Cool Colors for Balance

Using both warm and cool colors in a single project can create stunning contrasts and balanced designs. For example, combining warm oranges with cool blues can result in a visually striking piece that feels both energetic and grounded.

By thoughtfully choosing warm or cool colors—or a combination of both—you can tailor the mood and style of your weaving projects to suit any setting or purpose.

Check out this cool interactive color wheel changer that allows you to see all different combinations just by clicking.


Choosing Colors for Weaving Projects

  • Understanding Yarn Interactions
    The weave structure, yarn type (glossy, matt, thick, thin), scale of the pattern and the distance at which the item is viewed can all affect color perception. Some combinations of these factors can produce the serendipity of iridescence, which is a beautiful “glow” to your work.
  • Sample Before You Commit:
    The very best way to ensure you will be happy with your weaving project is to sample first, using your selected colours. Sampling tells you a lot of what you need to know for a successful project!
  • Do What You Love:
    Ultimately, choose colors that you love and that make you happy. This may involve choosing colors that may not be typically considered to “go together”. That’s ok, it’s your project, you’re paying for the yarn and putting in the effort and presumably you’re a grown up – so do what you want! 😀

Color Inspiration is all around you!

  • Find Ideas in the World Around You:
    Take photos when you’re out and about of sunsets, forests, flowers, buildings, outfits people are wearing – there is just so much inspiration right before your eyes!
  • Use Tools Online:
    There are many free tools available online to help you pick out colors. This one allows you to use a photograph to arrange a color palette. If you’re looking to make harmonious stripes this free stripes generator is fun. If you have no idea which colors to pick for your next project, try this random color generator. You can tell it how many colors to select, choose them from the color wheel or from a huge pool of colors and other simple specifications. There are also many color apps to choose from, many of them are free.
For this color palette I used a photo from our garden and the app Palette Cam.

Would you like the Color Theory Basics in a printable format to refer back to? I’ve put together a free printable Color Theory Basics Guide here:

Color_Theory_for_Weaving_GuideDownload

For members of the Online Weaving School I have a Gaining Confidence with Color Workshop available.

Incorporating color theory into your weaving projects can transform your creations from beautiful to breathtaking. By understanding how colors interact and choosing palettes that reflect your vision, you can create pieces that evoke emotion, tell stories, or simply bring joy. Whether you lean on classic harmonies, experiment with bold contrasts, or take inspiration from the natural world, the key is to let your creativity guide you. As you explore and refine your approach to color in weaving, remember that every choice adds to your unique artistic voice. So, gather your yarns, trust your instincts, and let color bring your weaving to life!

Until next time…

Happy Weaving!

Filed Under: Color, Weaving Tagged With: color, color theory

The Best Weaving Looms for Small Spaces: Compact Options to Maximize Creativity

by Kelly 4 Comments

Discover the best weaving looms for small spaces! Explore compact looms like rigid heddle, table, and frame looms, and learn tips for maximizing your weaving setup in a small area.

For many, the idea of weaving often brings to mind large looms and expansive studios—luxuries that aren’t feasible for those living in small apartments or homes with limited space.

The good news? Weaving is for everybody!

You don’t need a massive loom or a dedicated room to enjoy weaving! Thanks to modern designs and variety of loom availability, there are plenty of compact weaving looms that fit perfectly into small spaces and still give you a huge array of project options.

In this guide, we’ll explore the best weaving looms for small spaces, from lightweight rigid heddle looms to ultra-portable inkle looms. I’ll also share tips for maximizing your space and creating an inspiring weaving environment, no matter how small your space might be. Let’s dive in and discover the perfect loom for your needs!

What to Consider When Choosing a Loom for Small Spaces

  • Size and Portability:
    • You may want to focus on looms that are lightweight, foldable, or easy to store. Some looms, while not being fully foldable, will have fold down parts to reduce their bulk.
    • Consider how frequently you will need to be moving your loom. Ensure that the size and weight make this a manageable task.
  • Type of Loom:
    • Consider what it is you want to be weaving or how you think you will be using the loom. This will help to determine the suitability of the loom type.
    • The type of loom will also affect the size of the loom. For example, an inkle loom will almost always be smaller than a table loom.
    • Additional extras like a stand for your loom will take up extra space but many stands are now designed to have compact storage, like the Ashford Rigid Heddle Stand.
  • Functionality vs. Space:
    • Think about the trade-offs you might need to make when deciding on the right loom. Try to find a balance between features like multiple shafts and space limitations to minimise the possibility of loom regret or loom envy later on.
    • Do plenty of research! You may be convinced that you will never have enough space for a floor loom, but there are compact floor looms like the Louet David.

Top Compact Weaving Looms for Small Spaces

Rigid Heddle Looms

  • Versatile projects are possible; compact and beginner-friendly.
  • Rigid heddle looms come in a big range of sizes, so you really can find one to suit your space.
  • Some rigid heddle looms, like the Ashford Knitter’s Loom are foldable.
  • Double width weaving is possible with two heddles.
  • Examples:
    • Ashford SampleIt Loom: Lightweight and easy to store, comes in a 10″ and 16″ weaving width.
    • Schacht Cricket Loom: Great for portability and small weaving projects. Available in 10 and 15″ weaving width.

Table Looms

A table loom will inevitably take up more space than a rigid heddle loom, but they are wonderful for the weaver who wants to enter the multi shaft weaving world but has limited space.

  • Ideal for intermediate weavers looking for more complexity.
  • A huge variety of patterning possibilities.
  • Examples:
    • Louet Jane Table Loom: Compact yet offers multi-shaft functionality. 8 shafts, starts at 16″ weaving width. Folds down and has the added bonus of a built in raddle, limiting the “off loom” equipment needed.
    • Ashford Table Loom: Foldable for easy storage. 8 shafts. Castle folds down for flatter storage and easier portability. Starts at 16″ weaving width.

Frame Looms

  • Perfect for beginners or simple projects; affordable and space-efficient. Extremely portable and space efficient.
  • Examples:
    • Louet Lisa Loom: The smallest Lisa is just 7.5 x 9.5″. Portable and flat for easy storage, great for beginners.
    • Mirrix Tapestry Looms. The Saffron Pocket loom is the smallest in the range. For weaving tapestries and bead weaving.
    • Potholder loom: Usually a very small loom to weave fabric squares. You can find out how to make your own potholder loom and weave on it here.

Inkle Looms

Inkle looms are a “pick up and go” loom. They weigh very little and can be popped into a bag for easy transport.

  • For weaving narrow projects like belts, bands or straps. Bands can also be sewn together to make a larger item like an inkle bag.
  • Examples:
    • Ashford Inkle Loom: Simple design, perfect for beginners.
    • Ashford Inklette Loom: Super compact and portable.

Toy Looms

  • Great for small projects or weaving on-the-go.
  • Examples:
    • Lavievert Toy Weaving Loom: Compact, easy to set up, fun to weave on.

Tips for Maximizing Small Weaving Spaces

  • Smart Storage Solutions:
    • Use stackable tubs, wall-mounted racks, shelving or under-bed storage.
  • Multipurpose Furniture:
    • Use foldable tables, lap desks, or compact workstations. An adjustable office chair makes a very comfortable weaving chair and can be used for other purposes.
  • Go Vertical:
    • Install wall shelves for yarn, tools, books and looms. Small looms like the Sampleit can be hung on the wall with some simple hooks.
  • DIY Organization Ideas:
    • Hooks for hanging tools or pegboards for accessories. Stackable clear and lidded boxes are so useful! Drawers on wheels or shelf carts for supplies you want close to hand but can store out of the way again.

Comparing Features and Price Points

Here’s a comparison of some top weaving looms suitable for small spaces (please note that these details were correct at the time of writing this article and are subject to change. Prices are in USD):

Ashford 8-Shaft Table Loom
Type: Table Loom
Weaving Widths: 16″ (40cm), 24″ (60cm), 32″ (80cm)
Dimensions (W x H x D):

  • 16″: 22″ x 22″ x 29″
  • 24″: 30″ x 22″ x 29″
  • 32″: 38″ x 22″ x 29″
    Weight:
  • 16″: 18 lbs (8.2 kg)
  • 24″: 23 lbs (10.4 kg)
  • 32″: 27 lbs (12.3 kg)
    Key Features:
  • Folds flat to 7″ for easy storage and transport
  • Overhead beater for even beating
  • Independent shaft lifting levers
    Approximate Price:
  • 16″: $1,200
  • 24″: $1,400
  • 32″: $1,600
Ashford 8 shaft table loom | Adelaide Walker

Schacht Cricket Loom
Type: Rigid Heddle Loom
Weaving Widths: 10″ (25cm), 15″ (38cm)
Dimensions (W x H x D):

  • 10″: 11″ x 18″ x 6″
  • 15″: 16″ x 18″ x 6″
    Weight:
  • 10″: 4 lbs (1.8 kg)
  • 15″: 5 lbs (2.3 kg)
    Key Features:
  • Compact and portable
  • Made of high-quality maple
  • Includes 8-dent reed, threading hook, warping peg, table clamps, two shuttles, and yarn
    Approximate Price:
  • 10″: $229
  • 15″: $252
Schacht Cricket Loom - Hill Country Weavers

Ashford Katie Table Loom
Type: Table Loom
Weaving Width: 12″ (30cm)
Dimensions (W x H x D): 19″ x 19″ x 11″
Weight: 14 lbs (6.5 kg)
Key Features:

  • 8 shafts
  • Folds flat for portability
  • Overhead beater for even tension
    Approximate Price: $1,000
Ashford Katie Table Loom | 8 Shaft Table Loom | The Woolery

Ashford SampleIt Loom
Type: Rigid Heddle Loom
Weaving Widths: 8″ (20cm), 10″ (25cm)
Dimensions (W x H x D):

  • 8″: 12″ x 18″ x 5″
  • 10″: 14″ x 18″ x 5″
    Weight:
  • 8″: 3 lbs (1.4 kg)
  • 10″: 4 lbs (1.8 kg)
    Key Features:
  • Affordable and lightweight
  • Ideal for beginners
  • Includes 7.5 dpi reed, two shuttles, threading hook, warping peg, and clamp
    Approximate Price:
  • 8″: $150
  • 10″: $170

Ashford Inkle Loom
Type: Inkle Loom
Weaving Width: Up to 3″ (7.5cm)
Dimensions (L x W x H): 25.5″ x 6.75″ x 11.25″
Weight: 4 lbs (1.8 kg)
Key Features:

  • Ideal for weaving belts and bands
  • Adjustable tension
  • Solid hardwood construction
    Approximate Price: $120
Ashford inkle loom | Spinspul

Ashford Inklette Loom
Type: Inkle Loom
Weaving Width: Up to 2″ (5cm)
Dimensions (L x W x H): 14.75″ x 4.5″ x 7.25″
Weight: 1.3 lbs (0.6 kg)
Key Features:

  • Ultra-portable, ideal for narrow bands
  • Adjustable tension
  • Solid hardwood construction
    Approximate Price: $80

You may also be wondering whether owning a small loom will give you enough weaving project options? Well, check out this article to get some ideas for what you can weave on a small loom:

What can I weave on a small loom?

I hope that this article has helped you to see that small spaces can be transformed into a creative haven with the right loom and setup.

Are you a small space weaver yourself? Share in the comments below to help others with your best small space weaving tips and the type of loom you have! ⬇️

Take a moment to subscribe for more weaving tips, product reviews and weaving know how!

Until next time…

Happy Weaving!

*This post contains affiliate links. For more information, please see my disclosure policy.

Filed Under: Weaving Tagged With: compact looms, small loom weaving, small space

Top 6 Table Loom Issues and How to Solve Them

by Kelly Leave a Comment


Table looms are an excellent choice for both beginner weavers and experienced fiber artists, offering versatility, portability, and efficiency in a compact design. Whether you have a small weaving space or enjoy weaving on the go, a table loom makes it easy to create beautiful woven projects.

These looms are also a great way to explore multi-shaft weaving, allowing you to experiment with patterns and techniques without the larger cost or space commitment of a floor loom.

Whether you’re looking to weave scarves, placemats, yardage or experiment with complex drafts, a table loom is a practical and rewarding choice. If you’re interested to learn more about table looms, check out this resource page.

Even experienced weavers will encounter challenges on the table loom. Whether you’re a beginner or a seasoned artisan, this guide will help you identify and resolve the most common table loom weaving issues.


1. Uneven Tension in the Warp

Symptoms: Some warp threads are looser or tighter than others.
Causes:

  • Uneven winding on the warp beam.
  • Inconsistent tension when tying onto the front beam.
  • Tie on bunches are too large
  • Threads are disorderly or crossed excessively at the back beam
  • Inappropriate warp yarn used, causing stretching or breakages
  • No warp separation used

Solutions:

  • Use a threading and raddle cross when making your warp
  • Use choke ties before removing your warp from the warping board
  • Use a raddle to warp your loom
  • Tie on to the apron rod in 1″ or smaller bunches
  • Wind on the warp as evenly as possible
  • Use warp separation
  • Retie the warp threads with equal tension across the width of the loom.

Extra tips:

Warp separation – It’s important to separate your warp when rolling on, before you start weaving and as you weave and advance the warp.

  • Rolling on – I like to use brown craft paper on a roll to separate my warp at I roll it on. You can also use cardboard or wooden warping sticks, but I do feel the paper roll gives a superior result.
  • Finger combing – I don’t like to use combs or other implements for this, I just use my fingers. This is really gentle on the yarn but also helps to sort out any little snags or unevenness in tension.
  • Know your yarns – There are so many wonderful yarns to explore in weaving but there are a few that just won’t do well as a warp and are better saved for wefts. Here are some recommendations for choosing appropriate yarns:

Choosing and using yarns for weaving

3 yarns beginner weavers should never use


2. Sticky or Stuck Sheds

Symptoms: Warp threads don’t separate cleanly when you change the shed.
Causes:

  • Inappropriate sett was chosen
  • Incorrect threading or crossed threads.
  • Sticky or high static yarn
  • Warp is incorrectly placed during setup. The warp needs to go over both the front and back beam, not under (this is a very common beginner mistake!)

Solutions:

  • Be sure to calculate properly before beginning your project.
  • Re-slay the reed for a different sett if you feel that may be the issue.
  • Make sure threads are not crossed in the heddles to ensure clean sheds.
  • Don’t choose a fluffy or high static yarn for warping.

Extra tips:

  • Take your time to set up your loom, there is no hurry and going slowly helps to ensure mistakes are not made.
  • Use a checklist (like the free printable list available at the end of this article!) to check off the steps as you go.

3. Broken Warp Threads

Symptoms: Warp threads snap or break during weaving.
Causes:

  • Abrasion from the reed or heddles.
  • Using weak or unsuitable warp yarn.
  • Draw in is too extreme due to overly tight weft tensioning

Solutions:

  • Again, ensure correct sett as too close can cause over frictioning
  • Replace broken threads, as in this tutorial.
  • Use a smoother, stronger yarn for the warp.
  • Work on your weft tensioning. It is natural and normal to have some draw in but if it’s excessive it will cause the warp threads to move inward while the warp at the reed remains a similar width. When beating this will then stress your warp threads, causing repetitive friction and eventual breakage.

4. Uneven Selvedges

Symptoms: Wavy, inconsistent or untidy edges on your weaving.
Causes:

  • Overly tight or inconsistent weft tension.
  • Uneven beating with the beater.
  • Your weaving pattern skips outer warp threads
  • Uneven warp tension.

Solutions:

  • Practice gentle and consistent weft tension when weaving.
  • Beat evenly and avoid over or under packing the threads.
  • Use floating selvedges to avoid skipping warp threads at the edges.

5. Pattern Doesn’t Appear Correctly

Symptoms: The woven design doesn’t match the weaving draft drawdown.
Causes:

  • Mistakes in threading or treadling order.
  • Skipped heddles.
  • Crossed threads
  • Beat is too hard or too loose.
  • Sett is too close or too far apart.

Solutions:

  • Double-check your threading and treadling sequence.
  • Fix errors by re-threading the warp threads through the correct heddles.
  • If any threads are crossed between the reed and heddles, re-sley them to allow freedom of movement.
  • Work on a consistent beat.
  • Check your yarn using a sett test to ensure the optimal ends per inch has been chosen.

6. Loom Creaking, sticking or apron rod bowing

Symptoms: Loud creaking or resistance when operating the loom.
Causes:

  • Lack of lubrication in moving parts.
  • Loose or worn parts.
  • Over tightened parts.
  • Warp under too much tension.
  • More apron rod support required.

Solutions:

  • Apply a small amount of wood-safe lubricant to the joints. I like this one.
  • Loosen and then re-tighten screws or bolts to ensure parts are moving effectively.
  • Let your warp tension back a click or two before recommencing weaving.
  • Order replacement parts if your loom is older or used.
  • Consider using a metal rod or additional wooden dowel/stick to attach your warp to the back apron rod. Ensure that your apron rod ties are strong and evenly tied on to the loom.

Preventive Maintenance Tips

  • Clean your loom regularly to remove dust and lint.
  • Check for wear on heddles, reeds, and other parts.
  • Store your loom in a damp free environment to avoid warping. Keep out of direct sunlight to ensure the wood is well maintained.
  • Lubricate when required. Use a silicone free lubricant and apply it to a cloth rather than directly to the loom.
  • If transporting regularly, ensure the loom is stabilised during travel to avoid unnecessary sliding or bumping!

*This post may contain affiliate links. For further information, please see my disclosure policy.

PRINTABLE TABLE LOOM SETUP CHECKLIST

Let’s make your table loom setup just that little bit easier by using a checklist. This free checklist is printable and contains empty checklist boxes that you can tick off as you complete the steps – no more mistakes! 😀

Table loom setup checklistDownload

If you’re looking to level up your table loom weaving skills, I recommend my comprehensive online course Weaving on a Table Loom.

I hope this article was helpful to you and until next time…

Happy Weaving!

Filed Under: Table loom weaving, Weaving Tagged With: table loom weaving

How to Hem Handwoven Towels: A Step-by-Step Guide for a Professional Finish

by Kelly Leave a Comment

If you’ve ever woven a beautiful towel but put off hemming it, you’re not alone. Finishing touches like hemming handwoven towels often get delayed in favor of new projects, leaving a stack of unfinished weavings waiting for attention. But properly hemming your towels is the key to transforming them from raw fabric into polished, functional pieces.

A well-sewn hem not only enhances the durability of your towels but also gives them a refined, professional look. The good news? Hemming handwoven towels is easier than you might think!

In this step-by-step guide, I’ll walk you through simple yet effective hemming techniques suitable for any skill level. These methods will help you achieve a clean, long-lasting finish—so your handwoven towels are ready to be used, gifted, or even sold with confidence.

The methods I’m showing today use a domestic sewing machine. If you feel you need a little help to get started with your sewing machine, I recommend my free sewing series on Youtube.

If you don’t have a sewing machine, you can still hem towels! Check out my guide for hand hemming towels here.

Let’s get those towels off the “someday” pile and into your home!

1. Prepare Your Towels for Hemming before you dress the loom!

Something you may neglect to consider when calculating and planning your towels is a hem allowance.

There are a few factors that come into play when planning for a hem allowance:

  • Loom shrinkage
  • Trim/serger allowance
  • Fold allowance for actual hem

Think about your “off loom” waste before you do your calculations. This is important because you want to be able to add in this waste and then apply your shrinkage calculation to the total amount of fabric required.

Here is an example:

Say you want your completed towels to measure 25″ in length (after hemming).

I’ll start with the 25. I’ll add on around 1/4″ for serge waste. I’m planning for a double fold hem that will require 1/2″ for the first fold and 1″ for the second fold. That is 1 & 3/4″ extra length required. If I wanted extra leeway I could round that number up to 2″.

Now remember, that 2″ needs to be added to both ends of the towel.

So for my 25″ I would add an additional 4″ for the length of the towel = 29″. Then to this figure I would add my shrinkage allowance in my calculations.

Don’t forget your side hem allowance!

Side hems?!! Is that even a thing? Well, it is now 😆 Add around 1/2″ to the width of the towel on each side (so 1″ total) if using side hems (more about that in the ninja level pro tips section at the end 😉)

2. Wash the fabric first!

I never, ever cut or sew with my handwoven fabric unless it’s washed or wet finished first.

Why?

The fabric needs to get wet, swell with water and then get dry and contract back into itself to be finished and ready for the next step. If you doubt me, try taking two small pieces of handwoven fabric of the exact same type, wet finish one and not the other. Then take a pair of scissors to both pieces and note the difference.

When introducing water to fabric I’m intending to use for towels I always opt for a hot wash in the washing machine rather than a gentle wet finish.

Secure Raw Edges Before Washing or Wet Finishing

  • Serging or zigzag stitching is crucial to prevent unraveling. If you don’t have a serger you can do a tight zig zag (a couple of rows is best) on the sewing machine.

3. The “Dog Ear” Technique for Perfect Corners

The corners of handwoven fabric tend to not be so square. This creates a problem for hemming because your towels will want to flare out at the edges, and that doesn’t look so nice!

But don’t worry, my dog ear technique fixes this problem and also has other benefits. In addition to squaring the corners, using dog ears combined with a double fold hem completely encases raw edges. Yes, even secured, serged edges will fray over time when used in an item like a kitchen towel.

Let’s go through the steps for a double fold hem, using the dog ear technique:

  • Fold in a corner on each side of the hem at around 90 degrees and press down with an iron.
  • Make your first fold over at about 1/4 inch and press down with an iron (don’t burn your fingers!)
  • Fold for a second time, making the fold larger this time. It’s your choice how wide, depending on how you like it to look, but generally 1/2 – 1″ is perfect. Iron to make a nice crease and to help the fabric to hold in place.
  • At this point you can either pin or clip your hem in place while you take it to the machine. I like to use sewing/quilting clips as they are quick, easy and do the job perfectly. All raw edges should be encased.

4. Stitching the Hem

  • Machine Hemming:
    • Use a medium straight stitch (on my machine that is stitch length 2.5) close to the folded edge (1/4″ to 1/8″).
    • Reverse stitch at the start and finish for durability.
    • Take your time. Handwoven fabric is thicker than most commercial sewing fabrics.
    • If you experience any fabric bunching pause, lower your needle but lift the presser foot to allow the bunching to ease out. Lower presser foot and continue.
    • When your hems are sewn, give the whole towel a good press with an iron, paying particular attention to the sewn hems.

5. Tools and Materials for Success

  • Recommended tools:
    • A good-quality sewing machine or serger. Now, I don’t advocate for machines with “all the bells and whistles” unless that is what you really want. A basic machine from a reliable brand is a great way to go and won’t break the bank.
    • Gutermann sewing thread or other high-quality brands. Don’t get stuck in the false economy mindset. Yes, good quality thread is more expensive. Cheaper quality thread will break. It will bunch up in your machine. Don’t do it, it’s not worth the headache!
    • Sharp scissors (scissors from the Dollar Store and just not going to cut it here. Sorry, I couldn’t resist 😆), pins, or fabric clips.
    • A steam iron for pressing.
    • That Purple Thang (absolutely non essential but mega handy). This tool is so good for helping to keep fabric in place and push it under the presser foot when needed, instead of risking your precious fingers getting too close to the needle!

Extra Ninja Level Pro Hemming Tips

  • Side hemming

So, what is this “side hemming” I speak of? Well, I noticed over time and with repeated use that my handwoven kitchen towels would get a bit worn and ratty along the long edge, which is the selvedge of the cloth.

I thought, couldn’t I protect and reinforce that edge and at the same time make it even more beautiful to look at?

As it turns out, yes, I could!

This is such an easy step, you simply do a single fold hem, around 1/4 inch, iron and sew it and then complete the rest of your hemming.

And as if all those benefits are not good enough, if you are at all disappointed with the lack of straightness of your finished edges, the single fold hem is a great disguise!

  • Marking cutting lines

Having a marker for cutting your towels apart makes straight cutting a breeze. This quick video shows you the simplicity of this technique:

  • Press, press, press!!

Pressing with a hot iron is everything! Set it on the cotton setting and go for it. In sewing, this is how we get crisp lines and set the stitches we’ve made.

  • Contrast border

If you have woven a pattern, a couple of inches of contrast at the start and end of a towel looks really lovely. It can be in a different colour or weave structure. Plain weave as a border works well because it looks great when contrasted when a pattern weave and also provides an excellent, solid base for hemming.

Ready to weave some awesome towels?

Towels are one of my favourite projects to weave. They are beautiful but oh so practical as well. If you’re looking for some towel weaving resources, I have you covered!

ONLINE CLASSES:

Colour and Weave Towels…

Happy Fibonacci Towels…

Finishing options class…

PDF DIGITAL DOWNLOAD PATTERNS:

Bright & Beautiful Towels…

Lux Hand Towels…

Diamond Stripe Towels…

FREE TOWEL PATTERN:

Wash Your Hands Towels…

There’s something deeply rewarding about taking a project from start to finish, and hemming is the final step that brings it all together. Whether you’re creating towels for yourself, as gifts, or even to sell, these simple methods ensure your hard work shines.

So, grab those unfinished towels, set aside a little time, and give your handwoven creations the perfect finishing touch. You’ll feel the joy of accomplishment every time you use them—proof that every detail in your weaving journey was worth it.

Until next time…

Happy Weaving (and hemming!)

*This post contains affiliate links. For more information please see my disclosure policy.

Filed Under: Hemming, Weaving Tagged With: hemming, how to hem handwoven towels

  • « Go to Previous Page
  • Page 1
  • Page 2
  • Page 3
  • Page 4
  • Page 5
  • Interim pages omitted …
  • Page 25
  • Go to Next Page »

Primary Sidebar

Hand crafted boat shuttles

Categories

Archives

Meta

  • Log in
  • Entries feed
  • Comments feed
  • WordPress.org

Copyright © 2025 Kelly Casanova Weaving Lessons on the Foodie Pro Theme