• Skip to main content
  • Skip to primary sidebar

Kelly Casanova Weaving Lessons

  • Hi! I’m Kelly!
    • Disclosure
  • Online Weaving School Class Index
    • Common account issues
    • Common technical issues
    • What do I get with a membership?
  • New to rigid heddle weaving? Start here!
    • Never heard of the rigid heddle loom?
    • How to weave neat edges on the rigid heddle loom
    • Rigid heddle weaving
    • Rigid Heddle Weaving Patterns
  • Patterns
  • Subscribe

Weaving

Corn Flake Slice (easy recipe!)

by Kelly 4 Comments

Corn flake slice is one of those absolute classic grandma recipes.

I got my corn flake slice recipe from my mother in law and have used it so many times. It’s a real hit with children of all ages and was often featured in shearing sheds at smoko time.

One of the great things about a recipe like corn flake slice is that it’s so quick and easy to bake up with ingredients you are likely to have in your pantry already – no special shopping trips for fancy ingredients.
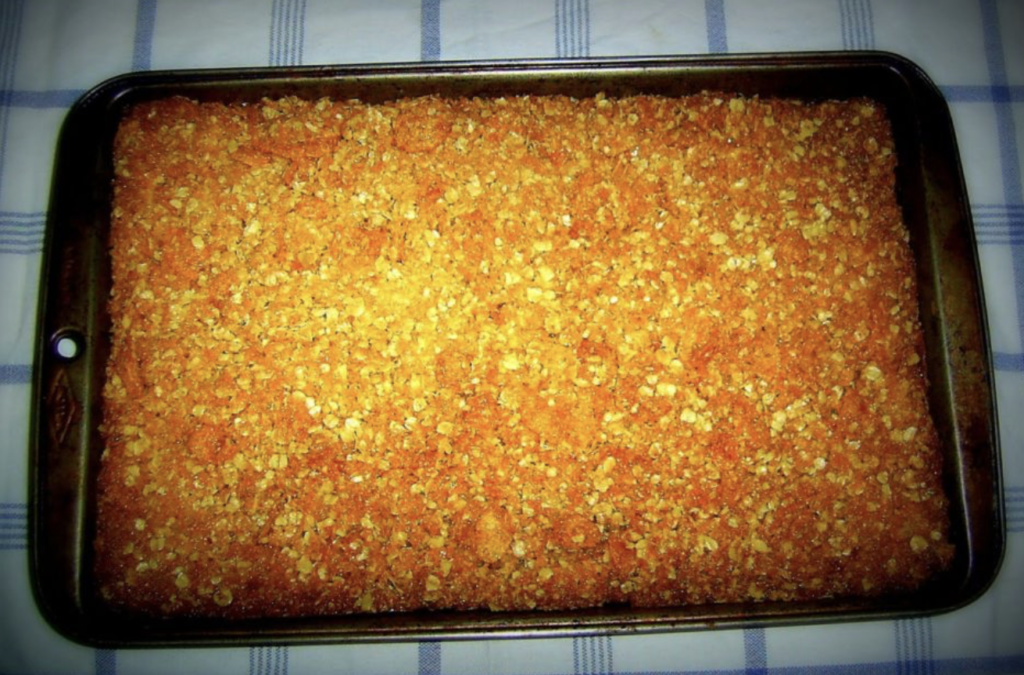
If you don’t have corn flakes in your home supply already, they are easy to come by and one of the most affordable cereals.

You will also want to have a basic slice tin (you might know it as a brownie pan). I find it well worth having this specific tin size, I use mine all the time.

Corn Flake Slice (very, very easy!)

Print Recipe Pin Recipe

Ingredients
  

  • 125 grams butter
  • 1 tablespoon honey
  • 1 cup rolled oats
  • 1/2 cup white sugar
  • 1 cup cornflakes
  • 1 cup desiccated coconut

Instructions
 

  • Preheat oven to a moderate (around 180 degrees celsius or 170 fan forced).
  • Melt butter and honey together.
  • Add to mixed dry ingredients.
  • Place in a shallow slice tin, press to even and flatten out a little.
  • Bake in the oven until golden brown (about 15 minutes) and leave in tin to cool.
  • Turn out and cut into squares.

It’s important to let your slice cool completely before cutting so that it hardens and holds together. Store in an airtight container.

I hope you enjoy this vintage recipe that was handed down to me.

Happy Baking!

This post contains affiliate links. For more information please see my disclosure policy.

Filed Under: Recipes, Weaving Tagged With: baking, corn flake slice, easy recipe, recipe, Recipes and food

Handmade business beginner essentials

by Kelly Leave a Comment

Starting a handmade business can be a big step in your life but it doesn’t have to be complicated.

My own business is a shining example of how a handmade hobby can organically grow into a business. The funny part is that I had been trying to make a living from my handmade goods for around 10 years when I shared my first weaving tutorial on Youtube that ultimately saw my business develop and eventually take off.

Many people in the business niche will tell you that the formulation of a business plan is an absolute must before starting a new business. While it can help you to plan and gain clarity around what you want to do or what your vision for your business is, it is not essential.

I never developed a business plan for my online business and I have no regrets about that.

However, there are aspects to a handmade business that I do think are really important. Some of these can develop over time and others are better to be put in place as soon as possible.

DETERMINING PRODUCT DEMAND

Basically, without demand, you don’t have a business. You could make something that is really cool and that you love to create, but if no one wants to buy it that can be a harsh reality to face.

My initial Youtube tutorials showed me very clearly that there was a demand for the product I was able to provide. Again, this happened organically for me and wasn’t planned but if you are wanting to sell your handmade products, actually having an idea beforehand whether or not there is a demand for them is super helpful.

You can get a basic idea of demand by googling your intended product or search terms associated with it. Let’s take an example here. I will use a handwoven scarf as our guinea pig.

Determining demand for handmade products is a little different from more commercial products because handmade is often unique and doesn’t “fit in a box” or typical niche. There are more factors involved than just looking at trends and what is selling well right now. Handmade is more nuanced than that.

When I google “handmade scarf” it comes up with a myriad of results. Some are local, authentic hand woven by usually a single person owned business (sole trader). Others are made overseas, woven on hand looms but by groups of people and marketed by an organisation. Some are commercially woven (you can always recognise these are they are much cheaper and usually more generic in appearance).

Googling is useful though, to see what is out there, where they are being sold and what they are charging. These factors can help you not only to find where potential customers might be looking to find hand woven products, but also what kind of pricing is realistic for the type of scarf you’re selling.

A terrific way to help determine demand for a handwoven scarf is social media – Instagram in particular is a very visual platform. I use Instagram not only to sell my products (you can read more about how I do that here) but to gauge interest in new products/ colours/ styles. It’s a simple and free way to get public opinion but in a more targeted way because all the people who follow you on a social media platform and potential customers – their opinion matters!

THE PRODUCT

You do need to have a good quality product and ensure that it meets quality standards, but if you tend towards perfectionism, please do not overcomplicate it! Next time you buy an item of clothing, a towel, whatever from a commercial source, I guarantee that if you inspect it carefully you will find small faults.

Handwoven is beautiful and unique, but it’s made by a real person often in a home or studio setting. It needs to present well and do the job that it’s made for – it does not need to be perfect.

PRICING

This is a non negotiable. You do not have a smooth running and profitable business without correctly priced items. Handmade creators are notorious for under pricing (I know, in my early days I was definitely guilty of this!)

While it is fine to price a bit lower when you’re just starting out, you need to know when to raise your prices and how low is too low. Price your handmade products too low and you don’t have a handmade business, you just have a hobby (and often an expensive one at that!)

Pricing is very tricky and often a fine balance of cost of materials, how much you want to be paid and how much the customer is willing to pay. In this article I talk about this more in depth, based on my personal experiences and I include a helpful formula for pricing handmade items.

WHERE/HOW TO SELL

Again, you really don’t have a business until you have a way or location to sell. To begin with, this can be as simple as selling to friends and family and gradually growing your brand by word of mouth. This is an excellent way to sell initially. It allows you to get a feel for it, you don’t have to pay for advertising, hosting and processing fees and as already mentioned it can help you to determine demand.

I’ll put in a little caveat here that some sellers find it a negative experience selling to family and friends. I have heard quite a few people say that those who are closer to them expect heavily discounted prices, free products or just to pay for the cost of materials but not your time.

On the other hand, those who are familiar with what you do may have a better understanding of the time, skill and quality of materials you put in to your work.

This is something you can explore for yourself and hopefully it is a positive experience for you!

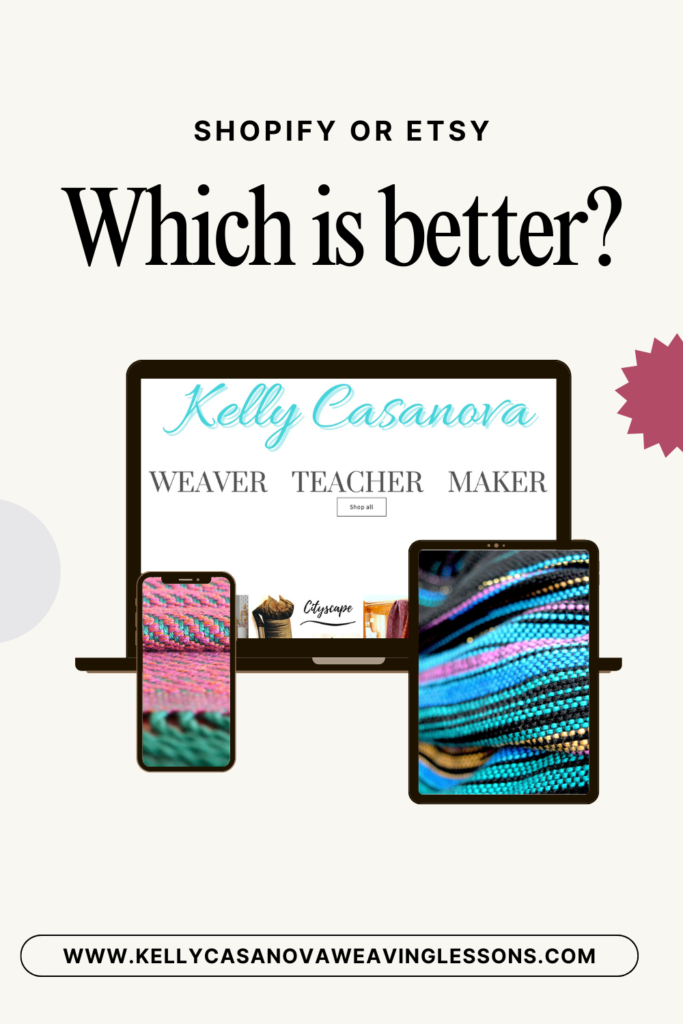
It is quite simple to get started selling online these days. The main avenues I recommend are Etsy and Shopify. Which one suits you will depend on a number of factors and for that reason I have provided a comparison between the two here.

Personally I am moving away from Etsy to focus more on my Shopify store as Etsy is changing and not for the better, in my opinion. Shopify does offer a trial where your first month is only $1, plus you actually earn credits on your own sales to help your shop pay for itself – this is a great deal if you’re curious as to whether it would be a good fit for you.

MAILING LIST

Start a mailing list from day one. No, really!

This will become one of the most important aspects of your business as it allows you to not only contact your audience in a reliable way (you can’t necessarily rely on social media platforms for this) but they are also qualified leads. People sign up to your mailing list because they are interested in what you do.

I use Convertkit for my mailing list and have for many years because they have the best functionality and are constantly improving. Yes, it does get more expensive as you gain subscribers and as you start using automations but for those starting out it is free way to start growing a list.

You can get subscribers to your mailing list in many ways. The first way is to just ask them to sign up if they are interested in your work and provide a way for them to do that (with Convertkit you can make landing pages).

You can also provide an incentive for sign up. Examples could include a discount to purchasing your products, a free guide, downloadable PDF or some other small incentive that provides value to your audience.

TAXATION

Ew, the unglamorous side of business no one wants to think about! So you stow it away and not think about it. Until it comes back to bite you!

How do I know? Because I didn’t keep records to begin with in my business and that was a big mistake. To be kind to myself, because my business grew so organically I didn’t keep records initially because I didn’t think of it as a business.

Then it started making money!

No, record keeping is not glamorous, but trust me folks, you need to do it or you are making a big headache and a lot of extra work for yourself down the track. Make it a habit from day one and it becomes a part of your routine and it’s easy.

I started out by just using a spreadsheet to record sales and expenses, it was very simple. As your business grows you definitely want to look into account keeping software.

The beauty of doing this is you can set up automations (or have someone set it up for you if you have no clue – this is what I did) to make the process really simple for you. I use the online accounting software Xero to automate my record keeping. All of my transactions filter through Xero so when it comes time to submit my Business Activity Statements and end of financial year tax return, all the information is there and ready. Doing this has reduced my stress levels significantly!

BE PATIENT

Building a business takes time, and so does learning business skills. I’m 8 years in and still learning, but that’s ok, you tend to learn what you need to know as the business grows.

Be willing to try new things as the same methods won’t necessarily work for everyone.

A slow growing business, in my opinion is advantageous as it allows you to learn and adapt as you need to. It will teach you a lot about yourself and what kind of business owner you want to be – embrace the slowness!

I hope this article has been helpful to you and given you some ideas for getting started. I have some additional resources here in case you want to do some more research:

3 ways to start selling online for free…

Do you want to start selling your weaving?

What would I do differently if I started selling now?

Selling for weavers online class (members only)

Until next time…

Happy Weaving!

*This post may contain affiliate links. For more information, please see my disclosure policy.

Filed Under: Business, Handmade business, Weaving Tagged With: business, entrepreneur, handmade business

Lost your creative mojo? Read this!

by Kelly 10 Comments

Every creative person experiences a loss of mojo at some point.

You know that feeling when you really want to be creative but you either can’t figure out what to do, or you simply don’t have the mental or physical energy to begin?

Thankfully there are some concrete steps you can take to make your way out of this uninspiring headspace and regain that creative mojo.

Here are the tips that always get me back on track:

HEALTH FIRST

An absolute essential is to take stock of your current overall health status. Have you been looking after yourself physically and mentally? Are you getting adequate sleep? Is your loss of mojo a result of over tiredness? If you have a chronic illness are you getting correct treatment or doing all the things you know you should be doing to avoid flare ups?

Although it’s not something that you can necessarily get on top of right away, it’s something that needs your attention first. If you have been neglecting any aspect of your health, start taking steps right now to improve that situation!

MESS IS STRESS

Cleaning up your creative space when you’re lacking energy may not sound like the best advice, but for me this is one of the best ways for me to feel inspired again.

I find that a cluttered space can also make me feel cluttered mentally, which is stifling to creativity. I never regret having a good old fashioned clean up as it allows me start afresh and start to feel like so much is possible again!

Another side benefit of cleaning up your space is you often rediscover lost materials, ideas or even partially started projects. Sorting these things will help you to prioritise and decide on what to do next. Sometimes that will be working on a project to get it finished and sometimes it could be more ideal that you get your creativity flowing again by starting something brand new.

Once you start cleaning you may not feel like stopping. Perhaps you will come up with a new layout or more ways to organise your creative stuff for the future too.

RESOURCES FOR INSPIRATION

Inspiration is actually everywhere, we just don’t always see it.

When I’m lacking mojo I love to flip through some of my favourite books. It can remind me of ideas I’ve already had or weaving drafts I’ve been wanting to try, or it can give me an idea for a new project.

It can be helpful to search on Pinterest and grab some new pins for your inspiration boards.

Youtube is an amazing resource for learning and inspiration where you can find almost anything you want to learn. Did you know that I have almost 400 videos on my weaving channel now? I also have a second channel, Providence Ridge that is a great source of inspiration.

Product image

Premium Membership

Access to full class library for one annual fee. All prices are in US dollars

1793 students enrolled

Last updated Apr 8th, 2025

Select a Pricing Plan
Buy now

You can find more online inspiration in the form of podcasts, Facebook groups and other online communities. When you have a membership with the Online Weaving School you gain access to a wonderful members only group.

GO AWAY

Here is another idea that seems counterproductive but actually works – get away from your familiar surroundings for a little while!

You know what they say, absence makes the heart grow fonder. By removing yourself from what you’re accustomed to seeing and doing you can come back to it with fresh eyes and a new appreciation.

Not only that, but often you will find new inspirations in a different setting. Whether it’s a nature hike, a visit to the beach, a road trip, visiting galleries or so much more, you can be inspired by nature or things you don’t see everyday.

TRY SOMETHING NEW

Perhaps you’re feeling bogged down by your craft. How about trying something new? I have done this frequently over the years and what I have discovered is that, rather than take me away from my main craft (in my case – weaving!) the more skills you learn the more you can contribute to that chosen craft.

And if you do try something new and feel that is the right time for you to move away from what you have been doing into this new endeavour, that is also a good thing. As an artist/craftist/maker we often feel compelled to be creative and to use our hands to make things. We don’t need to restrict ourselves in this and there are so many ways to achieve artistic expression.

I hope this article has been helpful to you!

Until next time…

Happy Weaving!

Filed Under: Books, Health and home, Inspiration, Online Weaving School, Personal development, Weaving Tagged With: creativity, health, inspiration, mental health, mojo

Should I start with Etsy or Shopify?

by Kelly 4 Comments

Opening your first online shop is such an exciting experience!

When I first started out as an Etsy seller in 2008 there were really only a couple of options for handmade sellers. Etsy is the one that has stood the test of time, but in 2024 you have a lot of choices when it comes to selling online and it may be difficult to choose one that best suits you, your products and your budget.

I sold my handmade goods on Etsy for many years and in the past 5 years I have moved almost exclusively into selling digital products. For me, digital products looks like hand weaving PDF patterns and ebooks.

This year, for a variety of reasons, I decided to open a Shopify store. This store contains the same patterns and ebooks as my Etsy store and the customer experience is quite similar. For now, I am keeping both stores open, and I will explain why as you read on.

Etsy has changed considerably since I opened my first shop there 16 years ago. Many of the changes (in my opinion) have not been for the better and that is why I have started my own store, on my own terms elsewhere.

I still do recommend Etsy for absolute beginners though, and we will have a look at the reasons why.

I’m going to take you through what I consider the pros and cons of Etsy and Shopify as well as how much my monthly fees cost.

Etsy Pros:

It is still a great option for absolute beginners. It’s easy to make an account and start listing products. All payments are processed for you and the templates are simple. Basically, you don’t need a lot of tech knowledge to get started.

One of the main attractions of Etsy for newbie sellers is the tiny financial outlay. The only initial cost you will pay is 20 cents to list an item. 

If you don’t make any sales for the month all you will be asked to pay is the 20 cent listing fee, so this is great for beginners as there is very little risk.

The other huge benefit to having a shop on Etsy is that it is a marketplace. This is great for those who are just starting out and may not have a customer base already.

Etsy Cons

Once you make a sale you must pay fees. Any you may be unpleasantly surprised by how much those fees add up to!

Yes, you start out with your very low 20 cent listing fee, but once a sale is made there is a transaction fee of 6.5% (this is even charged on your shipping amount) followed by payment processing fees. The payment processing fees will vary according to your physical location.

I mentioned in the “Pros” section that Etsy is a marketplace, and that can really help to build a customer base. Conversely, that marketplace can work against you because you have so very many competitors and it can be hard to be seen and found by new customers. There are many things you can do to optimise your listings but if you want to increase your reach Etsy will expect you to pay more for that in the form of offsite (which you can’t opt out of!) and onsite ads.

Now, another way in which a marketplace on Etsy can be a disadvantage is that when someone clicks on your listing to take a closer look, Etsy shows additional listings below your listing from other sellers. Effectively, they are using your page space to advertise other sellers!

Here is a screenshot example: I clicked on a knitted rabbit pattern listing from the wonderful Little Cotton Rabbits. When I scrolled down the listing page a little, Etsy had lists and pictures of similar items from other sellers and then underneath that there are more listings from other sellers under “You may also like”.

Underneath that, there are even more collections of other products to browse and related searches to explore.

OK, I get it, Etsy is a business, they exist to make money and they don’t care if they make a percentage of your sale or from another seller. But it certainly doesn’t help me, the seller, if my page advertises other sellers and I am not compensated for that.

On Etsy, you can’t collect emails in an automated fashion to be able to build and contact your customer base. This means that If anything happens to your Etsy shop you can’t get in touch with existing customers and you also can’t use Etsy to build a mailing list (an essential part of any business startup).

You also don’t own your shop and can be removed from Etsy at any time without warning. This has happened to many sellers who inadvertently or mistakenly breached copyright and had their shops removed. It can be a laborious and time consuming process to get a shop back and results in lost revenue while you’re trying to sort out the issues with Etsy customer service (which can be frustrating, to say the least).

I understand why Etsy does deactivate or remove shops, as copyright can be a huge issue in the selling field, but they seem to throw everyone into the same pool without carefully looking at individual circumstances. An example of this would be if a seller had made a short product video for one of their listings, and in the listing the seller is wearing a branded t-shirt. This can be seen as an instant copyright breach and the seller can be penalised, meanwhile the seller is wondering what on earth happened, as they were just wearing what they were wearing that day when they filmed the video!

A beef that I personally have with Etsy is that it is unrecognisable from back when I started, when it was a truly handmade marketplace. It felt niche and special in those days. Now they allow “vintage”, “supplies” and even print on demand. It feels more like a commercial shopping centre.

Shopify Pros

Shopify has a professional, clean and customisable look. Even if you don’t customise anything it still looks great and is easy to navigate.

It’s easy to setup and use and payments and ordering are simple processes

One of the best and most important part is that your own shop on the internet, you own it and can collect emails of your customers. You set your own parameters and no one can take the shop from you.

You can have a domain name of your own choosing for your shop, so it’s easy for customers to find.

Shopify Cons

You need to have a way to get eyes on your shop, Shopify is not a marketplace. If you already have an audience (especially in the form of a mailing list) it won’t be hard to share your shop link. But if you’re starting from scratch it’s going to be much harder for potential customers to find your shop.

The monthly fee that Shopify charges as hosting fees is charged whether you make sales or not. This can be a big disadvantage to a newer seller unless you get a lot of sales right away.

In addition to the monthly hosting fees, there are other fees that you will likely have to pay for customisation. This is not something that I realised when I first signed up for Shopify – I assumed that everything would be covered by the monthly fee. I use some apps for things like displaying customer feedback and social media icons.

Speaking of fees, I’m going to share some of my financials for both Etsy and Shopify to give you an idea of what to expect. Please note that my sales for both can vary immensely from month to month, this is particularly relevant to the Etsy figures considering they take a percentage of earnings.

FEES – Please bear in mind that these are my figures. Yours may look quite different.

Etsy per month -For me, the monthly fees range from $50 – $1600 (yes, really!!)

Shopify per month – $42 per month plus apps of around $20 = total of $60 a month

When you compare these figures you can probably see why I started the Shopify store. Overall, for me as an established seller with a very healthy customer base (over 12,000 sales on Etsy at the time of this article) Shopify fees work out at a much more affordable rate and are not dependent on my total sales for the month.

FINAL THOUGHTS ON SHOPIFY-

I wanted to share my thoughts as a newer user of Shopify. My sales in my Shopify store have been slower than I had hoped, but that is business in general in the present climate. I’m seeing slow sales in the Online Weaving School, my Etsy store and my affiliate links. There is a lot of economic uncertainty and inflation remains high, this is all having an impact on my business.

Also, having been on Etsy for 16 years, customers are comfortable with seeing and buying from me there. They are familiar with the process and they know where to find me. Not everyone likes change and I completely understand that.

Hopefully people will start to use my Shopify store more as time goes on as I would prefer to continue moving away from Etsy.

If you are interested in starting your own Shopify store, be sure to use my link to sign up! You can get your first month for just $1 when you sign up for a free trial, which is a great way to try out Shopify and see what you think.

Or if you are wondering about different avenues you can take for getting started selling your handmade products, check out there articles:

3 ways to start selling online for free!…

Do you want to start selling your weaving?…

3 Etsy essentials…

My 11 income streams…

What I would do differently if I started selling now…

I hope you found this article helpful in making a decision for yourself and your own needs as a seller or potential seller.

This post may contain affiliate links. For more information, please see my disclosure policy.

Filed Under: Handmade business, Selling, Weaving Tagged With: selling, selling handmade, selling on etsy, selling on shopify

Old fashioned rock cake recipe

by Kelly 3 Comments

Rock cakes are a firm favourite in our family, a recipe that I come back to over and over. If you’ve never heard of a rock cake, the way I make them is like a muffin but more buttery and substantial.

They are quick to make, use relatively few ingredients and are pretty healthy. They could be made healthier with wholemeal flour and a sugar substitute, but I’m happy to serve these to my kids as they are, knowing that they are fresh, home baked with no additives or preservatives 🙂

Our kids love to eat them warm from the oven, tops sliced off and spread with butter that melts in. They also love to top them with jam and cream (especially if the jam is home made!)

Rock cakes also freeze beautifully, so I usually make a double batch and freeze half.

The recipe below makes approximately 9 large rock cakes.

Rock Cakes

Old fashioned rock cakes are a family favourite!
5 from 1 vote
Print Recipe Pin Recipe

Ingredients
  

  • 2 cups Self raising flour
  • 1/4 tsp Salt
  • 1/2 tsp Mixed spice
  • 90 grams Butter
  • 1/3 cup Sugar
  • 1/2 cup Dried fruit (I use raisins, currants, sultanas)
  • 1 Egg Room temperature
  • 1-3 cup Milk (amount will vary) Use enough milk to make a thick batter that just drops off the spoon
  • 2 tbsp Raw sugar Optional – for topping

Instructions
 

  • Preheat oven to 190C and prepare a muffin tin with muffin patty pans. It helps to grease the top of the tray very lightly to prevent sticking. 
  • Sift flour, salt and spices into a large bowl. Add the chopped butter and rub into the flour until it resembles breadcrumbs. This step can be done in a food processor if you’re feeling lazy (but then you have to wash the food processor bowl, so not worth the trouble to me!) .
  • Stir in the sugar and dried fruits. Add the egg and some of your milk and start mixing. You’re going for a thick, sticky batter, not dry at all. 
  • When thoroughly mixed, spoon the batter into the patty pans, filling about 3/4 of the way. This will give you a large cake that doesn’t spill over the edge of the tin too much.
  • Sprinkle the tops of the batter with raw sugar (this is optional). Bake for around 18 minutes or until the tops are golden.

I hope your family enjoys these rock cakes as a snack or dessert!

Filed Under: Recipes, Weaving Tagged With: recipe, Recipes and food, rock cakes

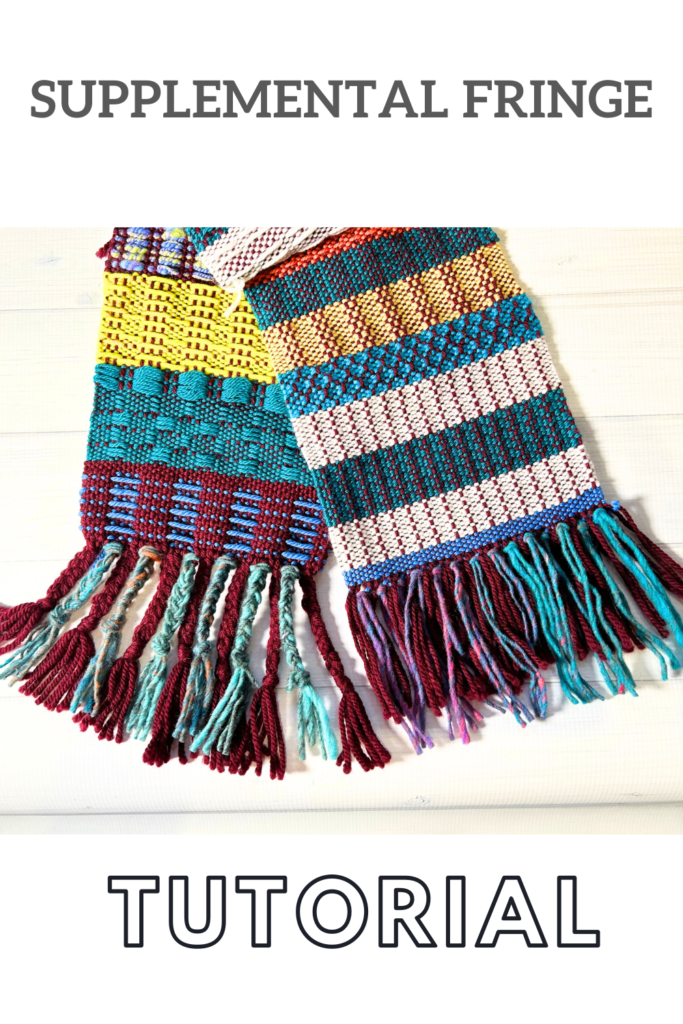
Supplemental Fringe Tutorial

by Kelly 7 Comments

A supplemental fringe is simply some additional fringing that you as the weaver may decide to add in to a finished piece.

The supplemental fringe (that’s what I call it – I just mean that it’s extra fringe in addition to the original) can be brought in after the woven piece is off the loom. It’s fast and easy to secure to your weaving.

But you may be wondering – in what kind of situations would a supplemental fringe be used? And why would I want to add extra fringe when there is one already existing?

Well, sometimes when you finish a project, you might just feel like it needs a little something extra. You might feel that your existing fringe is a little sparse or even just a little bit dull.

If you’re stuck for how to pick colours for the supplementary fringe one idea would be to have a look at the colours that are in the actual piece. Are there any that stand out to you? And really pop? You could coordinate the colours from your piece with your supplemental fringe?

Or you could pick up a yarn that you just really like and you think would look great alongside existing fringe. No rules here!

It can be helpful to be able to practice the technique first on a sample piece (I used a sampler from the Pick Up Perfection online class) if you happen to have one just so that you can ensure you get the most pleasing results, it helps because it will show you things like what different yarn thicknesses and colours look like, how many repeats you want to do and also allows you to practice the knotting.

What you will need to incorporate a supplementary fringe:

  • Yarn (I used Noro Ito, there is such a fantastic colour range)
  • Woven piece to add the fringe to
  • Crochet hook (size is not too important, it just needs to be able to go through your weaving and pick up the supplementary yarn
  • A book or similar to use as a fringe template
  • Scissors

Once you decided how long your want your supplemental fringe pieces to be, you can use a book as a template to quickly and easily wind off your pieces. Make them twice as long as the actual fringe length you need because we’re going to be doubling them over when attaching.

I chose to place my supplemental fringe every 4 warp threads of the existing fringe. Your choice may be completely different, it just depends on what you want to do.

I also chose to go in with the crochet hook 2 weft threads deep – again this is optional but I feel that having 2 weft threads makes for a sturdier edge for my extra fringe.

Grab your first fringe loop and hold it with the hook.

Pull the fringe loop through the 2 weft rows. Continue to pull through until you have a loop large enough to fit your fingers into, but not so large that the tail ends are pulled though.

About this sized loop is good.

Now you can grab the tail ends of the supplemental fringe and pull them through the loop you’ve made.

Tighten the knot up close to the woven edge and you’re done! Repeat across the rest of the weaving at your chosen intervals.

All that’s left to do is to trim your supplemental fringe, which can be longer, shorter or just the same length as your existing fringe.

There are lots of variations and possibilities with this idea. See the plaited (braided) fringe in the photo above? Well, if that interests you I suggest you watch my video tutorial for all the details on how to work that:

I hope you enjoyed this tutorial!

Until next time…

Happy Weaving!

This post contains affiliate links. For more information please see my disclosure policy.
Filed Under: Free tutorial, Tutorials, Weaving Tagged With: supplemental fringe, weaving tutorial

3 ways to level up your rigid heddle weaving

by Kelly 8 Comments

We all know that the humble rigid heddle loom is capable of a lot more than first meets the eye. That is why it’s such a wonderful loom for beginners – you can use it for it’s most basic function (plain weave) to begin with and increase your skills and exploration from there.

Many newer weavers though, are unsure of exactly what they can do with a rigid heddle loom. Or, on the other hand, there seems so much you can do but they are unsure of what to choose?

A bit of fear comes creeping in from a lack of confidence. “What if my skill level isn’t ready for the next step?” “What if I mess it up and lose my confidence entirely?”

These are really valid concerns that are common to many newer weavers. That is why I encourage new rigid heddle weavers to build skills in steps rather than leaps. Some weavers are ready to leap – many are not.

So, how does the fledgling weaver get his/her wings?

By taking off slowly. First the steps, building up, quickening as you go until you’re finally ready to stretch out those wings and fly.

If you feel like you’re in a bit of a rut with your weaving or you’re unsure of what to try next, here are a few suggestions to get those creative juices flowing!

Pick up sticks

Grab a pick up stick and hop to it! Pick up sticks are so easy to use but can totally transform your weaving. For my first foray into the pick up stick world I just put on a warp (not too long, not too wide) and just explored.

At its most basic level, pick up stick weaving can be started by placing your heddle in down and picking up whatever threads you like behind the heddle. I suggest starting with every second thread, so 1 up, 1 down. Next you can try 2 up, 1 down. Then 2 up, 2 down, and so on.

Once your stick is installed, place your heddle in neutral, slide the pick up stick forward and then place it on edge. Weave that pick and then change to a plain weave shed (up or down). Repeat, alternating between the plain weave sheds. An example of a repeating sequence could look like:

  1. Heddle up
  2. Heddle neutral, stick on edge
  3. Heddle down
  4. Heddle neutral, stick on edge

Then repeat the sequence from the top as many times as you would like. The variations on these theme are enormous, for example you could do a pick up stick row as a pop in between a few plain weave rows.

Next up with your pick up stick installed you can place the heddle in the up position and slide the stick forward (behind the heddle). Weave that row and note how it’s different to the other heddle/stick position.

Now you could try out the same 4 step weaving sequence I detailed above but this time use the heddle up/stick forward combination.

Once you’ve played around with those ideas, you can then start combining techniques. Here is a quick example for ideas:

  1. Heddle up
  2. Heddle neutral, stick on edge
  3. Heddle down
  4. Heddle up, stick forward

And then go back to the top and repeat. Are you starting to see how many variations you could come up with here?

Colour

Colour is one of the simplest and most effective ways to branch out in weaving. Again, it can be a bit of stumbling point for some who feel they have no talent when it comes to selecting colours. But I don’t think you need to be a colour expert to use colour effectively in weaving.

Most people are able to select 2 contrasting colours that they like and think go well together. That is a great starting point – one colour for the warp and one for the weft. Subtle, but classy!

Or if you’re looking to make a bolder statement, do blocks of colour in the warp and blocks of colour in the weft for Colour and Weave techniques.

If you’re not confident yet with changing colours in the warp, just change them in the weft. An example might be that you warp with a grey yarn. You use that same grey yarn in the weft but you add in a red. You alternate blocks of grey weft with blocks of red weft and voila! You have stripes!

You may feel ready to explore houndstooth or other colour and weave techniques.

What about variegated yarn? I love these yarns, as they do the colour work for you. You can choose to use it in either the warp or the weft (or even both – though the results may get messy!) One of my favourite ways to use variegated yarn is to warp with it and then weave with a solid colour. A more open weave (like one you might achieve with a pick up stick) can be the perfect pairing for a variegated yarn as it lets the range of colours really shine.

The scarf above was woven with fingering weight wool. For the warp I dyed a gradient, using the rainbow as a guide. In the weft I sed the same weight and type of yarn, but in a solid and commercially dyed grey.

Another example of a similar project is my free The Heart Scarf project.

Luxury yarns or special yarns

It’s true that not all yarns are going to be ideal for weaving, especially for the newer weaver. But there is a huge range of yarns available to today’s weaver, plus knitting yarns are often great to use with a rigid heddle loom.

A special or luxury yarn can really transform a weaving project. Think silk, or silk blends, tencel, cashmere and so many more.

For the pictured scarf I used a dk weight silk that I hand dyed. The end result was rather like a waterfall!

Luxury yarns can give your project new dimensions in a few ways:

  • Iridescence – silks, tencels and bamboos in particular create a wonderful gleam to your weaving.
  • Touch – All of the yarns mentioned are pleasing to the touch. They are soft, often slightly slippery and in the case of cashmere or a blend the softness factor can be next level!
  • Luxury/high end value – naturally more expensive yarns are going to be considered high end products. A luxurious gift or a higher ticket item to sell.

I hope these ideas are just what you needed to go to the next level with your rigid heddle weaving!

Until next time…

Happy Weaving!

Filed Under: Rigid heddle weaving, Selling, Weaving Tagged With: level up your weaving, rigid heddle weaving, selling your weaving

Weaving School Birthday Giveaway!

by Kelly

You know you’re busy when you completely miss important milestones, like I did this year!

The Online Weaving School turned 7 last week and yes, I totally forgot 🤦‍♀️

But it’s never too late for a celebration, right?!

One of my favourite ways to celebrate a milestone is with a giveaway, and from past experience I don’t think any of you object to the idea either.

Before I launch into the specifics, I want to take a moment to thank each and every one of you who has supported me these past 7 years. Kelly Casanova Weaving Lessons simply would not exist without you, nor would Kelly Casanova Designs. I am grateful for you!

OK, here is the deal. There will be one prize winner. The prize is:

  • A one year Premium membership to the Online Weaving School worth $157USD

OR

If you already have a Premium membership, you will receive $157USD credited to your PayPal account. If you have a monthly or 6 monthly membership, you will be upgraded to a Premium membership for one year.

  • 3 digital download patterns (your choice but patterns only, ebooks excluded) from my Shopify store worth $24 – $35AUD.

FOR A VALID ENTRY

  1. Please ensure you have registered an account with the weaving school. It is free and easy to do, and will ensure that if you win I can enrol you in your membership without any problems.

2. Tell me in the comments below what winning this prize would mean to you.

Please note that all comments need to be approved manually (thanks spammers 🙄) so please be patient as you wait for approval.

THIS GIVEAWAY IS NOW CLOSED. CONGRATULATIONS TO JANET, WHO HAS BEEN NOTIFIED VIA EMAIL.

Best of luck to all of you!

Until next time…

Happy Weaving!

Filed Under: Giveaways, Online Weaving School, Weaving Tagged With: giveaway, online weaving school

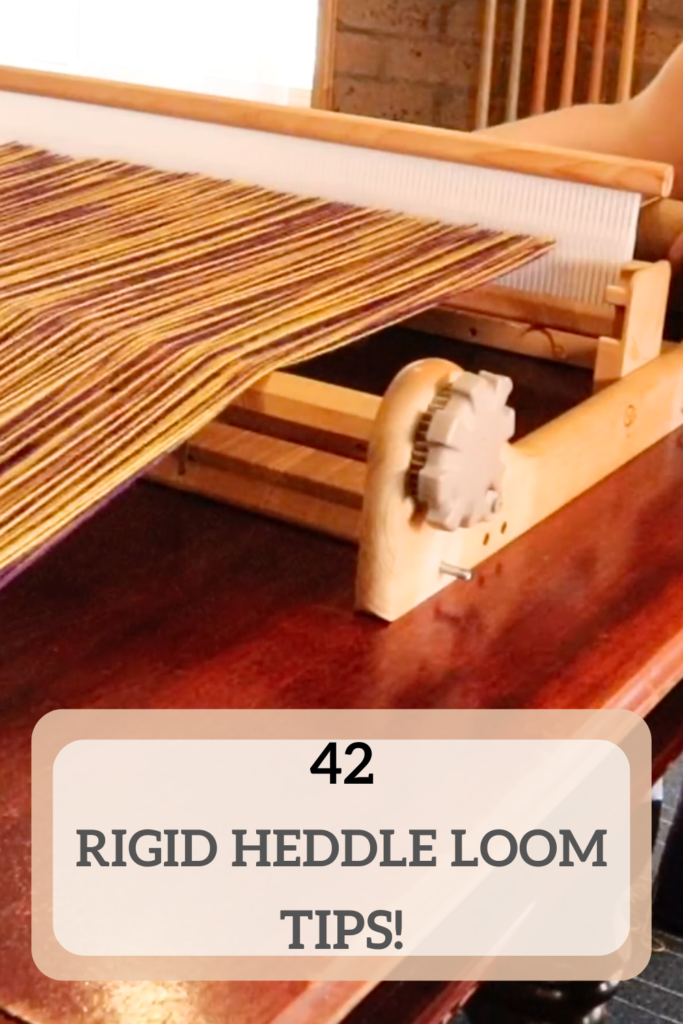
42 Rigid Heddle Loom Tips

by Kelly 10 Comments

My Youtube channel is packed full of helpful videos for weavers of all levels. But today I wanted to share a list of 42 rigid heddle loom tips that will make a difference.

Most of these videos are short and to the point and are all related to the rigid heddle loom! I want you to gain confidence and become the weaver you want to be. My hope is that gathering all these tips into one place means you have fast and easy access to a wealth of knowledge and information.

Whether you want to delve more into warping, threading, fixing mistakes or optimal weaving, you should find some help here:

Warping a different way…

What to do with weft tails…

How to fix wrong heddle size…

Packing the front beam…

Insert paper for warp packing…

Clamping hack for rigid heddle weaving…

Clearing the shed…

Strumming the warp…

5 rigid heddle warping tips…

Finding the sweet spot…

Lashing on technique…

Three heddles tips and tricks…

Independent warping…

Surgeon’s knots tie on trick…

Neater tie on trick…

2 tips for easier RH weaving…

Multiple heddle workflow…

Doubling your warp the easy way…

Targeted wedging for better tension…

Troubleshooting sticky threads…

What to do when you accidentally warp backwards…

Fix weaving floats…

How to read a RH weaving draft…

Try this trick for neater edges…

3 tips for weaving with finer threads…

How to use pick up sticks…

Heddle positioning…

Another neat edges tutorial…

Lifeline selvedge technique…

How to fix doubled up warp threads…

Calculating warp for the rigid heddle loom…

Rigid heddle book recommendations…

How to repair a broken warp thread…

Neat edges no matter what…

Weaving a slit or hole…

Hemstitch explained and demonstrated…

Rigid heddle threading tips…

How to determine sett…

RH weaving tools…

How to wind a stick shuttle…

How to make a heddle rod for RH loom…

Weave neat edges…

I hope this list is helpful to you.

Until next time…

Happy Weaving!

Filed Under: Rigid heddle weaving, Weaving Tagged With: rigid heddle weaving

How to weave krokbragd crosses

by Kelly Leave a Comment

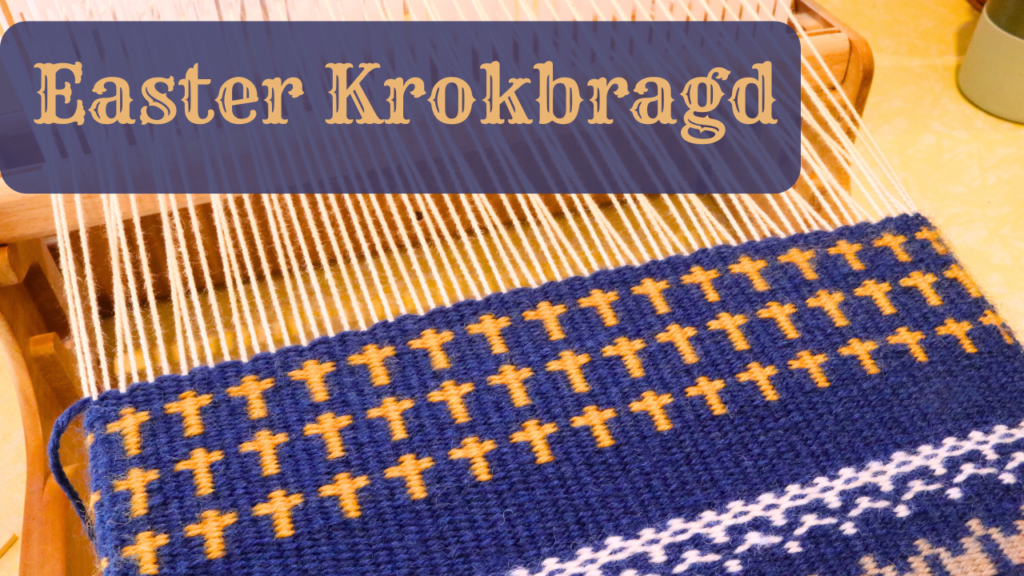
Here we are with yet another krokbragd weaving tutorial! It is close to Easter and so the design I chose to weave is in honour of our Lord Jesus Christ ❤️

I won’t explain what krokbragd is, because I have done that already, many times! Instead, if you want to know more, check out some of these links below:

How to weave krokbragd…

Krokbragd 101 Online Course…

Krokbragd Youtube Playlist…

In this tutorial I am weaving krokbragd with two heddles, but you can absolutely use another setup such as a single heddle, pick up stick and heddle rod. Both of these methods are outlined in detail in my Krokbragd 101 course.

What you need for this tutorial

  • A rigid heddle loom (I’m using my Ashford Sampleit)
  • Two heddles of the same size
  • Additional beater, such as a tapestry beater or fork
  • Two shuttles (or use little yarn balls or butterflies if you prefer)
  • Two contrasting weft yarns

There are all kinds of tapestry or additional beaters, and yes, a household fork works just fine. An additional beater is really essential for krokbragd though, as it is a weft faced weave structure and a regular rigid heddle/reed is not sufficient to beat the weft right down.

I beat the weft down every 3 weft rows – it saves time and is just as effective. Use your heddle to “place” the weft but use the additional beater to pack it down.

We only need 2 weft colours for weaving, so choose one colour that you would like your crosses to be and the other as the background. Make sure your colours have enough contrast to ensure boldness of the design.

You can place your weft yarns on stick shuttles, roll little balls or use yarn butterflies – all these methods work just fine.

Here is how the weft looks after weaving 3 weft rows and prior to packing the weft down.

And here is how it looks once packed down. You want to aim to cover the warp completely.

Now, how to weave.

If using two heddles, your heddle positions will be:

  1. Heddles 1 & 2 up
  2. Heddle 1 down
  3. Heddle 2 down

The colour sequences will be as follows (check colour key for abbreviations):

Colour key: Yellow (Y), Navy (N)

  1. Y,N,N x 5
  2. Y,N,Y x 2
  3. Y,N,N x 2
  4. N,N,N x 3

Exactly how you use the design is up to you – You can weave bands of crosses or repeats of crosses or a row of crosses embedded in strategically, there are so many options!

If you would like to see this sequence in action, check out the following video on Youtube:

I hope you enjoy weaving this design, if you have any questions or comments please leave them down below ⬇️

Until next time…

Happy Weaving!

Filed Under: Krokbragd, Rigid heddle weaving, Rigid Heddle Weaving Patterns, Weaving Tagged With: easter, krokbragd, rigidheddleweaving, rigidheddleweavingtutorial

  • « Go to Previous Page
  • Page 1
  • Interim pages omitted …
  • Page 3
  • Page 4
  • Page 5
  • Page 6
  • Page 7
  • Interim pages omitted …
  • Page 25
  • Go to Next Page »

Primary Sidebar

Hand crafted boat shuttles

Categories

Archives

Meta

  • Log in
  • Entries feed
  • Comments feed
  • WordPress.org

Copyright © 2025 Kelly Casanova Weaving Lessons on the Foodie Pro Theme