• Skip to main content
  • Skip to primary sidebar

Kelly Casanova Weaving Lessons

  • Hi! I’m Kelly!
    • Disclosure
  • Online Weaving School Class Index
    • Common account issues
    • Common technical issues
    • What do I get with a membership?
  • New to rigid heddle weaving? Start here!
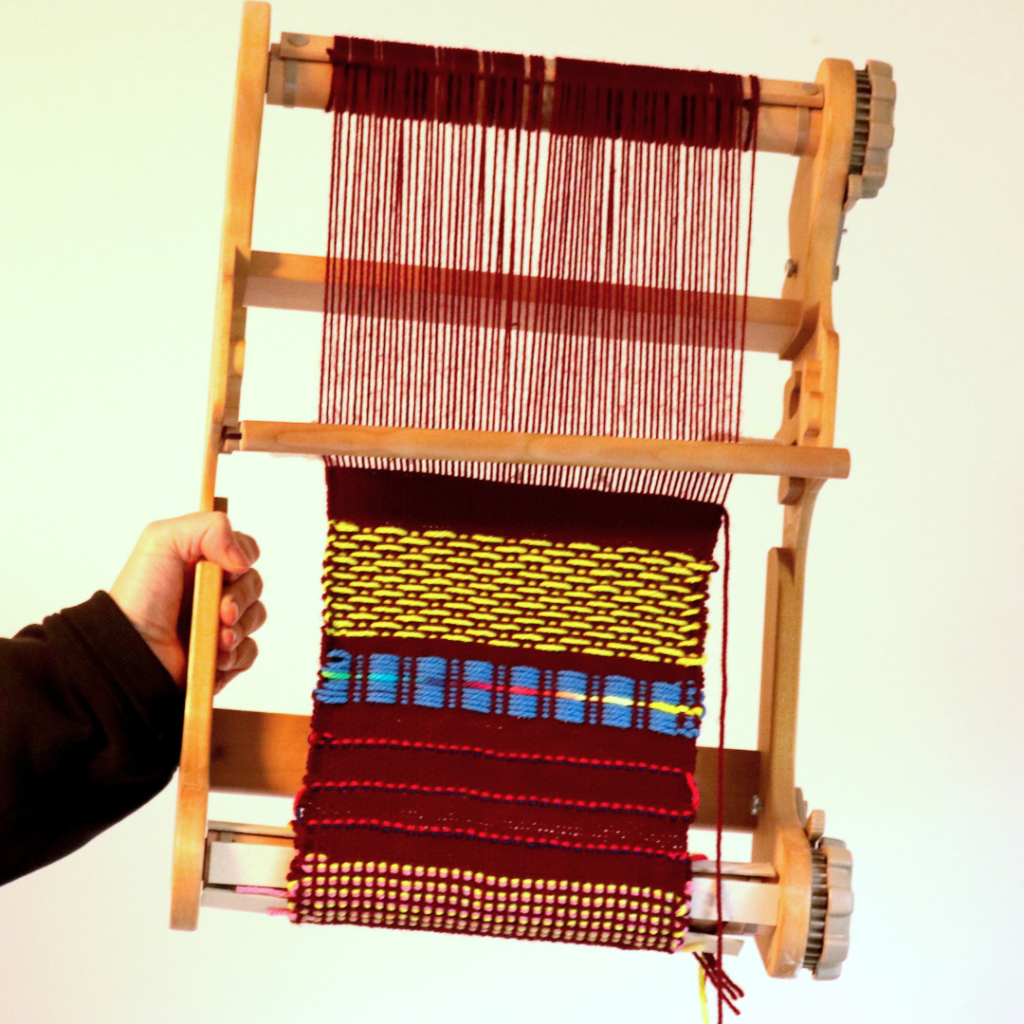
    • Never heard of the rigid heddle loom?
    • How to weave neat edges on the rigid heddle loom
    • Rigid heddle weaving
    • Rigid Heddle Weaving Patterns
  • Patterns
  • Subscribe

Weaving

Essential tools for rigid heddle weaving

by Kelly Leave a Comment

When you buy a rigid heddle loom, it will come with a few standard tools to get you started. Exactly what you get will depend on the manufacturer of your loom, but here are a few of the basics:

*A heddle/reed (usually 7.5 or 8 dent)
* A warping peg and clamp for direct warping
* A clamp for holding the loom to a table while warping
* A stick shuttle
* It may include a threading and reed hook
* Cardboard warp separators (may not come with all looms)
** Some looms now come with a double heddle block built in

Apart from the standard tools, there are extra things that are either essential or come in handy.

Other essentials:

*Scissors – A good pair of dressmaking shears will save you a lot of frustration

*Tape measure

*Something to separate your warp when rolling on (I like to use brown craft paper on a roll and cut it to size)

*Yarn
*Inch ruler (for figuring out the sett of your yarn)

*Project journal for recording all your project information

*A big mug of tea or coffee (hey, I don’t judge!)

   Handy optional extras:

* Tapestry needle
* Extra heddles
* Fringe twister
* Sewing machine 
* Serger
* Loom stand
* Tapestry beater, comb or household fork
* “S” hooks or other weights
* Calculator
*Instructional books –  this post will help you to determine which book/s might be right for you).
*Online lessons are an awesome tool to get started. You can check out my Youtube channel and my Online Weaving School for further help. 

Check out the video below where I discuss these tools in depth:

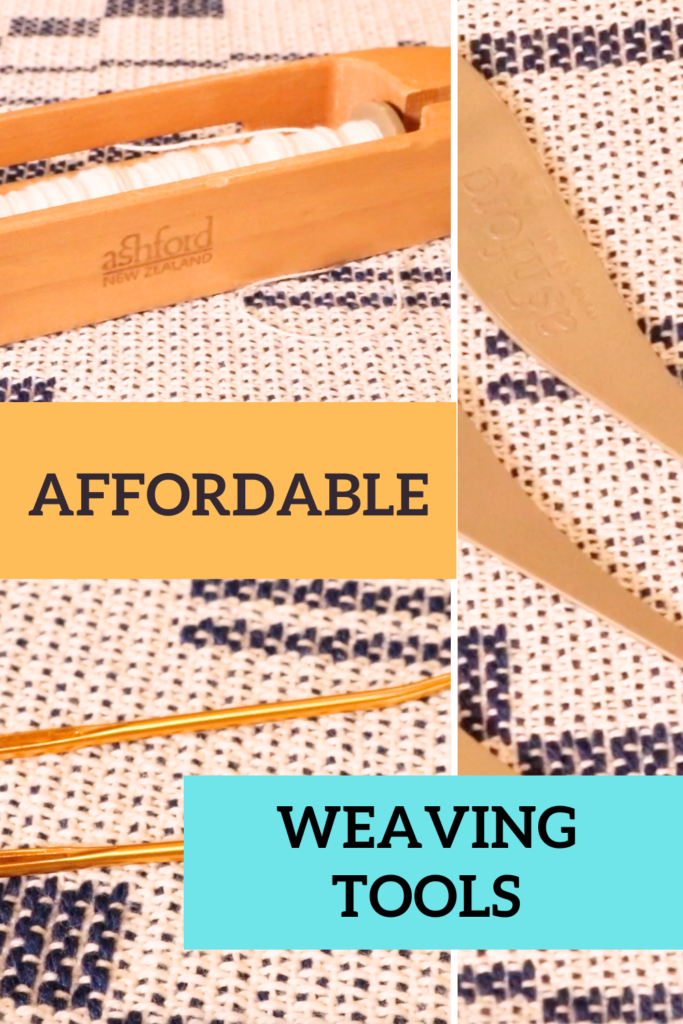
I also have an additional video that talks about affordable tools here:


Something to remember when you’re just starting out with rigid heddle weaving is that you don’t need All.The.Things right away! The tools that come with a newly purchased loom are sufficient to get you started, and you can gradually build from there as you begin to explore the wonderful world of rigid heddle weaving.

*This post contains affiliate links. Please see my disclosure policy for further information.

Until next time…

Happy Weaving!

Filed Under: Rigid heddle weaving, Weaving, Weaving Tools Tagged With: rigid heddle weaving tools, rigidheddleweaving, weaving tools

Never heard of the rigid heddle loom?

by Kelly 1 Comment

Then you might be wondering what exactly IS a rigid heddle loom?

The wonderful rigid heddle loom has gained considerable popularity in recent years due to it’s affordability, portability and versatility as a weaving loom.

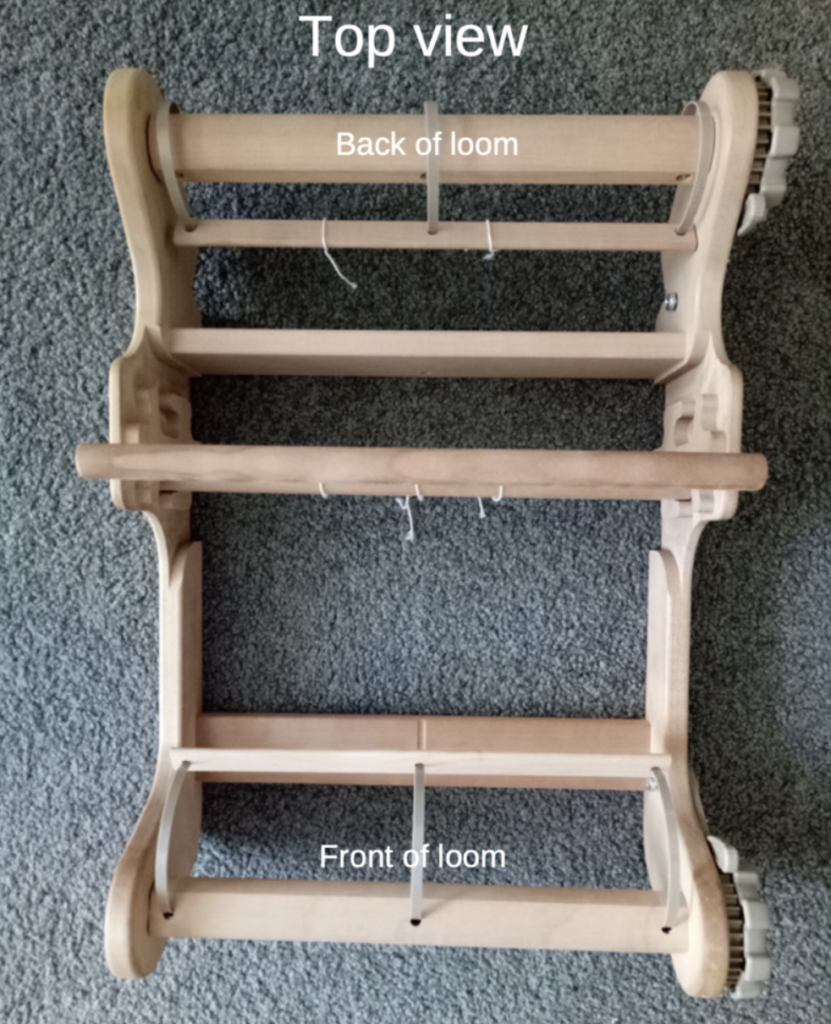
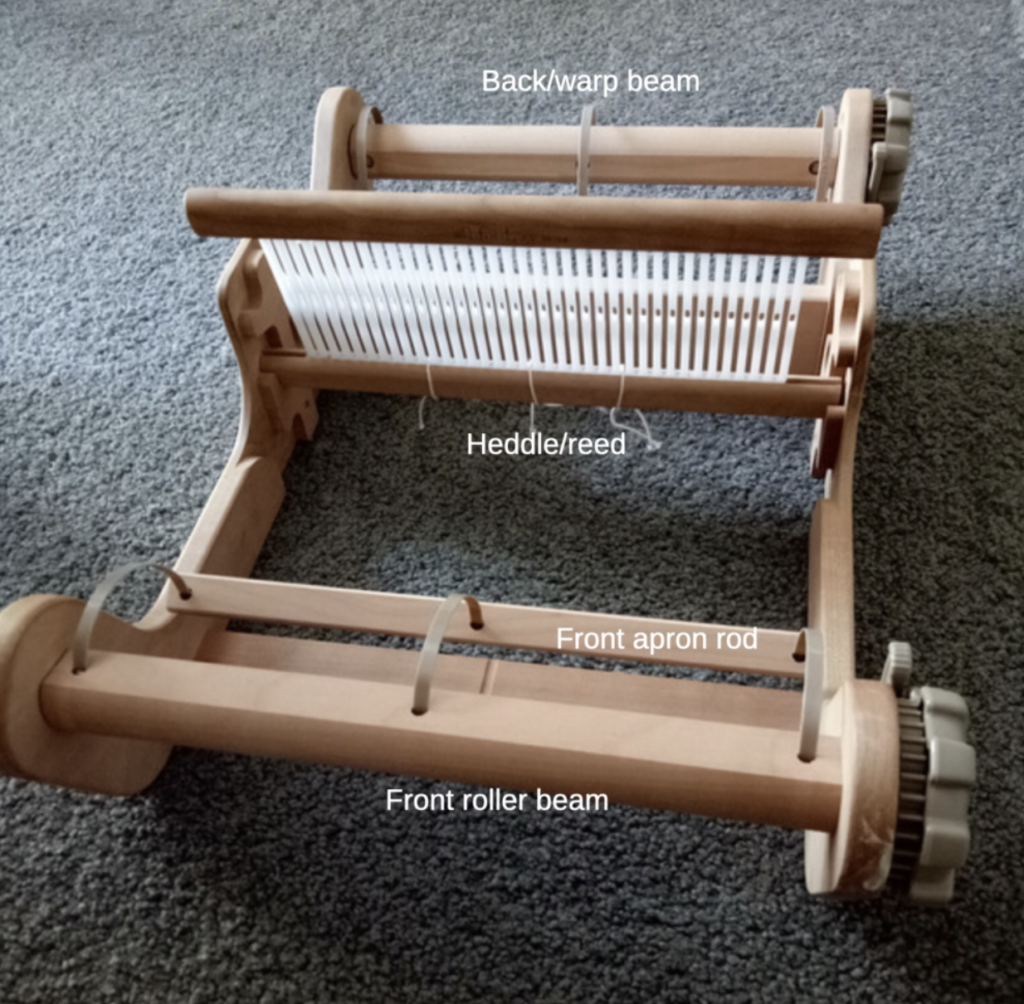
The rigid heddle loom is essentially a rectangular, wooden frame loom. However, it differs from the simple frame looms that are now readily available and often used for simple tapestry, as it has a space for a heddle/reed, making it capable of producing sheds (gaps or spaces) to weave through.

It can be called a 2 shaft loom (though some argue that this is not technically true because it doesn’t have traditional shafts – whatever the case, 2 sheds are possible), but has further reaching capabilities with a healthy dose of inquisitiveness and exploration!

The “rigid heddle” that the loom gets it’s name from is an ingenious device typically made from a wooden frame and plastic vertical pieces. A single heddle/reed gives your loom holes and slots (these are what allow you to create the sheds) plus it doubles as a beater.

The more of these heddles/reeds you use, the greater the possibility and range of sheds, and therefore patterns, become available. Another benefit of using 2 heddle/reeds at a time is the ability to weave double width cloth, which is ultra cool and can be seen in my Double Weave Baby Blanket class or Weaving with Two Heddles technique class.

Some rigid heddle looms now come with a built in double heddle block, which means it is easy to have 2 heddle/reeds positioned on your loom.
In it’s most basic, 2 shed format, you place the heddle/reed in either an up or down position, creating a different shed each time. Using these 2 sheds will give you a plain weave interlacement.

This same heddle/reed will have a predetermined size or sett, which means that once you have established the sett for your project, you choose a heddle/reed that matches. As you thread the heddle/reed, the rigid plastic slots keep the threads at a certain spacing, and that is what makes your sett.

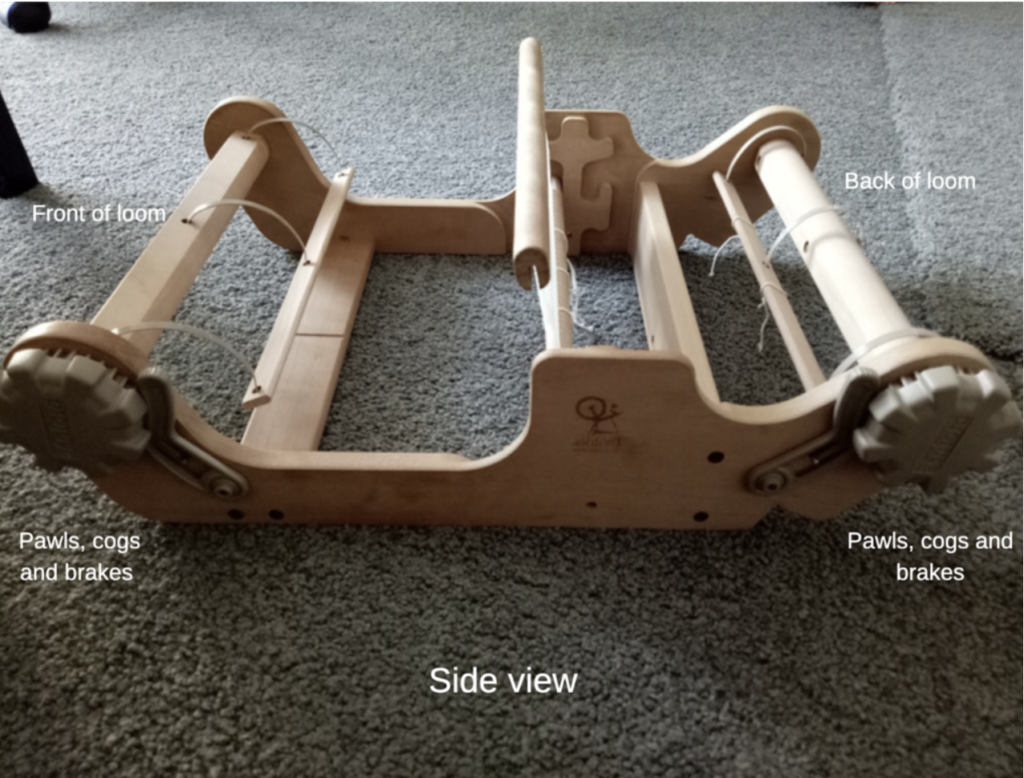
The rigid heddle loom, similar to table/floor looms, has a front and back roller, meaning that you can put on a long warp and you advance the warp as you go so that the cloth will roll around the front beam as you weave. Some looms will have the option of buying an additional warp beam that attaches to the loom and allows you to put on extra long warps. It also has a tensioning system, which varies from loom to loom, but usually involves winding a pawl or a crank at the side of the loom to achieve good tension. 

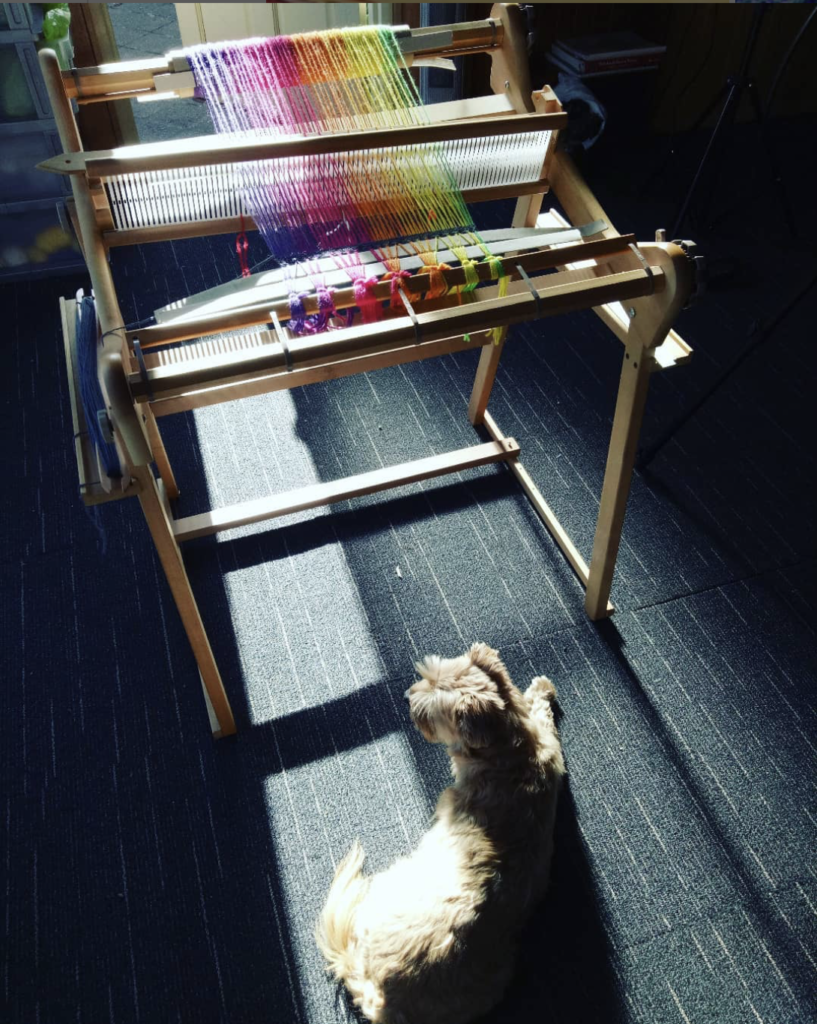
In addition to your loom, you can purchase a stand, which, in my opinion is a really good option. Buying a loom and stand combo can work out more economically. I talk more about that in this video.

*This post contains affiliate links. For more information, please see my disclosure policy.

If you purchase a rigid heddle loom new, it will come with everything you need to get started (except the yarn!)

I hope this has helped you to begin to wrap your head around what a rigid heddle loom is.

If you’re confused as to which loom is the right one for you I have a comprehensive First Loom Buyers Guide that covers a range of looms to help you make an educated decision.

Until next time…

Happy Weaving!
Filed Under: Rigid heddle weaving, Weaving Tagged With: rigid heddle loom, rigid heddle weaving

Basic Reed Substitution Chart

by Kelly 10 Comments

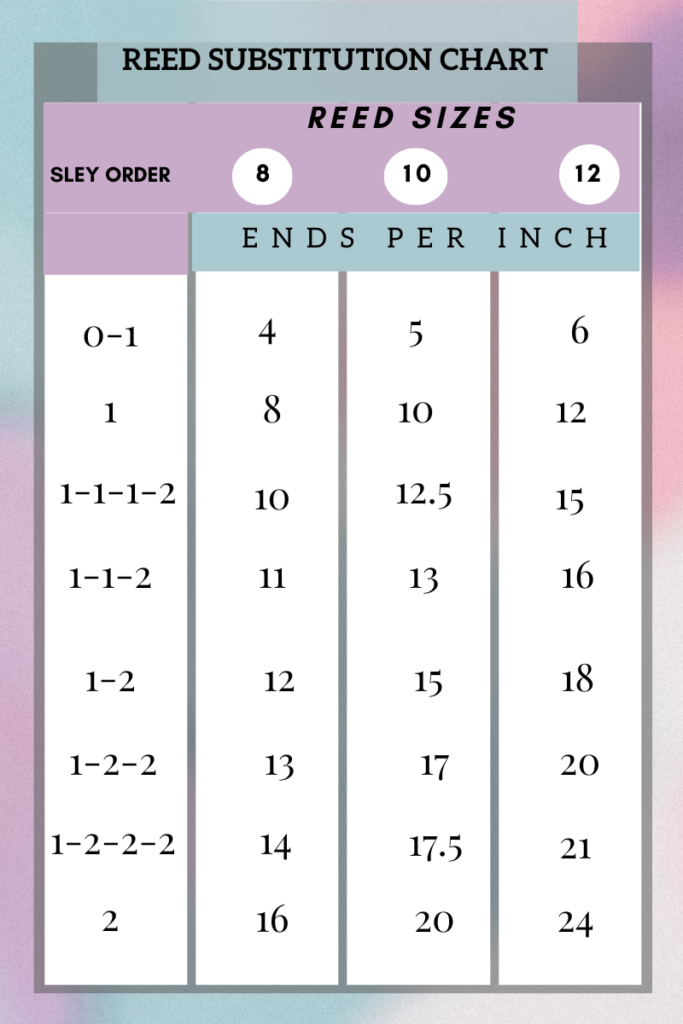
A reed substitution chart is extremely useful for those times you want to weave at a certain sett but don’t have a reed to match.

Purchasing extra reeds can be expensive and even with additional sizes you may find that you can’t achieve the sett (ends per inch) you were hoping for.

Using a reed substitution chart means that you don’t need to buy reeds in all the sizes and you can often achieve either an exact desired sett or something very close to it.

A reed is a tool for spacing your warp ends at a specific distance apart. Because our sett is a certain number of ends per inch, we can figure out how many ends we need to place in each dent (space) in the reed to achieve that number. And, we can change the number of threads to suit the required sett.

For myself, I find that I tend to weave within a fairly set range of ends per inch for many of my projects. One of my floor looms and my table loom have a 10 dent reed and the other floor loom has a 12 dent reed.

So, the chart you see below is a simple version for the numbers I use frequently. I’ve also included the 8 dent reed as many weavers do have that size.

How to use the chart?

It’s really easy and hopefully the way I have it set out is simple for you to follow. The reed sizes are in circles at the top. The ends per inch are listed in columns underneath and the sled order to the left.

Let’s do an example together.

Say I have a 12 dent reed and for my project, with the particular yarn I’m using, I want to weave at 18 ends per inch. First look at the “12” which is circled. Look down the vertical column underneath the 12 until you see “18”. Now follow horizontally to the left until you’re looking at the “sley order” section. You will see the numbers 1-2. This means that when you sley your 12 dent reed, you will place 1 thread in the first dent, then 2 in the second, 1 in the next and 2 in the next, and so on.

If you would like to download and print out this chart you can do that here:

Basic-Reed-substitution-chartDownload

I hope this helps you in your weaving journey!

Looking for help with your loom? Check out my popular classes here:

Introduction to Floor Loom Weaving

Weaving on a Table Loom

Beginner Rigid Heddle Weaving

Inkle Weaving

Until next time…

Happy Weaving!

Filed Under: Weaving Tagged With: reed substitution chart

Ask Kelly – How long should a scarf be?

by Kelly 4 Comments

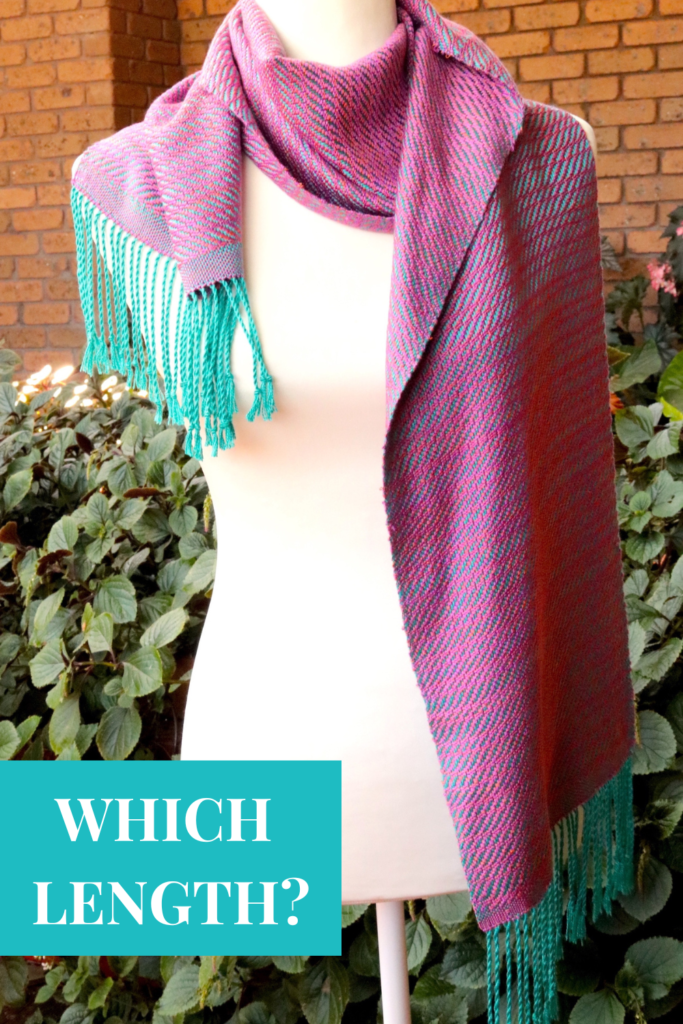
Asking how long a woven scarf “should” be is kind of like asking how long is a piece of string! However, since I personally have woven a heck of a lot of scarves, I can share the lengths that I typically use.

Today’s Ask Kelly question relates to not just the length of scarf, but how long should the warp be to obtain the desired length?

“If I want to create a pattern using different colors of DK 8 ply Bendigo Wool, what should I put on the loom for the length of a scarf?”

Laura

Now, as for the length of scarf, that does depend quite a bit.

When I’m planning a scarf I usually ask myself, do I want to be a “drape around the neck and go” scarf or do I want it to be a “wrap around the neck at least once” scarf? 

For a shorter scarf I would generally do about 60” weaving length, then allow for fringes. For a twisted fringe, I would generally add 6-7” on each end of the scarf. So that would be 60 + 14 = 74”. That is without adding on shrinkage and waste allowance.

For a longer scarf I would be thinking 70” weaving length plus fringes and allowances.

Here are some examples of various scarf lengths I’ve used:

The Ripple Scarf project

This one was a 68.5” weaving length + fringes.

The Candy Store Project
This one was a 60” weaving length. Yes, it is wrapped around but that is on a model that has a skinnier neck than mine. And it’s quite short in length when wrapped.

The Aquamarine Scarf
This scarf was around 70” weaving length with longer fringes, you can see it has that extra bit of length.

The scarf lengths I’ve outlined are fairly standard but if you are feeling adventurous and want to go all “Lenny Kravitz Blanket Scarf” you will definitely need some good pre planning to ensure you have enough length in your warp to achieve the length of scarf you want.

TOTAL WARP LENGTH

In the planning stages of your scarf it is best to use a calculations sheet so that you don’t miss any crucial numbers. It’s also an important focal point for your project – a launching pad or recipe, if you like.

Every project on your loom will have shrinkage, take up and other numbers that need to be accounted for.

I have a FREE project calculations sheet that also comes with an explanatory video. You can access that by registering for an account at the Online Weaving School (it doesn’t cost anything to register).

Check out the free calculations sheet and video here.

I hope this post was helpful to you!

Until next time…

Happy Weaving!

Filed Under: Ask Kelly, Etsy, Weaving Tagged With: scarf, weaving

Ask Kelly – Are two heddles worth it?

by Kelly Leave a Comment

One of the major challenges when you’re new to weaving is knowing exactly what tools you need. If you’re particularly budget conscious (and most of us need to be!) you don’t want to spend money only to find that you didn’t actually need or use the new tool.

Today’s Ask Kelly question is one about two heddles and whether it is worth the investment to purchase an additional heddle in the same size as an existing heddle. At first glance you might think, well I already have one 10 dent heddle, why on earth would I buy a second 10 dent heddle – isn’t that a complete waste of money?

Let’s delve into this discussion so you can find out why two heddles might be a worthwhile investment for you (or not!)


“Could you please suggest where I would get some information on why I would want to weave with two heddles on the flip. I am not new to rigid heddles but far from advanced. Some people have suggested two heddles is a waste and I should just leap to a 4 shaft. I want to make an informed decision about whether to invest in additional heddles for the flip. I appreciate your guidance. I have not yet done your classes on doing two heddles. Thanks so much.”

Marla

Hi Marla,

That is a very loaded question with a lot to unpack, but I’ll try to keep it brief and to the point. 

I guess one of the main reasons a rigid heddle weaver would buy additional heddles is to increase shaft capability without having to invest in another loom.

Yes, new heddles are costly, but if you compare that cost to a brand new 4 shaft table or floor loom it is a small investment.

I wouldn’t ever say that additional heddles for a RH loom are a waste, they are just another way to achieve a desired outcome. 

As demonstrated in my Weaving With Two Heddles online class, there are a lot of possibilities by adding just one extra heddle. You can weave a variety of 3 and 4 shaft (with the addition of heddle rods/pick up sticks) patterns, you can double your sett or you can weave double width or tubular.

Some of the questions I would be asking you are: Do you want a new loom? Are you interested in weaving on more shafts? Would it help you to have more than one loom so you can more projects going at once? Do you have the space for another loom? The budget?

The Schacht Flip rigid heddle loom differs a little to the Ashford rigid heddle looms in that the heddle positioning is not the same when using more than one heddle and some weavers are confused by that. But, as with everything in weaving, there are workarounds and you can find some more information about that on the Schacht website here.

You might also find these articles of interest:

Why would you weave with two heddles or more?

Doubling sett in rigid heddle weaving…

I hope this article has been helpful to you, feel free to share it with others so more can benefit. Leave your comments or questions underneath this article and

Until next time…

Happy Weaving!

*This post contains affiliate links. For more information, please see my disclosure policy.

Filed Under: Rigid heddle weaving, Weaving Tagged With: ask kelly, rigid heddle weaving, two heddles

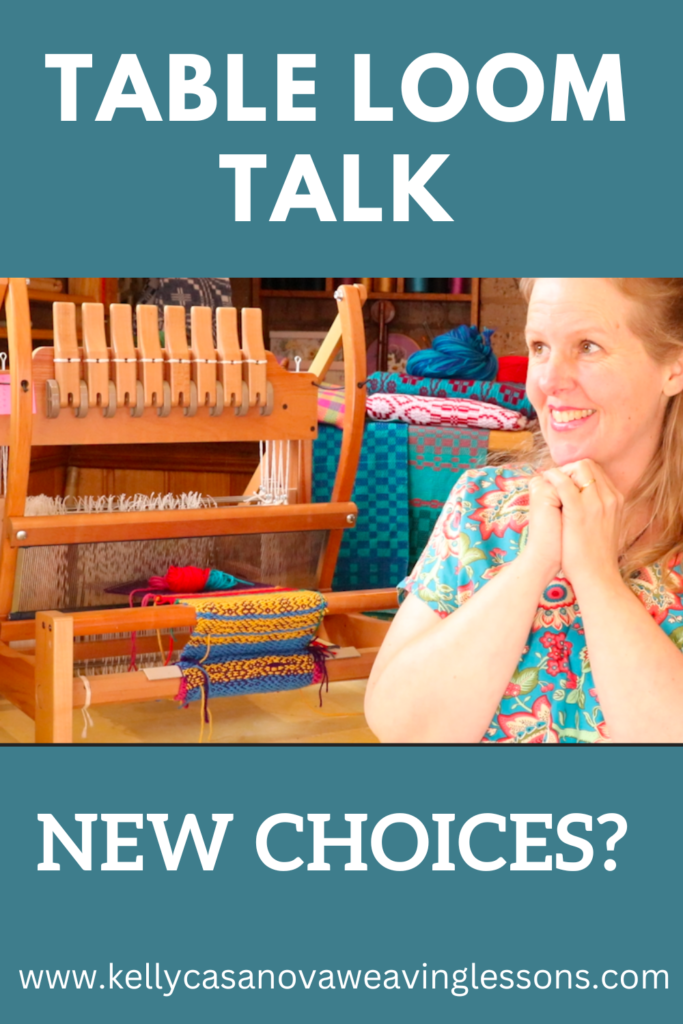
Table loom choices – new looms

by Kelly 10 Comments

What an exciting time to be a weaver! At this time in history we have so many resources, tools and support available.

Loom companies are innovating and listening to what weavers want, which is great news for us.

Today I’m looking at some new looms that have just come out this year (in fact, two of them are currently only available for pre-order!) and discussing why they may or may not be the right solution for you if you’re in the market for a new table loom.

I’m going to focus on three new looms specifically. First up we have a Louet loom. As a disclaimer, I do not own a Louet table loom myself. However, I am familiar with the company and their looms and have owned a Louet David floor loom for many years and absolutely love it.

Louet Jane 16 Shaft Table Loom

This brand new table loom from Louet has just become available for pre- order. Previously the Jane was only available with up to 8 shafts.

Here are some of the features of the new 16 shaft Jane:

Available in 50 and 70cm weaving width.

Overhead beater.

Foldable and portable.

Comes with travel bag.

You can purchase the new Jane with 8 shafts and upgrade to 16 shafts later because there is room to do that. This is a great bonus for those who want the option to upgrade later without having the initial outlay.

Things I love-

Smart design, slimline, minimal to increase functionality. 

Not heavy.

Attractive.

Quality.

Extra shafts without compromising on weaving width.

Now let’s do some cost comparisons for this loom. Please note that all prices are in USD and relevant to December, 2023. The width refers to weaving width, not actual loom width.

8 Shaft Jane Table Loom-

8 shafts – width 50cm $1,517   width 70cm – $1,722

16 Shaft Jane Table Loom-

16 shafts – width 50cm – $1,650     Width 70cm – $1,750

The prices between the 8 and 16 shafts are not all that different, so that is something to seriously consider.

In Australia, the Jane 16 shaft is available for pre-order here.

  The second table loom we’re looking at today is also available for pre-order, with an expected delivery date being around mid 2024. This release will be a limited edition.                   

Ashford 16 Shaft Table Loom

I have owned an 8 shaft Ashford table loom for many years and I think they are terrific looms.

One of the differences between the new Louet and Ashford is the available weaving widths. The Ashford will be available with a weaving width of up to 80cm, which is a little wider and might be important to you.

8 shaft Ashford table loom-

8 shaft – width 60cm – $1,050      width 80cm – $1,115

16 Shaft Ashford table loom-

16 shaft – width 60cm – $1,695 width 80cm – $1,950.  

Slightly different pricing and sizing between the two.

Now, I admit that I cheated a little bit on the third loom, as it’s not actually a table loom at all! But, I have good reason for including it in this article.

Schacht Cricket Quartet

Boy, was I impressed when Schacht released this new concept during the year! A kit to convert an existing rigid heddle loom to a 4 shaft loom.

Now, here is the catch. The Quartet kit will only attach to a 15″ Cricket loom and you can weave up to, bit not beyond 4 shafts. And you are limited to that 15″ weaving width.

So, why did I include it in this list?

Well, if you happen to already be in possession of a 15″ Cricket, then this could be the perfect way to upgrade to more shafts without the additional investment of a table loom.

The situation I would NOT recommend that you buy the Quartet is if you don’t already have the Cricket to use it with. In this situation, I would definitely recommend looking at a table loom instead, one reason being that you will not have your rigid heddle loom taken up with an attachment and only be able to weave one project at a time, but more importantly, by the time you purchased the Cricket plus the Quartet your investment amount would be getting close to the cost of some new table looms.

Here is the price breakdown:

Quartet – $473

15” Cricket – $252

Combined – $725

The second last point that I want to make here to help you make table loom decisions is to put careful consideration into how many shafts you will actually want to use.

16 shafts certainly sounds very appealing, but first you could ask yourself what you would weave on 16 shafts? Are you just starting out on a multi shaft loom? Do you know or understand what you might weave on 16 shafts?

Shiny object syndrome is a reality, but I encourage you to be practical and honest about your own needs. Perhaps you are fascinated with the idea of weaving on more than 8 shafts and have been researching. Or maybe you would be happy with just 4 shafts. If you doubt you could spend very long weaving 4 shaft weave structures, think otherwise! Even after years and years of floor and table loom weaving I still weave more often on 4 shafts than any other. Check out Anne Dixon’s Handweaver’s Pattern Directory to start exploring just how much you can do with 4 shafts.

And lastly, don’t forget to budget for the extras! If you are buying a new table loom, it will come with things like stick shuttles, warping separators, enough texsolv heddles to get you started and a reed for the beater.

The extras that you need to look out for are things like boat shuttles, raddles, (except for Louet looms – they have built in raddles!) threading hooks, additional texsolv heddles, and possibly a stand if you don’t have a table space.

If the prices listed above look way too prohibitive to you, check out guilds and Facebook groups for secondhand looms. You are not likely to find one of the new 16 shaft looms being sold as used for some time yet, but if you do happen to find a table loom that suits you, you will certainly save a lot of money. Sometimes a secondhand loom will even come with all the extra tools (maybe even yarn) to get you started.

You can view this article in video format here-

I hope you have enjoyed learning more about these new looms and feel free to keep the conversation going in the comments section by sharing your experience or asking questions you may have.

Until next time…

Happy Weaving!
*This post contains affiliate links. For further information, please see my disclosure policy.

Filed Under: Table loom weaving, Weaving Tagged With: table loom, table loom weaving

Weavers Gift Guide 2023

by Kelly 2 Comments

Wait, no, it’s Christmas time? Again? Didn’t we just have that?!

Jokes aside, it is almost that wonderful time of year (and yes, it’s been the speediest year ever!) and time to think about gifts for friends, loved ones and, of course – ourselves! 😀

This year I’m ordering the guide from lowest to highest price so you can jump to where your budget is currently at. Gifts most definitely do not have to be expensive but for some of you it may be the right time to purchase that upgrade or tool you’ve been wanting.

My biggest tips for this gift guide? Leave your computer/laptop open and on display, that way family members are sure to see it 😉😉😉

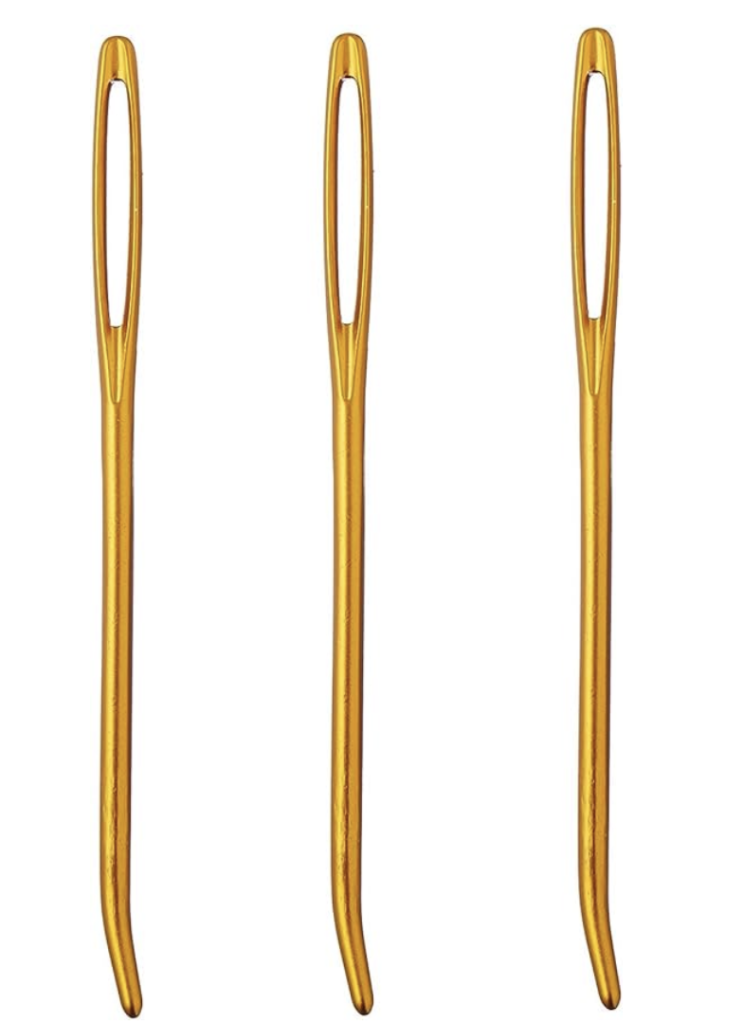
  1. The Clover Jumbo Bent Tip Tapestry Needles are one of my favourite and most used tools in my weaving studio! They are perfect for hemstitching or embellishing a piece on the loom and weaving in ends off the loom.

They are also super affordable, making them the perfect stocking stuffer.

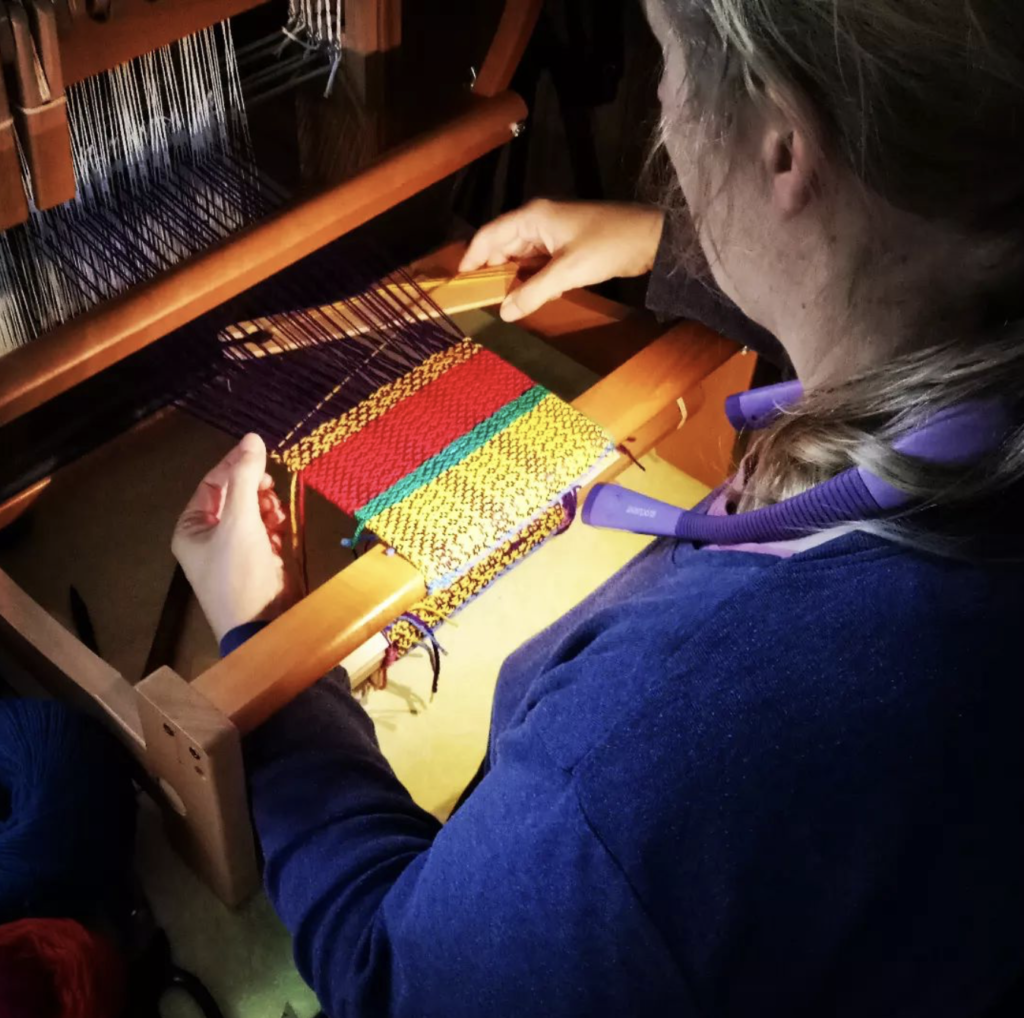
2. Glocusent Neck Reading Light

I posted about my neck reading light on Instagram during the year and the crowd went wild! These lights have been a game changer for me in a variety of crafts because you can direct the light to exactly where you need it.

There are 3 light intensity levels, the arms are flexible and they are rechargeable (I don’t charge mine very often, one charge lasts for ages).

These are another really affordable gift that will make a big difference to someone!

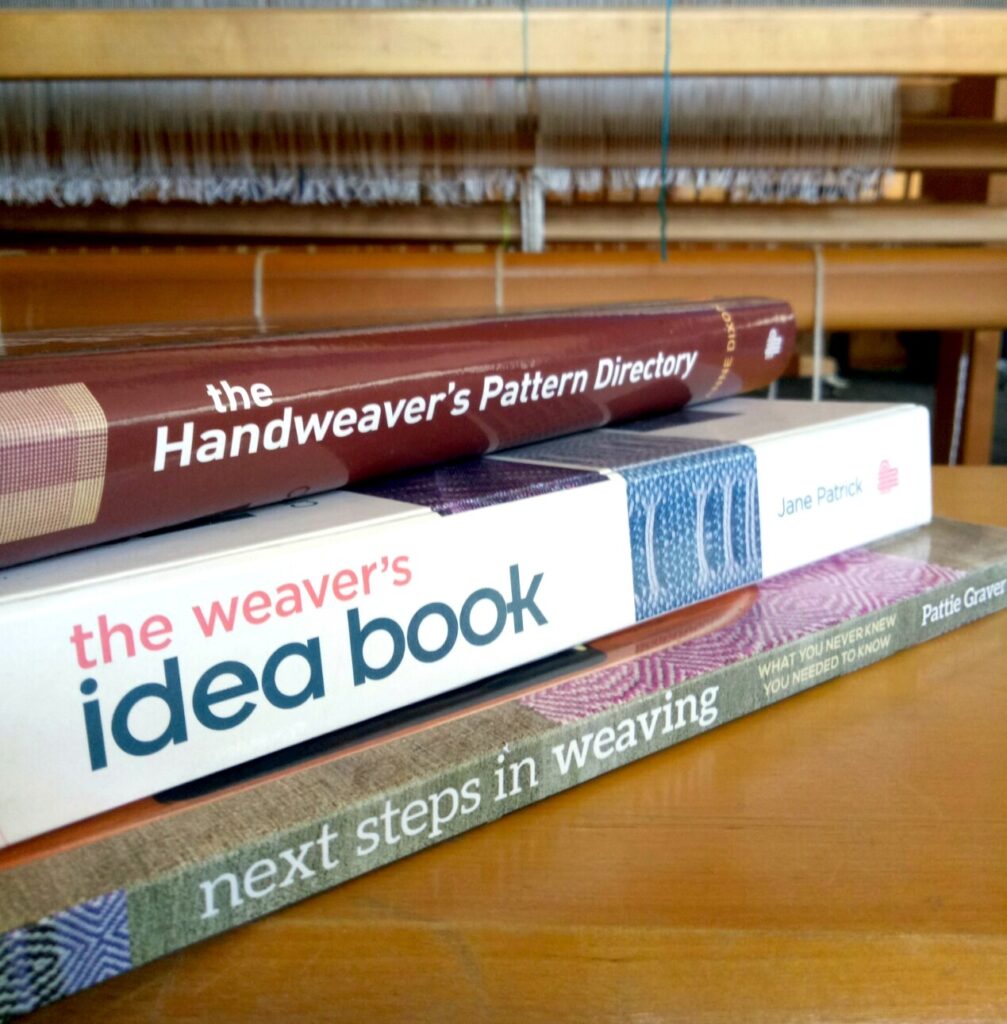
3. Weaving books

Weaving books make an excellent gift. Here are some of my personal favourites. For rigid heddle weavers, I always recommend Jane Patrick’s The Weaver’s Idea Book. For table or floor loom weavers I recommend Anne Dixon’s Handweaver’s Pattern Directory for a huge library of weaving drafts and Pattie Graver’s Next Steps in Weaving for seriously inspiring ideas and projects.

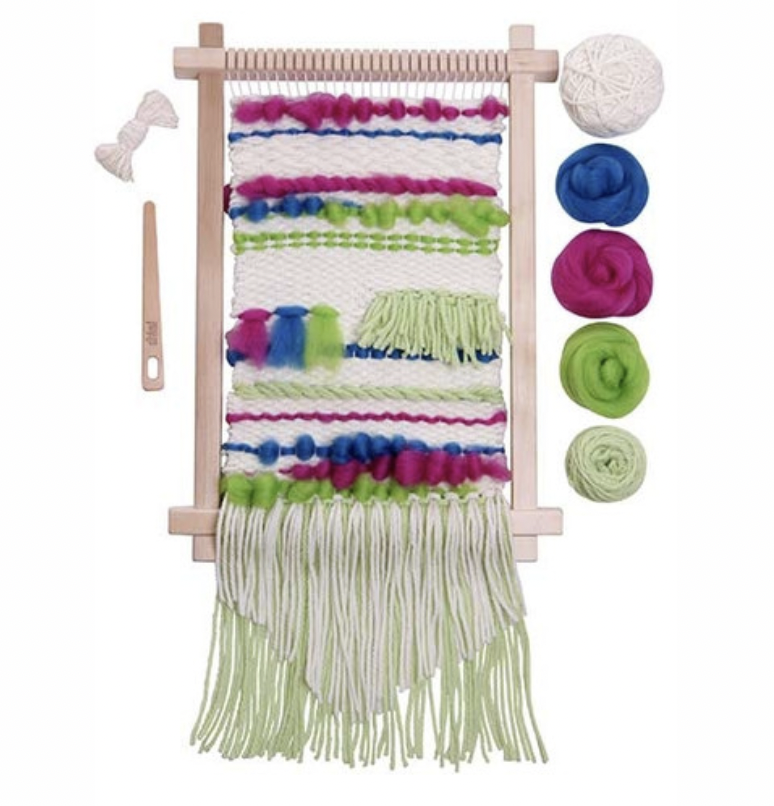
Ashford Weaving Starter Kit

This is a great gift option for someone who is curious about weaving but may not want to leap right into investing in something like a rigid heddle loom.

It’s true that you can find cheaper weaving frames on Amazon, but you do get what you pay for. With the Ashford frame loom, you are guaranteed a good quality, sturdy frame and you also have the bonus of receiving some lovely New Zealand wool in bright colours to get you started.

4. Schacht End Feed Shuttle

This shuttle has been a game changer for me when weaving a wide warp on my floor loom. The yarn feeds off a pirn and is tensioned from the end of the shuttle, making neat edges and appropriate weft tensioning really easy. It glides beautifully and is a joy to use, I bought the 15″.

5. The Schacht Cricket Quartet

The Quartet came out during the year and made quite a splash in the weaving world with it’s innovation and forward thinking.

The idea behind the Quartet is that you can take your regular 15″ Cricket rigid heddle loom and upgrade it to a 4 shaft loom (similar to a table loom) with the 4 shaft conversion kit. A pretty cool idea!

One thing I want to say about the Quartet is that I think it’s a great option if you already have the 15″ Cricket and want to explore further. However, if you’re looking to start with a 4 shaft loom, I would recommend looking at table looms as once you add the price of the Cricket to the Quartet conversion kit, you are looking at a fairly similar price to a table loom. Just some food for thought.

6. Louet Jane 16 Shaft Table Loom

Speaking of table looms, Louet has just announced the brand new 16 shaft Jane, which is currently available for pre-order.

Previously this loom was available with up to 8 shafts, so this is an exciting move for those weavers who want to explore more shafts.

The new 16 shaft Jane is available in a 50cm or 70cm weaving width and is a true luxury gift!

I hope that this gift guide has inspired you with some weaving gift ideas!

Until next time…

Happy Weaving!
*This post contains affiliate links. For further information, please see my disclosure policy.

Filed Under: Gift Guide, Weaving Tagged With: gift guide, weaver's gift guide

Krokbragd Reindeer Tutorial

by Kelly 2 Comments

It’s that wonderful time of year again, when thoughts start turning to festive project and gift ideas.

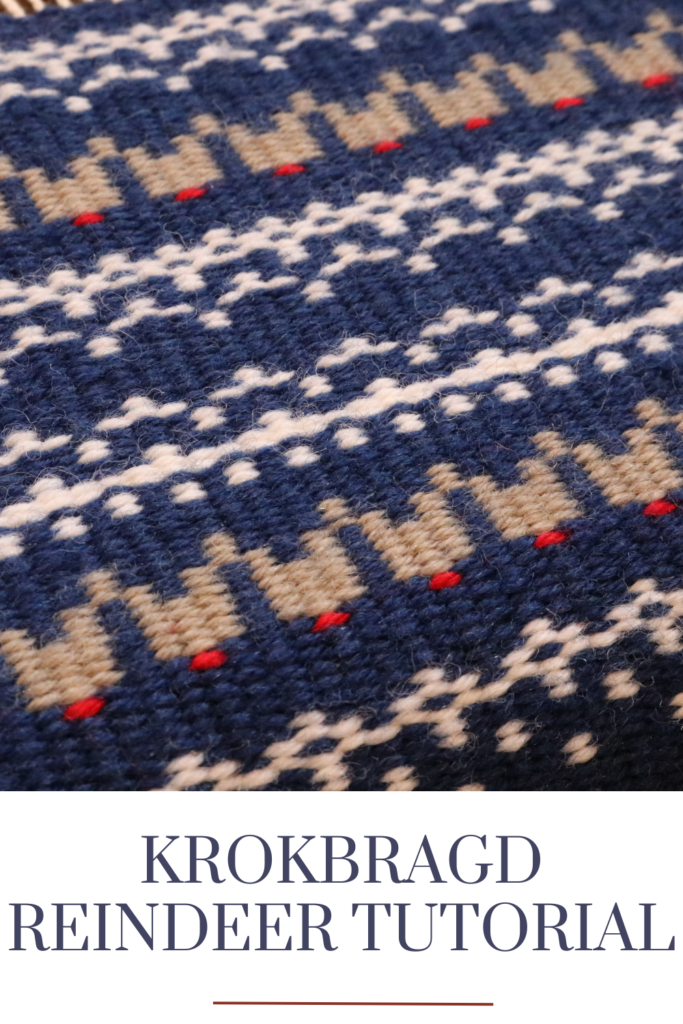
A number of years ago I released a How to weave Reindeer on a rigid heddle loom on Youtube and it has proved to be very popular! In that video we use pick up sticks in front of the heddle to achieve the shapes we need to build some little reindeer.

For my Christmas video this year, I decided to again weave reindeer but use a different weave structure for a different look. I already had my Sampleit loom warped for a krokbragd sampler so I set about designing some cute reindeer ensconced in a lovely Fair Isle inspired border.

This tutorial uses 4 colours for the weft – navy, white, red and beige. I used Bendigo Woollen Mills Luxury 4 play, which is a fingering weight wool. The warp should be a strong and thinner than the weft, I use a #12 seine twine.

Krokbragd-Reindeer-tutorial-PDFDownload

Be sure to watch the free Youtube tutorial so that you can follow the weaving sequence along with the printable PDF.

If you’re looking for further krokbragd learning resources, check these out:

Krokbragd 101 Online Course…

Krokbragd Youtube Playlist…

All About Krokbragd…

*This post contains affiliate links. For further information, please see my disclosure policy

Until next time…

Happy Weaving!
Filed Under: Krokbragd, Rigid heddle weaving, Rigid Heddle Weaving Patterns, Weaving Tagged With: Celebrations, christmas, krokbragd, reindeer, rigidheddleweaving, tutorial

Ask Kelly – Table loom or floor loom?

by Kelly 2 Comments

Most modern weavers know that a rigid heddle loom can be set up in various ways to achieve extra shafts, making it possible to weave 3, 4 or more shafts on this fairly simple loom.

Some of the options include the introduction of additional heddles, heddle rods and/or pick up sticks to create the extra desired shafts. This allows many rigid heddle weavers to achieve weave structures that are usually woven with a table loom or floor loom.

Adding the extra shafts can sometimes create additional problems for the weaver though. Some weavers may find the repetitious action of lifting a heddle rod that is situated behind the main heddle/heddles will activate or exacerbate neck, shoulder or back problems (🙋‍♀️).

Some weavers may find that using multiple heddles is difficult if for any reason your fine motor skills are challenged. It is this particular problem that today’s Ask Kelly question specifically relates to:

“I did love this class, and I really love this pattern; however, it was very hard on my arthritic hands. I ended up only making it about 15 inches, and that was over 3 days. I’ve done a couple of your projects with heddle rods and have really liked them, but I guess 3 was over the top for me. I’m considering a floor loom, as I’m loving the more intricate patterns. TBH, that intimidates me a LOT. If money and space are not an issue (I am fortunate that they aren’t), is there an advantage to the table loom over the floor loom? It seems far less intimidating to me. My daughter tells me that I should go straight to the floor loom, one reason being that sheds can be just as messy on a table loom as they are on my RHL, so why bother. I don’t know if that’s true. I’d appreciate any feedback you can offer.”

I’ve been thinking over your question – it’s a very good one but a real “can of worms” question! 😆

There is a lot to consider here. You’ve eliminated the cost and space issue, which is great, I don’t need to discuss that further here.

What springs to my mind first when thinking about a floor loom is age and ability. Now, I firmly believe that you can do anything at any age, but I also know from first hand experience and speaking to so many other weavers that our own willingness and desire to do something doesn’t always match what our bodies will let us do!

So, my next question for you would be, how are you physically? A table loom can be a strain on your neck and shoulders due to operating the levers. A floor loom can be a strain on your back due to doing tie ups and operating treadles with your feet, also possibly from stretching to throw the shuttle, depending on how wide your loom is.

Personally, I enjoy weaving on a floor loom way more than a table loom because I love the speed you can achieve by using your whole body to operate different parts (like driving a car, I guess). But I have to be careful about my back and make sure I take regular breaks and don’t weave for too long.

I have seen some weavers who are more advanced in years upgrade their regular floor looms to an AVL or similar. If you don’t know anything about that, it’s relying more on electronics so that you do less of the “heavy lifting”.

It’s a great way for older weavers to be able to continue weaving for longer. Very expensive looms though, and some may not like the idea of electronics being involved. As I said, there is a lot to consider, but if you have any more specific questions, let me know.

Do your research and take your time making a decision. If there is any way you can try out a table or floor loom before purchase, that would be invaluable to help you make your decision.

All the best in choosing the right loom for you!

*This post contains affiliate links. For further information, please see my disclosure policy.

Until next time…

Happy Weaving!
Filed Under: Ask Kelly, Weaving Tagged With: floor loom, rigid heddle loom, table loom

Ask Kelly – Is a larger loom right for me?

by Kelly 4 Comments

Buying a loom is such a huge decision. Many weavers start out using a smaller loom but find over time that they would like to upgrade to something larger. Today’s Ask Kelly question asks whether purchasing a larger loom is worth it.

” My ultimate goal in learning to weave is to make my own fabric so I can sew clothes for myself and others. Would getting the 48″ rigid heddle loom be worth the money? I currently have the 32″. Just would like your thoughts.”

Cindy

Hi Cindy,

It’s a personal choice but there are 3 main things I would be considering before making a decision:

1. Does your budget allow for the purchase?

2. Do you have space for a larger loom (you would definitely want the stand with it).

3. Is it going to be ok for you physically to weave on? The extra width is difficult for weavers who have neck, shoulder or back issues.

Also consider that fabric for clothing can be utilised in many different ways and styles, you are not limited if you only have narrower panels of fabric. I recommend that you check out Sarah Howard’s sewing patterns for weavers. Sarah often weaves on a small to middle sized loom herself and once you see her designs I’m sure you will agree she is at no disadvantage for having smaller pieces of fabric!

You will find that many of my own pattern designs or projects from my online weaving classes are not constructed on big looms either.

I have some more comprehensive articles that may also help you to decide whether a larger loom is a good decision for you:

Should I buy a larger loom?…

What can I weave on a small loom?…

And I just want to add one more thing before I go. Be careful to not develop loom envy by comparing yourself to others.

Perhaps you bought a smaller or medium sized loom to begin with and you were totally happy with it. But then you saw other weavers raving about their larger looms and how much better they are.

As I already pointed out to Cindy, whether to upgrade to a larger loom is a very personal decision and should not be influenced by feelings of inadequacy. In the multi shaft weaving world, “shaft envy” is very real. You think you will be happy with 4 shafts but then you want 8. You get the 8 shafts but then you want 16. And on, and on.

And while sometimes a loom upgrade is absolutely the perfect decision, no one should be made to feel that their current loom is not good enough.

We weavers are all different and we don’t have to fit the same mould. So, in a nutshell, you do you!

Until next time…

Happy Weaving!
Filed Under: Ask Kelly, Weaving Tagged With: ask kelly, larger loom

  • « Go to Previous Page
  • Page 1
  • Interim pages omitted …
  • Page 4
  • Page 5
  • Page 6
  • Page 7
  • Page 8
  • Interim pages omitted …
  • Page 25
  • Go to Next Page »

Primary Sidebar

Hand crafted boat shuttles

Categories

Archives

Meta

  • Log in
  • Entries feed
  • Comments feed
  • WordPress.org

Copyright © 2025 Kelly Casanova Weaving Lessons on the Foodie Pro Theme