• Skip to main content
  • Skip to primary sidebar

Kelly Casanova Weaving Lessons

  • Hi! I’m Kelly!
    • Disclosure
  • Online Weaving School Class Index
    • Common account issues
    • Common technical issues
    • What do I get with a membership?
  • New to rigid heddle weaving? Start here!
    • Never heard of the rigid heddle loom?
    • How to weave neat edges on the rigid heddle loom
    • Rigid heddle weaving
    • Rigid Heddle Weaving Patterns
  • Patterns
  • Subscribe

Health and home

Milk and Honey Bread

by Kelly 10 Comments

Milk and honey bread is a luxury bread, or at least, I think so!

Soft, sweet, moist and light all at once!

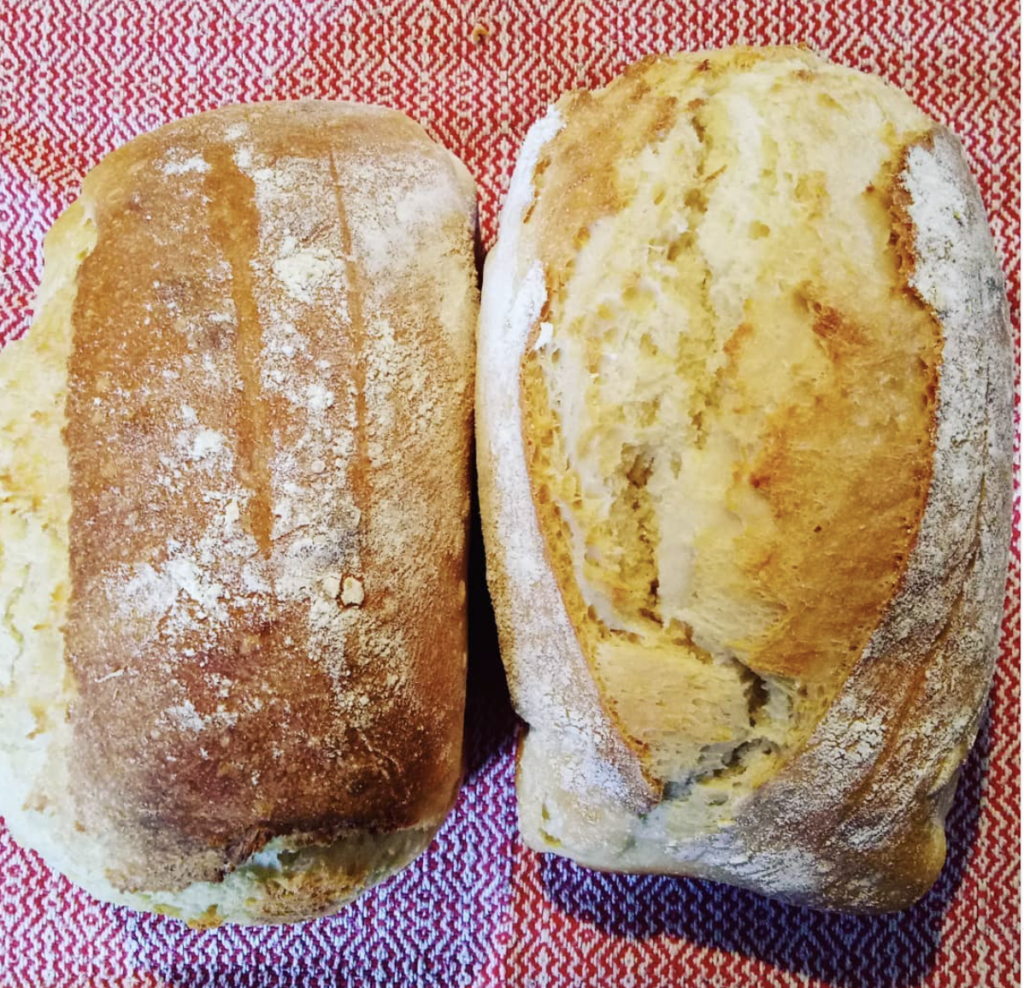
Milk and honey bread is a real treat in our home and the kids absolutely love it.

*This post contains affiliate links

Since the coronavirus pandemic began I had not been able to find white flour anywhere to buy. I know it’s been the same for many of you, as the need and desire for home baking has increased and suppliers were overwhelmed with trying to restock.

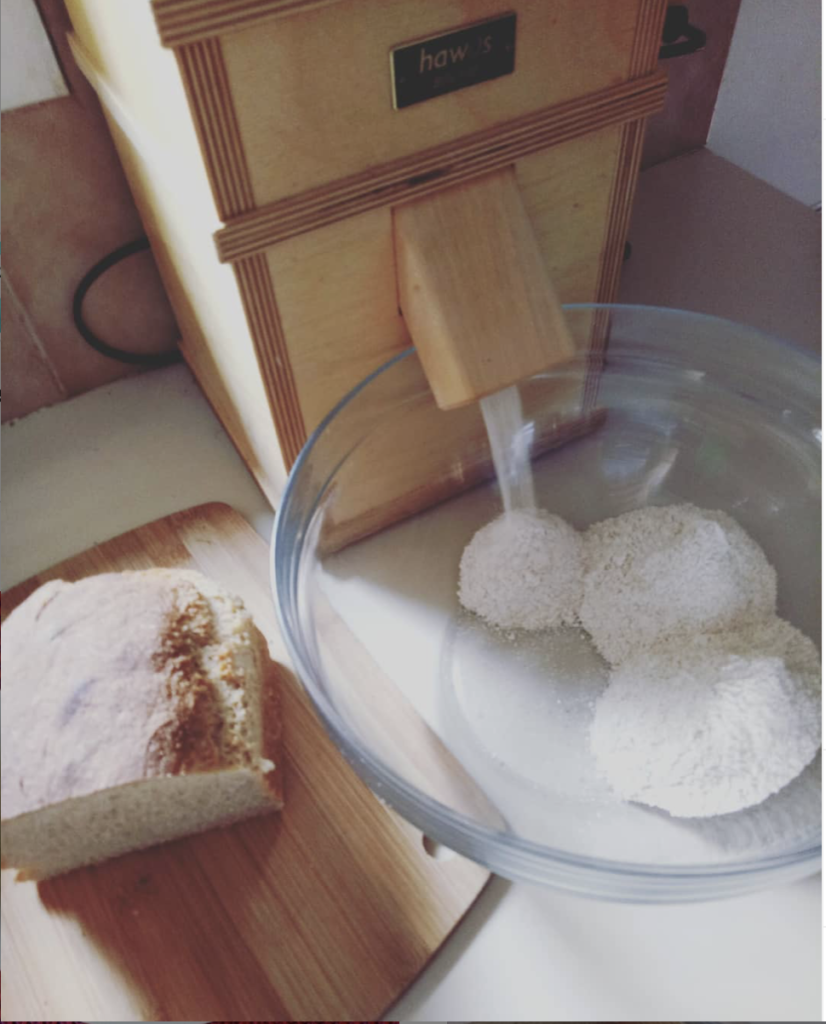
I’m so grateful to have my grain mill and we do love whole wheat bread (find my own recipe here), but occasionally I love to make an all white bread for my family as a treat.

Well, this week, my husband was able to buy a 10kg bag of unbleached white flour. I usually buy 25kg bags, but when he walked in with the 10kg bag it was as if he had walked in with a sack of gold, I was so excited!

So, the first thing I decided to do with this new bag of white flour was to make the milk and honey bread that I had not been able to bake for so long.

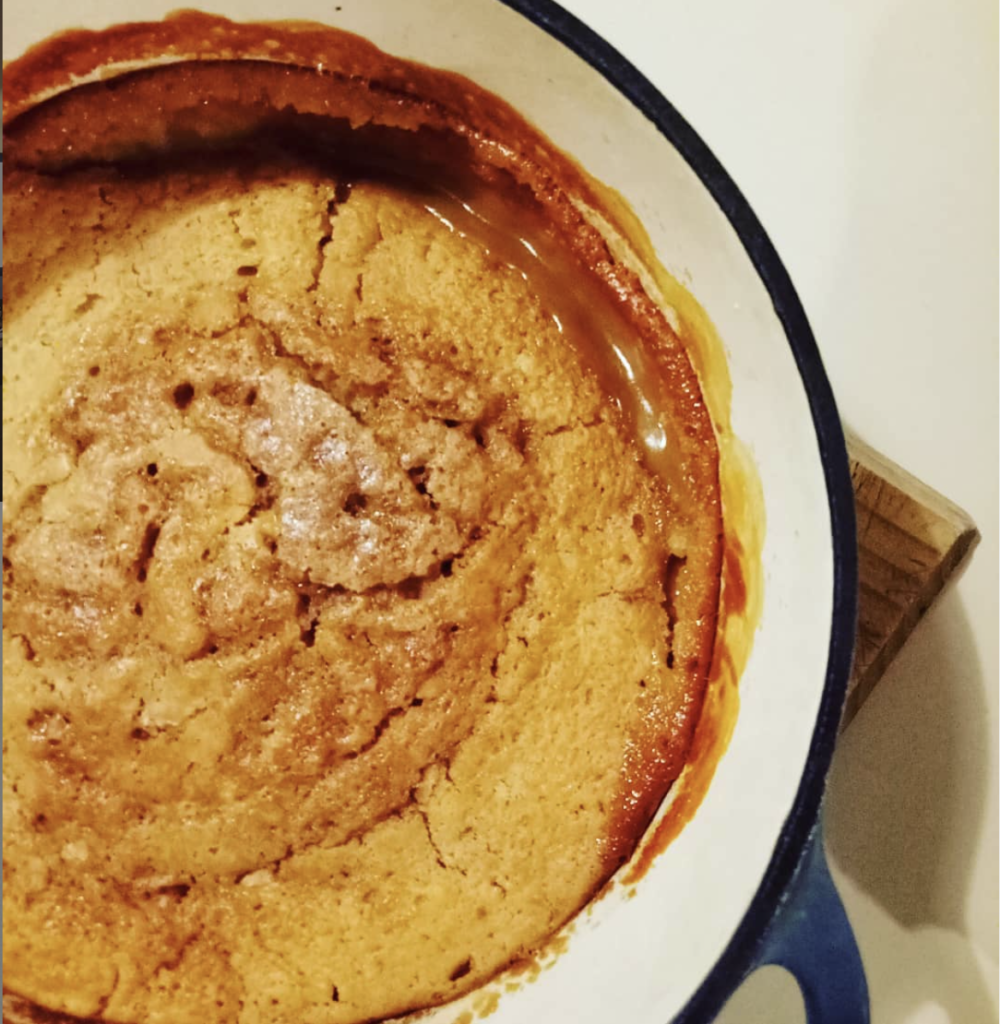
This bread makes wonderful sandwiches and is especially delicious when eaten on the same day it’s baked. But, I must tell you that it makes the.most.wonderful. toast on the next and subsequent days!

There are only 6 basic ingredients to this recipe. It takes a little longer with a few more steps than my Whole Wheat Bread recipe, but trust me, it’s worth the effort!

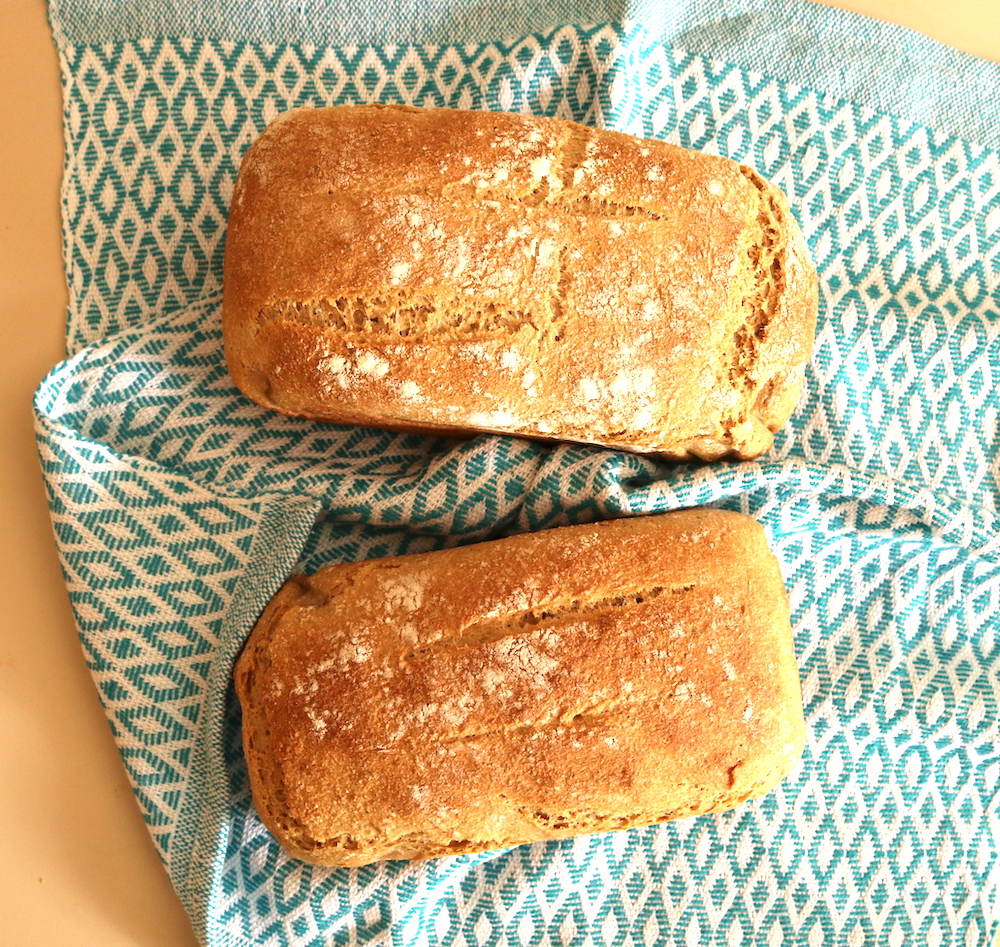
This recipe makes 2 x 500gram or 1 pound loaves. I find it easiest to bake them in loaf tins, (these ones look great!) as the dough is very moist and doesn’t cope so well with being a round loaf on a tray – it won’t hold shape that way.

Milk and Honey Bread

Soft, sweet, deliciously moist!
5 from 1 vote
Print Recipe Pin Recipe

Ingredients
  

  • 2 cups Warm milk Made up milk powder is fine too
  • 1 teaspoon Dry active yeast
  • 2 tbsp Honey
  • 3 cups White, unbleached, plain flour
  • 2.5 tsp salt
  • 4 – 4.5 cups White, unbleached, plain flour (additional)
  • 1.5 cups Warm water

Instructions
 

  • Whisk warm milk and honey together in a large bowl. Sprinkle the yeast over the top and allow to sit for 5 minutes.
  • Whisk in 3 cups of white plain flour, 1 at a time. Cover this mixture with a clean kitchen towel and allow to sit for 30 minutes.
  • Whisk the salt into the yeast and flour mixture.
  • Whisk in the warm water, making a thin batter like mixture.
  • With a wooden spoon, stir in the remaining flour, 1 cup at a time. If your mixture is too wet, you can add more flour. If it is too dry, don't add the full amount of flour recommended (which is why we add 1 cup at a time). Aim for a dough that is very moist, quite sticky, but not too difficult to handle.
  • Use my dough turning method as outlined in the post.
  • Sprinkle dough lightly with flour, cover with clean kitchen towel and leave to rise until doubled in size, usually 1 – 2 hours, depending on your room temperature.
  • Shape the dough into 2 loaves and place them in loaf tins, either oiled or lined with baking paper. Cover again with towel.
  • Preheat oven to 225 degrees celsius or 437 farenheit.
  • Allow dough to rise 20 – 30 minutes or until the dough looks nice and risen in the tins. Slash the tops and place in the oven.
  • Bake for 35 – 40 minutes or until golden brown on top.
  • Cool loaves on a baking rack.

To review the dough turning method as shown in this video:

I hope you enjoy this bread as much as my family does. If you try the recipe and love it, will you do me the big favour of leaving a 5 star review? I would appreciate that so much! I would also appreciate if you try this recipe and are on Instagram, please tag me so that I can share your loaves in my stories. Feel free to use the hashtag #kellysmilkandhoneybread as well.

As always, if you have any questions about this recipe, please leave a comment, I love to hear from you.

Until next time…

Happy Baking!

Filed Under: Health and home, Recipes Tagged With: milk and honey bread, my recipes, recipes

Life after lockdown – How to plan and prioritise with a daily practice planner

by Kelly 7 Comments

Some parts of the world are beginning to emerge from the COVID 19 pandemic crisis by tentatively lifting restrictions on lockdown and stay at home orders.

*Disclaimer – I am not a medical doctor or psychologist. I’m just a person living life and making observations. If you are concerned about any aspect of your mental health, please seek help from medical professionals.

Here in Australia, the government is moving ahead with plans to reinstate some freedoms we enjoyed before we all learned the term “coronavirus”.

As an online creator who has the privilege of being in touch with people from all different backgrounds from all over the world, I have unexpectedly learned a lot over this lockdown period. Mostly about my fellow humans.

I’ve seen a huge surge of people who, temporarily released from the obligations of a “normal” life, have found wonderful ways to fill the gaps and use their time productively. Weaving, baking bread, making and doing in a way that we have not previously seen. I wrote about this at the beginning of the pandemic, sharing how much I was enjoying a return to simpler times.

My Online Weaving School has seen one if it’s biggest months, with so many new members joining and eager to learn. In a time of great uncertainty, by business is going ahead in leaps and bounds.

In some ways, it seems lock down is just what the doctor ordered for so many people. Even for those who switched from a workplace to working at home, they have found that they have so much extra time without having to commute to and from work and expending energy to do so.

My Winter Butterscotch Pudding

It has been really wonderful for me to watch so many people joyfully finding the time to do what they would rather be doing, or discovering new learning opportunities and diving right in. How inspiring!

But, something concerns me about all this new found fervour.

What happens when everything goes back to normal?

How are people going to reconcile their former lives with their current (perhaps much preferred?) lives? People still have to work for a living, how will they find the time to continue pursuing the things they truly want to do?

Now is a great time to ponder such questions and to begin planning. Setting aside some time to make plans is going to make you feel a whole lot better about your future. There is something about having goals written down on paper that can soothe anxiety and empower you to feel in control of your life.

I’ve put together a very basic but rather pretty Daily Practice Planner that has helped me to gather and organise my thoughts in a really manageable way.

Here is what the blank planner looks like. I’ll take you through some of my own planning as an example. I don’t want you to copy what I’ve written, but to use it as a guide. You should write down what is most relevant to you and your own life.

Let’s start with column one – Important Daily Practices. Generally these are things that you are already doing, but if there are practices you would like to incorporate into each day, write them down as well. Print out as many sheets as you need to accomodate your daily practices or import the file into Adobe Acrobat where you can edit PDFs.

My first important daily practice is “Faith and Spirituality”. Under “What it looks like currently“. I’ve written the basics of what this topic looks like for me in my everyday life. When you write down what your topic currently looks like, be honest, don’t try to sugar coat it. No one has to see this list, it’s for your benefit only.

Working across, I fill in the next column “How I wish it looked ideally“. This is like the best case scenario column. If you could have that daily practice exactly how you want to, what would it be? Write it in and don’t worry if it seems too perfect or not achievable.

Now for the last column. This is the back down to earth column. It’s a recognition that nothing is perfect and your “ideal” may not be the most realistic thing for you. It’s validating the fact that you have higher ideals and it’s going to help you to move towards “better” not “perfect”. It is also to prove to yourself that you are not a victim of your circumstances. Yes, most people have to work for a living and yes, that can take a lot of time and yes, you may wish you could just do what you want to do instead. But this column shows you that you can make positive changes to fill that necessary cup of self investment.

So, for my last column, instead of writing down “attend daily Mass”, which I know is not really achievable for me due to time, work and family demands, I have written what I know can be achievable for me – “go to 1 additional Mass per week”. I can make that work, I can pick the day of the week to make it happen and I’m not tied in to commitment if I can’t do it every single week. It’s a good place to start. Likewise, with the 1 page per day of the bible. It’s about making a habit and keeping it but making it as easy as possible so that I will actually do it. These things are stepping stones that may eventually equate to bigger and better goals, but for now it’s more important to just make a start.

Here is my first page completed and I will likely print out at least one more page. You can do as many as you like, but don’t overwhelm yourself by trying to make too many changes at once or overthinking it.

Print your PDF here:

Daily-Practice-Planner.pngDownload

So, what do you think, would this be a beneficial activity for you? Plans can and do change, but taking a few minutes to fill out your own chart could be just what you need.

Leave me a comment if you complete a sheet and let me know how it helped you, I would love to hear all about it!

Until next time…

Happy Weaving!

Filed Under: Health and home, Inspiration, Weaving Tagged With: creative life, self help

Choc Coated PB Lumps

by Kelly 12 Comments

When I was a teenager I had a friend whose Mum made the most delicious peanut butter balls, coated in chocolate. It seemed every time I visited, there were balls in milk, dark and white chocolate, freshly made and ready to be eaten.

Unfortunately, they were also very unhealthy, made with lots of butter and icing sugar.

*This post contains affiliate links

I later came across the American “Buck eyes” which seem to be very similar to my friend’s peanut butter balls. Lately I’ve had a real hankering for these delectable balls, but they don’t exactly fit in with my attempts towards healthy eating and lifestyle.

I thought there must be a way to obtain a similar flavour to the traditional buck eyes in a healthier way.

It turns out there is!

The ingredients are really simple. This is something I’ve come to really love about healthy food, ingredients are usually very minimal because you are using good, natural food close to it’s natural state. It’s a wonderful way to eat.

For this ingredient amount, you will get about 12 chocolate lumps. You can easily double the recipe for a larger crowd.

So, this recipe uses lovely almond flour (almond meal), my secret addiction (peanut butter), vanilla extract, honey and my other not so secret addiction (dark chocolate). You can use either milk or dark chocolate, but if you’re opting for the healthiest option, dark is the way to go.

I used crunchy peanut butter, but you could use smooth if that is your preference.

Now, a little disclaimer. Although the taste is very similar to the unhealthy version, the texture of these is quite different – a little more grainy and cakey. Which doesn’t bother me in the slightest, but I just wanted to let you know.

Choc Coated PB Lumps

5 from 3 votes
Print Recipe Pin Recipe
Prep Time 15 minutes mins

Ingredients
  

  • 3/4 cup Almond meal (almond flour)
  • 2 tbsp Peanut butter
  • 1 tbsp Honey
  • 1 tsp Vanilla extract
  • 100 grams Dark or milk cooking chocolate

Instructions
 

  • Place all ingredients except the chocolate in a bowl.
  • Mash together until fully mixed and forming a paste.
  • Push mixture into moulds (if using) or roll into balls if you prefer. If using moulds, it's easiest to place them in the freezer for half an hour. Otherwise, regrigerate until very firm.
  • Melt cooking chocolate over a double boiler or you can sit a ceremic bowl on top of a small saucepan with a little water.
  • Using 2 forks, dip your peanut butter pieces or balls in the melted chocolate and place on non stick baking or parchment paper.
  • When all are dipped, place in the fridge to harden, then store in the fridge until you're ready to eat some.

Another disclaimer is that the chocolate coating part is a little messy and the end product a little blobby. Hey, they may not be as Instagram worthy as some, but once it’s in my mouth it’s all the same, so who cares? 😆

If you roll the mixture into balls, you can eat just as they are, without the chocolate coating, if you prefer. Or, if you love the chocolatey aspect but have run out of melting chocolate, you could try rolling the balls in cocoa. I did this recently, and while the result is not as decadent as melted chocolate, they were still totally delicious. Like most of my recipes, these are quite adaptable!

Just recently I decided to try making my own almond flour instead of buying it pre-made. The benefits of making your own are twofold.

  • The almond flour freshly ground will contain more nutrients than flour that has been sitting in a packet on a shelf for months.
  • It is much cheaper to buy whole almonds than to purchase already ground.

I actually think freshly ground tastes better too!

Balls, rolled in cocoa

If you’re interested in grinding your own almond flour you do need to have a food processor or other appropriate grinder.

I found that I couldn’t get my fresh almond flour ground quite as finely as the commercial stuff, as there is the risk of the almonds becoming too wet as you grind, if you over grind.

But interestingly, I found that I preferred the slightly grittier consistency of the freshly ground whole almonds.

I hope you enjoy this recipe! Please comment below if you try it and if you enjoy it, please leave me 5 stars to let me know!

Filed Under: Health and home, Recipes Tagged With: easter, healthy chocolate, healthy eating, healthy recipe, healthy treat

How to make bread – my No Knead Whole Wheat Bread Recipe

by Kelly 25 Comments

I’ve been making home baked bread for my family for at least 15 years (yes, I supply ALL the bread, but I have helpers too!) I started baking our bread at home for a few reasons – curiosity, nutrition, economy and self sufficiency. It is the perfect time right now to learn how to bake bread at home.

The idea of knowing exactly what was going into our bread, the superior taste and the cheapness of making it has made baking our own a priority.

Around 4 years ago, I bought a Hawos Billy 100 grain mill after wanting one for 10 years (I’m very patient 😎). It sits out on the kitchen bench as it’s in constant use. The first time we set up the mill and ground some wheat, I tasted some on it’s own and was immediately hooked. I had bought commercial wholemeal flour from the supermarket, but grinding it fresh is really next level.

*This post contains affiliate links

I buy my wheat from Simply No Knead and have it delivered. If you’re in the U.S. and looking for some wheat to grind , you can get hard white wheat berries here. If you’re wondering about the differences between red and white wheat, check out this helpful article.

Milling our own grain is a huge blessing at this time when currently there is no commercial flour available to buy due to coronavirus related panic buying. I bulk buy my wheat in 20 kg bags and have plenty of it, I’m so thankful.

I’ve always wanted to share with you all how I make bread. Over the many years of baking for my family, I’ve devised my own methods to make the process faster, easier and more achievable. My methods are no knead, low mess, low ingredients and very straightforward. I’ve tweaked my methods to streamline the process and am very happy to share this with you!

Now, if you have flour and wish to use that, go ahead! This recipe is very adaptable and has the same basic components of flour, yeast, salt, water and oil. You can use white or wholemeal flour, or a combination, they all work. You may have to adjust your liquid amounts slightly, as wholemeal flour takes up more water.

If you prefer your bread on the sweet side, you may want to add in two tablespoons of cane sugar or two tablespoons of honey. I do this occasionally as an extra treat for the kids.

Then you will just need a large mixing bowl, a wooden spoon, 2 bread tins, and you’re ready to bake some delicious bread! If you are going to make bread a lot, you will want a good bread knife, it will take the headache out of slicing. My husband gifted me this Mundial Serrated Knife right at the beginning of my bread baking journey and I use it every single day. Alright, let’s check out the recipe!

Let’s just go over some measurements first so that we’re clear on amounts. If you don’t know how much grain to mill to get the required amount of flour, 5.5 cups of whole wheat grains grinds up to 7.5 cups of flour. This amount of grain and flour also equals 1 kilogram (2.2 pounds). 1 litre of water is equivalent to 1.05 quarts.

No Knead Wholewheat bread

Kelly
5 from 2 votes
Print Recipe Pin Recipe
Servings 2 loaves

Ingredients
  

  • 7.5 cups Wholewheat flour (I use freshly milled)
  • 1.5 tsp Instant dried yeast
  • 2.5 tsp Salt
  • 1 litre Warm water (Around 1 quart)
  • 3 tbsp Sunflower oil

Instructions
 

  • Weigh and mill your whole wheat grain, if using. Otherwise, measure out your commercial wholewheat flour into a large bowl.
  • Add yeast and salt to flour and mix through with a wooden spoon.
  • Mix the warm water and oil together in a jug.
  • Make a well in the middle of your flour and pour all of the liquid in.
  • With a wooden spoon, mix gently to begin combining the wet and dry ingredients.
  • When the water is no longer "sloshy", use a chopping action with the wooden spoon to bring ingredients together. You want to eliminate any dry flour spots.
  • Once combined and completely wet, let the dough sit in the bowl for 3 – 5 minutes.
  • Using the folding technique shown in the video, fold the dough whilst turning the bowl slightly. Fold it around 5 times. Then allow dough to sit for 3 – 5 minutes again.
  • Repeat the folding technique 2 more times for a total of 3 times. You will notice the dough begin to change and become elastic.
  • Sprinkle with flour, cover with a cloth and allow to sit until approximately doubled. Depending on the temperature in your kitchen, this could be 1 – 2 hours. My dough took around an hour to double in a warmish kitchen.
  • Oil or flour your bench surface and tip the dough out. It will be stretchy and airy.
  • Fold the dough in on itself on each side. Cut in half with a sharp knife.
  • Shape the two pieces of dough into loaves according to the video instructions. Place in prepared loaf tins.
  • Sprinkle with flour and cover with cloths to rest for around 30 minutes. Begin to preheat your oven to 225 degrees celsius (437 farenheit).
  • Score your risen loaves with a sharp knife and place in the oven for 35 minutes.
  • Remove from the oven and tins and place on a cooling rack. Allow to cool completely before cutting open.

Did I tell you that this bread freezes well? I make up a batch of 4 loaves at a time, the maximum amount my oven will hold. I usually keep one loaf out for the next couple of days (if it lasts that long, often it does not) and put the rest in individual freezer bags, tie them up well and freeze until needed.

You will want to watch the video I’ve put together in order to learn the techniques I use, as these are crucial to the success of your loaves.

I hope you enjoy this recipe and bake some bread for your family! Please leave any questions in the comments section, let me know if you are going to give it a try, or if you already have. I’d love to hear from you!

Until next time…

Happy baking!

Filed Under: Health and home, Recipes, Tutorials Tagged With: how to make bread, make bread at home, recipe, wholewheat bread recipe

Healthful Toasted Muesli (Granola)

by Kelly 10 Comments

 
I know, I know, there are thousands of recipes for toasted muesli (or granola) on the internet. But I’ve been fiddling around to try and make a healthy, not too oily, but not too dry recipe.


And I’ve hit on something pretty darn good! There is the base recipe, but then you can add to that according to what you have at the time. This batch was timed to coincide with a visit to a Lebanese nut shop, so we had a lot of extra delights to put in.
 
The best part is that many of these ingredients are easily accessible and may be in your pantry already.


It includes those wonderful staples such as rolled oats, raw honey, olive oil, shredded coconut, vanilla extract and sultanas.
 
All you need to make this recipe is an oven and a roasting pan.
 

Healthful Toasted Muesli (Granola)

Kelly
Base recipe
5 from 1 vote
Print Recipe Pin Recipe
Prep Time 5 minutes mins
Cook Time 30 minutes mins

Equipment

  • Oven, roasting tray

Ingredients
  

  • 5 cups rolled oats
  • 1/4 cup honey
  • 3 tbsp olive oil
  • 1 cup shredded or desiccated coconut
  • 2 tsp vanilla extract
  • 1 egg white (optional)
  • 1/2 cup sultanas

Instructions
 

  • Preheat oven to 170 degrees (C).
  • Mix all dry ingredients in a tray with sides so it doesn’t spill. A roasting tray is ideal.
  • Warm the honey until runny and mix in olive oil and vanilla. Pour evenly over dry mix. Mix thoroughly.
  • Now pour over the egg white and mix thoroughly.
  • Place tray in the oven and set the timer for 10 minutes.
  • After 10 minutes, take out the tray, turn the ingredients and return to the oven.
  • Repeat until the muesli has baked for 30 minutes.
  • Remove from oven and stir in the sultanas.

This recipe is super flexible, making it great for when you have certain ingredients on hand. Here are a few options for ways you can vary your muesli.

Add ins (examples of)
1/2 cup chopped peanuts
1/4 cup chopped almonds
1/4 cup sunflower seeds
1/4 cup chopped macadamias
1/4 cup chopped cashews
1/4 cup pistachios 
1 cup LSA mix
Chopped dried fruit eg. apricots, peach, paw paw, apple, dates, cranberries
Rules for add ins
*For seeds and nuts, add these in at the dry mix stage. 
*For dried fruit add ins, mix in when the muesli has finished baking.
 
Allow the muesli to cool before placing it in an airtight container. Serve with milk or use as a delicious topping on stewed fruit and yoghurt.
 
Also makes a delightful gift when placed in an attractive jar.

I hope you enjoy this recipe! Don’t forget to comment and let me know how yours turned out. If you love it, you could even leave me 5 stars 😉

Filed Under: Health and home, Recipes Tagged With: frugal living, healthy food, muesli, my recipes, Recipes and food

When your life is on hold

by Kelly 32 Comments

Where to start when writing a post like this? It’s not like I’ve ever experienced anything like this before. But that’s the thing that really unites all of humanity at the moment. We’re all in this together and none of us are immune from the possible and real effects of the coronavirus.

Many of us are isolated in our homes, some working from home, others facing the uncertainty of job insecurity. No social meet ups. No extended family meet ups. No popping out to the shops to pick up some milk. It’s a completely different lifestyle to what most of us are accustomed to.

I know that there is some concern about the impact all of this could have on mental health if the isolation has to continue for some time. We don’t know at the moment when it will be safe to resume former activities, we don’t know if we will contract the virus, and if we do, we don’t know how bad it will be. There is so much we just can’t predict or plan for.

In many ways, it feels like life is completely on hold. No planning ahead, no getting ready to go back to work or school or social activities. For now, we just have to BE.

People have been talking about the state of JUST BEING for a long time. Of being present in the moment in whatever we’re doing. To think, be grateful, live slow. In the busy, noisy world of today, that goal can feel unrealistic and unobtainable.

Enter quarantine. And self isolating. And social distancing. Enter 2020 and COVID 19.

What if we completely turned this pandemic thing on it’s head and focused on the positives of what it means for us right now?

How many times, as you were rushing off to work in the morning or dragging yourself home at the end of the day, have you wished that you had more time? Have you thought to yourself “if only I had an extra day, I could take the time to learn to…… (fill in the blank)”. Or when you’ve been absolutely run off your feet and wondered why? Why am I doing this? Is this what I was meant for? Then why am I so unhappy?

That hobby that you’ve “always wanted” to get started with. “Maybe when I retire!” you may have joked. Or “I’ll do it once the kids have all left home and I have some time to myself”.

How about now? In this time of major uncertainty, perhaps you feel a bit lost. But maybe it’s time to search and find. Maybe it’s time to discover what God is leading you to – what talents are waiting to be revealed, perhaps even find out what you should really be doing and who you really are.

I’m finding that it’s wonderful time, not just for discovery, but re-discovery as well. I am taking more pleasure and satisfaction in my daily tasks as a homemaker. Baking bread is not just something that I do an have done for a long time anymore, now it’s an important skill that provides my family with food.

Preserving vegetables is something I can take pride in, knowing that my family will have healthy fermented vegetables to eat even if we can’t leave our home to go to the shops.

Our garden has become a major focus as we aim to grow as much of our own food as we can. It’s something that the whole family can work at and reap the rewards and benefits at harvest time. It gives us time out in the fresh air and sunshine too.

I have been thinking for some time how I would like to make soap again, it’s been so long. Now, it happens that you can no longer buy soap, you can however buy ingredients to make soap.

I’ve been writing on this blog since 2008 and if you look back on past posts, many of them are related to simple and frugal living. It’s something I’ve been both striving for and living out for a long time, and something that just makes sense to me. It’s serving us pretty well at the moment!

If you’re interested in reading some of my “posts from the past” related to simple living, I’ll list some here:

The Simple Life

Back to Basics, Frugality revisited

Honey and Oat soap

Cheese and Bacon Scrolls

I have a lot of recipes, all of them are simple and frugal. You can search the “recipes” tab on my blog or type in “bread” or “recipe” in the search bar and you’ll be inundated with posts! I need to do an updated bread blog post, as I make bread in a different, very easy and intuitive way these days.

If you’re looking to learn how to weave, start with my Youtube channel. I promise it will keep you busy for many, many hours!

This has become quite a rambling post, but I guess what I really want to say is: What are you going to do this with this time? How are you going to be different? Are you the person you want to be? The person you were made to be?

Today is the first day of the rest of your life. What will you do with it?

Filed Under: Health and home, Inspiration, Recipes Tagged With: coronavirus, covid19, frugal living, inspiration, life, Recipes and food, self sufficiency, simple living

Goodness Gracious Energy Balls

by Kelly 6 Comments

I seem to be craving sweet, nutrient dense foods frequently in the afternoons.

A cup of tea with something sweet around 3-4pm seems to be just what I need. I used to have a sweet, commercial cookie to dip in my tea, but that is way behind me now!

Something that I love about switching to a healthier lifestyle is that I have found I don’t have to compromise on taste or treats – I just need to find a way to make it tick some healthy boxes.

*This post contains affiliate links

And, if it’s quick and easy to prepare a batch that I can then have waiting for me in the fridge or pantry – even better!

These little energy balls tick all the boxes and then some!

They are sweet, slightly salty, substantial, economical and so fast to make.

To throw these together, I only used ingredients that were already in my pantry and that are always there.

The goodness and simplicity of oats, combined with favourites such as honey and peanut butter, (I can not get enough of the stuff!) coconut, linseeds (flaxseeds) , plump raisins, tahini and vanilla extract. So simple, so delicious!

A recipe like this is so adaptable too, you can put in whatever healthy ingredients you have on hand that you think will work.

*Change the linseeds for sunflower seeds.

*Add some chopped nuts to the mix.

*Switch honey for maple syrup or other natural sweetener.

*Switch the raisins for craisins, chopped dried fig, chopped dates or sultanas.

*Add in some chopped, dark chocolate.

*Dip half of each ball in some melted dark chocolate.

Goodness Gracious Energy Balls

Healthy snack balls that taste amazing!
5 from 1 vote
Print Recipe Pin Recipe
Prep Time 10 minutes mins
Servings 14 serves

Ingredients
  

  • 1.5 cups Quick or rolled oats
  • 0.5 cups Dessicated coconut
  • 2 tbsp Linseeds (whole)
  • 3 tbsp Raisins
  • 2 tbsp Peanut butter
  • 3 tbsp Tahini
  • 2 tbsp Honey
  • 2 tsp Vanilla extract

Instructions
 

  • Mix all ingredients together in a large bowl. I find it easiest to get my hands into the bowl and squeeze everything together. Once well combined, squeeze and roll into balls and store in the fridge.
    *Note – if your mixture is a little dry, add more honey
    ** If you want to make your balls a little more decadent, add some chopped, dark chocolate!
Keyword bliss ball, healthy treat, healthyfood

If you try out this recipe, I’d love to hear if you enjoyed it!

Filed Under: Health and home, Recipes Tagged With: bliss ball, healthy lifestyle, healthy recipe, recipe, recipes

Afternoon Choc Hit Bliss Balls

by Kelly 6 Comments

Do you have that typical afternoon slump? For me, it happens around 3:30 – 4pm. I always try to look after myself by having a cup of tea and, if I’m lucky, putting my feet up for a few minutes.

*This post contains affiliate links

It’s also the time of day that I start craving a sweet treat. To have something sweet but healthy on hand is a great way to prevent myself from scoffing something that is not so good for me.

Bliss balls are the perfect treat. You can make them in the size you want and from a variety of healthy ingredients. They are quick and easy to throw together. Oh, and they are absolutely delicious!

For this recipe, I’ve used some simple ingredients like almond meal, cocoa powder , local honey, maple syrup, freshly squeezed orange juice (if you love an orange zing, you could even include some orange zest!), vanilla extract and dessicated coconut (optional).

I hope you enjoy my recipe!

Afternoon Choc Hit Bliss Ball

Kelly
A delicious and healthy afternoon treat
5 from 1 vote
Print Recipe Pin Recipe
Prep Time 10 minutes mins

Ingredients
  

  • 1.5 cups Almond Meal
  • 2 tbsp Cocoa powder
  • 1 tbsp Honey
  • 1 tbsp Maple syrup
  • 1 tbsp Fresh orange juice
  • 1 tsp Vanilla extract
  • Dessicated coconut (optional for rolling)

Instructions
 

  • Place all ingredients in a medium sized bowl.
  • Mash together using a fork until well combined.
  • Roll into balls.
  • Roll in dessicated coconut or extra cocoa
  • Store in the fridge in a container.
Keyword bliss ball, healthy treat

Here is a little tip: If you can bear to let the balls sit in the fridge overnight, they taste even better the next day!

If you make this recipe, I would love to hear how you liked it, simply leave me a comment below 😊

Filed Under: Health and home, Recipes Tagged With: bliss ball, healthy, recipes

I’ve been keeping a secret…

by Kelly 86 Comments

Things are about to change in a big way in our household. It’s all very exciting and scary. Let me give you some background information to explain!

The past year has been just little too crazy. Running my business, homeschooling the kids, driving hours every week to get kids to lessons, activities and jobs, trying to ensure that everyone stays healthy with nutritious food, meeting the mental, physical and spiritual needs of 4 young people, maintaining a happy marriage, nurturing my faith and pretending that my house doesn’t look like a disaster zone are just some of the things I’ve been trying to juggle. More often than not, those juggling balls have been dropped.

So often people ask me how I “do it all” and I always reply that I don’t! I can’t – no one can. I have a family who I also consider my team. We work together to get things done, and still there is more than we can handle.

I’ll admit that I’ve been really stressed this past year and that my old, unwelcome “friend”, anxiety has been popping up more often than I care to mention.

On top of all this has been the problem of my husband’s back injury. Without going into too much detail out of respect for him and for the organisations he has worked for, he sustained an injury at work almost 15 years ago. He has a collapsed and oozing disc in his lower back. He has continued to work in his job to support us, but it has become increasingly difficult to do so. In recent years, it has become a bit of a jumble of specialist’s appointments, employer negotiations, daily pain medications, more doctor’s appointments and more referrals. The specialists want to avoid surgery, as it would mean full fusion, a 12 month recovery period, and no guarantee of success.

It has always been a dream of mine that my husband and I could work on a business together. I have been given the gift of being self employed and not having to rely on a job for income, and I wanted that for him too. We had planned to wait and hope that my business income would grow to such an extent that it would replace his work income. We’re not there yet. But it has become unfeasible for him to continue working when he is in constant and often severe pain.

That brings me to our decision! He is coming home. He will remain on casual status at his current job, but he is only obligated to work one shift a month. All of the things that I’ve talked about have been the catalyst for the change, and we feel that God is leading us in this direction, in fact, we feel that there is no other choice to make at this time. It’s not how I hoped or planned, but life rarely is that way.

So, what does this all mean for us?

It means that we can now be a real team. That I can get help with all of the things I need help with. That we will be working together for the benefit of our family. Reduced stress. More time to work on making the business bigger and better. More time to work on our neglected home and fix those things that have needed fixing for I don’t know how long! Particularly for my husband, who has worked so hard for so long, more time to spend fishing, which is his lifetime passion. Yes, it’s going to be a big financial change and challenge, but I think the benefits will outweigh the negatives. And I’m really excited about the possibilities that it will open up for my weaving school.

My husband is pretty camera shy, but who knows, maybe you will see a little more of him in my videos from now on.

Once again, I am so grateful to all of you wonderful people out there who choose to support me and my family by purchasing classes, memberships and patterns and watching my Youtube channel. Without you none of this is possible.

Onward and upward!

Until next time…

Happy Weaving!

Filed Under: Health and home, Inspiration Tagged With: changes, family

High Hopes

by Kelly 14 Comments

I read a quote recently that really impressed me. I don’t make New year’s resolutions, but the end of the year is a perfect time for a bit of reflection. Homeschooling has finished for the year and I try to take a break from making classes and just be peaceful and restful. With this gear change comes thoughts of what I did well during the year and what I could have done better.

The quote was “Have high hopes and low expectations“.

At first glance, it may seem a little defeatist. But something that 43 years on this earth has taught me is that life is a roller coaster. Many wonderful things happen and there are many, often bitter disappointments.

I don’t think it’s life that needs to change though. I think it’s the way we look at it that needs altering. If we expect that everything will be always rosy, we are kind of like spoiled little brats who never experienced a hardship.

Have you ever visited an impoverished country or area? Do the people go about with gloomy faces? Are they angry at life… or at God? No, they have something that many of us in our wealthier society have lost and forgotten.

They have little.

When you have so little, you appreciate what you do have. And you are grateful for anything extra that comes your way. Your life is simple. You have clothing, shelter and food for today – then you have everything you need and you are thankful. You have hopes that life may improve, but you are content to live simply.

So, I’m making this quote my motto for 2020.

My hopes are high. I hope this year that all of my family are happy and have good health. I hope that my business grows and that I can make my Online Weaving School even better. I hope I get lots of time to weave and learn. I hope that my husband’s back injury may improve. I hope that we can meet all of our financial responsibilities. I hope that we can finally make our move to the country. I hope that we have a great homeschooling year. I hope that my understanding of my faith will increase. I hope that I can love and serve God better than ever before.

And I will try to expect nothing.

There is a big difference between hoping for the best and expecting the best. One makes us joyful – the other miserable. One is a freedom, the other a slavery to our own thoughts and desires.

So tell me friends, is this something that you struggle with too? (oh yes, this is a huge struggle for me!) Share your hopes in the comments below!

Until next time…

Happy Weaving!

Filed Under: Health and home, Inspiration, Online Weaving School Tagged With: inspiration, inspiring quotes

  • « Go to Previous Page
  • Page 1
  • Page 2
  • Page 3
  • Go to Next Page »

Primary Sidebar

Hand crafted boat shuttles

Categories

Archives

Meta

  • Log in
  • Entries feed
  • Comments feed
  • WordPress.org

Copyright © 2025 Kelly Casanova Weaving Lessons on the Foodie Pro Theme