
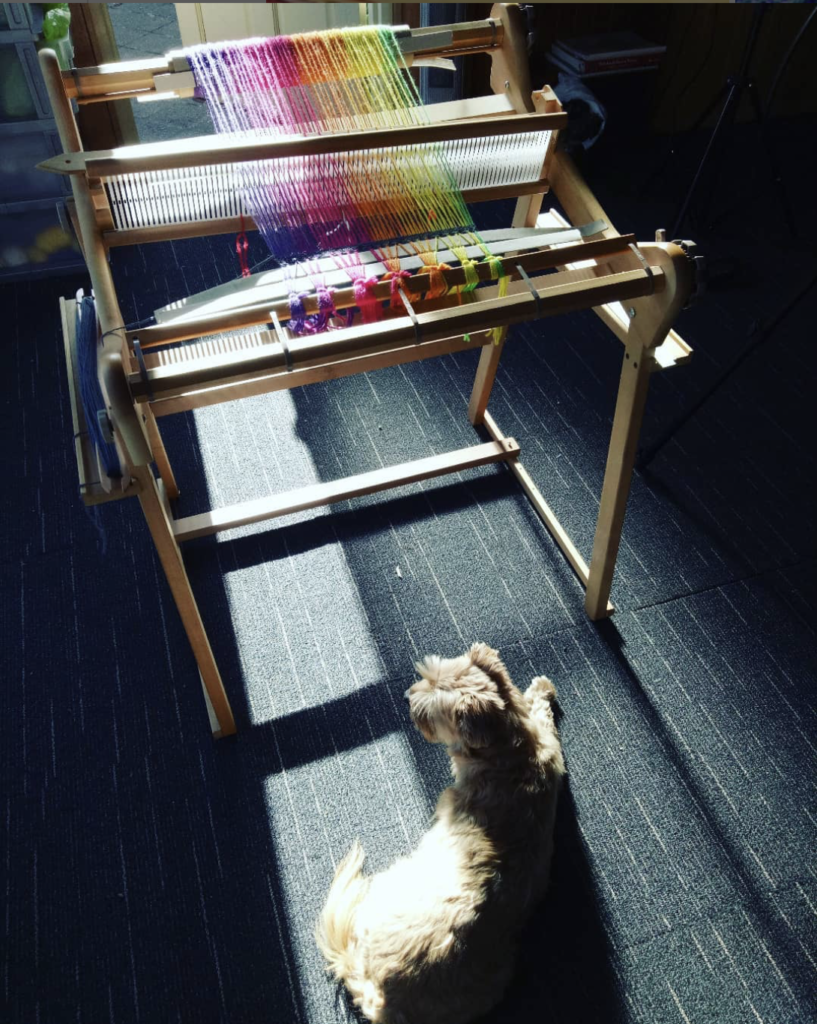
 We tend to be a hand – me – down magnet as a family which is mostly a good thing, but involves sorting through bags of clothes we often don’t want and that end up in the charity bin. Recently I saved a few items that were made with nice fabric but in a style I didn’t like or were too big for my girls. Cut out the seams etc. and ta – da! Free fabric.
So here is the first installment, a top made from 2 other tops. The crocheted flower was a gift, so, apart from the thread and the sweat of my brow the top was completely free.
Search Results for: sewing
Got some sewing done today :)
 A new cushion for the Madeit shop.
 Some flared pants from Kaufman cord fabric, which you can find at the Crafty Mamas shop.
Last chance to enter the giveaway, I’ll be posting the winner tomorrow.
On my sewing table today….

Besides the sprawling mess I have 2 dolls I’m working on. I haven’t started their outfits yet but have knitted a doll scarf and will do a matching hat with my lovely rainbow wool. Also have a top from sewing class to hem. The dolls take up a lot of time but are so rewarding.
Whatever you’re doing on this Saturday I hope you are relaxed and happy.
God bless.
5 easy rigid heddle weaving projects for beginners
Getting your very first rigid heddle loom is such an exciting experience! There are so many possibilities but at the same time, so much to learn.
It’s important to choose projects that are going to be suitable for your weaving level. Be realistic, we all start as absolute beginners and it makes sense to start with an easy project.
This will help you to start to get to know your loom without the stress and pressure of needing to weave at an advanced level.
Here is a list of 5 easy rigid heddle weaving projects for beginners to get you started.
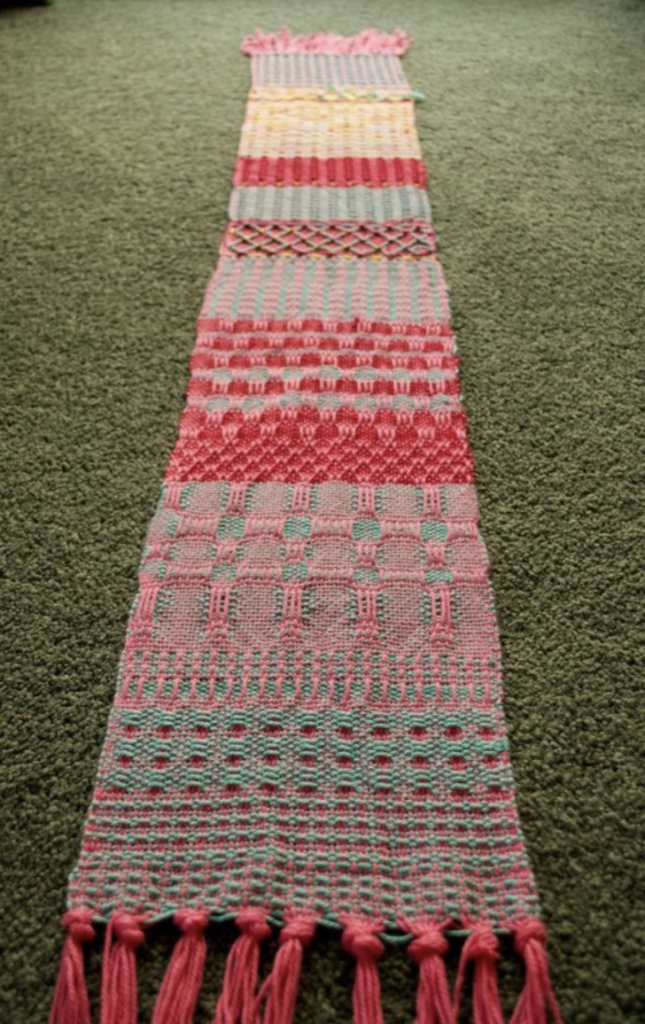
- A SAMPLER
A sampler is not necessarily a finished, functional object but it will teach you so very much! Not only does it give you a chance to get familiar with your new loom, it also allows you to try out yarns, practice your weaving and get a better idea of what to expect.
Yes, you do need to use a bit of yarn to warp up a sampler, but I look at it the same way I would look at purchasing a weaving book or class. It’s an investment in my own weaving journey.
Very early on in my rigid heddle weaving journey, I warped a fairly long warp (for a sampler), grabbed my copy of Jane Patrick’s The Weaver’s Idea Book, flipped through until I found something I wanted to try and just went for it!
This was such a valuable project for me, just look at the variety of designs, yarns and colours I got to try! Many from the book, many were my own experiments. I still think of this project, all these years later, as one of the most fun I’ve undertaken.
A sampler can also become a useable item if you wish – a small purse, a mug rug, a notebook cover, there are lots of possibilities.
2. PLACEMATS
Placemats are such a perfect beginner’s project. They look great in plain weave and if you want to jazz them up you can always use a fun variegated yarn. Placemats are also a great opportunity to practice finishing techniques, whether that is by knotting, hemstitching or hand hemming and machine stitching.
In my beginner rigid heddle class we complete some simple but beautiful placemats. This is my most popular class as it shows you how to take a bare rigid heddle loom and complete a woven project. You are guided through, step by step on warping, threading, weaving and completing the project as well plenty of tips and encouragement along the way.

3. TOWELS
Towels can be a little like an overgrown placemat, and can be a simple project for newer rigid heddle weavers. I do have some advice though, as not all towels are created equal!
As a beginner, I do not recommend that you try to launch into your first towels with a thin and light yarn, like 8/2 cotton. It is better to get some experience and practice under your belt first, as generally a lighter yarn is more challenging to use with a rigid heddle loom.
However, weaving towels with a thicker cotton yarn can be a wonderful experience. Again, you can make it as simple as plain weave or you could incorporate either warp or weft stripes (or both!)
A thicker cotton will result in a light hand towels rather than a kitchen/dish towel.
My free project, the Wash Your Hands Towels pattern could be just what you’ve looking for. While some of the techniques may be considered a little more advance (like pick up sticks and colour placement) the weaver has the option of weaving both towels in plain weave if not ready for other techniques.
Some of the cottons that are suitable for this kind of towel would be:
Bendigo Woollen Mills 10ply cotton
4. NOTEBOOK COVERS
Notebook covers in their most simple, low sew format are just a rectangle. The fun thing about a project like this is it can really be customised to reflect your own tastes. You can use a variety of yarns in plain weave and it just looks fantastic.
If you wove a sampler that was large enough, you could repurpose that as a notebook cover too!
If the thought of sewing with your hand woven fabric is a bit scary to you, rest assured that it can be a very simple process. If you have a needle and thread, that is enough!
Check out my free Notebook Covers project which guides you through the full process, from weaving the fabric to fitting and sewing it to an existing notebook, all the information is there for you.
5. FREESTYLE TAPESTRY
Oh boy, is this fun! The idea is similar to weaving a sampler, but this time you are weaving a weft faced item.
What on earth does that mean?
It just means that you’re going to use an additional beater (a household fork works just fine!) to beat your weft down to cover all the warp threads.
So, all the colour, texture and excitement happens in the weft threads.
What I really love about this kind of project is you need very little pre-planning and all the designing can be done on the loom, if you want to.
You get to use a variety of yarns from your stash and you have pretty free reign, as long as the weft packs down and stays down, you’re good to go!
Your design could be planned and pictorial or completely abstract and “made up on the spot”.
My free Freestyle Tapestry series was designed on the loom, just by building colour, bit by bit. My Van Gogh inspired tapestry was a little more planned but followed very similar principles.
I hope you feel super inspired by these 5 easy rigid heddle weaving projects for beginners!
Until next time…
Happy Weaving!
This post contains affiliate links. Please see my disclosure policy for further information.
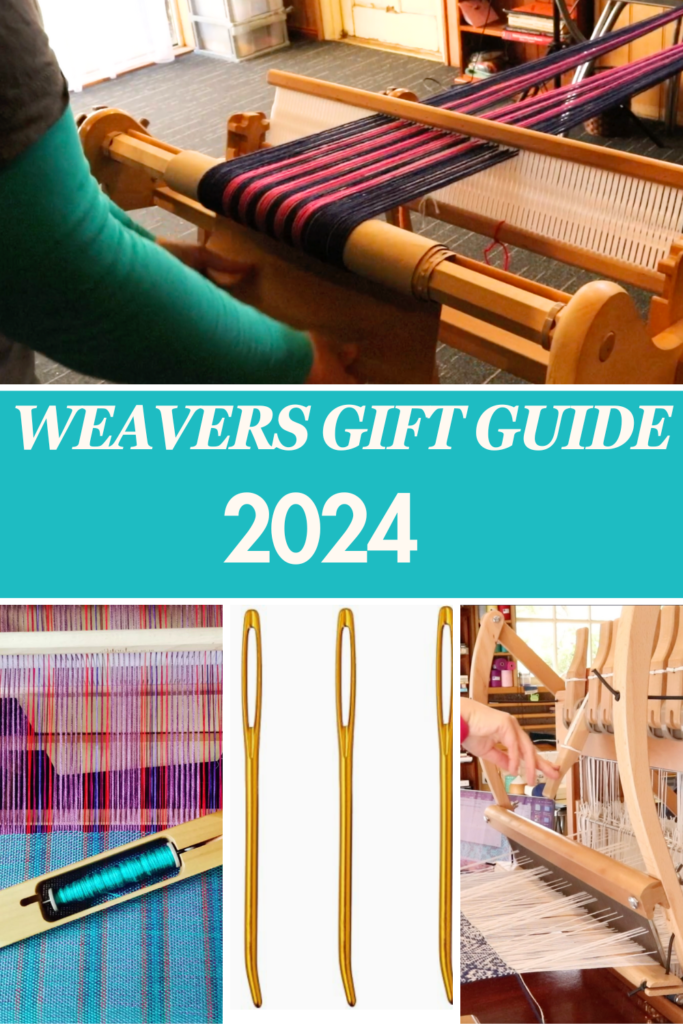
Gift Guide for Weavers 2024
It’s that wonderful time of year again, which means it’s also time for a new gift guide for weavers!
Welcome to the Gift Guide for Weavers, 2024!
This year I’m ordering the guide from lowest to highest price so you can jump to where your budget is currently at. Gifts most definitely do not have to be expensive but for some of you it may be the right time to purchase that upgrade or tool you’ve been wanting.
I don’t think I can every begin a new gift guide without making this one the first item:
- The Clover Jumbo Bent Tip Tapestry Needles are one of my favourite and most used tools in my weaving studio! They are perfect for hemstitching or embellishing a piece on the loom and weaving in ends off the loom.

I use them for hand sewing pieces of hand woven fabric together too. They are also super affordable, making them the perfect stocking stuffer.
I never knew these things existed until one of my students (hi Sandy!) very kindly sent me one. Yes, I had to read the label to find out what it was and now it’s an indispensable tool in my studio.

If you enjoy sewing your handwoven fabric with a sewing machine, you will love this low cost tool. It is a multi purpose tool but what I love to use it for most is to help run my fabric through the machine and press down seams as I go over them with the machine.
Sounds simple, but I used to use my finger for the job this tool is now doing for me! I’m happy to have my precious fingers much safer now.
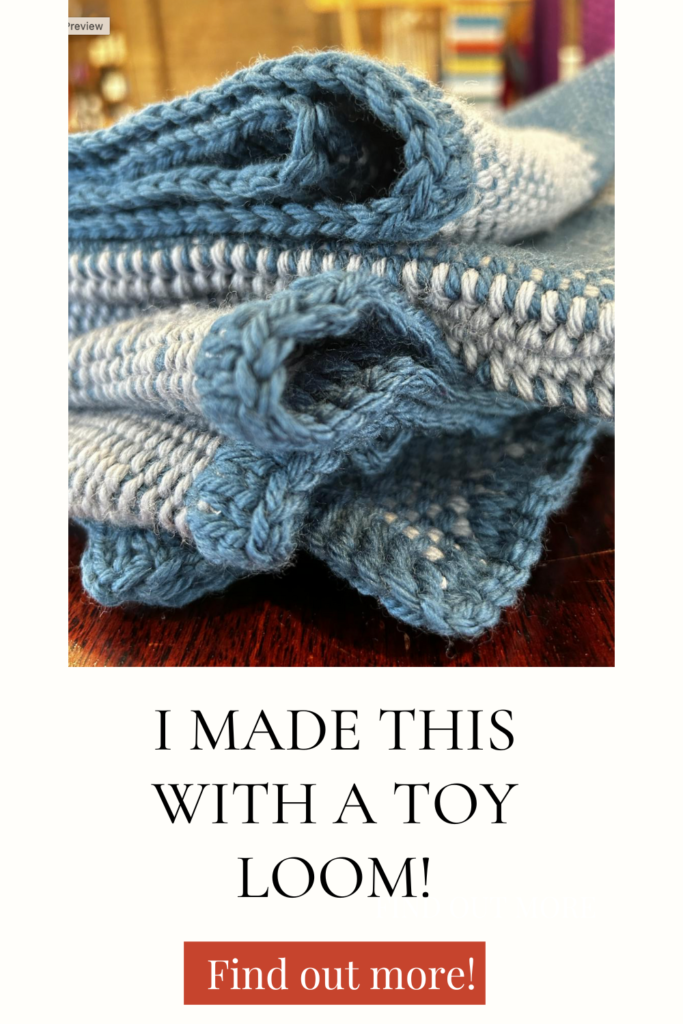
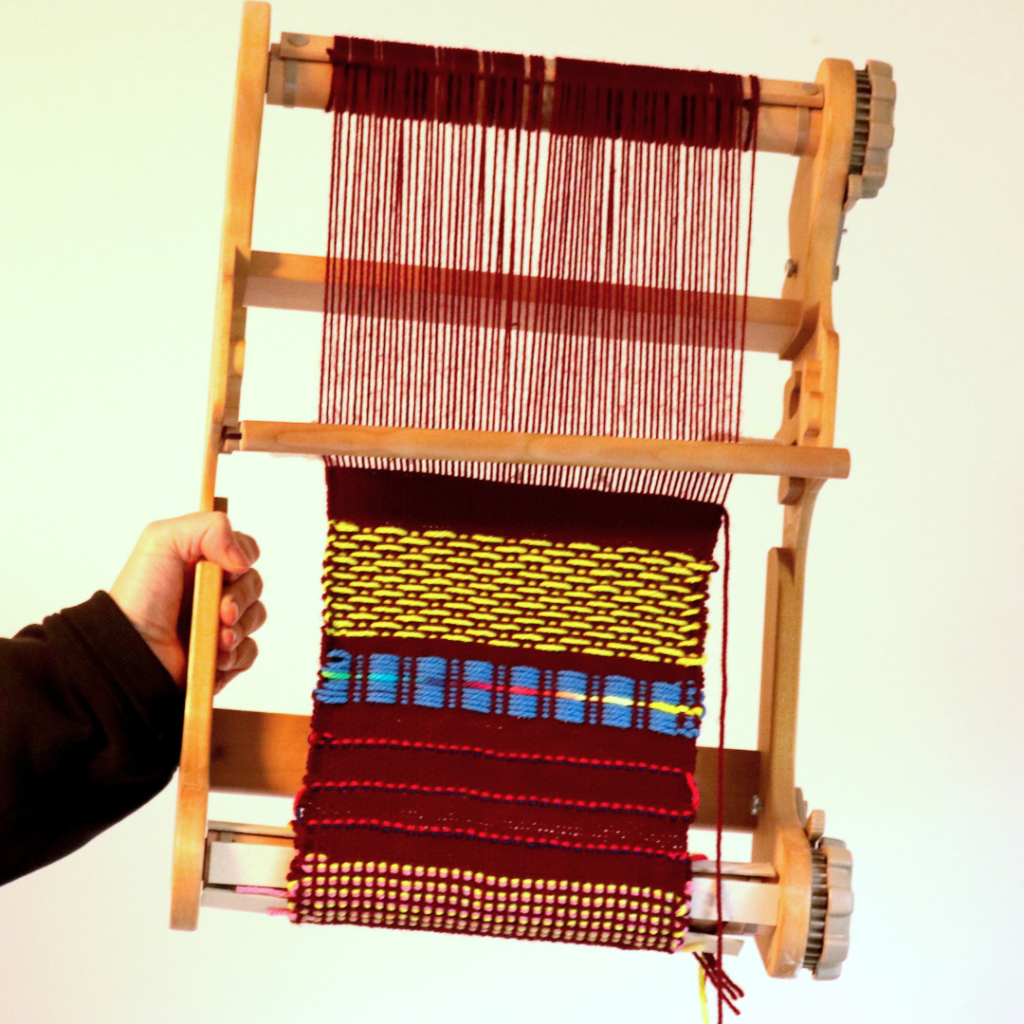
I bought my first toy loom as an experiment. I was curious to know, firstly – would it work and secondly, what could I weave on one?
Well, after playing around with my toy loom for some time I have been very pleasantly surprised!
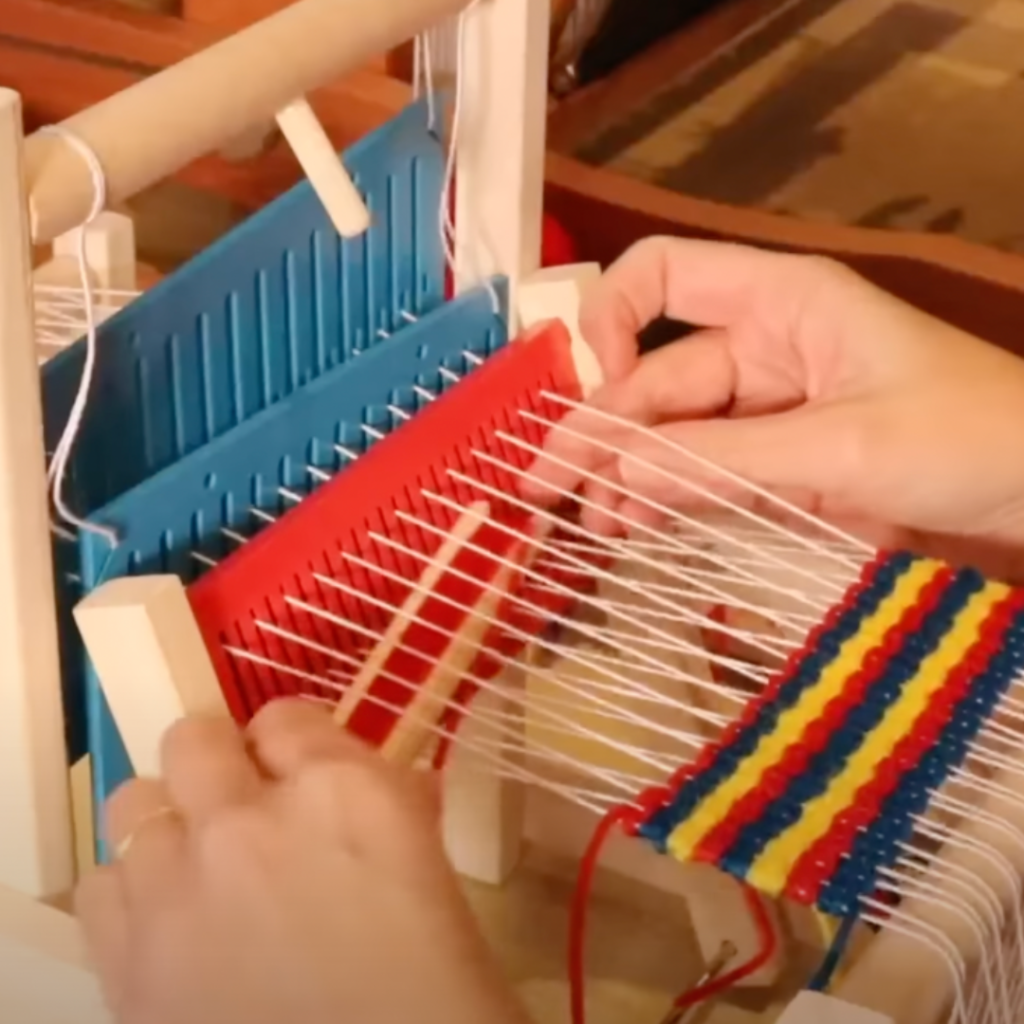
A toy loom like this is a great way to get into weaving for a small financial outlay. It is simple to learn how to use, it tensions a warp very well and pleasant to weave on.
It is a small loom, so it does have it’s limitations but it’s such a fun way to get started.
I have a number of resources available for this loom:
I bought a toy loom! Was it worth it?
I wove a blanket on a toy loom!
4. Weaving Books
I am a huge book lover and my weaving book library is quite extensive (but there is always room for more! 😉) Weaving books are really invaluable to weavers and make a wonderful gift too.
My favourite rigid heddle books can be found in this post. And my favourite multi shaft books can be found in this post. I have many weaving books listed in my Amazon store too.
5. Ashford Table Loom Shuttle Race
This product was just released recently and is very popular with the table loom weavers! The shuttle race prevents the shuttle from diving through the warp, which can be so frustrating! Available for new and older Ashford table looms in a variety of sizes, this will be a game changer for some table loom weavers!
Another new and wonderful product from Ashford is this larger sized boat shuttle. I am absolutely loving using this with my larger countermarch loom and will definitely be utilising it with my Louet David loom as well.
An inkle loom is a great gift for so many reasons. It’s one of the most affordable and portable looms. It also allows the weaver to have a dedicated band loom without taking up space on another loom. You can be weaving a project on one loom while weaving a band to match on the inkle loom!
For an even cooler gift opportunity, Ashford has an inkle loom available as a kit that includes the loom, some cotton yarn and a wonderful inkle weaving book to get started with.
My very first rigid heddle loom was given to me as a gift from my husband! So of course, I’m a huge advocate for gifting RH looms 😊 This loom is still constantly in use in my studio.

There is a huge variety of sizes available to suit every budget and size requirements. I have a guide for new rigid heddle weavers here.
It’s no secret that I love my David floor loom! It’s compact, modern and gives you a true floor loom weaving experience. I have a review of this loom here if you want to find out more.
10. Online Weaving School Gift Voucher
The weaving school is the perfect place to get started in your weaving journey. There is a huge variety of classes available as well as memberships. Classes include rigid heddle, inkle loom, table loom and floor loom, so there is something for everyone.
To purchase a class as a gift, you simply choose “send as a gift” at checkout plus fill in the name and email of the recipient – this is how it looks:

The recipient then receives an email with instructions for how to use the gift link.
Well, I hope all of you have a wonderfully happy Christmas and maybe even receive some new weaving goodies!
Until next time…
Happy Weaving!
*This post contains affiliate links. For more information, please see my disclosure policy.
I wove a blanket on a toy loom!
I’ve been weaving on my toy loom for some time now and thought it was a good time to challenge myself (and the loom!) to see what we could do together.
I love to encourage weavers of all levels and circumstances to think outside the box when it comes to weaving and to make the most of what you have, what is available to you or what you can afford.
I also wanted to prove to those who might say “you can’t really weave fabric on a toy loom” that you definitely can! And what better way to do that than to show you how to produce something rather large from something rather small.
I have more resources available on this toy loom. In this article and videos I unbox and set up the loom, give my first impressions and then do some replacements to improve it. Then I warp it myself rather than using the pre-made warp plus show you some things you can do with the loom, including pick up.
Now, onto the lap blanket project!
My idea was to weave strips of fabric to join together later. The weaving width for the toy loom is around 6″ and once you allow for draw in and shrinkage, the actual panel width is even less than that.
I wasn’t sure what length of warp this little loom could handle, so that part was a bit experimental. I’m pleased to say that it handled the 83″ of warp length very nicely.
My plan was to direct warp the loom by clamping the loom to one end of the table with spring clamps and achieving the length of warp I desired by using the pegs on my warping board (also known as hybrid warping).

I used an Aran weight (Australian 10 ply) wool and doubled it because the heddles that are built into the toy loom are sett at about 5 ends per inch – that is quite an open sett.
I used Bendigo Woollen Mills luxury 10 ply in Coastal Blue and Shadow. I used 2 balls in each colour (they are large, 200gram balls).
For and quick and easy doubling of the warp I simply took one loop through every hole and every slot using my double ended threading hook so that the loom width was fully warped.
For the blanket, I did a total of 4 separate warps for 4 panel pieces. Each panel piece would then be divided in half to make a total of 8 panel pieces.
I wanted to have stripes on my blanket, so for warps 1 and 3 I warped with the lighter coloured wool and used the darker colour for weft. For warps 2 and 4 I warped with the darker colour and used the lighter colour for weft.

You might think it fairly time consuming to work with 4 separate warps but with the small size of the loom and the ability to direct warp, it did not take long each time. I also skipped the threading step by warping in every hole and slot, so that was a definite time saver too.
Once I had all of my panels woven I wet finished them (secured the raw ends first by serging) and allowed to dry completely, then pressed on the wool setting.
When I laid the panels out in order to check the look and sizing, some of the panels were shorter, some were longer so I had to cut and serge to ensure the sides would be uniform.
My next job was to stitch the panels together. I decided to do this by hand using mattress stitch, again because I know not everyone has a sewing machine and so I wanted to show an alternative. I have a video tutorial on how to do mattress stitch here.
I used my much loved bent tip tapestry needle, which makes this type of stitching so much easier. The stitching by hand does take time but I wanted to ensure that my stitching was very neat and a bit of a feature on the blanket.

To finish off I could have hemmed the serged sides of the blanket by hand or on my sewing machine but I wanted to give it just that little extra bit of oomph to make it special.
I decided on a single crochet border all the way around the edges of the blanket. I used the darker yarn to complete this and won a game (only just!) of yarn chicken with the very last of my dark blue wool.
The total blanket used almost 600 metres of each yarn colour for a total of 1200 metres of yarn.
I hope that by sharing this project I have inspired you to consider what you might be able to do in the wonderful world of weaving!
If you would like to see the video that goes with this article, please visit my Youtube channel:
*This post contains affiliate links. Please see my disclosure policy for more information.
Until next time…
Happy Weaving!
Essential tools for rigid heddle weaving
When you buy a rigid heddle loom, it will come with a few standard tools to get you started. Exactly what you get will depend on the manufacturer of your loom, but here are a few of the basics:
*A heddle/reed (usually 7.5 or 8 dent)
* A warping peg and clamp for direct warping
* A clamp for holding the loom to a table while warping
* A stick shuttle
* It may include a threading and reed hook
* Cardboard warp separators (may not come with all looms)
** Some looms now come with a double heddle block built in

Apart from the standard tools, there are extra things that are either essential or come in handy.
Other essentials:
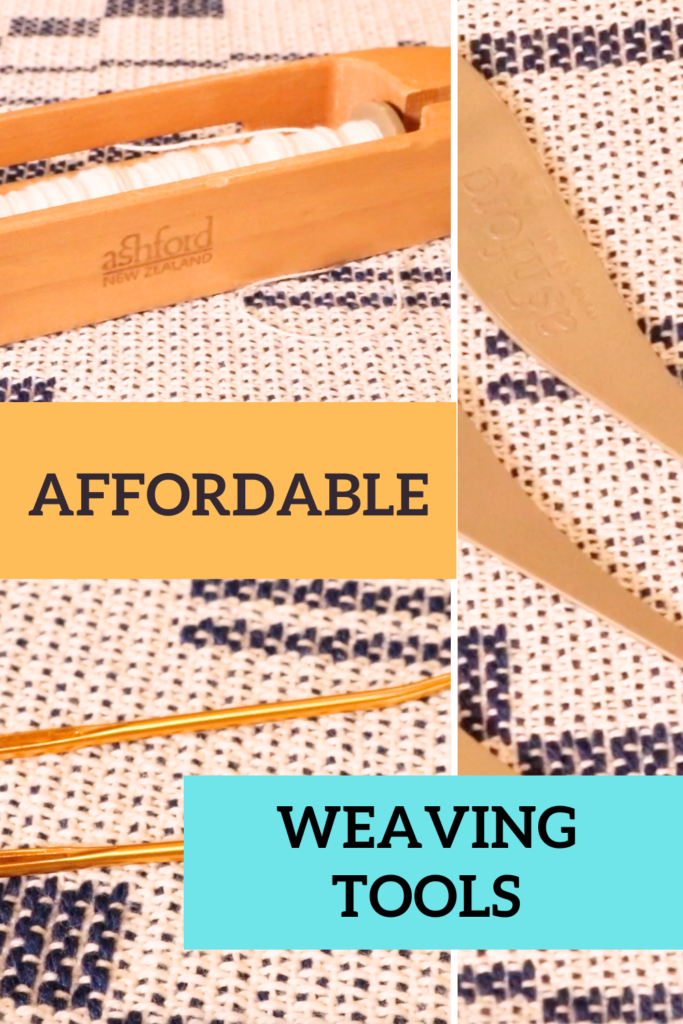
*Scissors – A good pair of dressmaking shears will save you a lot of frustration
*Something to separate your warp when rolling on (I like to use brown craft paper on a roll and cut it to size)
*Yarn
*Inch ruler (for figuring out the sett of your yarn)
*Project journal for recording all your project information
*A big mug of tea or coffee (hey, I don’t judge!)

Handy optional extras:
* Tapestry needle
* Extra heddles
* Fringe twister
* Sewing machine
* Serger
* Loom stand
* Tapestry beater, comb or household fork
* “S” hooks or other weights
* Calculator
*Instructional books – this post will help you to determine which book/s might be right for you).
*Online lessons are an awesome tool to get started. You can check out my Youtube channel and my Online Weaving School for further help.
Check out the video below where I discuss these tools in depth:
I also have an additional video that talks about affordable tools here:
Something to remember when you’re just starting out with rigid heddle weaving is that you don’t need All.The.Things right away! The tools that come with a newly purchased loom are sufficient to get you started, and you can gradually build from there as you begin to explore the wonderful world of rigid heddle weaving.
*This post contains affiliate links. Please see my disclosure policy for further information.
Until next time…
Happy Weaving!
Ask Kelly – Is a larger loom right for me?
Buying a loom is such a huge decision. Many weavers start out using a smaller loom but find over time that they would like to upgrade to something larger. Today’s Ask Kelly question asks whether purchasing a larger loom is worth it.
” My ultimate goal in learning to weave is to make my own fabric so I can sew clothes for myself and others. Would getting the 48″ rigid heddle loom be worth the money? I currently have the 32″. Just would like your thoughts.”
Cindy
Hi Cindy,
It’s a personal choice but there are 3 main things I would be considering before making a decision:
1. Does your budget allow for the purchase?
2. Do you have space for a larger loom (you would definitely want the stand with it).
3. Is it going to be ok for you physically to weave on? The extra width is difficult for weavers who have neck, shoulder or back issues.
Also consider that fabric for clothing can be utilised in many different ways and styles, you are not limited if you only have narrower panels of fabric. I recommend that you check out Sarah Howard’s sewing patterns for weavers. Sarah often weaves on a small to middle sized loom herself and once you see her designs I’m sure you will agree she is at no disadvantage for having smaller pieces of fabric!
You will find that many of my own pattern designs or projects from my online weaving classes are not constructed on big looms either.
I have some more comprehensive articles that may also help you to decide whether a larger loom is a good decision for you:
What can I weave on a small loom?…
And I just want to add one more thing before I go. Be careful to not develop loom envy by comparing yourself to others.
Perhaps you bought a smaller or medium sized loom to begin with and you were totally happy with it. But then you saw other weavers raving about their larger looms and how much better they are.
As I already pointed out to Cindy, whether to upgrade to a larger loom is a very personal decision and should not be influenced by feelings of inadequacy. In the multi shaft weaving world, “shaft envy” is very real. You think you will be happy with 4 shafts but then you want 8. You get the 8 shafts but then you want 16. And on, and on.
And while sometimes a loom upgrade is absolutely the perfect decision, no one should be made to feel that their current loom is not good enough.
We weavers are all different and we don’t have to fit the same mould. So, in a nutshell, you do you!
Until next time…
Happy Weaving!
Make a potholder loom
Remember the potholder looms from back in the 70’s?
Well, I actually think the humble potholder loom is a little under rated! I mean, it’s simple to use and it must be one of the cheapest looms out there if you make it yourself.
That’s what today’s post is all about. Recently, my husband and I teamed up to make a cheap and easy potholder loom and now we want to share it with all of you!
We’ve put all the information you need to make one of these simple looms into a simple to download file (you can access that below).
Not only that, but I’ve also made a series that you can find on Youtube that will show you two different ways you can weave on your own potholder loom.
You only need some simple materials to get started. Wood, nails, a hammer, some yarn, some wire (or a Tunisian crochet hook) and a regular crochet hook, I find the 5.75mm size is good. A tapestry needle can also be handy for sewing in any loose ends.
So, go ahead and grab your instructions file below and then check out the video tutorial for weaving further down.
I hope you have fun with this project and until next time…
Happy Weaving!
*This post contains affiliate links. For further information, please see my disclosure policy.
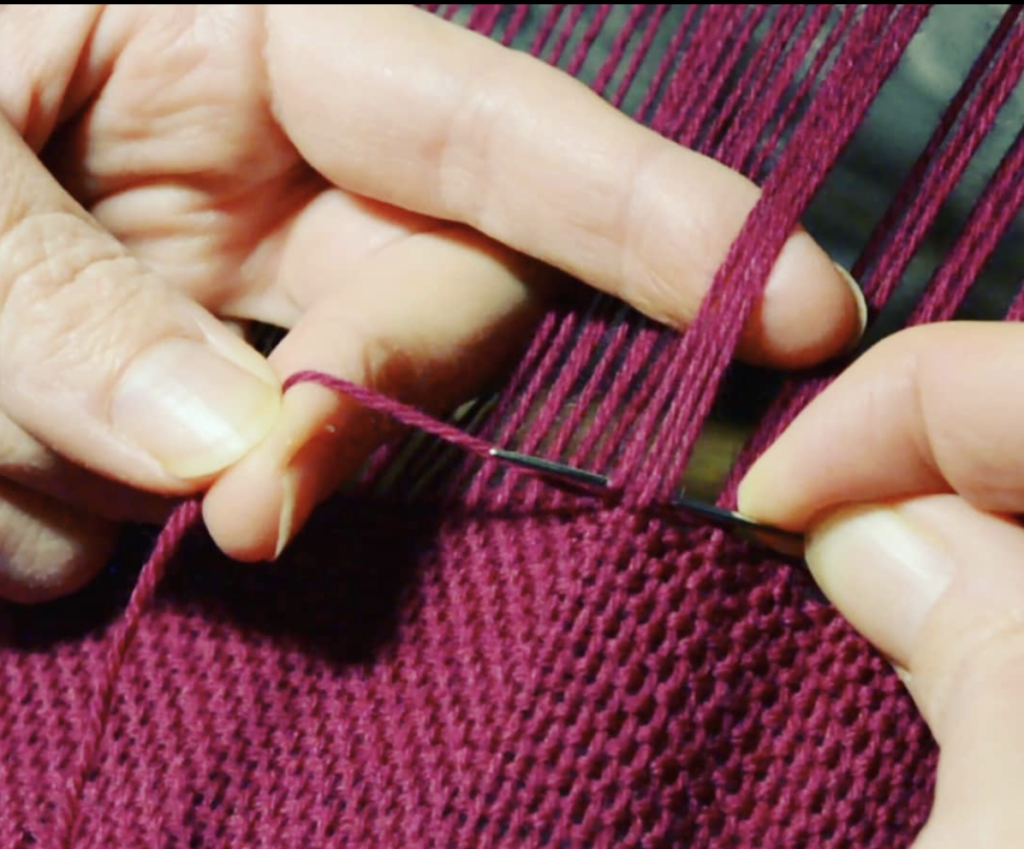
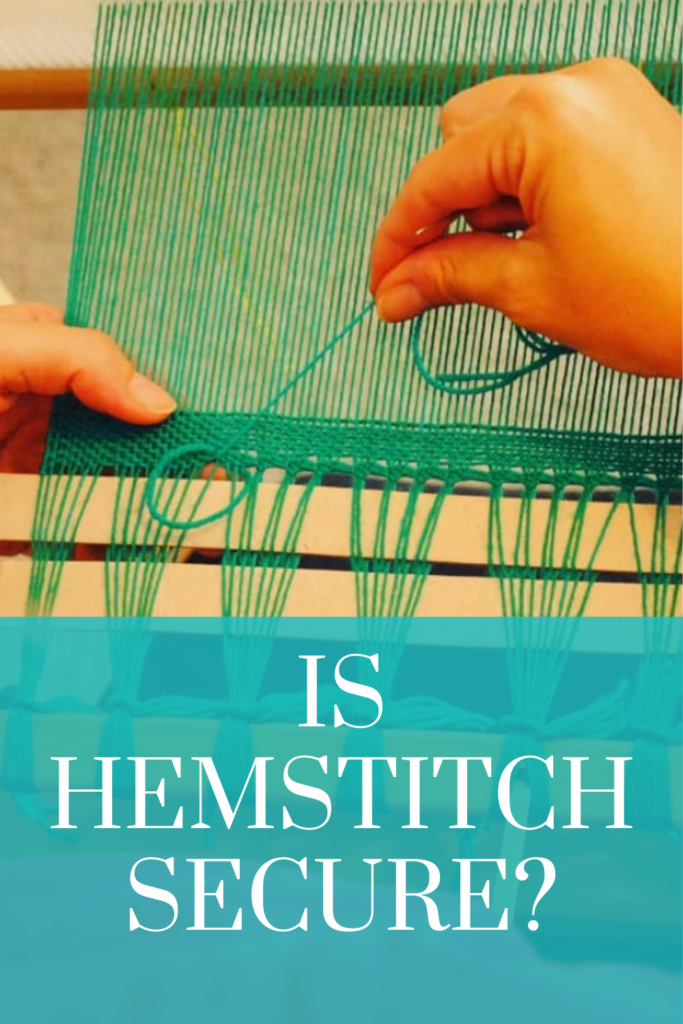
Ask Kelly – How sturdy is hemstitching?
Hemstitching must be one of my favourite topics to discuss.
Why?
Because I love things that are both beautiful and functional, and hemstitching fits that bill perfectly. I just think it’s a glorious way to finish a woven piece when you want to maintain a fringe.
Personally, I think the hemstitch is an essential for any weaver’s skill library.
And the good news is, you really only need a tapestry needle to do it. Plus (and this is a big bonus, in my opinion!) you can hemstitch the piece while it’s on the loom.
This means that when you remove the piece from the loom, it’s secure and the ends are finished!
Oh, and in addition to the benefits already mentioned, almost any yarn used in a woven project is suitable for hemstitching.
*This post contains affiliate links. For further information, please see my disclosure policy.
If you are looking for resources on learning to hemstitch, I have a lot of those. Make sure you read to the end of the article to find extra helpful links.
This week’s Ask Kelly question is related to hemstitching. It’s a great question and the answer is important to know:
“When you do the hem stitch on the edge of the weaving can you cut the warp and wear it without it coming adrift or do you have to weave the ends buck up into the fabric, for extra security?
So far I have done the hem stitch but then gone over it with the sewing machine and/ or added bias binding for necklines etc.
I’m thinking this may be unnecessary overkill.”
Leonie
If you’re using hemstitch and then having a fringe, it is fine to just hemstitch and then not do any further fringe treatment and you don’t need to further stitch over the ends. However, you do want to leave some length for fringe. If you cut too close to the hemstitch because you don’t want a fringe, then the hemstitch will unravel.
I have found hemstitching to be extremely reliable as a way to secure edges, again, as long as that fringe is present and not cut too close to your hemstitched knots.
If you are hemstitching but don’t want a fringe, you can always, as you suggested, weave the ends in.
Also, I generally only use hemstitching for fringed or sometimes for tapestry etc where I weave the ends back in. If I want to use the fabric to sew with then I serge the raw edges. With a sewing machine, you could do a double row of zig zag stitch to secure edges.
OK, now let’s have a look at those extra hemstitch resources I mentioned before:
Hemstitch as a feature (member’s only class)
Until next time…
Happy Weaving!