• Skip to main content
  • Skip to primary sidebar

Kelly Casanova Weaving Lessons

  • Hi! I’m Kelly!
    • Disclosure
  • Online Weaving School Class Index
    • Common account issues
    • Common technical issues
    • What do I get with a membership?
  • New to rigid heddle weaving? Start here!
    • Never heard of the rigid heddle loom?
    • How to weave neat edges on the rigid heddle loom
    • Rigid heddle weaving
    • Rigid Heddle Weaving Patterns
  • Patterns
  • Subscribe

Kelly

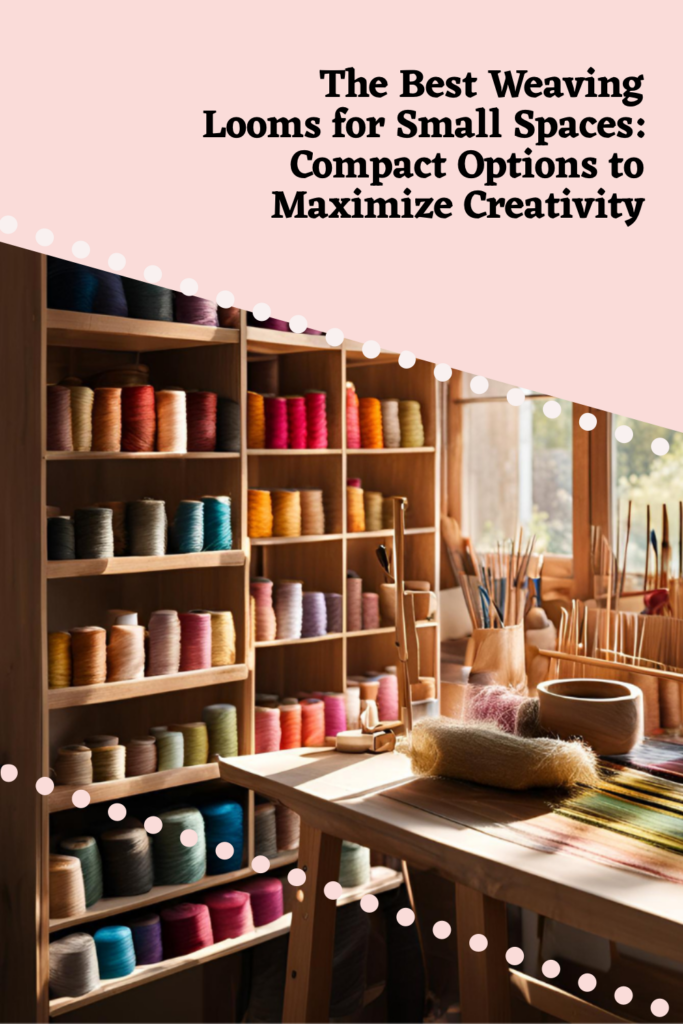
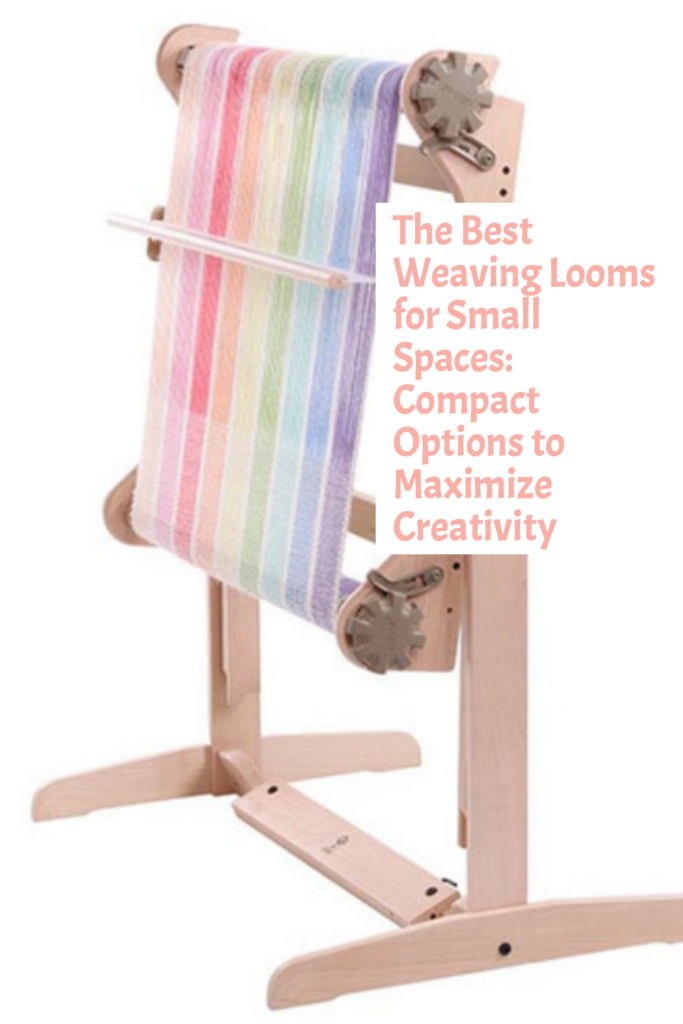
The Best Weaving Looms for Small Spaces: Compact Options to Maximize Creativity

by Kelly 4 Comments

Discover the best weaving looms for small spaces! Explore compact looms like rigid heddle, table, and frame looms, and learn tips for maximizing your weaving setup in a small area.

For many, the idea of weaving often brings to mind large looms and expansive studios—luxuries that aren’t feasible for those living in small apartments or homes with limited space.

The good news? Weaving is for everybody!

You don’t need a massive loom or a dedicated room to enjoy weaving! Thanks to modern designs and variety of loom availability, there are plenty of compact weaving looms that fit perfectly into small spaces and still give you a huge array of project options.

In this guide, we’ll explore the best weaving looms for small spaces, from lightweight rigid heddle looms to ultra-portable inkle looms. I’ll also share tips for maximizing your space and creating an inspiring weaving environment, no matter how small your space might be. Let’s dive in and discover the perfect loom for your needs!

What to Consider When Choosing a Loom for Small Spaces

  • Size and Portability:
    • You may want to focus on looms that are lightweight, foldable, or easy to store. Some looms, while not being fully foldable, will have fold down parts to reduce their bulk.
    • Consider how frequently you will need to be moving your loom. Ensure that the size and weight make this a manageable task.
  • Type of Loom:
    • Consider what it is you want to be weaving or how you think you will be using the loom. This will help to determine the suitability of the loom type.
    • The type of loom will also affect the size of the loom. For example, an inkle loom will almost always be smaller than a table loom.
    • Additional extras like a stand for your loom will take up extra space but many stands are now designed to have compact storage, like the Ashford Rigid Heddle Stand.
  • Functionality vs. Space:
    • Think about the trade-offs you might need to make when deciding on the right loom. Try to find a balance between features like multiple shafts and space limitations to minimise the possibility of loom regret or loom envy later on.
    • Do plenty of research! You may be convinced that you will never have enough space for a floor loom, but there are compact floor looms like the Louet David.
Top Compact Weaving Looms for Small Spaces

Rigid Heddle Looms

  • Versatile projects are possible; compact and beginner-friendly.
  • Rigid heddle looms come in a big range of sizes, so you really can find one to suit your space.
  • Some rigid heddle looms, like the Ashford Knitter’s Loom are foldable.
  • Double width weaving is possible with two heddles.
  • Examples:
    • Ashford SampleIt Loom: Lightweight and easy to store, comes in a 10″ and 16″ weaving width.
    • Schacht Cricket Loom: Great for portability and small weaving projects. Available in 10 and 15″ weaving width.

Table Looms

A table loom will inevitably take up more space than a rigid heddle loom, but they are wonderful for the weaver who wants to enter the multi shaft weaving world but has limited space.

  • Ideal for intermediate weavers looking for more complexity.
  • A huge variety of patterning possibilities.
  • Examples:
    • Louet Jane Table Loom: Compact yet offers multi-shaft functionality. 8 shafts, starts at 16″ weaving width. Folds down and has the added bonus of a built in raddle, limiting the “off loom” equipment needed.
    • Ashford Table Loom: Foldable for easy storage. 8 shafts. Castle folds down for flatter storage and easier portability. Starts at 16″ weaving width.

Frame Looms

  • Perfect for beginners or simple projects; affordable and space-efficient. Extremely portable and space efficient.
  • Examples:
    • Louet Lisa Loom: The smallest Lisa is just 7.5 x 9.5″. Portable and flat for easy storage, great for beginners.
    • Mirrix Tapestry Looms. The Saffron Pocket loom is the smallest in the range. For weaving tapestries and bead weaving.
    • Potholder loom: Usually a very small loom to weave fabric squares. You can find out how to make your own potholder loom and weave on it here.

Inkle Looms

Inkle looms are a “pick up and go” loom. They weigh very little and can be popped into a bag for easy transport.

  • For weaving narrow projects like belts, bands or straps. Bands can also be sewn together to make a larger item like an inkle bag.
  • Examples:
    • Ashford Inkle Loom: Simple design, perfect for beginners.
    • Ashford Inklette Loom: Super compact and portable.

Toy Looms

  • Great for small projects or weaving on-the-go.
  • Examples:
    • Lavievert Toy Weaving Loom: Compact, easy to set up, fun to weave on.

Tips for Maximizing Small Weaving Spaces

  • Smart Storage Solutions:
    • Use stackable tubs, wall-mounted racks, shelving or under-bed storage.
  • Multipurpose Furniture:
    • Use foldable tables, lap desks, or compact workstations. An adjustable office chair makes a very comfortable weaving chair and can be used for other purposes.
  • Go Vertical:
    • Install wall shelves for yarn, tools, books and looms. Small looms like the Sampleit can be hung on the wall with some simple hooks.
  • DIY Organization Ideas:
    • Hooks for hanging tools or pegboards for accessories. Stackable clear and lidded boxes are so useful! Drawers on wheels or shelf carts for supplies you want close to hand but can store out of the way again.
Comparing Features and Price Points

Here’s a comparison of some top weaving looms suitable for small spaces (please note that these details were correct at the time of writing this article and are subject to change. Prices are in USD):

Ashford 8-Shaft Table Loom
Type: Table Loom
Weaving Widths: 16″ (40cm), 24″ (60cm), 32″ (80cm)
Dimensions (W x H x D):

  • 16″: 22″ x 22″ x 29″
  • 24″: 30″ x 22″ x 29″
  • 32″: 38″ x 22″ x 29″
    Weight:
  • 16″: 18 lbs (8.2 kg)
  • 24″: 23 lbs (10.4 kg)
  • 32″: 27 lbs (12.3 kg)
    Key Features:
  • Folds flat to 7″ for easy storage and transport
  • Overhead beater for even beating
  • Independent shaft lifting levers
    Approximate Price:
  • 16″: $1,200
  • 24″: $1,400
  • 32″: $1,600
Ashford 8 shaft table loom | Adelaide Walker

Schacht Cricket Loom
Type: Rigid Heddle Loom
Weaving Widths: 10″ (25cm), 15″ (38cm)
Dimensions (W x H x D):

  • 10″: 11″ x 18″ x 6″
  • 15″: 16″ x 18″ x 6″
    Weight:
  • 10″: 4 lbs (1.8 kg)
  • 15″: 5 lbs (2.3 kg)
    Key Features:
  • Compact and portable
  • Made of high-quality maple
  • Includes 8-dent reed, threading hook, warping peg, table clamps, two shuttles, and yarn
    Approximate Price:
  • 10″: $229
  • 15″: $252
Schacht Cricket Loom - Hill Country Weavers

Ashford Katie Table Loom
Type: Table Loom
Weaving Width: 12″ (30cm)
Dimensions (W x H x D): 19″ x 19″ x 11″
Weight: 14 lbs (6.5 kg)
Key Features:

  • 8 shafts
  • Folds flat for portability
  • Overhead beater for even tension
    Approximate Price: $1,000
Ashford Katie Table Loom | 8 Shaft Table Loom | The Woolery

Ashford SampleIt Loom
Type: Rigid Heddle Loom
Weaving Widths: 8″ (20cm), 10″ (25cm)
Dimensions (W x H x D):

  • 8″: 12″ x 18″ x 5″
  • 10″: 14″ x 18″ x 5″
    Weight:
  • 8″: 3 lbs (1.4 kg)
  • 10″: 4 lbs (1.8 kg)
    Key Features:
  • Affordable and lightweight
  • Ideal for beginners
  • Includes 7.5 dpi reed, two shuttles, threading hook, warping peg, and clamp
    Approximate Price:
  • 8″: $150
  • 10″: $170

Ashford Inkle Loom
Type: Inkle Loom
Weaving Width: Up to 3″ (7.5cm)
Dimensions (L x W x H): 25.5″ x 6.75″ x 11.25″
Weight: 4 lbs (1.8 kg)
Key Features:

  • Ideal for weaving belts and bands
  • Adjustable tension
  • Solid hardwood construction
    Approximate Price: $120
Ashford inkle loom | Spinspul

Ashford Inklette Loom
Type: Inkle Loom
Weaving Width: Up to 2″ (5cm)
Dimensions (L x W x H): 14.75″ x 4.5″ x 7.25″
Weight: 1.3 lbs (0.6 kg)
Key Features:

  • Ultra-portable, ideal for narrow bands
  • Adjustable tension
  • Solid hardwood construction
    Approximate Price: $80

You may also be wondering whether owning a small loom will give you enough weaving project options? Well, check out this article to get some ideas for what you can weave on a small loom:

What can I weave on a small loom?

I hope that this article has helped you to see that small spaces can be transformed into a creative haven with the right loom and setup.

Are you a small space weaver yourself? Share in the comments below to help others with your best small space weaving tips and the type of loom you have! ⬇️

Take a moment to subscribe for more weaving tips, product reviews and weaving know how!

Until next time…

Happy Weaving!

*This post contains affiliate links. For more information, please see my disclosure policy.

Filed Under: Weaving Tagged With: compact looms, small loom weaving, small space

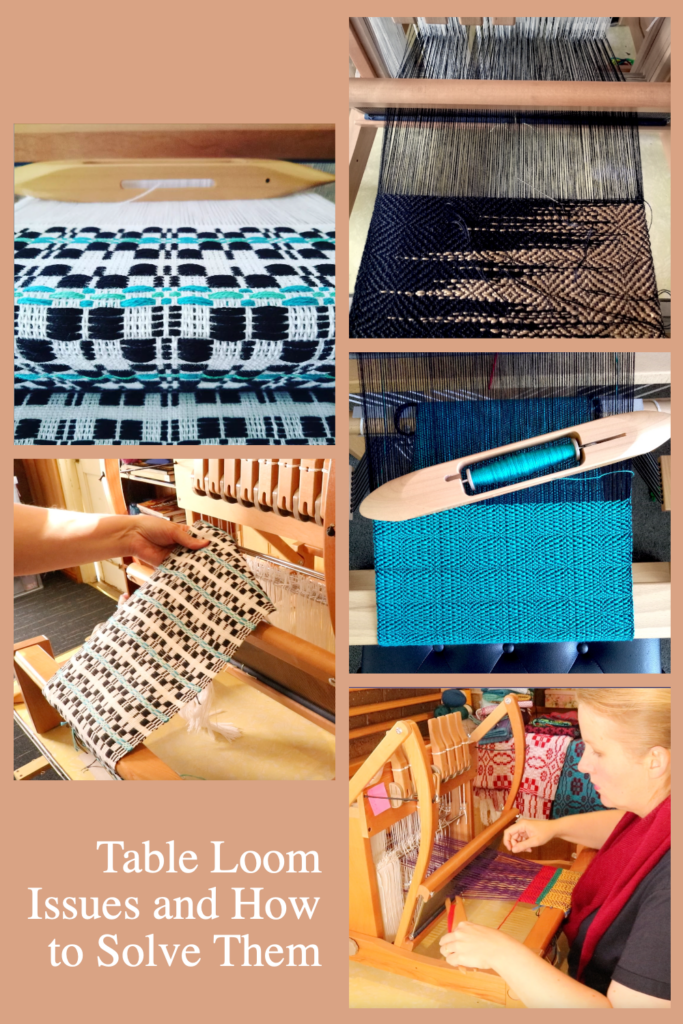
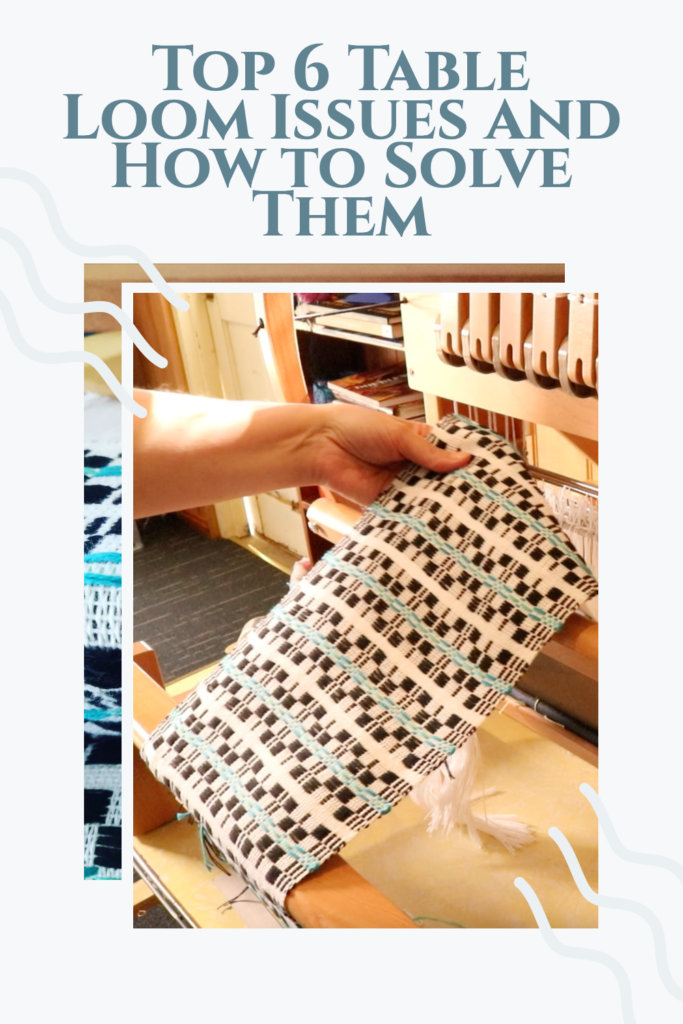
Top 6 Table Loom Issues and How to Solve Them

by Kelly Leave a Comment


Table looms are an excellent choice for both beginner weavers and experienced fiber artists, offering versatility, portability, and efficiency in a compact design. Whether you have a small weaving space or enjoy weaving on the go, a table loom makes it easy to create beautiful woven projects.

These looms are also a great way to explore multi-shaft weaving, allowing you to experiment with patterns and techniques without the larger cost or space commitment of a floor loom.

Whether you’re looking to weave scarves, placemats, yardage or experiment with complex drafts, a table loom is a practical and rewarding choice. If you’re interested to learn more about table looms, check out this resource page.

Even experienced weavers will encounter challenges on the table loom. Whether you’re a beginner or a seasoned artisan, this guide will help you identify and resolve the most common table loom weaving issues.


1. Uneven Tension in the Warp

Symptoms: Some warp threads are looser or tighter than others.
Causes:

  • Uneven winding on the warp beam.
  • Inconsistent tension when tying onto the front beam.
  • Tie on bunches are too large
  • Threads are disorderly or crossed excessively at the back beam
  • Inappropriate warp yarn used, causing stretching or breakages
  • No warp separation used

Solutions:

  • Use a threading and raddle cross when making your warp
  • Use choke ties before removing your warp from the warping board
  • Use a raddle to warp your loom
  • Tie on to the apron rod in 1″ or smaller bunches
  • Wind on the warp as evenly as possible
  • Use warp separation
  • Retie the warp threads with equal tension across the width of the loom.

Extra tips:

Warp separation – It’s important to separate your warp when rolling on, before you start weaving and as you weave and advance the warp.

  • Rolling on – I like to use brown craft paper on a roll to separate my warp at I roll it on. You can also use cardboard or wooden warping sticks, but I do feel the paper roll gives a superior result.
  • Finger combing – I don’t like to use combs or other implements for this, I just use my fingers. This is really gentle on the yarn but also helps to sort out any little snags or unevenness in tension.
  • Know your yarns – There are so many wonderful yarns to explore in weaving but there are a few that just won’t do well as a warp and are better saved for wefts. Here are some recommendations for choosing appropriate yarns:

Choosing and using yarns for weaving

3 yarns beginner weavers should never use


2. Sticky or Stuck Sheds

Symptoms: Warp threads don’t separate cleanly when you change the shed.
Causes:

  • Inappropriate sett was chosen
  • Incorrect threading or crossed threads.
  • Sticky or high static yarn
  • Warp is incorrectly placed during setup. The warp needs to go over both the front and back beam, not under (this is a very common beginner mistake!)

Solutions:

  • Be sure to calculate properly before beginning your project.
  • Re-slay the reed for a different sett if you feel that may be the issue.
  • Make sure threads are not crossed in the heddles to ensure clean sheds.
  • Don’t choose a fluffy or high static yarn for warping.

Extra tips:

  • Take your time to set up your loom, there is no hurry and going slowly helps to ensure mistakes are not made.
  • Use a checklist (like the free printable list available at the end of this article!) to check off the steps as you go.

3. Broken Warp Threads

Symptoms: Warp threads snap or break during weaving.
Causes:

  • Abrasion from the reed or heddles.
  • Using weak or unsuitable warp yarn.
  • Draw in is too extreme due to overly tight weft tensioning

Solutions:

  • Again, ensure correct sett as too close can cause over frictioning
  • Replace broken threads, as in this tutorial.
  • Use a smoother, stronger yarn for the warp.
  • Work on your weft tensioning. It is natural and normal to have some draw in but if it’s excessive it will cause the warp threads to move inward while the warp at the reed remains a similar width. When beating this will then stress your warp threads, causing repetitive friction and eventual breakage.

4. Uneven Selvedges

Symptoms: Wavy, inconsistent or untidy edges on your weaving.
Causes:

  • Overly tight or inconsistent weft tension.
  • Uneven beating with the beater.
  • Your weaving pattern skips outer warp threads
  • Uneven warp tension.

Solutions:

  • Practice gentle and consistent weft tension when weaving.
  • Beat evenly and avoid over or under packing the threads.
  • Use floating selvedges to avoid skipping warp threads at the edges.

5. Pattern Doesn’t Appear Correctly

Symptoms: The woven design doesn’t match the weaving draft drawdown.
Causes:

  • Mistakes in threading or treadling order.
  • Skipped heddles.
  • Crossed threads
  • Beat is too hard or too loose.
  • Sett is too close or too far apart.

Solutions:

  • Double-check your threading and treadling sequence.
  • Fix errors by re-threading the warp threads through the correct heddles.
  • If any threads are crossed between the reed and heddles, re-sley them to allow freedom of movement.
  • Work on a consistent beat.
  • Check your yarn using a sett test to ensure the optimal ends per inch has been chosen.

6. Loom Creaking, sticking or apron rod bowing

Symptoms: Loud creaking or resistance when operating the loom.
Causes:

  • Lack of lubrication in moving parts.
  • Loose or worn parts.
  • Over tightened parts.
  • Warp under too much tension.
  • More apron rod support required.

Solutions:

  • Apply a small amount of wood-safe lubricant to the joints. I like this one.
  • Loosen and then re-tighten screws or bolts to ensure parts are moving effectively.
  • Let your warp tension back a click or two before recommencing weaving.
  • Order replacement parts if your loom is older or used.
  • Consider using a metal rod or additional wooden dowel/stick to attach your warp to the back apron rod. Ensure that your apron rod ties are strong and evenly tied on to the loom.

Preventive Maintenance Tips

  • Clean your loom regularly to remove dust and lint.
  • Check for wear on heddles, reeds, and other parts.
  • Store your loom in a damp free environment to avoid warping. Keep out of direct sunlight to ensure the wood is well maintained.
  • Lubricate when required. Use a silicone free lubricant and apply it to a cloth rather than directly to the loom.
  • If transporting regularly, ensure the loom is stabilised during travel to avoid unnecessary sliding or bumping!

*This post may contain affiliate links. For further information, please see my disclosure policy.
PRINTABLE TABLE LOOM SETUP CHECKLIST

Let’s make your table loom setup just that little bit easier by using a checklist. This free checklist is printable and contains empty checklist boxes that you can tick off as you complete the steps – no more mistakes! 😀

Table loom setup checklistDownload

If you’re looking to level up your table loom weaving skills, I recommend my comprehensive online course Weaving on a Table Loom.

I hope this article was helpful to you and until next time…

Happy Weaving!

Filed Under: Table loom weaving, Weaving Tagged With: table loom weaving

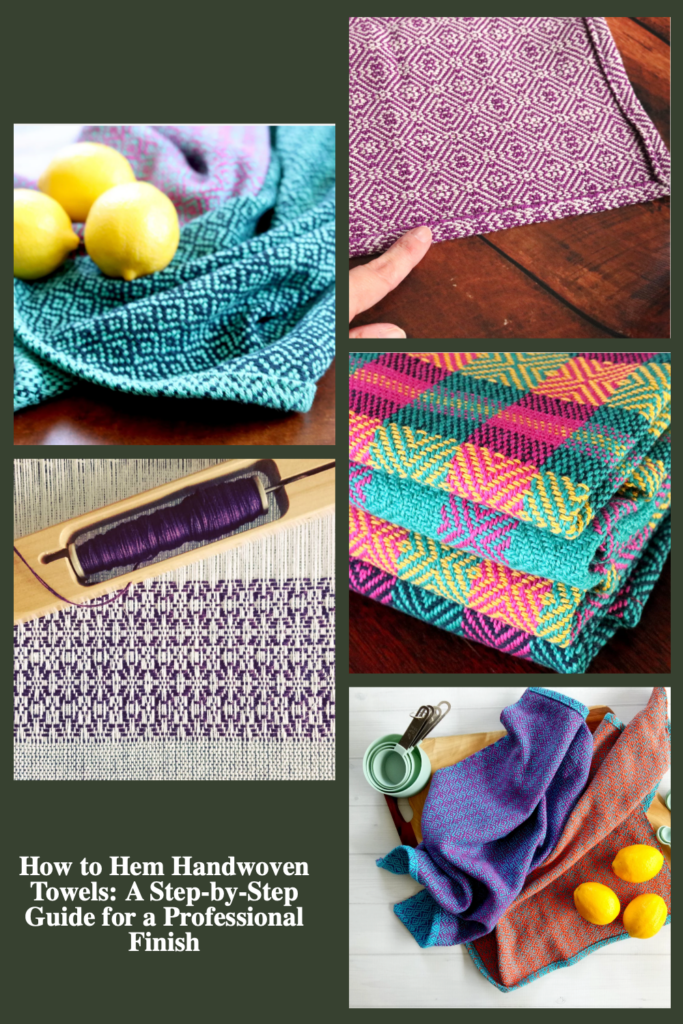
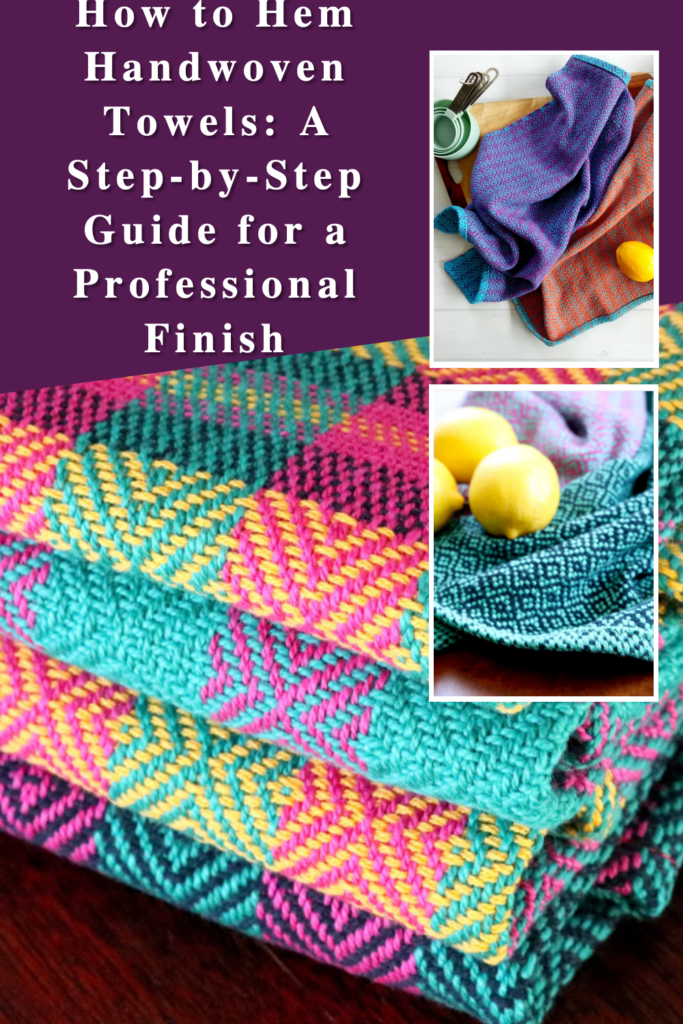
How to Hem Handwoven Towels: A Step-by-Step Guide for a Professional Finish

by Kelly Leave a Comment

If you’ve ever woven a beautiful towel but put off hemming it, you’re not alone. Finishing touches like hemming handwoven towels often get delayed in favor of new projects, leaving a stack of unfinished weavings waiting for attention. But properly hemming your towels is the key to transforming them from raw fabric into polished, functional pieces.

A well-sewn hem not only enhances the durability of your towels but also gives them a refined, professional look. The good news? Hemming handwoven towels is easier than you might think!

In this step-by-step guide, I’ll walk you through simple yet effective hemming techniques suitable for any skill level. These methods will help you achieve a clean, long-lasting finish—so your handwoven towels are ready to be used, gifted, or even sold with confidence.

The methods I’m showing today use a domestic sewing machine. If you feel you need a little help to get started with your sewing machine, I recommend my free sewing series on Youtube.

If you don’t have a sewing machine, you can still hem towels! Check out my guide for hand hemming towels here.

Let’s get those towels off the “someday” pile and into your home!

1. Prepare Your Towels for Hemming before you dress the loom!

Something you may neglect to consider when calculating and planning your towels is a hem allowance.

There are a few factors that come into play when planning for a hem allowance:

  • Loom shrinkage
  • Trim/serger allowance
  • Fold allowance for actual hem

Think about your “off loom” waste before you do your calculations. This is important because you want to be able to add in this waste and then apply your shrinkage calculation to the total amount of fabric required.

Here is an example:

Say you want your completed towels to measure 25″ in length (after hemming).

I’ll start with the 25. I’ll add on around 1/4″ for serge waste. I’m planning for a double fold hem that will require 1/2″ for the first fold and 1″ for the second fold. That is 1 & 3/4″ extra length required. If I wanted extra leeway I could round that number up to 2″.

Now remember, that 2″ needs to be added to both ends of the towel.

So for my 25″ I would add an additional 4″ for the length of the towel = 29″. Then to this figure I would add my shrinkage allowance in my calculations.

Don’t forget your side hem allowance!

Side hems?!! Is that even a thing? Well, it is now 😆 Add around 1/2″ to the width of the towel on each side (so 1″ total) if using side hems (more about that in the ninja level pro tips section at the end 😉)

2. Wash the fabric first!

I never, ever cut or sew with my handwoven fabric unless it’s washed or wet finished first.

Why?

The fabric needs to get wet, swell with water and then get dry and contract back into itself to be finished and ready for the next step. If you doubt me, try taking two small pieces of handwoven fabric of the exact same type, wet finish one and not the other. Then take a pair of scissors to both pieces and note the difference.

When introducing water to fabric I’m intending to use for towels I always opt for a hot wash in the washing machine rather than a gentle wet finish.

Secure Raw Edges Before Washing or Wet Finishing

  • Serging or zigzag stitching is crucial to prevent unraveling. If you don’t have a serger you can do a tight zig zag (a couple of rows is best) on the sewing machine.

3. The “Dog Ear” Technique for Perfect Corners

The corners of handwoven fabric tend to not be so square. This creates a problem for hemming because your towels will want to flare out at the edges, and that doesn’t look so nice!

But don’t worry, my dog ear technique fixes this problem and also has other benefits. In addition to squaring the corners, using dog ears combined with a double fold hem completely encases raw edges. Yes, even secured, serged edges will fray over time when used in an item like a kitchen towel.

Let’s go through the steps for a double fold hem, using the dog ear technique:

  • Fold in a corner on each side of the hem at around 90 degrees and press down with an iron.
  • Make your first fold over at about 1/4 inch and press down with an iron (don’t burn your fingers!)
  • Fold for a second time, making the fold larger this time. It’s your choice how wide, depending on how you like it to look, but generally 1/2 – 1″ is perfect. Iron to make a nice crease and to help the fabric to hold in place.
  • At this point you can either pin or clip your hem in place while you take it to the machine. I like to use sewing/quilting clips as they are quick, easy and do the job perfectly. All raw edges should be encased.

4. Stitching the Hem

  • Machine Hemming:
    • Use a medium straight stitch (on my machine that is stitch length 2.5) close to the folded edge (1/4″ to 1/8″).
    • Reverse stitch at the start and finish for durability.
    • Take your time. Handwoven fabric is thicker than most commercial sewing fabrics.
    • If you experience any fabric bunching pause, lower your needle but lift the presser foot to allow the bunching to ease out. Lower presser foot and continue.
    • When your hems are sewn, give the whole towel a good press with an iron, paying particular attention to the sewn hems.

5. Tools and Materials for Success

  • Recommended tools:
    • A good-quality sewing machine or serger. Now, I don’t advocate for machines with “all the bells and whistles” unless that is what you really want. A basic machine from a reliable brand is a great way to go and won’t break the bank.
    • Gutermann sewing thread or other high-quality brands. Don’t get stuck in the false economy mindset. Yes, good quality thread is more expensive. Cheaper quality thread will break. It will bunch up in your machine. Don’t do it, it’s not worth the headache!
    • Sharp scissors (scissors from the Dollar Store and just not going to cut it here. Sorry, I couldn’t resist 😆), pins, or fabric clips.
    • A steam iron for pressing.
    • That Purple Thang (absolutely non essential but mega handy). This tool is so good for helping to keep fabric in place and push it under the presser foot when needed, instead of risking your precious fingers getting too close to the needle!

Extra Ninja Level Pro Hemming Tips

  • Side hemming

So, what is this “side hemming” I speak of? Well, I noticed over time and with repeated use that my handwoven kitchen towels would get a bit worn and ratty along the long edge, which is the selvedge of the cloth.

I thought, couldn’t I protect and reinforce that edge and at the same time make it even more beautiful to look at?

As it turns out, yes, I could!

This is such an easy step, you simply do a single fold hem, around 1/4 inch, iron and sew it and then complete the rest of your hemming.

And as if all those benefits are not good enough, if you are at all disappointed with the lack of straightness of your finished edges, the single fold hem is a great disguise!

  • Marking cutting lines

Having a marker for cutting your towels apart makes straight cutting a breeze. This quick video shows you the simplicity of this technique:

  • Press, press, press!!

Pressing with a hot iron is everything! Set it on the cotton setting and go for it. In sewing, this is how we get crisp lines and set the stitches we’ve made.

  • Contrast border

If you have woven a pattern, a couple of inches of contrast at the start and end of a towel looks really lovely. It can be in a different colour or weave structure. Plain weave as a border works well because it looks great when contrasted when a pattern weave and also provides an excellent, solid base for hemming.

Ready to weave some awesome towels?

Towels are one of my favourite projects to weave. They are beautiful but oh so practical as well. If you’re looking for some towel weaving resources, I have you covered!

ONLINE CLASSES:

Colour and Weave Towels…

Happy Fibonacci Towels…

Finishing options class…

PDF DIGITAL DOWNLOAD PATTERNS:

Bright & Beautiful Towels…

Lux Hand Towels…

Diamond Stripe Towels…

FREE TOWEL PATTERN:

Wash Your Hands Towels…

There’s something deeply rewarding about taking a project from start to finish, and hemming is the final step that brings it all together. Whether you’re creating towels for yourself, as gifts, or even to sell, these simple methods ensure your hard work shines.

So, grab those unfinished towels, set aside a little time, and give your handwoven creations the perfect finishing touch. You’ll feel the joy of accomplishment every time you use them—proof that every detail in your weaving journey was worth it.

Until next time…

Happy Weaving (and hemming!)

*This post contains affiliate links. For more information please see my disclosure policy.

Filed Under: Hemming, Weaving Tagged With: hemming, how to hem handwoven towels

Troubleshooting Common Rigid Heddle Weaving Issues

by Kelly Leave a Comment

Weaving on a rigid heddle loom is an incredibly rewarding craft, but it’s not without its challenges.

Like learning anything new, time and patience are necessary to achieve your goals.

Something I have observed in my years as a weaving teacher is that most new weavers will experience the same issues that require troubleshooting. This is actually a good thing!

From a teaching perspective, I can identify problems that weavers are having very quickly by just looking at their work. And from a learning perspective, many weavers have gone before you with the same mistakes cropping up and there are many resources available to learn from to figure out where you went wrong.

Weaving should be relaxing, but common issues can unravel your peace.

Whether it’s uneven edges or frustrating warp tension issues, these common hurdles can leave weavers scratching their heads and feeling a bit disillusioned with the whole thing! The good news is that many of these problems are preventable with a little extra care, preparation and experience.

In this guide, we’ll explore why starting with a well-tensioned warp is essential, how patience in the setup process can save you from headaches later, and why taking the time to learn and reflect will make you a more confident and skilled weaver. Let’s turn those troubleshooting moments into learning opportunities!

1. Why a Well-Tensioned Warp is Non-Negotiable

I have no data to qualify this statement, but I feel confident is saying that at least 90% of negative issues encountered in the weaving process are due to something being off with the warp.

Consistency is more important than firmness of tension.

By this I mean that in the warping process you should aim to have all of your warp threads under approximately the same amount of tension, or as near as you can get it.

It’s no good achieving great tension on your edge threads and poor tension in the middle. Or vice versa. The idea being that if your tension is consistent while warping you can then focus on the tightness of the tension afterwards and all the warp threads will be under the same amount of tension.

Uneven tension causes a huge range of headaches to the weaver. Skipped threads, inconsistent edges, uneven or wavy weft picks, snagged or diving shuttles, heddle positions not holding correctly… I could go on!

  • How to achieve great warp tension: 

There are so many methods for warping your rigid heddle loom and it’s definitely not a “one size fits all” process. In my last article I discussed the importance of great warp tension in more detail, so be sure to check that out.

I also recommend that you check out this playlist on Youtube for a variety of methods to consider:

  • Quick tips for achieving good tension:
    • Adjust tension gradually and evenly.
    • Test warp tension by bouncing your hand across the warp once it’s tied on.
    • Separate your warp prior to weaving
    • Take your time and explore different methods to find one that works well for you.

2. The Virtue of Patience in Setting Up Your Loom – Don’t Rush!

There are many things in life that can be rushed and completed quickly. Weaving is not one of them 😆 Rushing will inevitably cause mistakes due to overlooking an important step or process, trust me on this one!

There is so much more to weaving than simply throwing a shuttle back and forth.

There is the planning of the project, sampling if necessary to ensure appropriate yarns and setts. There is the careful warping, threading and readying of the loom prior to weaving. There is the double checking to ensure correctness of threading and steps (especially important for newer weavers!) And that is all before we actually get to the weaving!

Embrace the process:

  • If you feel impatient initially, try to let the process envelop you and teach you to go slowly.
  • Setting up the loom is an integral part of the craft, enjoy it!
  • Take breaks if you feel frustrated—it helps avoid costly errors and gives you a breather.
  • Try to do your warping in a space where you can leave the loom if needed.

  • Tips for setup success:
  • Create a checklist for each setup stage so you don’t miss any steps.
  • It can be great to have a helper for your first project at least. They can hold the warp for you so you don’t have to focus on more than one thing at once. Another set of eyes can also help to pick up errors you may overlook.

3. Giving Yourself Time to Learn and Reflect

This ties in very closely with the last point on patience, but is less about the physical weaving and more about your learning journey.

We all learn in different ways and to be effective we need to give ourselves a lot of grace when learning something new. Perhaps you are the type of learner who just “get’s it” right away or perhaps you are more like me and need more time.

One thing that I do frequently, and have since I started weaving, is to grab one of my weaving books off the shelf and quietly flick through to see what strikes me that day.

Repetition is so good and necessary for learning. There have been many concepts that I had convinced myself I was not smart enough to learn, but it just takes persistence and not giving up on yourself.

Weaving is a journey, not a race:

  • Learning takes practice; each project builds skills. Start small and grow as you go.
  • Mistakes are opportunities to learn and grow.

Tips for cultivating a learning mindset:

  • Keep a weaving journal to note challenges and solutions.
  • Reflect on what worked and what didn’t after each project, and why.
  • Seek out advice and resources from weaving communities.
  • Have good quality books in your weaving library to refer to over and over.

4. Troubleshooting Common Issues (and How to Avoid Them)

These are what I see to be the most common issues that new rigid heddle weavers will encounter:

  • Uneven edges (selvedges):
    • Causes: inconsistent tension, improper beating, fraying edge threads, inappropriate warp threads used.
    • Solutions: Ensure proper warp tension to begin with, try to beat evenly, be sure to use a yarn that is suitable for warping. If edge threads are too loose, try using weights on those threads over the back of the loom. If they are too tight and middle threads are looser, try some wedging techniques as demonstrated in this video.
  • Broken warp threads:
    • Causes: tension too tight or uneven (so some threads end up super tight while others are loose), friction from the heddle (some yarns are more susceptible to this than others).
    • Warp yarn is not strong enough to be suitable for warping.
    • Solutions: choose a suitable warping yarn, ensure warp tension is not exceedingly tight, angle your weft before beating so it has room to settle rather than drawing in too much at the edges.
  • Skipped threads:
    • Causes: threading errors, uneven tension, incorrect angling of a stick shuttle as it travels through the thread. These problems will create floats and imperfections in your work.
    • Solutions: check threading, rethread problem areas if needed. Be vigilant with how you use your shuttle so it’s not inadvertently picking up warp threads it shouldn’t.
  • Gaps, uneven and slightly scrapping weaving:
    • Causes: uneven beat, inappropriate sett, slippery yarns.
    • Solutions: Getting a feel for a correct beat takes time and practice. For a balanced weave, you want a balanced beat. Try to think of pressing your weft into place, we are not whacking here! Hop up and view your work from a few different angles every now and then. Take photos of your progress and review. (Why? For some reason, mistakes stick out like a sore thumb when viewed as a photo! 🤷‍♀️) Again, an uneven warp will impact how your weaving appears. An incorrect sett will have a big effect on your finished weaving, so make sure you figure out the ideal sett before commencing.

It’s good to remember that challenges are part of the weaving journey. I have never personally made a weaving mistake that I couldn’t fix, which is very encouraging!

Having a community to turn to when your weaving is not going so well is invaluable. If you can’t meet with other weavers in person, online groups like my free Facebook group are wonderful for networking and inspiration.

Perhaps you’re ready to level up your weaving in a really supportive atmosphere with a library of online classes at your fingertips? Check out the Online Weaving School!

I hope these tips have been helpful to you, feel free to share your favourites in the comments below.

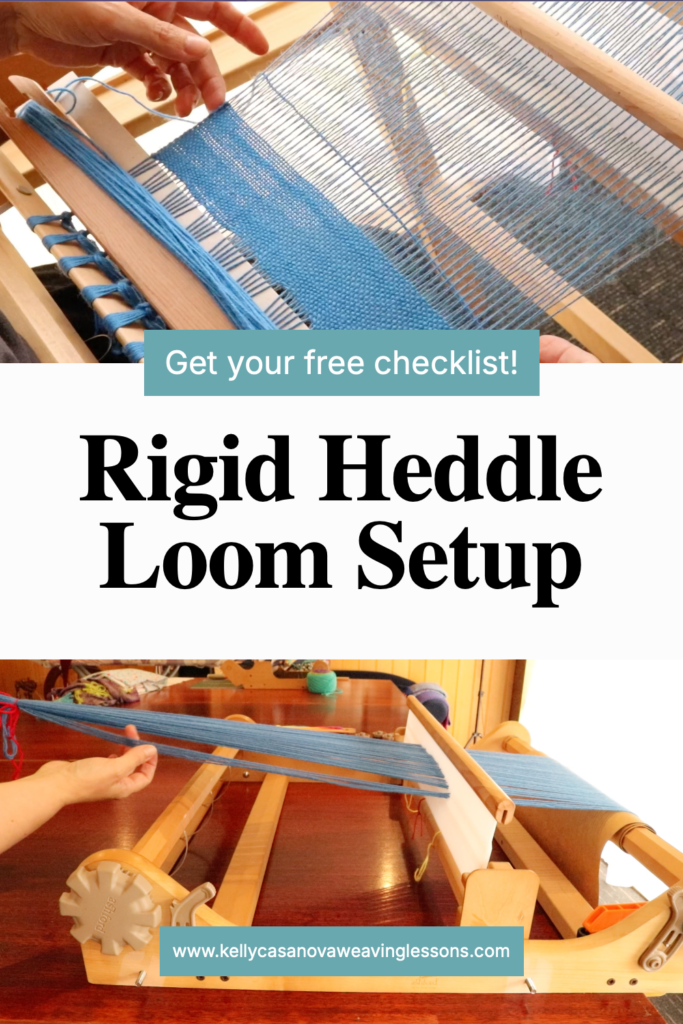
I have also put together a downloadable Rigid Heddle Loom Setup Checklist as a free resource just for you, enjoy!

Rigid Heddle Loom Setup ChecklistDownload

Until next time…

Happy Weaving!

Filed Under: Free tutorial, Online Weaving School, Rigid heddle weaving, Weaving Tagged With: rigid heddle loom setup checklist, rigid heddle troubleshooting, rigid heddle weaving

Why Rigid Heddle Looms Are Perfect for Creative Souls

by Kelly Leave a Comment

For those with a passion for creativity, the rigid heddle loom can be a tool that bridges the gap between artistry and craft. Whether you’re a fibre art novice or an experienced weaver looking for freedom, this versatile loom opens up endless possibilities for expression.

Here’s why rigid heddle looms are the perfect companion for creative souls:

1. Simplicity Meets Flexibility

Rigid heddle looms are delightfully simple. They’re approachable for beginners with minimal setup, yet they offer flexibility for more complex weaves. This combination gives creative minds the freedom to experiment without getting overwhelmed.

Once you have the basics down you can choose to either keep your rigid heddle weaving simple or expand in a multitude of ways.

  • Perfect for Play: Quickly try new yarns, colors, and patterns. Many weavers will use a rigid heddle loom like a Sampleit to weave either small items (it’s wide enough to weave a scarf!) or just to try out new yarns, setts and patterns by simply sampling.
  • Faster Gratification: Small projects can be finished in a day, sparking momentum for your next idea. A rigid heddle loom is super fast to warp and thread, letting you get to the weaving quickly!

2. Portable Weaving Freedom

For those who see creativity as a lifestyle, portability is key. Rigid heddle looms come in a great variety of sizes and the smaller ones are compact and lightweight, making them ideal for:

  • Creating at home (even if you’re lacking space), on vacation, or during creative retreats.
  • Weaving wherever inspiration strikes—your studio, living room, or garden.
  • Taking your loom out to guild or weaving group meet ups

3. A Canvas for Color and Texture

Rigid heddle looms provide so much opportunity for experimentation with colour, texture, and yarn. They’re a dream for fibre artists who:

  • Love mixing hand-dyed yarns, textures, or even unconventional materials.
  • Enjoy colorwork techniques like stripes, gradients, and clasped weft weaving.
  • Love the idea of weaving with their handspun yarn

Your loom becomes a blank canvas ready to showcase your artistic flair, however that may look for you!

4. Affordable and Accessible

Rigid heddle looms are among the most budget-friendly looms available, making them perfect for creatives who want to dip their toes into weaving without a hefty investment. With only a starter rigid heddle loom, shuttle, and some yarn, you’re ready to create.

Rigid heddle looms are used by many weavers who have mental or physical disabilities as they are so accessible.

Rigid heddle looms have great resale value. If you find that weaving is not for you, you decide to upgrade or your circumstances change, it is not hard to find a keen buyer.

5. Endless Room for Growth

Creative souls crave new challenges. The rigid heddle loom grows with you:

  • Simple Techniques: Start with plain weave. You can begin with solid coloured yarn or switch it up with different colours or variegated yarn.
  • Building Skills: Explore colour and weave. Add pick-up sticks, hand-manipulated lace, or tapestry-style accents.
  • Advanced Exploration: Try double heddle weaving for more complex patterns. You can even weave with three or more heddles or make extra shafts with pick up sticks and/or heddle rods.

6. Mindful Creativity

Weaving on a rigid heddle loom is a soothing, meditative process. The rhythmic movement of the heddle and shuttle creates a sense of peace and relaxation. Many weavers find that weaving helps them through difficult life periods as it switches their focus as they become immersed in the process.

  • Calm your mind and relax after a busy day.
  • Find joy in slowing down and savoring each thread you weave.

7. Small Loom, Big Potential

Rigid heddle looms encourage small projects that inspire big ideas. Scarves, wall hangings, table runners, or even fabric yardage—every project becomes a mini-experiment in design.

A huge variety of yarns can be used with a rigid heddle loom. I usually recommend that new weavers start out with some inexpensive and simple knitting wool around a dk weight, which is perfect for the 7.5 or 8 dent heddle that comes with your loom.

Knitting yarns are very accessible, whether you purchase online or in a physical store and the choices for colour and style are massive.

Unleash Your Inner Artist

Whether you’re a painter, knitter, a maker of all kinds, or don’t even consider yourself to be creative, rigid heddle weaving invites you to think outside the box and inside the loom. Let your creativity flow as you blend fibers, colors, and techniques into one-of-a-kind masterpieces.


Ready to try weaving? A rigid heddle loom might just become your next favourite creative tool. I have so many resources to get you started!

Check out my best selling Beginner Rigid Heddle Weaving Online Course to learn all about your rigid heddle loom and weave a beautiful placemats project from start to finish.

“Kelly, thank you very much for this course. I watched a trillion of free youtube tutorials before deciding to take your course. All is in the details! For so many little problems a beginner can meet you are giving explanations and solutions. Much worth its money.”

Frieda

_________________________________________________________________________________________

You will also find many helpful articles to explore right here.

And don’t forget to check out my Youtube channel for hundreds of rigid heddle beginner friendly videos:

Until next time…

Happy Weaving!

Filed Under: Rigid heddle weaving, Weaving Tagged With: beginner rigid heddle weaving, creative souls

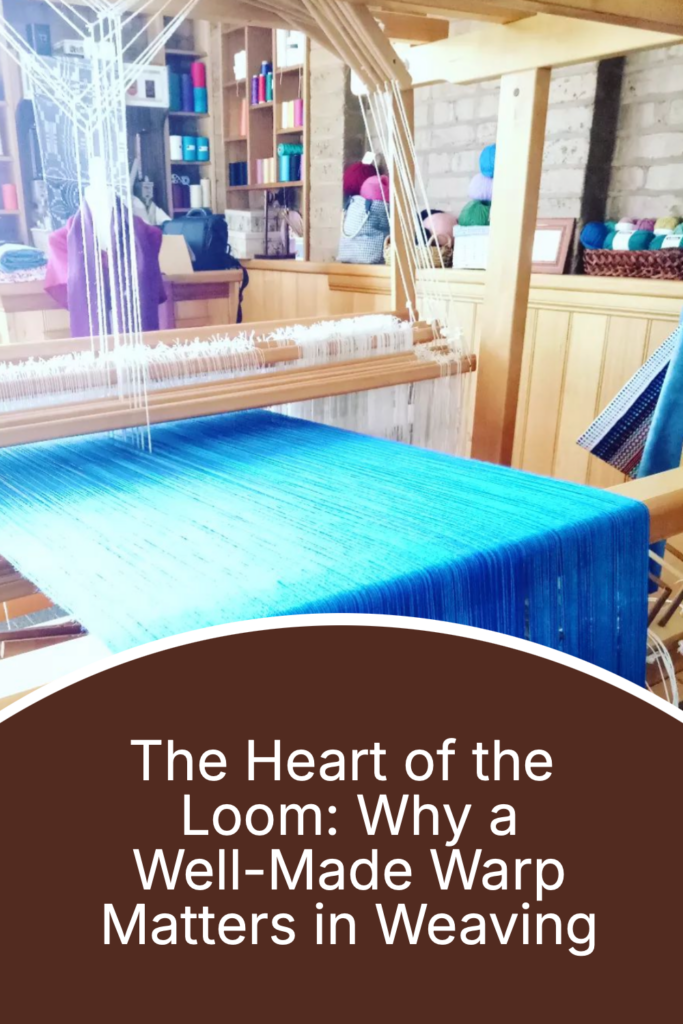
The Heart of the Loom: Why a Well-Made Warp Matters in Weaving

by Kelly Leave a Comment

Ask any weaver about their least favorite part of the process, and many will answer without hesitation: “warping the loom!”

Warping is often seen as tedious, complicated, and fraught with potential for mistakes.

But for me, warping is an essential and satisfying step in the weaving process, the foundation on which every weaving project depends. A well-made warp sets the tone for a successful and joyful weaving experience.

I remember saying to my husband one time, when I had just finished warping my Louet David Floor Loom. “That was my best warp yet. It went on like butter!”

That was a very happy day for me and a milestone reached. I realised that day that all the practice I had put in had been worth it. I felt completely relaxed and at ease during the whole warping process.

Whether you weave on a rigid heddle loom, a table loom, a floor loom or another type of loom, I hope the tips in this article will help you turn your warping experience around.

The Warp: Backbone of the Weave

In weaving, the warp is the series of threads stretched lengthwise on the loom, held under tension to provide the structure for weaving the weft threads. It’s not just a technical necessity; it’s the backbone of every design, ensuring stability and evenness in the final fabric. A poorly prepared warp can lead to uneven tension, broken threads, and frustration at every turn.

When done correctly, however, a good warp creates harmony. Every thread is aligned, tensioned evenly, and ready to support the creative process that follows. It’s like tuning a musical instrument; the preparation determines the quality of the performance. It can make all the difference between a happy and successful project or a frustrating and unfulfilling project.

Why Warping Matters

Warping isn’t just a step in the weaving process—it’s an act of care, discipline and skill. Here’s why I believe warping deserves respect, not dread:

  1. Foundation of Success: Just as a sturdy foundation supports a house, a well-warped loom supports a beautiful and functional fabric.
  2. Opportunity for Design: Warping isn’t just a chore; it’s a chance to engage deeply with your design. The choice of colors, fiber types, and spacing happens here, laying the groundwork for your creative vision.
  3. Mindful Preparation: Warping slows you down. It requires attention, precision, and patience – qualities which are actually character building!
  4. Fewer Problems Later: An hour spent carefully warping your loom can save countless hours of untangling, retying, and troubleshooting during the weaving process.

Finding Joy in Warping

So, how do you shift your mindset and embrace the joy of warping?

  1. Create a routine: Set aside dedicated time for warping in a space that feels peaceful. Play music or light a candle to make it an enjoyable experience.
  2. Invest in Tools: Good tools can make all the difference. A warping board, sturdy loom, and the right yarn are worth the investment to make warping more efficient and less frustrating.
  3. Learn Techniques: Experiment with different warping methods until you find one that works for you. Whether you use a direct warping peg, a warping board, sectional beaming or something else, mastering your preferred method can boost confidence and ease.
  4. Celebrate the Process: Remember, every part of weaving contributes to the whole. Warping isn’t just a means to an end; it’s an integral step that can result in deep satisfaction.

The Heart of Your Weaving

For me, there’s a special satisfaction in finishing a warp and seeing the loom ready for weaving. It’s a moment of anticipation, knowing that all the preparation will pay off in smooth, rhythmic weaving.

So, the next time you’re about to warp your loom, pause for a moment. Consider the care and craftsmanship you’re about to invest in your project. Embrace the process, and you might just find that warping becomes one of your favourite parts of weaving.

Or at the very least, it can become a less dreaded part of the process for you!

Because warping is such an important part of weaving, I have resources to help you to warp better:

Independent warping issues…

Rigid heddle warping tips…

2 tips for rigid heddle warping…

Strategies for better warping…

Plus I have a Youtube playlist specifically for learning more about warping.

Until next time…

Happy Weaving!

Filed Under: Warping, Weaving Tagged With: warping, weaving

Debt Freedom – My Story

by Kelly Leave a Comment

Hi, I’m Kelly, I’m 48 and debt free.

What does financial freedom mean to me? 

Well, it’s nothing to do with being rich or flashy.

It means not being beholden to anyone. It means feeling free to make sensible financial decisions for my family. It means being in a position to help others who are less fortunate. It means feeling in control of my financial future.

It means feeling very, very blessed.

I spent the first few years of my young adulthood wondering what on earth I was supposed to be doing. I started a degree and dropped out. I worked a variety of low paying jobs with long hours in order to pay my rent, run my car and eat!

Although I did complete an “at home” small business course (pre-internet days) I really had no idea what my own business would look like or how I could do it.

I got married and had my 4 children when I was in my 20s and early 30s.

When I was almost 30 my husband and I had scraped together enough money for a home deposit. We both worked full time and made many sacrifices in order to save. In 2005 property prices were much lower than they are now so with a deposit of around $100,000 we were able to purchase our first home with a $100,000 mortgage.

It seems like a very manageable amount all these years later, but at that time the struggle was real. As our family grew we made the decision that I would stay home to homeschool our children.

My husband’s wage from his full time job was modest to say the least.

But 10 years later, we paid off that mortgage. Yes, on one wage and with 4 children to clothe and feed.

6 years later we had another mortgage. We had a dream. We wanted to leave the suburban lifestyle we had grown to detest. My husband and I had both lived rurally on farms as children. We wanted that lifestyle again for our family.

In 2016 I started an online business in the hobby/education/design space. Over time this business grew enough for my husband to retire from his job and work at home with me. The business continued to grow so that in 2021 we achieved our dream of obtaining acreage in a beautiful rural location.

Within 3.5 years of our move we had again paid off our mortgage and were completely debt free.

Having lived below the poverty line to now being financially comfortable, I have a lot of helpful financial information to share.

Regardless of where you are at in life – stay at home parent, single, married, empty nester, you will find help and ideas here to work towards financial freedom.

Filed Under: Debt free, Financial freedom Tagged With: debt freedom, financial freedom

Financial Freedom, The First 3 Steps

by Kelly Leave a Comment

Financial freedom may sometimes feel like an unrealistic and unobtainable dream.

While the journey to financial independence varies from person to person, and there can be many methods and facets involved, I believe there are universal first steps that set the foundation for readiness. 

Here’s how to start your path to financial freedom these first 3 essential steps:

1. Know That You Can Do It

That’s right, I want you to not just believe but to know that YOU can become financially free. Many people think it’s something that is reserved for the wealthy or lucky, but countless stories of ordinary individuals prove otherwise (me being one of them!) 

Is there anything special about me? No. 

No super intellect (college drop out here, you can read my story here 🙋‍♀️), no generational wealth or special prior knowledge, no secret formula.

I’ll be blunt – if you don’t believe you can do it then you simply won’t.

2. Commit to It

Financial freedom doesn’t happen on its own. It’s not something that you hope will somehow be taken care of, or that someone will step in and fix for you.

Once you believe financial freedom is within reach, it’s time to commit wholeheartedly. This isn’t a casual “maybe one day” desire—it’s a focused decision that requires your active participation.

Commitment means creating a plan, educating yourself, and making sacrifices when necessary. It might mean cutting back on unnecessary expenses, building new skills, or creating multiple income streams. Without commitment, it’s easy to fall back into old habits or the sense of apathy that may have created your overwhelming debt in the first place.

3. Be Patient

Financial freedom doesn’t happen overnight. It requires discipline, patience and desire for change. Some months may feel slower than others, but consistency is key to keep moving forward.

Avoid comparing your journey to others. Remember that everyone starts at different points and faces unique challenges. Celebrate small wins—each step brings you closer to your goal.

The time that it takes to become debt free does not matter as much as the fact that you are doing it. Be proud and thankful that you are taking positive steps towards your financial future!

The path to financial freedom starts with the right mindset, a solid commitment, and the patience to see it through. These first three steps—believing you can achieve it, committing to the process, and being patient—create the foundation for success.

Remember, every step forward is progress. Start today, stay consistent, and watch how the small changes lead to a big transformation. 

Your financial freedom is closer than you think!

Filed Under: Debt free, Financial freedom, Weaving Tagged With: debt freedom, financial freedom

Debt Free in 2025 – A Roadmap to Financial Freedom

by Kelly Leave a Comment

In 2024 our family became debt free. We have been working at this for years and it’s rewarding to now have achieved such a major goal!

The only debt we have been willing to take on is a home mortgage. We have never used credit cards and always lived a frugal lifestyle, living within our means and saving for important purchases. Using these principles, we have been able to pay down our mortgage and have reached a new level of financial freedom.

Debt freedom is such a wonderful feeling and I want you to be able to achieve it too!

Debt Free in 2025: A Roadmap to Financial Freedom

As we approach a new year, many of us are setting resolutions, and one of the most powerful goals you can set is to become debt-free by 2025. Personally, I don’t make resolutions, but I do have a lot of goals and am constantly working towards them.

Living without the burden of debt opens up a world of financial possibilities, promotes a simple lifestyle and reduces so much stress!  For me, one of the best things about debt freedom is the ability to give more to others and improve their lives as well.

Here’s a comprehensive roadmap to help you achieve this goal, particularly if you have multiple sources of debt.

Step 1: Assess Your Current Financial Situation

Before you can tackle your debt, you need a clear picture of where you stand. Take some time to have an honest look at your true financial situation, even if it’s difficult to face:

  • List all debts: Include credit cards, student loans, personal loans, and any other obligations.
  • Calculate total debt: Add up the amounts owed to see your total debt load.
  • Review interest rates: Identify which debts carry the highest interest rates.

Step 2: Create a Budget

A budget is helpful for managing your finances effectively. Here’s how to get started:

  • Track your income and expenses: Use apps, spreadsheets, or good old-fashioned pen and paper to see where your money goes.
  • Identify areas to cut back or change: Look for non-essential spending that can be reduced, eliminated or reassigned.
  • Allocate funds to debt repayment: Designate a specific amount each month to pay down your debts.

Step 3: Choose a Debt Repayment Strategy

There are several strategies for paying off debt. Here are two popular methods:

  • Debt Snowball: Focus on paying off your smallest debt first while making minimum payments on larger debts. Once the smallest is paid off, move to the next one. This method provides quick wins and can boost motivation.
  • Debt Avalanche: Prioritize debts with the highest interest rates first. This method saves you money in the long run by reducing the total interest paid.

Choose the method that resonates with you and fits your financial situation. You could even do a mix of the two if you can afford to. For example, make extra repayments on the debt with the highest interest whilst also hitting your smallest debt in order to eliminate it.

Step 4: Increase Your Income

Besides decreasing spending where possible, the other reliable way to get in control of finances is finding ways to increase your income. This can significantly speed up your journey to being debt-free:

  • Side hustles: Consider freelance work, selling unwanted or un-needed items from your home, start an online business.
  • Ask for a raise: If you’ve been performing well at your job, and if it’s appropriate, discuss a pay increase with your employer.
  • Monetize skills or hobbies: If you have skills in crafting, tutoring, or consulting, explore ways to turn them into additional income streams.
  • Start an online business: There are so many online opportunities and many of them can be started while still maintaining a job.

Check out My Story to see how I increased our income to such an extent that my husband retired from his job in his early 40’s, we paid off our first mortgage, saved for our dream property and are now completely debt free!

Step 5: Build an Emergency Fund

While paying off debt is crucial, it’s equally important to prepare for unexpected expenses. Aim to save at least $1,000 as a starter emergency fund to avoid falling back into debt when emergencies arise. Even in our days of living below the poverty line as a family, we still had an emergency fund.

Step 6: Stay Motivated and Accountable

The journey to becoming debt-free can be challenging, but staying motivated is key:

  • Set milestones: Break your goal into smaller, achievable milestones and celebrate each one.
  • Join a support group: Connecting with others on the same journey can provide encouragement and accountability.
  • Follow others who are or have been on a debt free journey
  • Visualize your goals: Create a vision board or write down your financial goals to keep them front of mind.
  • Have fun: Did I just tell you to have fun?! Sure I did! Believe it or not, the process to debt freedom can be fun! Ticking boxes, getting loans paid down, seeing progress and eventually achieving financial freedom? Now, that’s my idea of fun 🤩

Step 7: Educate Yourself

Knowledge is power. Take the time to learn about personal finance through books, podcasts, and online resources. Understanding financial principles can help you make informed decisions and avoid falling back into debt in the future. It can also be super inspiring to read other people’s stories and learn more about how they did it.

Becoming debt-free by 2025 is a realistic and empowering goal. By assessing your finances, creating a budget, choosing a repayment strategy, increasing your income, building an emergency fund, staying motivated, and educating yourself, you can take control of your financial future. Remember, the journey may have its ups and downs, but the reward of financial freedom is worth every effort. Start today, and take one step closer to living a debt-free life!

Filed Under: Debt free, Financial freedom

5 Fun Floor Loom Weaving Projects for Beginners

by Kelly Leave a Comment

Welcome to the colourful and exciting world of floor loom weaving!

If you’re looking for a creative and relaxing hobby, weaving might just be your new favourite pastime. Don’t worry if you’re a complete beginner— with a good dose of patience, enthusiasm and just a bit of guidance, you can create beautiful projects in no time. Let’s dive into five fun weaving projects that will spark your creativity and boost your skills!

1. Simple Placemats

Kick off your weaving journey with some simple placemats! They’re quick to make and add a personal touch to your dining table.

  • Materials Needed: Cotton yarn in various colors.
  • Steps:
    1. Set up your loom with plain weave threading.
    2. Weave by alternating shafts 1 and 2 for plain weave.
    3. Finish the edges by tying simple knots or using a hem stitch.
  • Tip: Don’t hesitate to mix and match colors—this is a great opportunity to experiment!

2. Basic Scarf or Cowl

Next up is a lovely scarf! It’s perfect for keeping warm or levelling up your wardrobe and makes a wonderful gift for friends or family.

  • Materials Needed: You have so many choices here! Some options (click to see examples) would be:
  • Wool
  • Tencel
  • Bamboo
  • Acrylic
  • Cotton
  • Steps:
    1. Warp the loom according to the desired scarf width and length (don’t forget to pre-calculate. The Introduction to Floor Loom Weaving course includes printable calculation sheets).
    2. Explore basic patterns like plain weave or twill.
    3. Hemstitching on the loom is a great way to secure your ends, then a twisted fringe adds a really stylish and professional looking finish.
  • Encouragement: This project is not only practical but also a great way to showcase your personality through color and patterning choices!

The project for my Introduction to Floor Loom Weaving online course is a beautiful cowl which is perfect for beginner floor loom weavers and beyond.

3. Woven Wall Hanging

Transform your space with a beautiful woven wall hanging. This project allows for creativity and self-expression. Pretty much anything goes – if you like it then it’s good!

  • Materials Needed: A mix of fibres is possible here, and a dowel for hanging. This can be a terrific project for using up stash yarn.
  • Steps:
    1. Set up your loom for free-form weaving. Plain weave threading is perfect.
    2. Experiment with different techniques like looped or knotting. You could weave a balanced plain weave or a weft faced weave (more like tapestry).
    3. Finish by attaching it to a dowel.
  • Tip: Choose colors that resonate with you and your decor for a piece that feels uniquely yours!

4. Tote Bag

A practical project, a woven tote bag is perfect for carrying your essentials in style.

  • Materials Needed: Sturdy yarn. You can use pre made handles or make your own.
  • Steps:
    1. Weave a large rectangle in plain weave.
    2. Sew the sides together and attach the handles.
    3. If you want to get a little fancier, you can line the bag with commercial fabric like I do in the Tote Bag Series.
  • Encouragement: It’s not just useful; it’s a great way to show off your weaving skills wherever you go! I love projects that are both practical and useful 😉

5. Baby Blanket

For a larger project that’s oh-so-rewarding, consider weaving a baby blanket. I recommend completing a baby blanket before trying a larger sized throw or blanket because it gives you all the practice you will need. Seeing a fresh little human being wrapped up in a handwoven blanket made with love just warms my heart.

  • Materials Needed: Cottons are safest for babies.
  • Steps:
    1. Warp your loom to accommodate the blanket size.
    2. Explore with your weave structure if you’re ready, but be careful there are no long floats where little fingers and toes could catch. Plain weave is lovely for blankets too. Check out Tom Kinsley’s Handwoven Baby Blankets book for heaps of inspiration and blankets to try!
    3. Finish by securing the edges. Neatly finished double fold hems are best for babes.
  • Tip: This blanket can become a treasured item for years to come — babies who grow into children who grow into adults can get quite attached to their blankies!
  • BONUS TIP

There are so many great weaving books available but I recommend that you start out with a draft and pattern directory like Anne Dixon’s Handweaver’s Pattern Directory (4 shaft patterns) or Carol Strickler’s A Weavers Book of 8 Shaft Patterns.

These are the kind of books that I refer back to again and again or frequently flip through for inspiration.

Weaving on a floor loom is not only a fun craft but also a fulfilling creative outlet. It can even become a way to make an income doing something you love. Remember, every project you complete builds your skills and confidence, so don’t be afraid to experiment and make mistakes. Choose any project that excites you, (but be realistic – walk first, then run!) and let your creativity flow.

Until next time…

Happy weaving!

*This post may contain affiliate links. For more information, please see my disclosure policy.
Filed Under: Floor Loom Weaving, Weaving Tagged With: 5 fun floor loom weaving projects for beginners, floorloomweaving, weaving projects, weaving projects for beginners

  • « Go to Previous Page
  • Page 1
  • Page 2
  • Page 3
  • Page 4
  • Page 5
  • Page 6
  • Interim pages omitted …
  • Page 115
  • Go to Next Page »

Primary Sidebar

Hand crafted boat shuttles

Categories

Archives

Meta

  • Log in
  • Entries feed
  • Comments feed
  • WordPress.org

Copyright © 2025 Kelly Casanova Weaving Lessons on the Foodie Pro Theme