• Skip to main content
  • Skip to primary sidebar

Kelly Casanova Weaving Lessons

  • Hi! I’m Kelly!
    • Disclosure
  • Online Weaving School Class Index
    • Common account issues
    • Common technical issues
    • What do I get with a membership?
  • New to rigid heddle weaving? Start here!
    • Never heard of the rigid heddle loom?
    • How to weave neat edges on the rigid heddle loom
    • Rigid heddle weaving
    • Rigid Heddle Weaving Patterns
  • Patterns
  • Subscribe

Kelly

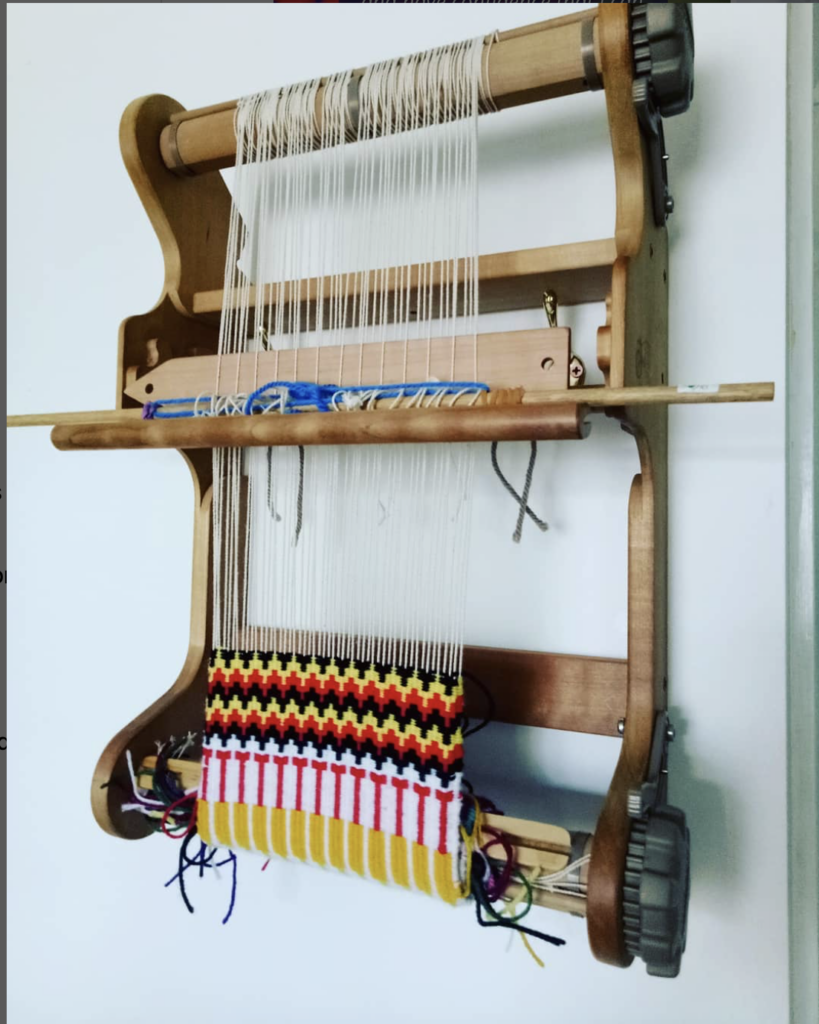
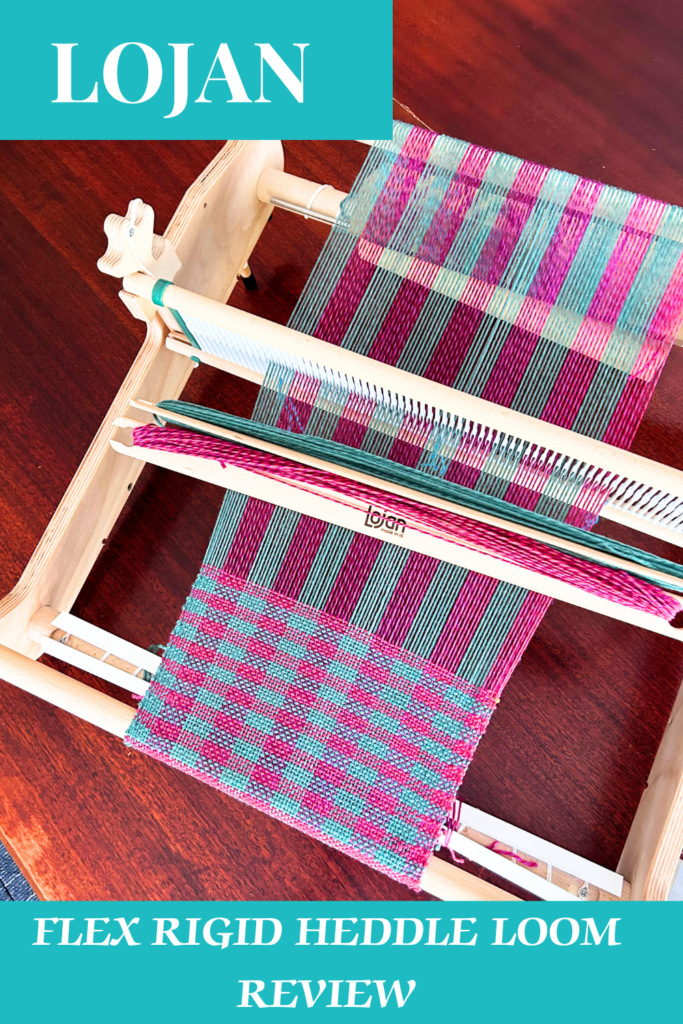
Lojan Flex Rigid Heddle Loom Review

by Kelly 6 Comments

Lojan Flex Rigid Heddle Loom Review: My Honest Thoughts

I’m so excited to share my review of the soon to be released Lojan Flex Rigid Heddle Loom! Now that I’ve had some time to weave with it, I have plenty to say about its features, benefits, and what you should know before adding it to your weaving loom collection.

First Impressions & Setup

Right out of the box, I noticed some interesting differences with this loom. One of the first things that caught my attention was the metal warping rod—a great feature held in place by texsolv cords. This keeps the rod steady while warping, making the process easier and more secure. If you haven’t already, I recommend checking out my assembly video before diving into this review, as I explain all the parts in more detail.

The loom also comes with little rubber feet that do a great job of keeping it stable on the table without clamping! I pulled the loom out a little so that the back rubber feet were over the edge of the table, keeping it from moving as I was direct warping. That’s a nice touch for those who prefer to warp without extra setup hassle.

Warping the Flex Loom

For my first project, I used lovely variegated green wool, alternating with a soft pink. I chose to use direct warping, and I have to say, the process was smooth. One of my favorite warping techniques is using two warping pegs to minimize yarn waste—a little trick I always recommend!

As I started winding on, I noticed that the texsolv cords played another helpful role. When rolling the warp onto the back beam, the cords held the apron rod in place, preventing shifting and ensuring an even tension. When it was time to start weaving, I simply slipped the cords off and let them hang out of the way until next time.

The plastic warp separators that come with the loom are similar in size to traditional cardboard sticks, but a bit more durable. Still, my personal favorite remains brown craft paper, which I use repeatedly for superior warp separation.

Why I Recommend a Stand

Now, let’s talk about comfort. I typically weave with a stand when using a larger loom, and after working with the 50 cm Flex Loom, I highly recommend getting one! Without a stand, I found the weaving angle a bit awkward, making my arms work harder than usual.

Lojan does offer foldable, height adjustable stands, which can be packed away easily. If you’re investing in this loom, I’d suggest grabbing the stand along with it to make your weaving sessions more enjoyable!
Tensioning: A Standout Feature

One of the biggest highlights of the Lojan Flex is the tensioning system. Just like their inkle loom, which I also love, the tensioning is simple, seamless, and smooth. The loom has front and back bars in addition to the warp and cloth beams, helping to maintain excellent tension throughout the weaving process.

If you’ve ever struggled with keeping tension even, you’ll appreciate this design. Plus, it’s very user-friendly for those with hand or wrist issues, making adjustments easy without strain.

Innovative Rigid Heddle Design

Another unique aspect of this loom is its modular rigid heddle design. Instead of a single, fixed heddle, this loom features individual plastic sections that fit together. This means you can:

  • Mix and match different heddle sizes for varied setts.
  • Swap out sections instead of buying an entirely new rigid heddle.
  • Customize your setup for thick-and-thin weaving with a variety of yarns (similar to a variable dent reed).

I found this to be a super clever feature that adds more options to the weaving experience!

Weaving Experience & Final Thoughts

Initially, I tried weaving with the loom flat on the table, using the extra dowels at the back to create a slight incline. However, I quickly realized that the breast beam and back beam sit quite high, making it a bit tricky to get the right angle without a stand. This reinforced my recommendation—if you’re using the 50 cm size, a stand will make weaving much more comfortable!

Overall, I’m really impressed with the Lojan Flex Rigid Heddle Loom. The smooth tensioning, modular heddle system, and well-thought-out features make it a fantastic option for weavers looking for a high-quality, innovative loom.

The top back beam helps the weaver to achieve a beautifully well ordered and well tensioned warp.

What’s in the box?

Whether you purchase the 30cm or 50cm Flex, you will receive:

  • Loom parts to assemble, including screwdriver for simple assembly (check out my assembly video here)
  • A 7.5 heddle reed and heddle sections
  • 2 stick shuttles
  • Direct warping peg and clamp
  • Heddle hook for threading
  • Warp separators
  • Apron rod metal rods and texsolv cords

Optional extras

  • Stand
  • Additional rigid heddle frames and heddle segments, available in sizes 2.5 dpi – 15 dpi.
  • Pick up sticks
  • Additional warping pegs and stick shuttles

Even more options!

The Flex can be used purely as a rigid heddle loom but it can also be much more than that! Shortly there will be the option to upgrade the regular Flex to either a 4 or 8 shaft loom through the purchase of conversion kits. Reverting back to the rigid heddle loom is quick and easy so you can weave what you want, when you want!

The Flex is available now for pre-order (March 2025). If you’re in Australia you can re-order through me 😉 or if in the US, check them out at the Woolery. If you are interested in the Lojan Inkle Loom I have a review of that here.

Want to see the loom in action? Check out the review video here –

Have any questions about the Flex Loom? Let me know in the comments below! And don’t forget to check out my assembly video for a closer look at how this loom comes together.

Until next time…

Happy weaving! 🎨✨

Filed Under: Lojan products, Rigid heddle weaving, Weaving Tagged With: lojan flex loom, loom review, rigid heddle loom, rigid heddle weaving

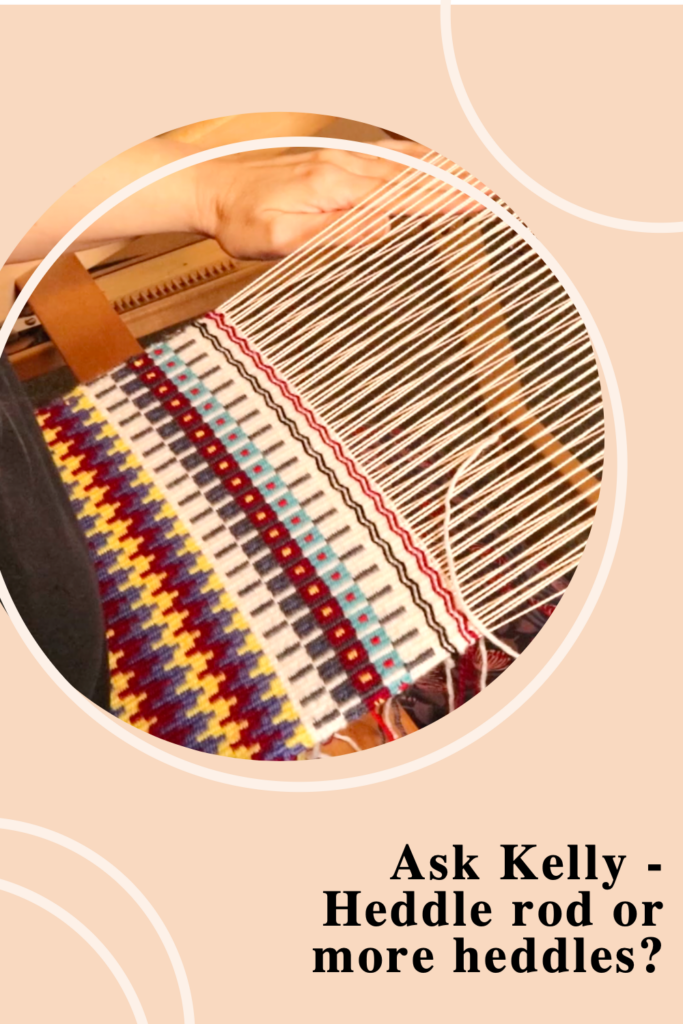
Ask Kelly – Heddle rod or more heddles?

by Kelly 4 Comments

Today’s question springs from the popular online Krokbragd 101 class for rigid heddle weavers. In that class I show you different options for setting up your rigid heddle loom. You can either opt for a single heddle with a heddle rod or pick up sticks OR you can choose to set up with two heddles.

In many of my classes at the Online Weaving School I try to provide more than one option for loom setup because, well, we’re not all the same! What suits one weaver may not suit another.

When I received this question from Milly I realised that no one had asked it of me before. I wanted to share so that all can benefit.

For context, method one refers to setting up the rigid heddle loom with a single heddle, a pick up stick and a heddle rod.

Method two is a two heddle set up.

“Hi Kelly,

Your video is very informative and very easy to comprehend, thanks for making this and I am glad that I have purchased it. Just a quick question. For Method 1 and 2, in terms of preparation of threading and set up and in terms of speed of completing project such as changing shaft 1-3 for each method, which do you feel more smooth to continue the project and which is faster and convenient do you think?

Budgeting wise, rather than purchasing two heddles, if you have a rod and buying a picking stick it is maybe a bit more cheaper right? But I just wondered about in terms of practical convenience, speeding of threading and completing the project which is better I wonder…?? Appreciate if you can give me your opinion on this:)“

Hi Milly!

It might depend a little bit on the weaver. If you prefer one method it’s probably because you can get it set up easily and quickly? For me personally, method two definitely trumps method one in terms of speed of set up and ease of weaving. I have quite a bit of experience with using more than one heddle now and I “get it”.

But many would say the opposite and say they prefer method one. Method one is undeniably more economical as buying additional heddles of the same dent can be expensive. I usually advise students to purchase the extra heddle if:

A) They are already weaving with pick up sticks/heddle rods and find it cumbersome for any reason (eg. some weavers, myself included, will get neck/shoulder strain from repeatedly picking up a heddle rod) then it could be worth investing in another heddle.

B) If they intend to do a lot of weaving that requires more than the regular 2 shafts it would be worth buying a second heddle.

I hope my response to the question is insightful for all of you but perhaps you are at more of a beginner level?

What is a heddle rod?

A heddle rod is a replacement tool for a pick up stick. When you wish to use more than one pick up stick to create texture or patterning on a rigid heddle loom you may find that the two sticks will not slide past each other.

This is a problem because one stick will need to be removed and the threads picked up again each time you need to weave that pick (row). Hello tedium! 😆

A heddle rod completely bypasses this issue because it can pick up the threads you want, sit behind the heddle and still leave a clear path for a pick up stick.

I have a full, free tutorial that shows you how to install a heddle rod, including how to make your own string heddles.

What About More Than One Heddle?

Weaving with a single heddle, lowering and raising it to weave with, can achieve 2 shafts. But we can add an additional heddle (or heddles) to achieve even more.

For weaving a 3 shaft krokbragd like we do in the Krokbragd 101 online class, this means we can set up the rigid heddle loom with two heddles to achieve the three shafts we need for the weave structure.

As I already pointed out to Milly, I love weaving with two heddles but I understand it’s not the best solution for everyone.

The heddles must be the same size, so if you want to weave your krokbragd with a 7.5 dent heddle, you need two of the exact same size. Naturally, this is a more expensive option than using a piece of dowel or similar for a heddle rod.

There are so many options for weaving with two heddles though, beyond just krokbragd. For some weavers, an additional heddle opens up the world of weaving on a rigid heddle loom in a new way, I know it did for me when I discovered it!

*This post contains affiliate links. For further information, please see my disclosure policy.

Let me know if you found this article helpful by commenting below ⬇️ Heddle rods or two heddles? Do you have a preference?

Until next time…

Happy Weaving!

Filed Under: Ask Kelly, Rigid heddle weaving, Weaving Tagged With: heddle rod, rigid heddle weaving, two heddles

The 10-Minute Rule: A Simple Trick to Boost Creativity, Productivity & Beat Procrastination

by Kelly Leave a Comment

Today, I want to share a simple yet powerful trick that has helped me stay productive and creative, even on those days when I just don’t feel like doing anything. I call it the 10-Minute Rule—and trust me, it’s a game-changer!

The Inspiration Behind the 10-Minute Rule

Spring is in full swing here in Australia, bringing the urge for spring cleaning, organizing, and tackling all those little tasks we’ve been putting off. I had a busy day ahead with two appointments—one over the phone and another in person (which, let’s be honest, I don’t love having to leave the house for!). But before heading out, I had a short window of time in my studio, and that’s when I realized just how much I rely on my 10-minute rule.

So, what is the 10 minute rule?

It’s not really a strict “rule” but more of a simple productivity hack. It’s about breaking tasks into manageable, bite-sized chunks that feel achievable—even when you’re low on time, motivation, or energy (and if you are, I hear ya!)

How the 10-Minute Rule Works

The concept is simple: dedicate just 10 minutes to a task and see what happens. There are two main scenarios where I find this rule helpful:

  1. When I have limited time – If I only have an hour between appointments or other commitments, I can still accomplish something meaningful in a short burst of focused time.
  2. When I don’t feel like doing anything – On days when I’m feeling unwell, uninspired, or just plain unmotivated, committing to just 10 minutes often gets me started—and sometimes, that’s all I need to keep going.

A Real-Life Example: How It Helped Me Get Creative Again

Yesterday, I wasn’t feeling great. I’ve been dealing with some ongoing health issues and a lingering cold, which left me feeling drained. I had convinced myself to take the day off from my creative projects, but when I stepped into my studio to grab something, I saw my quilt project sitting on the table.

At that moment, I had two choices: walk away or commit to just 10 minutes of sewing. I chose the latter. I told myself, “I’ll just sew a couple of blocks together and see how I feel.” And guess what? Once I started, I felt inspired and ended up working on the quilt for an hour! That’s the magic of the 10-minute rule—it lowers the mental barrier to getting started, and once you’re in the flow, you might just surprise yourself.

The 10-Minute Rule in Action

You can apply this rule to just about anything:

  • Creative projects – Weaving, quilting, painting, knitting—whatever it is, just commit to 10 minutes.
  • Household chores – Cleaning an entire room might feel overwhelming, but tidying for 10 minutes? Totally doable!
  • Work and organization – If you’re procrastinating on emails, paperwork, or planning, set a timer for 10 minutes and make a start.

Why It Works

  1. It reduces overwhelm – Instead of dreading a big task, you’re just committing to a small, manageable portion.
  2. It builds momentum – Often, the hardest part is getting started. Once you begin, you’ll likely want to keep going.
  3. It creates a sense of accomplishment – Even if you only spend 10 minutes, you’ve still made progress!
  4. It helps you manage time better – You can get a surprising amount done in short, focused bursts.

Frequently Asked Questions

Does the 10-minute rule really work?
Yes! It’s a proven method for overcoming procrastination and increasing productivity. The key is that starting small reduces resistance, making it easier to begin tasks.

How can I use the 10-minute rule to be more productive?
Try applying it to tasks you tend to avoid—whether it’s creative work, housework, or admin tasks. Once you get started, you’ll often keep going beyond the initial 10 minutes!

Give It a Try!

Next time you feel stuck, uninspired, or short on time, try the 10-minute rule. Set a timer, start the task, and see where it takes you. You might find that it’s exactly what you needed to get moving—and who knows, you might even finish that project you’ve been putting off!

📌 Loved this tip? Save it to Pinterest to try later!

Have you ever tried a method like this? Let me know in the comments how the 10-minute rule works for you!

Need some further tips to help you organize your creative space? Check out this article:

Must Have Storage Solutions for Weavers

Filed Under: Motivation, Weaving Tagged With: life hack, motivation, productivity

What My Health Reset is Teaching Me: Overcoming Excuses and Finding Strength

by Kelly Leave a Comment

Five weeks ago, I never would have believed I could finish a 25-minute workout—let alone with no modifications. If I had seen this workout back then, I would have said, “That’s too hard. I can’t do that.” But today? I didn’t just do it—I felt strong, energized, and unstoppable. The secret? I didn’t start here. I started small, with just 10-minute beginner workouts. And those tiny steps added up to something life-changing.

Instead of dreading workouts, I wake up excited to move, to walk, to get as much activity in my day as possible because it makes me feel amazing. This shift didn’t happen overnight, but it’s proof that consistency and mindset matter more than we think.

The Turning Point: Breaking Free from Victim Mentality

For those following my journey, you know I’ve struggled with my weight and health for a long time. I’ll be sharing a more detailed update soon, but today I want to focus on the biggest lesson I’ve learned.

The one thing that changed everything? Letting go of my victim mindset.

For years, I told myself:

  • “I’m gaining weight because I have Hashimoto’s disease.”
  • “Perimenopause makes me too tired to work out.”
  • “I can’t exercise because it’s bad for autoimmune disease.”
  • “I’m always hungry because of my condition.”

Excuses. I had convinced myself that my circumstances were impossible to change. I genuinely believed that I couldn’t lose weight, build muscle, or feel better at my age with my health issues. And that belief kept me stuck.

But here’s the truth: I was wrong.

You Are Not a Victim of Your Circumstances

I know that everyone’s situation is unique. Some have severe illnesses, injuries, or other major challenges. I’m not saying you need to follow exactly what I’m doing. But what I am saying is that things can get better from where you are today.

It might take small changes, or maybe big ones, but the most important shift happens in your mind. The moment I stopped playing the victim and started asking, “What CAN I do?” everything changed.

Every Day is a New Opportunity

Every morning, I wake up and say, “Thank you, Lord, for a new day.” I no longer see my health challenges as roadblocks—I see them as opportunities to find better ways to live.

I still have Hashimoto’s. I still have anxiety. I’m still in perimenopause. Those things haven’t disappeared. But what has changed is how I manage them. I’ve discovered that even with my setbacks, I can make progress. I can feel stronger, healthier, and more energetic than I ever thought possible.

You Already Have the Tools—You Just Need to Use Them

Looking back, I realize that I always had the tools to improve my health. I just didn’t know how to use them. I was stuck in a cycle of self-pity, telling myself life was unfair.

But when I cleared out that negative mindset, everything became easier. The hardest part? Just getting started.

So if you’re struggling, feeling stuck, or making excuses like I was—know that you’re not alone. But also know that things can change. You don’t have to be perfect; you just have to take one step at a time.

I hope this post inspires you to look at your own journey with fresh eyes. Start where you are, make small changes, and believe in your ability to improve. You are stronger than you think.

Until next time, friends—keep moving forward!

Filed Under: Health and home, Health Reset, Weaving Tagged With: health reset, healthy lifestyle, motivation, weight loss

5 Beautiful Leno Weaving Project Ideas for the Rigid Heddle Loom

by Kelly 2 Comments

If you loved learning how to weave Leno lace on your rigid heddle loom in my previous article, you’re going to be excited about today’s post!

Leno is a beautiful, open-weave technique that adds texture and lightness to your projects. It’s a finger controlled technique that can easily be woven on a plain weave threading and with very minimal tools – all you need is your rigid heddle loom and a pick up stick!

In this post, I’ll share five gorgeous Leno weaving project ideas to inspire your Leno journey.

Let’s dive in!

1. Airy Leno Scarf

A lightweight, lacy scarf is a perfect way to showcase Leno weaving. Use a soft cotton, wool or silk for a breezy, elegant accessory. To add interest, you could use contrasting warp and weft colours. The Garden Path Scarf uses the Brook’s Bouquet weave structure, but is a lovely example of how special a lace weave scarf can look.

2. Leno Market Bag

A sturdy yet flexible string bag is a fantastic use of Leno lace! The open weave allows for some stretch, making it ideal for carrying groceries, beach essentials, books or even yarn. Use a strong cotton or linen yarn for durability. A tapestry cotton or seine twine is the kind of hard wearing yarn you need for a project like this 😉

Check out the digital download PDF pattern for The Farmer’s Market Bag for an easy to follow project.

3. Sheer Leno Curtains

Leno is a very popular structure for weaving airy, light-filtering curtains. Because you are already threaded for plain weave, a hem and top section for hanging are easy to include on each end of your Leno panel. Choose natural fibers like cotton or linen.

4. Table Runner with Leno accent

Although Leno is not really appropriate for a table runner due to its need for some sturdiness and the ability to sit flat on a table, it is very lovely when used as an accent. You could choose to weave a plain weave table runner with recurring repeats of Leno, strategically placed.

Or you could place your Leno in particularly places rather than doing a full row to create Leno sections or windows in your runner.

Coupled with an Italian Hemstich, your table runner would be a real show stopper!

5. Lightweight Leno Wrap or Shawl

A Leno-woven wrap or shawl is perfect for layering over outfits in warmer weather or draped with an evening dress on cooler nights. You could try a sheeny and soft yarn like tencel or bamboo for a luxurious drape. Using the same colour for both warp and weft would create a classy and bold statement piece. Introducing Mexican Lace (a type of Leno as demonstrated in this online class) would make a truly beautiful shawl.

There is a lovely shrug project in Jane Patrick’s The Weaver’s Idea Book on page 74.

More About Leno

Want to undertake one of these projects but you’re not sure if Leno is for you? Check out my free tutorial to get started weaving Leno on an open shed.

And if you’re interested in delving into some more finger controlled techniques like Mexican Lace, Brook’s Bouquet and Spanish Lace, you need the Lovely and Lacey Online Workshop. In this workshop we weave a sampler to practice the techniques, so there is no need to commit to a full sized project.

Leno weaving is a fantastic way to add texture, lightness, and a touch of elegance to your rigid heddle loom projects. Whether you’re weaving a breezy scarf, a sturdy market bag, or delicate curtains, this technique opens up so many creative possibilities and variations.

*This post contains some affiliate links. For more information, please see my disclosure policy.

I hope these project ideas inspire you to try Leno in new and exciting ways! Have you woven with Leno before? I’d love to hear about your favourite projects—share your thoughts in the comments below 👇

Until next time…

Happy Weaving!

Filed Under: Rigid heddle weaving, Rigid Heddle Weaving Patterns, Weaving Tagged With: finger contolled, lace weave, leno, rigid heddle weaving, rigid heddle weaving books, rigid heddle weaving patterns, rigid heddle weaving project ideas, weaving

Lojan Inkle Loom Review plus a free inkle pattern!

by Kelly 16 Comments

If you’ve been on the hunt for a reliable and well-designed inkle loom, let me introduce you to the Lojan Inkle Loom—a game-changer for weaving inkle bands! I’ve had the pleasure of weaving on this loom for a while now, and I have to say, it’s my new favourite Inkle Loom.

Let’s dive into what makes this loom so great!

What I Love About the Lojan Inkle Loom:

Sturdy Construction

One of the first things I noticed about this loom is just how well-built it is. The solid construction means I don’t have to worry about it wobbling or shifting while I warp or weave. The stabilising legs of the loom have rubber stoppers on each end, meaning the loom doesn’t slip when sitting on a table.

A clamp is included with the Inkle Loom but I have not found it necessary to use it.

Easy to put together

It’s no secret that I’m no genius when it comes to assembly. Let’s just say I’ve never shopped at Ikea and don’t intend to! 😆 Most of the time I need loom or weaving tool assembly work done, I get my husband onto the job, he is so methodical!

But I decided to have a go at putting together the Lojan Inkle Loom myself. Not only was it simple and straightforward, using the instruction book provided, but I even filmed an assembly video to make it easier for you. You can check that video out here:

Longer Pegs

This loom features longer pegs, which is fantastic for those who like to weave wider bands or use tablet weaving cards. You get more weaving space width-wise, which means less crowding of warp threads and more freedom with the size of your band.

The pegs all screw in, rather than glue in. This is brilliant for a couple of reasons:

  1. You can adjust the tension of the screws over time. This means you will never have loose or wobbly pegs.
  2. You can change the peg configuration of the loom. Remove pegs or add them where you want them and as you need them.
  3. The top peg is completely removed for tablet weaving, giving you more space to manipulate the tablets. Very smart!

Rubber Stoppers

It’s a small detail, but a really thoughtful one. The rubber stoppers on the pegs keep the warp threads secure, preventing any accidental slipping of the warp off the ends of the pegs. This is especially useful when warping and when weaving a wider band. The stoppers are removable if you need to do that.

Moveable Pegs for Different Configurations

As I mentioned, one of the standout features of this loom is its adjustable pegs. You can move them around to create different warping configurations, which gives you more flexibility in your projects. This is perfect for customizing your warp length and experimenting with different weaving setups.

Effortless Tensioning—Great for Those with Fine Motor Challenges

Tensioning the warp on this loom is almost effortless, making it a fantastic choice for weavers with arthritis or fine motor challenges. Personally, I love a drum tight tension for weaving inkle bands. Adjusting tension can sometimes be a struggle on other looms, but Lojan has designed this one to be smooth and easy to work with.

Great as a Lap Loom

If you prefer to weave on your lap instead of a table, you’ll love this loom! The Lojan Inkle Loom is lightweight yet sturdy, making it comfortable to hold on your lap while weaving. This is especially handy if you like to weave while sitting in a cozy chair.

I love to inkle weave in the evenings while seated in my comfy recliner. I place the loom between my legs and use the recliner part of the chair to prop the end of the loom on – it works beautifully.

If you would like to see me actually warping and weaving on this loom while reviewing it, check out this video:

If you like the look of the inkle band I’m weaving in the video, I’m offering a free download so that you can weave it too!

FREE INKLE BAND PATTERN CLICK HERE ⬇️

Free Inkle Band PatternDownload

The Lojan Inkle Loom has quickly become one of my favorite weaving tools. From its sturdy build to the thoughtful design details, this loom makes inkle weaving both fun and effortless. Whether you’re new to inkle weaving or an experienced weaver looking for a reliable loom, the Lojan inkle is absolutely worth considering!

Interested in owning a Lojan Inkle Loom? I am an authorised reseller for Australia, so please feel free to get in touch for more information. If you are in the US, you can purchase from The Woolery and also Revolution Fibers carry some Lojan products.

If you are located in another region, check the Lojan website for your nearest stockist 😉

Have you tried the Lojan Inkle Loom? Let me know your thoughts in the comments—I’d love to hear about your experience!

Until next time…

Happy Weaving!

*This post contains affiliate links. For more information, please see my disclosure policy.

Filed Under: Inkle Weaving, Weaving Tagged With: inkle loom, inkle weaving, lojan inkle loom

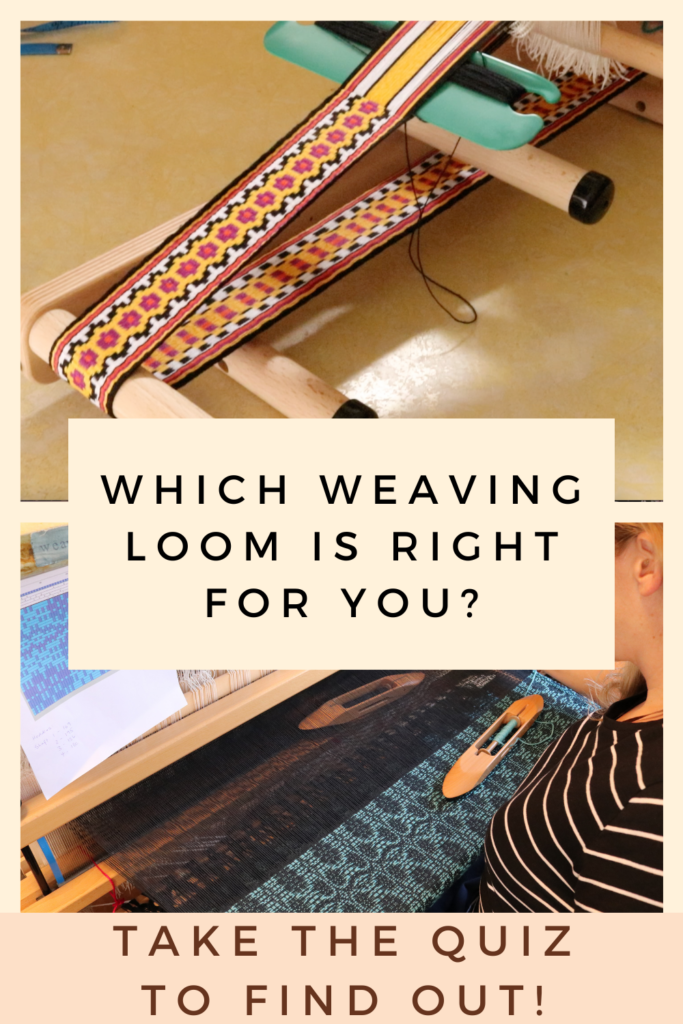
Which Weaving Loom Is Right for You? Take This Fun Quiz to Find Out!

by Kelly Leave a Comment

Choosing the right weaving loom can feel overwhelming, especially with so many options now available! Whether you’re drawn to simple scarves, intricate patterns, or sturdy woven bands, knowing which loom is right for you will make all the difference in your weaving journey.

Not sure which loom is best for you? Take this fun, interactive quiz to help you find out! In just a few quick questions, you’ll discover whether a rigid heddle, table, inkle, or floor loom is the perfect fit for your needs.

Which Loom is Best for You?

Which Loom is Best for You?

Now that you’ve taken the quiz, you have a better idea of which loom suits your weaving goals and situation. Whether you’re ready to dive into rigid heddle weaving, explore patterning on a table loom, create unique and decorative bands with an inkle loom, or invest in a floor loom for larger, more involved projects, the right choice will set you up for success.

No matter where you start, weaving is a rewarding and creative journey. There are so many other weavers just like you out there, waiting to connect, inspire and be inspired!

Check out the Online Weaving School for step by step classes in many weaving disciplines. Learn from the comfort of your own home, in your own time.

Classes are available for single purchase or if you choose a membership not only do you gain access to the full class library of over 100 classes, you also receive an invitation to join the private member’s group.

Is it time for you to delve in a join the Online Weaving School? 😀

I hope you enjoy the quiz, I would love for you to share your answer in the comments below and let me know whether it reflects you and your situation ⬇️

Filed Under: All about looms, Quizzes, Weaving Tagged With: quiz, weaving quiz

What Kind of Weaver are You? Take the quiz!

by Kelly 9 Comments

Take this simple weaving quiz to find out your weaving style, then scroll down for weaving project and loom suggestions to suit your results!

What Kind of Weaver Are You?

What Kind of Weaver Are You?

Share your result in the comments below, just for fun! 🤩

Whatever your results, the Online Weaving School can help you!

With classes for rigid heddle, inkle, table and floor loom weaving from beginner to advanced, there really is something for every weaver!

Classes are completed in your own home, at your own pace and in your own time. Choose from single purchase classes or deep dive with a membership and gain access to the private member’s group!

Weaving is a deeply personal and creative journey, and every weaver has a unique style, approach, and preference when it comes to tools and projects. If you’ve taken the What Kind of Weaver Are You? quiz, you’re probably eager to learn more about your weaving personality and how that knowledge can help you in your weaving journey. Below, we’ll explore the different types of weavers, suggest ideal weaving projects, and recommend looms that suit each style.

1. The Traditionalist

You love classic techniques and time-honored weaving styles.

Project Suggestions:

  • Handwoven heirloom table runners with intricate overshot or twill patterns
  • Classic wool blankets and throws with traditional weave structures
  • Historic pattern samplers and reproductions to connect with weaving heritage

Recommended Looms:

  • Floor Loom: A multi-shaft loom gives you the freedom to explore more complex weave structures.
  • Table Loom: Offers precision and control while still being space-friendly.

2. The Experimental Artist

You enjoy pushing boundaries with color, texture, and unconventional materials.

Project Suggestions:

  • Mixed-media wall hangings incorporating fiber, beads, and unconventional materials
  • Tapestry weaving with bold color blends and freeform shapes – anything goes!
  • Experimental fabric pieces that challenge traditional patterns

Recommended Looms:

  • Frame Loom: Provides an open canvas for unrestricted creative expression.
  • Tapestry Loom: Perfect for artistic and intricate woven designs.

3. The Practical Maker

You weave for function, focusing on useful and sellable projects.

Project Suggestions:

  • Handwoven dish towels and napkins in durable cotton or linen
  • Wearable scarves and shawls with versatile weave structures
  • Bags and purses woven with sturdy fibers like hemp, cotton or wool

Recommended Looms:

  • Rigid Heddle Loom: Versatile, easy to use, and perfect for functional projects.
  • Table Loom: Great for detailed work while remaining compact.

4. The Fiber Enthusiast

You’re obsessed with yarns and fibers, always on the hunt for the perfect texture.

Project Suggestions:

  • Handwoven scarves showcasing unique handspun yarns
  • Textured wall hangings to highlight different fiber types
  • Hand-dyed yarn samplers woven into artistic pieces

Recommended Looms:

  • Rigid Heddle Loom: Lets you experiment with different yarn textures.
  • Inkle Loom: Great for narrow woven bands using a variety of fibers.

5. The Speed Weaver

You like efficiency, quick projects, and minimal setup time.

Project Suggestions:

  • Quick-warp mug rugs in bright, fun colors
  • Chunky scarves and cowls woven with thick yarns for fast results
  • Simple table runners that can be finished over a weekend

Recommended Looms:

  • Rigid Heddle Loom: Easy to direct warp and get to the fun of weaving faster!
  • Pin Loom: For super quick and portable weaving projects.

I hope you enjoyed this quiz and list of suggestions.

Until next time…

Happy Weaving!

Filed Under: Weaving Tagged With: weaver, weaving quiz

Rigid Heddle Loom Warp & Weft Calculator

by Kelly 10 Comments

Planning your weaving projects just got easier! This free Warp & Weft Calculator takes the guesswork out of determining how much yarn you need for your rigid heddle loom. Simply enter your project dimensions, sett, and other simple weaving details, and the calculator will automatically determine your warp and weft yardage.

No more running out of yarn mid-project or buying too much—get precise calculations for warp length, weft requirements, and shrinkage allowance all in one place. Try it out below!

If you prefer the old school method of pen and paper, I have you covered for that too! Check out my free printable calculations sheet that also includes a mini class to walk you through filling out the calculations!

Please note, the calculator is not perfect, for example, the weft section at the bottom does overestimate slightly. Hopefully I can fine-tune that!

Warp Calculation Quiz

Calculate Your Warp & Weft Requirements

Width Calculation

Length Calculation

Yarn Requirements

Yarn Required for Warp

Yarn Required for Weft

Need some help to understand and use the calculator? Check out this free tutorial to get you started:

I hope this calculator is super helpful and helps you get started on your weaving project quickly and easily!

Until next time…

Happy Weaving!

Filed Under: Rigid heddle weaving, Weaving Tagged With: rigid heddle weaving, rigid heddle weaving calculator, warp and weft calculator

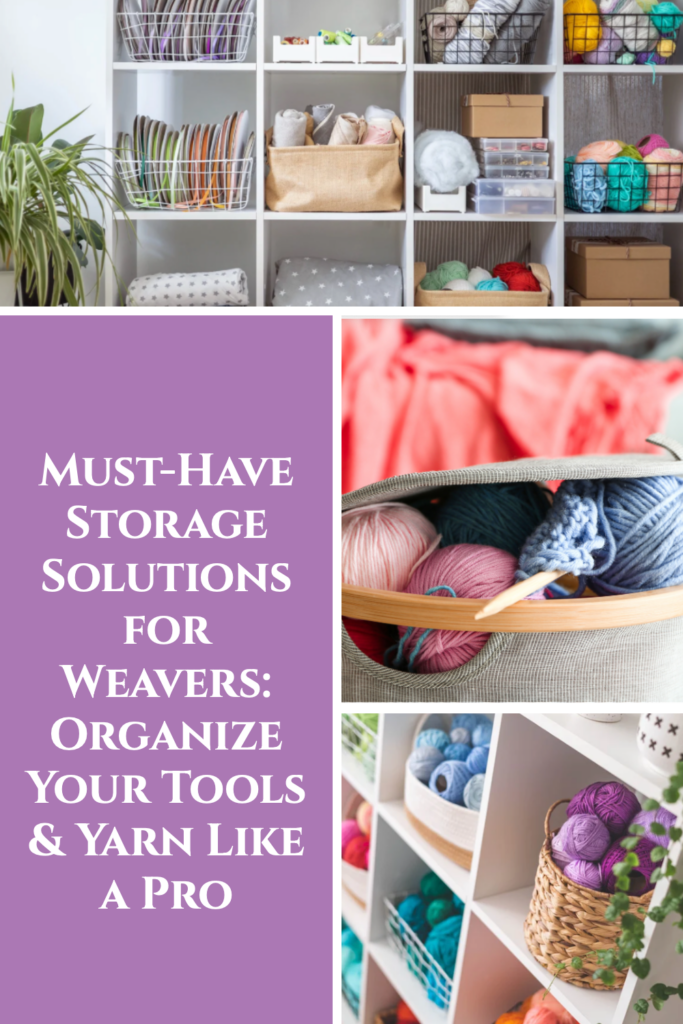
Must-Have Storage Solutions for Weavers: Organize Your Tools & Yarn Like a Pro

by Kelly 12 Comments

If you’ve ever found yourself rummaging through a tangled mess of yarn or searching for that one shuttle that always seems to disappear, you’re not alone. A cluttered workspace can slow down your creativity, but with a few must – have storage solutions, you can transform your weaving area into an organized haven.

Whether you have a dedicated studio or just a cozy corner, these storage tips will help you maximize your space and keep everything within easy reach.

When you look at your weaving space, try not to think of it as “too small or limited” but rather look at the availability of space and how it can be arranged to be more productive and less frustrating.

Let’s dive in!

Smart Yarn Storage Solutions

Yarn has a way of multiplying when you’re not looking (seriously, where does it all come from? 😆) We all have smaller lengths of yarn leftover from larger projects, and if you’re like me and hate to waste anything, you also have thrums (warp ends left on your loom after finishing your project) here, there and everywhere! Keep your stash tidy with these ideas:

  • Wall-Mounted Shelves & Pegboards – Not only do they free up space, but they can also make your yarn collection look like a work of art!
  • Clear Storage Bins & Baskets – Sort your yarn by color, fiber, or project to make grabbing what you need a breeze.
  • Over-the-Door Organizers – Perfect for small skeins, yarn scraps, and those odd little balls you just can’t part with.
  • Stackable Drawers or Cubbies – Keeps your yarn dust-free while still letting you see what you have at a glance.

Organizing Weaving Tools & Accessories

Small tools are the easiest to lose (hello, missing threading hook!) Here’s how to keep them all in check:

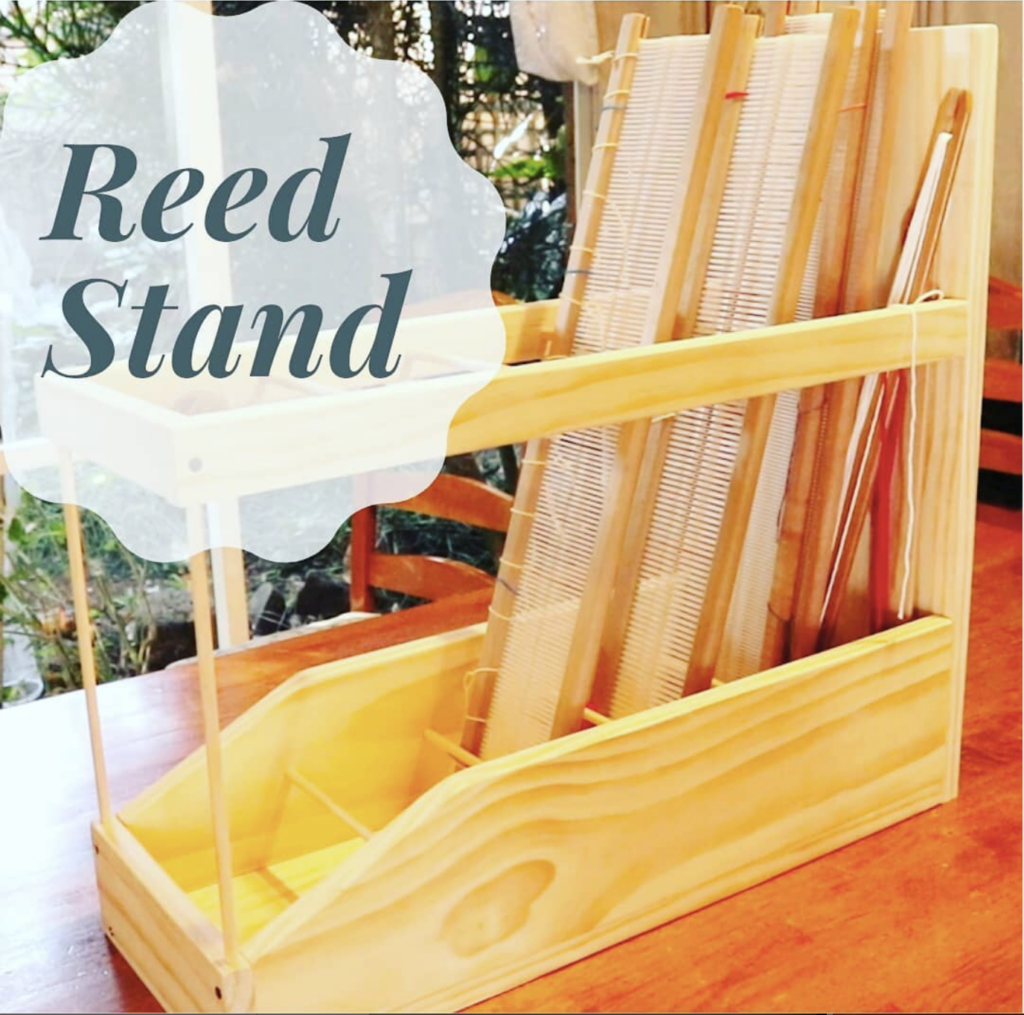
  • DIY Heddle/Reed Stand – This is a great way to store rigid heddles and pick up sticks and doesn’t take up a lot of space. I have some free instructions available here for a DIY reed stand.
  • Magnetic Strips or Pegboards – A great way to keep scissors, heddle hooks and tapestry needles handy.
  • Drawer Dividers – Keep small tools and accessories from turning into a jumbled mess.
  • Portable Tool Caddies – If you like to weave in different spots, having a grab-and-go caddy can be a lifesaver.
  • DIY or Repurposed Storage Ideas – Use mason or other decorative jars for bobbins, utensil holders for shuttle storage, or tackle or craft boxes for beads, embellishments and smaller tools.

Loom Storage & Space-Saving Ideas

Looms take up space, so it’s important to choose an appropriate sized loom for your situation, but with a little creativity, you can store them more efficiently:

  • Foldable & Compact Looms – If you’re tight on space, a folding loom can be a game-changer. Some floor looms, like the Louet David have a folding back beam for storage. Others, like the Ashford Table Loom have a collapsible castle.
  • Wall Hooks or Coat Racks – Store frame looms and rigid heddle looms vertically to free up floor space.
  • Rolling Carts or Trolleys – Keep smaller looms and weaving supplies mobile and organized. These are just so handy to wheel around and tuck away when not in use. You can choose how many tiers your trolley has, depending on how much space you need. I love to keep all my “close at hand” tools on the top tier to move between looms or workspaces.
  • Closet and Built in Storage – If you need to tuck a loom away between projects, a closet can be ideal.

Keeping Your Weaving Space Neat & Functional

A tidy workspace means more time for actual weaving! It’s also way more inspiring to walk into a clean and tidy space than it is to try to weave amongst chaos. Here are some extra tips:

  • Labels – Trust me, future-you will be grateful when you’re looking for that specific skein or tool. At the least, keeping the labels from your yarn will be so helpful, you think you will remember the exact fiber content, weight and color lot of each yarn but you really don’t!
  • Create Work Zones – Having designated areas for warping, weaving, and finishing can streamline your process. This helps to keep designated areas clear so that they are useable when you want to use them.
  • Declutter Regularly – We all hold onto scraps and extras, but doing a periodic clean-out keeps your space feeling fresh and inspiring. Vacuuming, sweeping and wiping down surfaces is not the fun part of being creative, but there is something about shiny surfaces that makes my heart sing! 🫶

Storage Hacks for Small Weaving Studios

Although I am now blessed with an actual studio space it wasn’t always that way! My first “studio” was a corner of a shared living room in our home. Even though I dreamed of having a studio of my own one day, I was grateful for that corner! It gave me a place to be creative and taught me the value of tidiness and organisation.

My first “studio”.
  • Multi-Use Furniture – Foldable tables, storage ottomans, and wall-mounted desks can double your workspace without taking up extra room.
  • Hanging Baskets or Floating Shelves – Perfect for keeping supplies off the floor while still within reach.
  • Maximize Vertical Space – Use the walls for shelves, pegboards, or hanging storage solutions.

To learn more about specific looms that are suitable for smaller spaces and additional organizational tips, check out this article.

*This post contains affiliate links. For more information please see my disclosure policy.

How would you like a free printable checklist to help you get your weaving space organized?

Weaving Space Organization ChecklistDownload

A well-organized weaving space isn’t just about aesthetics—it makes weaving more enjoyable and stress-free. With these storage solutions, you can spend less time searching for supplies and more time doing what you love.

What’s your favorite storage hack for keeping your weaving space tidy? Share your tips in the comments! And don’t forget to pin this post on Pinterest so you can come back to it later!

Until next time…

Happy Weaving!

Filed Under: Inspiration, Weaving Tagged With: creative space, organizing, weaving studio

  • « Go to Previous Page
  • Page 1
  • Page 2
  • Page 3
  • Page 4
  • Interim pages omitted …
  • Page 115
  • Go to Next Page »

Primary Sidebar

Hand crafted boat shuttles

Categories

Archives

Meta

  • Log in
  • Entries feed
  • Comments feed
  • WordPress.org

Copyright © 2025 Kelly Casanova Weaving Lessons on the Foodie Pro Theme