• Skip to main content
  • Skip to primary sidebar

Kelly Casanova Weaving Lessons

  • Hi! I’m Kelly!
    • Disclosure
  • Online Weaving School Class Index
    • Common account issues
    • Common technical issues
    • What do I get with a membership?
  • New to rigid heddle weaving? Start here!
    • Never heard of the rigid heddle loom?
    • How to weave neat edges on the rigid heddle loom
    • Rigid heddle weaving
    • Rigid Heddle Weaving Patterns
  • Patterns
  • Subscribe

Weaving

Rigid Heddle Weaving Patterns for Beginners

by Kelly 26 Comments

It is sometimes presumed that the rigid heddle loom is a plain weave loom. This is because, at it’s most basic, it is a two shaft loom, and plain weave is woven on two shafts.

While it’s true that plain weave is often woven on a rigid heddle loom, it’s capabilities for weaving patterns can be surprising (and very pleasing to the newer weaver!)

Plain Weave

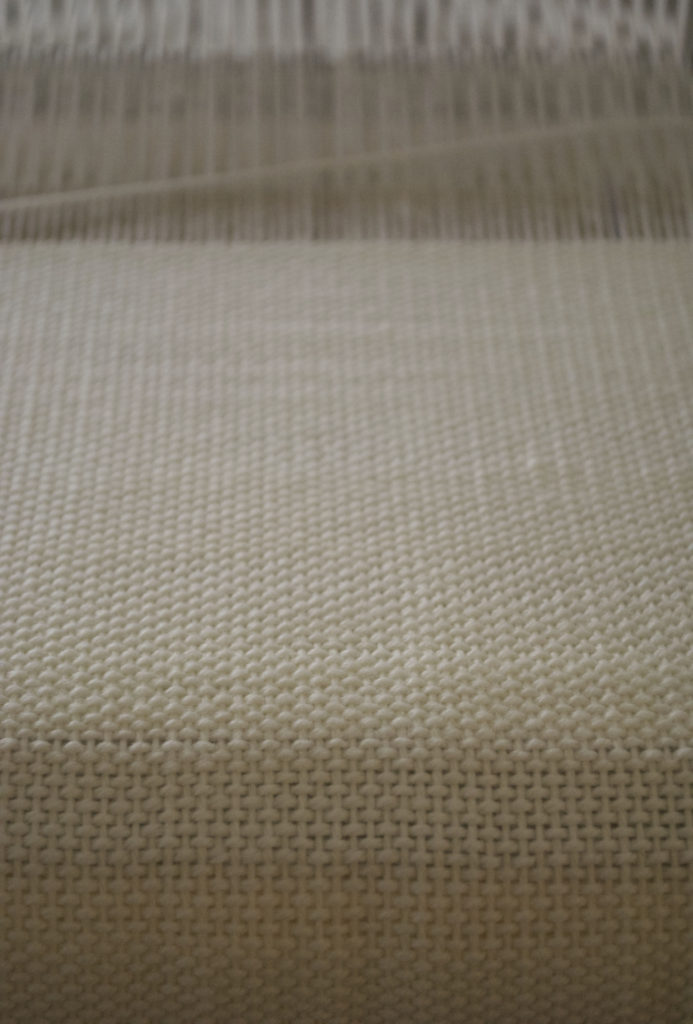
Plain weave is very simple on a rigid heddle loom and easy to set up. Thread one slot and one hole alternating for the width of your project, then when weaving alternate the heddle between the up and down position, and you’re on your way!

*This post contains affiliate links. For more information, please see my disclosure policy.

After a plain weave project or two (or three or four!) weavers often want to know “what is next?” Can I do anything else?

The question that I have come to challenge myself with more in recent times is “is there anything I can’t do on a rigid heddle loom?” Yes, it’s really that capable.

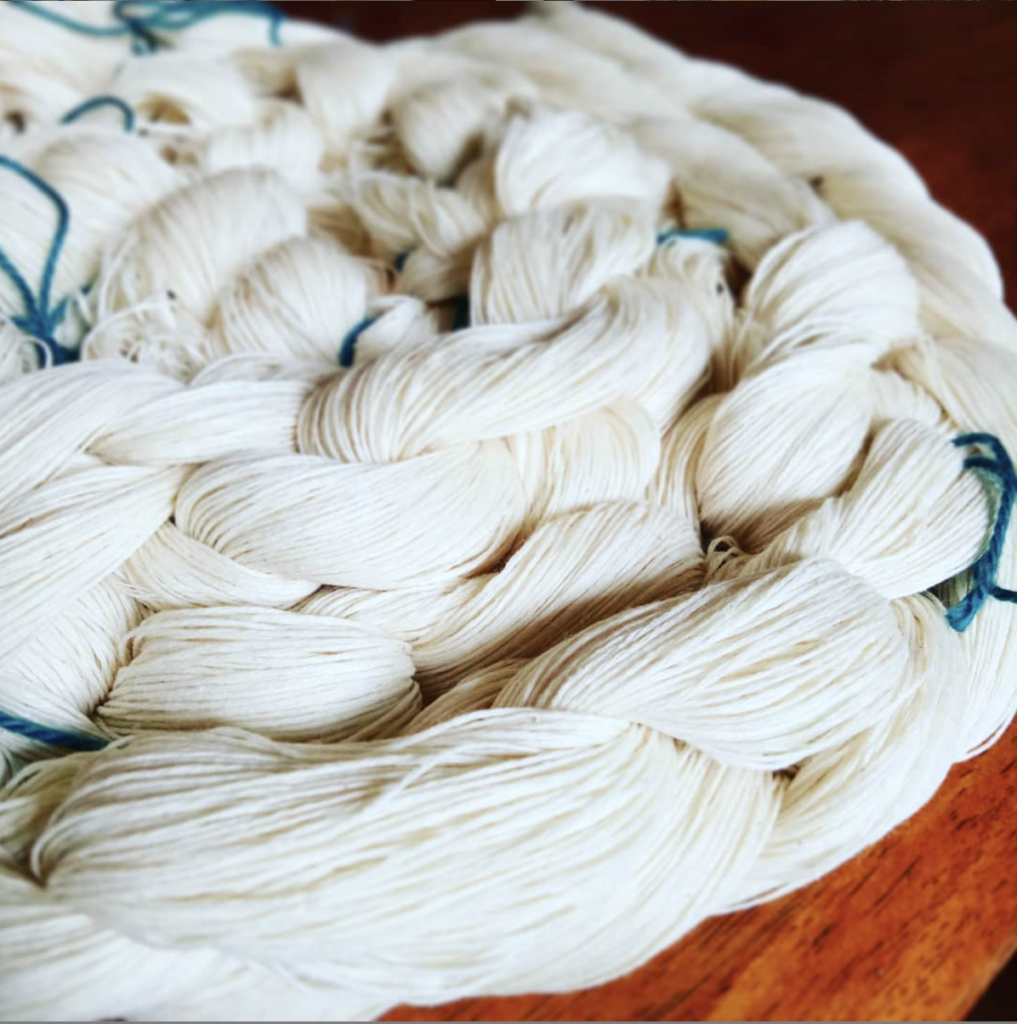
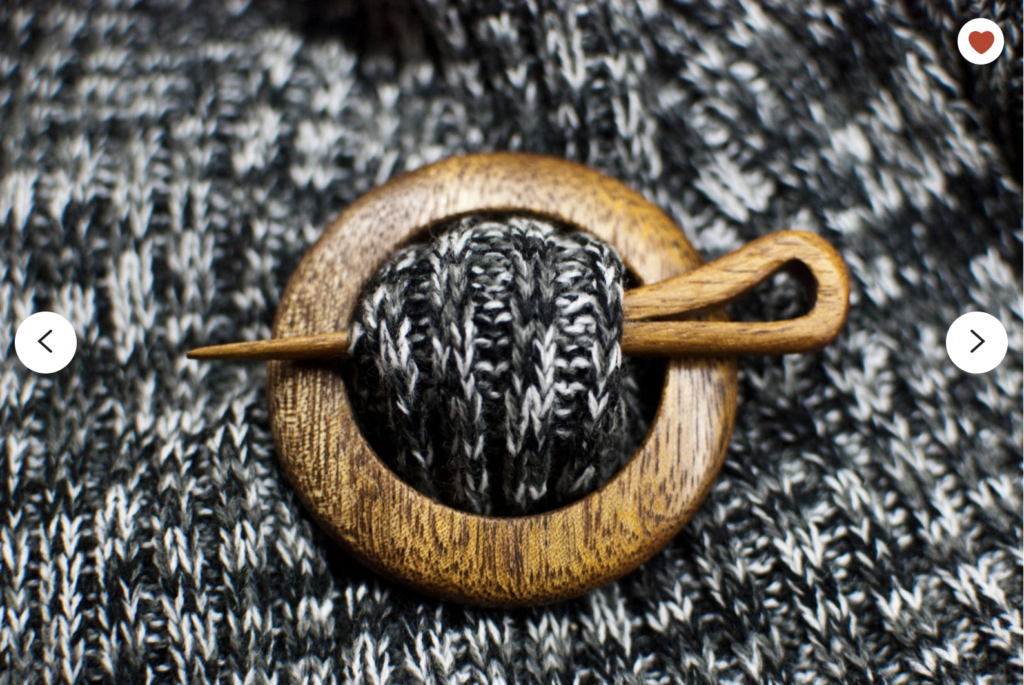
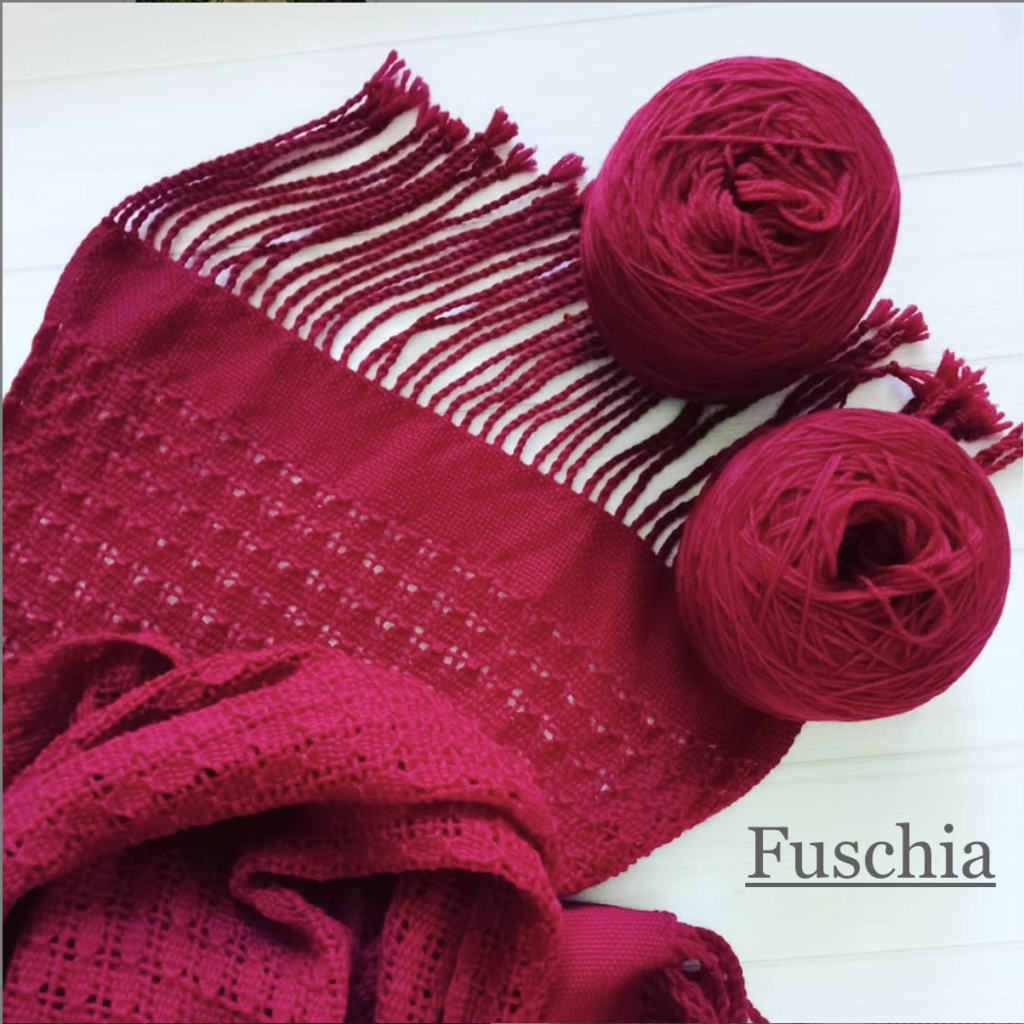
An easy way to jazz up your plain weave so that it looks patterned is to use a variegated yarn. Whether you dye your own or buy a commercially dyed variegated, it’s a really cool effect that makes the plain weave look much more involved.

You have two options with this technique. You can either warp with the variegated yarn and weave with a solid colour or warp with the solid colour and weave with the variegated.

Plain weave using hand dyed variegated yarn

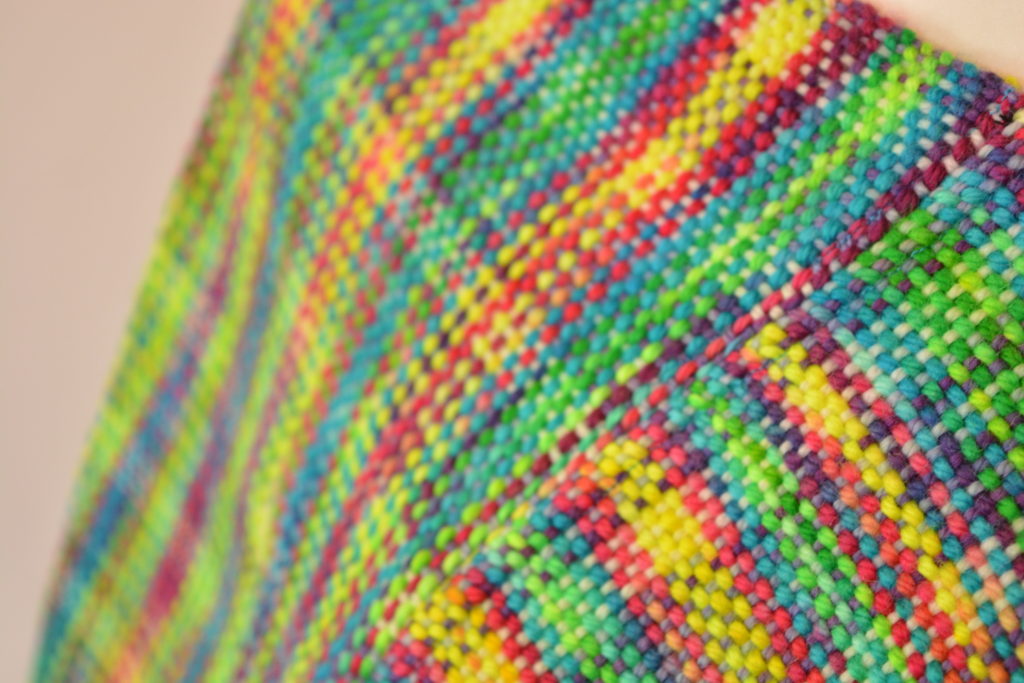
Here are a couple of examples of commercial variegated yarns:

Sugar n Cream ombre cotton

Lion Brand Landscapes

Red heart Jellybeans

Then there is clasped weft! Once again, we have plain weave but with the use of colour and some clever techniques, you can create distinctive and unique patterns. Pairing variegated and solid yarns works very well for clasped weft.

It lends itself beautifully to almost any woven items you can think of, so warp up and start experimenting!

Here is a beginner’s video on where to start with clasped weft:

I also have videos on clasped weft with 3 colours and 4 colours, but if you’re just starting out with it, I recommend you go through this one first to get the concept set in your mind.

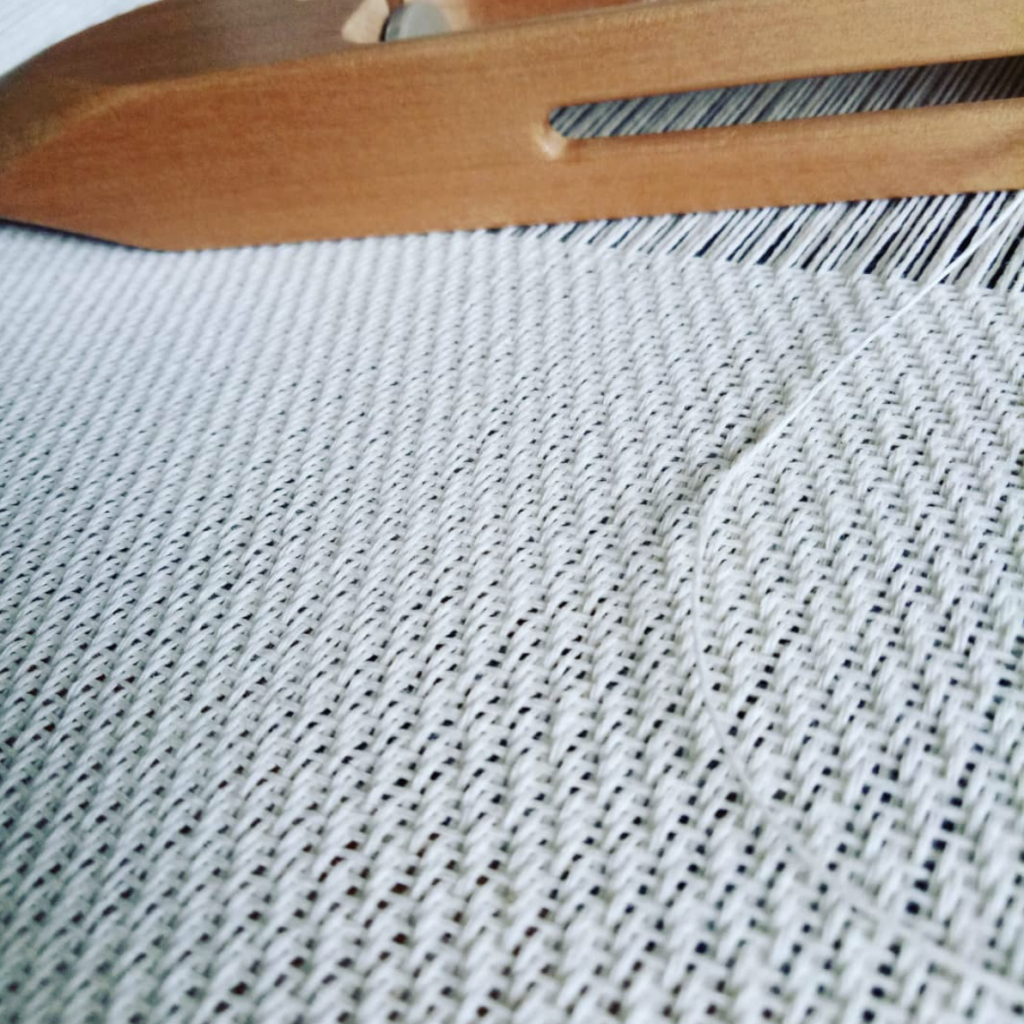
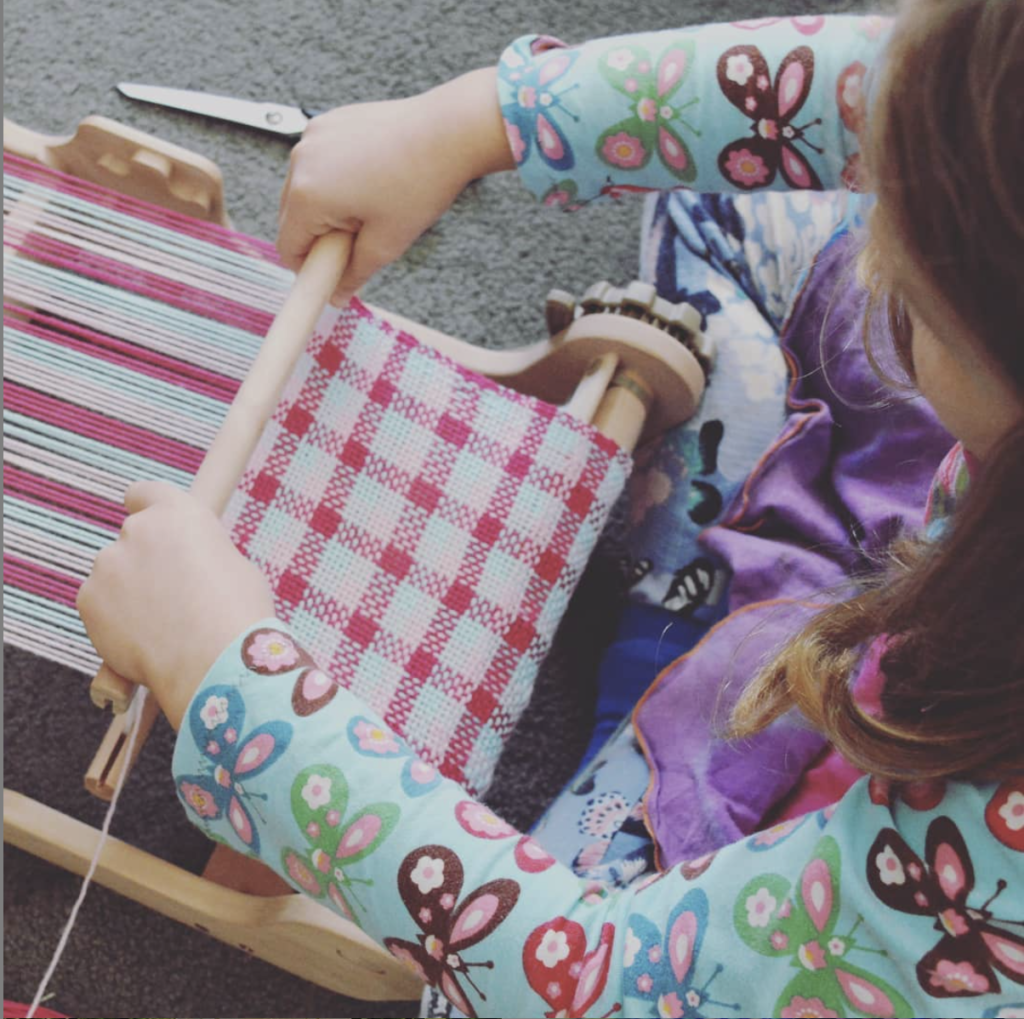
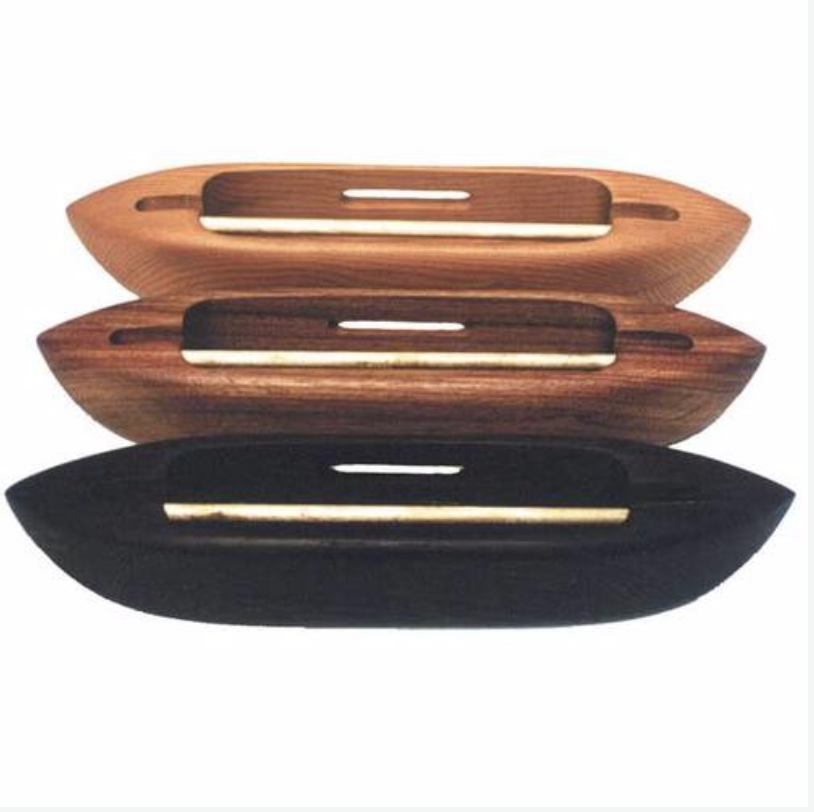
The most logical next step up from plain weave is the introduction of pick up sticks. These are simple, effective and inexpensive flat sticks of timber with usually tapered ends that assist in the picking up of the threads. Some people who are handy with wood even make their own.

The things I really love about pick up sticks are:

  1. You don’t really need to know what you’re doing in order to start using them.
  2. They are a very affordable way to change and advance your weaving skills.
  3. They can radically change your woven piece.

Check out this video or this detailed article on how to use pick up sticks:

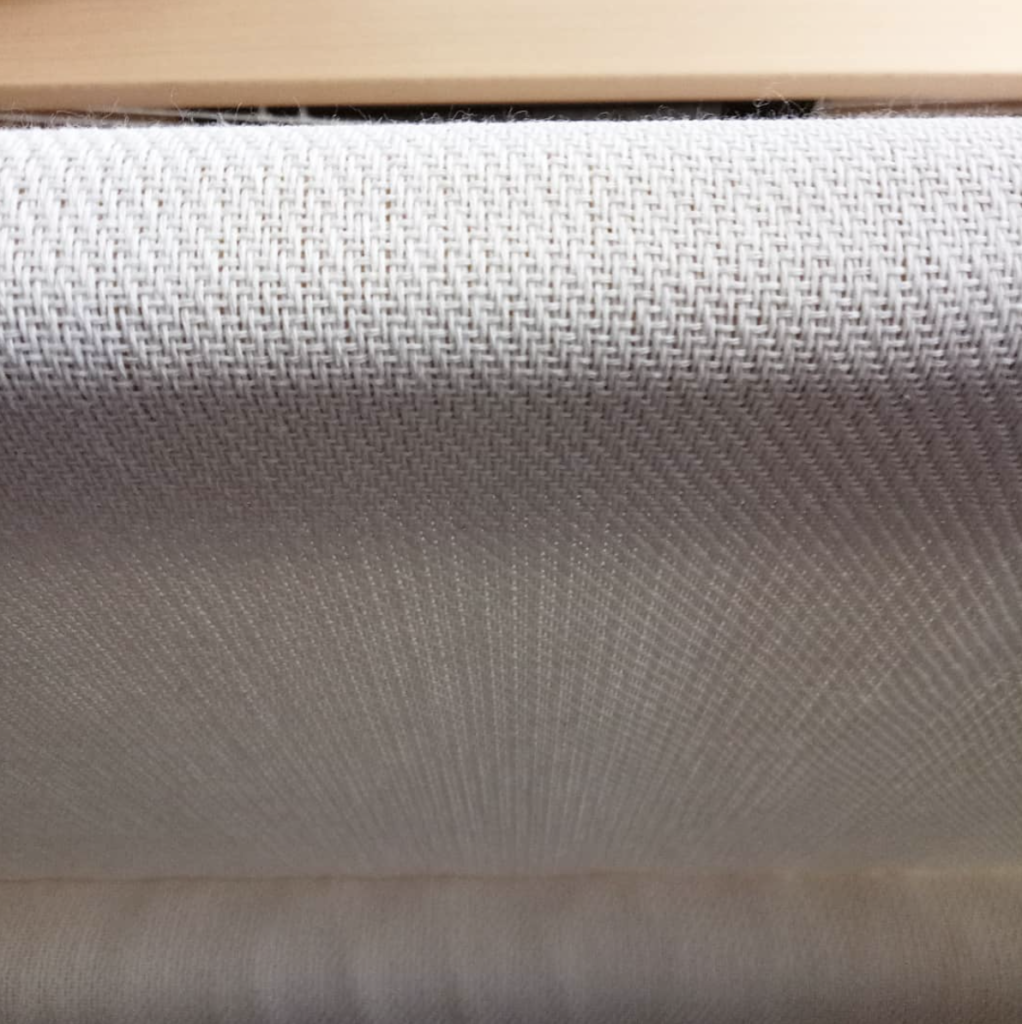
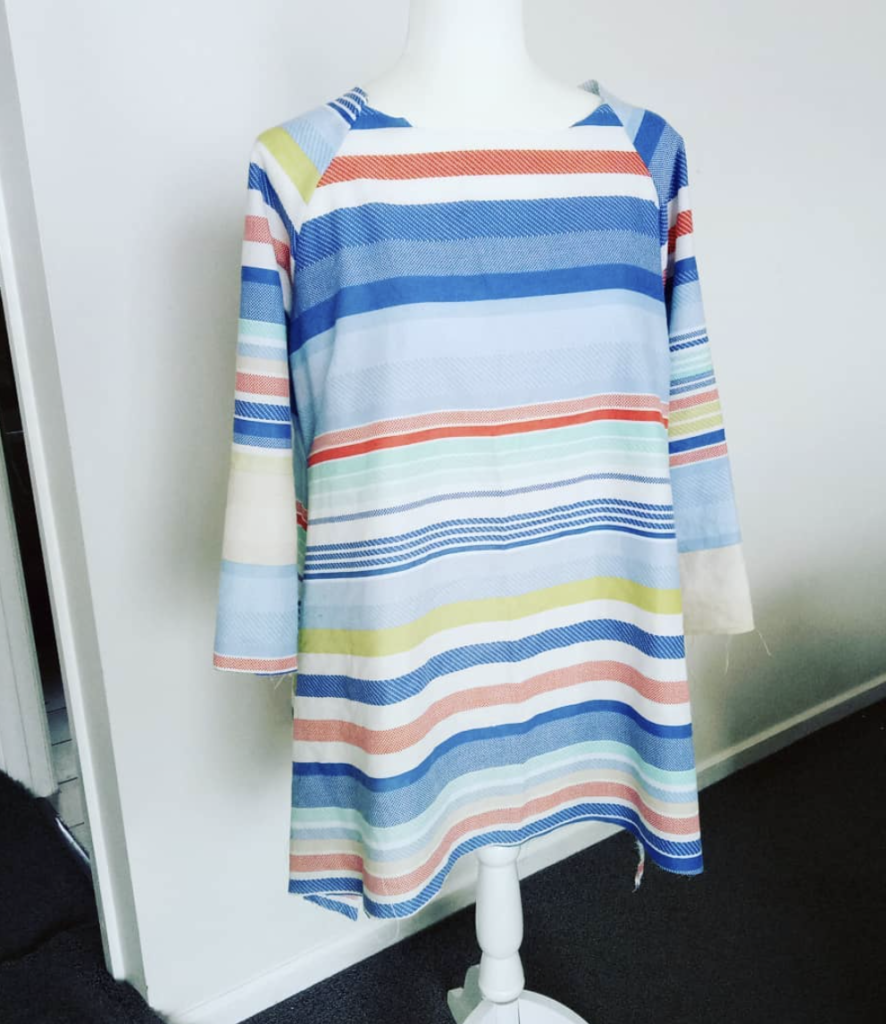
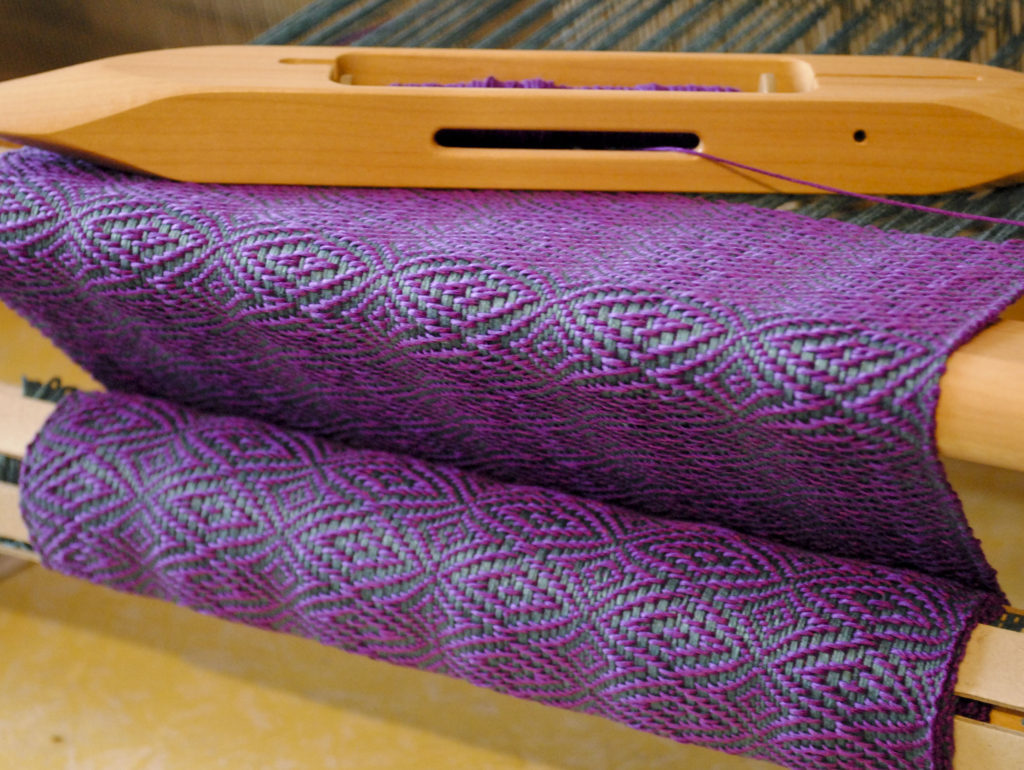
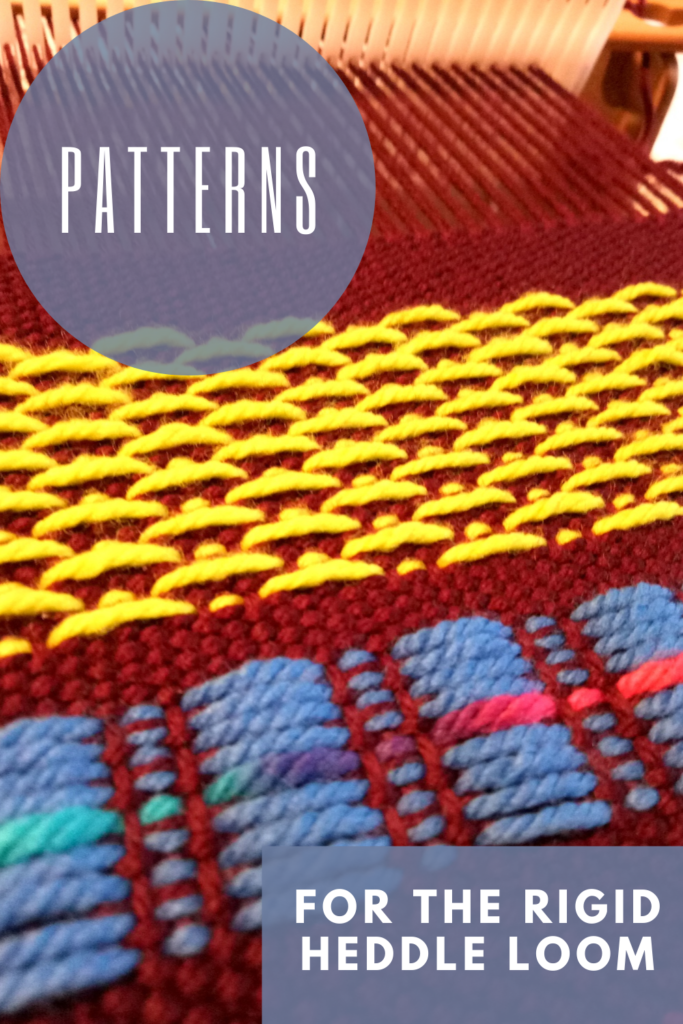
There is just so much you can do with one, two or more pickup sticks. Besides picking up behind the heddle to weave patterns, you can also pick up at the front to weave a type of overshot. This is where your pattern will sit on top of the background weaving rather than being incorporated in (this is called a float). If you arrange your floats and colours in particular ways, you can weave all sorts of cool patterns!

I have a lot of these overshot style videos on Youtube, but considering the Christmas theme is so loved, here are a couple of the most popular videos:

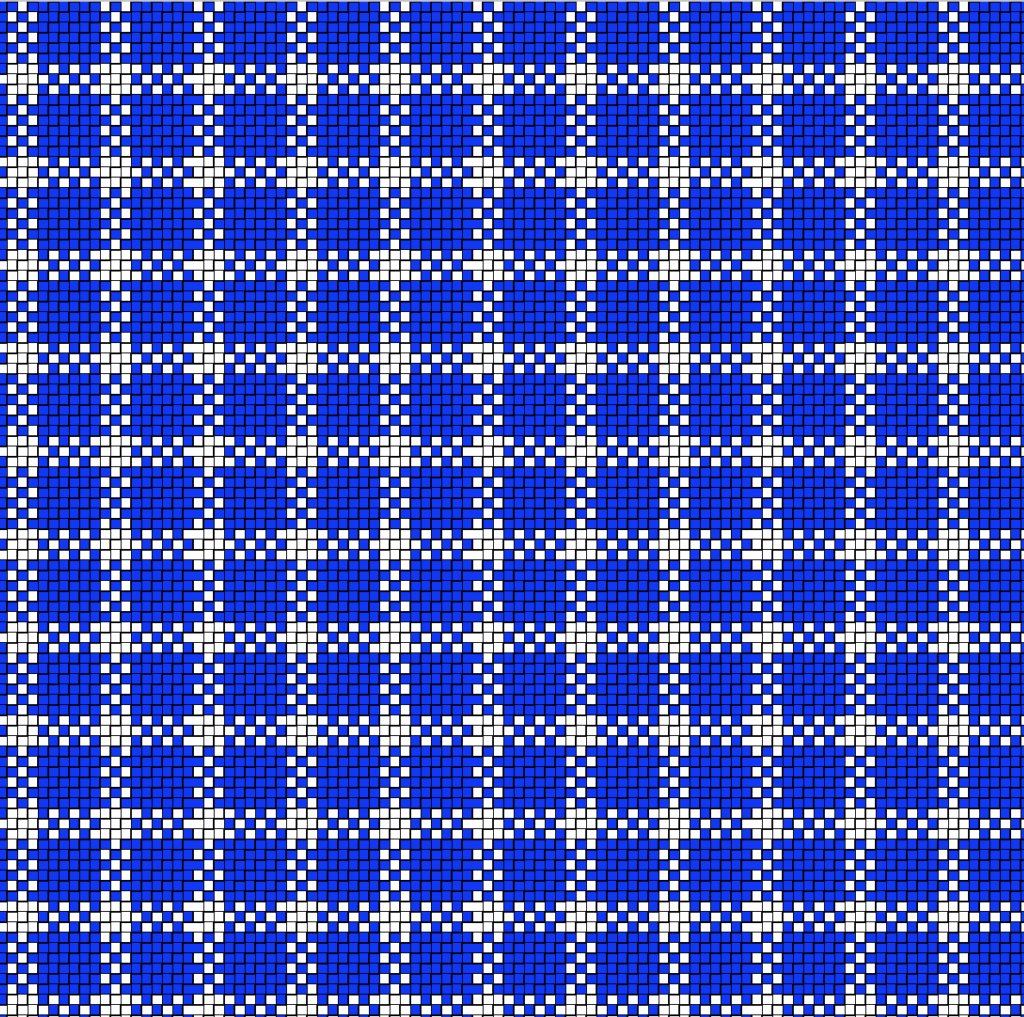
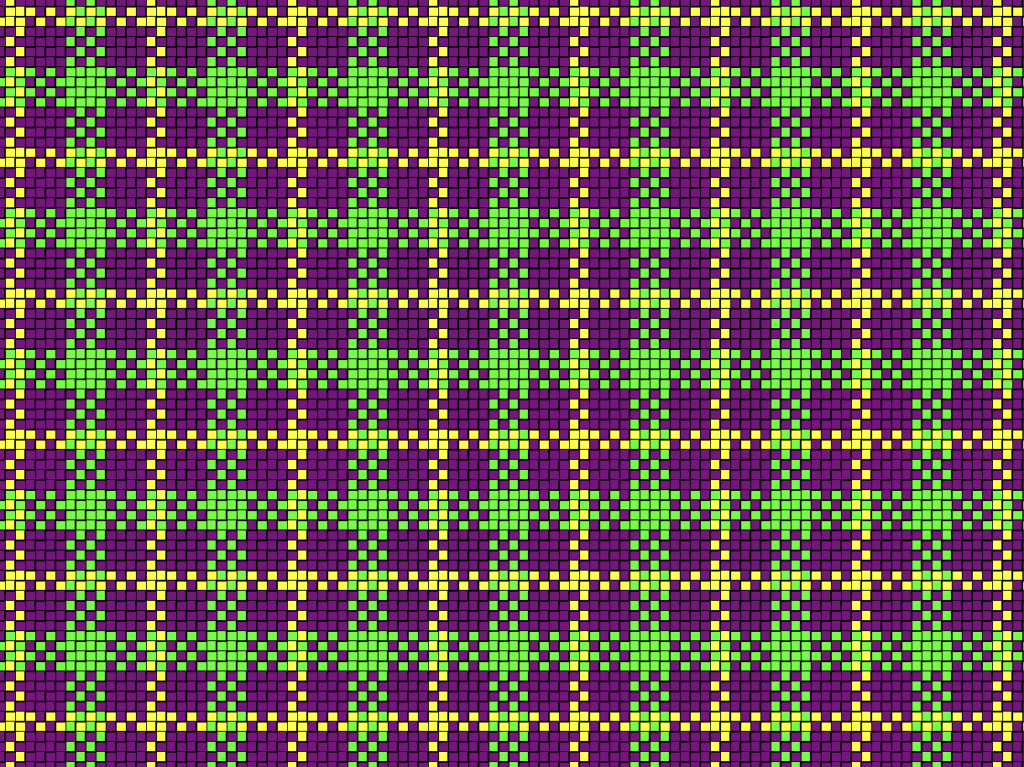
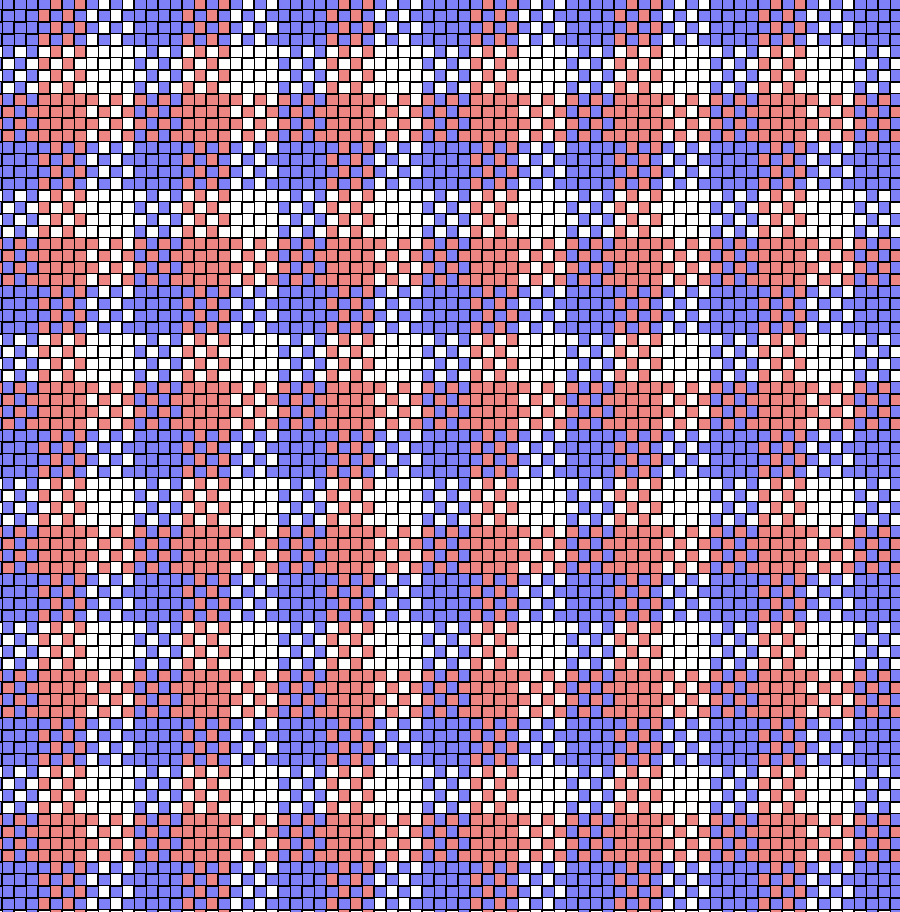
This is intended to be a brief overview of pattern weaving on a rigid heddle loom, there is so much more! I haven’t touched on Colour and Weave here, as it deserves it’s own post. You can read more about Colour and Weave in this article. I have, however written about plaid and made some free drafts for your use. You can read that post here.

You can find even more resources for weaving more stunning patterns in this post where I take you through techniques like doubled weft, pick up rows, staggered pick up, dots and butterflies. So many possibilities!

I do hope that this has given you some ideas on where to start when you want to level up from plain weave.

If you are just starting out with rigid heddle weaving, I highly recommend my beginner’s online class From Woe to Go! It takes you step by step through everything you need to get up and weaving.

Until next time…

Happy Weaving!

Filed Under: Rigid heddle weaving, Weaving Tagged With: rigid heddle weaving, rigid heddle weaving patterns

Heritage Crafts and Skills Book Review

by Kelly Leave a Comment

My thanks to Pen and Sword Books for asking me to review Lynn Huggins- Cooper’s new book “Spinning and Weaving”.

Disclaimer – Although I received no payment for this post, Pen and Sword generously sent me a copy of the book for free.

This is not an instructional book, but an historical account of spinning and weaving throughout various periods in time.

It begins with a discussion of heritage crafts in the UK and their general decline, something which is obviously close to the author’s heart. It is quite focused on the history of spinning and weaving in the UK, particularly in later periods of time.

Starting with ancient times, the reader is taken on a journey of what is know of spinning and weaving and the significance of these crafts on our civilisation. From the basic tools of drop spindles and homemade looms, to the advances in technology, which ultimately completely changed the cloth industry, each chapter is a fascinating insight into times gone by.

I found so many interesting tidbits to ponder over whilst reading this book. I also learned many things I didn’t previously know or had not really thought about. For example, the massive impact that the mechanisation of spinning and weaving had on the poor, who relied so heavily on the slow, skilled process of basic wheels and looms to earn their bread. How the demand for commercially produced fabric impacted lifestyles and how fabric was viewed.

It is sad to know that the spinners and weavers who were so valued and made first class fabric for wealthy folk were made obsolete by machines. And yet, was it fair that only the rich could afford handspun and woven cloth?

What pleased me most in the reading of this book was the realisation that, perhaps, in a way, things have come full circle. Yes, we live in a very commercialised world but it is also a world full of opportunities. We still have machines producing millions of yards of cloth every year, but we also have people like you and me, who have chosen to take up our wheels and looms in pursuit of authenticity, quality and satisfaction in our work. And thankfully, more and more all the time, we have an audience who appreciate what we do and who also desire quality, slow and beautifully made unique garments and pieces.

The book finishes off with some inspiring interviews with fibre artists (I noticed there was even an Australian included!)

I feel so blessed to be a part of something that many of our ancestors (my ancestors were English) earned their living by and now, we have the luxury of choosing to do. It’s a wonderful thing to be able to practice these crafts and pass them on to the next generation.

“Spinning and Weaving” is available from the Pen and Sword website and also on Amazon (affiliate link).

Until next time…

Happy Weaving!

Filed Under: Reviews, Weaving Tagged With: bookreview

My completed Clothtober project!

by Kelly 20 Comments

I’m so excited to be finished! A little overdue perhaps, but isn’t the nature of slow cloth?

I went through quite a few of the weaving details like yarns and weave structure in last week’s post, so please check that out if you’re interested (and read of my nightmare-ish warp!)

*This post contains an affiliate link

I’m happy to say that the actual weaving was fairly plain sailing and enjoyable with the simple 1&2, 2&3, 3&4, 4&1 order of treadling.

So, once removed from the loom I had a lovely long length of delightful cloth without serious errors (I’m happy to say that the double threading error referred to in the last post does not even show in the finished garment!)

I made a lovely big vat of indigo and tested it with the neck facing pieces I had cut out of a light commercial cotton. The colour was even better than expected, so I felt very good about submitting my long piece of cloth to the vat.

Have you ever dyed with indigo? It is a wonderful, peaceful and relaxing process. While I was standing at my laundry sink, I had the door next to me wide open and a blackbird hopped right up beside me. He didn’t even notice I was there! I thought to myself “perhaps this is the very best way to live. Quietly, slowly, making beautiful things”. It certainly struck me as a beautiful moment in time.

I took my cloth outside (indigo is very messy!) to let the magic happen. As oxygen hits the cloth, it turns from a glorious green to a wonderful blue. The blue is much darker when wet, so I took that into account. I wanted a dark blue. So, I went back to the vat for a total of 3 dippings. On the last dip, I left the cloth sitting in the vat for at least half an hour.

I absolutely love the colour in this shot. I would have preferred that it stay this dark and rich as it dried, but alas that was not the case. I still think it came out a beautiful colour anyway. That is another of the charms of indigo, even if you obtain a very light colour it is bound to be a really beautiful blue – I don’t think an indigo vat can produce anything ugly!

As an aside, I have just begun work on my Journey to Japan course. One of the focuses of the course will be learning to dye with indigo, so if that interests you, be on the lookout for that.

The next step once my fabric was dry was to cut out the pattern. I’m not scared of cutting my handwoven fabric as it all turns out well as long as you take the right precautions. For this project I cut the pieces as I would for commercial fabric but got them quickly to the serger without disturbing the fabric too much, and it was fine. If you’re worried about cutting your handwovens, you may want to check out this video:

There was a hitch with cutting out the pattern though. The fabric had shrunk more than I calculated for. My front and back pattern pieces didn’t fit the folded fabric! Aaaaagh!!

These are the things that feel horrible at the time, but later I am really grateful for. Why? Because I learn! Not only do I learn what to do by thinking about all the possibilities, I also learn that I might be more capable than I thought, which is a great confidence booster! So, I ended up with some odd little shapes and pieces that I tacked on here and there to make up for the lack of width. And it worked!

I now have a comfortable, special garment that fits really well. Unfortunately we are coming into warmer weather here in Australia, so I won’t get much wear out of it this year, but I expect it to last many, many years. If the indigo fades at all, I’ll do as the Japanese do and re-dip it. Only I know the work that went into making this, but that makes it all the more rewarding.

The little voice in me says that the neckline is too wide and so are my hips. But I told the little voice to shut up please, I want to bask in the joy of having woven, dyed and sewn a garment from scratch just for me.

I don’t know if any of you decided to make your own garment for Clothtober, but I’m thinking I need to make this an annual thing, even if it’s just to push myself to do something just for me again.

Until next time…

Happy Weaving!

Filed Under: 4 shaft weaving, Clothtober, Floor Loom Weaving, Inspiration, Sewing, Weaving Tagged With: 4shaftweaving, clothtober, hand woven, handmade, indigo

Help! My edges are wonky!!

by Kelly 12 Comments

The single biggest focus I’ve noticed that new weavers have is achieving straight edges. And not without reason. Let’s face it, how neat and professional a woven scarf looks depends a great deal on whether the edges are straight and attractive.

Let me start out by saying that I think there is maybe a little too much focus on the edges. I see so many newbies lamenting their weaving because the edges are not perfect. It would be a pretty rare event for a first time weaver to achieve near perfect edges. For most weavers, the problem improves very quickly with a bit of practice and knowledge of a few handy techniques.

There are some essentials to achieving neat edges.

  1. Correct warp tension
  2. Correct weft tension

Let’s talk about the warp tension first. Something that is quite common is that the weaver finds the tension is uneven across the warp, and typically the middle of the warp will be looser while the edge warp threads are tighter. If the edge warp threads are either too loose or too tight, the woven edges will be uneven and lumpy looking.

Combatting this problem begins when you are rolling the warp onto your loom. I’m referring here to direct warping a rigid heddle loom. If possible, have a helper to hold the end of the warp while you stand at the back of the loom and roll it on. The helper maintains the tension and makes the process easier. If you don’t have a helper, you can either weight the warp as it is rolled on or, if you are more experienced, hold the warp yourself but pay particular attention to maintaining even tension.

Then, when you come to tying or lashing the warp ends onto the front apron rod, ensure you have as consistent as possible tension across the width of the warp. I always say at this point, it doesn’t have to be tight – just consistent. The warp will tighten up when you advance the warp.

If all of this feels a bit advanced to you, I’m sure you would benefit immensely from my From Woe to Go – Beginner Rigid Heddle Weaving course.

Now, about the weft tension. This refers to how much tension you place on your weft thread as you weave it. Too much tension, and your edges will pull in. Too little tension and you will have loose loops sitting at the edges of your weaving. Neither of these are ideal. Over time, I’ve developed my own technique that I think is just about a perfect balance and that consistently gives me very neat edges. You can view the video for that here:

So far I’ve only been referring to edge maintenance for plain weave projects. If you are doing something with pick up sticks (which changes the weave structure) you will need a slightly different approach to neat edges and I talk about that in this post. There is also a companion video so that you can see the technique in action:

Floating selvedges are also an option and basically means that you add an extra end on either side of your warp that is not actually part of your warp, but becomes part of the finished weaving. I always use floating selvedges on my floor loom unless I’m weaving plain weave and it makes a huge difference. I have a member’s only class on how to set up floating selvedges over at my Online Weaving School.

Another instance where you may employ a different technique for your edges is when you are using more than one weft colour and need to decide whether you will cutting each time you change colour or whether you will carry the yarn up the sides. I also have a video demonstration of how to do that!

Another trick to try is to arrange your threading so that both of your edge warp threads are threaded in holes instead of one in a hole and one in a slot. The aim of this technique is to match the tension of the edge threads on both sides for more consistent looking edges.

I have a video tutorial on this method to show you exactly what to do:

And lastly, yet another technique to try (I told you it’s a popular topic!) is what I call my Lifeline technique. This works in a similar way to floating selvedges, except that you use fishing line and remove it when the weaving is finished. I have heard from a lot of happy weavers who say this techniques saved their project. Here is the video demonstration:

I hope this discussion has been a great help to you. Do you struggle with weaving neat edges? Let me know in the comments.

Until next time…

Happy Weaving!

Filed Under: Rigid heddle weaving, Tutorials, Weaving Tagged With: neatedges, weaving success

Clothtober progress

by Kelly 3 Comments

I would rather be here to tell you that my Clothtober project is completely finished, but alas, life is not like that. Life is busy, distracting and full.

So, instead of showing you my finished project I am here to update you on my progress. Because I have made progress, and sometimes that is more important than the finish line.

I started with a 10/2 weight cotton. I wanted a light weight and soft fabric for my finished garment. I had woven samples with Full Circle Australian Cotton previously and felt that it was the perfect fit for this project.

I decided on a 4 shaft, straight draw twill for a couple of reasons.

  1. It’s an easy and familiar threading pattern that doesn’t take as long to thread as 8 shaft straight draw.
  2. As I’m using all one colour, I didn’t want to weave a pattern that would not be seen all that well after dyeing.
  3. I wanted a really good drape for my garment, and felt that twill would be more suitable than plain weave.

I chose a sett of 25 ends per inch, meaning that for my 10 dent reed I sleyed 2,3. If that is gobbledygook to you, it means that I placed 2 warp threads in the first reed space, then 3 in the next, then back to 2 and so on. I did this because I only have a size 10 reed for my floor loom.

As soon as I had my warp chains on the loom (800+ ends!) I started having trouble. Was it the yarn or was it me? Hmm, probably a mixture of both. As mentioned, I have used this yarn before, but only as a short, narrow warp for a sampler. This one is full width on my 90cm loom. I had so many snags and tangles, and by the time I was finally ready to weave I had quite a few broken threads. Certainly, this 10/2 cotton is very fine and perhaps not as strong as the regular 8/2 cottons I’m accustomed to.

So, the warping took a really long time and I got to exercise a lot of patience. I also learned (yep, still learning with every single project!) that this yarn may be more suitable next time as a weft if I intend on a wide warp again.

If you have ever struggled with a difficult warp, you know that special moment of being threaded, sleyed, tied on and ready to weave. Oh, the joy!

I noticed after a couple of inches of warping that I had doubled up on ends in one of the reed dents. This means there is one small section of fabric that has a thicker section and stands out as a stripe.

I could have unwoven, re-sleyed and then re-woven. But I didn’t. I decided I could live with the fault and hence forth consider it a design element.

I’m more than half way done weaving and can’t wait to finish up and take this long length of cloth (4 yards or so) off the loom.

I’m now considering which dye process I want to use. I want a dark blue, so I’m considering indigo or a fibre reactive blue. We shall see. As I weave, I have plenty of time to ponder these things.

To read more about the dyeing and sewing of the cloth, click here.

Until next time…

Happy Weaving!

Filed Under: 4 shaft weaving, Clothtober, Floor Loom Weaving, Weaving Tagged With: 4shaftweaving, clothtober, floorloomweaving, weaving

What is plaid? How can it be woven on the rigid heddle loom?

by Kelly 20 Comments

Recently on the private member’s group on Facebook, we were discussing plaid and how it might look as a weaving draft. A very interesting topic!

So, first of all, what is plaid?

Quite simply, it is stripes of specific colours in the warp that are then repeated in the weft. A proper plaid will have the exact same treadling order as the warp, otherwise known as “tromp as writ” or “as drawn in” and is a balanced weave.

As the weft stripes cross the warp stripes, squares are formed.

There can be some heated discussions and disagreements about what makes a plaid and what makes a tartan. If you’re interested in researching tartan, this PDF is a detailed and interesting document.

For our member’s discussion, I made an example plaid draft based on a student’s desire to see what her colour ideas would look like. This is the fabric view of the draft.

It is a simple warp of 6 blue, 3 white repeated. The weaving sequence will also be 6 picks of blue, 3 picks of white.

*This post contains some affiliate links. This means that if you click on the link and buy, I receive a small commission at no extra cost to you.

Let’s have a look at what can happen if we vary colour arrangement and number.

This draft uses 3 colours instead of 2 and the warp colour repeats are 4 purple, 4 green and 2 yellow. I used a bold and modern colour scheme to illustrate how different a simple plaid draft can look. I quite like this one!

If you like this draft and want to try it out, I’ve made a printable PDF for your personal use.

Plaid-bright PDFDownload

Lastly, I made this very balanced draft in more muted colours. This draft uses 4 ends of each colour (purple, white, peach) and then repeats the same in the weaving.

You can grab a PDF of the draft for your personal use for the muted version too.

Plaid-muted PDFDownload

If you want to have a bit of fun making your own plaid designs, PlaidMaker is an excellent, free resource.

Regarding yarns that you might use to weave a plaid, there are so many choices! One of my personal favourites though (and I have one of my daughters to thank for this, as she designed and wove her own plaid piece) is a light worsted to worsted weight cotton with a 7.5 or 8 dent heddle.

Here are some possible cotton suggestions:

Bendigo Woollen Mills 8ply cotton

Sugar n Cream, pastel colours

Sugar n Cream, bright colours

Lion Brand Cotton

Babytoly Organic Cotton

I strongly recommend that, whichever yarn you choose, go with a solid and not variegated colour. Plaids are “busy” to look at and using a variegated could change it from busy to messy!

I hope you learned a lot from this post. I would love to hear from you if it was helpful, and if you decide to use one of my drafts. Let me know by leaving a comment below!

Until next time…

Happy Weaving!

Filed Under: Rigid heddle weaving, Weaving Tagged With: cotton yarn, plaid, rigidheddleweaving

Weaver’s Gift Guide!

by Kelly 5 Comments

I can’t believe I’m writing a gift guide already, wasn’t last Christmas just like yesterday? Or the day before?

Well, I don’t mind at all if Christmas comes around super fast because it’s my favourite time of year. And not because of the gifts. Though gifts are nice.

*This post contains some (but not all) affiliate links. This means that if you click on a link and purchase, I will receive a small commission at no extra cost to you.

Because gifts are nice, here is a list of ideas for the weaver in your life. Or just for you, if you are the weaver. You’re allowed to buy yourself Christmas gifts too!

  1. Ashford Rigid Heddle Loom and stand

You had to expect that one! The perfect gift for a beginner weaver or someone who may want to upgrade to a larger size. This is the same loom and stand as my rigid heddle loom, the 24″ (if using this link, make sure you select the size you want before purchasing). Of course, you can go for just the loom without a stand, but I do really love my stand and recommend them for all weavers.

2. Enamel Weaving Pin The Creativity Patch

So cute, enough said!

3. Online Weaving Classes

It’s a great time to learn to weave (isn’t it always?!) or to take your weaving skills to the next level. Check out my Online Weaving School for single classes or memberships for all levels.

4. Mini shuttles by Polleda Textiles

These sweet mini shuttles can be used as an ornament or made into necklaces and earrings. They are hand crafted from a variety of woods and I think they’re just beautiful.

5. Wooden Shawl Pin, hand crafted.

This is definitely on my own personal wish list, as I love wearing shawls and larger woven pieces. I would love to have a whole collection of hand made shawl pins, they are both useful and beautiful.

6. Inkle Loom Kit

I love this idea to get a weaver started in inkle weaving. Everything you need to get going! You can’t go past this book for inkle patterns, it’s absolutely brilliant.

7. Bluster Bay weaving shuttles

Another one for my own personal Wishlist, yes these are pricey! But, I’ve heard very, very good things about them and think that one of these shuttles would be the ultimate indulgent gift for the weaver in your life.

8. Purl and Loop Swatch maker.

If you haven’t heard of a swatch maker before, it’s basically a quick and easy way to make samples without having to warp an entire loom. That makes it a winner in my opinion! This swatch kit also comes in acrylic for slightly lower price.

9. Ashford 8 shaft table loom

Having owned one of these myself (and regretting having sold it to make more room in my tiny studio!), I can testify as to the quality and ease of use of these looms. They come in various widths to suit your space, budget and weaving requirements. There is also the option to set up with a stand and treadles, if you want more of that floor loom experience.

10. Coffee Mugs

Because coffee, tea and weaving just go together! And why not have a weaving mug to sip out of while you’re weaving? Makes perfect sense to me! Each mug is double sided, one with text and the other a weaving picture. Lots of different colours available.

11. Weaving Kits

OK, so I might be blowing my own trumpet a little too much here, but I did really want to include my kits because they make the perfect gift for a weaver. In the Garden Path Scarf kit, you get all the Australian merino yarn you need for one scarf, plus a printed, step by step pattern. I have a bunch of different colours available and ship worldwide. If you don’t see a colour you’re after, let me know and I’ll do my best to get it for you. If you’re after just a digital pattern rather than a kit, visit my Etsy shop.

12. Gift Certificate

If you’re really not sure what your weaver would like to receive, a gift certificate is the perfect way to go. The Woolery in the US has a huge range of supplies and gift certificates are available. Here in Australia, Thread Collective is my go to for weaving yarn and Louet supplies and I also love Knit Spin Weave for yarn, Ashford supplies and looms.

I hope you find something here for the weaver in your life, or, if you are the weaver, perhaps a gift to yourself!

Until next time…

Happy Weaving!

Filed Under: Gift Guide, Weaving Tagged With: gift guide, weavers gift guide

Clothtober – Finding your style

by Kelly 3 Comments

If you haven’t heard about Clothtober and why I started it yet, you can check out this post to be filled in.

If you’re frustrated with your fashion (or lack thereof!) situation, I think a good first step towards action can be to spend a bit of time thinking about what your style might be. You may have multiple styles, or you may feel that you have no style at all!

There is hope though. I have always found that I can point out very quickly what I DON’T like rather than choosing what I definitely DO like. If you are the same, make that your starting point by using a process of elimination. Check out Pinterest for ideas and start to gather a board of possibilities for you. I have several of these kind of boards on Pinterest, for example, my general weaving board, sewing and feminine dressing. Pinterest is really good at showing you things you are likely to want to pin, so start collecting and use their search functions to your advantage.

I am your typical fashion avoider, in general I hate fashion and don’t follow trends at all. But, once again, we can use available fashion tools to help us know what we want.

I was amazed when I started googling that there are so many free resources out there designed to help women with fashion.

Using free online tools like this one from Visual Therapy can be really handy when determining your style. They usually involve a short quiz with a series of simple questions that place you in a style category.

I got Classic/ Bohemian, which is actually pretty accurate for my tastes and style.

I really like the Birdsnest Style guide function. You do have to register with the website to access this function, but you don’t have to buy anything. They are an Australian company with a huge range of women’s clothing (as a customer I can also tell you their service is great).

The style guide is formed from detailed questions on all kinds of things about you – your lifestyle, body shape, habits, budget etc. Once your style guide is filled out, they give you suggestions for outfits that may be for you. This is a great way to get an idea of clothes that might suit you and that may be your style. If you want to sew clothes to fit you, you can use the suggestions as inspiration to either search for similar sewing patterns or if you’re really clever, to make your own patterns (I’m not that clever.)

My final suggestion is to research clothes that may be suitable for your body shape. I can’t tell you the number of times I’ve found an outfit that I like, but looked terrible on me because it didn’t suit my body shape. It’s worth having a basic understanding of your body shape so that you can eliminate clothes that are likely to never look right on you and go for things that are going to flatter your unique shape. Of course, body shape diagrams are a generalisation, they still don’t allow for individual specifics, but you can treat them as a guide. You may want to check out Clothes recommendations according to your body shape.

Next time I’m going to be touching on colour – how to choose the right colours for you and pitfalls to avoid. If most of your wardrobe is currently black (my hand is up!), the colour post is for you. Click here to read that post.

Until next time…

Happy Weaving!

Filed Under: Clothtober, Sewing, Weaving Tagged With: clothtober, fashion, style

Clothtober!

by Kelly 48 Comments

I’ve been thinking a lot about clothes lately. How dissatisfied I am with my current wardrobe and why. What I might be able to do about it.

I don’t have all that many clothes, and I tend to wear the same things over and over. Once I’m comfortable with something I don’t want to give it up and I really do wear things until they’re completely worn out. This means I don’t have to go shopping too often.

I’m one of those strange women who actually hate clothes shopping. It’s like a vicious cycle on repeat. I head out to the local shopping centre, sometimes the op shop. I have a list of what I need (I never randomly buy clothes, that is just not my personality type!) And the search begins.

I go through a series of predictable steps. I can’t find what I actually want or need, so I compromise, because I need it, because I’ve worn my other clothes to death. I start to try things on. I start to feel hot. Physically hot. Is it the act of trying on one thing after another, or the building anger that nothing fits or looks right that causes this overheating? Probably an even mixture of the two.

I leave the shop. Sometimes I leave with a purchase, which is never really something that I love, it’s just something to get me by until the next thing wears out and I’m forced to come back.

My body type just doesn’t seem to exist on a clothing rack. I need 3 different sizes, 1 for my chest and waist, a larger one for my upper arms, and an even larger one for my hips. So nothing ever fits.

There is something good about all this, I’m coming to that!

It has forced me into a place of action. I’m tired of not wearing clothes I like. I’m tired of being uncomfortable. I’m tired of feeling like I have not style because I can’t buy what I really like. I want to change this.

So, here is my line of thinking. I’m a weaver. I can sew. Pattern drafting is my weakness, but perhaps I can use existing patterns as a template and change them to fit my body? Perhaps, through putting in the extra work and time and effort, I will be able to produce something I enjoy wearing? And perhaps I will even enjoy wearing it more because I know how much time went into it! Instead of junky, off the rack, ill fitting clothes, I can build my own wardrobe of special pieces! Bingo!

I have already begun. I sketched ideas first, then started looking for a sewing pattern that might fit the bill.

I started with the “Esme tunic dress pattern” from Lotta Jansdotter’s book, Everyday Style. (Affiliate link) This book has so many wonderful, classic designs that I would love to build a wardrobe from. I cut the tunic out from the largest size and sewed up a quick muslin from an old bedsheet. The problem was when I set the sleeves in. They looked terrible! No amount of tweaking and re-sewing could make it look better.

After plenty attempts to change my muslin and plenty of sage advice from Instagram and Facebook friends, I decided to look for a different pattern with a raglan sleeve instead of a set in.

I stumbled upon the It’s Always Autumn blog and found a free Raglan tee pattern. She has a lot of really good free patterns, so be sure to check them out if you head over there. Using that tee pattern I started tweaking and changing to get the dress tunic I had in mind. It took hours of cutting, placing darts, sewing, ripping apart, sewing again and then doing it all over and over, to finally get a tunic pattern that fits me properly and in a style I like! Here is the muslin.

Semi fitted, yet not clingy – perfect! And did I mention that it fits?!

OK, so now onto the fabric. I’ll give more of my warp details next time, but the basic idea is to weave the fabric from an undyed cotton and then dye it to a colour I like. Yes, I want this garment to be as customised as possible!

A lot of my social media followers seem to be right into this idea, so I thought “why not make a thing of it? I can encourage other weavers to make an item of clothing with the same aims in mind. And, if we do it through October, then I can name it Clothtober!” Win, win!

So, I’m going to be sharing more details of this project as I go along (and lets face it, with over 800 ends to warp and thread, this is not going to be over in a flash!) And I hope that I may inspire some of you to choose an item of clothing you want to weave for yourself. According to your skills and what you need in your wardrobe. I will be weaving on my floor loom, but you can do what you like.

Ideas?

A skirt, a fitted blouse, a poncho, a jacket, a top, pants, a hat?

If you feel you need some extra help, here are some classes that may interest you:

Clasped Warp Quechquemitl Wrap

Garment making on a rigid heddle loom

Wrist warmers

I’ve also been eyeing the Bias Top sewing pattern from Sarah Howard, which looks terrific.

What do you think, is this something you can do? Are you fed up with crappy clothes that don’t fit?

Let me know in the comments if you want to join in. What will you make? Or perhaps you just want to follow along with my project for future inspiration, that is fine too.

Next time I’ll be talking about finding your own individual style, so be sure to check that out.

Until then…

Happy Weaving!

Filed Under: 4 shaft weaving, Clothtober, Floor Loom Weaving, Sewing, Weaving Tagged With: clothtober, tunicdress, weaving

Is a table loom the answer?

by Kelly 34 Comments

One of my most commonly asked questions relates to physical conditions.

No, I’m not a physician, but I am a weaver and I do have physical restrictions. I’ve also found ways around the restrictions and I’d love to share some of them with you.

This post contains affiliate links. This means that if you click and purchase, I will receive a small commission at no extra cost to you.

My first multi shaft loom was an 8 shaft, 32″ Ashford Table Loom.

Image from Ashford website.

My decision to buy this particular loom was based on a few things.

  1. My physical capabilities
  2. What the loom could do
  3. Price
  4. Size

Addressing number 1 first. I have a back injury that causes daily pain and discomfort and limits what I can do physically. I desperately wanted a multi shaft loom but thought it probably wasn’t going to be possible for me to physically use one. So I started researching (a lot!) and found that a table loom could be a very good option. And it was! Here is why:

  • My table loom was operated by levers rather than treadles. This meant no getting down on the floor to tie up treadles.
  • The raddle was separate to the loom. This meant that if I was doing a narrower warp, I could sit at the table, away from the loom to place my warp chain in the raddle ie. less time standing.
  • I had my loom on a table rather than a stand. I also had a height adjustable chair on wheels. So I could adjust my chair to the right height, then roll right in under the table and get close to the loom. Many table loom weavers weave standing up, I couldn’t do that, so the adjustable chair was very important.
  • The loom had a slung beater. Effortless to use.
  • Because the table was at a good height for me, I found warping easy, not having to bend to the height of the loom.

On to number 2 – what the loom could do.

Well, it could do anything that an 8 shaft floor loom could, but there were some differences. I could never achieve as good tension on the table loom as I can on my floor loom. It wasn’t a really huge deal, but could be frustrating at times when my boat shuttle would dive through the weaving. The other thing that bothered me was not being able to remove or add heddles from the shafts once I had a warp on. Once again, not a huge deal, but annoying at times.

The all important number 3 – the price!

Table looms are really affordable considering the abilities they have. If you can find a used one with all the pieces and in good condition, even better! For those who really can’t afford the outlay (which can be massive!) for a floor loom, a table loom can be 1/4 to 1/2 the price. You also have the option of starting out on 4 shafts to reduce the initial outlay. You can either stay with your 4 shafts or upgrade to 8 later on.

Finally, number 4

If you simply don’t have space for a floor loom, a table loom can be the solution. Whether you have it sitting on a table or on a stand, it is more compact than most floor looms.

As I mentioned, I do now have a floor loom. Testing myself on a table loom taught me many things. One thing was that my body could handle it if I was careful and that greatly influenced my final decision to buy a floor loom. It was also the perfect learning ground for weaving with multiple shafts, so that moving up to a floor loom was a short, rather than steep learning curve. I had to sell my table loom in order to finance and make space for my floor loom, but many times I still wish I had the table loom as well.

If you are interested in learning more about table looms, I have some Youtube videos that will help.

I have also written about table looms in a previous post where I discuss Which loom to buy?

I hope you found this post informative and helpful. Please let me know by leaving a comment, and be sure to ask any questions you may have.

Until next time…

Happy Weaving!

Filed Under: 4 shaft weaving, 8 shaft weaving, Weaving Tagged With: 8 shaft, disability, table loom

  • « Go to Previous Page
  • Page 1
  • Interim pages omitted …
  • Page 18
  • Page 19
  • Page 20
  • Page 21
  • Page 22
  • Interim pages omitted …
  • Page 25
  • Go to Next Page »

Primary Sidebar

Hand crafted boat shuttles

Categories

Archives

Meta

  • Log in
  • Entries feed
  • Comments feed
  • WordPress.org

Copyright © 2025 Kelly Casanova Weaving Lessons on the Foodie Pro Theme