• Skip to main content
  • Skip to primary sidebar

Kelly Casanova Weaving Lessons

  • Hi! I’m Kelly!
    • Disclosure
  • Online Weaving School Class Index
    • Common account issues
    • Common technical issues
    • What do I get with a membership?
  • New to rigid heddle weaving? Start here!
    • Never heard of the rigid heddle loom?
    • How to weave neat edges on the rigid heddle loom
    • Rigid heddle weaving
    • Rigid Heddle Weaving Patterns
  • Patterns
  • Subscribe

Weaving

Making pictures with your loom

by Kelly 10 Comments

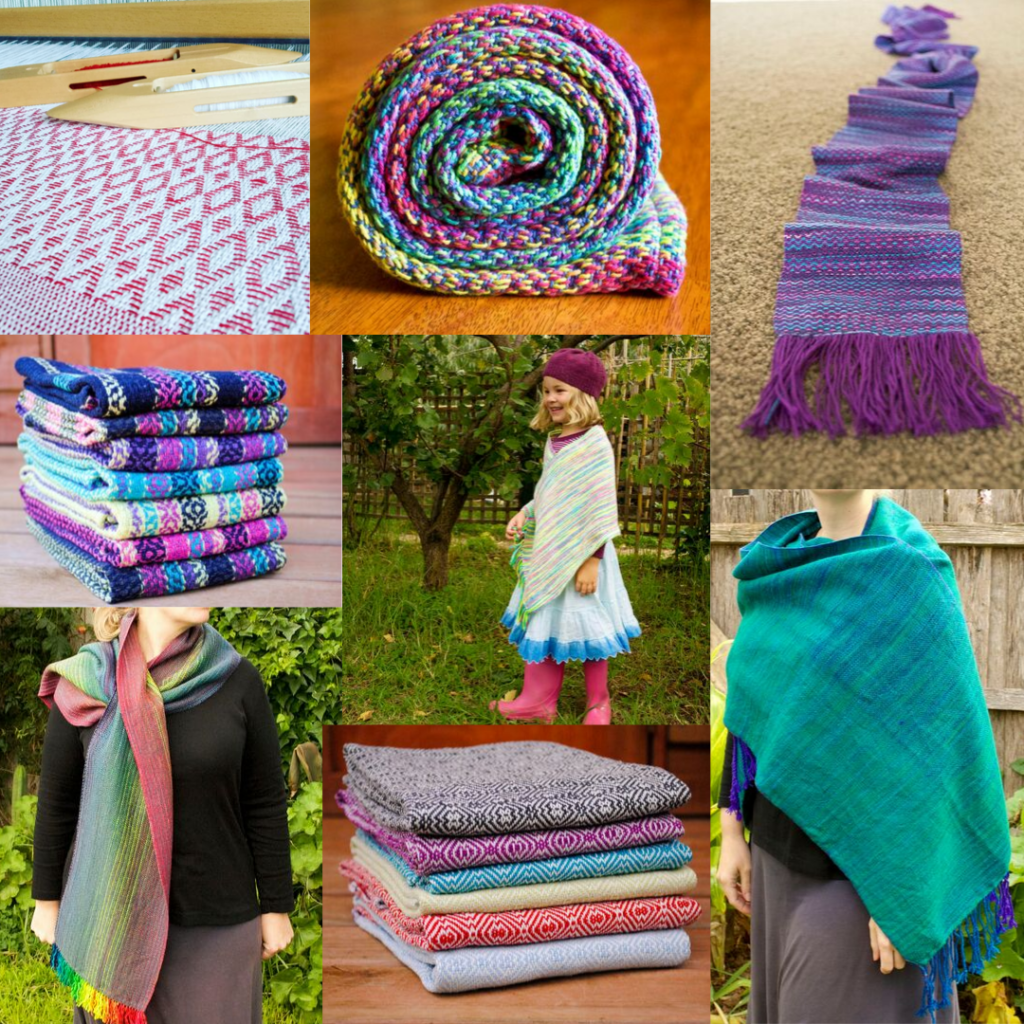
Something that really captivated me before I even started weaving, was the idea of using artistic creativity in weaving.

When I was younger I loved to draw and paint. In my adult life, I have not made a lot of time to devote to making art, but I have been happy to discover that there is a huge crossover with art and weaving.

This post contains affiliate links.

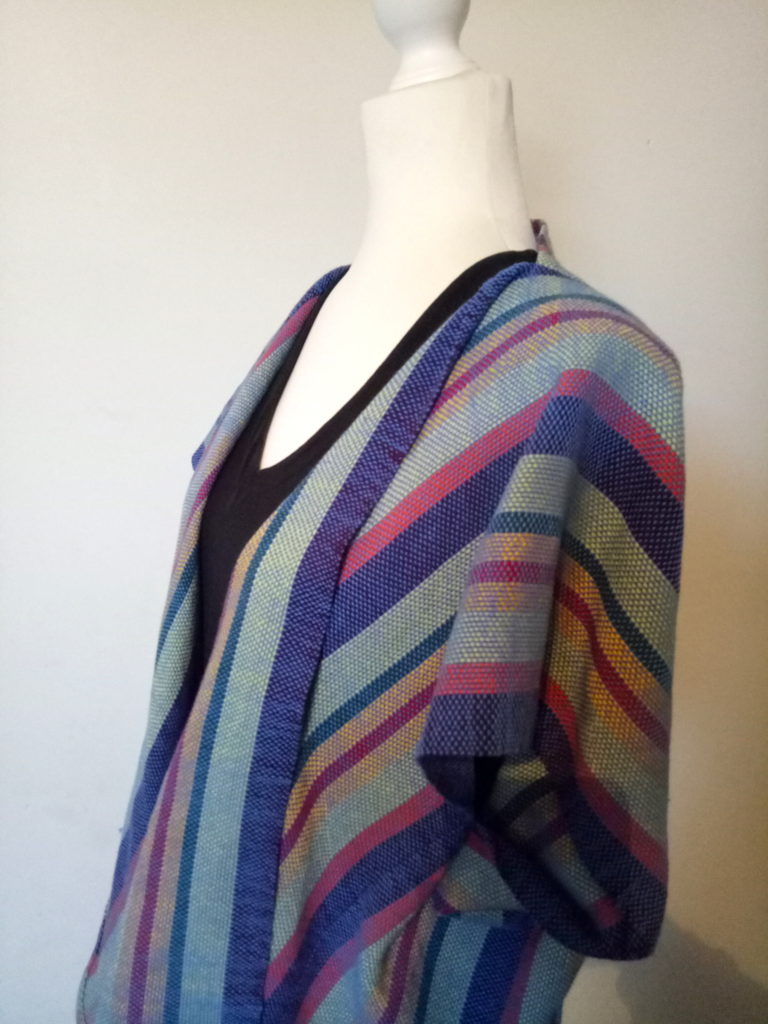
One of the most obvious forms of weaving that this crossover takes place in is tapestry weaving. In tapestry, the weaver can have total artistic licence through the use of colours and shapes. The shapes can be basic or complex. Colours can be blended on the loom. And, tapestry can be woven on many different types of looms.

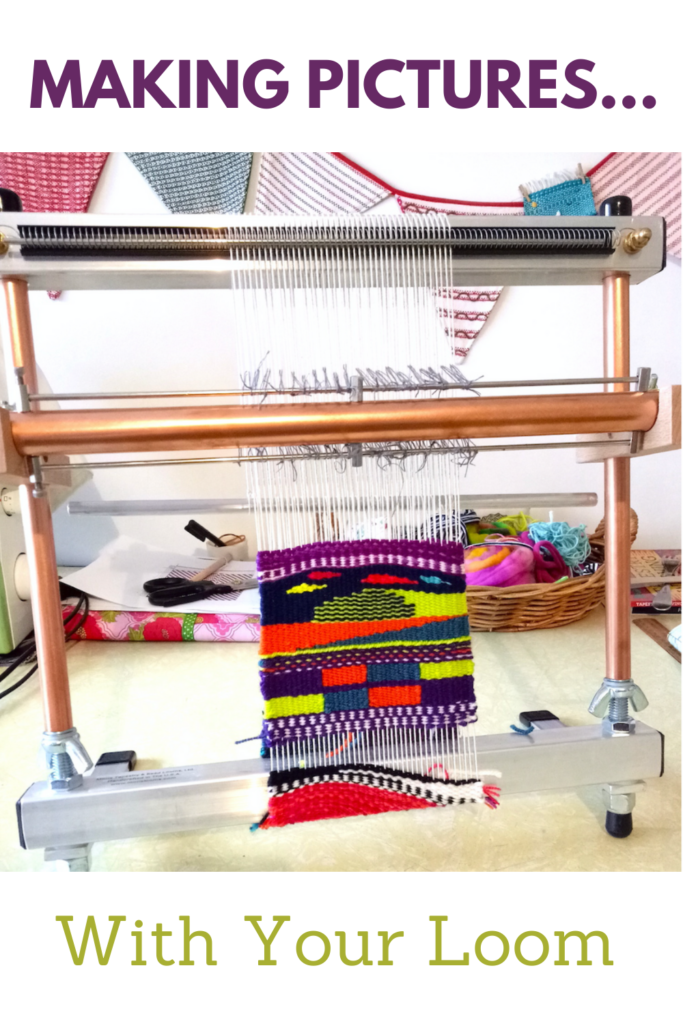
I purchased a Mirrix Big Sister last year, as I wanted to develop my tapestry techniques and also have a dedicated tapestry loom. It is an excellent loom for tapestry, as even though it’s small, I find the available weaving room quite spacious and the tension is awesome.

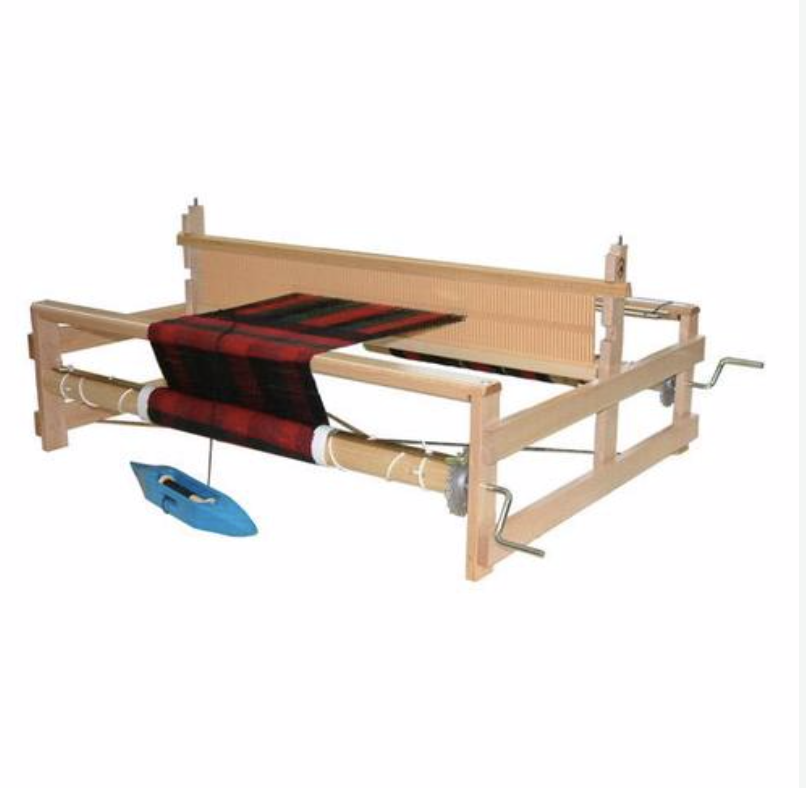
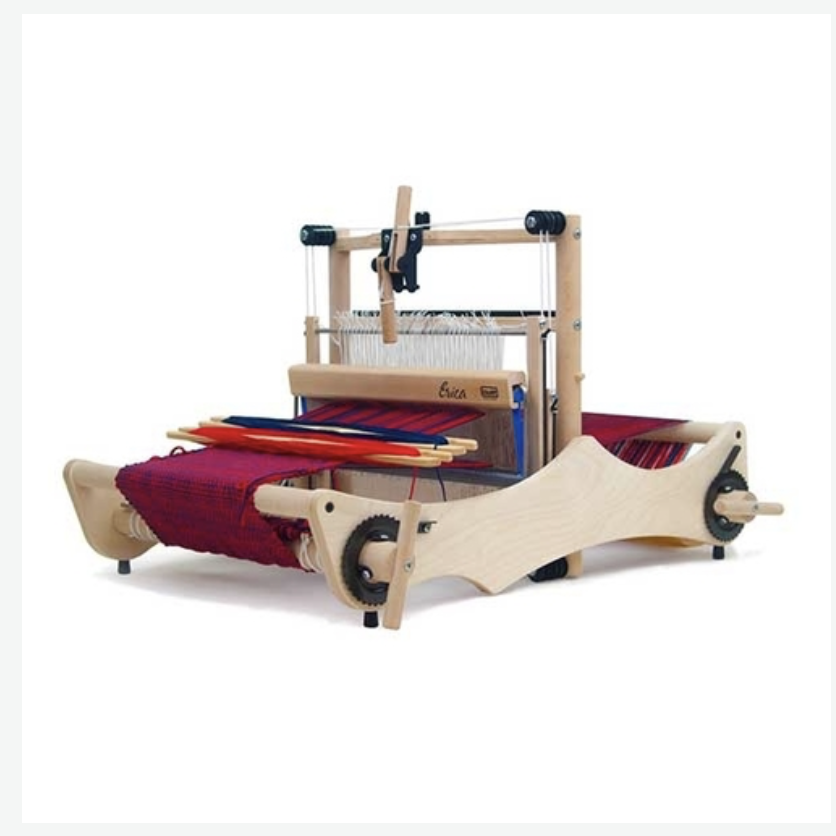
Before I bought the Mirrix, I wove tapestries on my rigid heddle loom.

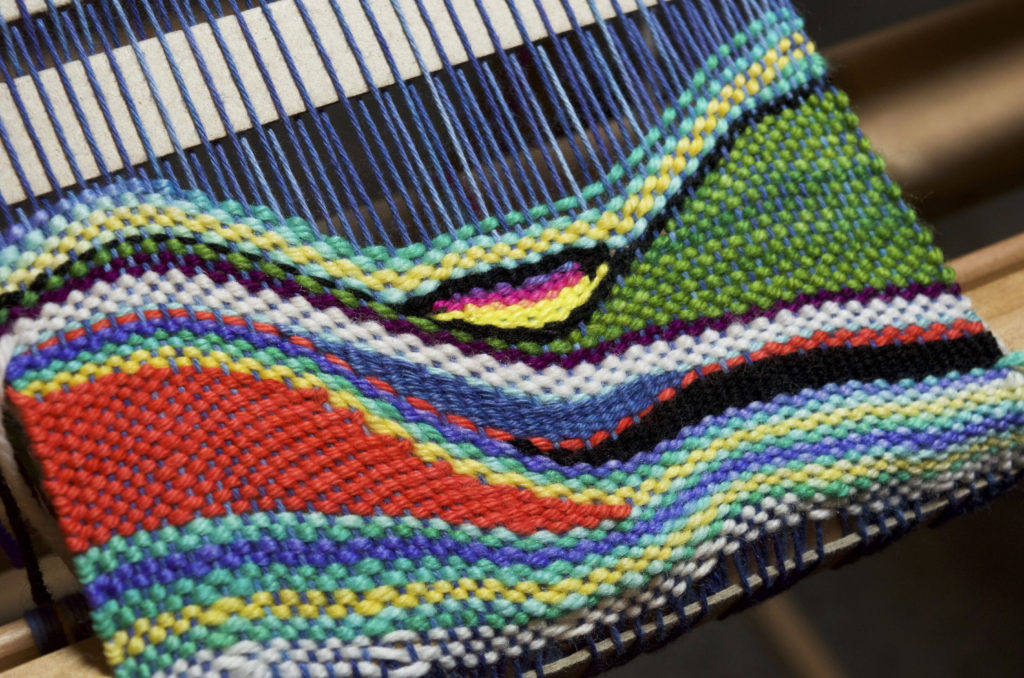
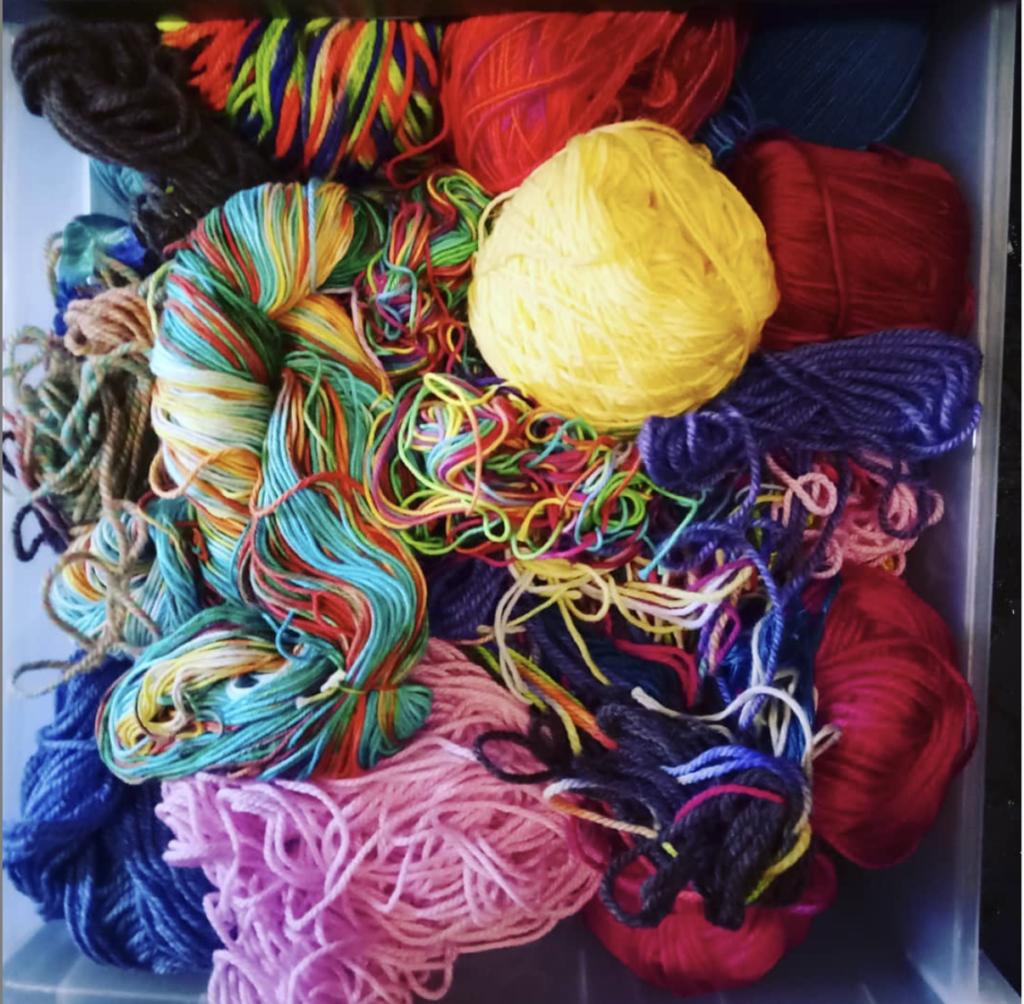
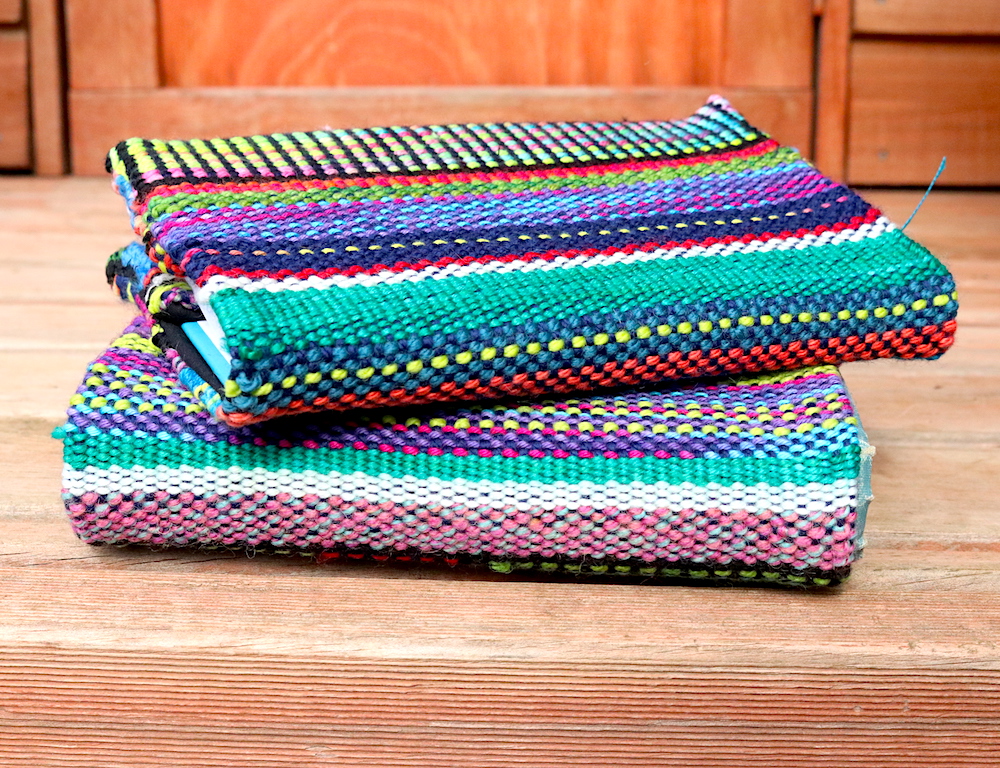
I had a lot of fun using different yarns and styles. My most popular Youtube series details how to weave in a free and unplanned style with a variety of yarns and colours.

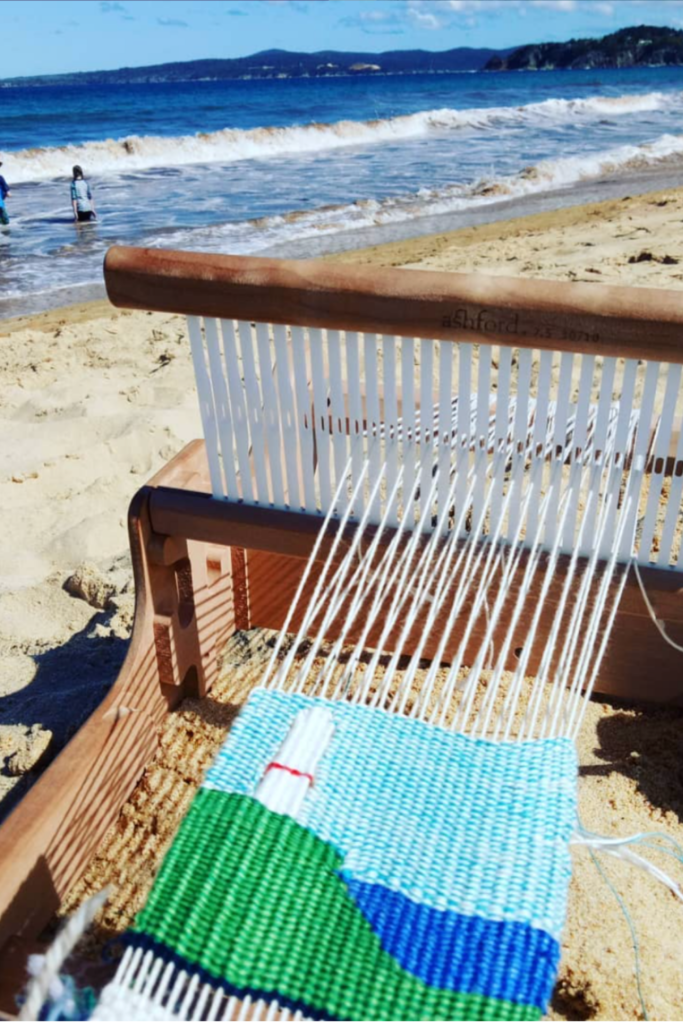
I’ve also explored more tradition tapestry techniques on the rigid heddle loom. I particularly enjoyed taking my Sampleit on vacation, which enabled me to sit on the beach, watch the kids enjoy the waves and weave. What bliss!

My adventures with tapestry on the rigid heddle loom gained so much interest on social media, that I developed a course to show others how to do it! The course includes all the basic tapestry techniques you need to know, plus how to use all of these techniques to weave a finished project. If that sounds interesting to you, the course is available here.

Another way to get started in tapestry without breaking the budget, is with a more affordable tapestry loom. Depending on your budget, you could opt for something like the Schacht Tapestry Loom, or even just an el cheapo like a Melissa and Doug simple frame loom. Some people choose to make their own by building a simple frame or repurposing a wooden picture frame or similar. Just be aware that the more tension the loom holds, the better it is for tapestry and if you go down the cheap route, well, you tend to get what you pay for.

A resource that I found to be great when starting out with tapestry, and still use for inspiration, is Kirsten Glasbrook’s book, The Art of Tapestry Weaving.

Aside from tapestry, are there other ways to make pictures with your loom. Oh, yes indeed!

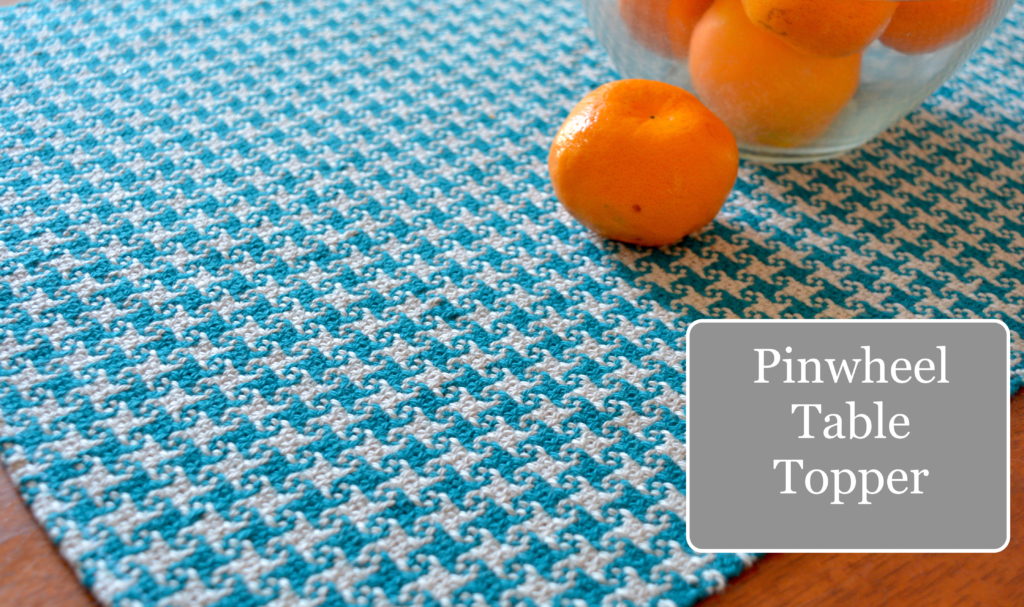
If I haven’t already gushed about krokbragd on this blog enough times, here I go again! If you’re interested in going down my blog rabbit hole on this topic, start with this post. Krokbragd is a weft based, most of the time but not always 3 shaft, weft faced weave. You repeat the same order of treadling over and over, but can vary your yarn colour combinations to produce simple and complex shapes and images. It is seriously cool, and that is why I’m always gushing about it.

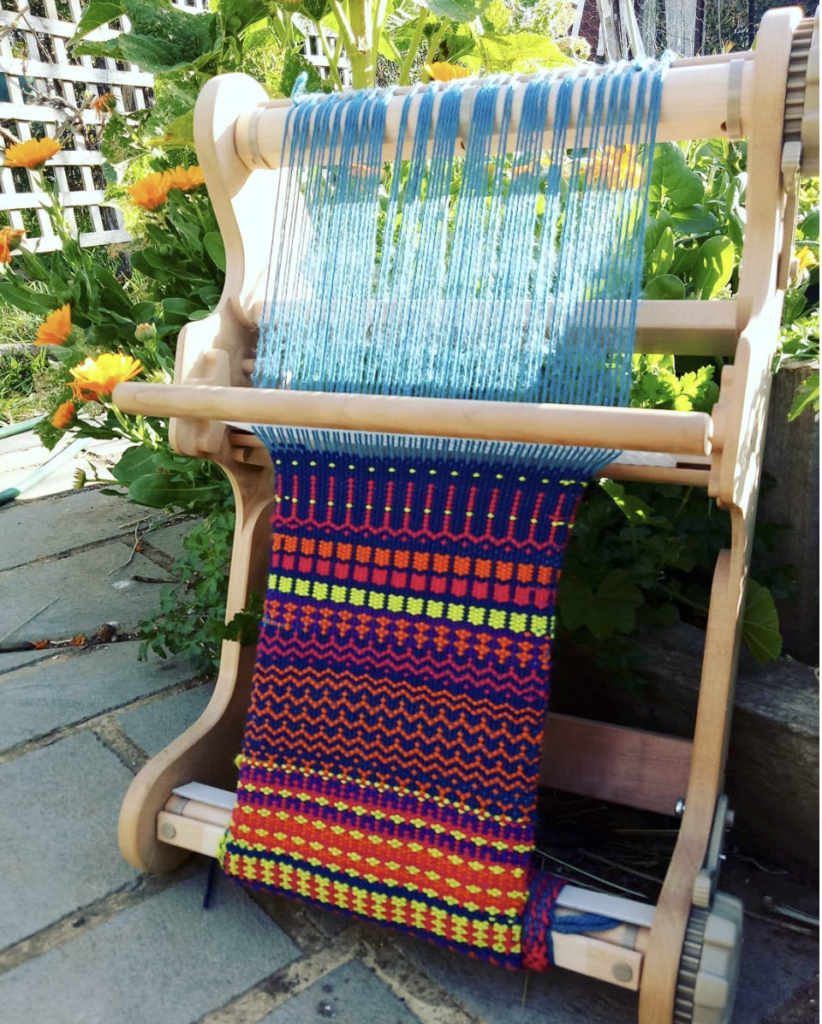
Many of the shapes are open to interpretation, as they can be slightly non specific, but there is really so much to explore. One of my goals for this year is to weave a striking krokbragd wall hanging using my floor loom. Can’t wait for that one! Debby Greenlaw has written a terrific book, Krokbragd: How to Design and Weave.

I have a number of Youtube lessons on krokbragd using my rigid heddle loom, but if it’s new to you, start with the above video.

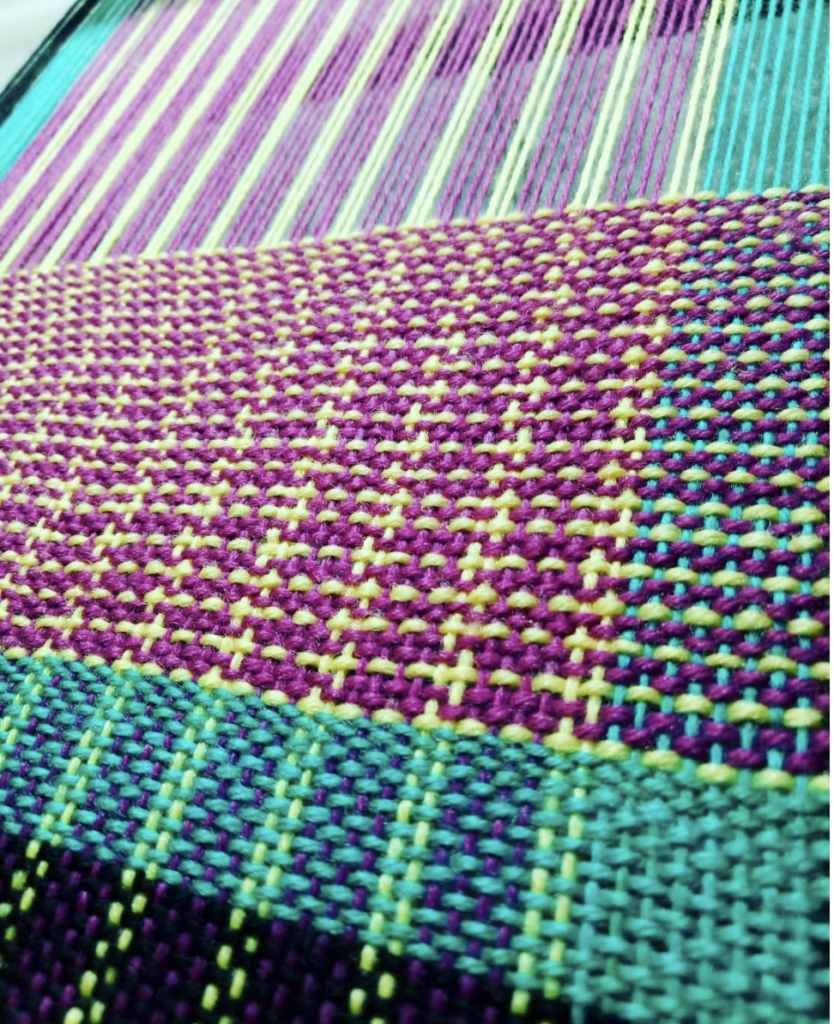
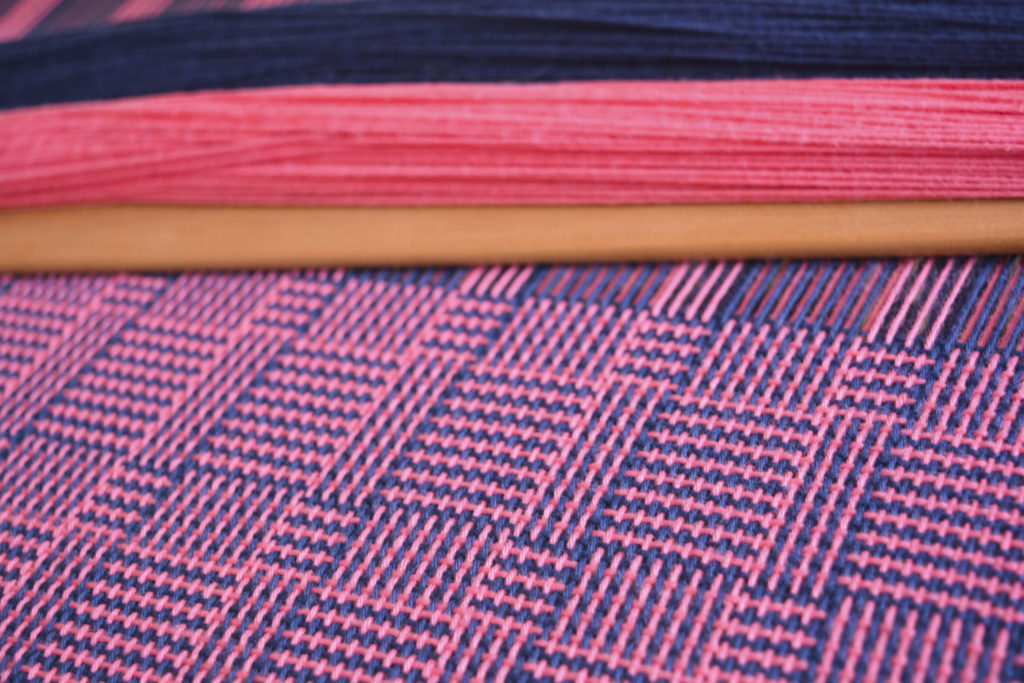
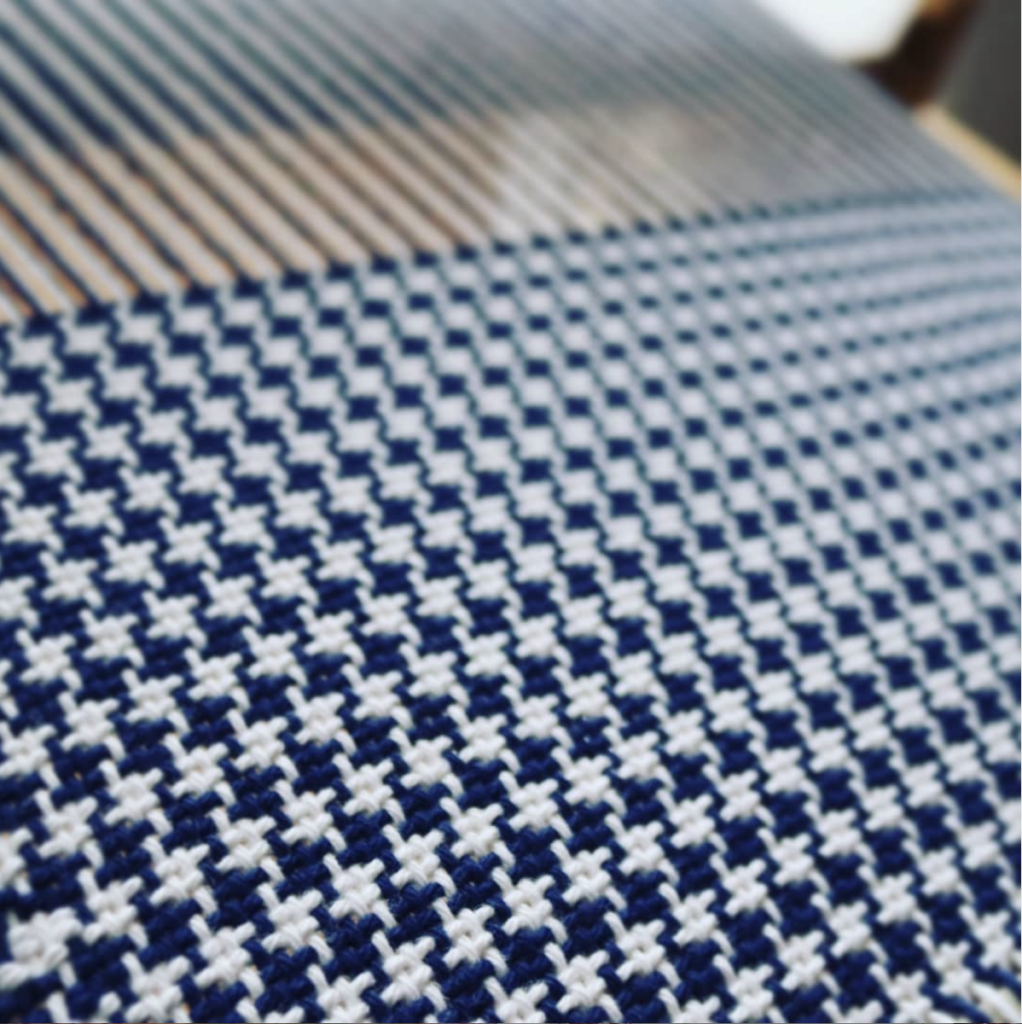
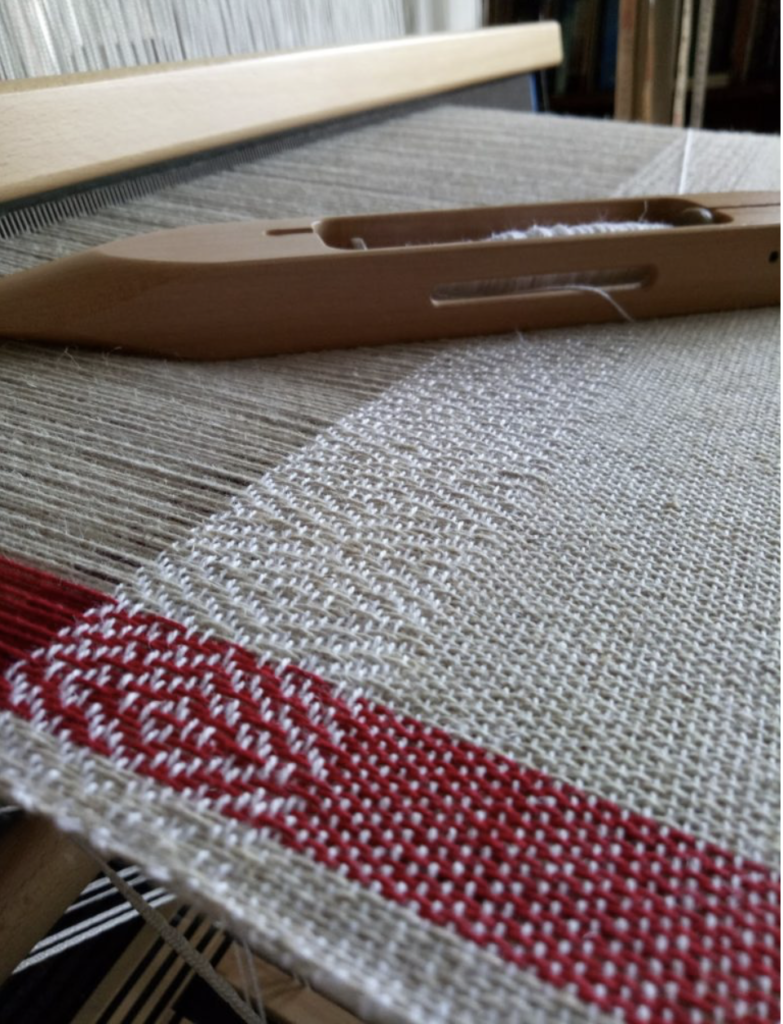
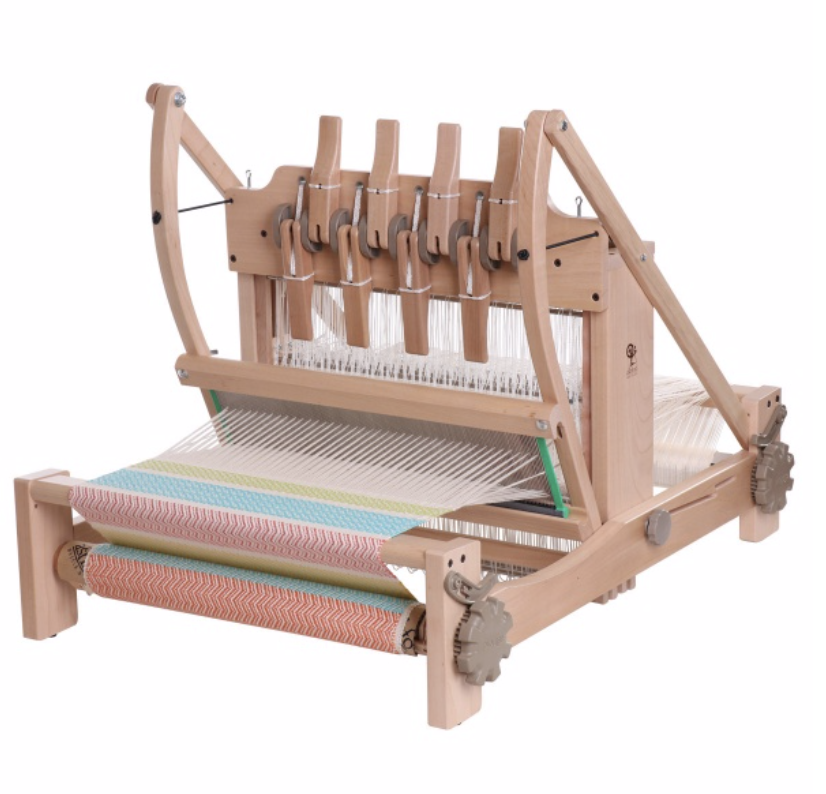
Boundweave is another weft faced weave that is very adaptable and versatile. It can be woven on 4 or more shafts (so it’s possible on a rigid heddle loom). The picture possibilities are endless. I have been playing around with bound weave on rose path threading and 6 shafts recently on my floor loom.

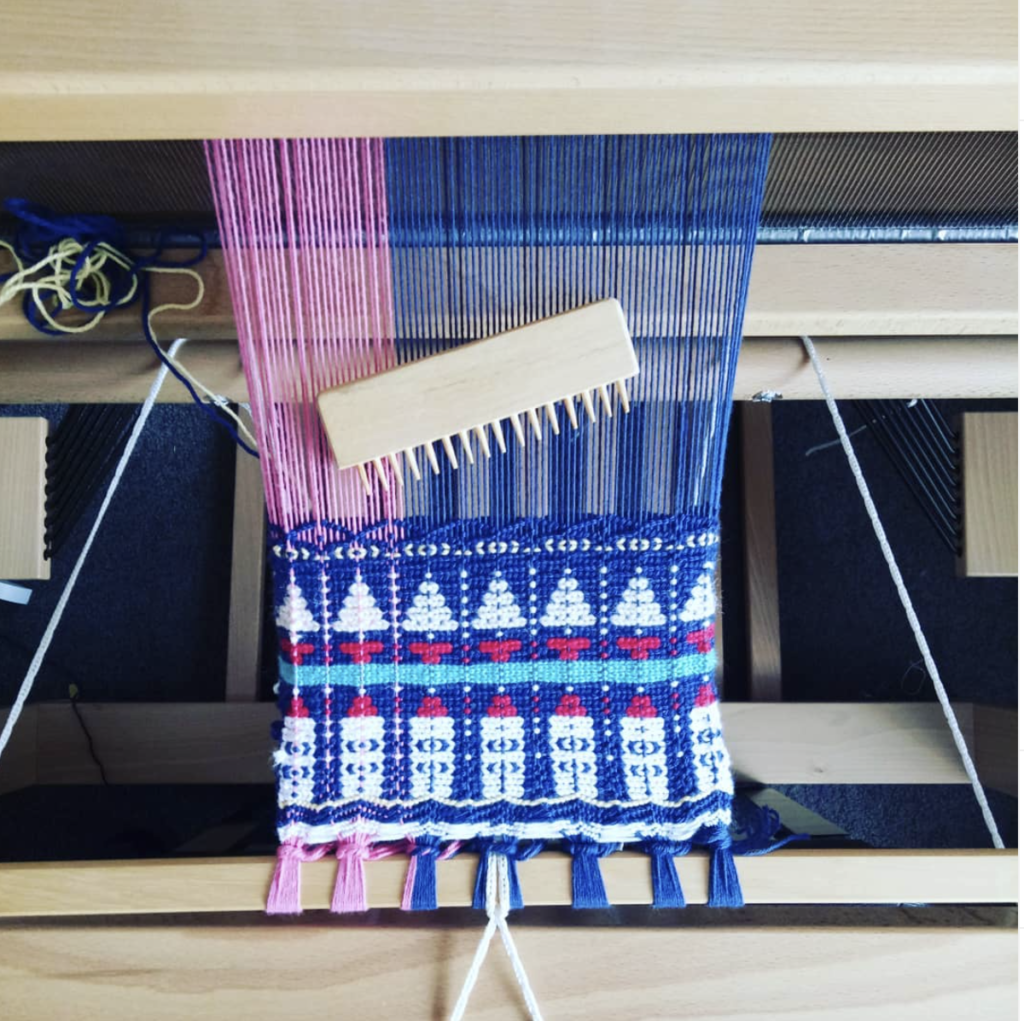
I’m using Nancy Arthur Hoskins’ Weft Faced Pattern Weaves book for guidance. My goodness, what an extensive book – so much to learn! This was my first attempt and I’ve now branched out with some more random designs, which is all very interesting. Slow, but interesting.

There is a lot more to be said about making pictures on your loom, but I hope this post has inspired you with some of the possibilities. Have you tried any of these techniques? Which is your favourite? Let me know in the comments!

Until next time…

Happy Weaving!

Filed Under: 4 shaft weaving, 8 shaft weaving, Floor Loom Weaving, Krokbragd, Rigid heddle weaving, Tapestry Weaving, Weaving Tagged With: boundweave, pictures, tapestry

Which loom to begin with? Table loom and Rigid Heddle Loom Comparison.

by Kelly 10 Comments

When you’re starting out on your weaving journey, it can be confusing when you are faced with the variety of looms for purchase. How do you know before buying which one is going to suit your needs the best?

I get asked this question a lot, so I’ve put together a list of things to consider before purchasing. Specifically, I will compare the rigid heddle and the table loom, as these are the most common “beginner” looms available.

*This post contains affiliate links.

My first recommendation when considering the type of loom you might want to purchase is to try actually weaving on one. I know it’s not always possible, but if you have a friend who has a loom or you can get in touch with a guild that has looms for you to try, it can be a big bonus. Many shops that sell looms will be more than happy for you to come in store so that you can physically see and try a loom before buying too.

When I was looking for my first loom, a few factors contributed to my final decision.

  1. The price
  2. Simplicity of the loom
  3. Recommendations

My first loom purchase was the Ashford 24″ rigid heddle loom. I found that I could buy the loom and stand for a fraction of the price of a table loom. Having never woven anything in my life, I didn’t want to spend a heap of money up front, not knowing whether it was something I was definitely going to enjoy.

Being a complete newbie also helped me to decide on the RHL. I could see just by looking at it that it was a more simple loom, and I didn’t want something that was over complicated, as I was going to be weaving on my own.

I chatted with some craft friends online who already owned a rigid heddle loom, and their recommendations also helped me to decide that it was the right choice for me.

Now I’ll go over the pros and cons of the rigid heddle loom (in my opinion!):

Pros–

  • It’s very lightweight and portable, making it easy to travel with or carry from room to room.
  • Easy to learn. Like anything, becoming comfortable with a RHL takes time, but as long as you have good information, enthusiasm and practice, becoming a good weaver on a RHL is very achievable.
  • Time efficient. I guess this comes under easy to learn as well, but the RHL is really quick and simple to warp and get weaving.
  • Even though it’s a 2 shaft loom, it has more capabilities than meets the eye. By using pick up sticks, heddle rods and extra reeds, you can turn a RHL into a multi shaft loom. If this sounds interesting to you, I have an in depth class showing you how to convert 3 and 4 shaft pattern drafts to your RHL. You can find that class here. I also have a class that shows you how to achieve 4 shaft patterns by weaving with 3 heddles. You can find that class here.
  • Very little loom waste (you gotta love that!)
  • Very comfortable to sit at and use
  • Affordable to get started

Cons–

  • When I mentioned the possibilities in the “cons”, this means a little extra work and thought for the weaver. You may need some pretty good guidance to be able to set up your loom for more shafts or patterned weaving. A loom that is already set up for multi shafts is more efficient in this respect.
  • Limited reed sizes. The smallest dent reed currently available is a 15 dent from Ashford. This is due to most reeds being manufactured with heavy duty plastic in a wooden frame. It can only go so small.
  • It is hard to achieve good tension with finer yarns.
  • I tend to use my rigid heddle loom with thicker yarns as I feel it is better suited. Is that a con? It’s not really, it’s more of a consideration!

Some weavers ask: “So why would you bother buying a table loom if you can do so much on a rigid heddle loom?”

Well, for me, I was keen to level up my weaving without the full investment of a floor loom. I admit that after weaving on a RHL for a few years, I had loom envy! I felt like everywhere I turned I saw wonderful 8 shaft patterns tempting me, and convincing me that I just had to be able to weave them! If you are completely content with your RHL, I admire you, I really do. I wish I was more like you! šŸ˜„

But seriously, I did want the challenge of learning to weave on a multi shaft loom. And I wanted to achieve intricate patterns on a loom that was built for that very purpose.

My first table loom was the Ashford 8 shaft, 32″.

So let’s look at some pros on cons of a table loom.

Pros–

  • A more affordable way to set up for multi shaft weaving than a floor loom.
  • All the shafts are there, once you have “dressed” the loom (warped, threaded, sleyed and tied on) you can just enjoy the weaving without further set up necessary.
  • Boat shuttles work well.
  • Castle is collapsable, so even though it stands somewhat tall it can be compacted down.
  • Easy to use when it’s just sitting on a table.

Cons-

  • You need a sturdy table to place it on
  • Depending on the size of your loom, you may need help to move it.
  • Some table loom weavers stand while weaving – that is not going to appeal to everyone (me included!)
  • Not quite as comfortable to sit at as a RHL and it is best to have a good, height adjustable chair.
  • Heddles are not moveable once your project is threaded. You can make extra heddles if you need to, but cannot move the shafts during a project.
  • Dressing the loom is quite a time commitment!
  • Shed can be small
  • Depending on the size of the loom, you may not be able to advance the warp from a seated position.

It seems like there are quite a few cons for the table loom, but I try to give as much information as possible and don’t want to leave out any observations that I think are important.

I do think table looms are awesome, and for me, my table loom was a huge leap in my weaving knowledge and ability, especially towards my journey of owning and using a floor loom.

If you enjoyed this post, you may also want to watch the companion video:

If you want to learn more about table looms, please go to this post. Or, if you are interested in rigid heddle looms this post will help. Actually, I have a lot of rigid heddle posts here, so you can also use the search bar at the top of this page and type in “rigid heddle” and you will be spoiled for choice.

I hope this post was really useful to you, as always, you can speak to me in the comments or ask any burning questions you may have.

If learning to weave on a rigid heddle loom is interesting to you, my From Woe to Go! Beginner Rigid Heddle Weaving class is for you 😊

Or, if table loom weaving is your thing, my extensive Weaving on a Table Loom course is what you need.

I also have a comprehensive First Loom Buyers Guide that covers a range of looms to help you make an educated choice in purchasing.

Until next time…

Happy Weaving!

Filed Under: Rigid heddle weaving, Table loom weaving, Weaving Tagged With: rigid heddle loom

Table loom options

by Kelly 27 Comments

When it comes to selecting a table loom to purchase, we are not as spoiled for choice as we may be for rigid heddle looms.

This can actually be a positive rather than negative thing, as it can be easier to choose when the selection is more narrow.

In this post I’m going to provide details for table looms currently available commercially (if I miss any brands it would be because they are obscure and not easy to obtain.) I will also give the retail prices of each so that you can compare.

*This post contains affiliate links

As a little disclaimer, the only brand of table loom I have actually used and am really familiar with is Ashford. So, I’m not giving an opinion or appraisal on the other brands, but rather providing available information and pricing.

Most of the looms I mention here do not come with extras like stands, benches or raddles. These things are available as separate purchases.

Let’s dive in!

I’m going to start with Ashford table looms, for the reasons already given above. There are quite a few options with Ashford and pricing is quite reasonable by comparison. Please note that the photographs are all courtesy of the manufacturers and all prices do not include stands.

All prices are in US dollars.

The entry level table loom from Ashford is a 4 shaft and is available in weaving widths of 16, 24 (pictured) and 32 inches. Prices start at around $840USD for the 16″.

The cool thing about a 4 shaft is that there is room on the castle front to upgrade to 8 shafts later if you choose to, so if you’re not sure you can always start out on 4 and see how you go.

There are also stands available separately, and these come with the option of also purchasing a treadle kit for more of a floor loom experience.

Then we have the 8 shaft range, also available in 16 (pictured), 24 and 32“. 8 shaft prices start at $890USD.

There is even a 16 shaft table loom for those who love the idea of having lots of shafts to play around with.

All the Ashford table looms have a folding castle for compatibility, meaning they are a good travel or teaching loom. The beater is overhead and easy to use. Each loom comes standard with a stick shuttle, threading and reed hook, 10 dent beater and 640 texsolv heddles to get you started. All Silver Beech wooden pieces come lacquered and ready to assemble.

If you need help to assemble your new Ashford table loom, I have instructional videos:

Le Clerc has several table loom options. Their looms look to me to be made in a more traditional style with dark wood, straight lines and metal heddles plus a boat shuttle included.

The Dorothy table loom comes in 15.75 or 24″ weaving width and may have 4, 8 or 12 shafts. Starting price is $750USD. Le Clerc also make the Voyageur, which goes right up to 16 shafts. You have the option of buying a stand with these looms and I must say that I really like the way their stands are basically a sturdy little table with side shelves – shelves are a great thing to have with any loom in my opinion! There is also the option here to purchase a treadle stand.

Your options for table looms with Schacht are a little narrower, to be the best of my knowledge they just make one model of table loom, but in a variety of weaving widths and a choice of 4 or 8 shafts. These looms are constructed with maple wood and you actually get a choice of reed size, which is a nice bonus! Prices start at $742USD. A stand is available for separate purchase, as is a double back beam kit.

Glimakra makes the Victoria Table Loom. Once again, there is not a lot of variation as this is their only table loom and it is only available in 4 shafts with a 27″ weaving width. Something I find interesting about this loom is that it doesn’t fold and isn’t very portable, but just looking at it you can see that it’s a solid, sturdy loom. The starting price for this loom is $1,100USD and once again you have the option of purchasing a stand and treadle kit.

Toika makes a table loom in only one size (23.6″) but with a choice of 4 or 8 shafts. It comes with an 8 dent reed and 200 texsolv heddles. The levers for this loom look a little different as the ends that you grip on to for shaft manipulation are rounded pegs. At first glance, I wonder whether the shape of these pegs cause hand fatigue for the weaver, I do think that would be a possible problem for me. Prices start at $825USD. This loom can apparently be mounted on a stand, however I don’t think Toika actually make a stand specifically for this loom.

Lastly, Louet make a few different table looms. I have to mention the Klik Table Loom first, as it’s such a different concept to your regular table loom. The shafts are actually operated (raised) from the side based on a spring and click system. Then you beat with a swinging beater. The loom comes with 4 shafts, but up to 16 shafts can be added to the space. This loom looks very lightweight and portable, which would make it an ideal “take with you” loom. A couple of thoughts that spring to mind though. 1. You have to lean around to the side to operate the shafts, possibly not good for back or shoulder injuries? 2. The loom looks like it would sit flat on a table, but at the same time the shafts look lower than the bottom edge of the loom? And what about those handles, could you not do a full rotation if the loom was on a table? Therefore, would it possibly be necessary to purchase the stand to use this loom effectively? So, while the concept is very interesting, I would definitely want to try this loom before buying. Price for the Klik is $750USD.

Louet also make the Jane (pictured) and the Erica table looms. I have heard very good things about these two looms and they are definitely gaining popularity. The Erica starts at $555USD for the 4 shaft or you can start with the 2 shaft at $370USD and upgrade to 4 later. The Jane comes standard with 8 shafts in 2 different weaving widths, and a built in raddle (no separate purchase for that) starting at $1,195USD. These looms fold down and are light weight to transport.

The links I’ve provided in this post are from Amazon and The Woolery.

If you are in Australia and interested in purchasing an Ashford loom, I recommend Tracy from Knit Spin Weave.

If you are in Australia and it’s a Louet you’re after, I recommend Nicky from The Thread Collective.

Have I missed any table looms that should have been mentioned? If so, please tell me in the comments below.

If you are interested in table loom weaving or already own one but need help to get going, my Table Loom Weaving course would be perfect for you!

I hope this has been useful to you!

Until next time…

Happy Weaving!

Filed Under: 4 shaft weaving, 8 shaft weaving, Table loom weaving, Weaving Tagged With: table loom weaving

What is a table loom?

by Kelly 39 Comments

A table loom enables multi shaft weaving without the space or financial investment that a floor loom requires.

*This post contains affiliate links.

A table loom usually comes with four or more shafts. Four and eight shaft looms are the most common, but they can have more. Ashford, for example, manufacture a 16 shaft table loom!

Ashford 16 shaft table loom. Image from Ashford website.

Table looms are often favoured for their portability and affordability. They make a great loom to take along to workshops, or anywhere you want to take a multi shaft loom. Some will come with a handy carry bag and many will fold down to be even more space efficient. They are also often used for sampling, as you can test out your yarns or pattern before committing it to the floor loom.

Table looms come in a variety of sizes, meaning that if you only require one for sampling or you have a very small space to fit the loom, you could choose a 16 inch or lower weaving width. This size would also be suitable if you only wanted to weave narrower pieces like scarves.

The mode of operation for weaving on a table loom differs to other looms and makes it instantly recognisable. The shafts, rather than being operated by raising or lowering a heddle/reed (as in rigid heddle weaving) or being foot controlled (such as treadling on a floor loom) are raised by the manoeuvring of levers that sit at the front of the castle (the upright part of the loom) and are tied to the shafts underneath. These levers are very simple to operate and as lever 1 corresponds with shaft 1 and so on, it is visually simple – you are actually looking at the levers right in front of you, making it difficult to mix up and get the pattern wrong.

Table looms are also adaptable. In the last paragraph I explained that the levers are hand operated, however if you want more of a floor loom experience, you can purchase a stand along with treadles. The treadles are tied to the shafts in place of the levers, allowing you to lift the shafts by depressing treadles with your feet.

Some looms can be purchased as a four shaft and upgraded to an eight shaft later on. This is a terrific option for those who:

  1. Wish to start out on four shafts only OR
  2. Don’t wish to make the financial commitment of an eight shaft loom right away.

To weave on a table loom, you will need a few things apart from the tools that come standard with the loom:

*A table space to keep the loom on whilst weaving (unless you also purchase a stand, which is available separately). If weaving at a table, some weavers choose to stand. My back is no good for standing so I like to use an adjustable height office chair that I find comfortable.

*A warping board. A table loom is warped indirectly, so you make your warp on the board and transfer it to the loom.

*A raddle kit. This is necessary for spacing your warp before taking it to the loom. You can buy the raddle kit that fits your size of loom. Some weavers choose to make their own.

You can see a short overview of the Ashford 8 shaft, 32″ table loom here-

And you can see a demonstration of me using the loom here-

I have some exciting news regarding table looms too! I recently purchased the Ashford 16″ 8 shaft table loom to use for teaching. My husband and I made a two part video that shows you how to assemble it.

But that is not all! My primary purpose for buying this new loom is because I have had so many requests for a table loom class and I am happy to say that I’ve put together a very comprehensive class, Weaving on a Table Loom.

I hope this post has been useful to you, let me know in the comments if you have any questions or simply want to leave me a comment.

Until next time…

Happy Weaving!

Filed Under: 4 shaft weaving, 8 shaft weaving, Table loom weaving, Weaving Tagged With: table loom

Which weight of yarn do I choose?

by Kelly 11 Comments

For newer weavers, yarn choice has to be one of the biggest conundrums. We are totally spoilt for choice when it comes to variety of yarns available these days, but there are some important aspects to consider before you start shopping.

I often recommend that newer weavers start out by using knitting yarns. There are a couple of reasons for this.

  • Knitting yarn is readily available.
  • It is usually economical.
  • Many new weavers have a knitting background and therefore will often have a healthy stash of yarn!
  • Knitting yarn often has a nice amount of elasticity and are therefore quite forgiving to work with.
  • And finally, it’s usually thicker than weaving yarn, so for first projects it is an excellent choice – it will make your warping and weaving faster and easier.

*This post contains affiliate links. For more information, please see my disclosure policy.

When you purchase a weaving specific yarn online or in a shop, the recommended sett for that yarn will often be provided. Not so with knitting yarns, which tend to come with knitting needle or crochet hook recommendations instead. But, this is no problem to the savvy weaver who knows how to figure out the sett for her/himself! All you need is your chosen yarn and an inch ruler.

If you’re not familiar with the concept of sett in weaving, I explain it in this video:

And if you need an easy demonstration of how to figure out the sett for your chosen yarn, I recommend this video:

The demonstration in this video refers to balanced plain weave, the twill equation is a little different.

The next consideration after you have figured out the ideal sett is what you’re actually weaving. A scarf, for example may require a different approach to a table runner or placemat, even if you’re using the same yarn.

Let me give an example:

Say I have a light worsted weight (Australian 8 ply, DK) cotton that is lovely and soft. Say that I’ve done my wrap test to determine the sett and it showed me that my 7.5 heddle/reed is the best option. I go ahead with this sett because I want a soft and slightly flow-ey scarf.

I like the yarn so much that I decide to also use it for a table runner. But I want my table runner to have a firmer feel, so that it stays put on the table and is somewhat solid. Given my experience with weaving the scarf at a sett of 7.5, I decide that I’m going to use my 10 dent heddle/reed for the runner, as it will ensure that my warp and weft interlacement is closer than it was with the scarf, giving me a firmer fabric.

Here is a little tip when selecting a yarn for a woven piece you intend to wear eg. a scarf. Hold the yarn to your cheek and lightly rub back and forth. If the yarn feels scratchy or unpleasant to your skin, it will not be suitable to wear. If the shopkeeper and patrons are knitters, crocheters or weavers, they will understand what you’re doing. If not, you may get some odd stares!!

There is another, basic test you can perform if you’re unsure of yarn to heddle/reed suitability.

That is to grab your yarn and thread a single of it through a slot. If the yarn doesn’t fit through the slot, it is too thick. If it doesn’t fit, but you have to encourage it to get through, it is likely too thick. If you rub the yarn up and down in the heddle/reed and it seems a bit squashed, it is likely too thick.

Remember that your yarn has to deal with that friction for the entirety of your project, so if there is too much friction you increase the likelihood of broken warp threads and a less than comfortable weaving experience.

Likewise, if you thread your yarn through a slot and there is a heap of space leftover and your yarn seems very loose in the slot, it may not be the right heddle/reed for your project. Unless of course you are trying to achieve an open and airy fabric!

So, what if you don’t have a heddle/reed that is the equivalent sett for your yarn?

This can happen when using a finer yarn. The finest heddle/reed currently available for a rigid heddle loom is a 15 dent. But the recommended sett for my yarn is 30. Well, you can simply double your ends to achieve the right sett.

Then you have the choice for the weft, if using the same weight of yarn as warp, whether you double the weft as well or not. And this choice comes back once again to the purpose of the project and the type of fabric desired. Which brings me to sampling.

I used to think that sampling was a big waste of time. I’m not sure at what point I became a sampling convert, but it was probably somewhere in the throws of another project that did not turn out as anticipated.

Sampling is an absolutely failsafe method to guarantee the success of your project. It allows you to try the yarn at a particular sett, in particular colours, experiment with weft density, take the project off and wet finish. So, you get a mini glimpse of what your actual project will look like. It’s a very valuable education tool!

There is a lot to cover when it comes to the topic of yarns and this post really only scratches the surface.

If you found this post interesting and want to delve further into choosing yarns and understanding all the numbers, I have an online class that could be just the ticket. This is a short and sweet class that includes PDF charts for selecting the correct heddle/reed for your project and converting yarn terms for different countries.

You can purchase the class by following this link.

I have some other yarn related resources that will be helpful too.

The Weaver’s Toolkit is an ebooklet that includes all kinds of useful charts and information that are invaluable to the weaver.

I also have an “All about Yarn” playlist on Youtube, which includes 11 free videos:

I hope this post has been helpful to you, and as always, comments and questions are welcome.

Until next time…

Happy Weaving!

Filed Under: Rigid heddle weaving, Tutorials, Weaving Tagged With: choosing yarn, rigid heddle weaving, weaving yarn

Colour and Weave

by Kelly 12 Comments

Recently I was talking about patterns for the rigid heddle beginner (you can read that post here if you missed it). I briefly mentioned Colour and Weave as an additional technique to jazz up your weaving, but decided that it would need to have it’s own discussion, as it is so versatile and varied.

Firstly, what is colour and weave?

Well, it’s very simple. It’s the introduction of colour, usually in a set sequence, first in the warp and then also in the weft. When you begin weaving, that is when the magic happens!

The prearranged colours cross paths and have a party on your loom 🄳

Plaid, which I discussed recently is a type of colour and weave, as you have set colours in set amounts in the warp and then cross with the same colours and amounts in the weft. Take a look at this post if you want to see some examples of plaids I made on my weaving software.

*This post contains some affiliate links. For further information please see my disclosure policy.

Candy Store Scarf

When the warp and weft colours cross over each other, they can produce some very interesting effects. You can use colour and weave in all kinds of weave structures, but it works great for plain weave and is perfect for the newer weaver. You are still weaving your familiar plain weave, but it can look very different! My Candy Store Scarf is the perfect example of this.

Colour and weave is wonderful for the rigid heddle weaver as it is such a simple “next step” once you have practiced plain weave and are looking for a new and interesting challenge.

Log Cabin

Some of the most famous and popular examples of colour and weave are Log Cabin and Houndstooth. These are often considered a “next step” for weavers venturing out from limited colour plain weave.

Although you can use multiple colours for both of these weaves, it can be a good idea to limit the colours to two that contrast well, otherwise the beauty of the crossing colours can become a bit lost.

Houndstooth colour arrangement is very simple, whereas log cabin is a little more complicated and warping can take quite some time. So, if you are a newer weaver, definitely have a go at houndstooth before attempting log cabin.

Houndstooth

Jane Patrick’s “The Weaver’s Idea Book” is a great resource for getting started with this technique. She has a section on weaving a colour and weave sampler and it includes many examples or suggestions for colour arrangements.

If you’re interested in exploring colour and weave, you have come to the right place! Here is a list of resources I have that can help.

Log Cabin Table Runner Class

Log Cabin Rable Runner PDF

Houndstooth Placemats Class

Candy Store Scarf PDF

The Town Bag PDF

The Weekend Scarf PDF

Pinwheels

Finally, I want to mention the applications of colour and weave beyond 2 shafts. Pinwheels are an easily recognisable example of this and can be woven on 4 or 8 shafts. Even though there are more shafts, the initial warp colour setup, then weaving colour sequence is still an essential aspect. My Pinwheels Table Topper class shows you how to set up your rigid heddle loom to weave this beautiful 4 shaft pattern.

When you get into 4 shafts and beyond, you can play around with your colour placement in the warp and weft in order to highlight certain areas of pattern. When I wove some bread towels for myself, I included a contrasting strip of red in the warp.

This is really not a colour and weave because I had already threaded the loom with the intended pattern – the pattern didn’t appear strictly because of my colour placement.

But I still think it’s worth mentioning to highlight how patterns can appear or at least become more prominent when selective colour arrangement is used. If I had planned this piece better, I would have ensured in the design process that the strip of red was going to be wide enough for one full repeat of the pattern – you can see part of the pattern has been cut off.

Another example from a 4 shaft project for the floor loom or table loom weavers is the Bright and Beautiful Towels.

This project uses a twill weave structure but strategically uses colour in the warp and weft so that they meed at specific points of the pattern AND so that they weave squares. This twill pattern is beautiful to begin with, but playing with the colour arrangement makes it truly unique and eye catching.

I think it’s a wonder that so many fascinating patterns can appear just by the meeting of colour!

I hope you enjoyed this post, and please leave any thoughts of questions you may have in the comments below – I would love to hear from you!

Until next time…

Happy Weaving!

Filed Under: Colour and Weave, Pinwheels, Rigid heddle weaving, Rigid Heddle Weaving Patterns, Weaving Tagged With: colour and weave, weaving

What running a creative, online business is really like.

by Kelly 156 Comments

I’m well aware that as an online weaving teacher, designer and encourager, I have a lot of people’s dream job.

I design my own classes and projects, I make my own hours around my family commitments and I work from my own home.

It could be easy for those on the outside looking in to think “she is so lucky” or “I wish I could do that”. And honestly, I consider myself so blessed to be able to do this. But there is definitely more than one downside to being an online entrepreneur.

Tracy from Knit, Spin Weave wrote a blog post recently that was quite candid about the reality of owning a creative business. It struck a chord with me.

Being a part of the online world can have it’s ups and downs. People will type things that they would not dare to say to your face (depending on their level of rudeness I guess!) It has been suggested that I am somehow a greedy person lacking charity because I choose to earn money from my business rather than doing it just as a hobby. I guess that person (and yes, unfortunately it was someone well known in online weaving circles) never too the time to browse through my completely free blog and Youtube channel. Or signed up for my email list for extra free information, patterns and inspiration. I think I have published more free content to the internet than paid content. I guess that person has no idea how much time I spend every single day at my computer responding to questions and helping weavers with advice. That is not paid either, but I feel it’s an essential part of what I do.

Is there something wrong with wanting to earn money doing what you love? I certainly didn’t make any money for a long time and now earn a modest income. Out of that modest income, I of course pay taxes, materials for projects, online selling fees, I could go on and on. I pay well over $1000USD a year for online course hosting, the same for this website, $79USD per month for email hosting. The costs of actually running a business can be huge, thousands of dollars every year, even without a bricks and mortar shop.

There are times, many times where you simply do not make any money. But still, the bills must be met. And the work must continue. Yes, unlike a wage job, you have to continue to put in the work, whether or not you are being paid for it.

As a business owner, I do everything. I don’t have help with the business, apart from my wonderful sounding board husband and my son who occasionally does closed captions for me when he has time. I’m in that very tricky position of the business growing but still not earning enough to hire out help occasionally – every penny goes back into the business and into raising my family.

I did not start out intending to make money from weaving. It was, and is my passion and above all I wanted (and still do want to) share my passion with others and ignite the same passion for them. My Online Weaving School only grew out of a demand from weavers who had seen my Youtube videos – I had no idea about online courses. Over the past 3 years I’ve seen the potential grow from a hobby to a business. This has allowed me to continue to stay home with my family, homeschool our kids and contribute to our income, which has been an amazing blessing and as a stay at home Mum, was something I prayed about for years and years.

A hobby that is all of a sudden taking over every waking hour can not continue to be a free hobby. It would not be fair to my family if I spent so much time on a hobby that did not otherwise contribute to all of us.

Anyone who has seen my online classes or has purchased a pattern could not claim that I overcharge. I purposefully keep my prices as reasonable as I can. I want weaving to be accessible to anyone who wants to learn, that is why I continue to upload to Youtube even though I don’t need to anymore and the revenue that I earn from ads on Youtube is a very, very small portion of my income.

Perhaps it’s the wrong time of year to be writing this kind of post, but I do feel very reflective as the new year approaches. Perhaps it’s wrong of me to share this kind of information with those who follow me for my lessons and tutorials. It’s certainly something I don’t normally talk about, but I want people to know that this is not all easy and fun. Not just for my sake, but for the sake of other business owners in similar situations.

The internet can be so deceptive. I do love Instagram and social media but there are times I just want it all to go away. Social media can be a monster that never rests, there is always someone doing better than you, looking better than you, having more than you. Increasing the anxiety of those who use it. But don’t be fooled. Things are not always as they seem.

If there is only one point that you take away from this lengthy and disjointed post, I hope that it will be this:

Be kind. Don’t judge. Be patient with others. You can’t see behind the scenes and you can’t assume to take everything at face value. People are complicated, life is complicated! We all have to do our best to love one another, even though it’s possibly the hardest thing we are asked to do.

You know what? I think I need to go and weave something wonderful. I’ve been thinking about Krokbragd again…

Until next time…

Happy Weaving!

Filed Under: Inspiration, Online Weaving School, Weaving Tagged With: entrepreneur, online business, weaving

Should I buy a larger loom?

by Kelly 19 Comments

One of the number one questions I’m asked by either brand new or seasoned weavers is “Should I buy a larger loom?”

In this post I will take you through the main points to consider when you’re wondering whether a size upgrade is the right choice for you.

*This post contains affiliate links.

The first consideration is what type of loom we’re talking about. Most people who ask me are rigid heddle weavers. So I’ll cover rigid heddle looms first, specifically Ashford looms, as they have the largest sizes available.I often recommend my 24″ loom as a great starting point for a beginner who wants a decent, but not huge width. It is wide enough to weave smaller width items like scarves but just large enough to weave kitchen towels and bags.

You can, of course weave yardage to sew with (to make your own clothes and larger items) but that involves sewing panels together to make wider widths. Depending on the item you plan to sew, this may or may not work well.

Beyond the 24″, the next size up is the 32″ rigid heddle loom. The largest currently available is the 48″ rigid heddle loom.

When considering a larger loom, consider the following points:

  • Do you have the physical space for a larger loom?

If you buy a rigid heddle loom 24″ (that is the size I have) or above, I would definitely recommend to also purchase a stand with it.

I personally would not enjoy using a larger loom trying to lean it on the edge of a table or similar, and I don’t think that this would allow you to maintain a beneficial weaving posture. A good posture is really important – even if you have no physical injuries or problems, know that you could develop problems long term through repetitive poor setup and practices. So a stand is well worth the investment.

But, this means that your loom will be free standing rather than packed away. Do you have a space where you can set up a loom of that size and leave it on the stand when finished? Or does your living space/s dictate that your loom would need to be packed away in between uses?

  • What is your budget?

This is a pretty important consideration for most of us! Naturally, the larger your loom, the more it will cost. And not just the initial outlay for the loom, but addition tools or pieces that you wish to add along the way. Every time you buy a different sized heddle/reed, a pick up stick, a stick shuttle – these are all going to be larger to compliment and fit your loom and that will cost more.

Here are a couple of examples as a comparison. I’ll list the 24″ loom specifics as compared to the 48″. All prices are in US dollars.

24″ RHL and stand – $394 USD (you can sometimes find a combo deal of the loom and stand together for a slightly cheaper price).

24″ 10 dent reed/ heddle – $37.50

22″ stick shuttle – $7.50

48″ RHL and stand – $695

48″ 10 dent reed/heddle – $89

48″ stick shuttle $40

Uh huh, big price differences!

  • What do you intend to weave?

Some new weavers don’t really consider this when purchasing. Not being familiar with the possibilities or not having used a loom before, it can be very difficult to know what items you will end up enjoying weaving. If you only intend to weave scarves and smaller items, why go to the expense of the largest loom?

On the other hand, you may find that your absolute favourite thing to weave is baby blankets or afghans, therefore making the larger loom well worth your consideration. What if you make the decision to buy a smaller loom but after a little experience find that you want something larger?

Well, the good news is that rigid heddle looms are easy to resell. If you have kept it in good condition, it should be easy to find an eager new weaver willing to take it off your hands for a fair price. You can then use this money to invest towards the larger one.

  • How is your back?

Back or shoulder problems? Neck trouble? Then you need to consider carefully whether a larger loom is the right choice for you. A larger loom means a much wider reach with a shuttle.

As an example, I can sit very comfortably at my 24″ on it’s stand, extend each arm out to insert the stick shuttle and not have to move forward in my seat.

As someone who has a back injury and regular flare ups, if I had to lean forward or to the side every time I wanted to throw a pick, that would be a real problem for me. It would be a much greater strain on my body. I prefer to accept my limitations and be grateful that I am able to weave on the 24″ and plan my projects accordingly.

That brings me to the next related topic, the table or floor loom.

I’ve written a large number of articles on this topic, here is a list of those posts if you’re interested in researching more.

When I had my 8 shaft, 32″ table loom it was a little more difficult to weave on when I had it fully warped, but with the correct height adjustable chair, it was more than manageable. I still miss that loom, I sold it to make space and provide extra funds for my floor loom. I’ve since replaced it with a smaller 16″ table loom that I can use for teaching purposes – perfect!

Now that I have my Louet David 2, 35″ floor loom, even though it is the widest loom I have owned, it is a good fit for me width wise. It is wide enough to weave baby blankets and wide shawls.

Recently I wove yardage on it for my Clothtober project, which was a tunic for me and it worked out well. So, why is this loom not a problem for my back? Well, I always use a boat shuttle with this loom.

Because the tension is excellent, I can shoot my boat shuttle back and forth with ease. I am also seated on an adjustable piano bench and find that I develop a slight rocking motion as I get into the weaving rhythm. Although my shoulders do get a little sore if I put in a long weaving session, it is not excessive and generally my back is fine as long as I’m not in a dreaded flare up phase.

The action of throwing a boat shuttle is quite different to passing a stick shuttle. Yes, you an use a boat shuttle with a rigid heddle loom too, but I generally don’t because it can’t hold the same tension so I end up mostly passing the boat shuttle through anyway.

I should also add, if you do have a rigid heddle loom that is a little smaller than you would like, you always have the option of double width weaving. Although somewhat limited, it is a really terrific way to double the width of your fabric. I have two classes that teach you how to do this – Doubleweave Baby Blanket and Weaving with Two Heddles. I also have the Rainbow Lap Blanket, which is woven entirely on a Sampleit loom.

I certainly didn’t intend to write such an epic post when I sat down to address this topic today, but there is a lot more to be said about it than I realised! I hope my ramblings have been of use to you.

As always, leave me a comment with any questions or additional points you may have to add. I appreciate your input!

Until next time…

Happy Weaving!

Filed Under: 4 shaft weaving, 8 shaft weaving, Floor Loom Weaving, Rigid heddle weaving, Weaving Tagged With: buying a loom, floor loom weaving, rigid heddle weaving, table loom weaving

Rigid Heddle Loom cost comparisons

by Kelly 31 Comments

It can be so hard to know where to start when you’re in the market for a new rigid heddle loom, especially if it is to be your first ever loom.


Having only used Ashford rigid heddle looms, it is not really within my scope to compare different looms from a practical perspective. I can’t in fairness give appraisals of looms I have not used (though I’ve made it pretty clear that I love my Ashford!)

Cost is an important factor when considering your loom, and this is where I can help by offering a comparison of various looms and what will be included in the purchase cost.

Not all looms are going to be the same size, so I am going to compare looms of similar size but not always equal. I’m using Amazon for comparisons, but will use other sites if any particular loom is not available on Amazon.

*This post contains some affiliate links. This means that if you click and purchase, I receive a small commission at no extra cost to you.

These prices do not take into account any additional costs such as stands, extra tools or shipping. All prices are in U.S. dollars.

Please also note that most rigid heddle looms come flat packed in a box, so unless you pick one up in a store where an assembly service is offered (usually for a fee), you can expect to be putting the loom together yourself.

Let’s start with the first rigid heddle loom I ever bought and still use constantly.

Ashford 24″ Rigid Heddle Loom-

Listed at $225, this loom comes with a standard 7.5 dent heddle, warping peg, 2 clamps, a threading hook, 2 shuttles, cardboard warping sticks and an instruction booklet. Made from Silver beech hardwood in New Zealand. *Edited to add – this loom now comes with a built in warping board if you purchase the warping pegs separately.

Beka 24″ Rigid Heddle Loom-

Listed for $159.99. Comes with one 10 dent heddle, two stick shuttles, one pickup stick, a pair of heddle blocks, threading tool and complete instructions. SG series looms are made from Cherry wood and finished with Danish Oil.  Made in Minnesota, USA.

Schacht Flip Rigid Heddle Loom 25″

Listed at $335, this loom includes a 10-dent reed, warping peg, 2 shuttles, threading hook, and complete warping and weaving instructions. It is foldable and made in America from maple wood.

Glimakra Emilia Rigid Heddle Loom 18″

Listed for $279, this loom is made of birch and is foldable. It includes a 10 dent heddle, shuttle, warping peg, two clamps and a sleying and threading hook. Made in Sweden.

Kromski Harp Forte 16″

Prices starting at $279, this one is interesting. Kromski claim that you will not get a “complete package” with any other RH loom, and that seems to be true. This loom is designed to also be used as a warping board, I think that is quite innovative! I rarely warp my rigid heddle loom indirectly, so it’s not a feature that I would use, but for those who prefer to warp from a warping board, this is a really good deal. You don’t have the extra expense or purchasing a warping board separately and you don’t need the extra space. Smart! Kromski say that this loom also comes with a “warp helper” but I’m not sure what they mean by that.

The Harp is also foldable and as a bonus, the wood is already finished, so you can assemble right away.

A somewhat obscure loom is the Toika Siru Rigid Heddle Loom, 16″. Made in Finland in a classic raw wood, minimalist style, these looms start at around $260 USD.

These looms have an interesting design, with a metal bar and thick back cloth beam. They are foldable and seem to come standard with a double heddle block, which is handy for those wanting to use more than one heddle. You won’t generally find this loom for sale in the usual places (Amazon, large yarn or supplies stores) though other Toika looms are not too hard to find.

Leclerc Bergere Rigid Heddle Loom 24″

Price for this size is $285. This one comes with a blue boat shuttle! The Leclerc looks to be a very basic, sturdy design. I’m not sure what to think of the metal handles for tensioning, I feel like that may not be so comfortable.

This loom comes with extra warping blocks, lease sticks and extra shuttles, but doesn’t seem to include a reed or threading hook.

Erica by Louet.

I’m being a bit sneaky including the Erica by Louet in this list. It’s not actually a rigid heddle loom, but it is a 2 shaft table loom. So why include it in a rigid heddle comparisons list? Well, I get a massive number of messages from new weavers who are trying to decide between a rigid heddle loom and a table loom. I almost always recommend a rigid heddle (but not always, it depends on the circumstances of the person asking) but I would definitely not rule out something like the Erica. Here is why:

*It’s like a rigid heddle and table loom rolled into one. It has the same basic shape/frame and tensioning pegs as a RHL, but the “castle” (the upright part!), heddles, shafts and reed as a table loom.

*It’s a fantastic introduction to weaving on a table or floor loom. You have the functionality of a sturdy, upright loom with texsolv heddles without being overwhelmed by too many shafts.

*You have the option to upgrade later to 3 or 4 shafts, increasing the possibilities for your weaving.

With prices starting at $370USD, this is definitely a higher priced entry point loom, but still very reasonable for it’s capabilities.

*It’s foldable and light enough to pick up and put in the car for workshops, teaching or travelling.

I hope this collection has helped you to understand a little more about what you will pay when purchasing a new rigid heddle loom. If I have missed any, please mention them in the comments below!

Filed Under: Gift Guide, Rigid heddle weaving, Weaving Tagged With: rigid heddle loom, rigid heddle weaving

Stashbuster Woven Notebook Covers

by Kelly 9 Comments

Otherwise known as “the project that began with a messy drawer”.

The messy drawer

This is the yarn drawer that my girls have access to. I could use this photo opportunity to blame it all on them, but if we’re being truthful, I’m pretty messy myself!

*This post contains some affiliate links

Anyway, this mess inspired me to make something, so it’s not all negative. A lot of my yarn stash is smaller pieces leftover from warping or are thrums (what is left on the loom when you cut your piece off) and can be difficult to find uses for.

Perfect for the idea that struck me, and it’s also a great project for little loom weavers, as it can be done on a Sampleit.

I had to break this into a series of 3 videos, you can either view them on Youtube or my Online Weaving School. You can download the printable PDF from my weaving school or view the information here:

Notebook Essential Information

I thought it might be a great time of year to do a tutorial for all my followers and students as a thank you for your support. The bonus is that you can make lots of notebook covers as Christmas gifts, they don’t take much yarn and they are quick to weave up.

The only part of the project that you need a longer length of yarn for is the warp. Here are some suggestions for your warp:

Bendigo Woollen Mills Luxury 8ply

Cleckheaton Country 8 ply

Patons Classic dk superwash

I always use Gutermann Sew all thread because it is so strong and multi purpose.

During the video series, you will notice that I mention some other helpful links, I will list them here for easy access:

Clasped weft tutorial

Woe to Go – Beginner Rigid Heddle Weaving

How to weave neat edges

I really hope you enjoy this project! Let me know in the comments if you intend to give it a go.

One more thing! If you like this project I would really appreciate you sharing links with your friends or on social media so that even more weavers can benefit.

Until next time…

Happy Weaving!

Filed Under: Free tutorial, Rigid heddle weaving, Sewing, Tutorials, Weaving Tagged With: free tutorial, notebook covers, youtubetutorial

  • « Go to Previous Page
  • Page 1
  • Interim pages omitted …
  • Page 17
  • Page 18
  • Page 19
  • Page 20
  • Page 21
  • Interim pages omitted …
  • Page 25
  • Go to Next Page »

Primary Sidebar

Hand crafted boat shuttles

Categories

Archives

Meta

  • Log in
  • Entries feed
  • Comments feed
  • WordPress.org

Copyright © 2025 Kelly Casanova Weaving Lessons on the Foodie Pro Theme