• Skip to main content
  • Skip to primary sidebar

Kelly Casanova Weaving Lessons

  • Hi! I’m Kelly!
    • Disclosure
  • Online Weaving School Class Index
    • Common account issues
    • Common technical issues
    • What do I get with a membership?
  • New to rigid heddle weaving? Start here!
    • Never heard of the rigid heddle loom?
    • How to weave neat edges on the rigid heddle loom
    • Rigid heddle weaving
    • Rigid Heddle Weaving Patterns
  • Patterns
  • Subscribe

Rigid heddle weaving

Can you weave plain weave on krokbragd threading?

by Kelly 9 Comments

My answer to this question is: “Yes… but are you sure you want to?”

There are times when you’re weaving krokbragd and you want to have a little area of just plain colour, whether it’s to break up a busy design or as a border section.

*This post contains affiliate links. For more information, please see my disclosure policy.

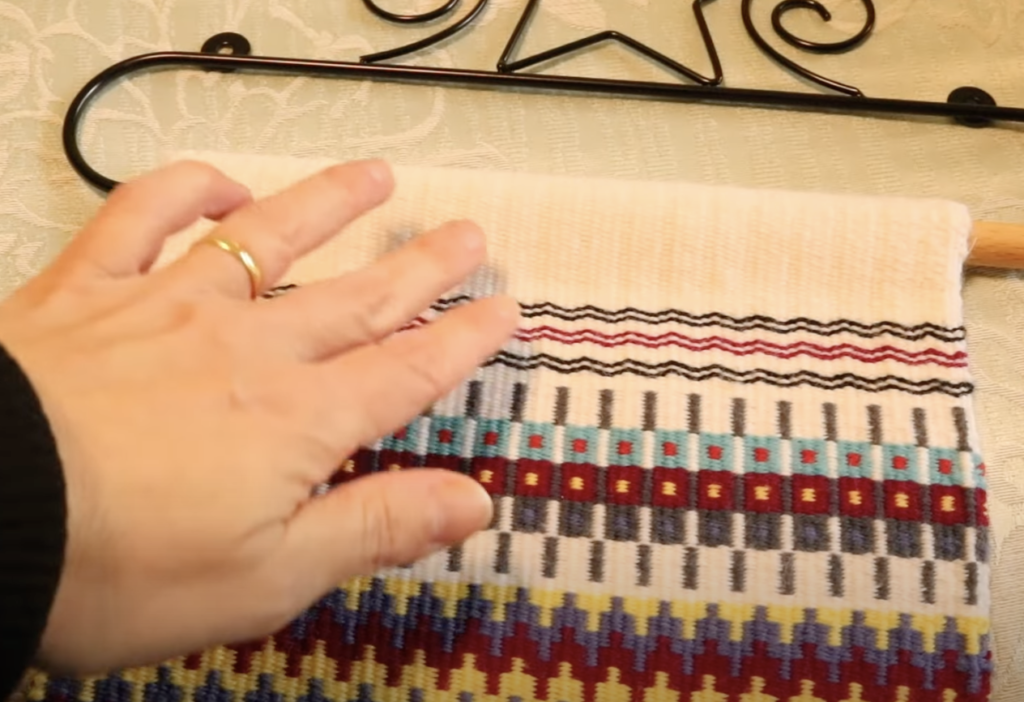
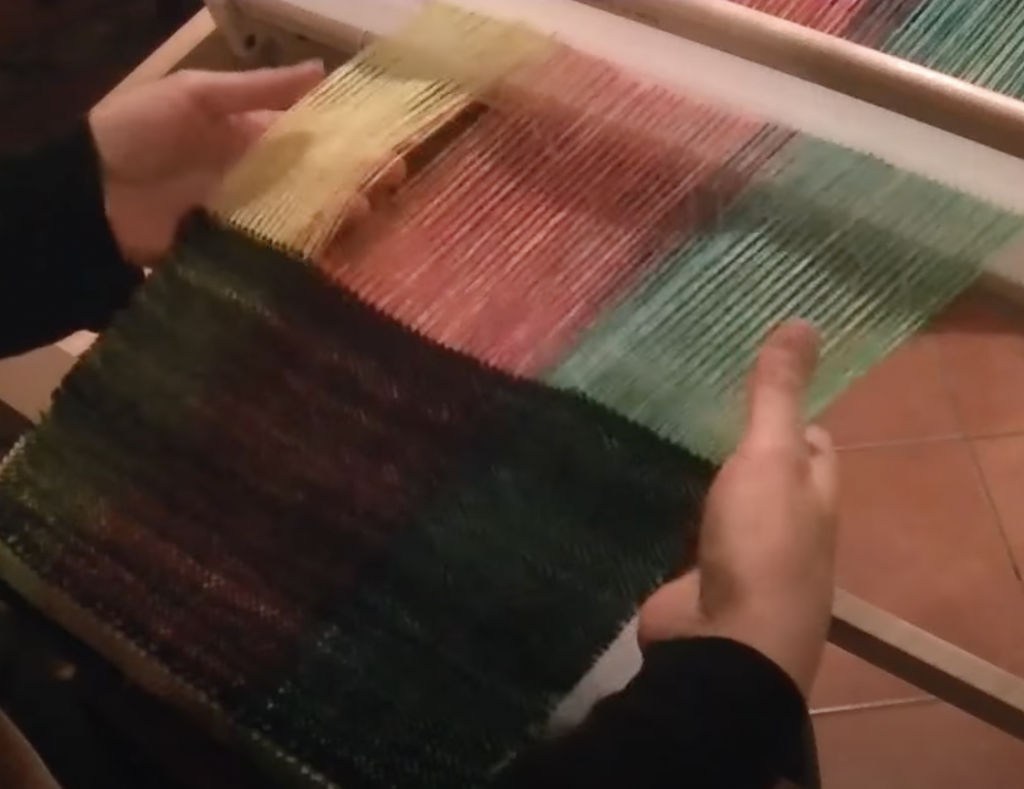
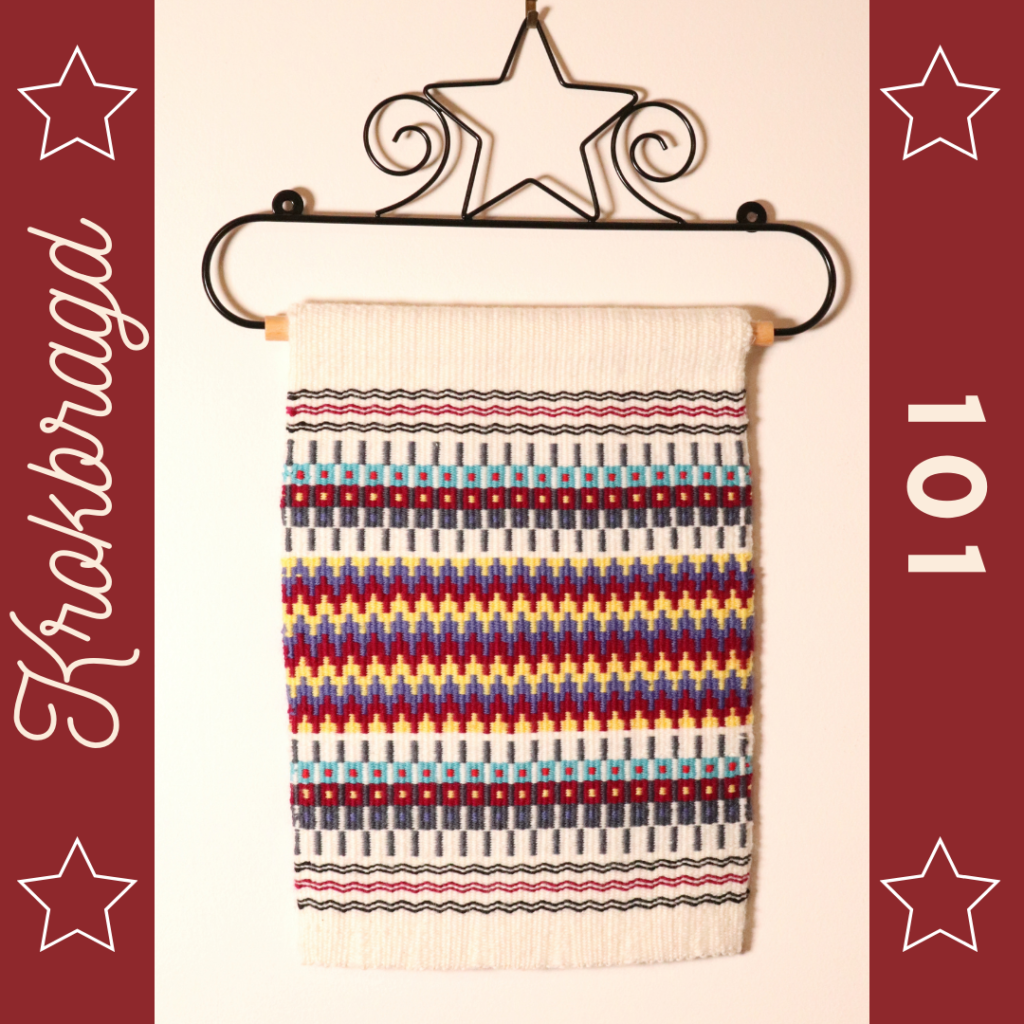
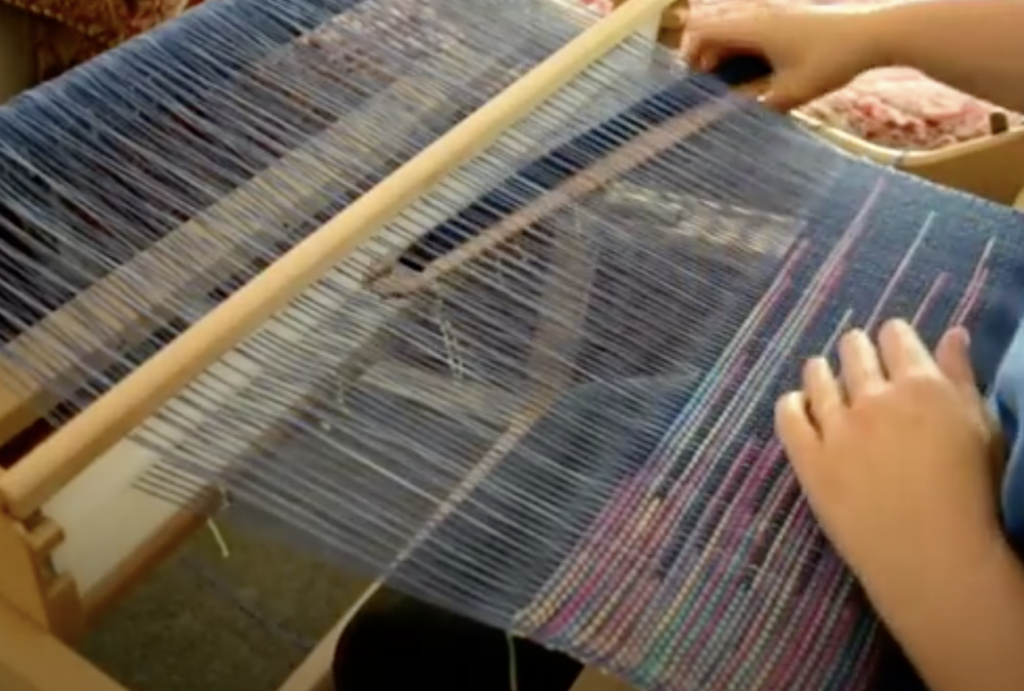
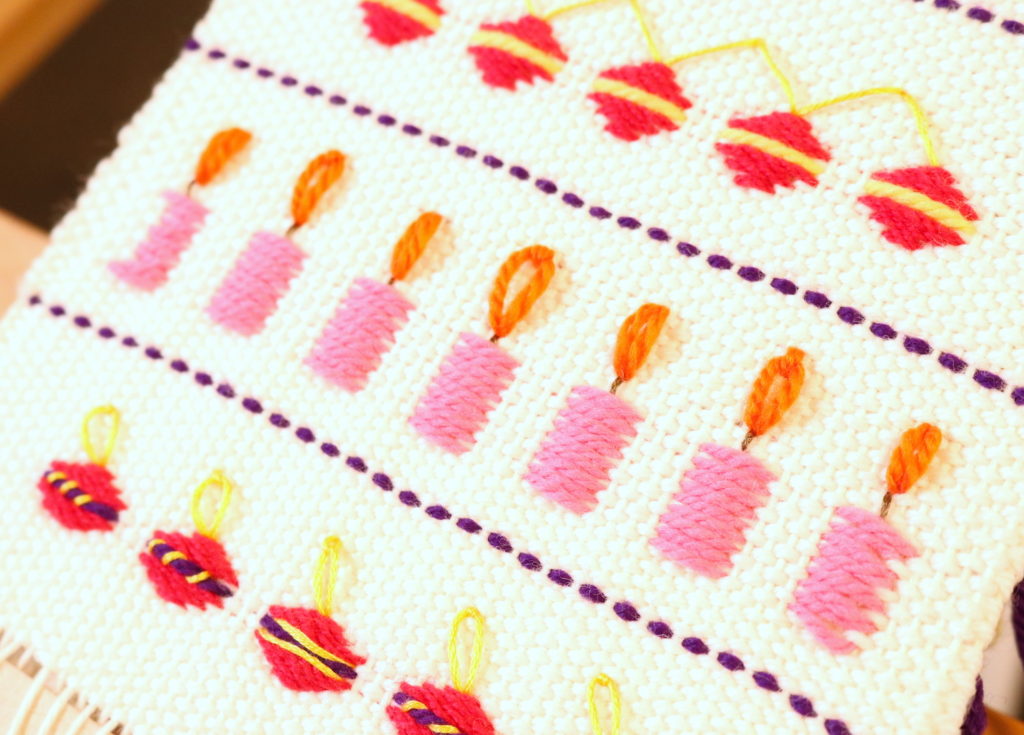
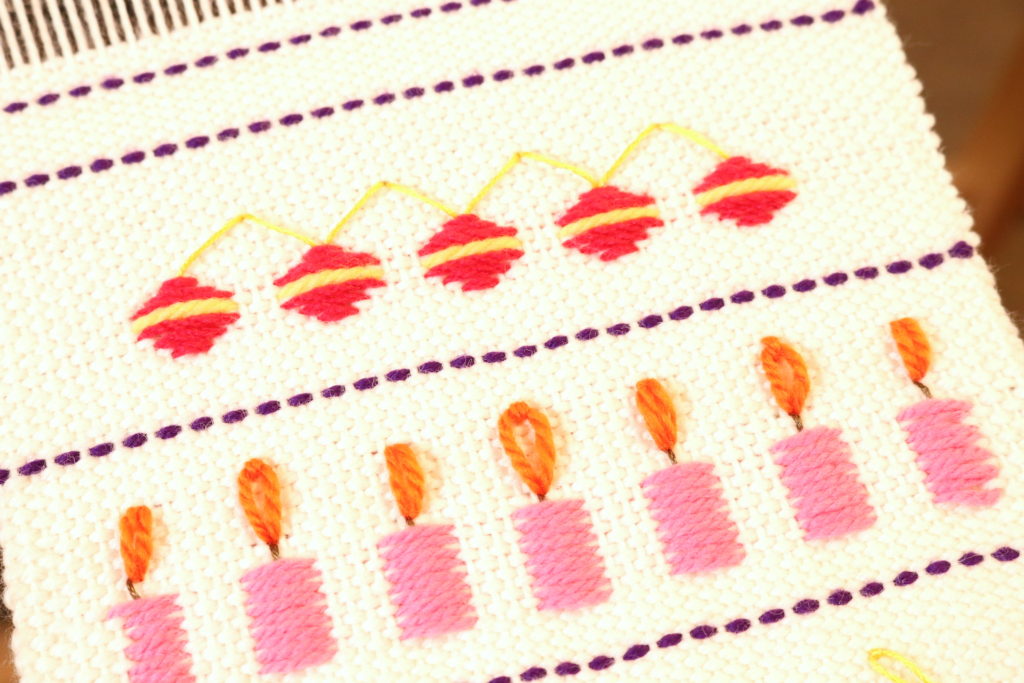
My wallhanging piece pictured above has some larger bands of solid white at the top and the bottom to act as borders. The top section was also woven in order to fold over and form the sleeve for my quilt hanger.

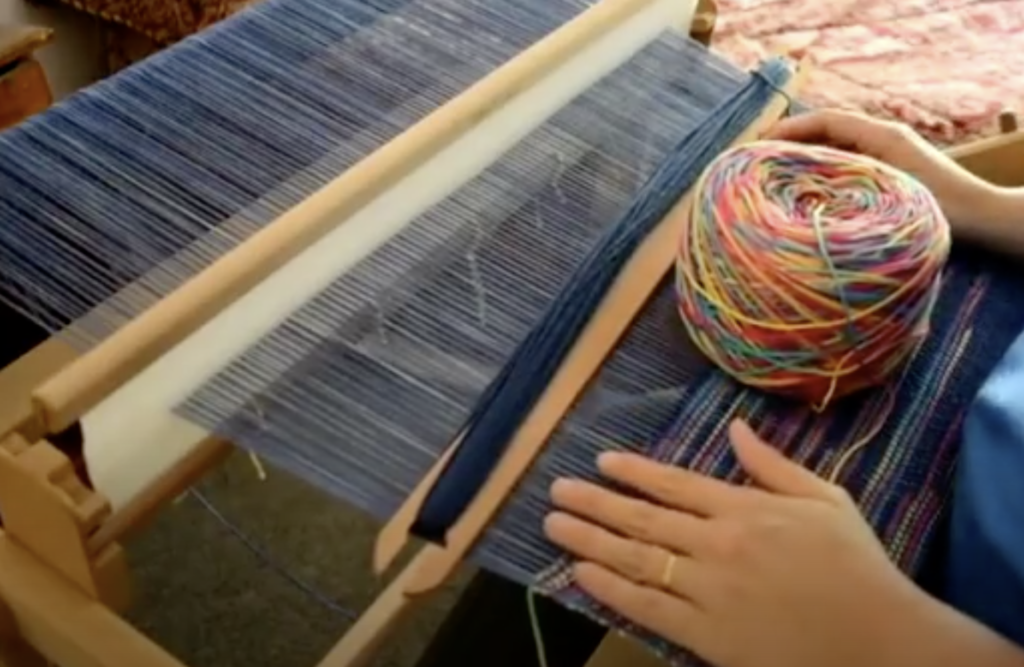
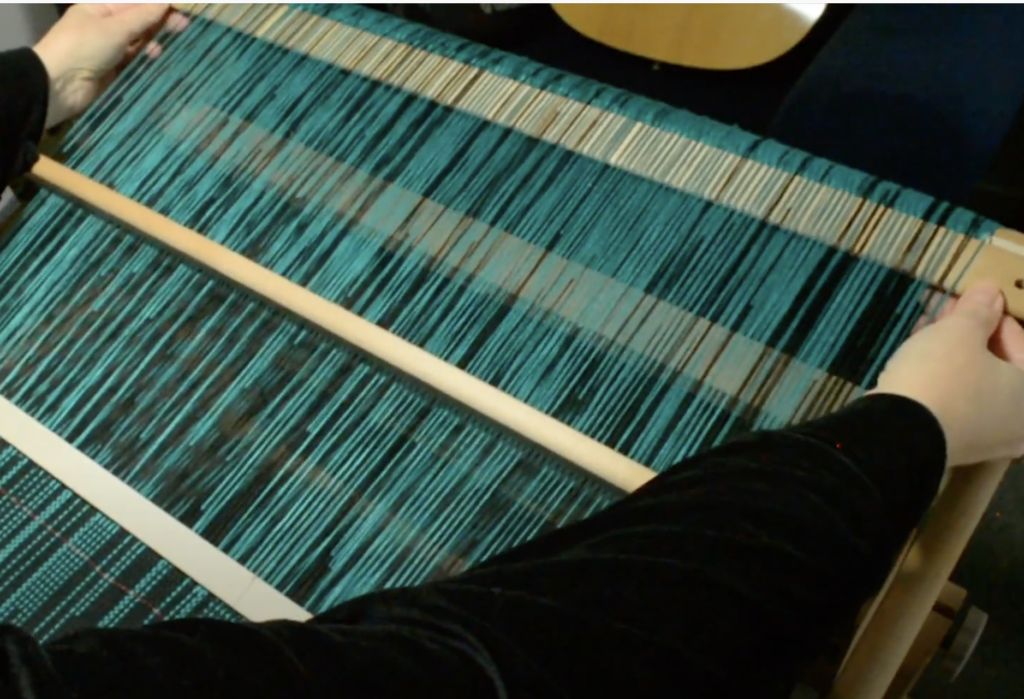
You might naturally think that for weaving a solid band of colour, you would choose plain weave. If you have your rigid heddle loom set up with a single heddle, heddle rod and pick up stick, plain weave is easy.

Single heddle, heddle rod and pick up stick loom setup

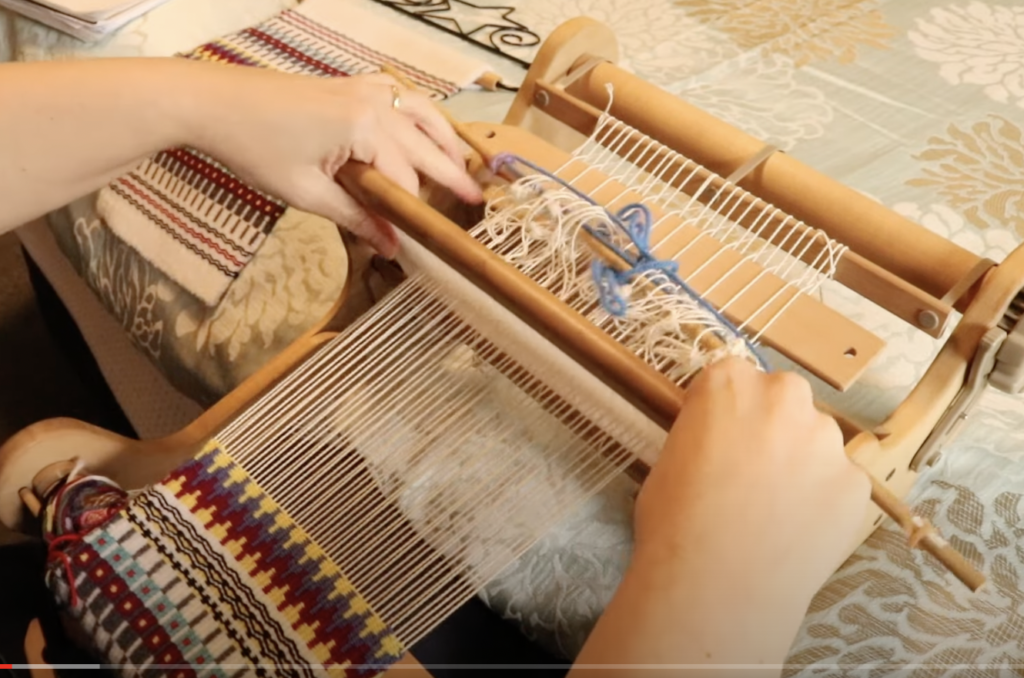
All you have to do to achieve plain weave on this setup is:

  1. Heddle up
  2. Heddle down

However, plain weave is definitely not the best option (in my opinion) and I’m going to tell you why.

Plain weave is a balanced weave

By it’s very nature, the amount of warp showing compared to the amount of weft showing is equal, ie. balanced! Now, consider the very weft faced krokbragd you have been weaving all this time. The weft completely covers the warp so that all you see is the colours of the weft forming patterns. If you suddenly throw a band of plain weave in there, it’s not going to match up so well with the krokbragd.

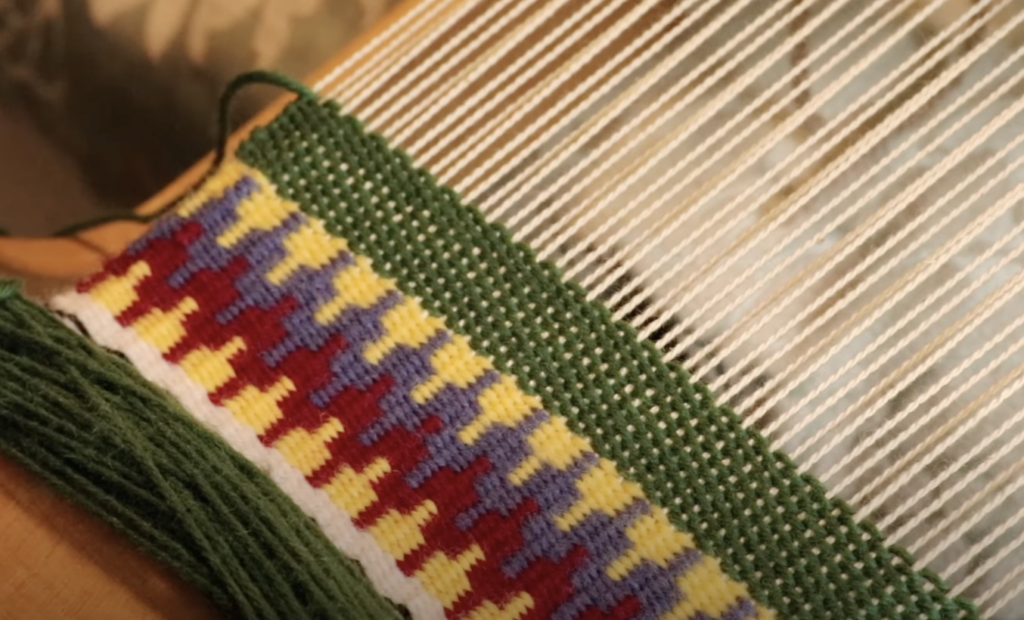
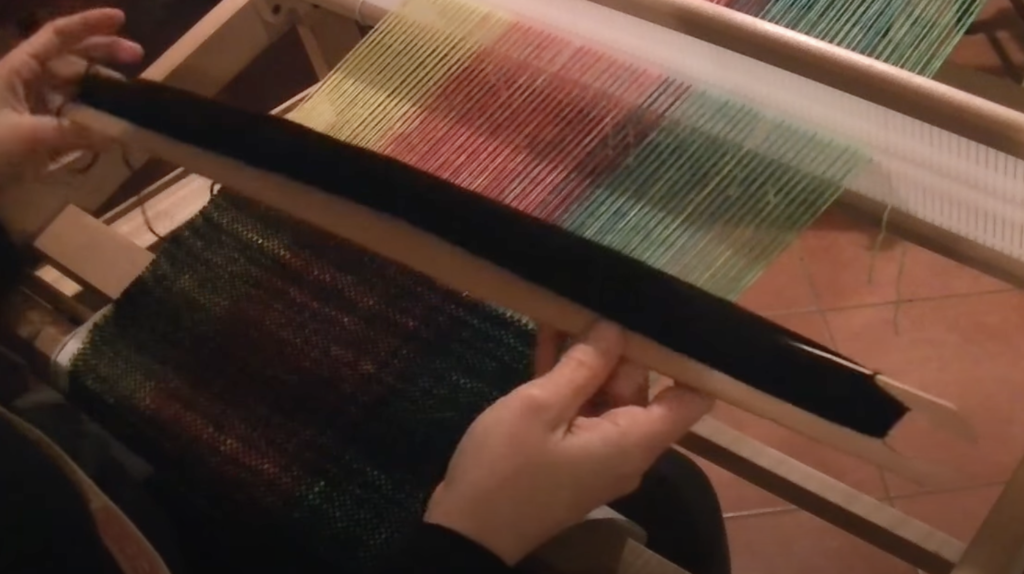
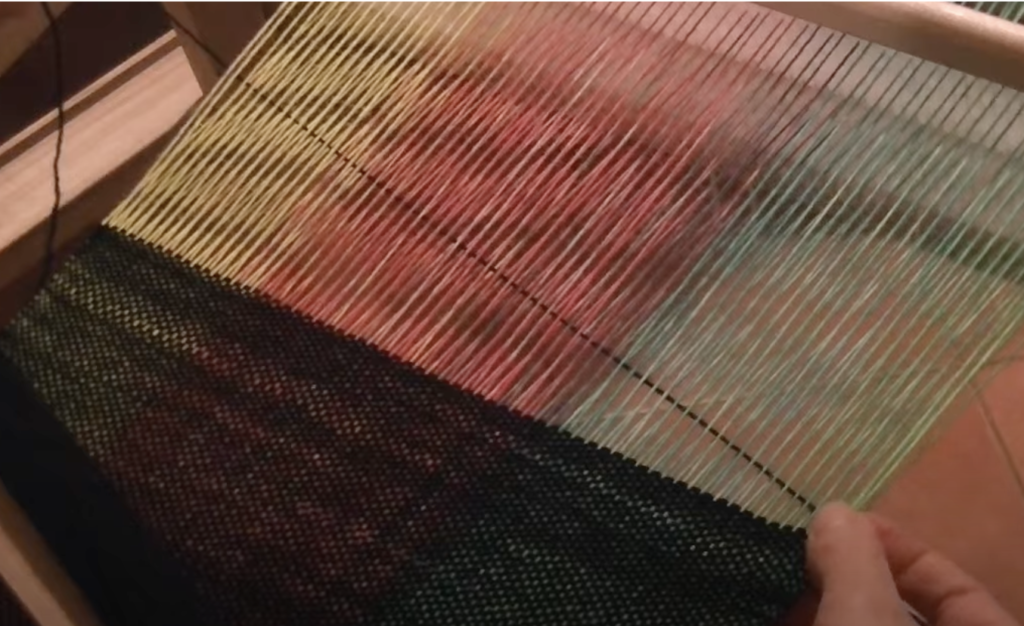
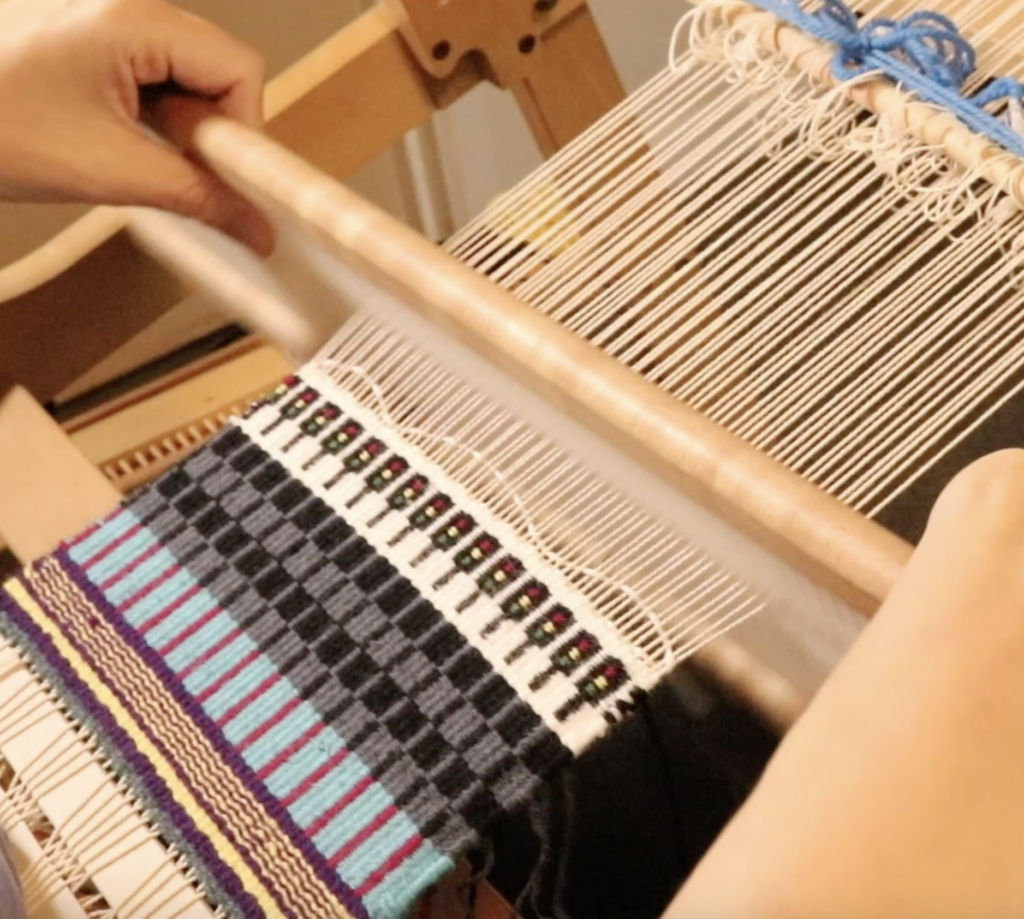
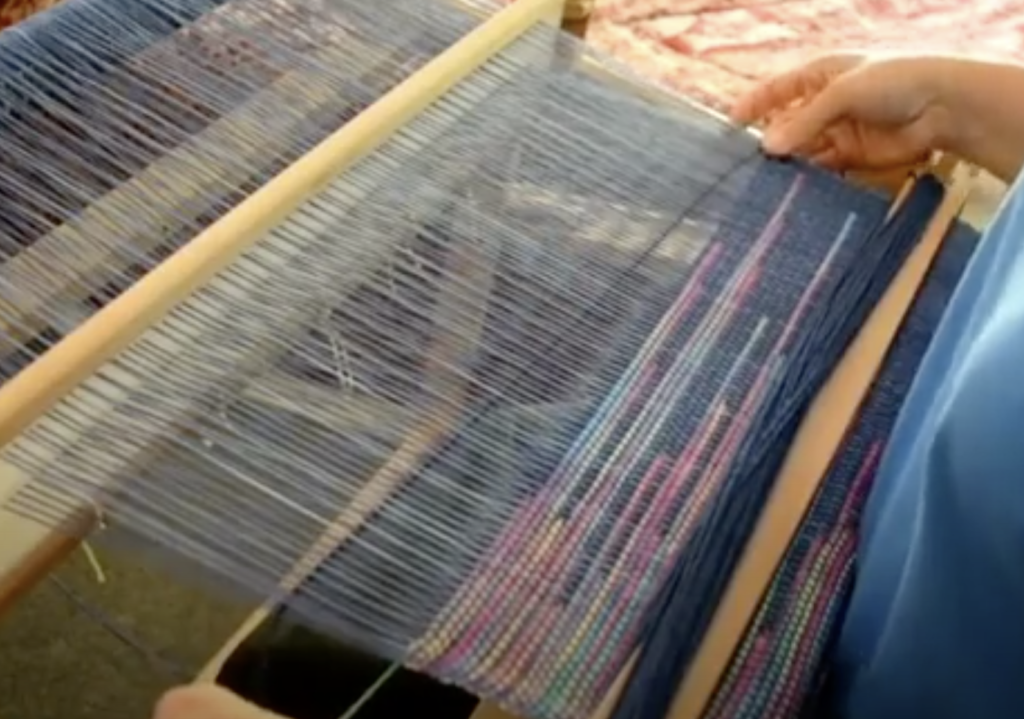
Compare the band of green plain weave just woven with the rest of the krokbragd underneath. See the problem?

The warp is showing through, and considering we have spent the rest of the piece carefully beating down the weft to cover the warp, the plain weave now sticks out like a sore thumb! If the entire piece was plain weave, it would be desired that the warp is showing through at the same rate as the weft, but not for krokbragd.

Plain weave is a lighter weave structure

It’s not only the visual aspect of the plain weave that is different to the krokbragd either. Weft faced fabrics are generally quite stiff and dense. There is a great difference in texture between the two weave structures on this piece, with the plain weave section being thin and light.

Changing the weave structures changes your edges

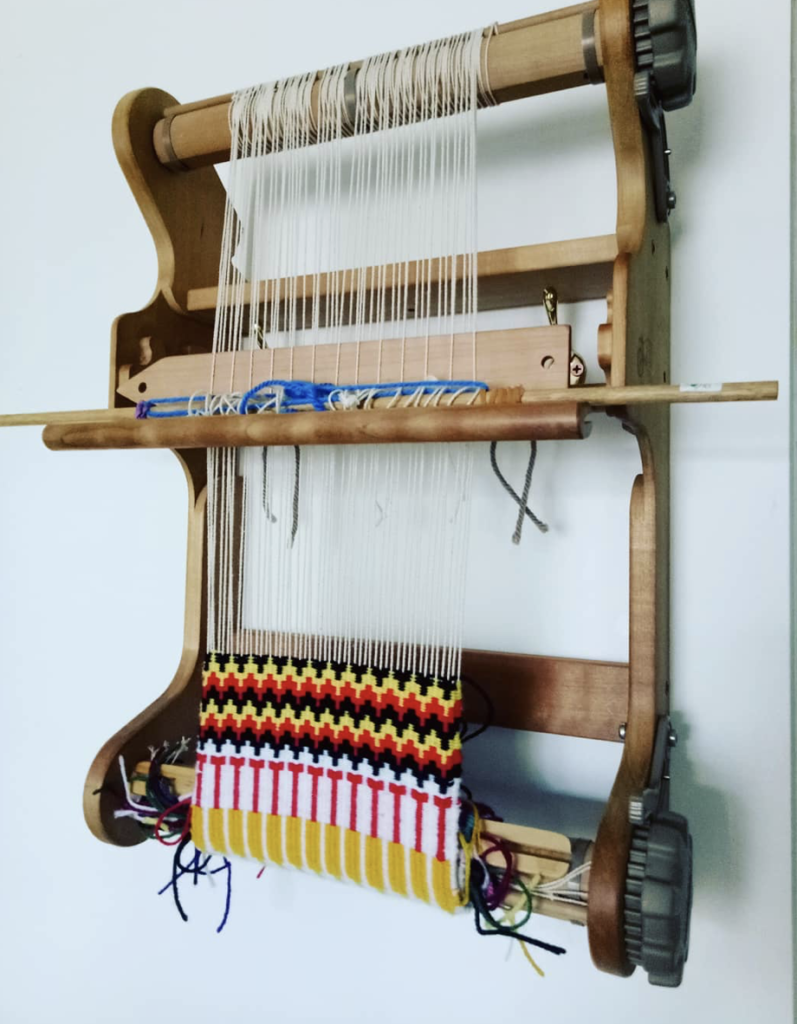
This difference in weight of the woven piece affects the fabric in other ways too. Krokbragd has more draw in than plain weave, so suddenly my edges are no longer consistent and look slightly bulgy in the plain weave section.

So, how do we solve this problem?

Thankfully the answer is extremely simple. All you have to do is keep weaving krokbragd!

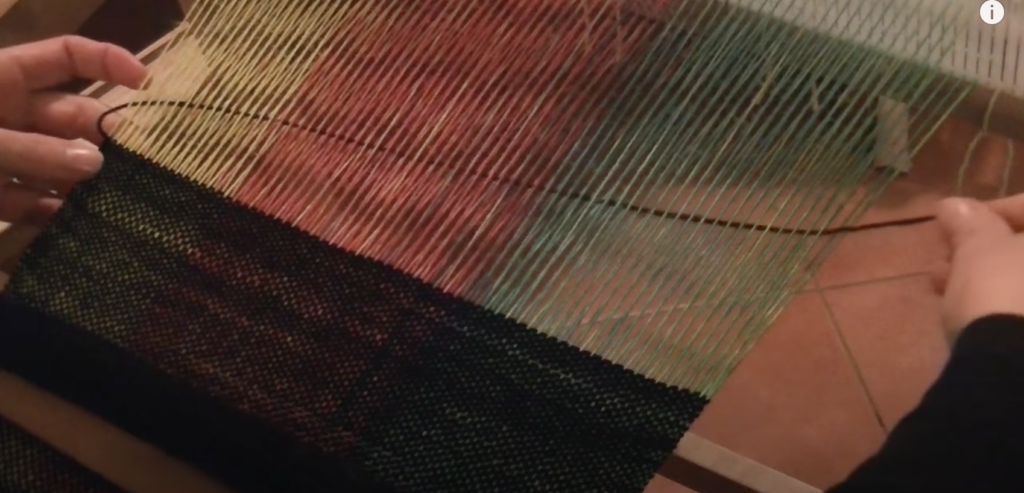
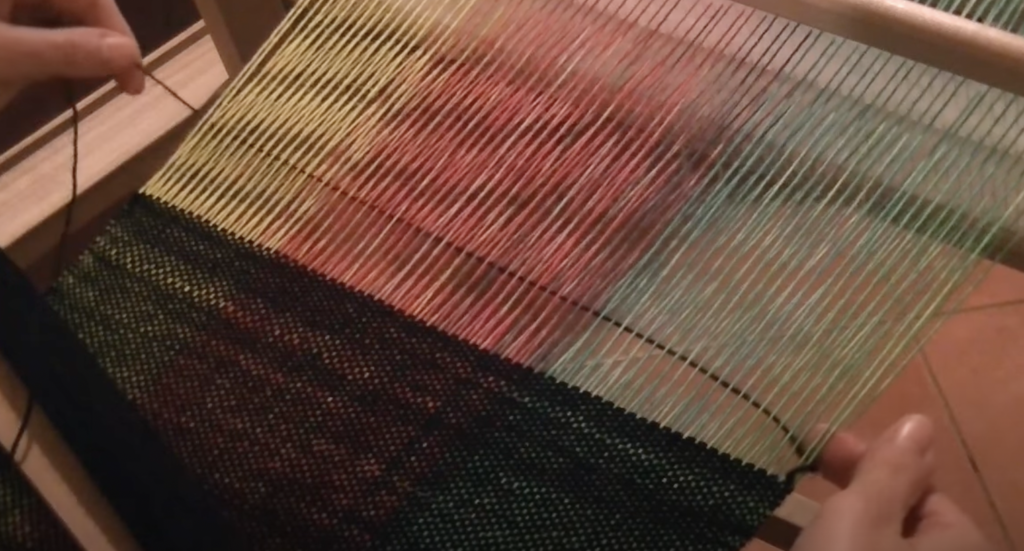
Just use the solid colour that you want for your band of colour and move through the 3 step krokbragd weaving sequence. Don’t change your colour until you have the desired amount of weaving.

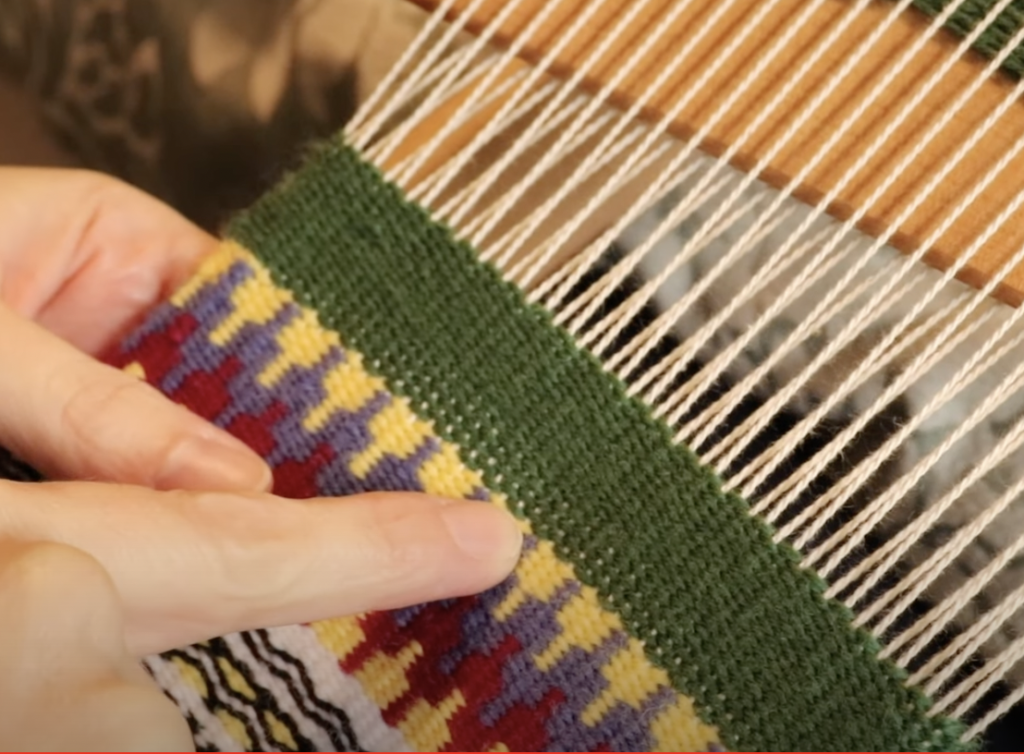
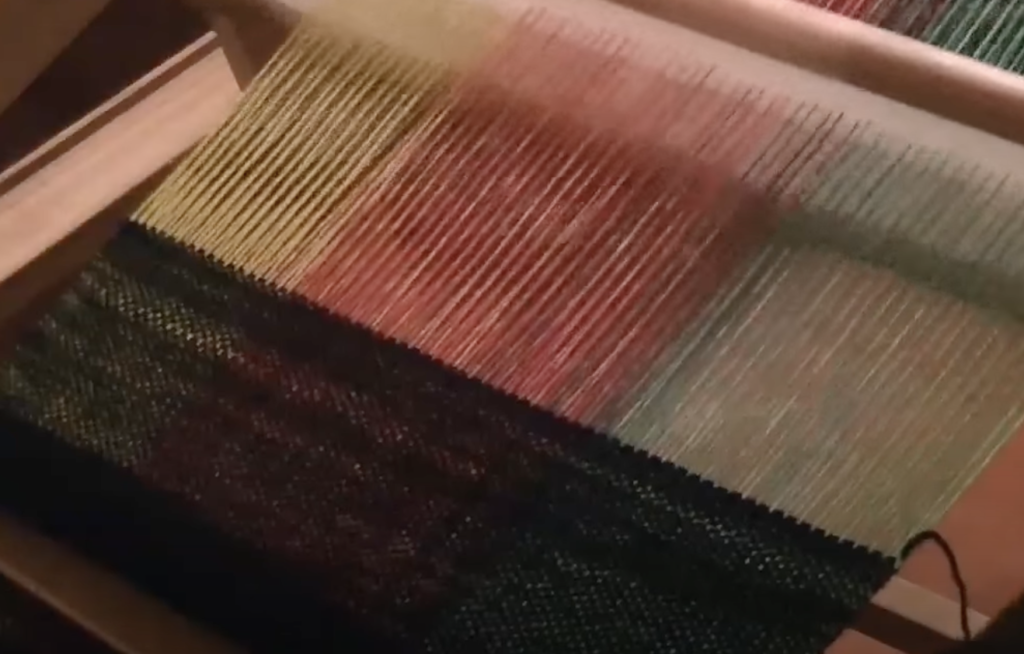
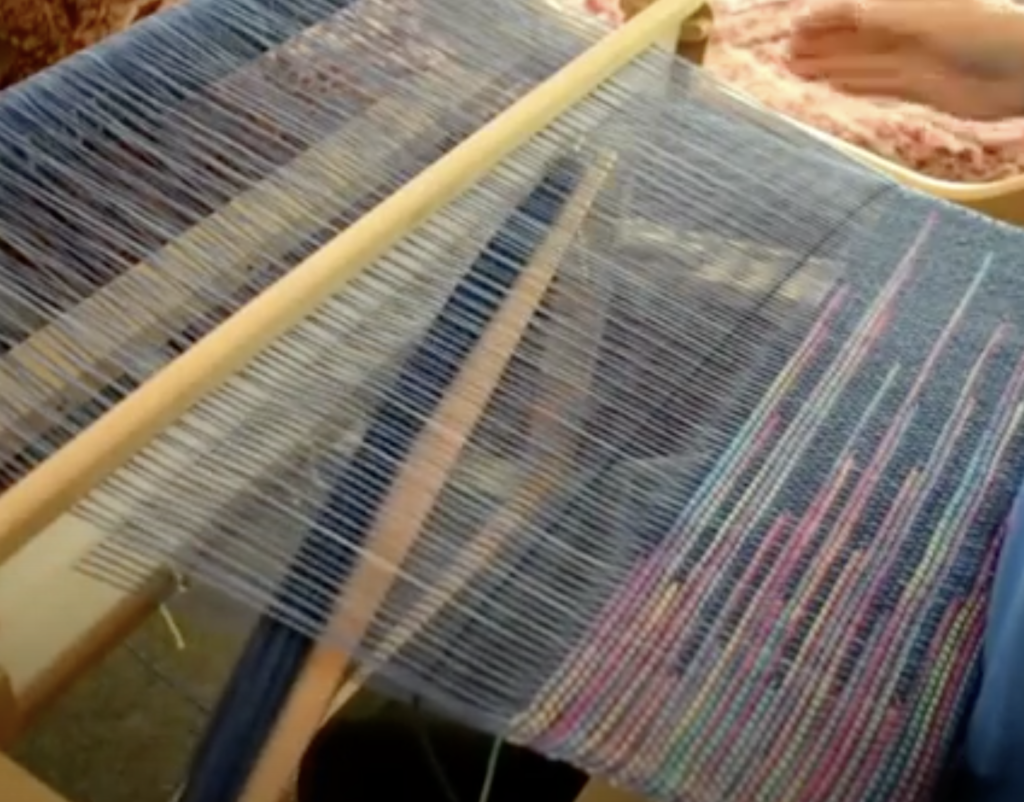
You can now compare the two sections of weaving in green – the part where the warp is showing is the plain weave and the more uniform looking part on top is the krokbragd. Also, because the green krokbragd follows the previous weave structure, it looks much more uniform and “like it belongs” there.

If you want to learn more about weaving krokbragd on your rigid heddle loom, check out my Krokbragd 101 online course.

If you would like to view this blog post in video format, please view here:

I hope you enjoyed this article! Perhaps it gave you some new ideas for krokbragd design? Or perhaps it has inspired you to give krokbragd a try? Let me know in the comments section below!

P.S. Have you seen the share buttons at the top of this post? You can easily share this article to Pinterest, Facebook or via email with one click. The more shares, the more weavers I can help! Thank you!

Until next time…

Happy Weaving!

Filed Under: Krokbragd, Neat edges, Online Weaving School, Rigid heddle weaving, Rigid Heddle Weaving Patterns, Tutorials, Weaving Tagged With: krokbragd, plainweave, rigid heddle weaving

How to weave neat edges on the rigid heddle loom

by Kelly 8 Comments

Nearly a decade ago, I took a leap and uploaded my very first YouTube video: How to Weave Neat Edges on the Rigid Heddle Loom. Using my son’s old camcorder (surprisingly, the footage still holds up!), I shared a simple yet essential weaving tip. My son even stepped in as editor, complete with some charmingly cheesy background music! 😄

*This post contains affiliate links. For more information, please see my disclosure policy.

You could say that this is the video that started it all for me. And to be really dramatic, I could say that there would be no Online Weaving School without this first video. Because, regardless of my fears and zero expectations, people actually watched the video. Then they asked for more.

I never did write a blog post to compliment that video, and there are tips and tricks that I want to point out as important, especially for beginner weavers. So here we go, one blog post, coming up!

TIP ONE – TENSION!

I do go on about this a bit, but that is only because it is SO CRUCIAL!! If your warp is either too loose or too tight, you are going to meet with trouble when you start weaving. Let’s look at too loose first.

Too loose!

This is an example of too loose. If you push up underneath the warp or push down on top and it’s like your hands are on a trampoline that has lost it’s zing, you’re too loose. A too loose tension will result in too loose edges, and even if you employ the techniques I discuss in the video, it’s only going to help a certain amount. When your weft travels around the edge warp threads, it naturally wants to draw in that warp thread a little as it travels to the other side.

That is normal and natural as the weft takes it’s path back and forth across the warp. But, it should not be an excessive amount and it should be consistent. I’m going to talk about consistency more in a moment.

One way to know if your warp is way too loose, is your heddle won’t like to stay in position when you place it there. In the up position, it may fall, in the down position it may just hang there. Doesn’t that sound sad?

So, if your edges seem too loose, try advancing your warp a little.

Then there is the opposite problem, your tension is too tight.

An easy way to know if this is your problem is that you have to wrestle with the heddle to get it into the up position. Not good for your poor old warp which my repay you by snapping a thread. Not good for your loom either, which is only designed to hold a certain amount of tension before damage can occur.

When your tension is too tight, you will also get problems at the edges. They may start to curl upwards as you weave the weft and the warp tries to deal with all that tension. This will also cause the dreaded “smile” from your weaving. It sounds like a good thing to have your weaving smile, but trust me, it ain’t smiling because it’s happy! It will be hard to beat, so your fell line could end up uneven. I can always tell a “too tight” warp because the weft at the edges looks unsettled and unhappy. Not consistent and cruisy.

In between “too tight” and “too loose” tension is “inconsistent tension”. I feel that this is even worse than the previous two, because at least they can be remedied easily by adjusting warp tension.

Inconsistent warp tension usually occurs in the warping process. Perhaps you have warped independently, you’ve grabbed the warp with one hand to roll it on, but you haven’t paid enough attention to the middle part of the warp. It then rolls on looser than the rest. What you finish up with when you start warping is a loose middle and too tight edges. Aaaagh! Not fun. At all. And, once again, a sure recipe for whacky edges.

If you have ongoing warp tension issues and find that frustrating, I highly recommend a beginner’s class like my Woe to Go – Beginner Rigid Heddle Weaving.

TIP TWO – WINDING OF YOUR STICK SHUTTLE

The way in which you wind yarn onto your stick shuttle will affect your edges. I like to use a figure 8 to wind my shuttle yarn, as it creates a flow, meaning the yarn feeds off the shuttle without snagging or pulling unnecessarily. This, in turn, means a smoother weave and no sudden catching or pulling in of the edge threads due to yarn getting stuck on the shuttle.

If you need to see the figure 8 method of loading your stick shuttle, you can watch here:

TIP 3 – ANGLE THE WEFT

When you take your weft picks through, you want to ensure that you angle it before beating. If you’re a beginner, a 45 degree angle is good, and for more experienced weavers, around 25 – 30 degrees is fine. Doing this helps with your edges because it gives the weft room to settle into place, rather than being dragged into a tight spot that feels un-natural. And now I’m talking as though the yarn has feelings, but that is what happens to you if you work with it for long enough 😆

TIP 4 – PINCHING TECHNIQUE

I think that maybe, out of all the things I’ve shared with others about weaving, this one may have been the most helpful to the greatest number of people. It really does make that much difference.

Let’s go over the steps to my pinching technique:

I’ve taken the weft through, I’m angling it, and then I’m bringing my pointer finger into the shed to feel the weft as it travels around the edge of the warp thread.

Then, I’m placing my thumb on top so that the weft yarn, along with the warp thread are wedged or “pinched”. This gives me a really good tactile sense of how the weft is behaving at the edge warp. Perhaps it needs tightening up, or perhaps it needs loosening. I place some tension on the weft yarn with the opposite hand to help it settle in.

The last step of the process is to give that weft tail that is sitting up on the right hand side a little tug to help it settle into place before the next pick.

If you practice this technique for a while, you will learn what the yarn is telling you (oops, there I go again!) and how you should proceed.

If you enjoyed this tutorial, you may want to check out the huge variety of classes I have on offer in my Online Weaving School. There are many rigid heddle classes, from beginner to advanced. If you purchase a membership, you also gain access to the private member’s group – a fantastic community of like minded weavers and support team. I hope to see you there!

I have a bunch of other posts and videos on weaving neat edges, as it’s a problem that pops up so often. Isn’t it good to know that there is something you can do about it?

Help! My edges are wonky!

Troubleshooting loose slot threads

Going around the edges

Try this trick for neater edges

Lifeline selvedge technique

Yet another neat edges tutorial

Thank you for visiting, and be sure to leave me a comment down below.

Until next time…

Happy Weaving!

Filed Under: Neat edges, Online Weaving School, Rigid heddle weaving, Tutorials, Weaving Tagged With: neat edges, rigid heddle weaving tutorial

Krokbragd 101 Online Course

by Kelly 13 Comments

It’s been in my mind for a long time to make a complete “from start to finish” style rigid heddle krokbragd class to add to my Online Weaving School.

My krokbragd videos on Youtube are some of my most popular videos, but many of you have asked me for more. Considering krokbragd is one of my favourite weave structures, I am more than happy to oblige!

*This post contains affiliate links. Please see my disclosure policy for further information.

My aim for this course is to introduce newer weavers to this fabulous weave structure, but also to help more seasoned weavers learn and enjoy weaving krokbragd. I provide two different loom set ups to accommodate for personal preferences, for the equipment you may have on hand and as an additional learning experience.

The first section is a sampler woven with a single heddle, a pick up stick and a heddle rod. This is how you will see me weaving krokbragd in my Youtube videos.

The second section is the exact same sampler, but woven using two heddles of the same size.

The student can choose to either weave the sampler twice, practicing both methods of setting up the loom, or weaving the sampler once, choosing the set up method they prefer.

Whichever set up method you choose, step by step instructions are provided.

In the sampler we learn to weave some really fun and beautiful designs, including:

  • Columns
  • Squares
  • Stripes
  • Flowers
  • Flame point, and even
  • Traffic lights!

You then have the space and freedom to practice these designs on the same warp or to try some of your own designs!

In this course we will be looking at common krokbragd issues like beating tension, appropriate yarns, colour and neat selvedges.

There will be additional visual threading diagrams as well as the video demonstrations.

The course culminates in a final project which will be a beautiful, one of a kind wall hanging. I have always wanted to weave a krokbragd wall hanging as an artistic feature for my home and I can’t wait to share this project with all of you!

Krokbragd is so fun, relaxing and rewarding, I just know you are going to LOVE this course!

Gold members of the Online Weaving School have early access to the course as it is being made and uploaded. If you are a Gold member, go to your curriculum list and look for “Krokbragd 101” under “K”. Alternatively, click here for the direct link.

This course will become available to other members upon the release date. It will also be available for single, non member purchase.

This class is now open and can be purchased here.

If you are interested in krokbragd and want to know more prior to the course opening, I have a lot of free resources for you! Start with this post for more information.

Until next time…

Happy Weaving!

Filed Under: Krokbragd, Online Weaving School, Rigid heddle weaving, Rigid Heddle Weaving Patterns, Weaving Tagged With: krokbragd, krokbragdweaving

How to read a rigid heddle weaving draft

by Kelly 26 Comments

Most of the time when you are weaving on a rigid heddle loom and following instructions, there will be written notes for how to weave a pattern.

For example, in any of my rigid heddle classes you will see threading instructions, telling you which holes and slots to thread, including colour order wherever it’s applicable. You will see any extra instructions for using pick up sticks if they are being used. All these things will be shown and often written in a file with step by step text instructions.

*This post contains affiliate links. For further information please visit my disclosure policy.

But, what about weaving drafts? Weaving drafts are not something that a rigid heddle weaver needs to know, because, as I mentioned above, most weaving patterns or classes for rigid heddle will have written instructions and won’t even mention a weaving draft.

However, learning to read a basic weaving draft can be really useful for two main reasons:

  1. It helps you to gain an understanding of how your rigid heddle loom actually operates. You will discover this in a moment as we go through how to read a plain weave draft and how it translates to your RH loom.

2. Many rigid heddle weavers choose to venture into multi shaft weaving – either by adapting their rigid heddle loom or by purchasing a table or floor loom. Knowing how to read a draft is invaluable to the weaver who aims to weave with more than two shafts at some stage.

Today, we’re going to look at a simple plain weave, two shaft weaving draft. I chose to help you learn about a two shaft draft because I want you to focus first on learning the basic layout of a non complicated weaving draft, and also because a rigid heddle loom is a two shaft loom.

You can see that I opted for bright and contrasting colours so that you can distinctly see the pattern. Personally, I would probably not choose these colours for a project, but some of you may love them! 😬

This is the most typical layout for a weaving draft, but if it is an older draft you are looking at, the information may be in different places, for example, the line of numbers I have at the top may be at the bottom instead.

Alright, let’s get into the nitty gritty by learning the different parts of the draft and what they mean, starting at the top.

The top section circled in red is the threading. For plain weave on a rigid heddle loom we use two shafts and these are represented by the numbers 1 and 2 that repeat across. The threading section is a horizontal bar on the draft, but indicates the vertical purple warp threads. You can think of these numbers as being like the vertical threads of your warp.

You can think of the holes on your heddle as shaft 1 (number 1 in the threading section) and the slots on your heddle as shaft 2 (number 2 in the threading section).

To find the start of the threading section, we read from right to left, beginning in the first box in the right hand corner, which is a number 1.

Also note the colour that appears above the number 1, which in this case is purple.

This tells me that my first thread for my warp is a purple thread that will be threaded in a hole. The second will be in a slot. Then a hole, then a slot, and so on.

This would be an easy warp as there are no warp colour changes.

Next I want to discuss the tie up box.

When using a multi shaft loom, you need to know which shafts need to be tied up to which treadles, this is where the tie up box in the top right corner of the draft comes in.

The circles you can see in the box match up with either number one or two on the threading section, indicating which shafts are to be used. The circle usually means that the tie up is for a rising shed loom. An “X” will often mean the tie up is for a sinking shed loom.

See how the first circle in the tie up box lines up with the shaft 1 threads in the threading section?
And circle 2 from the treadling box lines up with shaft 2 threads in the threading section.

How is this relevant to the rigid heddle weaver, considering we don’t have to tie up treadles?

It simply shows us which shafts need to be engaged in order to weave the pattern. If we thread our shaft 1 in the heddle holes and shaft 2 in the heddle slots, as described earlier, we don’t need to do anything else (like tie up treadles) in order to start weaving those shafts. The warping and threading of the heddle is all the preparation we need.

The long, vertical box to the right of the draft is the treadling section. The box is vertical, but indicates the horizontal part of your weaving, which is the weft. My weft is yellow, and this is indicated by the yellow box next to each number.

Again, as rigid heddle weavers, we don’t “treadle” but we do manipulate our heddle in order to open shafts, and this box gives us the correct order we need to use to weave the pattern.

On the rigid heddle, we operate the heddle for plain weave by either lifting it into the up position or placing it in the down position.

When you lift your heddle up, have a look at what is happening with the threads. All the hole threads are lifted up, and the slot threads stay down. The space in between the two layers of threads is our shed.

Now, when you place your heddle down, the opposite occurs – all the slot threads pop up and the hole threads stay down. This creates a second, different shed. In that case:

Heddle up = Shaft 1 engaged

Heddle down = Shaft 2 engaged

So, we understand that the heddle just goes up and down and that makes our 2 shafts. But let’s look more closely at the draft to ensure that we can visually follow the changing of shafts.

We start reading the treadling (or order of shafts) in the first box that appears under the tie up box. The treadling sequence will not always be indicated by numbers, there may be a filled box, a diagonal slash or similar.

Also, some drafts will use numbers to indicate how many times you are going to weave a certain pick. But, because we are just alternating between shafts 1 and 2, I have used the numbers 1 and 2 underneath the circles.

For this draft, the first number is on the left, underneath the circle that indicates shaft 1. For the RH weaver, shaft 1 means hole threads, which means heddle up.

When you have woven your shaft 1 pick you will then change to the next shed by following along to the next number in the next line down. It is a number 2 and so for the RH weaver, that means the down shed.

After weaving this shed, you then follow to the next row down, which is a shaft 1. And so on.

The last part of the weaving draft is the drawdown.

The drawdown is essentially a diagram of the fabric you will weave. It provides you with a visual representation of what your pattern might look like.

Naturally, elements such as your sett and chosen yarns can vary the look of the cloth greatly, so your finished piece will not necessarily look just like the drawdown. It shows the interlacement of your thread colours.

With our plain weave, checkerboard pattern you can easily see that the alternating colours in each row of purple, yellow, purple, yellow represent our warp and weft colours, and also our shafts one and two.

If you would like to use this draft, as well as the fabric view, to print out, I have made a printable PDF for you, which you can download below:

Plain-weave-draftDownload

If you would also like to see this post in video format, please visit my Youtube channel:

If you are interested in knowing more about reading weaving drafts, I have two members only classes at my Online Weaving School.

Introduction to reading weaving drafts

Reading a 2 shaft plaid draft for rigid heddle weavers

I hope this was helpful to you. Questions and comments are welcome, I love to hear from you!

Until next time…

Happy Weaving!

Filed Under: Rigid heddle weaving, Rigid Heddle Weaving Patterns, Weaving Tagged With: rigid heddle weaving tutorial, weaving draft

Clasped Weft Weaving Step by Step Tutorial

by Kelly 19 Comments

Just when you think you’ve tried everything in weaving, you come across something different, like Clasped Weft.  

Clasped weft can be a great “next step” for newer weavers with a few plain weave projects completed and who are ready for something a bit more adventurous.  

The cool thing about weaving clasped weft is that, similar to Colour and Weave, most of the work is in using colours to make your weaving look fancy, when in actual fact it is quite simple.  

The clasped weft technique uses 2, 3 or 4 interlocking weft colours. Using 2 colours to begin with is the easiest and least complicated approach. If you have done any tapestry, you may already be familiar with the interlocking technique.  

*This post contains affiliate links. for more information, see my disclosure policy.

We mainly use a plain weave structure (though clasped weft can actually be used in other structures, such as twill). It is a perfect technique for a rigid heddle loom, because, although it’s simple, it looks special and has big impact.

Before we go through the tutorial steps, let’s look at some (rather poorly drawn, sorry about that!) diagrams to get a clearer idea of how this works. The drawings are over simplified, as I haven’t drawn in the warp and weft interlacement, but I have drawn in the edge warp threads:

Clasped weft with 2 weft colours.

Clasped weft with 3 colours.

Clasped weft with 4 colours.

Now let’s go through the tutorial steps so that you can get clear on how clasped weft is actually woven. Today, we are just focusing on working the two weft colour technique, as I believe this is the best place to begin if you’re not familiar with clasped weft or haven’t attempted it before.  

  Begin with two contrasting weft yarns of the same weight. I have used one with a dark navy colour and another that is variegated with bright colours. See the tips section below for more on why variegated works perfectly.  

My warp and weft yarns were all light worsted/dk/ Australian 8 ply weight. Wool, acrylic or cotton are all fine.  

One weft yarn is loaded onto a stick shuttle, in my case this was the dark navy. The other colour is left in a ball or on the cone. My variegated colour was in a skein and so I wound it into a yarn cake with my ball winder.  

A yarn cake (also known as a centre pull ball) is particularly good to work with for clasped weft, because it sits nice and flat on the floor and won’t roll away. The yarn also feeds off the yarn cake seamlessly, which makes the whole process that little bit easier. If you have a round ball or a cone, you may want to sit it in a box or basket on the floor to contain it.

Place the ball of yarn on the floor at your left. It doesn’t matter if you place it on the right or left, but for the purpose of this tutorial it’s on the left.  

Because the ball (let’s call it the contrast yarn) is on the left, we enter the shed with the stick shuttle on the right. Again, it doesn’t matter whether you are in the up or down shed, but I am beginning in the down shed.  

Take your stick shuttle across from the right hand side to the left as though you’re going to weave a regular plain weave pick.

When you get to the left, take your stick shuttle underneath the contrast yarn. An easy way to do this is to pick up the contrast yarn as the stick shuttle exits the shed and place it on top of the shuttle.

On the right hand side (where your shuttle entered), tidy up and prepare your weft yarn at the selvedge as though you’re going to beat the pick in. If you’re not familiar with how to do this, watch my free video on How to Weave Neat Edges.  DON’T BEAT.

Take the shuttle straight back into the same shed. Don’t change sheds, and don’t beat! Take the shuttle through, back to the right where you first entered the shed.

  As you return the shuttle to the right, you will find that the navy yarn is linked or clasped with the contrast yarn. This means that the contrast yarn is pulled into the shed. Now you get to decide how far you will pull the contrast yarn into the shed. A little? A lot? Your choice, depending on the effect you want to achieve.  

Hold both yarns under tension on either side to manipulate where you want the two yarns to go.

  When you’re happy with the yarn positioning, beat the picks into place. You will notice that both yarns are now doubled in the shed.  

Change to the next shed (in my case I had been working in the down shed, so I go on to change to the up shed).  

Continue weaving in the exact same manner in the new shed and repeat until you’ve finished weaving.

Isn’t your head just swimming with all the possibilities of this wonderful technique?  

Clasped weft can be extremely planned or extremely random. It looks wonderful both ways and is just so much fun to weave.    

Here are a few recommendations for best results:  

1. Use contrasting weft colours.

Light and dark will make the weaving pop.   

2. Use the same weight yarn for both warp and weft.

You will get better results and avoid the not so pretty lumps and bumps that can occur at interlocking points.  

3. Variegated yarn is perfect for this.

For the 2 colour clasped weft technique, a variegated yarn with a contrasting yarn looks really cool! (See photos below and above).  

4. Using the same colour as the warp for one of your weft colours works great.

Too much colour can confuse the contrast of the clasped weft lines. In the tutorial, I used the same navy yarn for warp and weft no.1. I then used a contrast yarn for weft no.2.

If you like the look of clasped weft as much as I do, I have some great news for you!

I have 3 free Youtube video tutorials that will teach you each of these techniques. Start with video 1 so that you can practice the technique, before moving on to the others. 

Clasped Weft with 2 colours

Clasped Weft with 3 colours

Clasped Weft with 4 colours

I mentioned that the clasped weft technique can also be used for other weave structures. This can create really interesting and impressive special effects. One of my Etsy patterns, The Cityscape Scarf is a perfect example of a clasped weft combined with a twill.

Try it out and let me know what you think.

Leave me a comment here or under any of the Youtube videos, I love to hear from you!  

Until next time…  

Happy Weaving!  

Filed Under: Free tutorial, Rigid heddle weaving, Rigid Heddle Weaving Patterns, Tutorials, Weaving Tagged With: clasped weft, clasped weft tutorial, rigid heddle weaving, rigid heddle weaving tutorial

How to sit correctly at a rigid heddle loom

by Kelly 16 Comments

In my last post, I spoke about my back pain journey and gave all my best hints to help you avoid experiencing pain while weaving on your floor loom.

That post was very popular and many of you asked if I could do something similar for weaving on your rigid heddle loom. A floor loom and a rigid heddle loom are quite different when it comes to seating, and while a lot of the same principles I talked about in my last article regarding posture still apply, I think it’s worth going over the options.

*This post contains affiliate links. For more details, please see my disclosure policy.

I’d like to point out that, even though some of these are not my personal preference, that doesn’t mean that they’re not right for you. And, if you are using a seating arrangement currently that works really well and allows you to weave pain free – don’t change it!

Regular chair-

Some weavers use a regular, straight backed dining chair to weave. This is what I started off with when I began my rigid heddle journey, but it did not suit me at all. I did find it better if I bolstered my lower back by wedging a cushion between my back and the chair when weaving, but it was still not comfortable for me.

Weaving bench–

I would not use a weaving bench or piano stool with my rigid heddle. The length of the stool does not allow me to get right in close to the loom, and there is no back support.

Office chair–

This is what I use and I’m going to go over in more depth why I think it is the best option in a moment.

With a stand-

I do recommend weaving with a stand for loom sizes 24″ and above. This is because the larger/wider the loom, the more difficult it is to prop against a table to weave, and the longer your reach distance will be. A longer reach distance means more stress on your body.

Without a stand-

I don’t use a stand for my Sampleit 10″ loom because it’s so small, light and portable that I can weave on it just about anywhere, it makes a great lap loom. You don’t have to have a stand for your rigid heddle, but I do think it’s really worthwhile investment. If you have or are looking at purchasing a really large loom, such as a 32 or 48″, I would definitely be wanting a stand.

I want to talk now a little more about my office chair and why I think it’s the perfect solution. I was lucky enough to get my chair for free when my husband’s workplace was closing an office and it was barely used!

  • Height adjustable
  • Contoured
  • Back rest adjustable
  • Tiltable

    All of this means that I can sit right in close to my loom and adjust the chair to be as comfortable as I could possibly want to be. My back, shoulders and neck are not stressed because my body is so well positioned.

Because my chair is on wheels, it’s really quick to make minor adjustments to get closer to or further from the loom.

My feet are either flat on the floor or positioned on top of the stand’s stabilising bar, meaning the loom is very stable.

Now, just because we have a super duper chair with nice back support doesn’t mean we can get lazy about posture. Yes, it’s still possible to slouch, bend or tilt your body in ways that will wear on your back over time.

So don’t forget those good posture points – a straight back, level shoulders, elbows resting comfortably on the front beam.

Regular breaks are important, to give your body an opportunity to move about in a different way after being in one position for a while. If you want to read more about posture, breaks and stretching, I recommend you read over this post.

And to see my seating position in action, I’ve made a video for you. The video shows both how I sit with my loom on a stand and how I sit when not using a stand. You can click below to check that out:

I hope this post was helpful to you and gets you thinking about ways you can maximise your weaving time by minimising back, neck and shoulder pain.

Until next time…

Happy Weaving!

Filed Under: Free tutorial, Health and home, Inspiration, Rigid heddle weaving, Tutorials, Weaving Tagged With: back pain, posture, rigid heddle weaving

What do I need to get started in rigid heddle weaving?

by Kelly 9 Comments

I’m going to make a bold statement. 2020 is the year of the weaver!

Yes, this year has been very difficult, very strange, and frequently lacking in positivity. But as I’m the kind of person who likes to look for the good things in the face of adversity, I think in many ways it has been a really wonderful year, full of opportunity and promise!

*This post contains affiliate links. For further information, please see my disclosure policy.

I don’t have any exact figures, but I know that weaving, and rigid heddle weaving in particular has seen a massive popularity surge this year.

It totally makes sense. Most of us have been through some sort of lockdown (some of us multiple lockdowns!) and have found ourselves shut in our homes with a lot of extra time on our hands.

I’m so happy to see that so many people have used this unprecedented time to start something new or to dive in to something they always wanted to do.

Perhaps we can use this as life inspiration for going forward. So many of us are waiting for just the right time to do what we truly love. The fact is, for some, that right time may never come. If we have learned anything this year, I think maybe it should be – DON’T WAIT! START NOW!

So, if you are one of the many who have started weaving this year or are waiting on your new loom to arrive, welcome! It’s so good to have you on the journey.

I thought that it might be useful today, to look at the bare basics you need to get started in rigid heddle weaving. I’ll break down and explain each item you will need to get up and running.

  1. A rigid heddle loom

That’s a can of worms right there! There are a lot of choices and in the interests of not keeping you here for the next 3 days, I’m going to keep this section brief and refer you to further learning resources if you need them.

I do want to say, you do not need the biggest, most expensive loom if you’re just starting out. If you’ve never used a rigid heddle loom and are not sure what to expect, start out small. A Sampleit (I have one of these!) or Cricket is a perfect size for practicing weaving, and you might be surprised at the range of items you can weave, even on a small loom.

If you have already tried out a loom and have goals for the types of items you want to weave, you may want to go with something larger. As a general guide, a 24″ loom is great for scarves, towels, table runners and bags. A 32″ and larger is great for large shawls, baby blankets and yardage fabric.

For a larger loom you will also want to consider purchasing a stand for ease of use.

If you want to know more about various looms available, how to choose a loom that will suit you and what you can achieve with a rigid heddle loom, go here.

2. A heddle/reed

You will receive a heddle/reed with your rigid heddle loom. It will either be a 7.5 or 8 dent, depending on the brand. This is a great size to start out with and you don’t need to purchase any other sizes initially unless you are really keen to work with some lighter (fingering weight, 8/2 weight) yarns.

If you do want to grab an extra heddle, I recommend a 10 dent – it’s a great all rounder.

3. A stick shuttle

You should also receive a stick shuttle appropriate to the size of your loom when you purchase. This is what you wind your weft yarn on to in order to weave.

If you want to weave with more than one weft colour (say if you’re weaving stripes) you will want more than one stick shuttle. They are quite affordable, and some weavers even make their own.

If you need to know how to wind a stick shuttle, check out this video:

4. A threading/reed hook

You may or may not receive a threading and reed hook with your loom, but you will definitely need them! They can be purchased as a separate threading hook or reed hook, but I love to use my double ended heddle hook.

These are two tools in one, they are cheap, I like that they lie flat and don’t roll off surfaces and I find the flexibility of the plastic great when threading. I have also found that metal hooks tend to split my yarn when I’m using a thicker yarn, whereas the plastic is a little kinder.

If you need tips on how to thread your rigid heddle loom, check out this video:

5. Separators

You will need something to separate your warp with when rolling it on to the loom. This is crucial for good tension. You have a few options for separators.

  • Cardboard stick separators
  • Corrugated cardboard
  • Roll of thick paper (this is my favourite)
  • Drawer liner

6. Warping peg

Most weavers start out warping their looms directly, using a warping peg. This is a really fast and easy way to warp and also means you don’t have the added expense of a warping board, frame or mill. A warping peg and clamp may come with your loom, as well as an extra clamp for fixing your loom to a table.

7. Inch ruler

This is used to determine the correct sett of your yarn. This is particularly important when you’re starting out and getting to know how different yarns behave in different projects.

You could also use a wraps per inch tool or yarn gauge or a sett checker.

If you need to know how to determine sett for your yarn, have a look at this video:

8. Scissors

A nice, sharp pair of scissors will save you a lot of headaches. I have a large pair of dressmaking shears for cutting off the warp and cutting my handwoven fabric and a smaller, embroidery sized pair I keep close to the loom for snipping weft threads. Some weavers like to use thread snips as their smaller pair.

9. Tape measure

You will need a tape measure to measure out your warp length and to measure your weaving as you advance your warp. I am frequently seen with a tape measure hanging around my neck, I use them so often!

They are very affordable, so I like to have a few that I can leave in different places and always have one near at hand.

10. Yarn

We’re not going to be able to achieve much with our looms and equipment unless we have the yarn to play with! Many of you will have come to weaving from knitting and crochet and will already have a healthy stash to delve into. Knitting yarns are great for beginning weaving.

For those of you with no stash, don’t worry, just start out simple. Don’t go out and buy all the yarns – plan your project and just get the yarn you need to begin with. Or weave a sampler with small amounts of yarn.

But wait, you say! I have no idea where to start with yarn. You’re not alone in that, but relax, I have created resources to help you with that:

Choosing and using yarns in weaving

3 Yarns beginners should avoid

Which weight of yarn should I choose?

If some of the terminology I’ve used in this article is confusing to you, why not head over and check out my Weaving Glossary? I suggest you bookmark it so that you can refer back to it as much as needed.

Once you have all the tools you need to begin, then it gets really exciting! If you are ready to dive in and get weaving, I recommend you check out my Online Weaving School. You will find classes for all levels, including free and paid classes.

If you are an absolute beginner, you definitely need to enrol in my best selling From Woe to Go! Beginner Rigid Heddle Weaving course.

If it’s a free project you’re looking to start out with (or for a second or third project perhaps), have a look at my list of free tutorials here. In particular, I want to recommend a project that has been massively popular this year, the Wash Your Hand Towels.

I hope this article has been useful to you, if you have any questions or comments, leave them down below!

Until next time…

Happy Weaving!

Filed Under: Rigid heddle weaving, Weaving Tagged With: beginner weaving, getting started in weaving, rigid heddle weaving

Troubleshooting loose slot threads

by Kelly 31 Comments

Loose slot threads when weaving on a rigid heddle loom are very common. The fact is that a rigid heddle loom just does not hold the same amount of tension as a floor or table loom.

This means that the rigid heddle weaver can run into a bit of bother when warping up with fine, rigid weaving yarns. An 8/2 cotton is a floor loom weaver’s dream but can be quite a challenge on the rigid heddle.

*This post contains affiliate links. For further information, please view my disclosure policy.

Knitting yarns or slightly thicker weaving yarns with some elasticity work beautifully on a rigid heddle loom, as they don’t need a lot of tension and are very forgiving.

How do I know if my tension is good enough?

This can be a personal preference, but there are certainly a few guidelines for knowing whether your tension is suitable or not:

Too loose

Your warp threads bunch in between weft picks (rows)

You have floats or skipped warp threads often

Your stick shuttle keeps snagging on warp threads as you enter the sheds

Your heddle doesn’t click easily into the up or down shed

Too tight

You struggle to get your heddle/s into the up position

You have warp threads breaking

You feel a lot of resistance when trying to beat

Does this mean that rigid heddle weavers should not weave with weaving yarns? Not at all! There are too many wonderful weaving yarns in a massive variety of colours out there to try! With the right approach and strategies, all yarns can be used successfully.

  1. Getting the warp right

The warping the loom stage is the most crucial time to get that tension as good as you can. Not as tight as you can, necessarily, but even, consistent and firm. When I have a good warping experience, I just know that the project is going to go smoothly.

There are a few key strategies for getting good tension during the warping process. I talk about it in this webinar but I also want to mention some of them here:

  • Have someone help you. Your helper can hold on to the end of the warp, providing great tension, while you focus on standing behind the loom and winding on.
  • Pack the back beam as you roll on. You can use cardboard or wooden sticks/ separators, a roll of thick paper, a blind or a drawer liner. My personal favourite here is the roll of paper which you can cut to size if needed. 125 gsm is a good weight.
  • For a wider warp, use more than one warping peg. This helps distribute the threads over the width of the loom in a more practical way and is more economical, as threads don’t have to travel as far to loop around just one peg.
  • Take your time. Extra time spent in warping is well worth the investment. Remember – good warp = happy weaving experience 😄
  • Pay particular attention to the middle of the warp while rolling on, particularly if warping independently. The middle is the most likely place to lose tension and get saggy threads.

2. Consider a shorter warp

A rigid heddle loom can take quite a lot of length in a warp, but I haven’t found a long warp to be best practice. If I have the opportunity, I will break a warp into smaller increments where possible.

This doesn’t bother me, because the rigid heddle is so quick to warp for more simple projects, so it doesn’t take much extra time. I find that the longer my warp on the rigid heddle, the harder it is to keep a good tension for the duration of the warp.

3. The tie on

The tying on step is also important for your overall tension. Whether you tie directly on to the apron rod (as I do 99% of the time) or lash on, this step is another opportunity to “get it right” before beginning weaving.

Once again, I don’t aim for really tight tension when tying on, but I do aim for the best consistency I can manage. This means going over the tied on threads once, twice, thrice if needed so that they all feel about the same.

I gauge this tension by bouncing my hand across the warp (like a trampoline!) Any bunch of threads that feel much looser than others will get a re-tighten.

4. Know your yarns

There are certain threads that are harder to tension due to their inelastic structure. I already mentioned 8/2 cotton, but many plant based or cellulose fibres (cotton, linen, hemp, etc) are quite rigid and easier to weave with a higher level of tension. Animal fibres or protein fibres (wool, alpaca, etc) generally have a little more stretch.

There are certain threads that are harder to tension due to their inelastic structure. I already mentioned 8/2 cotton, but many plant based or cellulose fibres (cotton, linen, hemp, etc) are quite rigid and easier to weave with a higher level of tension. Animal fibres or protein fibres (wool, alpaca, etc) generally have a little more stretch.

The amount of twist, number of ply and thickness or weight can also effect how rigid a yarn is. It helps to know your yarns – to sample yarns you’r unsure of and accustom yourself to all their particulars.

If you need a little more guidance with yarns, I have some resources that will help:

Choosing and using yarns in weaving

What is a superwash wool yarn?

3 yarns beginner weavers should never use!

5. Stuff it!

Packing, stuffing and wedging your back and front beams will always help with tension. If, despite your best efforts, your warp is just not tensioned well enough then start packing! You can use stiff paper, cardboard, sticks (either separators or pick up sticks) or whatever else you can come up with that works, to wedge under or between your warp at the beams.

When advancing your warp, start packing the front beam. This will prevent the knots from the apron rod from sticking into your weaving as it rolls around them beam (which can damage or distort your weaving and mess with your tension) and provide overall better tension each time you advance.

You can insert a pick up stick or something similar into a shed that is giving you particular trouble (usually the down shed) and slide it to the back beam. Push it right back so that it becomes wedged between the thread layers and tightens that shed for you.

You can also wedge something directly under the warp at the back beam to increase overall tension. To see this in action, watch this video, which also includes additional tips for working with fine threads:

6. One sided looseness

Perhaps your loose tension problem is at the selvedge? To be more specific, one selvedge is fine while the other is loose? You end up with neat edges on one side and not so great edges on the opposite side.

If you want generally to improve the neatness of your edges, check out this post for more resources.

One thing you can try in this instance is to begin and finish threading in a hole. When we thread for plain weave, we usually thread one thread in a hole, one in a slot, and so on. Most of the time we are threading an even number of threads.

But for this technique, we thread an uneven number of ends on purpose, so that the last thread gets threaded through a hole. The reasoning behind this technique is twofold. Firstly, the threads are threaded in holes, which hold better tension than the slots. Secondly, the outermost threads will be under the same or similar tension (both being in holes) so the results of your woven edges should be more similar looking.

If that sounds confusing, check out this video where I show you how to thread both selvedge threads in holes and you will see how simple it is:

7. Warping in down shed

As a disclaimer, I have not tried this technique, I have only heard about it. The idea is that it’s the down (slot) sheds that have looser tension, so warping your loom with the heddle in the down shed potentially tightens the slot thread tension. If you decide to give this a go, I would be interested to know how it turns out for you!

I hope this article was useful to you. As always, questions and comments are welcome, please leave them down below! ⤵

Until next time…

Happy Weaving!

Filed Under: Free tutorial, Rigid heddle weaving, Tutorials, Weaving, Yarn Tagged With: better tension, loose warp threads, rigid heddle weaving, rigid heddle weaving tutorial, troubleshooting

Baubles and Candles on a rigid heddle loom

by Kelly 11 Comments

With Christmas fast approaching, I wanted to gift you all with something fun and achievable, as well as having a festive theme.

I came up with some simple baubles and candles that I’m confident is suitable for any level of rigid heddle weaver.

This project is very decorative and better suited to low wash items.

*This post contains affiliate links. For more information, please see my disclosure policy.

For the project, I just wove a sampler to illustrate the patterns, but you can use the designs however you please.

What you will need:

A rigid heddle loom (any size is fine if you just want to weave the sample.

A 7.5 dent heddle

A threading/reed hook

A stick shuttle wider than the width of your weaving

A pick up stick wider than the width of your weaving

A tapestry needle

Yarn options:

For my warp I used a light worsted/dk weight wool in white. I used this same yarn for my plain weave. The same yarn, but in different colours was used for the pattern weft. Please see the video for colours used.

For embellishments, I used small amounts of DMC embroidery floss.

Sampler Specifications:

If you wanted to weave a sampler just like mine, here are the basic measurements.

Number of ends: 64 (32 slots)

Approximate width on loom: 8″

Sett: 7.5

Total warp length: 35″

The baubles and candles use the same overshot weaving technique as my reindeer, snowmen, gift boxes and winter trees.

There is a pattern weft that forms the picture or design, and in between every pattern pick is a plain weave pick (either an up or a down shed).

Weaving Instructions:

The Baubles –

I left a border either side of my designs in order to centre them and make sure that none were inadvertently cut in half! I left 6 threads on each side. This is optional, and you an adjust the border threads to suit.

I’m not including the border threads in the weaving steps, but if you watch the video you won’t have any trouble following along with these instructions.

Remember that you need to weave a plain weave row in between every pattern weft.

Step 1. 6 up, 2 down, *7 up, 2 down, repeat from * (7 up, 2 down for the rest of the way across)

Step 2. *5 up, 4 down, repeat from *

Step 3. 4 up, 6 down, *3 up, 6 down, repeat from *

Step 4. Repeat row 3, with a contrast colour

Step 5. Repeat row 3, with the original colour

Step 6. *5 up, 4 down, repeat from *

Step 7. Repeat row 1

The Candles:

For the candles, I left a border either side of 5 threads instead of 6, to work in better with the required calculations for the design.

Step 1. *4 down, 4 up, repeat from *

Step 2. Repeat row 1, alternating plain weave rows with pattern rows.

All of these details are available in a handy PDF for you to print out. You can download and print that right here:

Baubles-and-CandlesDownload

And you will want to watch the video and follow along with the instructions. You will find the free and detailed video here:

I hope you enjoy this project! Thank you all for your AMAZING support this year!

I wish you all a very Merry Christmas! 🎄

Until next time…

Happy Weaving!

Filed Under: Free Pattern, Free tutorial, Inspiration, Rigid heddle weaving, Rigid Heddle Weaving Patterns, Tutorials, Weaving Tagged With: baubles, candles, christmas, free tutorial, rigid heddle loom, rigid heddle weaving, rigid heddle weaving patterns, rigid heddle weaving tutorial

Weaving Glossary: Essential Terms Every Weaver Should Know

by Kelly 11 Comments

Starting something new can feel overwhelming—especially when it seems like everyone is speaking a different language! Weaving is no exception, with all its unique terms and jargon.

The good news? It won’t take long before these words become second nature. But in the meantime, having a quick reference guide is a lifesaver for those moments when you think, Wait… what does that mean again? That’s exactly why this weaving glossary is here—to help you feel more confident at the loom, one term at a time!

This simple guide is arranged in alphabetical order.

Beat – The action of pressing the weft threads into place. For a rigid heddle loom, this action is performed with the heddle/reed.

Closed shed – No shafts are engaged. In rigid heddle weaving, the heddle would be in neutral. There is no space to weave through. See also “shed”.

Direct warp– Common with rigid heddle looms, a warping peg is used to make your warp by drawing threads through the heddle/reed and looping them around the peg.

Draw in– The amount that your weaving decreases on the loom. It is expected that you will have at least some draw in and we calculate for that in the project planning stage.

Ends per inch (epi)– The number of warp threads you have in an inch.

Heddle– In rigid heddle weaving, the terms “heddle” and “reed” are often used interchangeably. For a rigid heddle loom (RHL) the heddle performs multiple functions. The threading of it allows the manipulation of sheds by placing it in the up or down position. It also spaces the warp threads and is used to beat the weaving.

  • In floor loom weaving a heddle is a single, detached texsolv cord or metal loop that is positioned on a shaft. It has a hole in the middle, through which the yarn is threaded.

Indirect warp – The warp is made on a warping board or mill and then taken to the loom.

Floating selvedges– An extra warp thread on either side of your weaving that is threaded in a slot and weighted over the back of the loom. Floating selvedges are not necessary for plain weave but are invaluable for other weaving structures where your weft thread may not always wrap around the outer most warp threads.

Open shed – Shafts or heddles are engaged. In rigid heddle weaving, an example would be that the heddle is in the up or down position – there is an opening to weave through. See also “shed”.

Pick– A weft row

Pick up stick – A smooth, flat stick used to pick up weft or warp threads to create patterning by creating additional sheds or lifting additional threads.

Plain weave– A weave structure with a balanced one over, one under interlacement of warp and weft threads.

Reed hook- Used to thread or “sley” the reed. In rigid heddle weaving, it is used to thread the slots during direct warping.

Selvedge– The edges of the woven fabric, or during weaving, the edge threads

Sett- The number of warp threads in an inch. An easy way to think of it is how close together or far apart the warp threads are.

Shed– the space or gap created for the weft shuttle to enter into. In RH weaving, this happens when the heddle is either raised or lowered ie. shed one and shed two.

Shot- Another name for pick or weft row.

Sley- Threading the warp threads through the heddle/reed. In multi shaft weaving, sleying refers to threading the reed. See also “open shed” and “closed shed”.

Tabby- another name for plain weave, but particularly used when the plain weave is used to create structure in the fabric in between pattern rows. A classic example is the weave structure overshot.

Threading hook– Used to thread the holes in the rigid heddle.

Thrums- loom waste, or amount of thread left over from the loom when the project is finished.

Warp faced– the warp threads are dominant in the weaving. This is not a balanced weave. A good example is inkle weaving, where most of what you see in the end weaving is the colour of the warp.

Weft faced– the weft threads are dominant in the weaving. Not a balanced weave. A good example is krokbragd.

Wet finish- The wash process at the end of the weaving that completes the project by allowing yarn to absorb water in order to bloom and settle into place.

This weaving glossary is taken from my super helpful e-booklet, The Weaver’s Toolkit.

I wrote this 22 page toolkit to provide weavers of all levels with a handy reference guide. It is beautifully designed and can be viewed on your screen or printed out.

Included in the guide are:

*Warp and weft calculations sheets

*Project record sheet

*Yarn conversion sheets

*Sett explanations

*Recommended tools

*Measurement conversion sheets

*Size guides for woven pieces

You can find the Weaver’s Toolkit in my design store for a very affordable price.

Until next time…

Happy Weaving!

Filed Under: Rigid heddle weaving, Weaving Tagged With: glossary, weaving glossary

  • « Go to Previous Page
  • Page 1
  • Interim pages omitted …
  • Page 4
  • Page 5
  • Page 6
  • Page 7
  • Page 8
  • Interim pages omitted …
  • Page 15
  • Go to Next Page »

Primary Sidebar

Hand crafted boat shuttles

Categories

Archives

Meta

  • Log in
  • Entries feed
  • Comments feed
  • WordPress.org

Copyright © 2025 Kelly Casanova Weaving Lessons on the Foodie Pro Theme