• Skip to main content
  • Skip to primary sidebar

Kelly Casanova Weaving Lessons

  • Hi! I’m Kelly!
    • Disclosure
  • Online Weaving School Class Index
    • Common account issues
    • Common technical issues
    • What do I get with a membership?
  • New to rigid heddle weaving? Start here!
    • Never heard of the rigid heddle loom?
    • How to weave neat edges on the rigid heddle loom
    • Rigid heddle weaving
    • Rigid Heddle Weaving Patterns
  • Patterns
  • Subscribe

Weaving

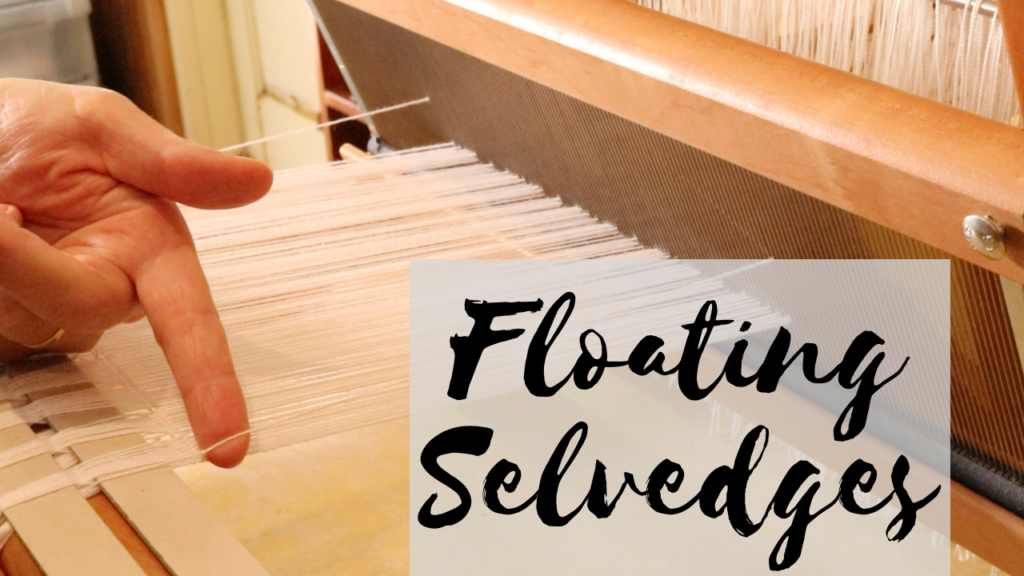
How to use floating selvedges

by Kelly 2 Comments

In my last post I talked about what floating selvedges are, how they can benefit your weaving and included a photo tutorial for how to install them.

Today, we’re going to have a look at how you actually use floating selvedges in the weaving process.

It’s very simple, but there are a few little rules and things to remember:

  • “Over, under”. This is going to be on repeat in your mind as you weave with your floating selvedges in place. The photo tutorial will show you how this works.
  • You will need to adjust your weights as you weave and advance the warp. This is because your floating selvedge (FS) threads will roll on to your front cloth beam along with the warp threads as you advance.
  • The weft should always wrap around the FS on each side. This also relates to the “over, under” action and will be clear for you to see when you’re weaving.
  • The yarn that you use for your FS can be the same yarn as either the warp or weft. Most of the time, I will use the exact same yarn for the FS as I’m intending to weave with (weft). But, if I have frequent colour changes and more than a few colours in the weft, I will use the warp yarn to set up my FS.

In this tutorial, I’m imagining that you have already set up your floating selvedges and you’re ready to start weaving. If you haven’t done that yet and need a step by step tutorial, please view this post first.

*This post contains affiliate links. For further information, please see my disclosure policy.

This tutorial is specifically for rigid heddle weavers, but I also have a video tutorial for table/floor loom weavers.

I am starting with my shuttle on the left and my heddle is up. (It doesn’t matter which side your shuttle is on or which shed you’re in, but I wanted to be specific so that the photos make sense!)
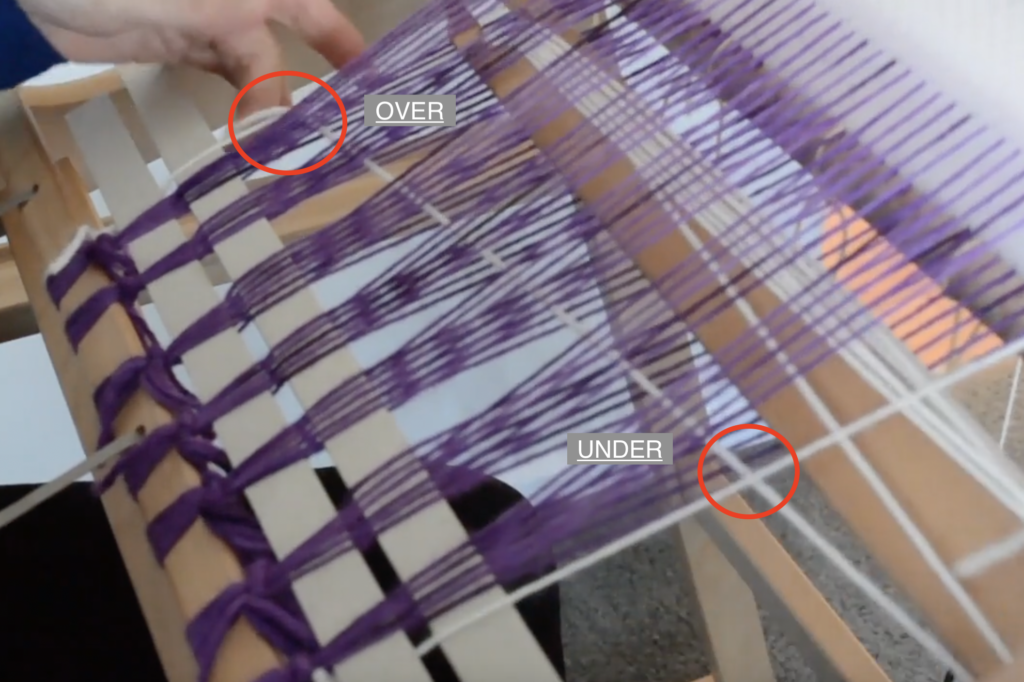
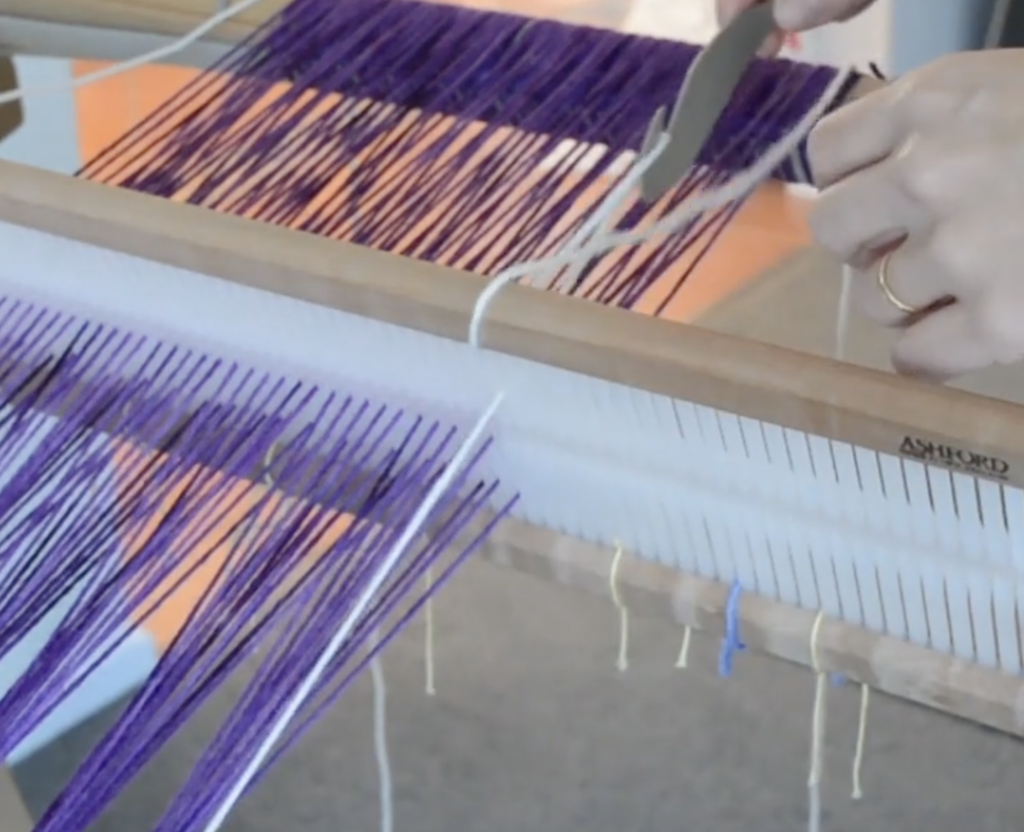
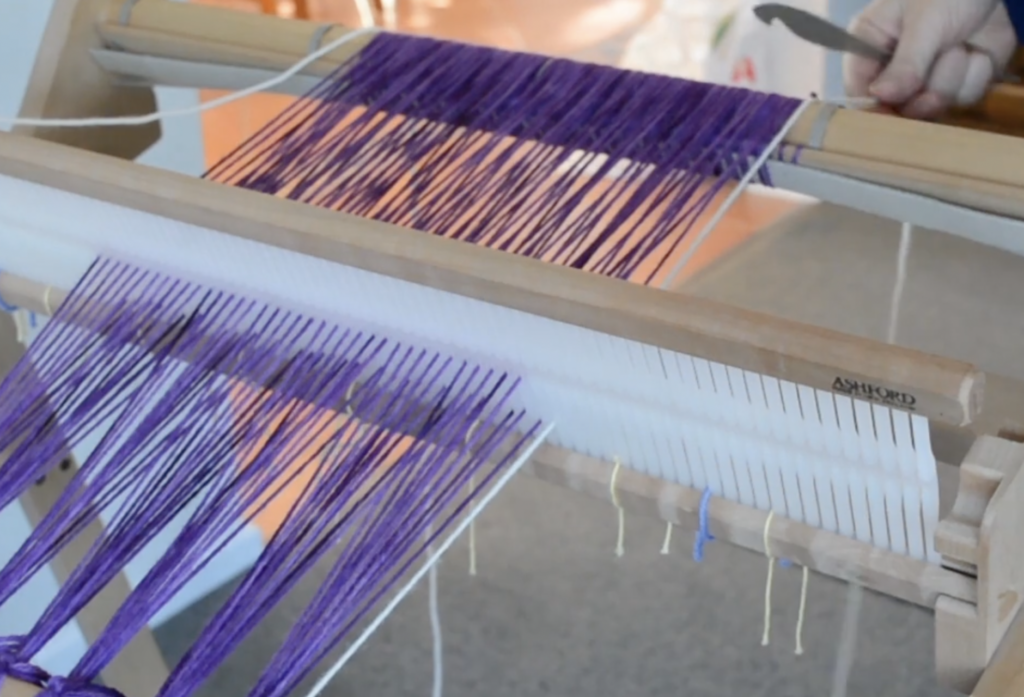
When I enter my shuttle from the left, my shuttle (and therefore my weft yarn) goes OVER the floating selvedge. As my shuttle exits the shed on the right, it goes UNDER the floating selvedge. Beat.
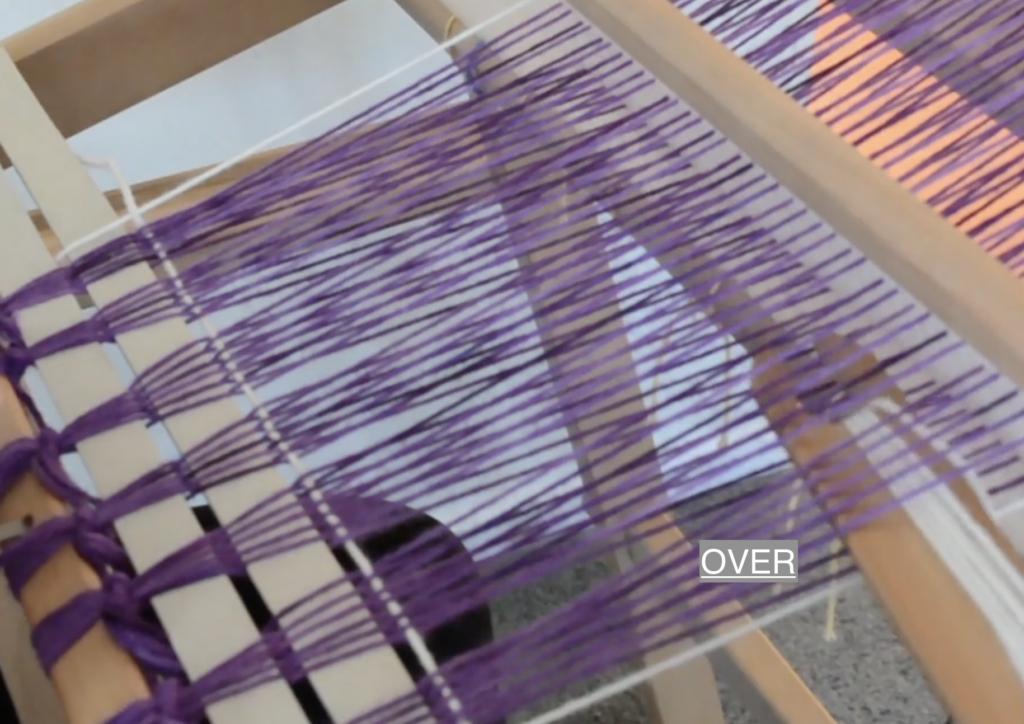
Now I change my heddle to the down position. As my shuttle enters the shed from the right, it will go OVER the floating selvedge. As it exits the shed on the left, it will go UNDER the FS. Remember, OVER, UNDER. Beat.
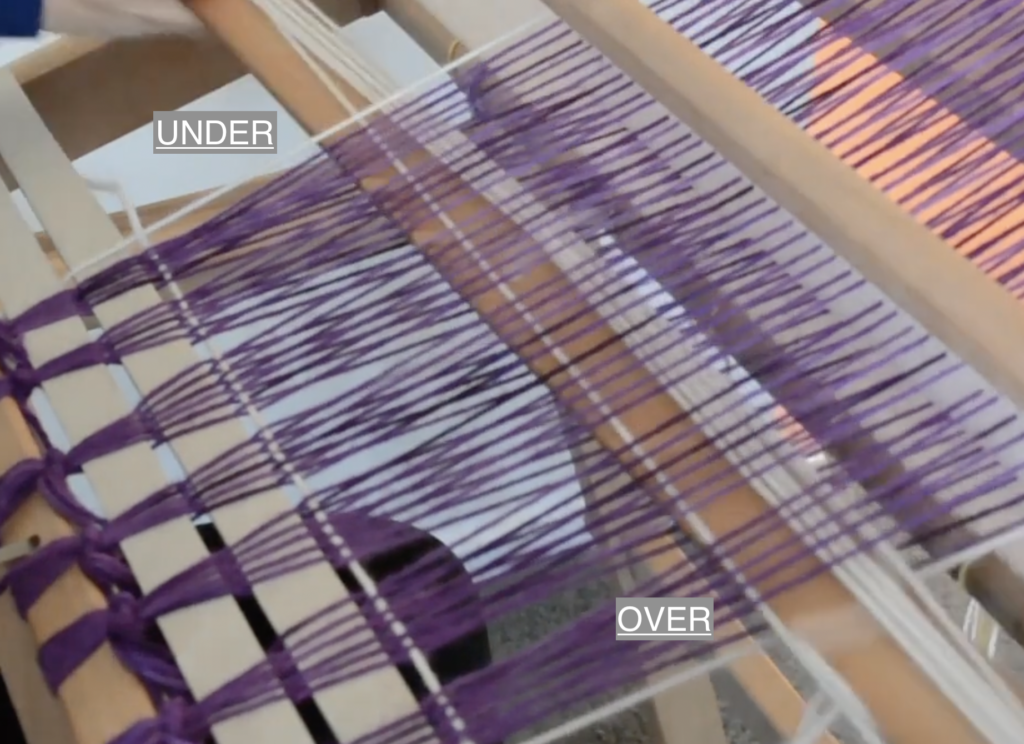
Here is how your shuttle should look for that second pick (weft row).
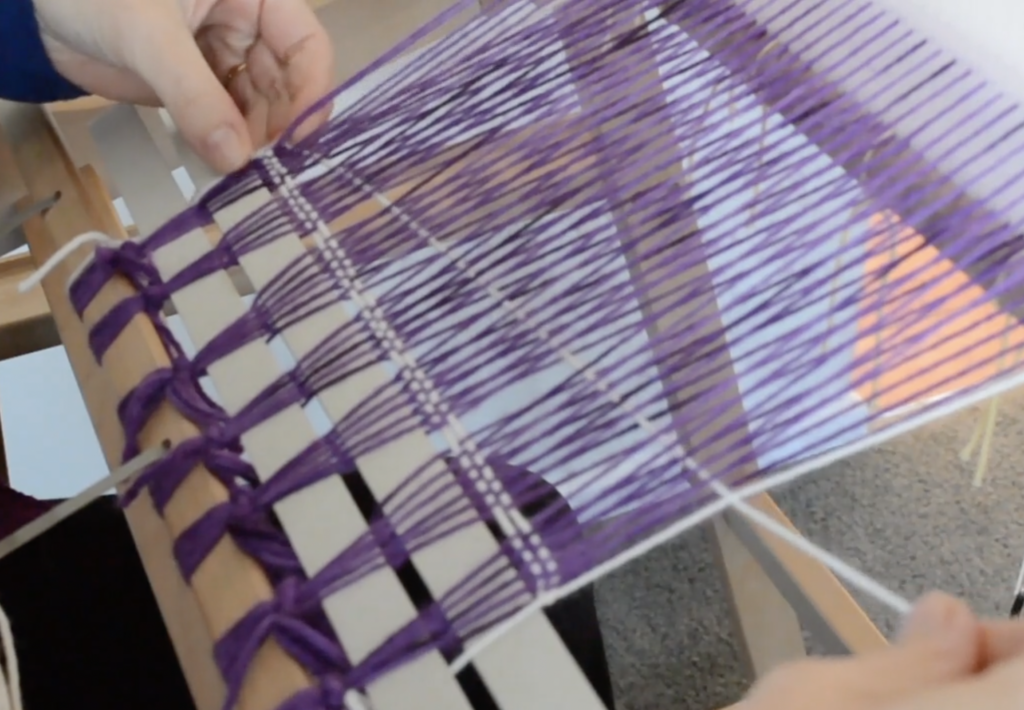
Back to the up position for the third pick. The shuttle will go OVER the FS on the left and come out UNDER on the right.

It’s important to note that using floating selvedges does not change the way we weave. We still need to arrange and tension our weft picks to ensure neat edges. If you are not familiar with my pinching technique, I have a free video tutorial that will make a huge difference to your edges:

If you are having trouble remembering whether you are supposed to be taking the shuttle over or under the FS in your next shed, you only need to look at how your last weft pick is sitting.
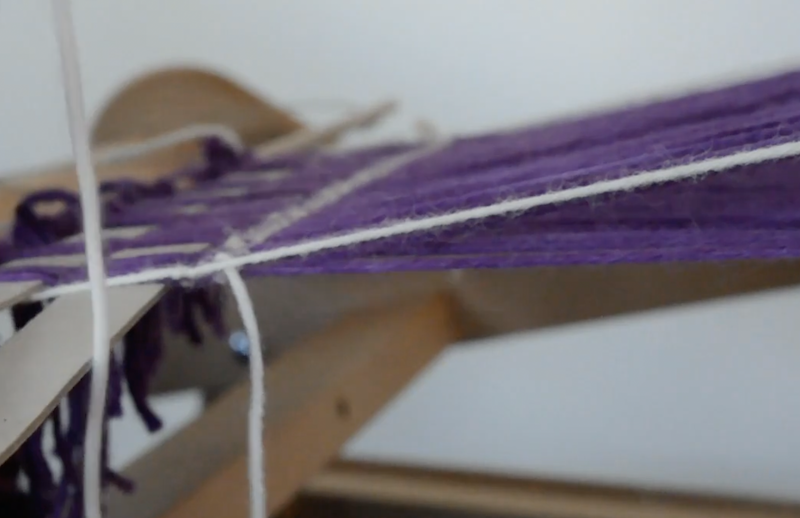
For example, you can see clearly in this photo that the last weft pick is sitting UNDER the floating selvedge. This tells me that, to ensure the weft yarn wraps around that FS edge, I will need to take it OVER the FS as the shuttle re-enters the shed.
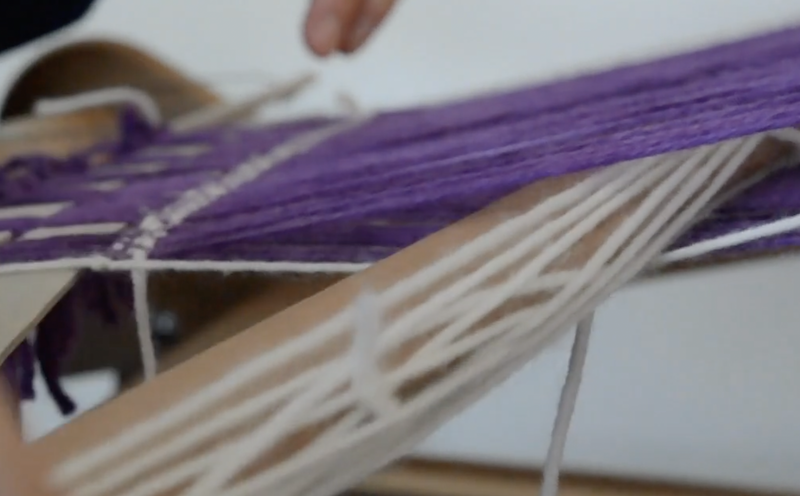
When your heddle is in the up shed, you can see that the floating selvedge also sits up a little with the warp. The easy way to weave is to just depress the FS with the tip of the shuttle as you enter the new shed.
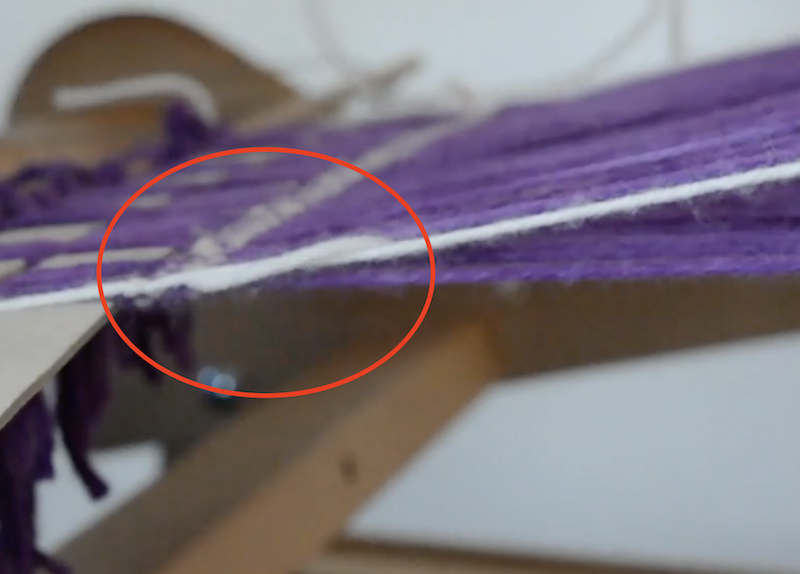
See how the weft yarn wraps around the FS as it you enter the shed?
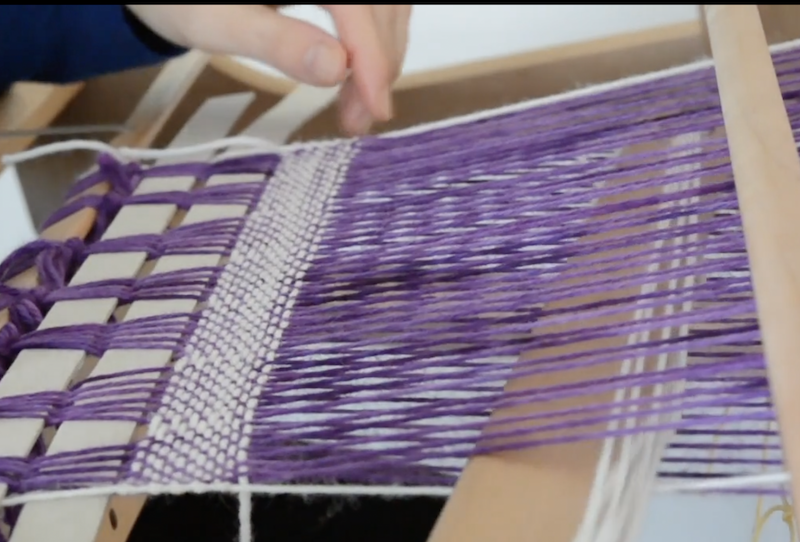
As you weave, the FS becomes a part of the fabric and provides a straight edge. The floating selvedges are not removed when you finish weaving, like you would remove fishing line if using the Lifeline Technique, they are truly a part of the piece and that is why we match the yarns when we set up our FS in the beginning.
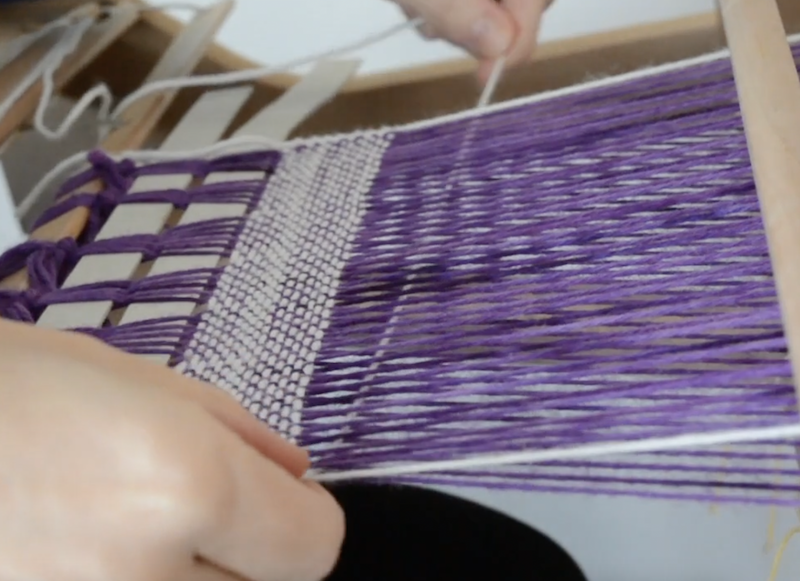
Continue to tension and angle your weft as you weave. I think you will be very pleased with the results!

If you would like to see me weaving on the table loom using floating selvedges, please view this free video tutorial:

I hope you found this tutorial valuable.

Until next time…

Happy Weaving!

Filed Under: Floating selvedges, Free tutorial, Neat edges, Rigid heddle weaving, Table loom weaving, Tutorials, Weaving Tagged With: floating selvedges, table loom weaving

What are floating selvedges?

by Kelly 17 Comments

If you’ve been weaving for a little while now it’s very likely that you’ve come across the term “floating selvedge”.

What is a floating selvedge?

Floating selvedges (FS) are used on either side of a warp and are replacement threads for the original edge warp threads. This may lead you to wonder why you would want or need to replace your edge threads?

When weaving a simple plain weave, the interlacement of weft and warp doesn’t change. You alternate between the two plain weave sheds and the weft thread always naturally wraps around the outer most warp threads.

*This post contains affiliate links. Please see my disclosure policy for more information.

But when you are weaving something other than plain weave, you will often find that the weft skips the outer warp thread – either in every shed or, more likely just in certain sheds. If you don’t do anything to combat this problem, the result will be messy edges and a cloth that lacks integrity at the selvedges.

Now, there is a manual method you can use to prevent this from happening, but I find it easy to install floating selvedges and I also love the neat edge finish this gives me.

How does the floating selvedge work?

A floating selvedge will provide you with an unchanging edge thread, unlike your natural edge thread that may change according to the pattern, or the way you have threaded your loom. The path of the weft thread is determined by your action with the shuttle when you begin weaving, ensuring that every edge warp thread (now your floating selvedge) is wrapped with weft yarn.

When we install floating selvedges, they are usually not a part of the original warp. They are always threaded into an empty slot next to the last naturally occurring warp thread. This makes them independent of your warp and pattern, and means that we can adapt them to our own purposes.

Although floating selvedges are not necessarily a part of the original warp, they do become a part of the finished woven piece – they are not removed afterwards.

For this reason, it’s important to choose a colour that will blend well with the project. If I am weaving my piece with just one, solid coloured weft, I will choose that same yarn and colour for my floating selvedges.

If I am going to be changing the weft colour multiple times within that one piece, I will choose the same yarn and colour as my warp.

The idea is that, once your piece is off the loom and finished, you won’t be able to tell that there was a floating selvedge introduced (other than the fact that your edges will look really nice!)

Can you use a floating selvedge on any loom?

Pretty much. I use them mostly on my floor loom and table loom, and on my rigid heddle loom if I’m weaving something other than plain weave.

Today’s tutorial is specifically for the rigid heddle loom. Scroll to the end of this post to find a video tutorial specifically for table loom floating selvedges.

I like to install my floating selvedges when the warp is all tied on and I’m almost ready to weave.

The photos from this tutorial are taken from my member’s only Floating Selvedges on a Rigid Heddle Loom class.

I most often use the same yarn for my floating selvedges as I use for my weft. So, in the example above, I will be using a white weft.

I don’t do this every time though. If I am weaving a project where I intend to have multiple and frequent weft colour changes, I will use the same yarn that I used for warp for my floating selvedges.

Step 1. is to measure out a length of yarn that is similar to the length of your warp. A little more is fine, a little less is not so great, as then you may have to install the floating selvedges again in the same project. It’s doable, but preferable to have a little more than you need so you don’t run out.

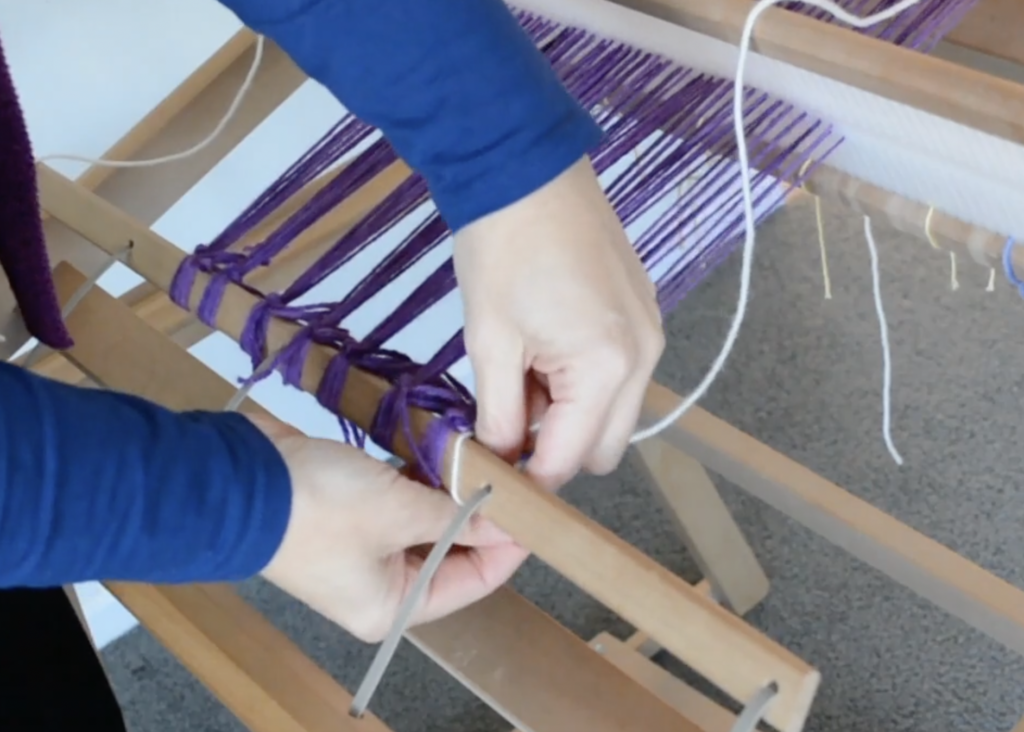
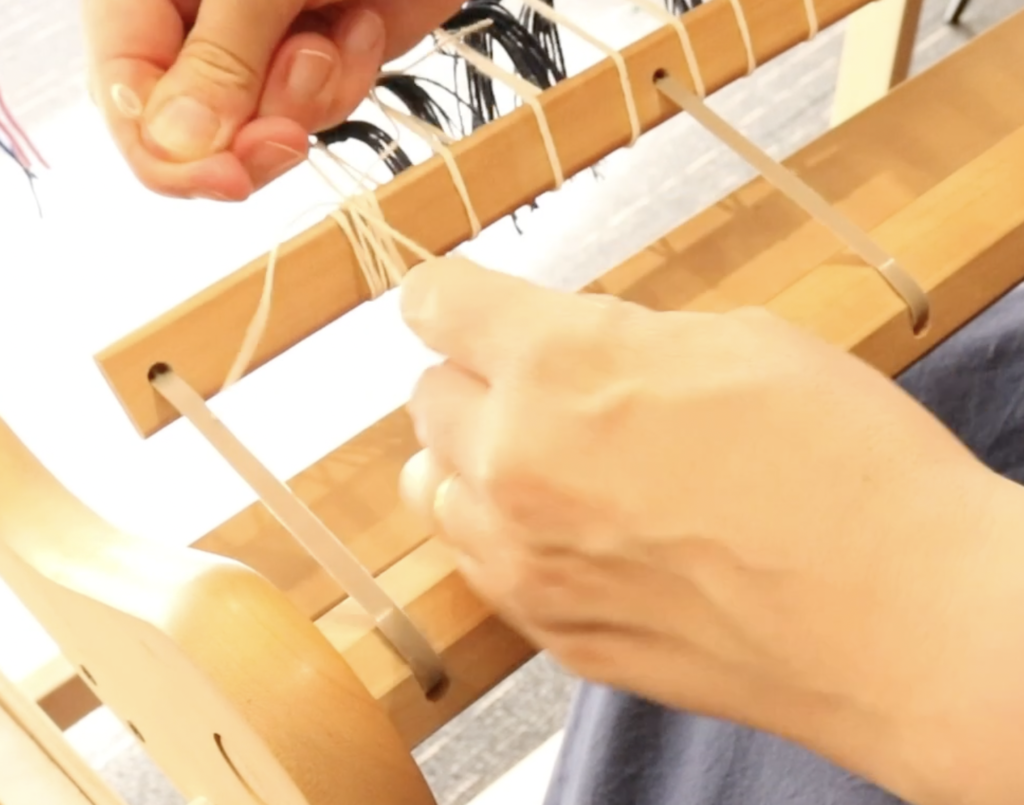
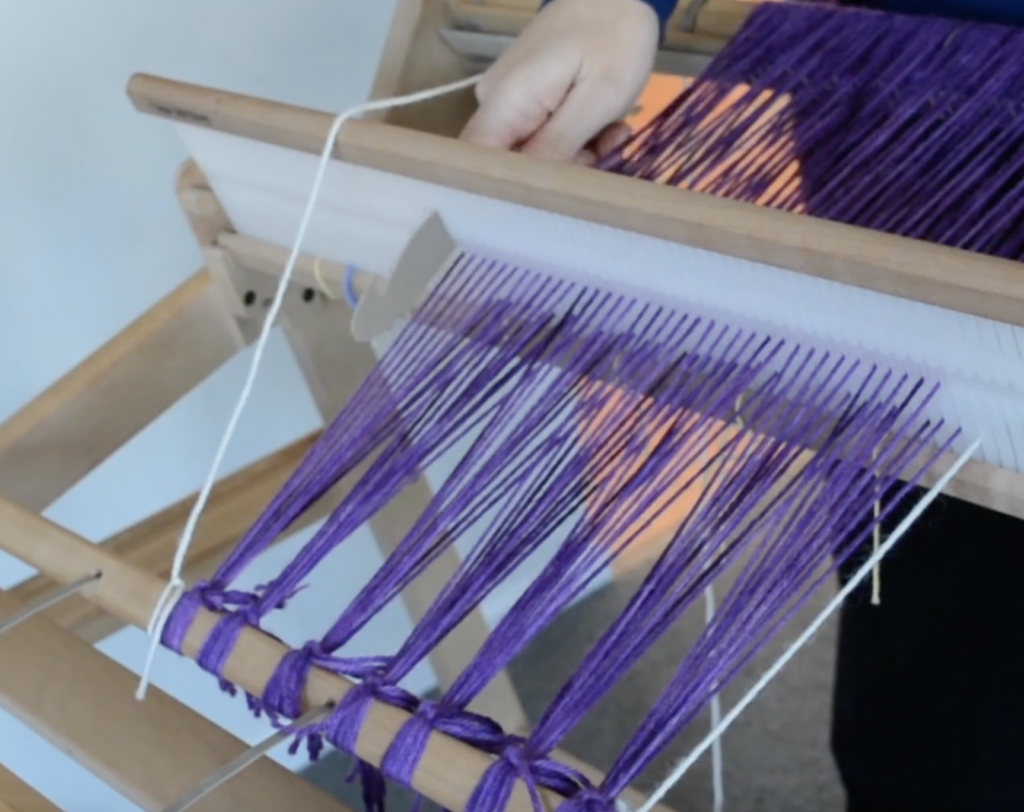
Cut your length of yarn and tie one end in a secure, double knot to the front apron rod on one side of the warp. It makes no difference whether you do the right or left side first.

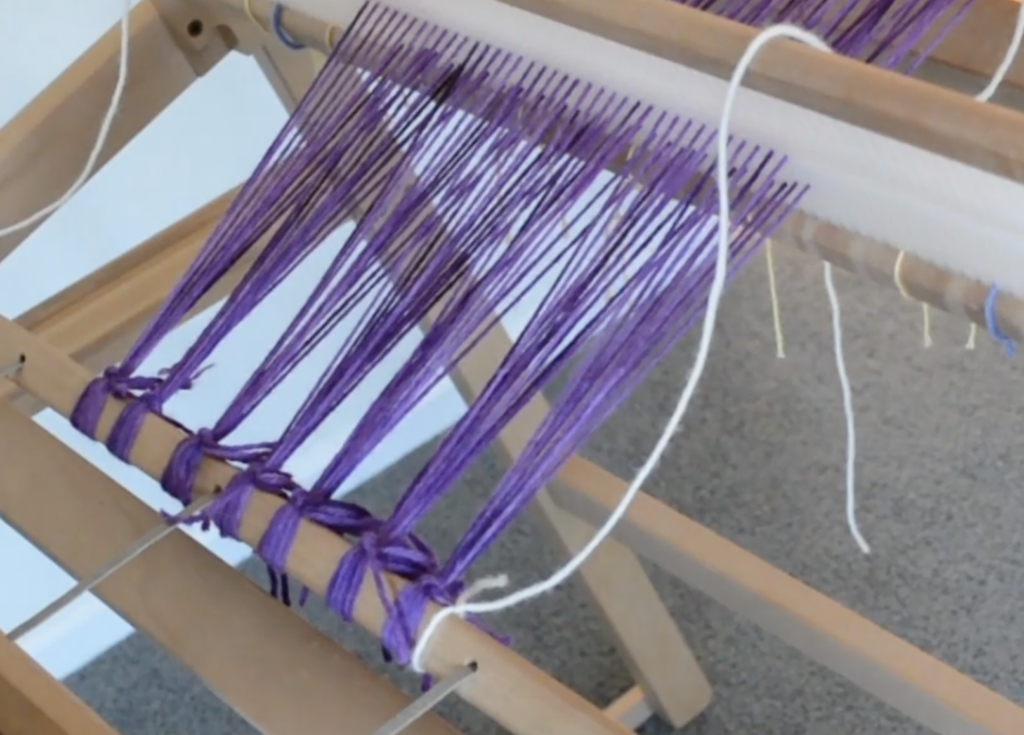
Drape the tied yarn over the top of the heddle. It doesn’t really matter what position the heddle is in at this point, but it make sense to have it in the neutral or resting position.

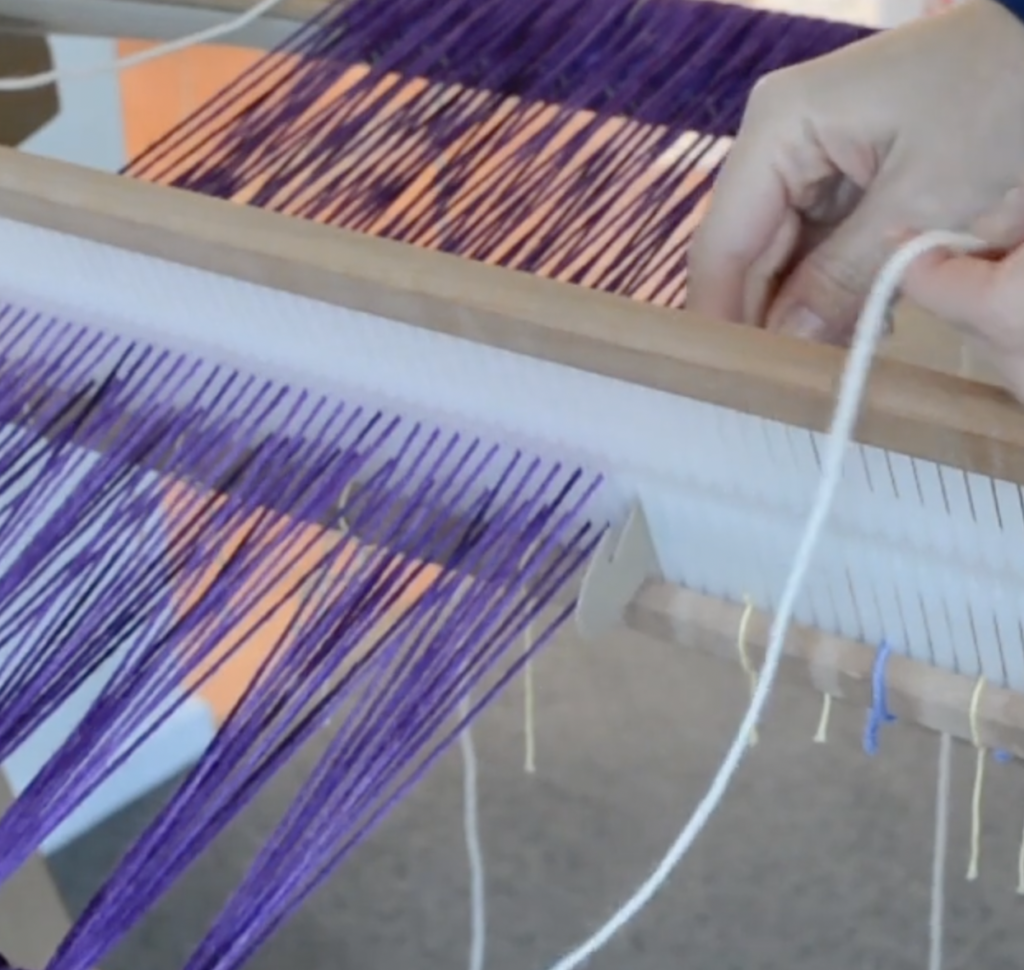
Find the next slot, next to your outer most edge warp thread that is empty. This is the slot you will thread your yarn through. Having the floating selvedges in a slot makes them a “free agent” that we can then manipulate in the weaving process to ensure that our edges are always wrapped with a weft thread.

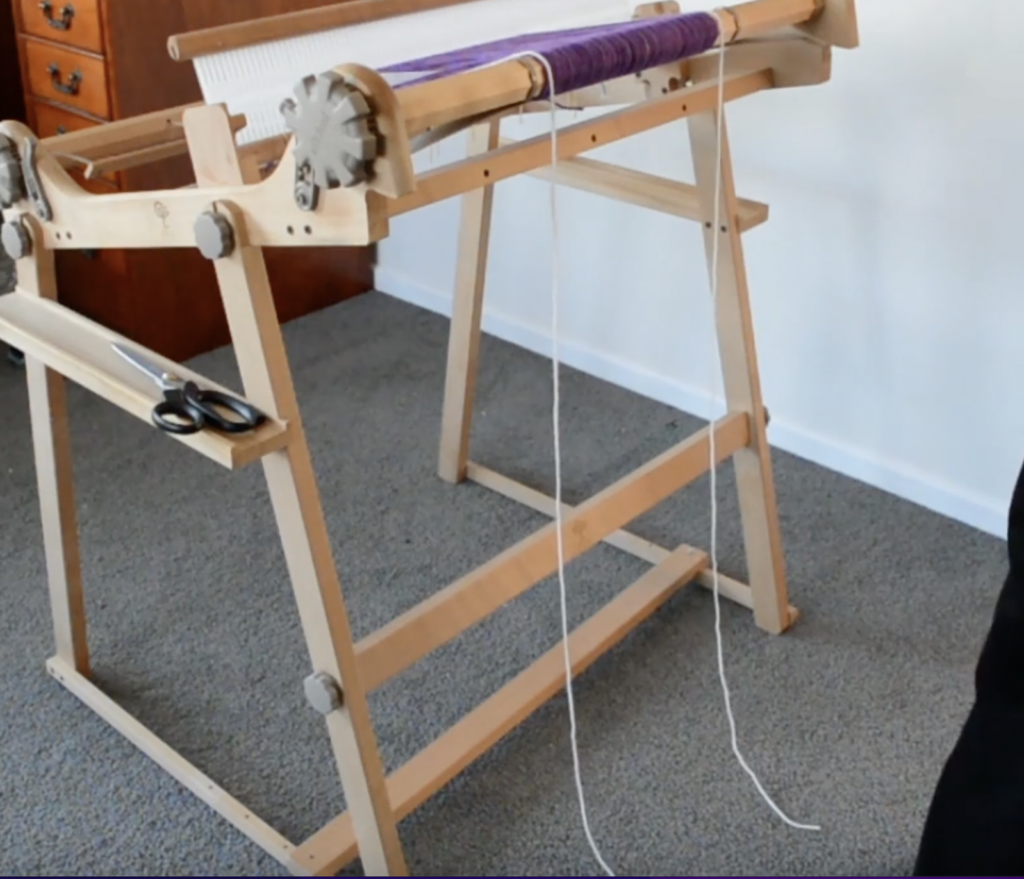
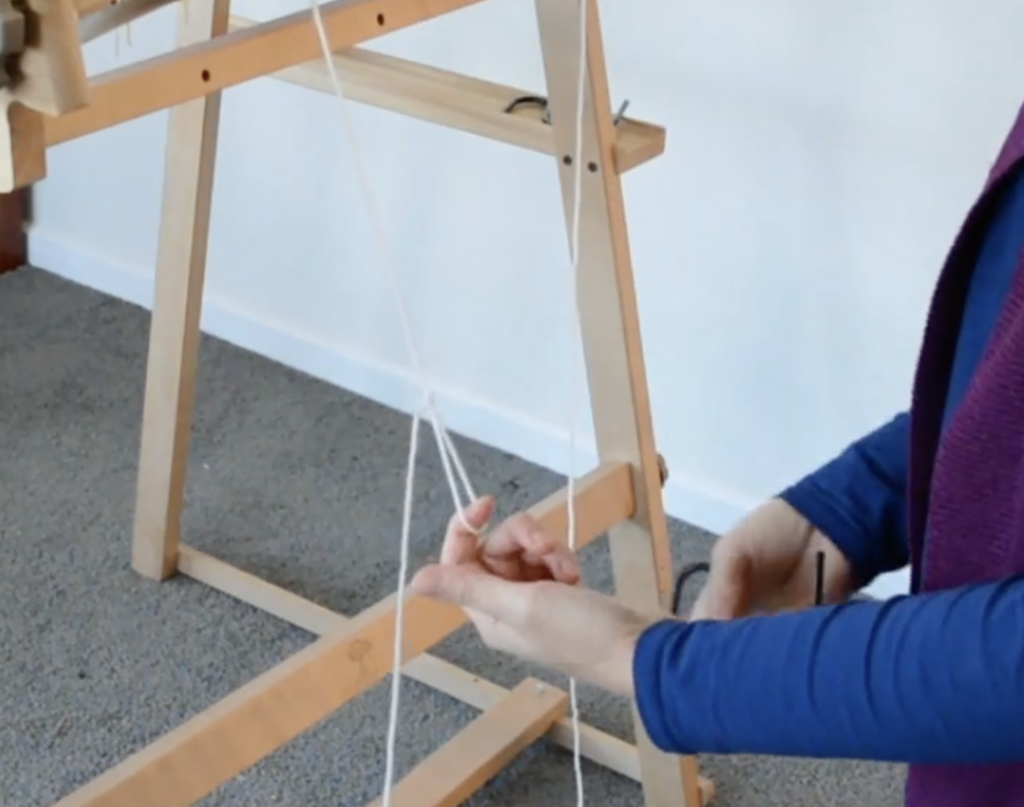
Pull the thread right through the slot and over the back beam and leave it hanging.

Now repeat the exact same steps on the opposite side of the warp.

Now you have two threads in slots on either side of your warp and they are ready to be weighted. If you don’t weight them, they won’t work, they need to be under tension!

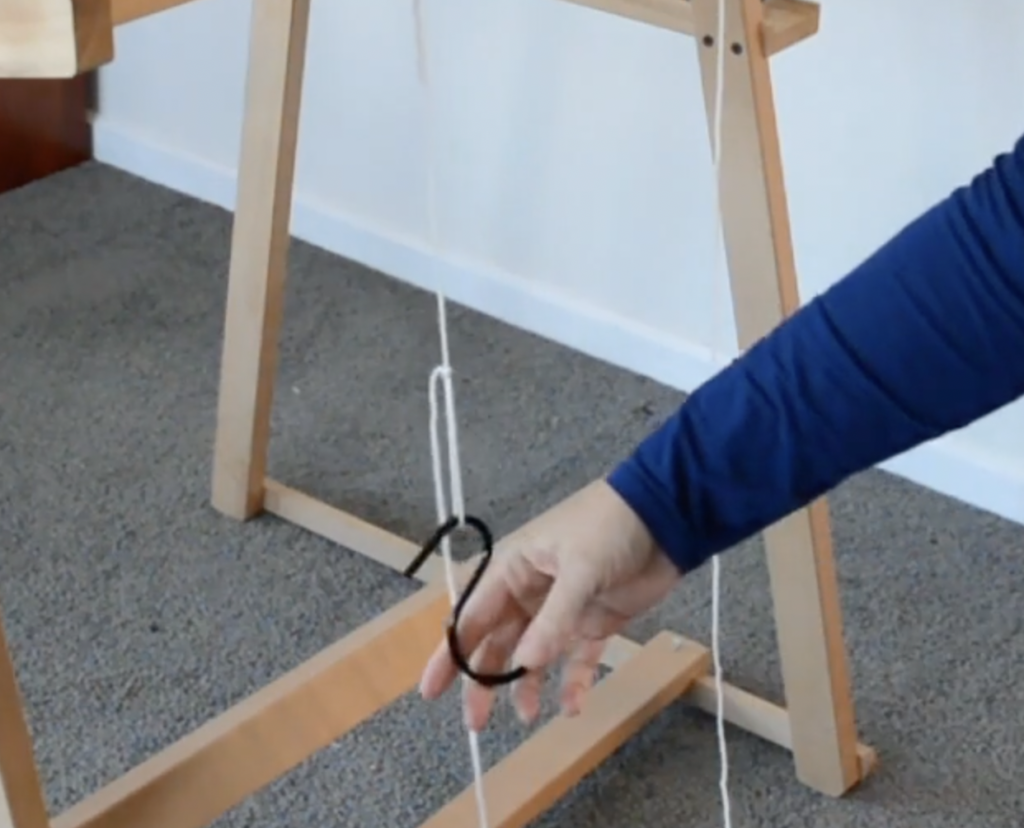
Make a slip knot in the hanging thread. You can do this half way down, or further towards the floor, the main thing is that the weights are not resting on the floor, you want them to dangle and place tension on the thread.

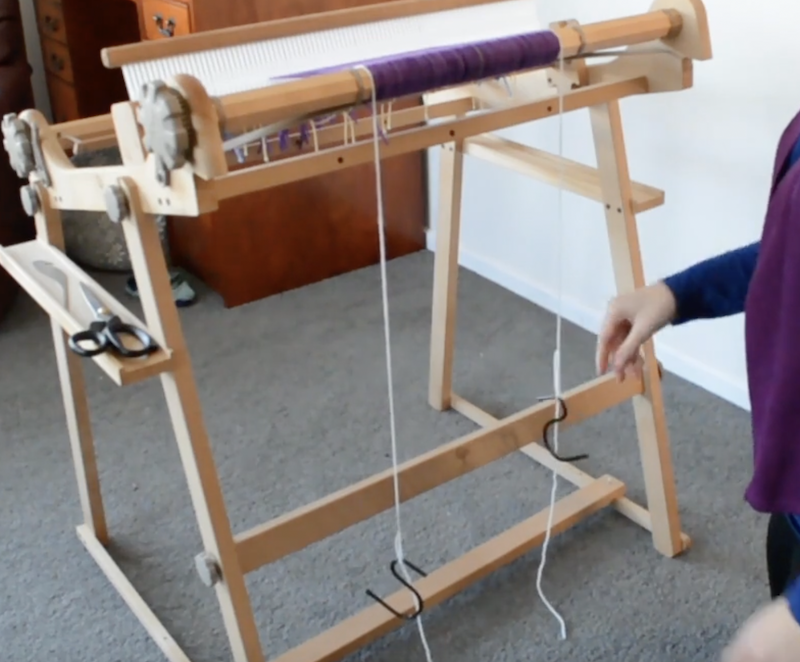
Place an “S” hook or something similar through the loop of the slip knot and allow it to hang. You can tighten up the slip knot to prevent your hook from jumping out of the loop. I have a bunch of S hooks, they are so handy for tensioning broken or loose threads and I always use them on my floating selvedges.

Do the same for the other floating selvedge thread, and you’re ready to start weaving!

As a side note – this method is not the only way to install floating selvedges. Some weavers prefer to allow for the additional two threads when calculating the warp, and then roll the FS on with the rest of the warp. They would then thread the FS threads through an empty slot rather than threading as part of the pattern.

If you’re interested in knowing more about floating selvedges and viewing a tutorial for installing them on a table loom, please view this video:

In the next post I will have a tutorial for how to actually use the floating selvedges when weaving, so look out for that one.

Until next time…

Happy Weaving!
Filed Under: Floating selvedges, Floor Loom Weaving, Free tutorial, Neat edges, Rigid heddle weaving, Table loom weaving, Tutorials, Weaving Tagged With: floating selvedges, rigid heddle loom

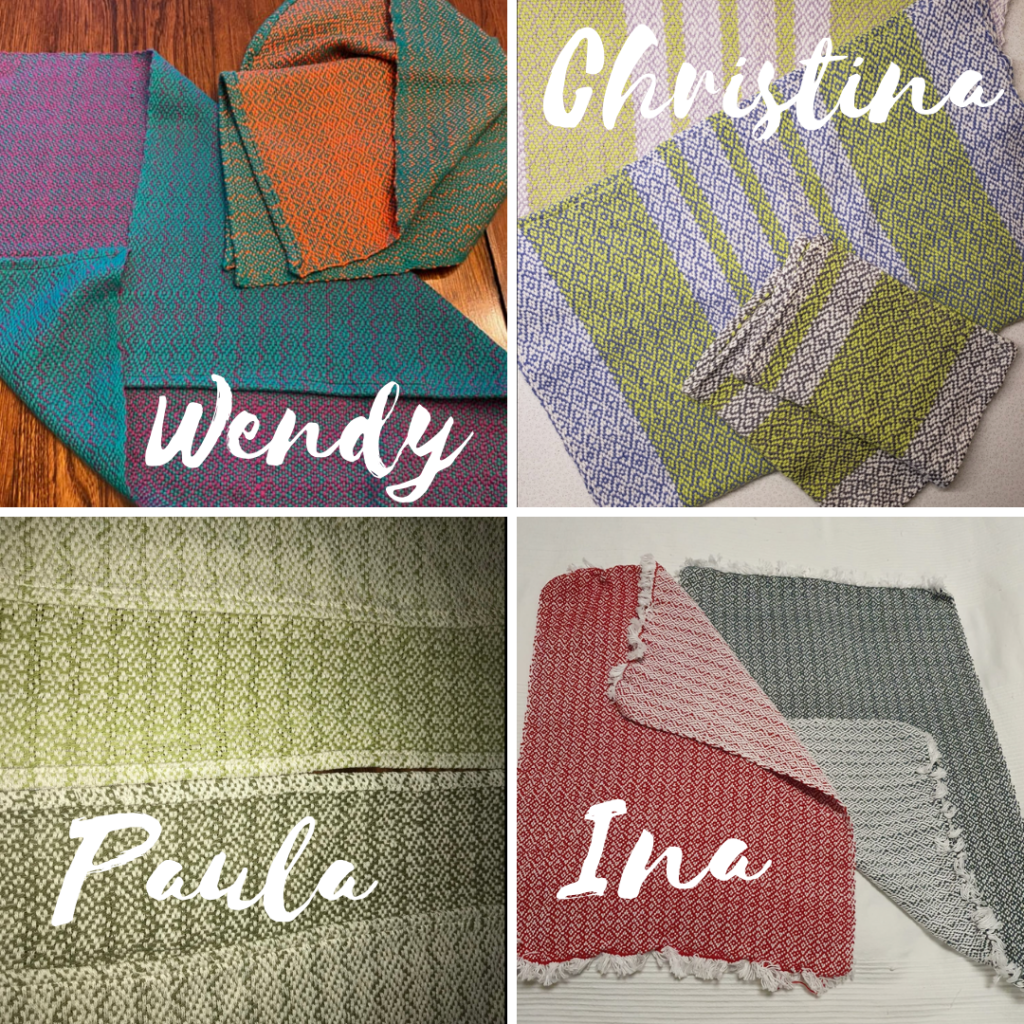
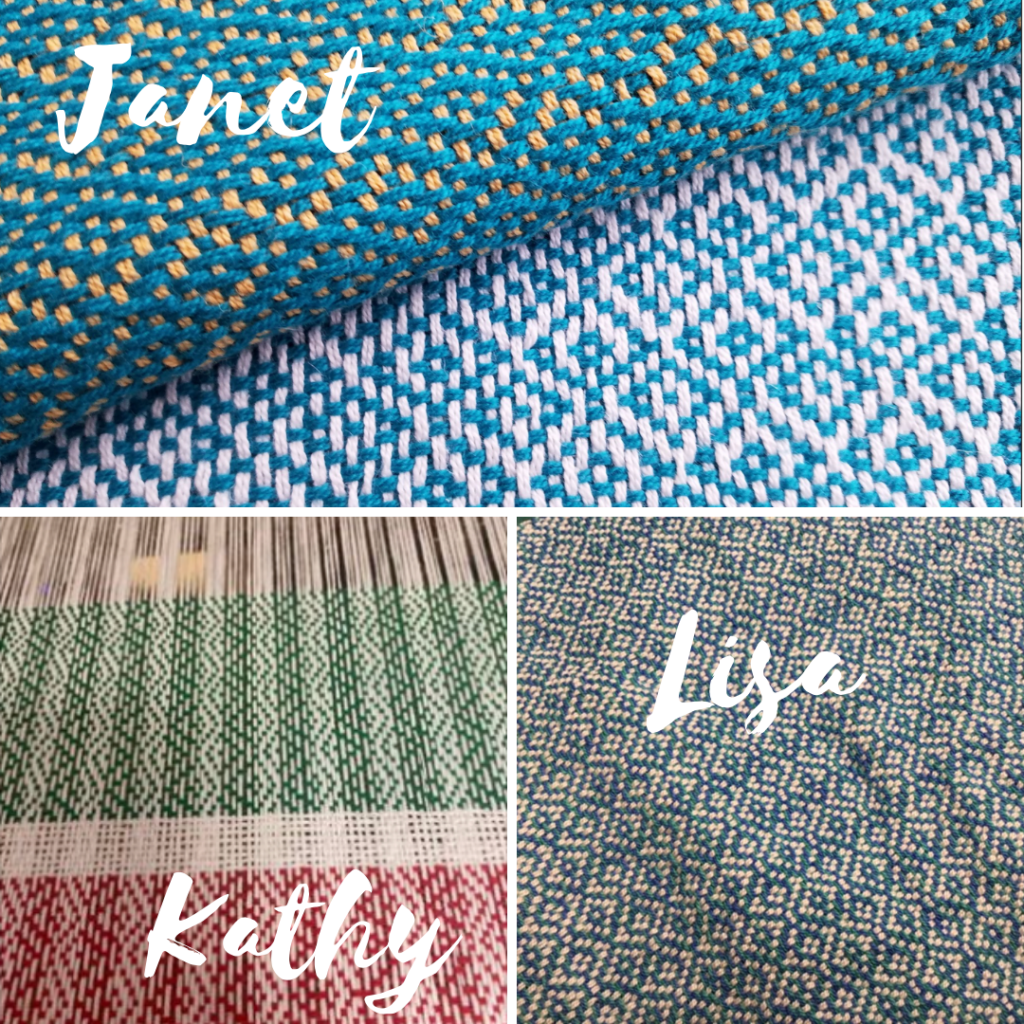
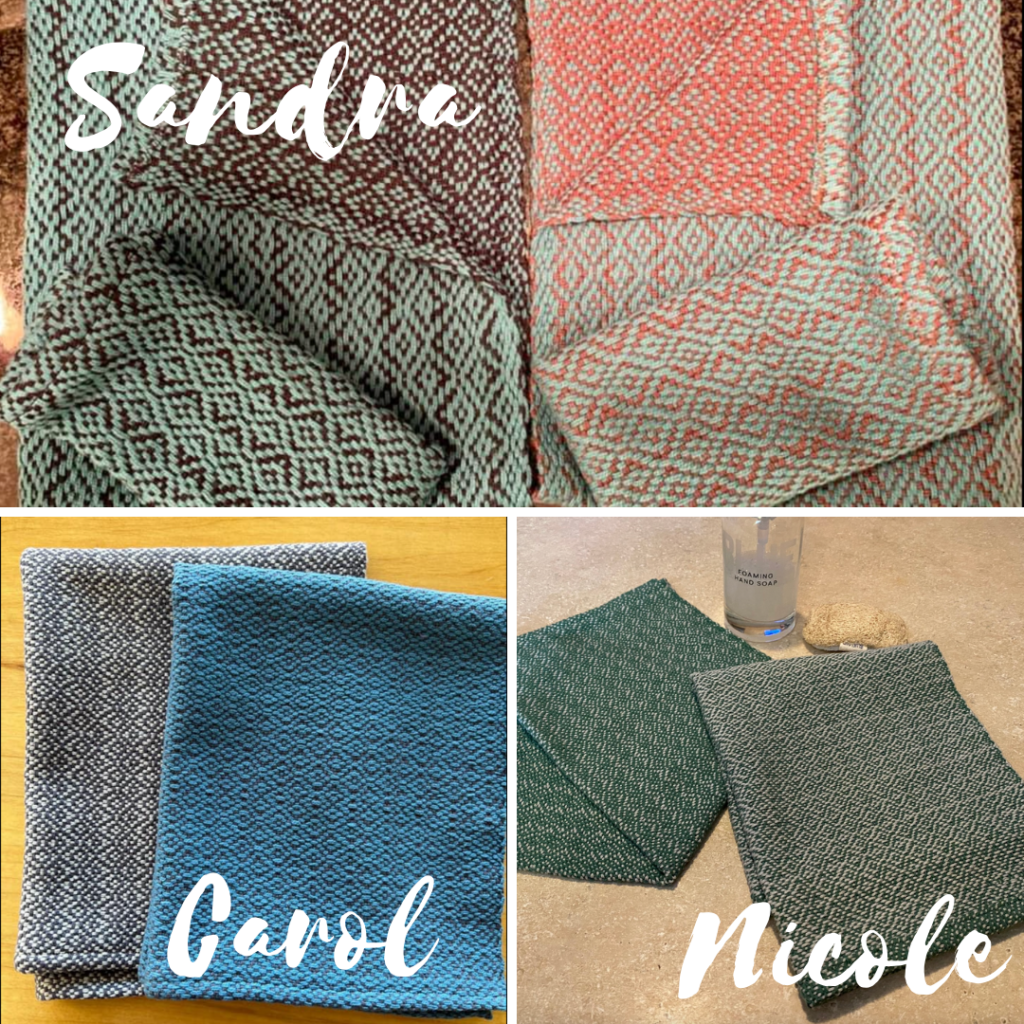
Diamond Stripe Towels Weave Along Gallery

by Kelly 2 Comments

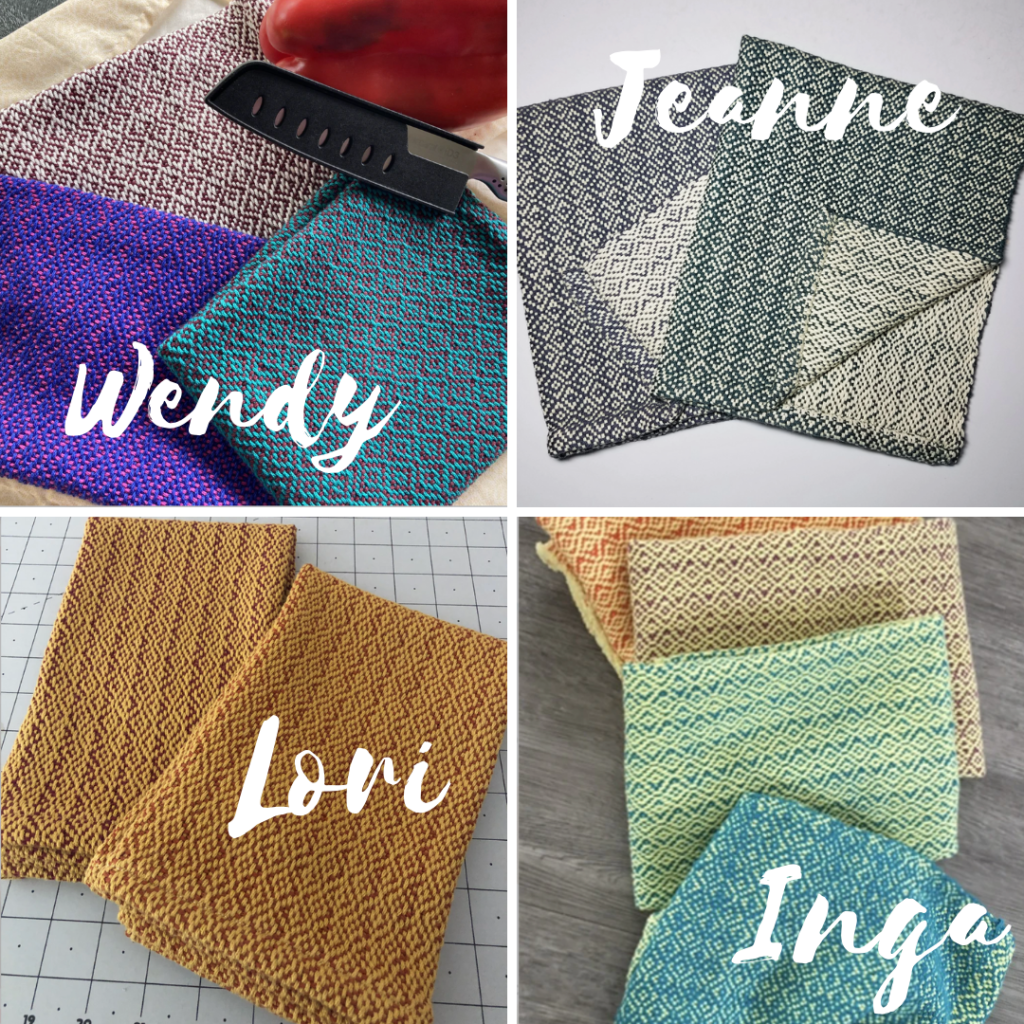
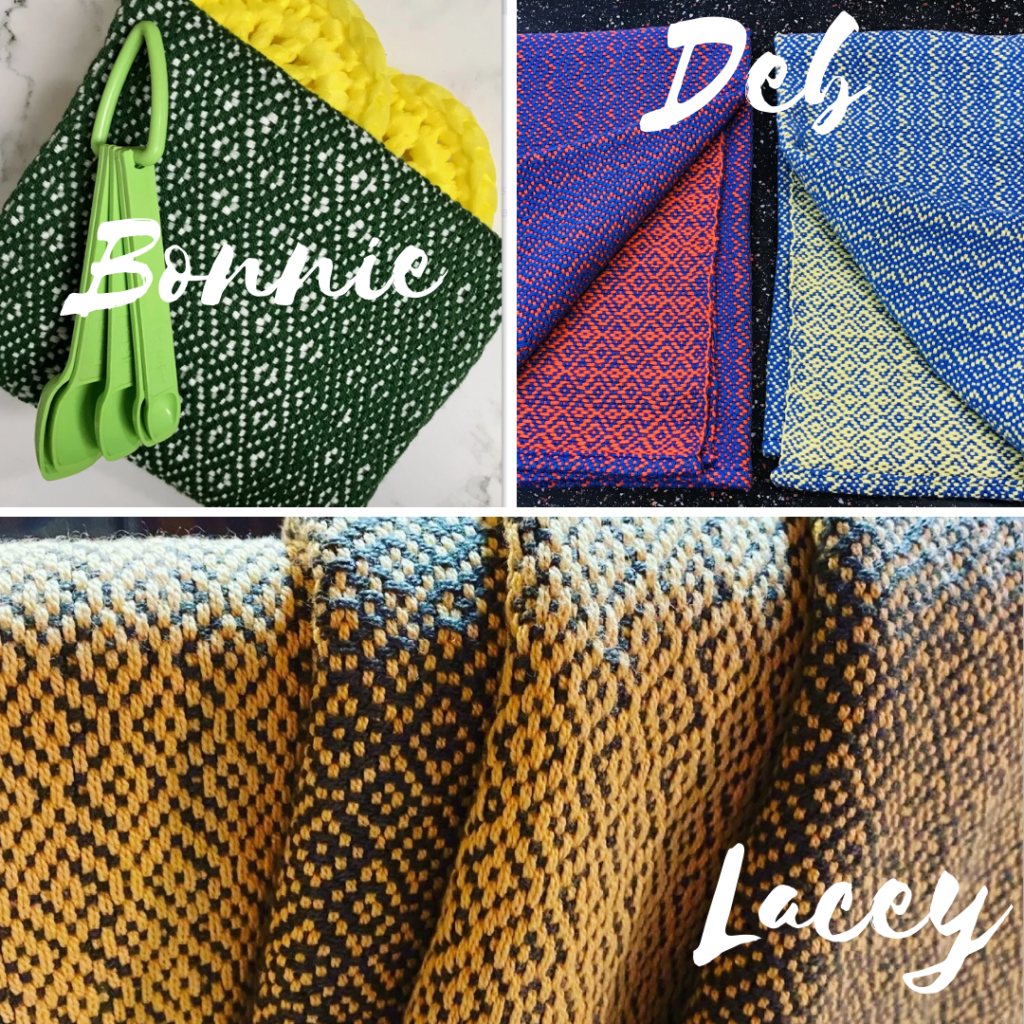
Last year I ran a Weave Along based on my Diamond Stripe Towel pattern.

This rigid heddle pattern is a best seller in my Etsy shop (over 1000 copies sold at the time of writing this article!), but many weavers requested that I put together a class or weave along to compliment the PDF pattern.

The first Weave Along was such a huge success and I had so many students ask me to run it again this year. The second weave along ran throughout January 2022 and just like the first one in 2021, was a raging success.

*This post contains affiliate links. For further information, please see my disclosure policy.

Similar to the Wash Your Hands Towels Gallery, I wanted to be able to showcase some student’s beautiful work from the weave along.

The individual choices of colours and styles is so impressive and inspiring!

In this project we use two heddles to create the diamond pattern. It is a challenging technique, but so many participants completed their towels successfully.

Many participants told me that finishing the Diamond Stripe Towels and weaving with two heddles has opened up a whole new world of weaving for them. That is so exciting to hear!

In addition to the community interaction at the Online Weaving School, participants were also invited to join a private Facebook group to share and troubleshoot. This is a wonderful group with a true spirit of willingness to help.

In the first weave along and in the pattern, there was only the option to use 8/2 cotton for the towels. Following feedback from the first participants, I updated the information to include a supplement video section for those who wished to use 8/4 cotton instead. This has allowed weavers to use what is readily available to them, either from their stash or from local suppliers.

*Please note, these cottons are available in Australia from Thread Collective.

The 2022 Diamond Stripe Towel Weave Along is closed for enrolments, but here is the good news.

If you are a Gold Member of the Online Weaving School, this Weave Along is available to you at any time, following the purchase of the pattern.

And who knows? Maybe if I start to get requests, I will run this weave along again sometime in the future šŸ˜‰

I hope you enjoyed viewing all of these beautiful towels.

Until next time…

Happy Weaving!
Filed Under: Rigid heddle weaving, Rigid Heddle Weaving Patterns, Weave Along, Weaving Tagged With: diamond stripe towels, rigid heddle weaving

I’m proud of you!

by Kelly 25 Comments

Has anyone ever said that to you? Maybe you have longed to hear those words but it just never happened.

There are certain words that we all hope to hear at some time in our lives, words that make us glow inside with happiness. “I love you” might be at the top, but I reckon that “I’m proud of you” comes in a close second.

My husband has repeated both of these sentences to me many times, something that I am ever so grateful for. But recently I heard “I am proud of you” from somebody else. Someone who is very important to me. Someone who struggles with expressing emotions.

I’m not going to tell you who it was, in the interests of protecting and respecting privacy. What I can tell you is that hearing those words from that person floored me. I teared up and for the rest of the day I felt like I was floating on a cloud.

When I was thinking about what I wanted to say to you in this “end of 2021” post today, the words “I am proud of you” kept resonating in my mind.

I am so grateful for the position I’ve been given, the friendships I have with my students and followers and the immense blessing it is to watch and help you all learn and improve.

Yes, I am so very proud of ALL of you!

People look to me for inspiration, but in reality, it is all of you who inspire me every single day.

If you’re not feeling very proud of yourself right now, I hope you will think again.

Here are some of the things I’ve discovered about all of you through the Online Weaving School.

  • You are smart
  • You are eager to learn
  • You are creative
  • You don’t give up
  • You are kind
  • You are capable
  • You are willing to try
  • You are passionate
  • You make the lives of others better (starting with me!)

I don’t make New year’s resolutions for two reasons:

  1. I know from past experience that I OVER resolve and then feel bad when I fail.
  2. Once a year is not often enough.

Here is my approach.

Each day is a new day. If you want to get right down to the truth, each moment is a new moment. A brand new opportunity.

You don’t need to wait until a specific day or date to be better. Decide how you want or need to be better and start right now!

Until next time…

Happy Weaving!
Filed Under: Inspiration, Weaving

How to double your weft thread

by Kelly 14 Comments

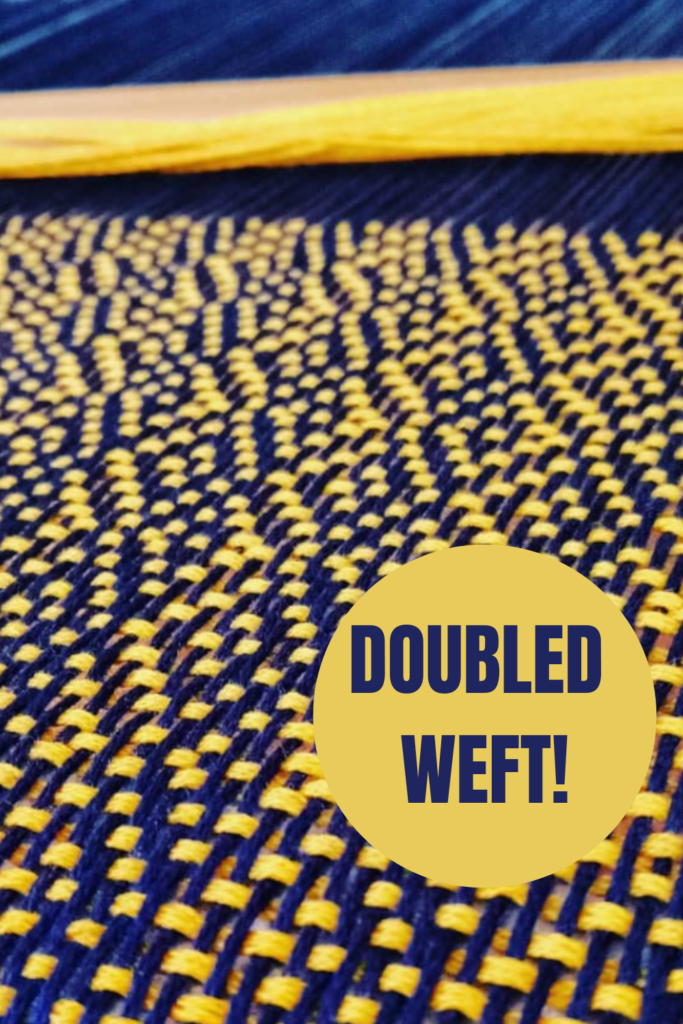
There are times that you will want to double your weft thread in order to achieve a balanced sett. Or, you may just be wanting to make the weft stand out and feature more.

If you only have one cone or ball of yarn to work from, you will need to think around how you’re going to load the shuttle to be double, rather than single stranded.

*This post contains affiliate links. For more information, please see my disclosure policy.

Today I’m going to show you how to easily double your weft when using a stick shuttle. I’ll cover a couple of different methods.

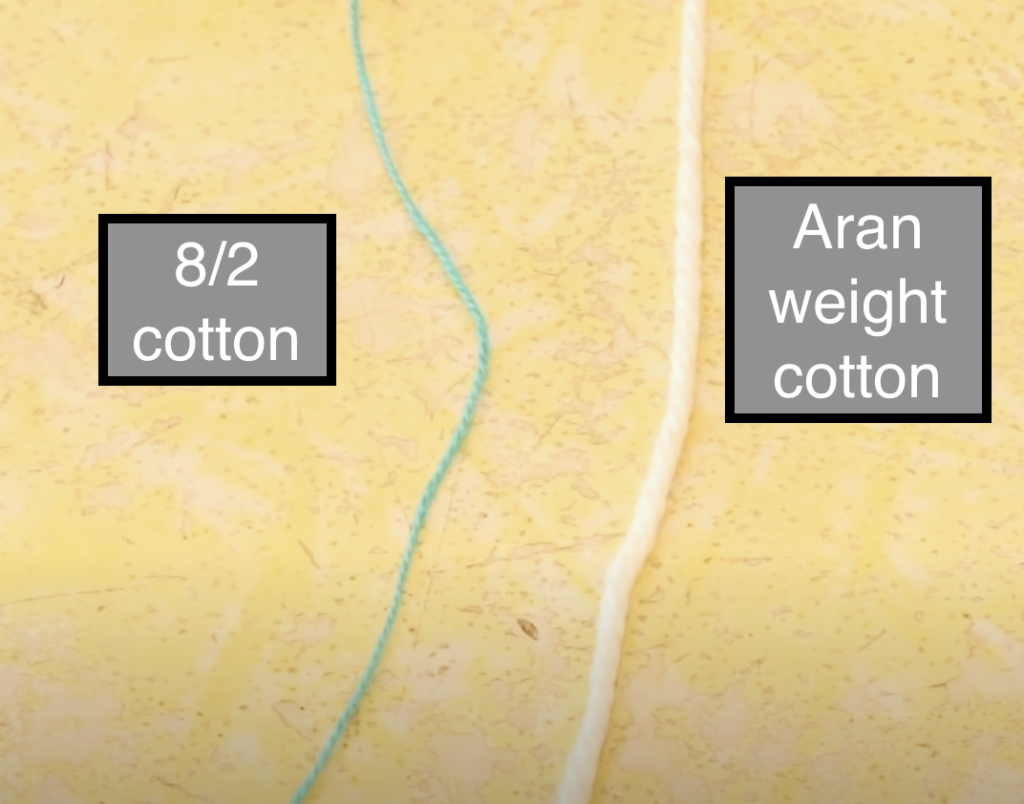
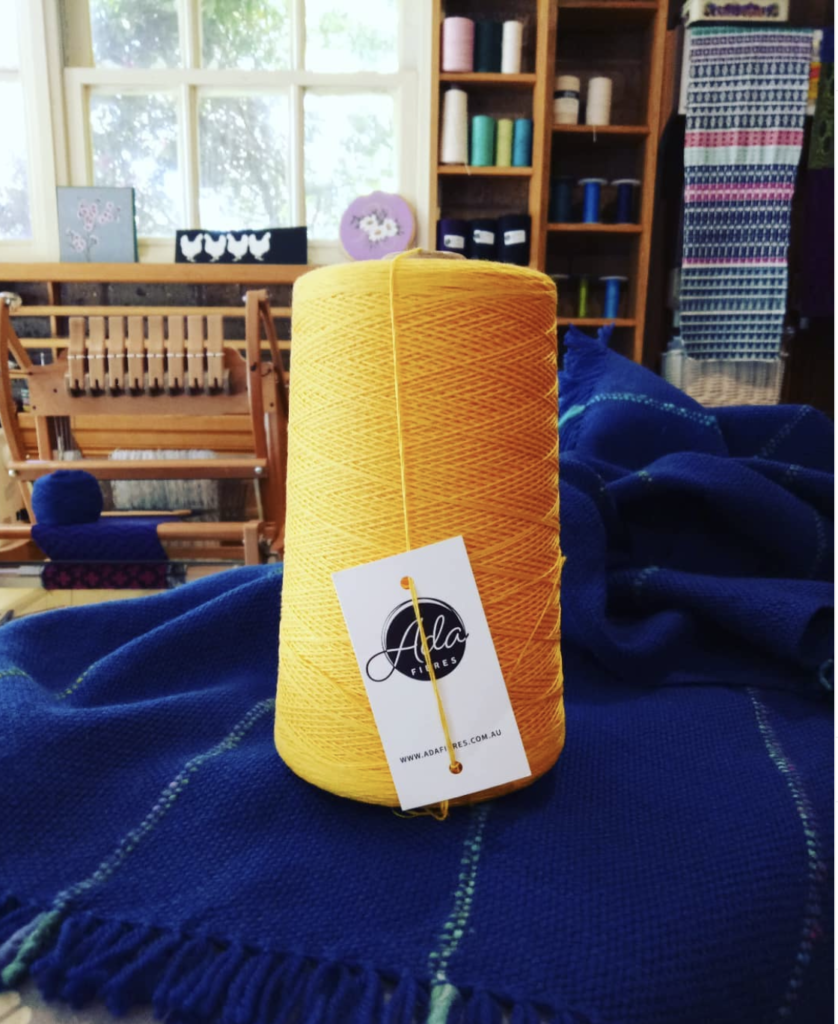
In my example piece, my warp is 8/4 cotton. For my weft, I want to use a lovely, bright yellow, I received recently from the brand new Australian cotton range from Thread Collective. This yarn however, is 8/2 cotton – quite a bit lighter than the 8/4 warp.

Considering it’s important to me that my pattern stands out and is nice and bold, the 8/2 as a single weft would not have the impact I’m wanting to achieve. I decided to double the weft.

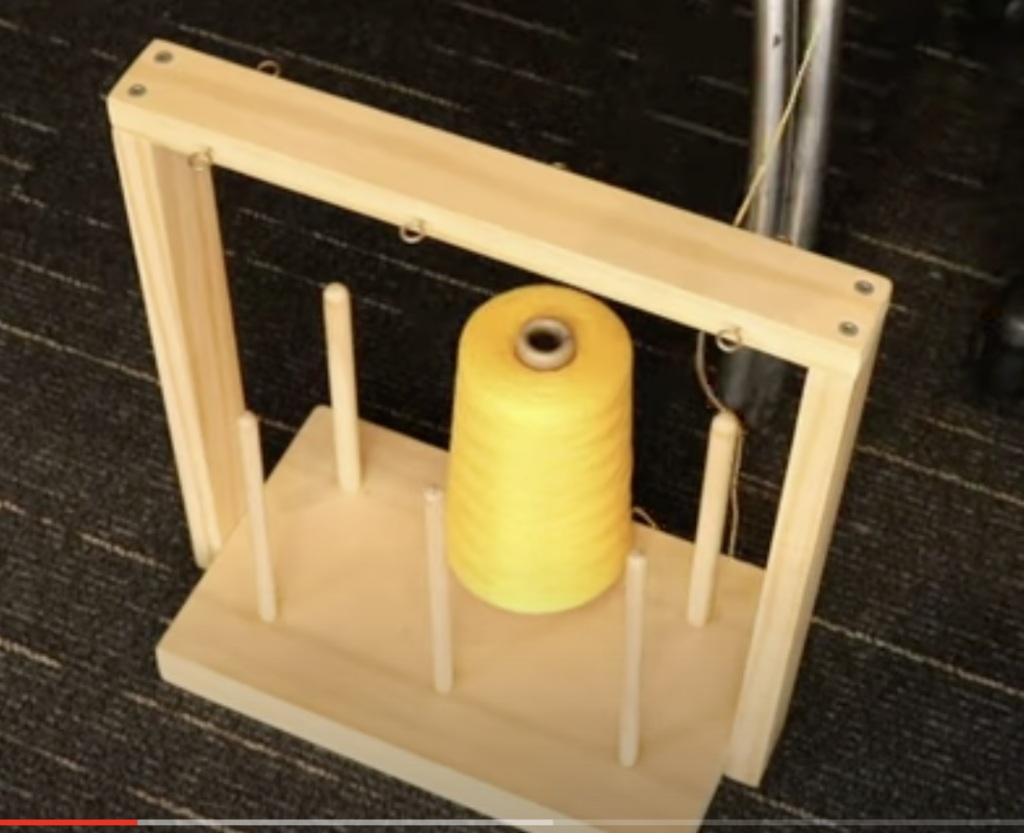
I start by placing the cone of yarn that I want to use for weft on the floor next to the table I’m sitting at. I use my cone warping stand to hold the cone steady and to feed the yarn off freely. You can also stand your cone in a box or empty cylinder of the right size – whatever stops the cone from rolling all over the floor while you’re trying to feed yarn off it!

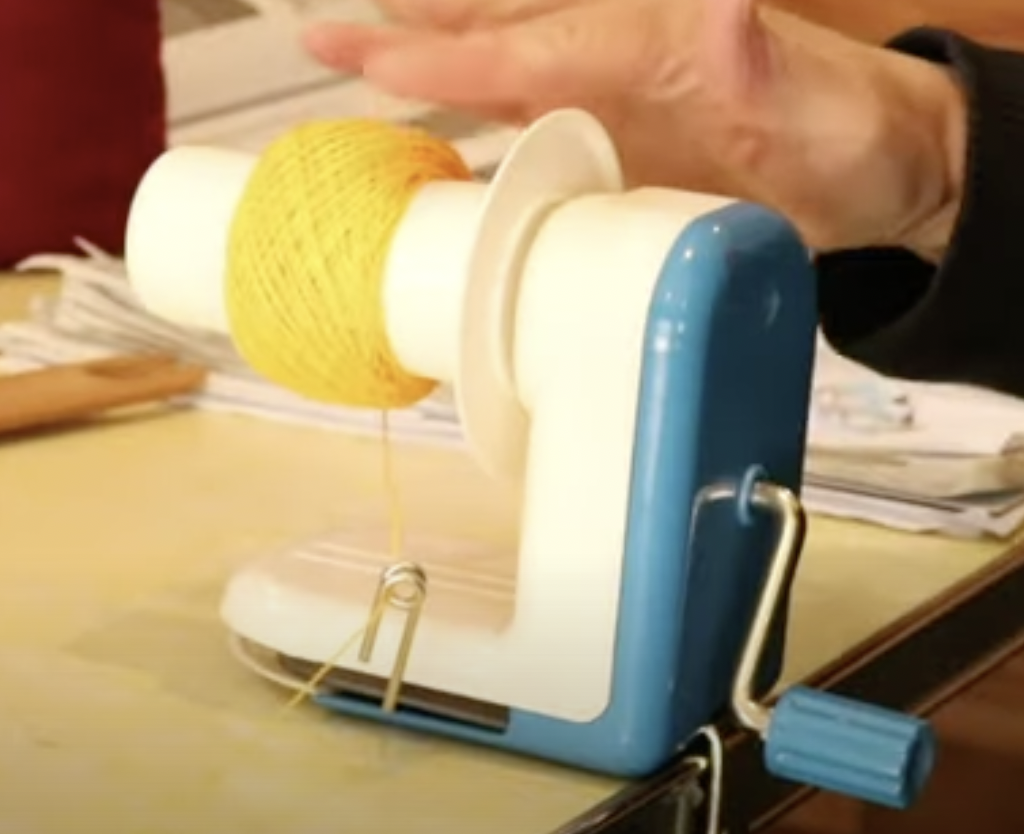
I’m going to be using my ball winder for this tutorial, but you do not have to have one in order to successfully load your shuttle with doubled weft.

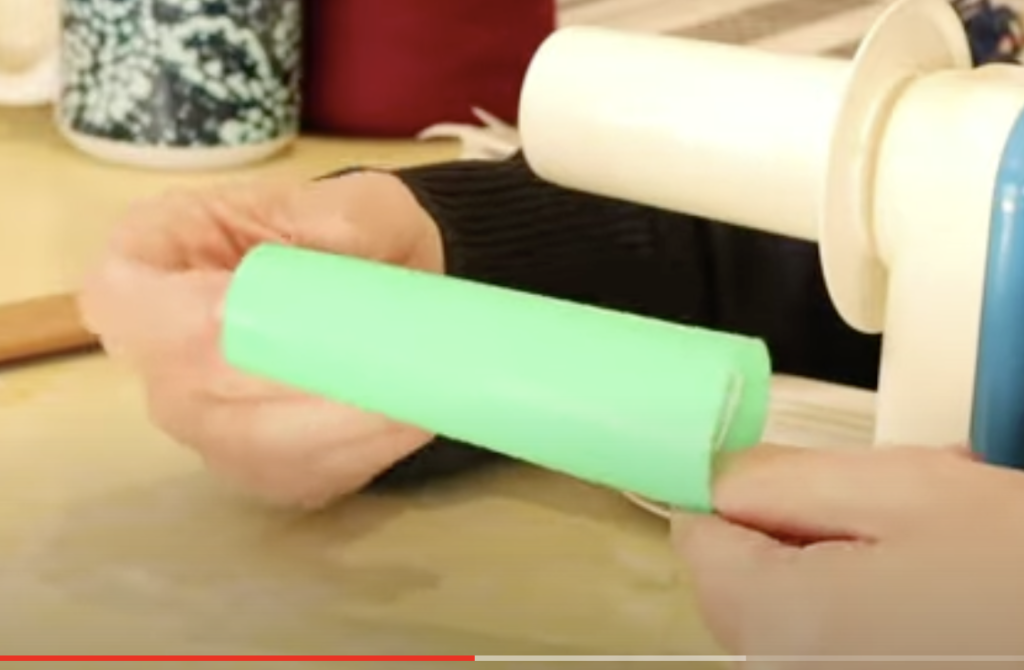
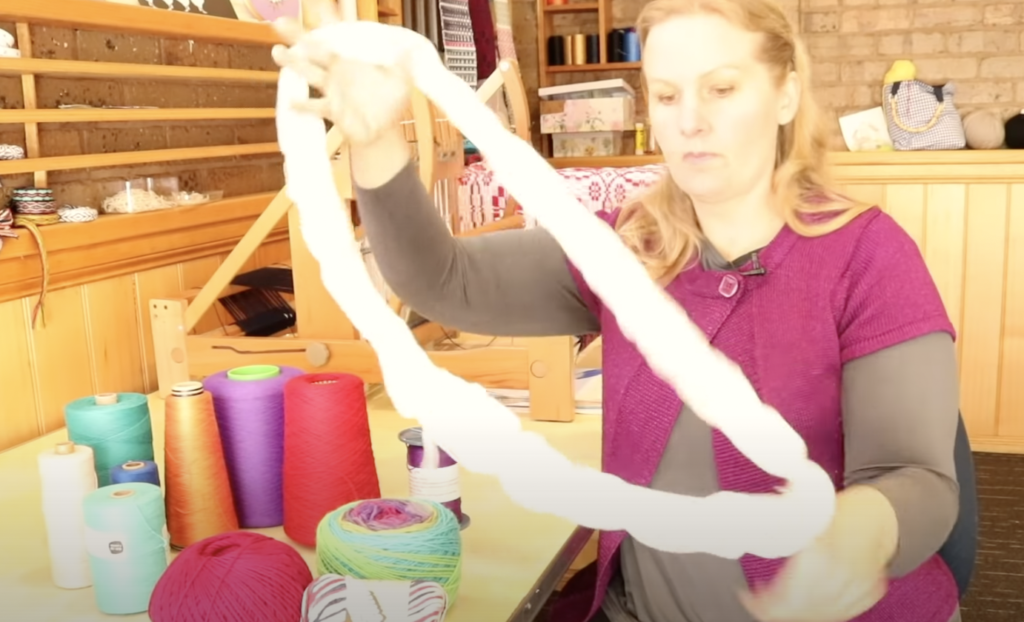
Another suggestion is to use an empty cone cylinder to wind the yarn off your full cone by hand. This plastic one is handy because it has a grip, so it’s easy to wind fast by hand, but empty toilet paper rolls are also great. You can even wind off an amount of yarn just onto your hands, though that may be a more potentially tangly method.

A ball winder is simple to use and does the job really quickly. I just clamp the winder to my table, thread the yarn in through the side loop, up over the central cylinder and into one of the notches, which holds the yarn in place initially and also creates a centre pull ball once you’re finished.

You then just wind manually, using the handle until you have a quantity of yarn. A couple of tips I have for successfully ball winding:

  • Keep some tension on the yarn as it’s feeding off the original cone, but don’t make it really tight. This is a mistake I made initially, and it caused problems with the yarn rotations slipping off the ball and tangling. Now I keep it a bit looser and never have that issue.
  • Hold the yarn tail for the first few rotations (particularly if you’re using a finer yarn) so that it doesn’t slip out of the notch. After the first few rotations, you can let go and it will be fine.
  • When I’m using the ball winder for doubling my weft, I usually wind off relatively small amounts at a time. I can always come back and wind off a little more if I need to.

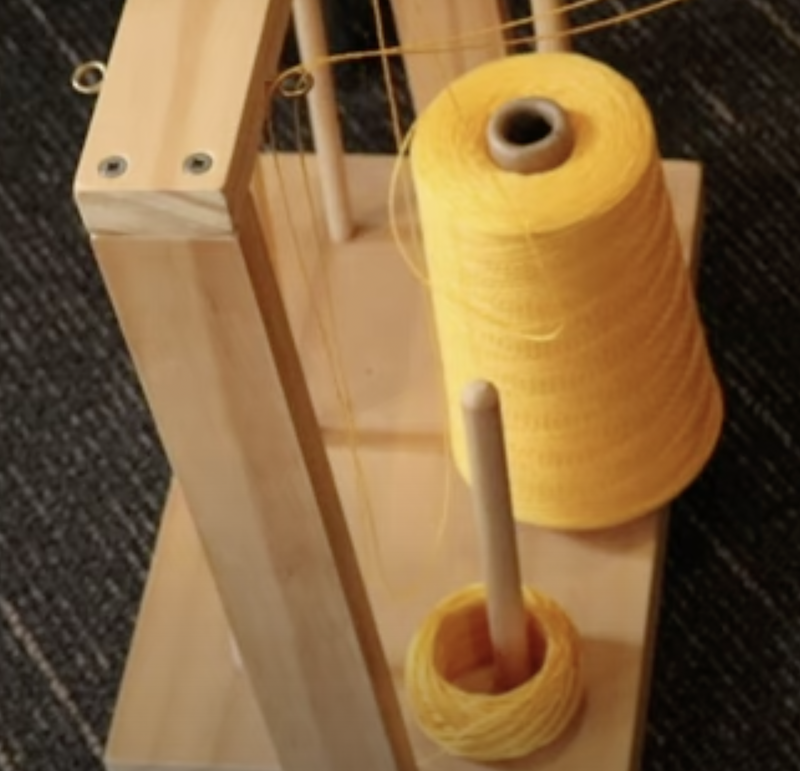
Now you have 2 sources of yarn to feed from. I place the yarn cake on the cone stand, next to the original cone and feed it up through it’s own round hook.

Yarn Donation

Now things get super easy! I just slip knot the two yarns together at the ends, ready to start loading onto my stick shuttle.

From this point on, you can treat the two yarns as though they are one, and simply wind them on together.

If you need help with how to wind a stick shuttle in a figure 8 (my favourite method), watch this video:

When you are ready to start weaving, you also just use the two yarns together as though they are one. So, each pick will have two threads instead of one.

This tutorial is available in video format, if you’re interested, click on the video below:

I hope this tutorial was helpful to you, leave your questions or comments down below.

Until next time…

Happy Weaving!
Filed Under: Free tutorial, Rigid heddle weaving, Weaving, Yarn Tagged With: double weft, doubling weft, weaving tutorial

What is the difference between knitting and weaving yarn?

by Kelly 2 Comments

One of the biggest challenges when starting out in weaving is determining which yarns are suitable for your project. There are is certainly a huge variety of yarn available to the modern weaver, but that can be part of the problem – how to choose?

Both knitting and weaving yarns can be used for weaving, in fact, I recommend that brand new weavers start out with knitting yarn because they are forgiving, affordable and readily available. Knowing the differences between yarns that are made specifically for knitting or for weaving will be a huge help to you when planning your next project.

*This post contains affiliate links. For further information, please see my disclosure policy.

Because choosing yarns is such an important (and sometimes puzzling aspect) of weaving, I have already made several resources on the topic, some of which you can find here:

Choosing and Using Yarns in Weaving…

3 Yarns Beginners should Avoid…

What do all the Numbers Mean?…

Now let’s have a look at what I consider to be some of the main aspects that differentiate a weaving from a knitting yarn.

  1. Appearance
  • Knitting yarns are often sold in a ball, yarn cake, hank or skein. These can all vary in size and total weight. They will often be wrapped with a label that details what the yarn is made of, country of origin, knitting and crochet information (like needle or hook size), the total weight and the washing or care instructions.

Some knitting yarns will be sold on a large cone, particularly yarn that is for flatbed knitting machines, as it’s important to the machine tension that the yarn feeds off freely.

  • Weaving yarns will usually be sold on a cone of some kind. These cones can vary in shape and weight according to the type and thickness of the yarn. Spools are more uncommon, but you will sometimes see weaving yarns sold that way too.

2. Yarn Thickness

In general, knitting yarns are thicker than weaving yarns. Knitting very fine yarn on needles is not for the faint hearted and most knitters will tend to go with thicker yarns for practical reasons (and for sanity!)

A weaving loom on the other hand, and in particular, multi shaft looms are really set up to accommodate much thinner yarns. On my floor loom, I never use a yarn that is greater in size than a fingering weight, as it would be difficult to thread through my texsolv heddles, which would be wearing on the yarn. I only have a 10 dent reed on this loom too, and that is fairly standard for a multi shaft. It’s the same with my table loom. So, there is the expectation that you won’t be weaving with very thick yarns.

The rigid heddle loom is more accommodating when it comes to thicker yarns, as the dent size varies from as high as 15dpi to 2.5dpi!

3. Amount of Stretch

Knitting yarns will generally have more elasticity and stretch whereas weaving yarns are often somewhat tough and rigid.

This makes sense when you think about it – a knitting yarn usually has a pretty easy life compared to a weaving yarn. A loom puts the yarn under tension and friction – it needs to be able to stand up to the process. Weaving yarns are also used to make a woven fabric for items like towels and clothing, that requires a tough and robust yarn.

That’s not to say that you can’t weave with an elastic yarn, you absolutely can, you will just need to factor in that stretch component to your calculations so that you’re not shocked to find your piece loses a lot of length once it’s no longer under tension.

4. Amount of Twist

A knitting yarn is most often used for wearables, and therefore needs to be very comfortable against the skin. Usually, it won’t have the same level of twist as a weaving yarn. Again, the weaving yarn is strong and hardworking, so the increase in twist gives it that extra durability.

If you have a knitting yarn that seems to have a very loose twist, it is likely that it won’t be suitable for warping with. A good test to use if you’re unsure is the drift test.

5. Strength of the Yarn

This relates very much to the last point. Knitting yarns don’t need to be under a lot of tension. You hand tension a little as you knit, and the rest remains in the ball, waiting to be gently fed off and used.

A weaving warp undergoes a lot of tension, so using a weak yarn for your warp is almost a guarantee of an unhappy weaving experience!

6. Yarn Availability

There are thousands of knitting yarns available all over the world. Whatever colour, type, size you desire, you will not be too hard pressed to find it!

Weaving yarns are a bit more limited. This is improving over time as more home weavers take up the craft and weaving is seeing a bit of a resurgence in popularity (yay!)

There are also a lot more knitting yarn suppliers than weaving yarn suppliers, but again, this is on the improve. In Australia, we are blessed to have Thread Collective for a big range of weaving supplies. If you would like to find suppliers in your area, check my Weaving Suppliers List.

Available from Thread Collective

7. Measurement Systems and Terminology

This is one of the most confusing aspects for new weavers who are trying to make yarn choices.

The measurement systems for knitting and weaving yarns are different, and these differences can further change from country to country! Super confusing!

I recommend my Weaver’s Toolkit Ebooklet for charts that will help you convert yarn terms to navigate the confusion. My short class What do the Numbers Mean? will also be helpful for those of you who want to understand why certain measurement systems are used and what they mean.

The easiest way to determine whether the yarn you have is suitable for the project you want to weave is to determine the sett using an inch ruler. I have two resources that will show you how to do that:

What is sett?

How to determine sett…

I’ve made a video to compliment this post where you can see me talking about specific yarns from my personal stash and showing you what they look like:

I hope this was a super helpful post for you!

Until next time…

Happy Weaving!
Filed Under: Weaving, Yarn Tagged With: knitting yarn, weaving yarn, yarn

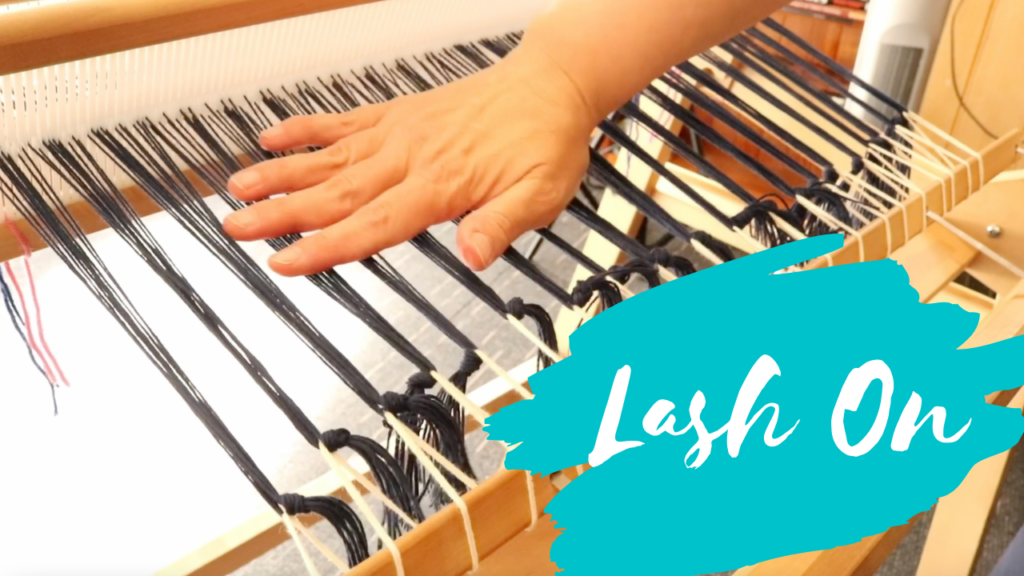
How to lash on your warp to your loom

by Kelly 14 Comments

Lashing on your warp to the loom is an alternative method to a direct tie on.

I’m going to show you exactly how to do that in a moment, but first I want to talk about why you would choose to lash on rather than tie the warp directly to the front apron rod.

There are certainly advantages and disadvantages to both methods and usually it comes down to a matter of personal preference.

  • This post contains affiliate links. For further information, please see my disclosure policy.

Firstly, let’s go over the pros and cons of each method.

Lashing on pros:

  • You can achieve excellent, consistent tension across you warp, regardless of the warp width.
  • The tension is very adjustable and simple to tweak
  • It’s the perfect method for dealing with slippery warp threads that don’t want to hold their direct tie on knots
  • It is very yarn efficient

Lashing on cons:

  • It takes additional time before you can begin weaving
  • You need a long length of strong cotton as the “lash on” yarn. This long length can be a bit of a handful when you’re threading it through your knotted bunches.

Direct tie on pros:

  • It’s fast and easy
  • If you tie on with surgeon’s knots, these will be adjustable
  • Works very well for most yarns

Direct tie on cons:

  • Slippery yarns (like silk or tencel) may not hold their knots. They can slip on the apron rod and come undone.
  • You have more warp waste because you need that extra length of warp to go around the apron rod and tie on. This is not a problem if you are planning to have fringes, as the tie on knots can be included in fringe allowance.
Yarn Donation

Now let’s have a look at the steps involved in lashing on.

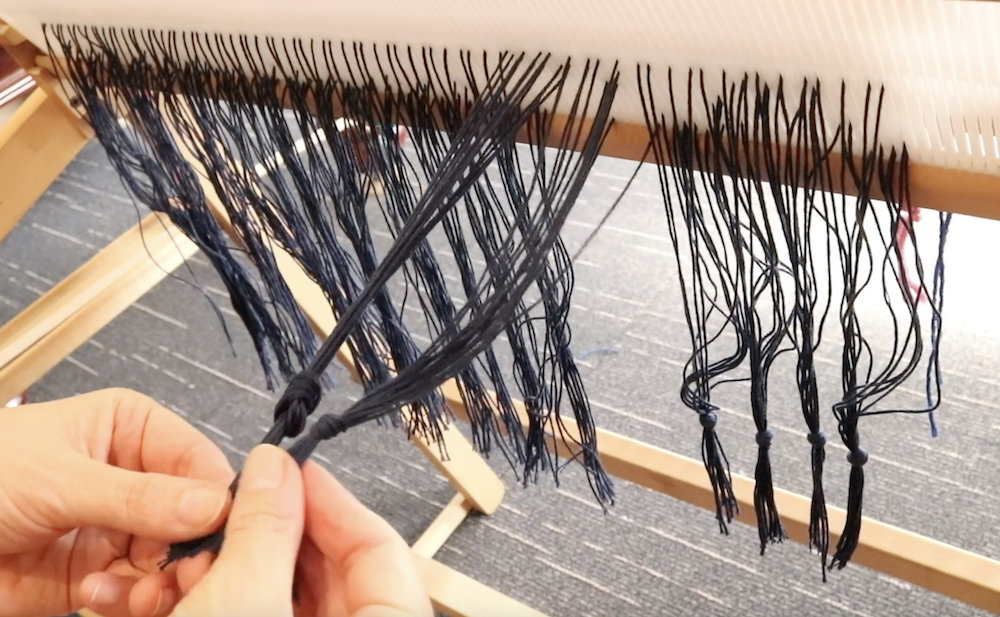
Working from one side to the other, take approximately one inch sections fo warp and make an overhand knot, leaving a couple of inches of tail.

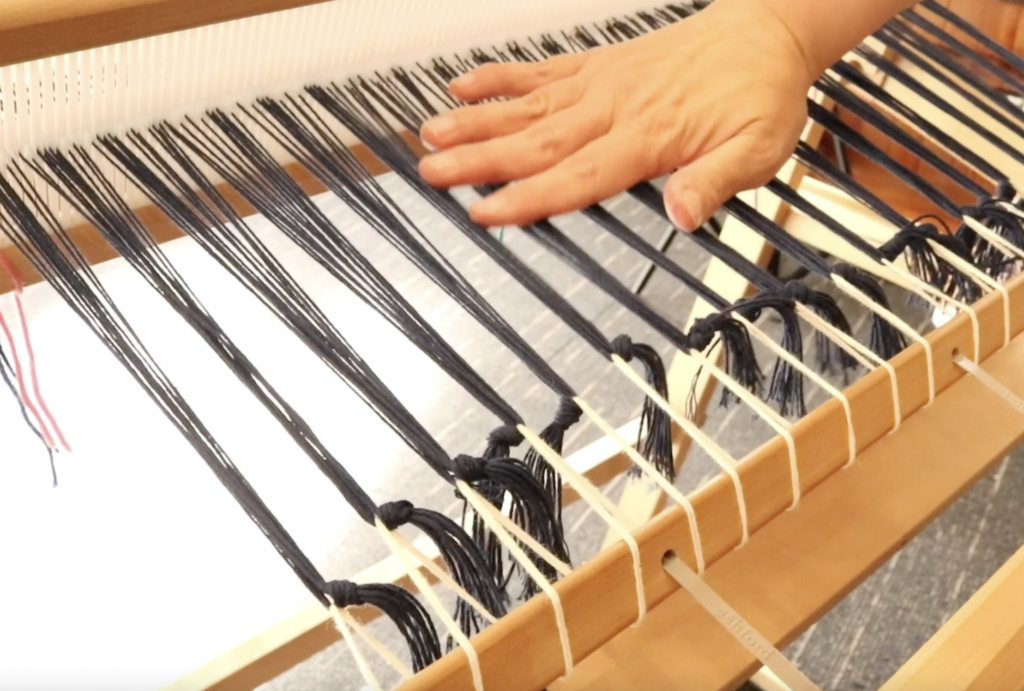
When you full extend your front apron rod, you don’t want the ends of the knotted bunches to touch it, as you need a bit of distance between the bunch and the rod for effective tensioning.

Try to make your knots at about the same place on the bunch each time, it’s helpful to compare the new bunch with the last knotted bunch to try to match up your knots.

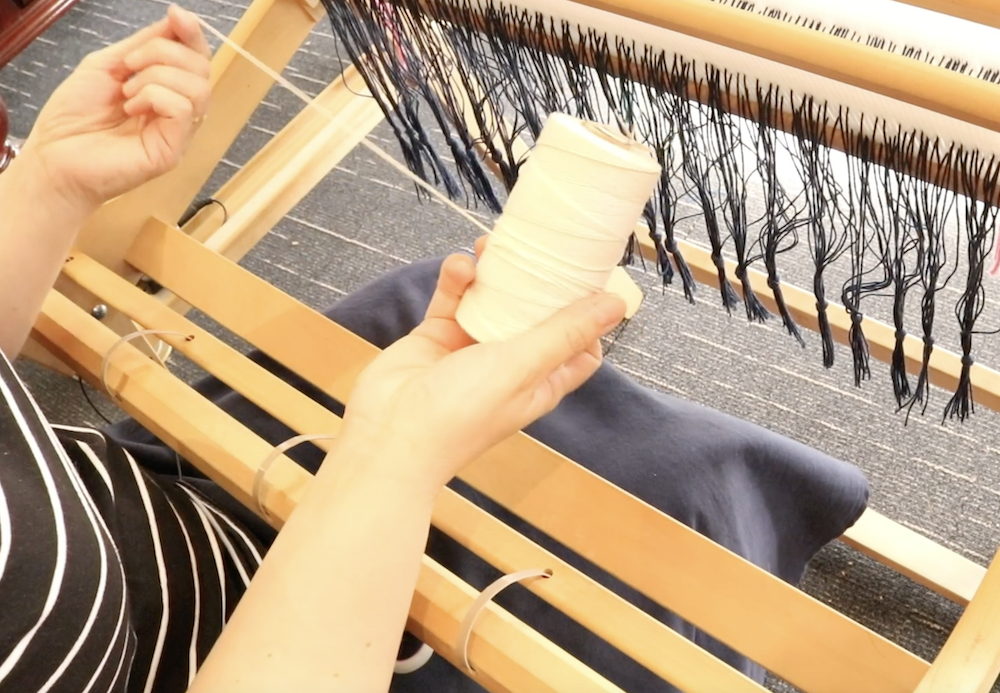
Wind off some tapestry cotton or similar yarn to use as your lashing on yarn. You want this yarn to be strong and not elastic.

Measure around 6 times the width of your warp, and then double that over.

Place the fold of the doubled up yarn on the apron rod. Make sure your front brake is on!

Lift up your first knotted bunch. As you do, you will notice that some threads separate from others, giving you an opening. Insert your index finger into this opening to hold the place.

Take the cut ends of your lashing on yarn through the space and pull all the way through.

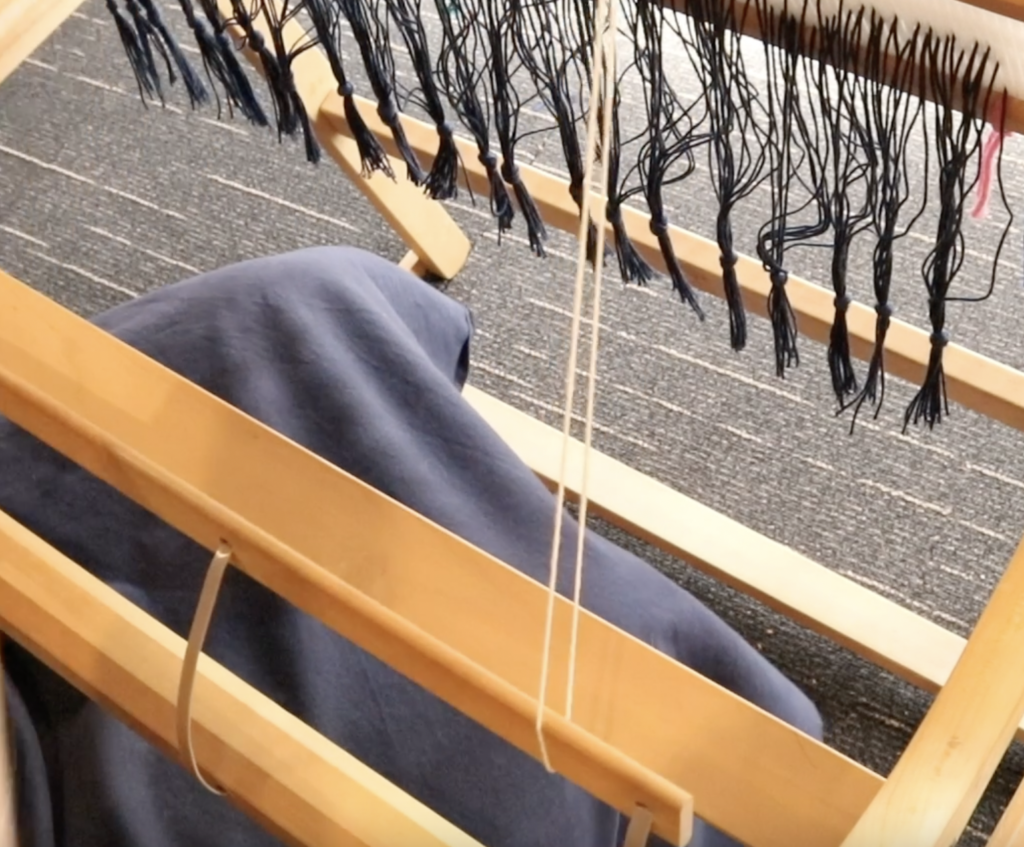
Take the waste yarn over the top and then underneath the apron rod, ready for the next bunch.

The lashing on yarn goes underneath the apron rod each time.

Continue going though your bunches and under the apron rod all the way to the other side of the warp.

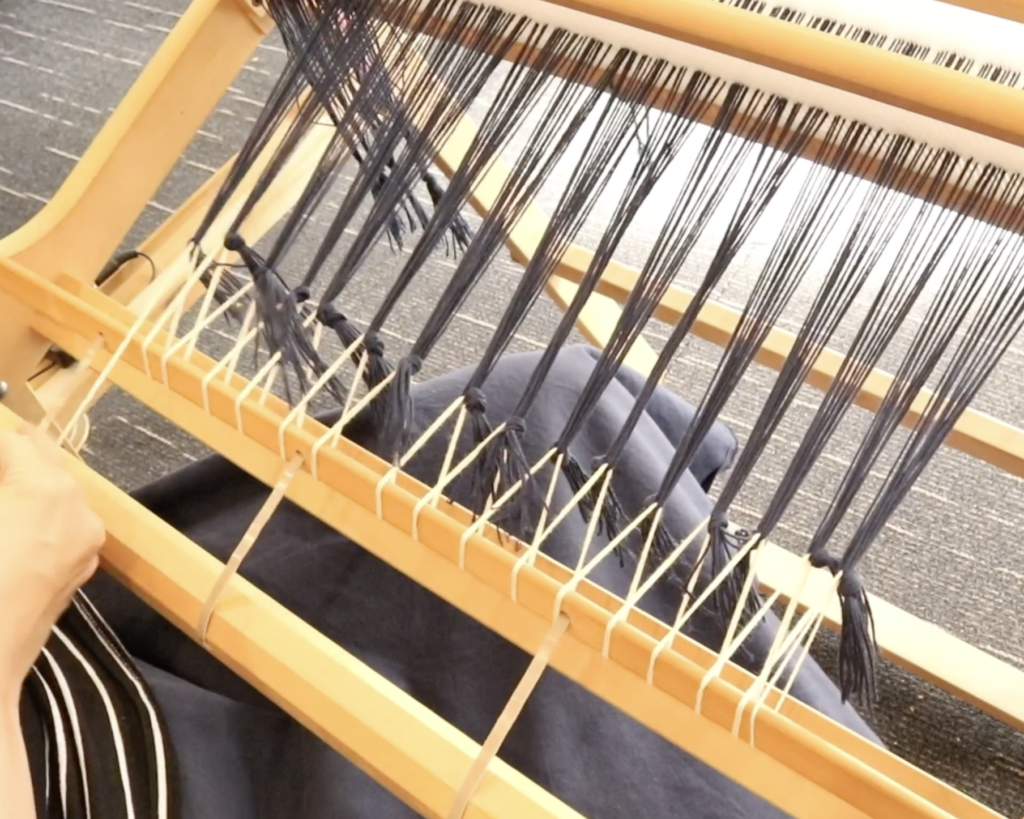
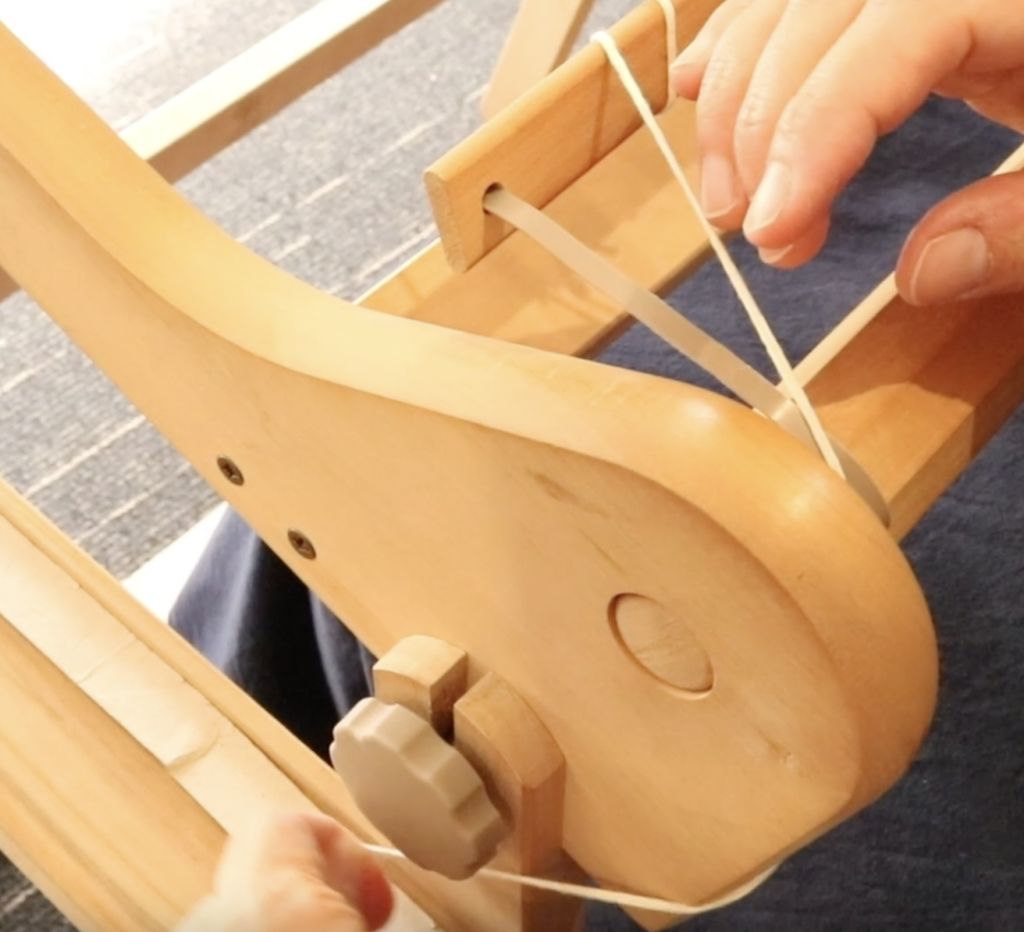
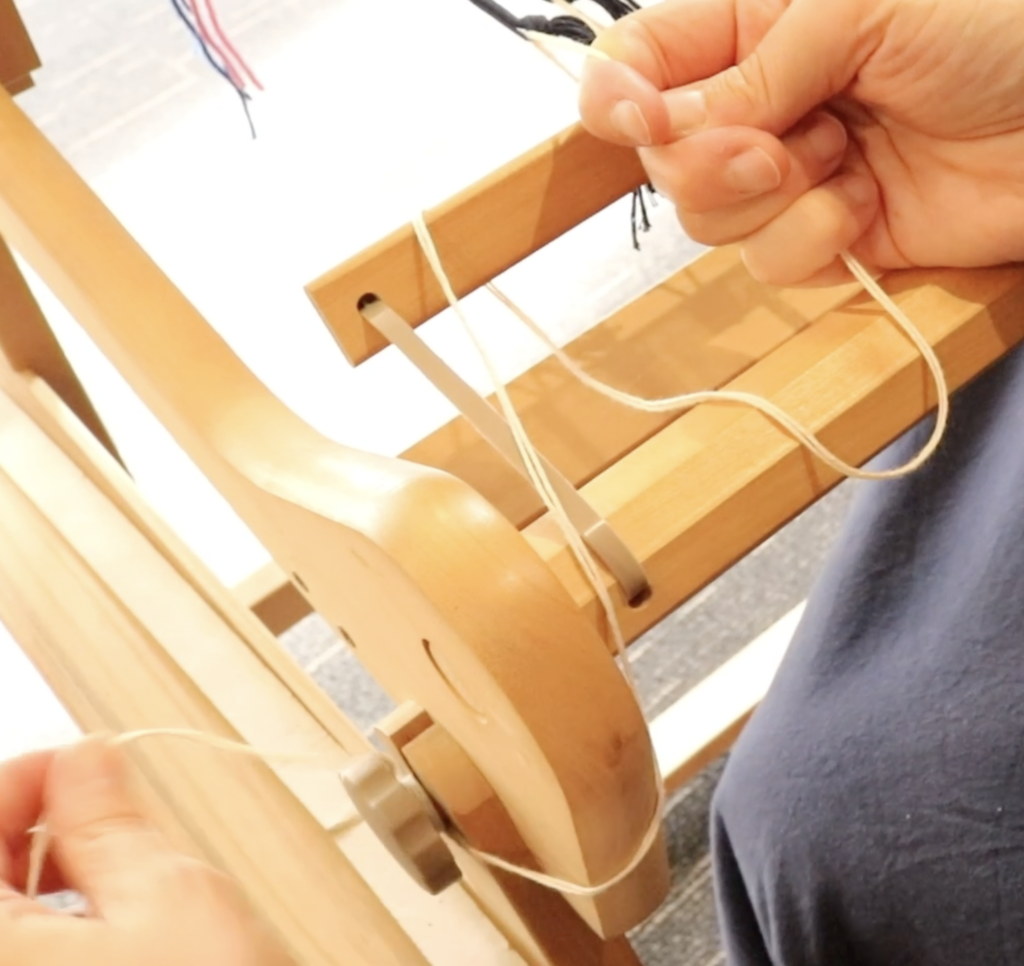
To temporarily secure your lashing yarn, if you have a stand, you can take the yarn under the edge of the loom then around the side knob a couple of times.

Now is the time to perfect that tension! Starting at the right (or which ever side you made your first bunch) pull down on the lashing yarn firmly, the slack will transfer to the next bunch. Still holding the lashing yarn at the first bunch (to prevent losing that great tension), pull down on the yarn at the second bunch. Hold the tension there, while you go on to the next bunch and work your way across.

When you reach the other side, you should have a good bit of slack on the lashing yarn, and your tension should be nice and uniform across the warp. Don’t let go of the yarn at the end here until you have it fully secured.

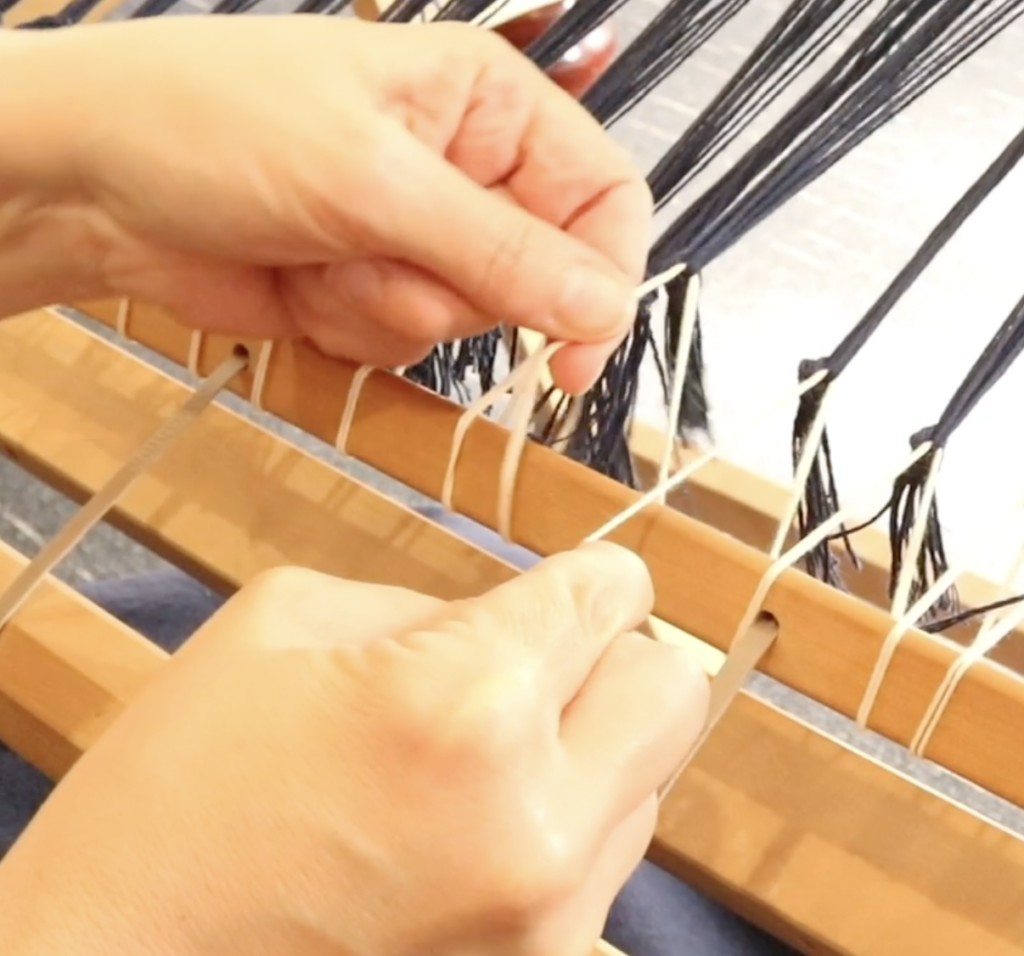
This part is much easier to show than to explain, so definitely check out the video below. Basically, you are knotting and securing the end of the yarn to the apron rod in a way that is a very firm hold, but is undoable in case you need to adjust your tension again.

When you bounce your hand from one side of the warp across to the other, all the bunches should feel like they are under the same amount of tension. It feels like a nice light, bouncy trampoline. If you have any loose parts, adjust the tension again by pulling the lashing yarn at the loose section, and transferring the slack as before.

If you would like to see all this in action, check out the video I made for you:

Equipment used in the making of this tutorial:

Ashford Rigid Heddle Loom 24″

Ashford Tapestry Cotton

For detailed weaving lessons, check out my Online Weaving School.

I hope this is helpful to you, leave your questions or comments below.

Until next time…

Happy Weaving!
Filed Under: Free tutorial, Rigid heddle weaving, Weaving Tagged With: how to lash on, lash on, lashing on

2021 Gift Guide

by Kelly 2 Comments

As always, Christmas has arrived very quickly this year, but considering it’s one of the best times of the year, I don’t mind at all!

It’s also a lovely time to either treat yourself (yes, you are totally allowed to buy gifts for yourself, I give you permission!) or be treated with a weaving related gift.

This year I’ve decided to arrange the guide according to weaving types and categories, that way you can just hop straight to the section (or sections, nudge, nudge, wink, wink!) that is relevant to you.

*This post contains affiliate links. For more information, please see my disclosure policy.

At the end of the list, I’m also going to list my personal favourite suppliers so you can click and check out all the wonderful weaving and fibre arts related supplies they have available.

In no particular order, here we go!

Rigid heddle weavers

Ashford Rigid Heddle Loom

The available widths are 16, 24, 32, 48″ so this gives plenty of choice for budget and weaving goals.

The Weaver’s Idea Book by Jane Patrick

This book remains one of my favourite rigid heddle books. It was the first RH book I ever bought and it is definitely my most used!

Weaving Project Kit

This makes a great gift for a weaver because it allows them to do what they do best, but the hard work is taken out of it for them. Many kits come with pre-measured warps, all the colours and yarn amounts are taken care of plus instructions for a project are provided.

Online Weaving School Gold Membership

Gain access to the full online class library of 70+ classes. Learn in your own time, in the comfort of your own home. Many rigid heddle classes are available!

Inkle weavers

Ashford full sized Inkle or Inklette loom.

Both are excellent options, depending on budget and the size of band you want to achieve. I have the full sized inkle and I do recommend a larger size if you can afford as it just gives you more wiggle room.

Weaver’s Inkle Pattern Directory by Anne Dixon

Just an awesome book, simple enough for beginner inkle weavers and complex enough for those who are more advanced. It includes over 400 patterns and a huge variety of weaves to explore (not just plain weave).

Annie MacHale’s Etsy Shop

Annie has been inkle weaving a really long time and she knows her stuff! Her Etsy shop contains her books and inkle supplies.

Inkle Weaving on an Inkle Loom Online Course

My online course takes you right from the beginning to ensure the student will successfully weave their first inkle band!

Tablet Weaving Cards

A lot inkle weavers will naturally branch into tablet weaving, as it offers even more and intricate patterning possibilities. If you already have an inkle loom, all you need is a pack of cards to get started.

For the weaver who wants to fast track their learning, my Tablet Weaving on an Inkle Loom is the perfect gift!

Band weavers

Historically, bands were woven with simple materials and often used body tensioning in conjunction with environmental items (eg. a tree trunk) to tie onto or around.

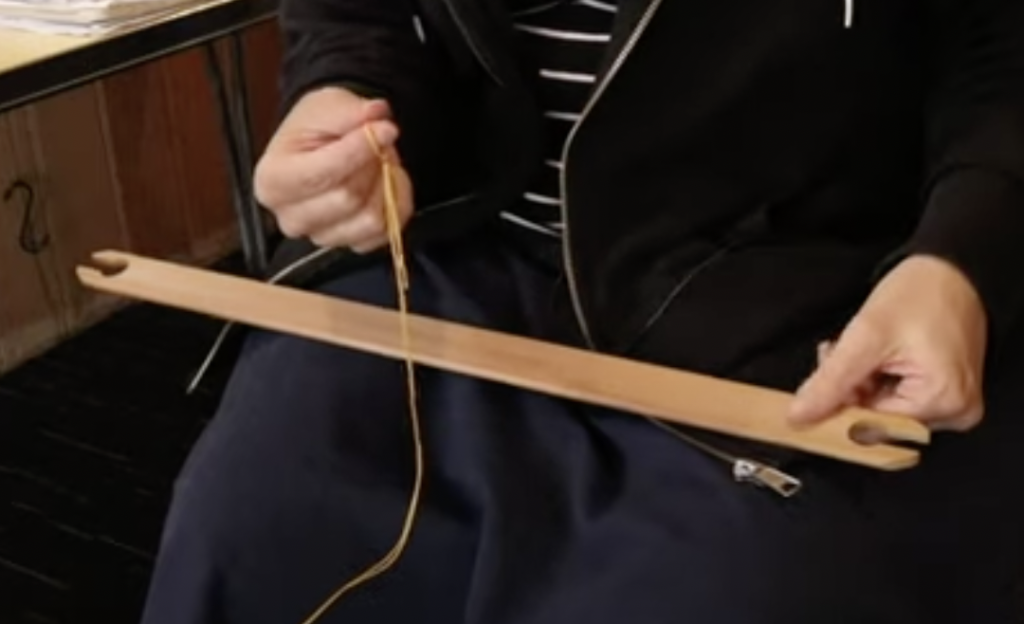
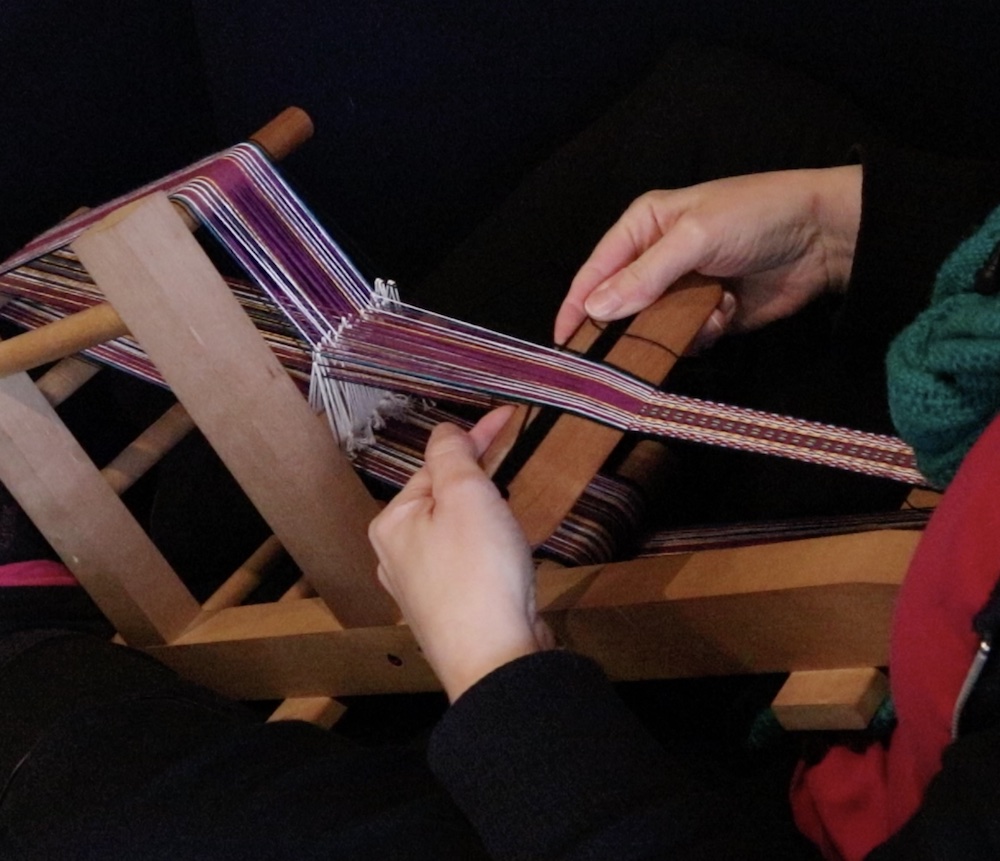
A band weaving kit is a great way to get started if you don’t want the investment of purchasing an actual loom just for bands. There are different styles, but the basic Saami weaving setup uses a small heddle (similar to a rigid heddle) made of plastic or wood. The warp is attached to the body with a band and tensioned around another object.

If you are hesitant to buy a loom or just like the idea of stripping your weaving right back to basics, this could be a great option for you.

Weaving Patterned Bands by Susan Foulkes

Disclaimer – I do not own this book, but if I wanted to get started in Band Weaving I would purchase this book.

Norwegian Band Weaving by Heather Torgenrud

I do own this most excellent book, but for absolute beginners, I would first recommend the previous book. This book is very extensive, very inspiring and contains a plethora of patterns and ideas.

Tapestry weavers

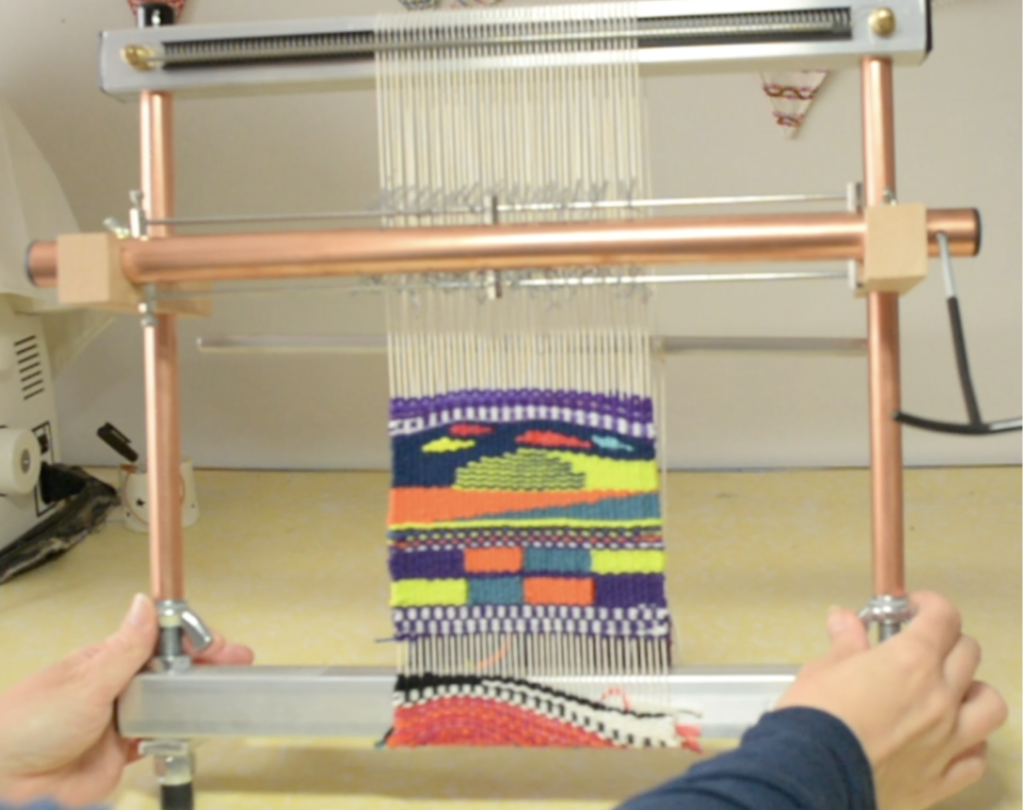
Mirrix Tapestry Looms are awesome, I love my Big Sister. The tension is excellent, they are well made and thought out by an actual tapestry weaver, and it is so great to have a dedicated tapestry loom so that lengthy projects aren’t taking up space on other looms.

If you would like to learn more about Mirrix, read my interview with Claudia Chase. I also have a review of my Mirrix Big Sister here.

If you are interested in playing around with tapestry on your rigid heddle loom, check out my Tapestry on a Rigid Heddle Loom Class.

Tapestry beater

While you can get away with using a household item like a fork or comb to beat down your weft, if you want to do it in style with a purpose built tool, a tapestry beater is a beautiful piece of equipment and quite affordable. I like the look of the Navajo beaters, I think I need one of those on my Christmas Wishlist!

Floor/ Table loom weavers

It’s hard to know where to start in this category, as the choices are enormous. I’ll go with what I know and have used myself.

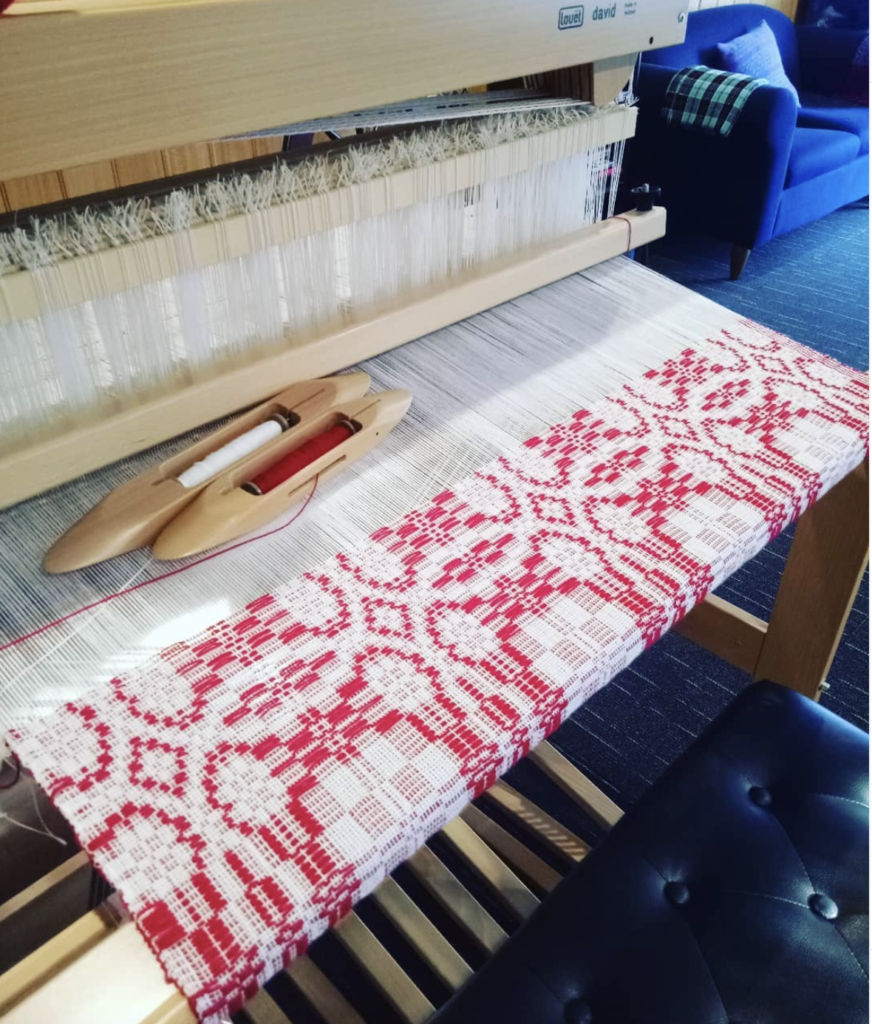
David by Louet

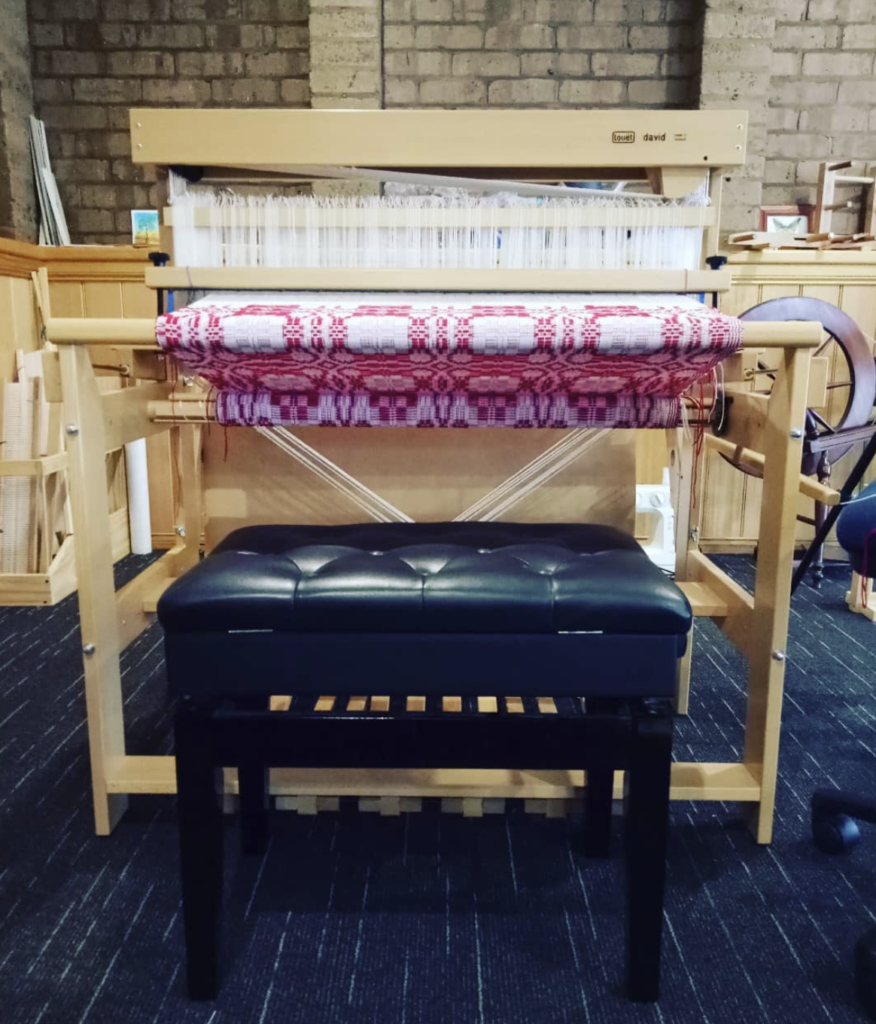
My floor loom is an 8 shaft, 35″, sinking shed David 2 by Louet. This loom was indeed gifted to me by my husband as my very first floor loom! This is the kind of luxury gift to be remembered, the initial investment is large but the years of enjoyment and learning are worth the cost in my opinion!

Ashford 8 shaft table loom

Available in 16, 24 or 32″, I have owned a 32″ in the past (I sold it to help fund the floor loom!) and now own a 16″, which is perfect for teaching classes, weaving samples and narrower projects like scarves. These are great looms, relatively easy to set up and learn on, and a great bridging step between a rigid heddle and floor loom.

The Handweaver’s Pattern Directory

Yes, I talk about this book all the time and that is because it’s SO good! My most used multi shaft weaving book, for sure. It’s not a “how to weave” book but rather is full of 4 shaft patterns and techniques, as the title says, it really is a directory.

Learn to weave on a floor loom online class

This is my online class that helps weavers get started on a floor loom. It is very comprehensive, step by step and designed to help the student gain confidence and fall in love with their loom!

Learn to weave on a table loom online class

This is one of my mega popular classes and has rave reviews! For beginner table loom weavers or those who just feel they need help to get going.

Boat shuttles

These make a great gift for a weaver. Every multi shaft weaver needs one, and buying a boat shuttle will not break the bank. I still use the two Ashford boat shuttles I bought with my first floor loom and they have been fine, but I encourage you to look around and see what is available – there are a lot of shuttles out there, all at different price points and specifications.

Now, for my favourite suppliers!

The Woolery

My Amazon Shop

Thread Collective

Knit Spin Weave

If you are interested in my Weaver’s Gift Guides from previous years, you will find 2020 here and 2019 here.

I hope this guide has been helpful to you! If you have questions about any of the items in the guide, I’m more than happy to advise, just pop your comment down below and I’ll respond.

Until next time…

Happy Weaving!
Filed Under: Gift Guide, Weaving Tagged With: gift guide, gift guide 2021, weaver's gift guide

5 Life Lessons from a Difficult Warp

by Kelly 24 Comments

I started my latest project full of enthusiasm and confidence.

I often feel at the beginning that whatever I’m working on is going to be my best piece yet. This is an important motivating tool for me and I’m sure that many of the projects I’ve undertaken would not have come to life without this initial confidence.

You could say that I felt super confident going into this new project. Experience with the weave structure? Check! Experience with the yarns? Check! Experience with the loom? Check, check, check!!

  • This post contains affiliate links. For further information, please see my disclosure policy.

I thought I was cool with the long and wide warp. First mistake!

I should have asked someone to hold the warp for me so I could focus on winding it on. But no, being the “independent to my own detriment” kind of person that I am, I forged ahead alone.

Let me share some more details about this project. Those of you who have been around here for a while will be familiar with my bordering on obsessive desire to weave a full sized overshot coverlet, heavily influenced by the early American Woven Coverlets.

My main stumbling point to weaving my own coverlet is the seaming. Traditional coverlets were woven in panels, usually 2 or 3, then joined. Most looms were not wide enough for the full piece, and my 90cm width Louet David is no different.

The threading for the panels has to be arranged to be able to match up when the seams are joined. This usually consists of a centre panel and 2 panels either side (if weaving 3 panels). Then the seaming method has to be chosen with the view of minimising visibility – a really good coverlet weaver will have almost invisible seams.

Another essential aspect of successfully seaming the panels is to ensure a very consistent beat so that the pattern woven is continuous once the panels are joined. That means measuring picks per inch, something I’m not particularly fond of doing.

So, my idea was to weave just one panel and to practice rearranging threading and weaving a pleasing pattern. I even had the thought initially that I could use the panel to cut into pieces and make a patchwork quilt. I’m not sure the pattern lends itself well to a quilt, but I’m not too fussed about that. I will decide what to do with the piece once it’s off the loom.

For my warp I chose 8/2 cotton in white. I have a lot of experience with this yarn and have used it extensively in other overshot projects. Normally I pair it with a fingering weight wool for the pattern weft, but this time I decided to try Australian 3ply, which is in between a lace weight and fingering weight. In retrospect, I would have been better to sett a little closer than the 20 ends per inch I chose. There is more space between pattern wefts than I would like.

I found the weaving draft in Carol Strickler’s book “American Woven Coverlets”. I made some adjustments to the draft with plenty of calculations. Yet, when it came to the threading, I found that my warp was 16 threads short! I measured out the extra threads and weighted them over the back of the loom.

After threading and sleying the 650 ends I was looking forward to weaving! But my less than ideally tensioned warp came back to bite me at this point. I had to take the initial weaving very slowly to avoid floats and boat shuttle warp dives.

Initially I felt quite angry about all this. The project was meant to be a happy and relaxing experience. It was supposed to help me progress in my coverlet ambitions.

As I sat there weaving today, I started to think. The anger had subsided to disappointment, and that put me in a reflective mood.

There are so many life lessons in weaving. Challenges, frustrations are all part of the process.

I wanted to share some of my reflections from working on this piece.

Lesson 1 – Things don’t always go according to plan and that’s OK

I once heard someone say “you expected ABC and you got XYZ”. I expected this to be a fun, rewarding project, but it was harder than I thought. It’s my reaction to the unfulfilled expectations that matters. The problem is not the problem, the problem is how I deal with the problem!

You’ve probably heard me say before that there is no perfection in this world. That doesn’t mean that we shouldn’t strive for high standards and excellence, it just means that we should have more hope than we do expectation.

Lesson 2 – Accepting responsibility

My first reaction was to lay blame elsewhere or make excuses. I was tired, I was rushed, I didn’t want to bother one of my family members to help me, I thought I’d be fine to do it myself. While there may be some truth to some of these elements, ultimately it is my project and my decision making lead to a warp that wasn’t adequately tensioned and is now causing me more difficulties in the weaving process.

I have to accept that responsibility and work to overcome and undo the problems that I made.

Lesson 3 – Patience and persistence pay off

I could have given up on this warp. But aside from not wanting to waste all that beautiful cotton that I had paid for, I also didn’t want to let the project defeat me. I know from past experience that if I give up on a project I will feel far worse than if I decide to battle through it.

I guess I have a bit of a stubborn streak, but in weaving that works for, rather than against me. Because it forces me to do uncomfortable things. Things that make me angry and frustrated. If I stop at the angry stage, then I’m suspended in that anger and negativity. If I keep going, I’m forced to work through the frustration and come out the other side, much happier and with a sense of satisfaction that even though it was hard, I did it.

Beautiful things are such a treasure that they should take time and shouldn’t necessarily be easy to achieve. They are worth the time and the effort.

Lesson 4 – Learning is a journey

Learning to weave is a journey of stepping stones, walking, then running, but never stopping and sitting down. The journey is every changing and building. Just as life is a constant striving to be better that doesn’t finish. You don’t just wake up one day and say “now I’m the person I should be”. You wake up and prepare to work and practice all the good things you know will make you better. And you repeat that each and every day, building, changing and adapting.

There may be a tendency in weaving to feel like you should know more by now, you should be producing perfect pieces by now. Instead, try to recognise and enjoy the journey and keep building everyday. I’ve talked about Slow Learning before, you can check out this video to learn more-

Lesson 5 – Adversity is good for us

This is one of those hard life lessons and not one that everyone will agree with me on. But if we spend our whole lives being pampered, having it easy and getting what we want, when we want it, we become soft and spoiled.

Difficulties help us to build character. They allow us to develop empathy. They make us strong. We don’t like hardship, because it doesn’t feel good – but that doesn’t mean it isn’t good for us.

This challenging project has certainly been good for me. Right now, I’m at a better place with it, slowly weaving (slower than I would like, but that’s just how it is) and making adjustments as I go. I feel at peace with my progress. I’ve gained confidence that I can deal with pretty much anything my loom throws at me.

I would still rather that this was the easy and enjoyable project that I originally envisioned, but I’ve shifted to a place of gratitude.

I am grateful that:

  • I have a loom and can use it
  • I have supplies to weave with
  • I can figure out how to fix things when I need to
  • I have the time to devote to this wonderful craft
  • Most of the time, I end up with a beautiful piece of weaving

And lastly, that I learn so much more from weaving than just how to weave.

If you would like to see this post in video format (and see me weaving the project itself!) please click on the video below.

Now it’s over to you. What life lessons have you learned from weaving?

Please share your thoughts or comments down below, I love to hear from you!

Until next time…

Happy Weaving!
Filed Under: Floor Loom Weaving, Inspiration, Overshot, Weaving Tagged With: encouragement, life lessons, overshot

Studio Sign with Cricut Maker 3 Tutorial

by Kelly 5 Comments

Ever since I moved into my very first studio this year, I’ve wanted to put up an official studio sign. I thought about purchasing one online, but couldn’t decide on one that I liked.

So when Cricut Australia contacted me recently and asked me to partner with them, my first thought was “Awesome! I can make a studio sign!”

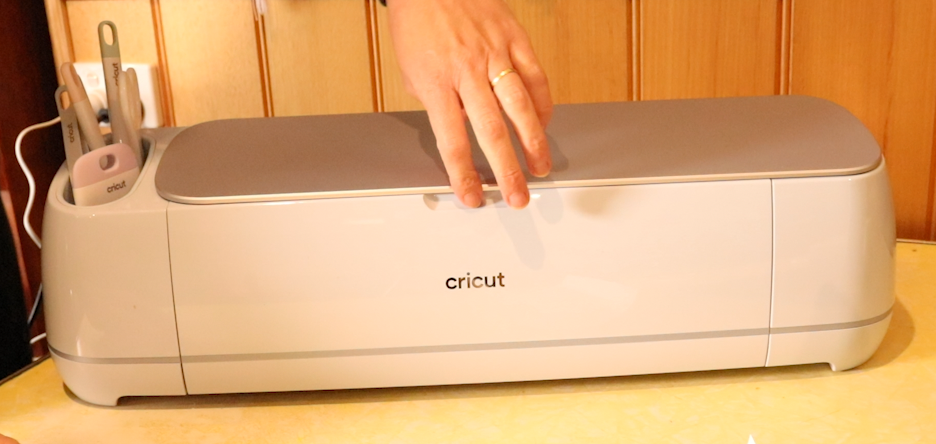
If you have never heard of Cricut before, (pronounced “cricket”) you are missing out! I admit that I wasn’t sure exactly what to expect when my Cricut Maker 3 arrived and even felt a bit intimidated by the thought of learning new technology, but I have been very pleasantly surprised.

*This post contains affiliate links. For further information, please see my disclosure policy.

The machine has been very easy to learn and I’m excited by how much more I can explore. Cricut also included a rotary cutting tool that fits into the machine so that I can experiment with cutting out shapes with my hand woven fabric. I can’t wait to do that!

Here are some of the things I’m loving about this machine:

  • The design possibilities are awesome. In addition to the availability of the app, Design Space, which has hundreds of images and fonts, you can also upload your own designs.
  • The Cricut Maker 3 doesn’t just cut paper and vinyl. It can cut fabric, leather, balsa wood – a total of over 300 materials can be used.
  • The Adaptive Tool System matches the cutting direction and pressure to match the material you’re cutting. Tools can be changed according to what you want to do.
  • Design Space is compatible with iOS, Android, Windows and Mac (I use it with my MacBook Pro).

My husband and I worked together on this project so it was double the fun – I love any excuse to work together!

My idea for the studio sign was to repurpose everything to make it a low to no cost project. Thanks to finding materials around our property and of course to Cricut for sending me the Maker 3 plus tools and materials, I am happy to report that the final result was a NO cost project!

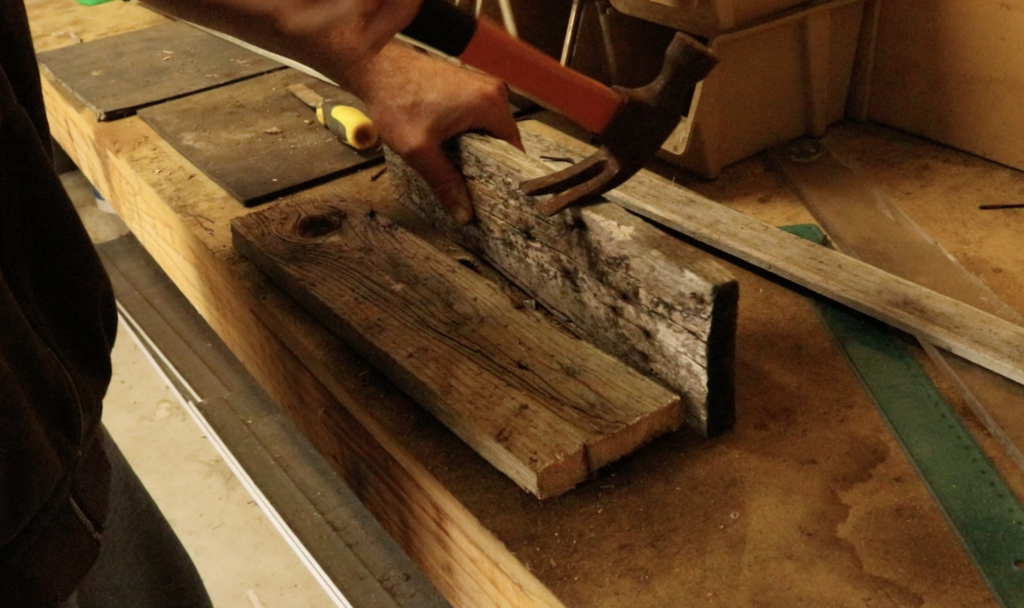
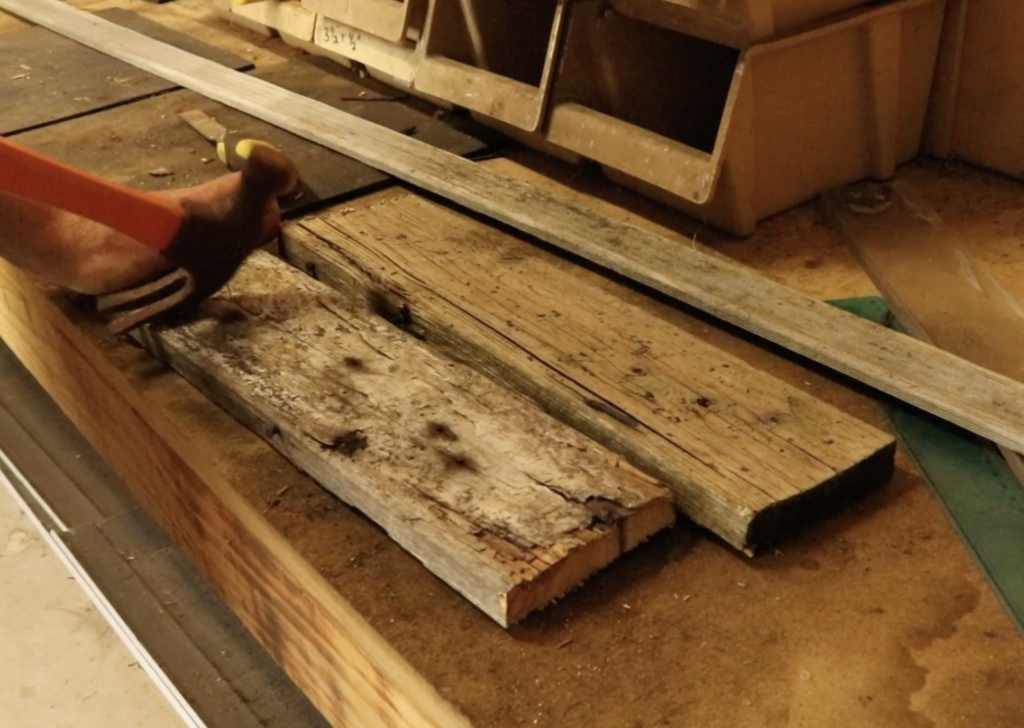
We found some planks of wood that had been stacked on top of a low shed. Absolutely perfect, as I wanted to use naturally distressed wood and these planks fit the bill perfectly. We also used some waste wood as the braces at the back of the sign. My husband already had an old sheet of MDF (medium density fibre board), and that was used for the front of the sign.

The cut pieces of distressed wood measured around 18 x 4″ each, with a depth of just over 1.5″.

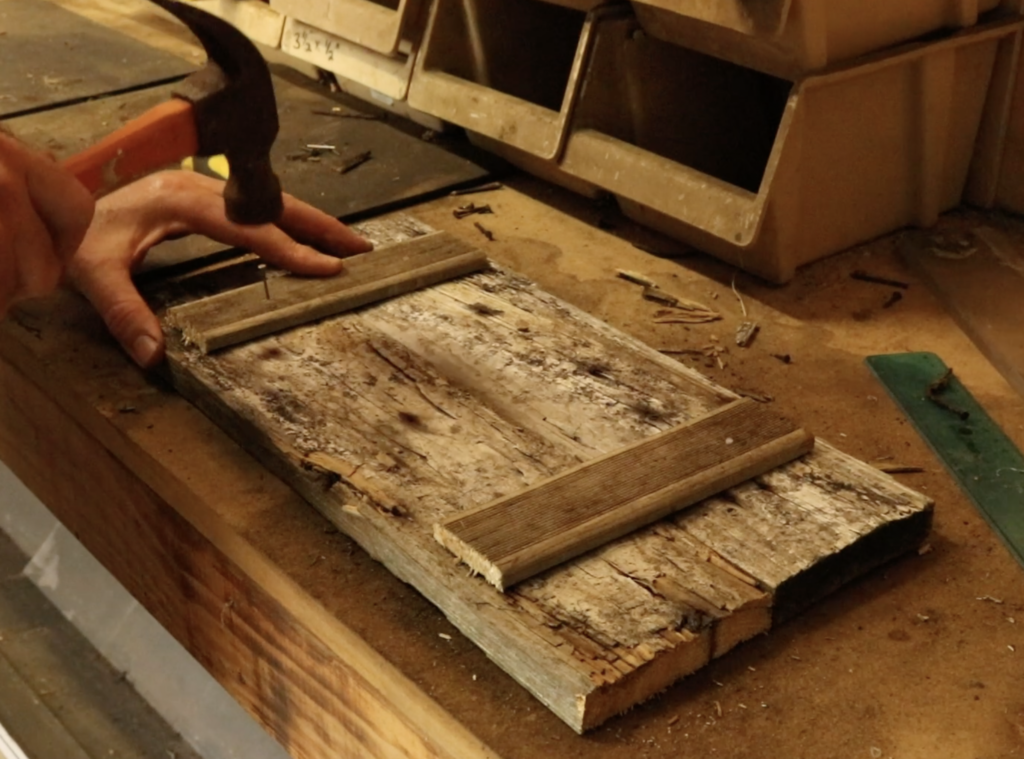
We loved the rustic look of the timber, so we left it rough without sanding, but we did need to remove the rusty nails!

My husband nailed on two short and narrow pieces of wood (also found on our property) as a brace to hold the two main pieces together. These measure about 7.5 x 1.5″ with a depth of around 1.25″.

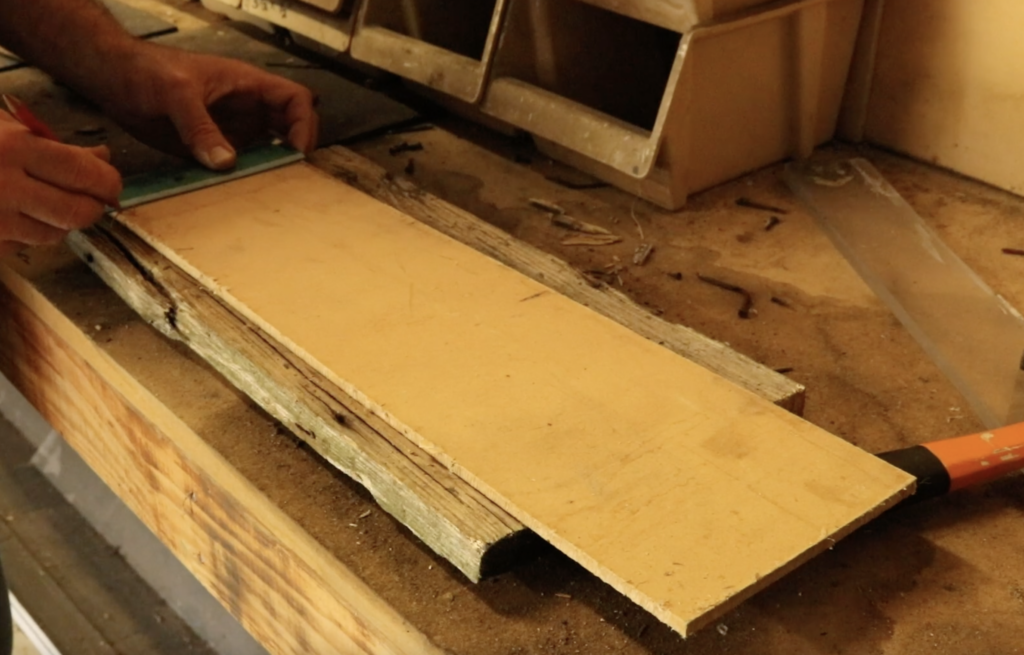
Then we took some MDF (plywood would also work) that we had lying around to use as a front plaque on the wood frame. This was an important step, as the Cricut vinyl I wanted to apply to the front of the sign needed a smooth surface to adhere to.

My husband eyeballed the MDF to match the size of the wooden backing. He drew up some quick measurements, then cut the piece, which ended up measuring around 13.5 x 5.5″. He also cut the corners off using our scrollsaw. Then he gave it a good sand with a fine sandpaper to smooth rough edges.

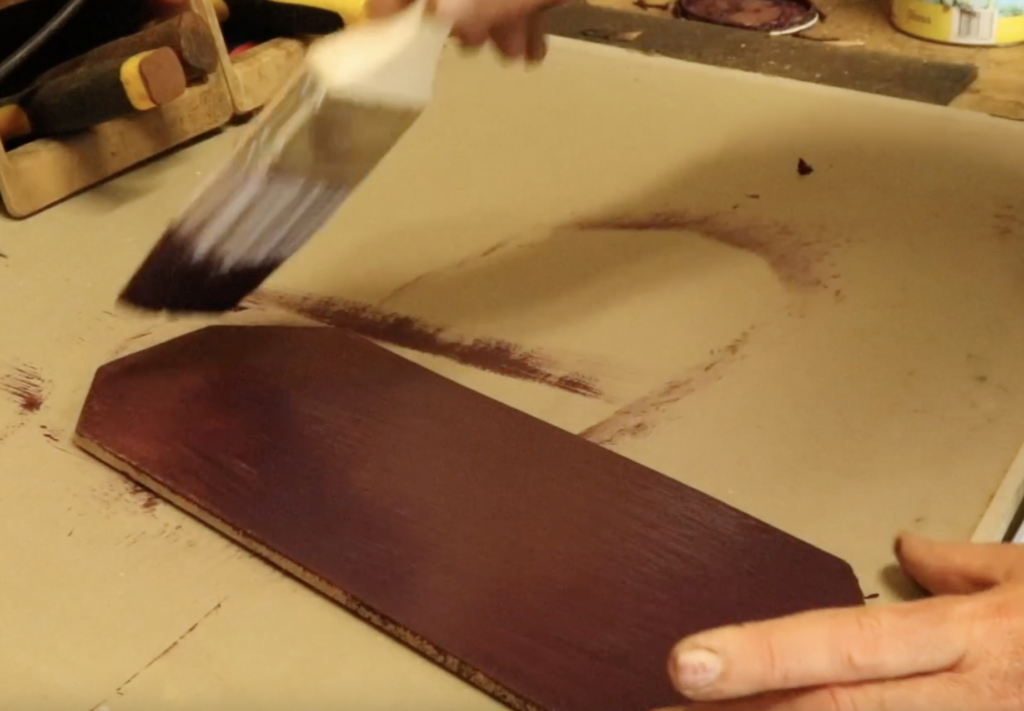
We painted the MDF plaque with some old paint we found in one of our sheds. It just happened to be a great colour that would set off the gold vinyl lettering perfectly! We let this paint dry completely before the next step.

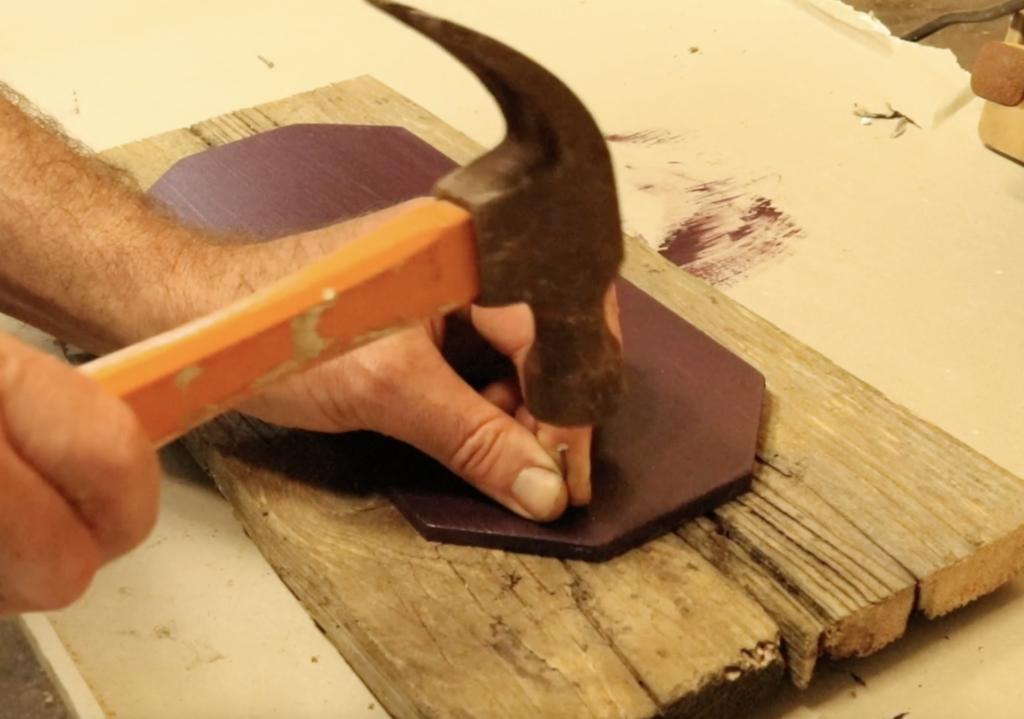
The plaque was then nailed to the wooden backing.

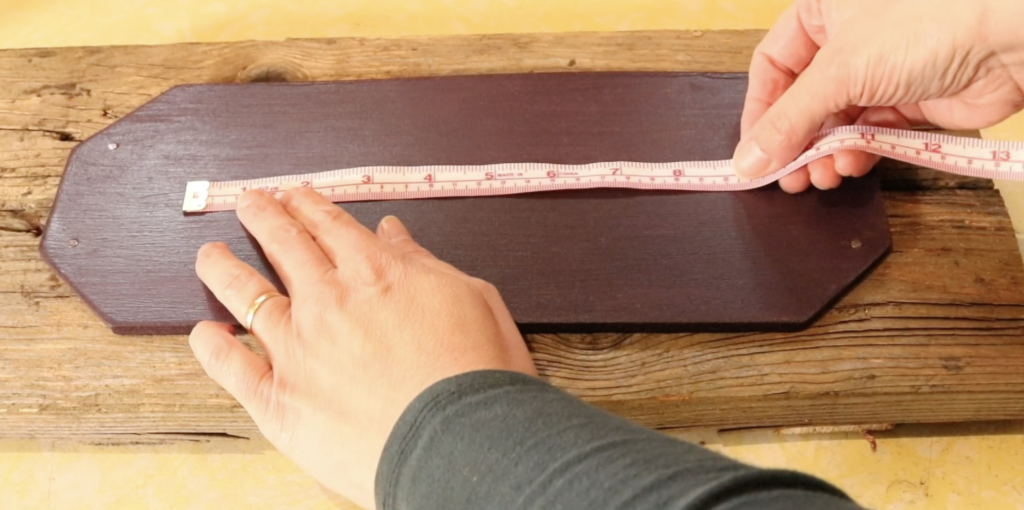
The rest was up to me! I measured the plaque in order to get accurate measurements for my vinyl lettering.

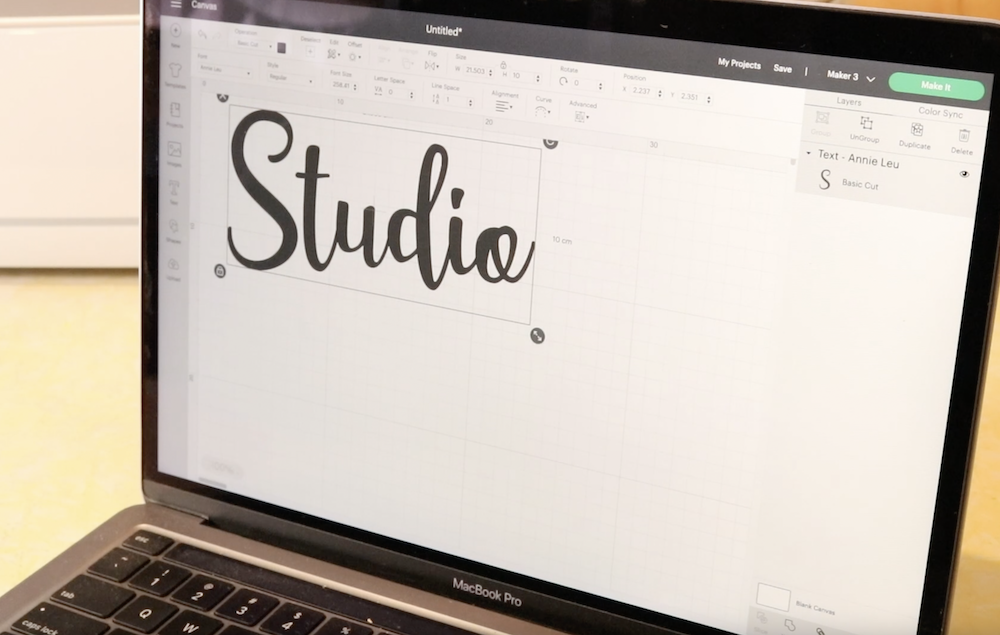
I went into the Cricut Design Space to get my text organised. This is really simple to do using the Design Space app. I simply typed in the text (“Studio”), chose the font, then adjusted the measurements to suit my plaque.😊

My laptop is paired with the Cricut Maker 3 using Bluetooth, which works really well with no need for cables.

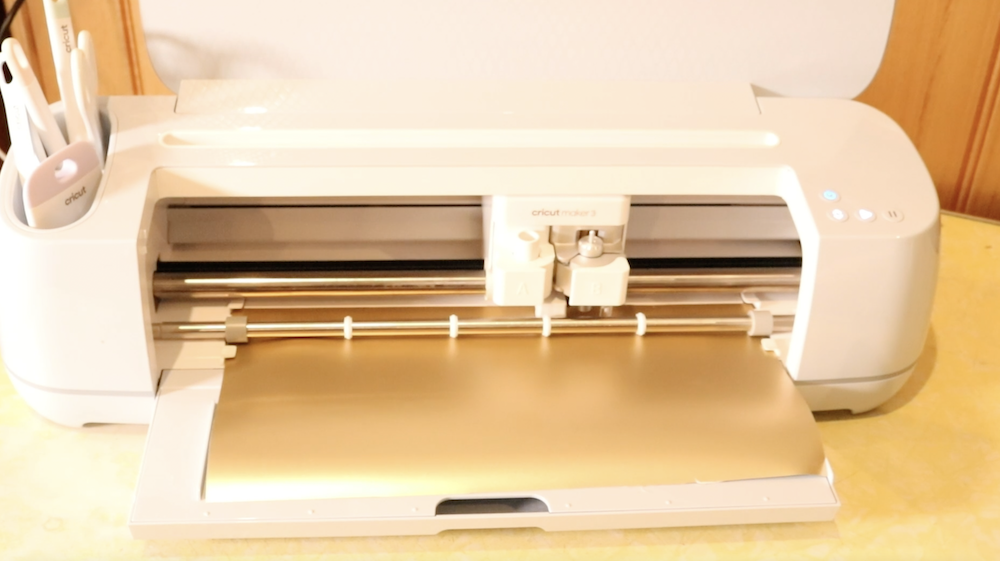
Following the prompts from the Design Space app, I lay in the material I’m wanting to cut, in this case Smart vinyl in Champagne. The Smart materials from Cricut don’t require a cutting mat, it simply feeds into the machine, cuts out the design, then feeds out again.

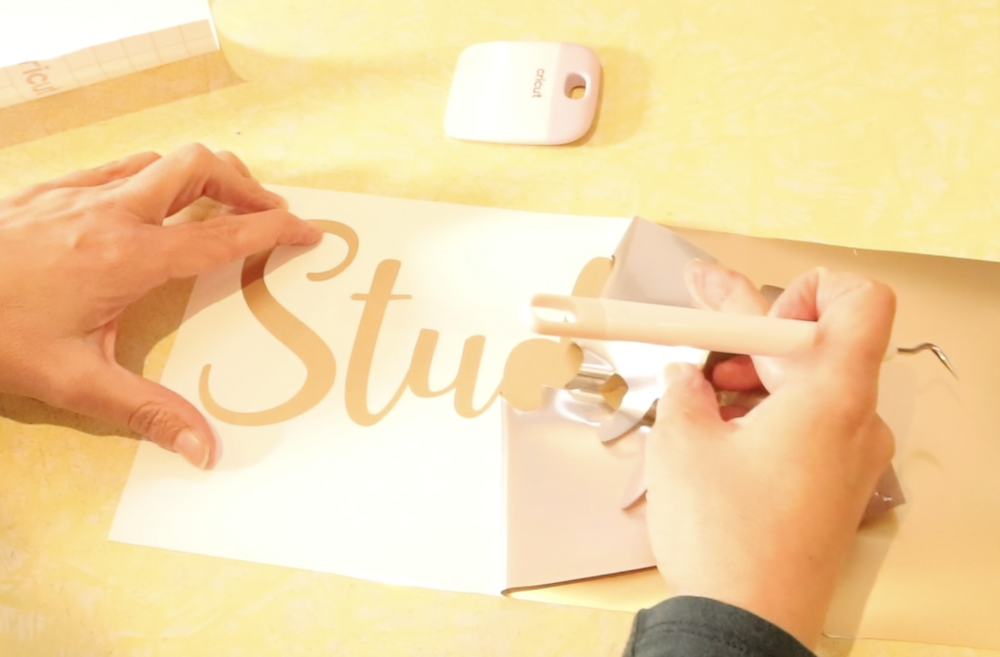
The next step is to peel away the excess vinyl from the design using the handy weeding tool (the hook) to pull up any vinyl still stuck to the backing.

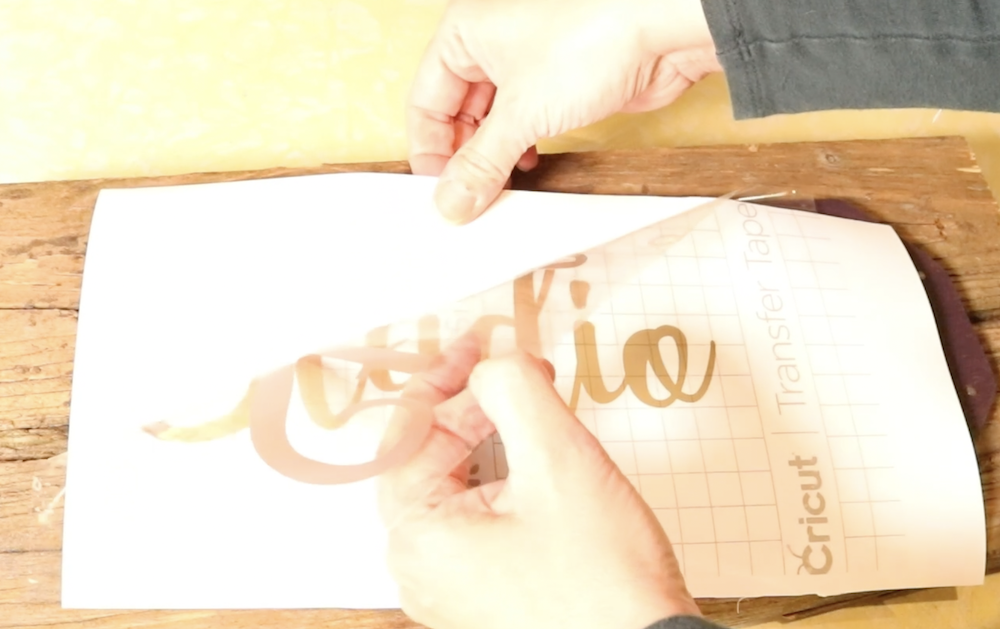
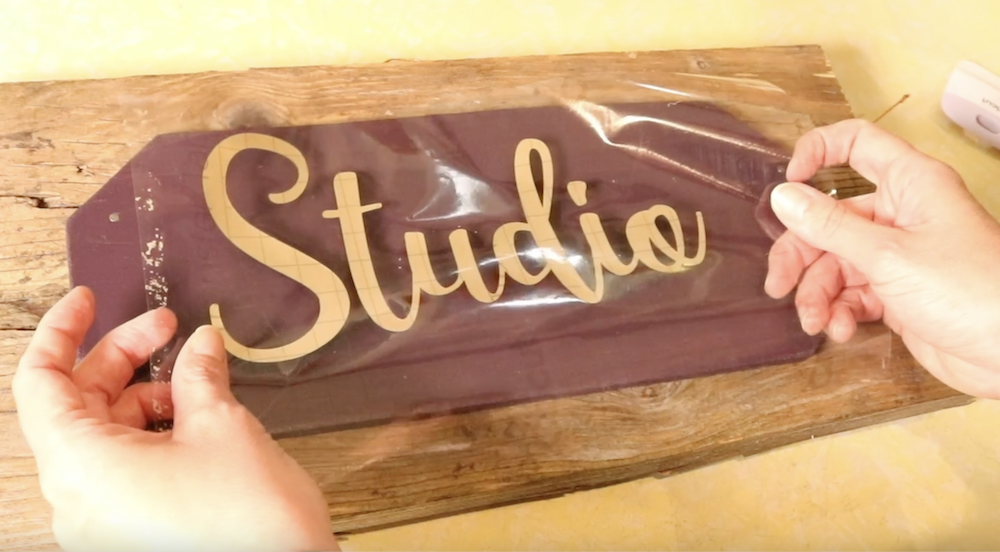
The Transfer Tape is placed over the top of the design. This allows you to peel up your design and place it precisely where you want it to go.

I positioned the design onto the plaque, smoothed it down and removed the transfer tape. All that was left to do was to hang my beautiful new sign outside my studio. I love the way it looks, and it makes my studio feel really official.

I had so much fun making this sign that I couldn’t stop at just one! In Design Space there are so many great images to choose from, so I wanted to take advantage of some of those.

I got my girls involved so that we could work together to make some signs relevant to their own hobbies and spaces.

For my 14 year old horse lover, it was a no brainer to make a sign for her tack room.

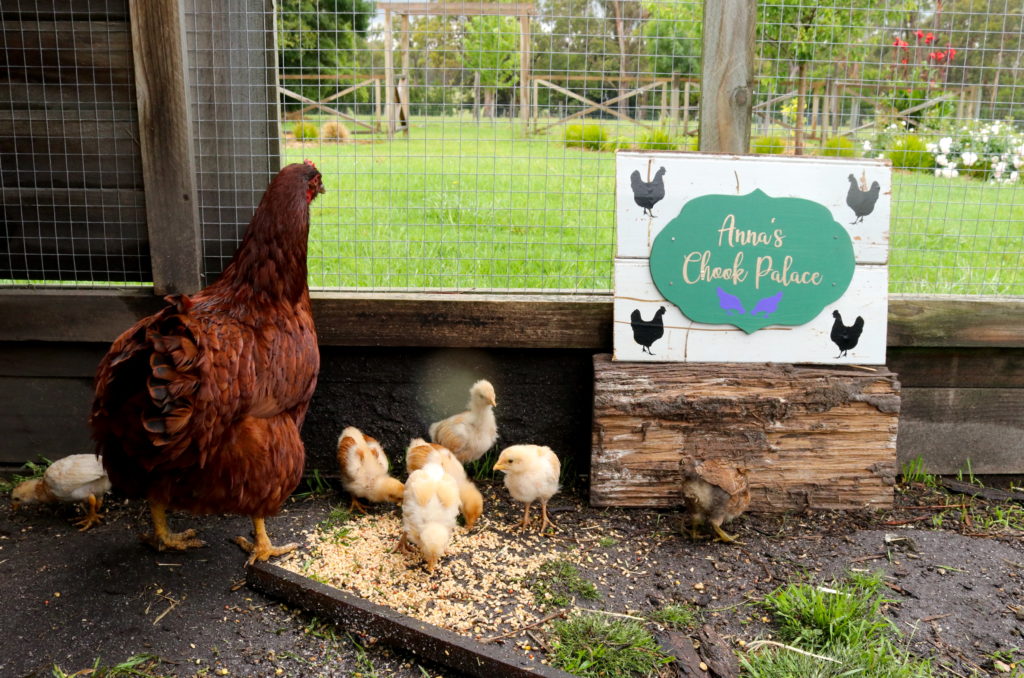
My youngest daughter is chicken crazy and the caretaker of our chicken coops.

These signs were all no cost projects for us, thanks to Cricut Australia and New Zealand, and thanks to repurposed materials.

What I’m really looking forward to now is checking out the Cricut rotary cutter tool with some of my handwoven fabric. Stay tuned for that!

If you would like to see the full free video tutorial for how I made the studio sign, click on the video below:

The Cricut Maker 3 can be found at Spotlight or Harvey Norman in Australia. In New Zealand, suppliers are Spotlight and Warehouse Stationary.

You can also find Cricut here-

Instagram: https://www.instagram.com/cricut_anz/

Facebook: https://www.facebook.com/cricutanz/

YouTube: https://www.youtube.com/channel/UCffy4UQ9lfgQPDlyEUCgWPA

Until next time…

Happy Weaving!
Filed Under: Free tutorial, Inspiration, Tutorials, Weaving, Woodworking Tagged With: studio sign, tutorial, woodworking

  • « Go to Previous Page
  • Page 1
  • Interim pages omitted …
  • Page 9
  • Page 10
  • Page 11
  • Page 12
  • Page 13
  • Interim pages omitted …
  • Page 25
  • Go to Next Page »

Primary Sidebar

Hand crafted boat shuttles

Categories

Archives

Meta

  • Log in
  • Entries feed
  • Comments feed
  • WordPress.org

Copyright © 2025 Kelly Casanova Weaving Lessons on the Foodie Pro Theme