• Skip to main content
  • Skip to primary sidebar

Kelly Casanova Weaving Lessons

  • Hi! I’m Kelly!
    • Affiliates Disclosure
  • Online Weaving School Class Index
    • Common account issues
    • Common technical issues
    • What do I get with a membership?
  • New to rigid heddle weaving? Start here!
    • Never heard of the rigid heddle loom?
    • How to weave neat edges on the rigid heddle loom
    • Rigid heddle weaving
    • Rigid Heddle Weaving Patterns
  • Patterns
  • Subscribe

Rigid heddle weaving

How to weave Snowmen on your rigid heddle loom

by Kelly 10 Comments

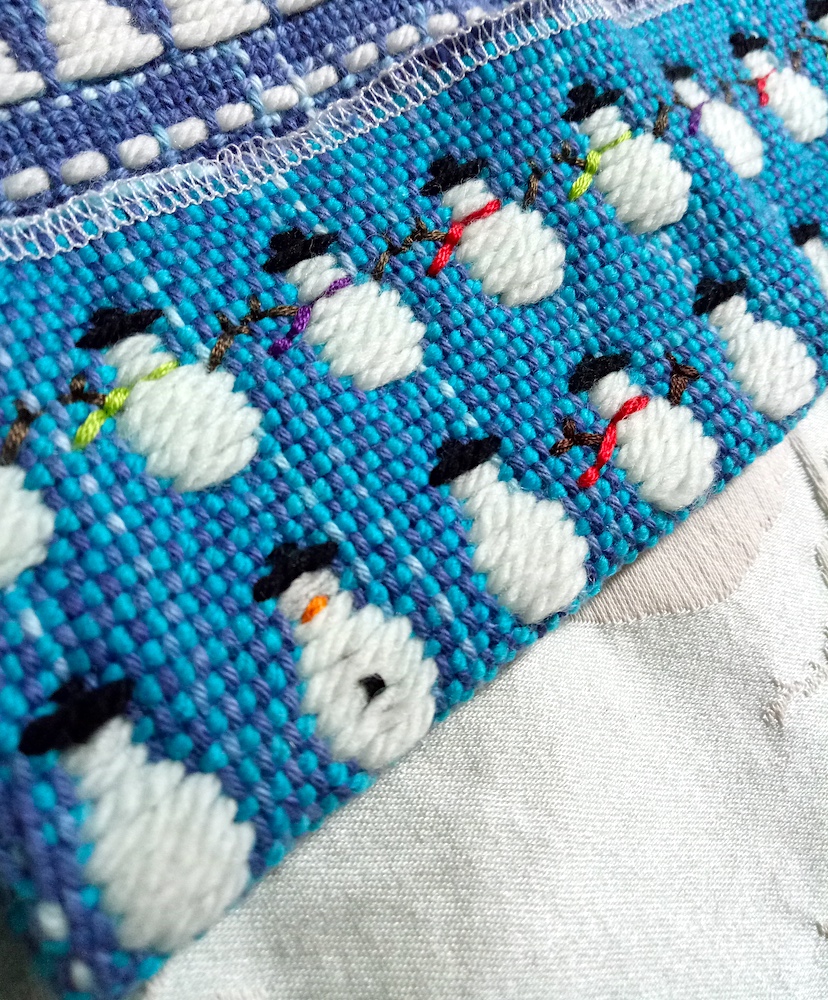
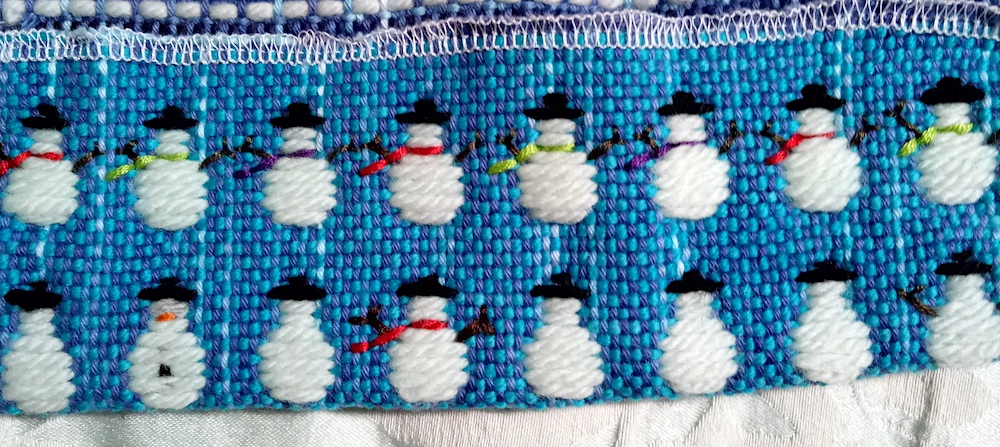
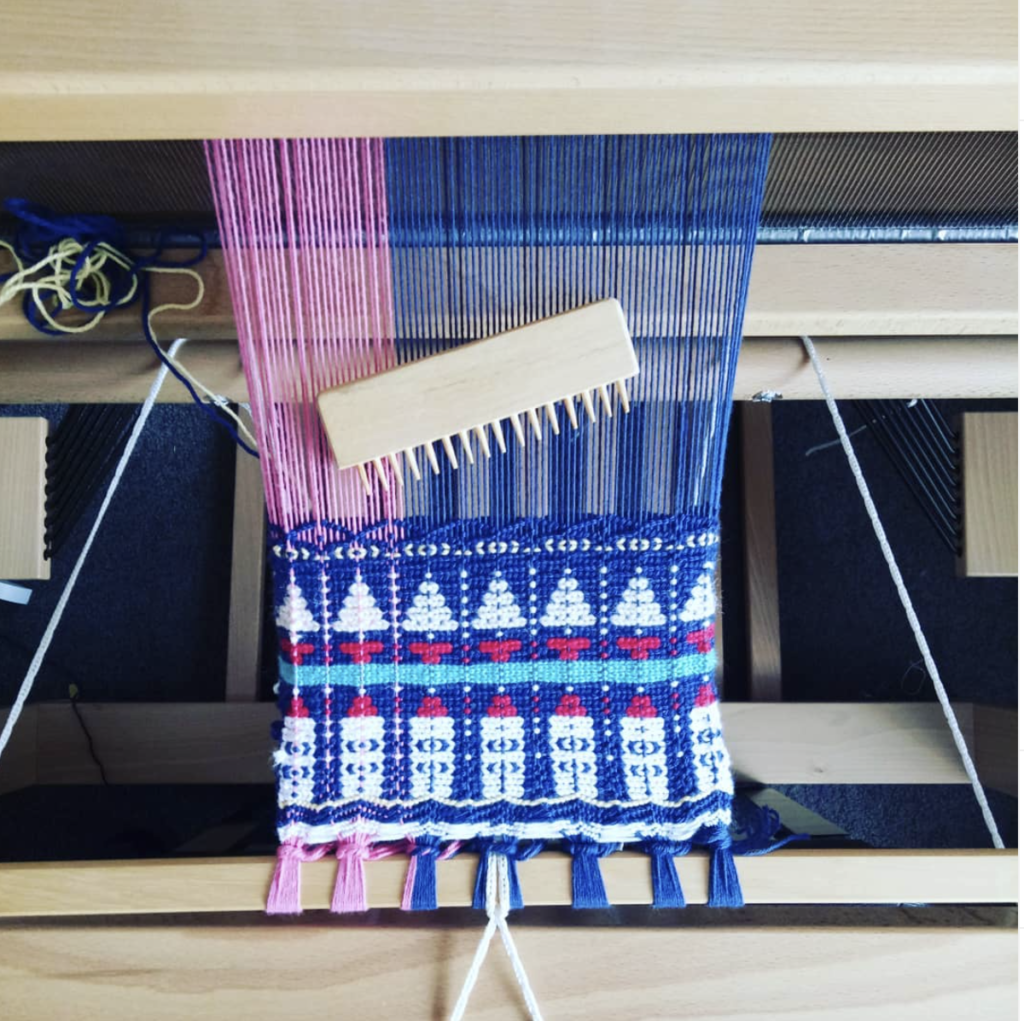
Snowmen are not something you might naturally think of when wondering what to weave next on your rigid heddle loom, but I love any excuse to make pictures on my loom, especially if they are as cute as these little snowmen guys are!

Weaving snowmen on your rigid heddle loom may not be as difficult as you think. We employ a type of overshot technique to create floats. Depending on the length of each float, we can then arrange them to make pictures. We warp the loom as we normally do for plain weave.

Overshot usually uses a thicker weft for the patterning (or floats) and a thinner, contrasting weft for the background (plain weave, commonly known as “tabby” when used in this way).

*This post contains affiliate links.

The weft floats do not become incorporated into the fabric, they literally float on top, which is why we use tabby in between pattern rows to tie the whole thing down and create a stable fabric. It also gives that lovely, slightly 3D effect of the pattern or picture being slightly raised.

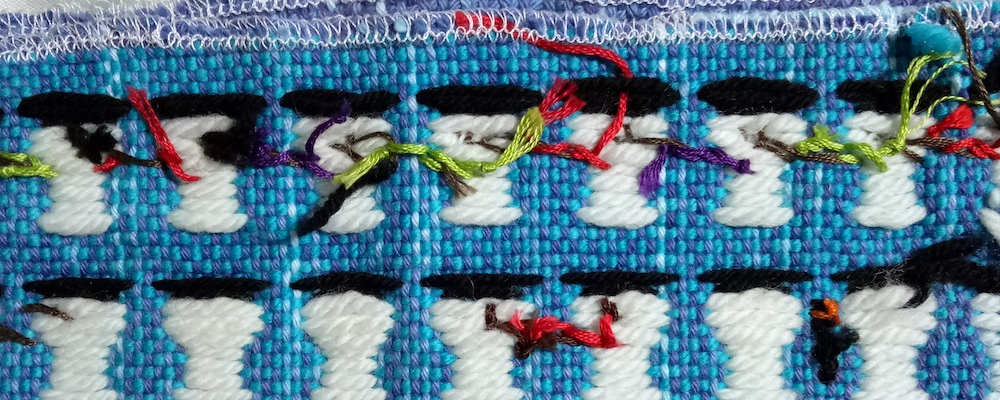
Because of the varying length in floats, there is something you need to keep in mind when doing this kind of weaving. Quite often, and particularly with a thicker yarn like I’ve used for this sample, the floats at the back of the work will be long. This might make the piece unsuitable for some uses. For example, a kitchen towel with long floats on the back is not ideal. The floats will catch on things and likely become a bit ratty and not neat looking over time. That is the other consideration – the back does not always look attractive and you may not want it on show. In my sample below, you can see the added untidiness of my having embroidered on details like the scarves.

The back of the sample

A way around this issue is to plan to use this technique in a pattern where the back of the work will not show. Some ideas are notebook or journal covers, a table centrepiece or runner where you intend to sew a backing to the piece, a cute Christmas wall hanging and so on.

Here is what you will need to weave a sample like this one:

A rigid heddle loom (I used my 24″ but a Sampleit size is fine if you just want a small sample)

10 dent reed

A pick up stick

A knitting needle is handy but not essential

Yarns-

There are no set yarns for this project, but I will share what worked well for me and give suggestions for possible alternatives.

For the warp I used a fingering weight (Australian 4 ply) cotton in a hand dyed medium to dark blue. Rug warping cotton would work fine.

My tabby weft (background weft) was a lighter but strong coloured light worsted/dk weight (Australian 8 ply) in wool.

For the pattern weft, I used a cream coloured aran weight (Australian 10ply) in wool.

For the little hats, I used some black fingering weight wool – you don’t need very much of that.

I love to use wool, particularly for the patterning in this type of weaving because it works so well. Because it has that lovely fluff and bounciness, it fills in any gaps between pattern wefts and makes the design look full. You will notice that my pattern weft is only slightly thicker than my tabby weft, but the pattern weft still stands out due to it’s loftiness.

The embroidered details are what really bring these little snowmen to life. Stick arms, scarves, eyes, carrot noses, buttons down the front – the amount of detail is up to you. You don’t need to be a great embroiderer as the details are all just worked in simple straight stitches. For the scarves, to give them that really nice shiny look, I used Bambu 7. This yarn can be quite difficult to obtain, so here are some alternatives:

5/2 bamboo weaving yarn

Pure Bamboo yarn

DMC Embroidery floss (my favourite brand)

Anchor Embroidery floss

If you decide to use embroidery floss, don’t separate the strands, use all 6 of them for just the right snowman thickness.

If you would like to weave some snowmen of your own, here is a printable PDF that gives you the weaving sequences and details:

Snowmen-on-a-rhlDownload

You will also want to watch and follow along with the instructional video to see the weaving in action:

I hope you enjoyed this tutorial! Let me know if you weave some little snowmen of your own, and as always, leave any comments or questions underneath, I love to hear from you!

Until next time…

Happy Weaving!
Filed Under: Free Pattern, Free tutorial, Rigid heddle weaving, Tutorials, Weaving Tagged With: rigid heddle weaving, rigid heddle weaving patterns, rigid heddle weaving tutorial, snowmen

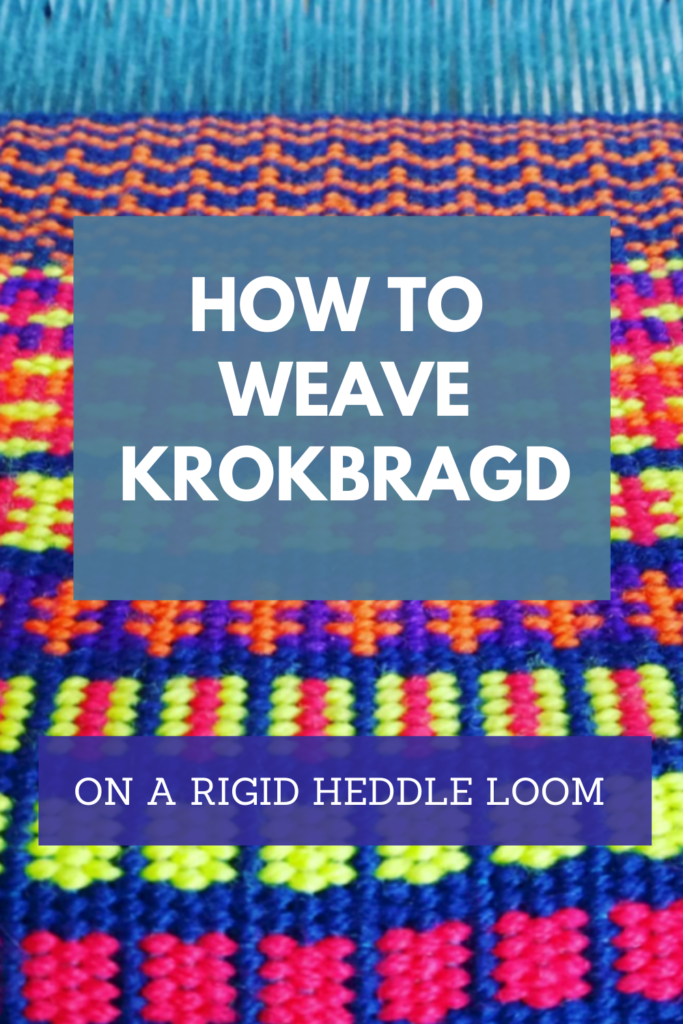
How to weave Krokbragd on a rigid heddle loom

by Kelly 8 Comments

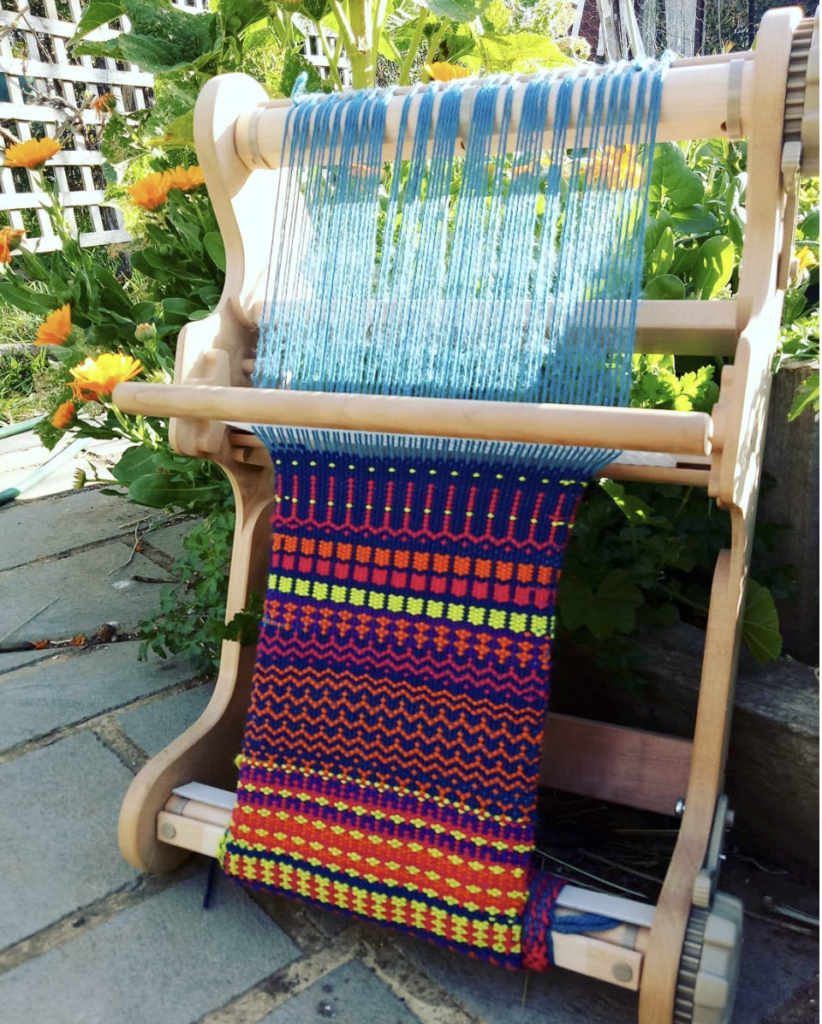
Krokbragd weaving has captivated my weaving heart and mind ever since I first laid eyes on it. So, what is it krokbragd? And how is it pronounced?!

Krokbragd is a twill weave structure that has Scandinavian origins. It is woven on 3 shafts and is weft faced (meaning the weft is dominant, covering most of the warp).  It is pronounced “croak-brod”, or sometimes “croak- brog” or “croak bra-rg”, “crok -brog” or “crok – brag”. Clear as mud? 😂

I was thrilled when I discovered years ago that krokbragd could be easily woven on my rigid heddle loom. The idea of weaving this colourful, detailed cloth without having to use a bunch of shafts and without having to purchase extra tools was very appealing to me.

*This post contains affiliate links. Please see my disclosure policy for further information.

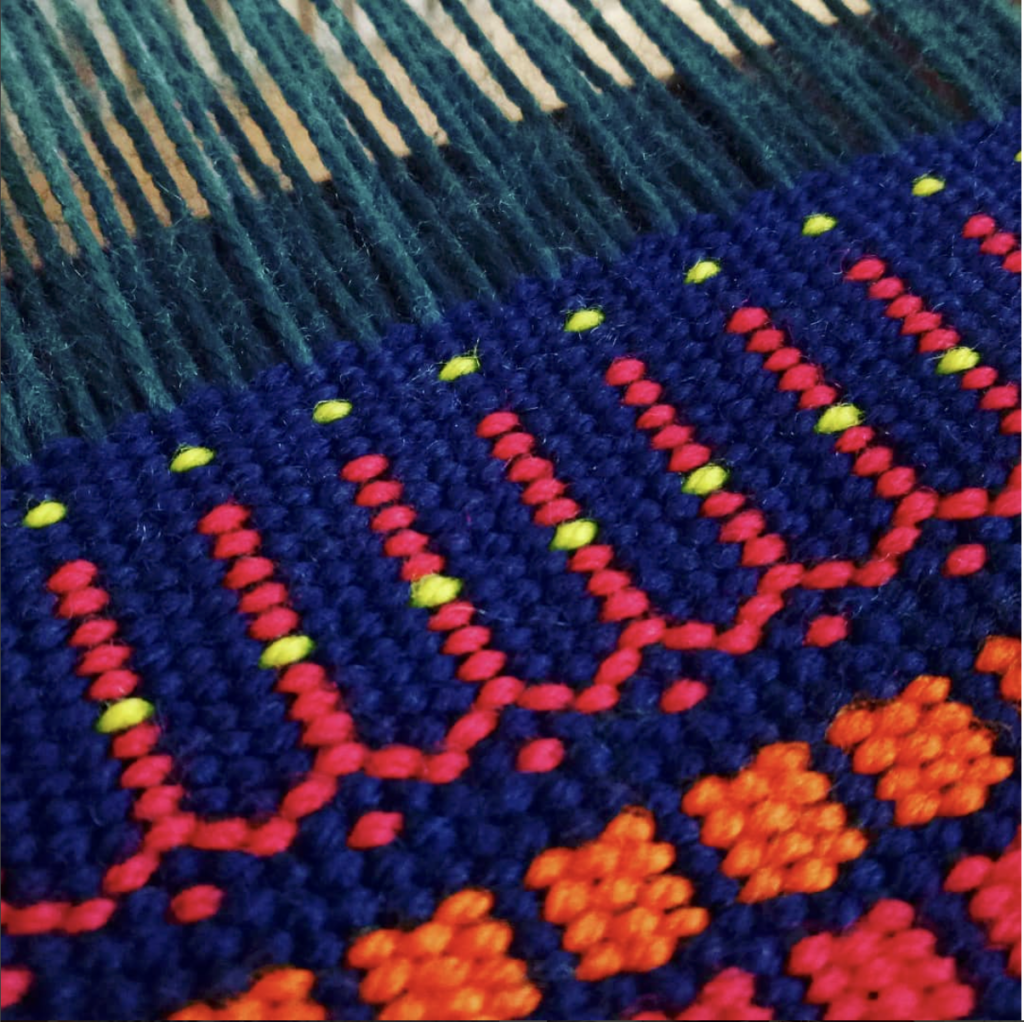
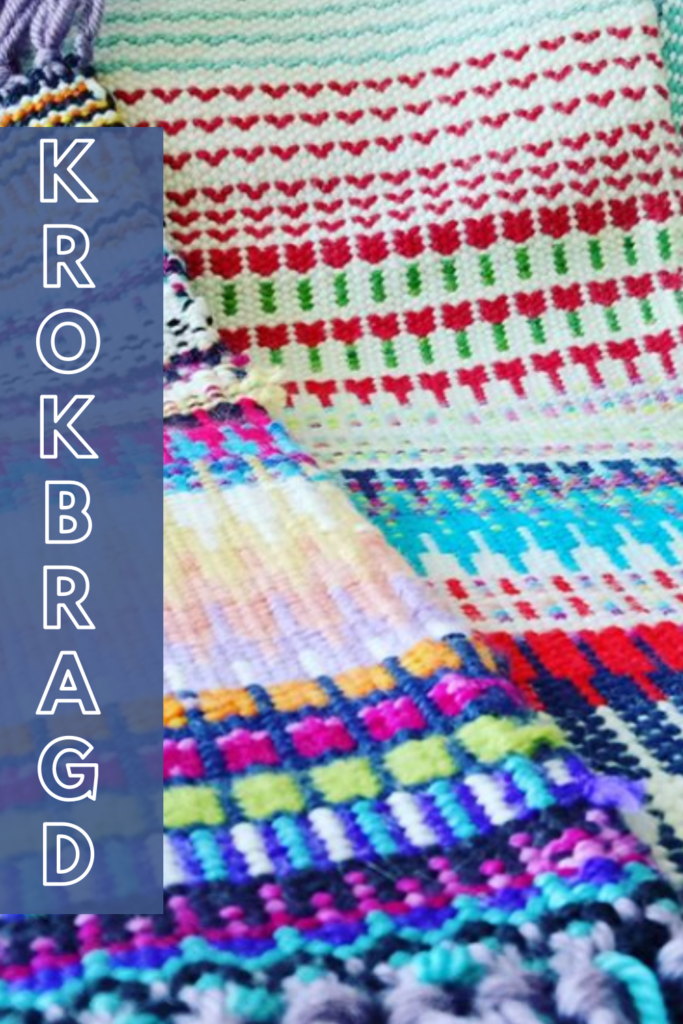
This weave structure produces bold and colourful patterns. These patterns can be built into little pictures as well. The weaving sequence has three simple steps and does not change, so the patterns are formed by changing colours. It’s quite magical!

The more you experiment with krokbragd, the more you feel that the possibilities are really endless. Choosing contrasting colours is one of the keys to success, as this keeps the patterns distinct. Another important consideration is to ensure your warp yarn is thinner than your weft yarn to ensure good coverage. The aim is to not have any warp yarn showing at all.

Because the weft is packed in, krokbragd produces a dense, heavy fabric. Historically, in Scandinavia, items with this structure were mainly heavy duty pieces such as chair and travel cushions as well as for warmth in the form of bed coverings. It was also used artistically, mainly for wallhangings. It is likely that some wallhangings served a double purpose of keeping the home more cosy, as hangings were sometimes used as door coverings to keep out cold draughts.

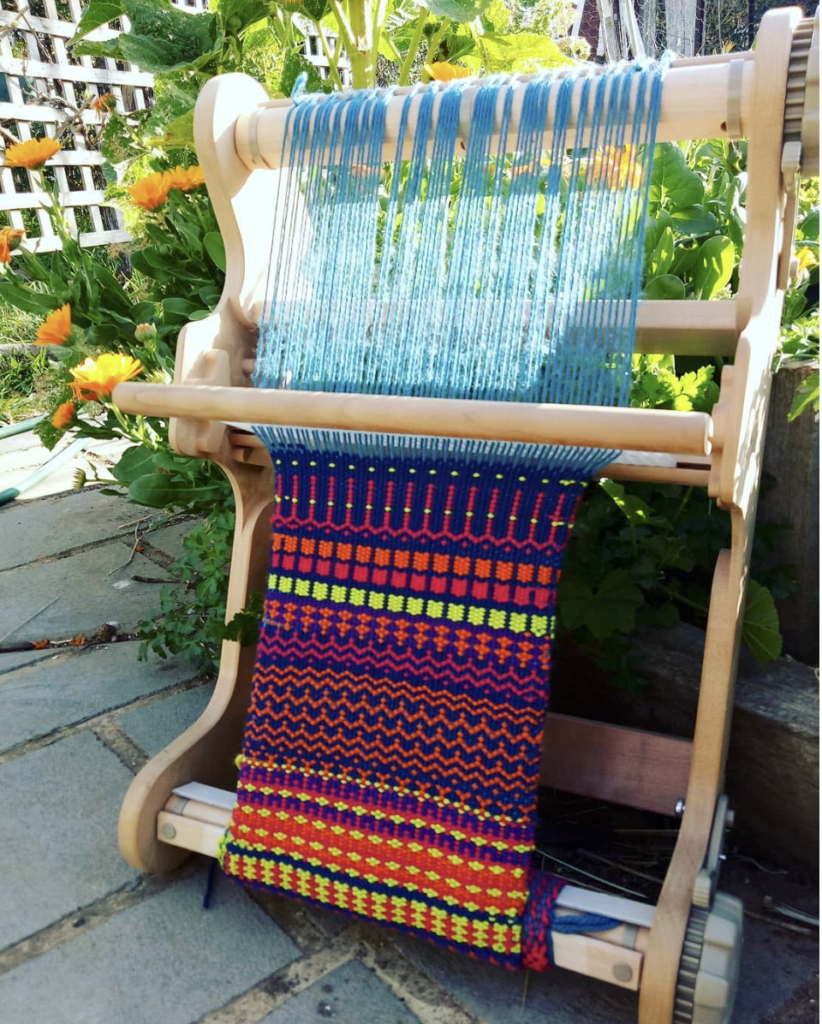
I wove this beautiful krokbragd sampler on my Sampleit loom.

Once your rigid heddle loom is set up and threaded for krokbragd (which can be done either with a single heddle, pick up stick and heddle rod OR with two heddles), the same three step sequence is woven over and over, the only thing that changes is your weft colours. This is how you build patterns, by altering the colours. Three rows of weft passes equals one completed krokbragd sequence.

Let me give an example:

If I weave my 3 pick sequence in just one colour (lets say blue), I will have a solid row of blue once I’ve packed the weft down with my tapestry beater. The instructions would look like this: (“B” stands for blue)

  1. B,B,B x 1

If in my next sequence I introduce another colour, I will start building a pattern: (“Y” stands for yellow)

  1. B,B,Y x 1

Even better than trying to explain how it works is to show you how it works. This free beginner video will show you how to get started, give you the information you need to set up your loom and then give a basic krokbragd pattern for you to try-

Once you’ve mastered the basics, you can move on to some more adventurous, but still fairly simple patterning, like these little birds-

And one of my favourites, tulips!-

Once you have been through these videos you can start to design some of your own krokbragd pieces. There are a couple of ways to do this – either on the loom, as you are weaving or as a separate design, either on graph paper or using weaving software. I like both methods for different reasons!

Designing on the loom is very intuitive and relaxing, You can write down the colour changes as you go, that way if you find a design you love you can revisit it later because you have the instructions ready to go.

Designing off loom is also very beneficial. It allows you to plan out very specific designs to try on the loom. If this concept interests you, I recommend Debby Greenlaw’s book Krokbragd – How to Design and Weave, which I reviewed in this post.

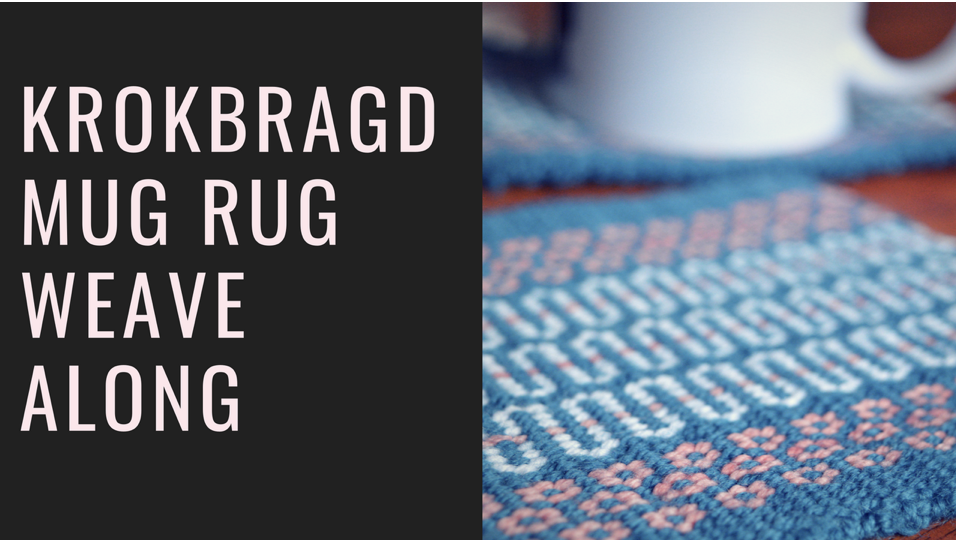
Over at my Online Weaving School, there are three krokbragd classes available. The first one, is the Krokbragd Mug Rug Weave along, which is available to members only. This is a great class that provides instructions for different threading methods, so you can choose to use pick up sticks and a heddle rod or instead use two heddles.

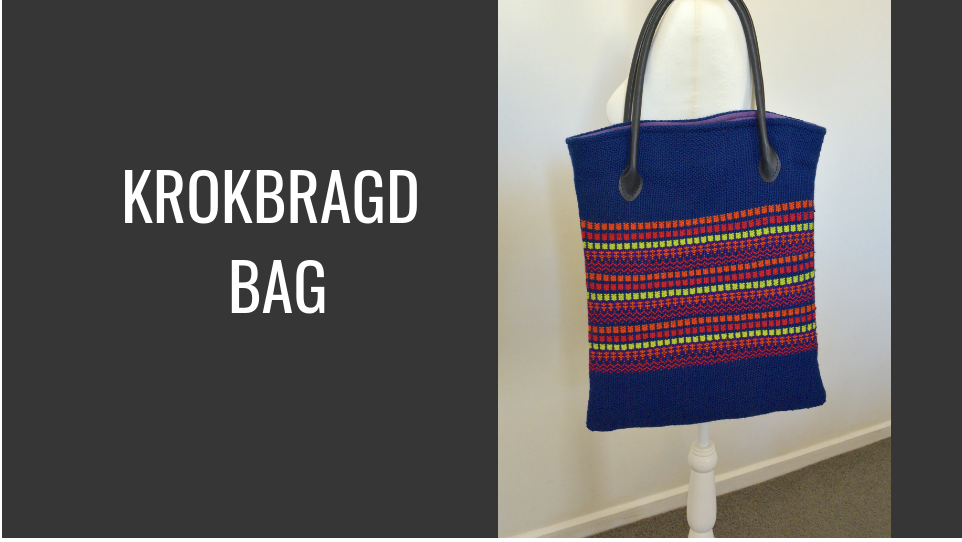
Then there is the Krokbragd Bag, which is a gorgeously fun and functional project. This class uses two heddles to achieve the three shafts, which is not as difficult as it sounds! You can see a roundup of some of student’s beautiful pieces from this class in this post.

And thirdly, my newest offering is Krokbragd 101, which is an “all you need” comprehensive course to get you weaving beautiful krokbragd.

Krokbragd can even be woven on an inkle loom by turning the warp faced draft into a weft faced draft. I wrote about a Krokbragd inkle band I wove in this post.

Krokbragd is such a captivating and addictive weave structure, I hope you will love it as much as I do. If you have any questions or comments, please leave them down below, I love to hear from you!

Until next time…

Happy Weaving!
Filed Under: Krokbragd, Rigid heddle weaving, Tutorials, Weaving Tagged With: krokbragd, krokbragdweaving, rigid heddle weaving

Wash Your Hands Towels Free Rigid Heddle Loom Project

by Kelly 95 Comments

The Wash Your Hands Towels Project was released in 2021, when the world looked a little (OK, a LOT) different!

Almost an entire world of people found themselves at home and only able to leave in a limited capacity. I felt a real need at that time to reach out with a free and very useful project that was beautiful but achievable, even for beginner weavers.

That is how the idea for hand towels was born! We were all being told “don’t forget to wash your hands”.

So I thought, why not turn this routine into a joy with beautiful, handwoven towels? This free project is perfect for both beginner and experienced weavers, offering a fun and creative way to brighten your home while practicing essential weaving skills.

*This post contains affiliate links

Why Make Handwoven Towels?

If we’re washing our hands frequently, we might as well enjoy the process! These towels are practical, vibrant, and customizable. With bright colors and soft cotton yarn, they’re designed to bring happiness to your daily routine.

This project is beginner-friendly, but you’ll need to know how to warp, thread, and set up your rigid heddle loom for plain weave. If you’re still learning, check out my Woe to Go! Beginner Rigid Heddle Weaving class. for step-by-step guidance.

Both towel designs are quite adaptable and can be varied in many ways. I give you some ideas on how to go about this in the video class.

Tools and Materials Needed

Here’s what you’ll need to get started:

*Rigid heddle loom 24” weaving width or wider (yes, you can also use a smaller loom with the understanding that your towels will be narrower than mine).

*1 x 10 dent heddle  (or a 7.5 – 8 dent heddle if using Sugar n Cream yarn)

*3 stick shuttles longer than the width of the project. (For the first towel we are weaving with 3 weft colours).

*1 pickup stick longer than the width of the project (additional pick up stick to aid transfer of pick up is optional – a stick shuttle can be substituted.

*Reed and threading hook

*A sewing machine and serger are very handy for hemming but not essential

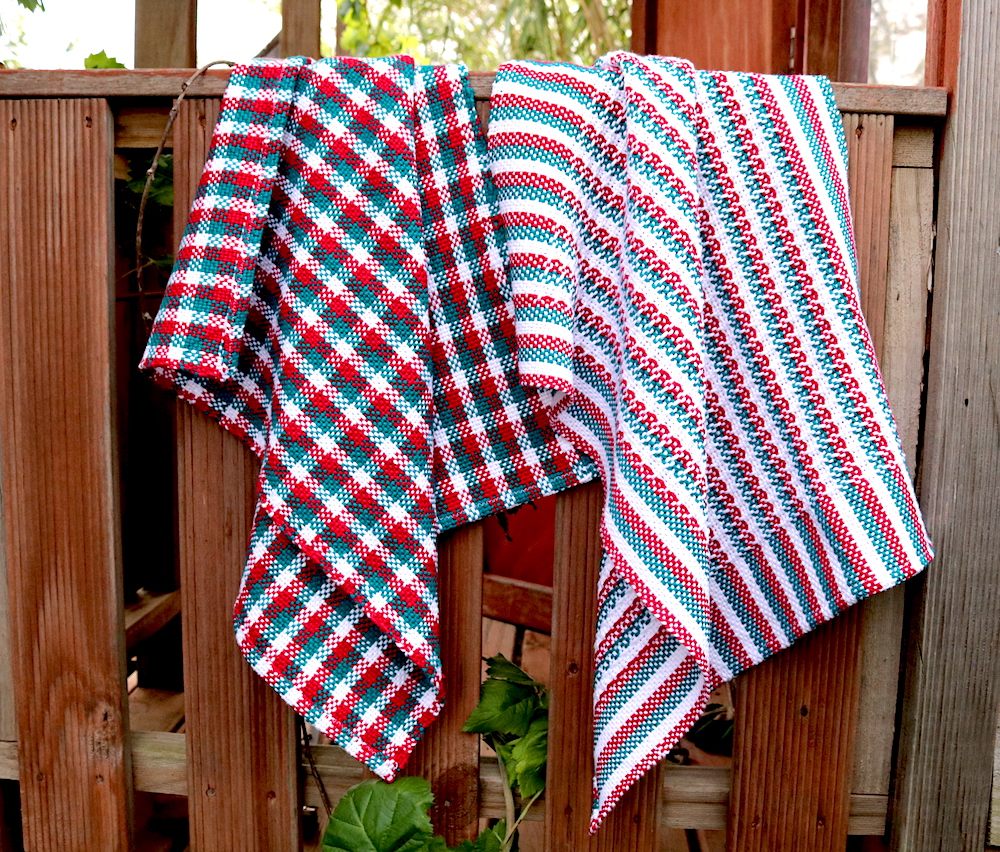
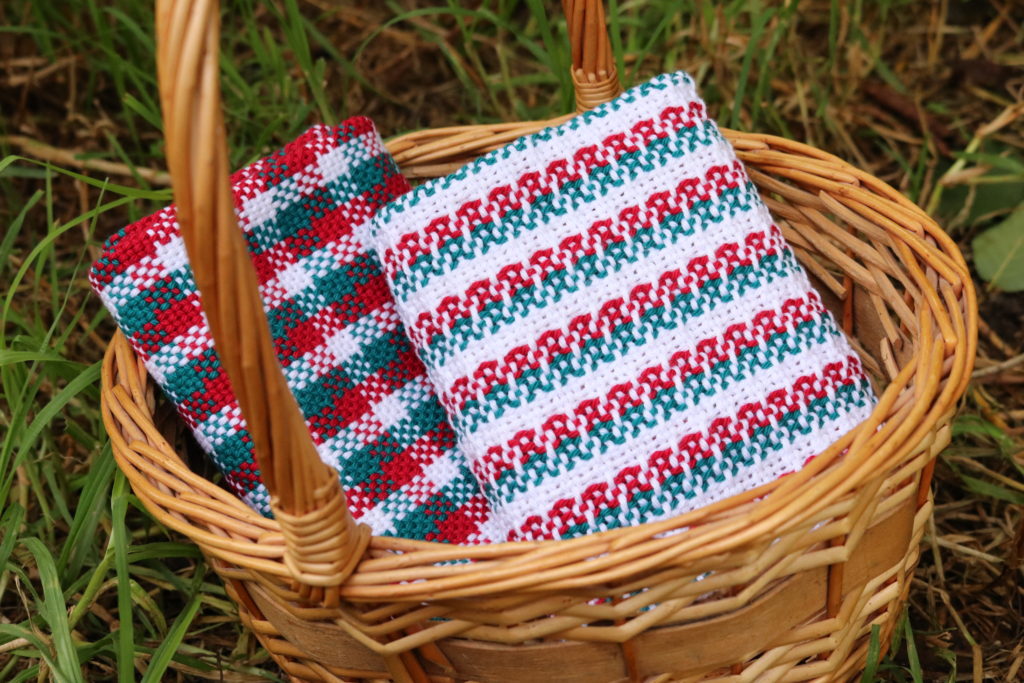
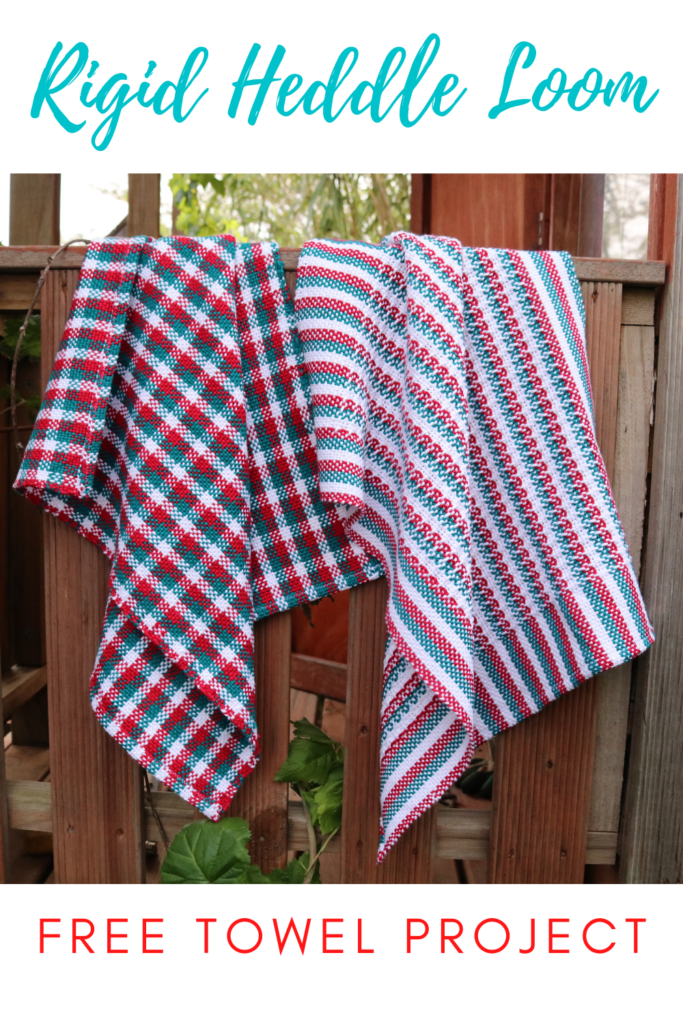
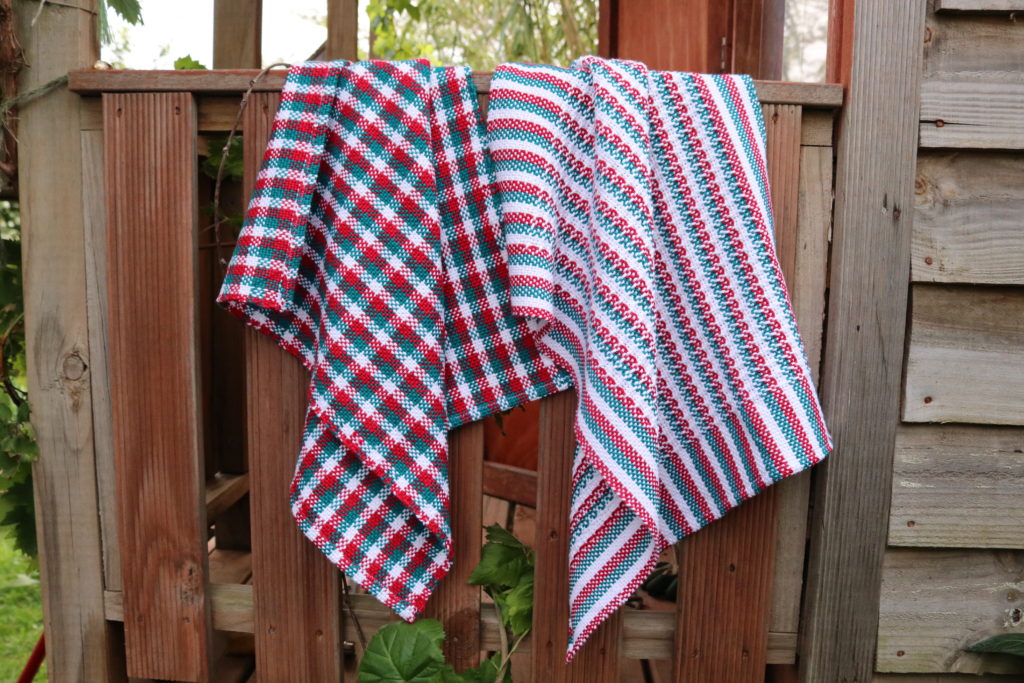
I used a beautifully soft and lofty cotton to weave these towels on my rigid heddle loom. We will be using the same warp for both towels, but as you can see, using different techniques makes the towels wonderfully varied in how they look.

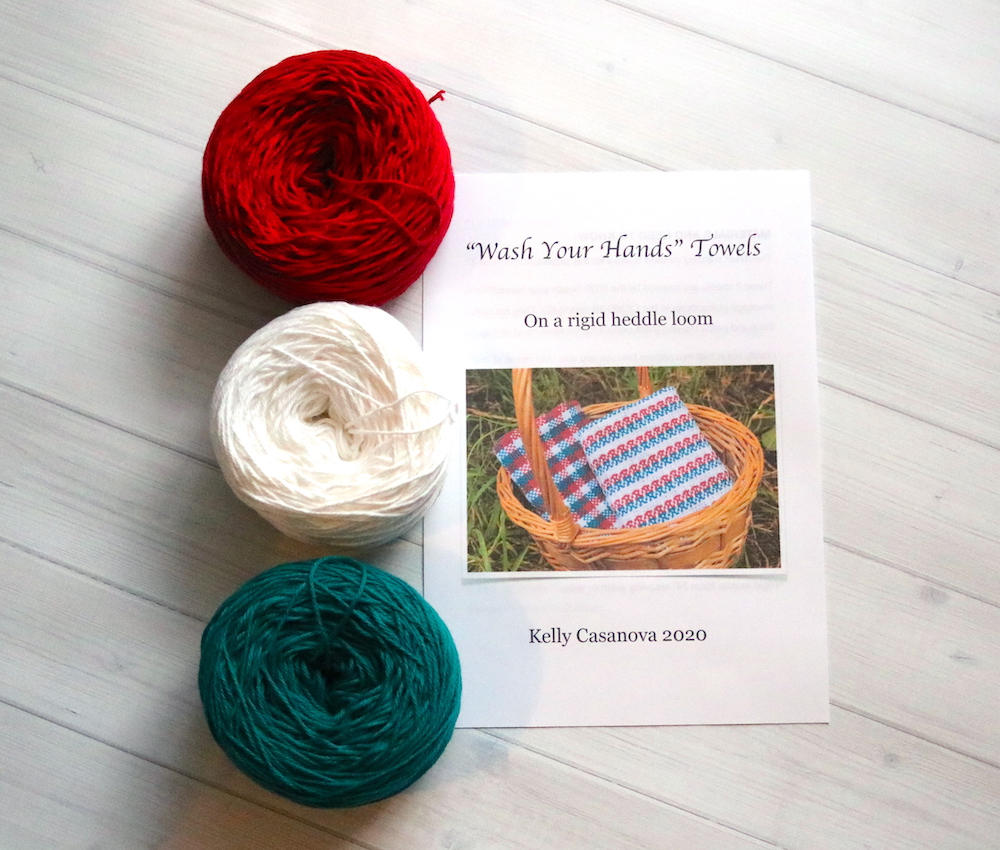
If you’re in Australia, my yarns were from Bendigo Woollen Mills in the following: Pomegranate, Peacock and White cotton 10ply. But, if you need substitutes, here are my recommendations:

Sugar n Cream in red

Sugar n Cream in white

Sugar n Cream in aquamarine

I Love this Cotton

Knit Picks Dishie

Two Towels, One Warp

Both towels use the same warp setup, but different techniques make each unique. This project includes a downloadable PDF with warp calculations, weaving instructions, and pickup sequences.

Wash-your-hands-towels-1Download

Towel 1: Plaid Design

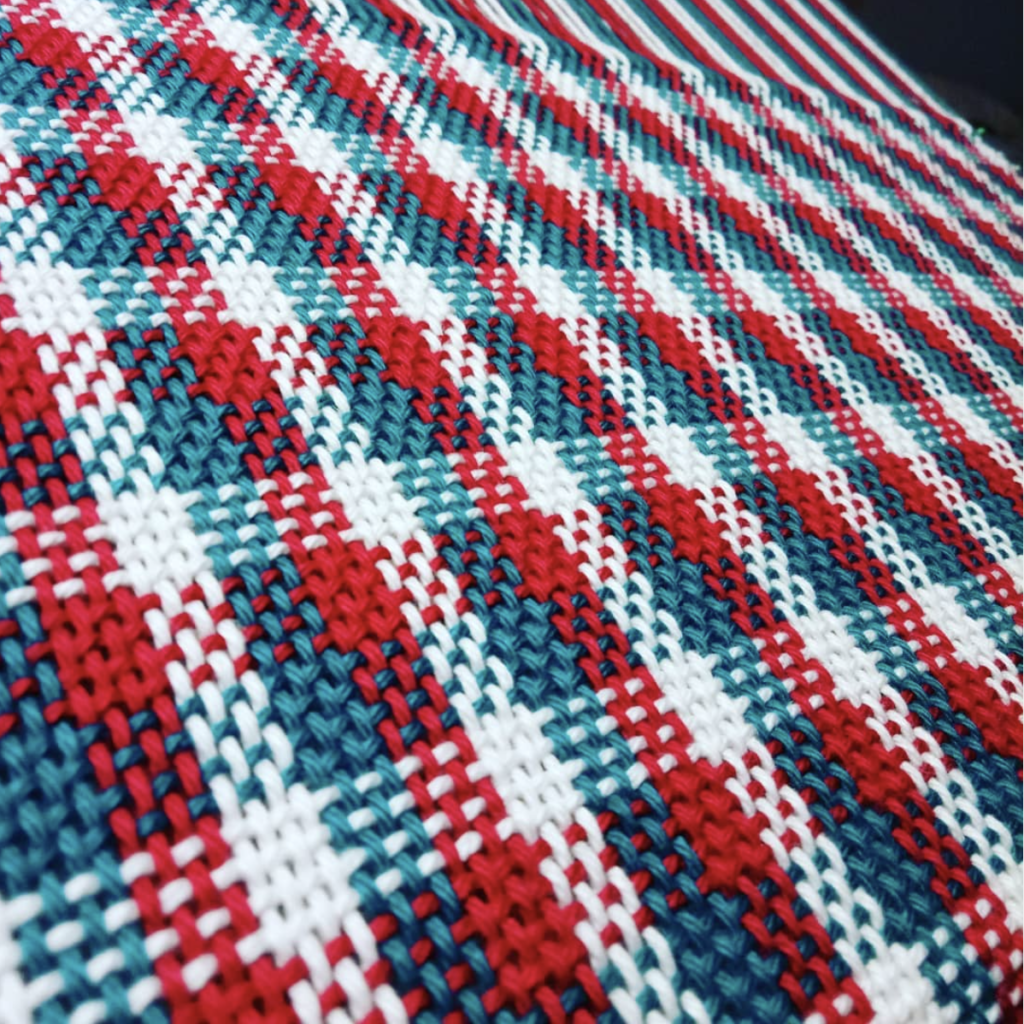
The first towel uses the same color sequence for the weft as the warp, creating a vibrant plaid pattern. This is a great opportunity to practice frequent color changes by cutting and introducing new colors.

Key features:

  • Plain weave borders.
  • Simple pickup design in the center.
  • Alternating weft colors (4 picks each color).

Tips for Beginners:
If you’re new to using pickup sticks, check out my pick up tutorial for a quick guide before starting this towel.

Towel 2: Classic White

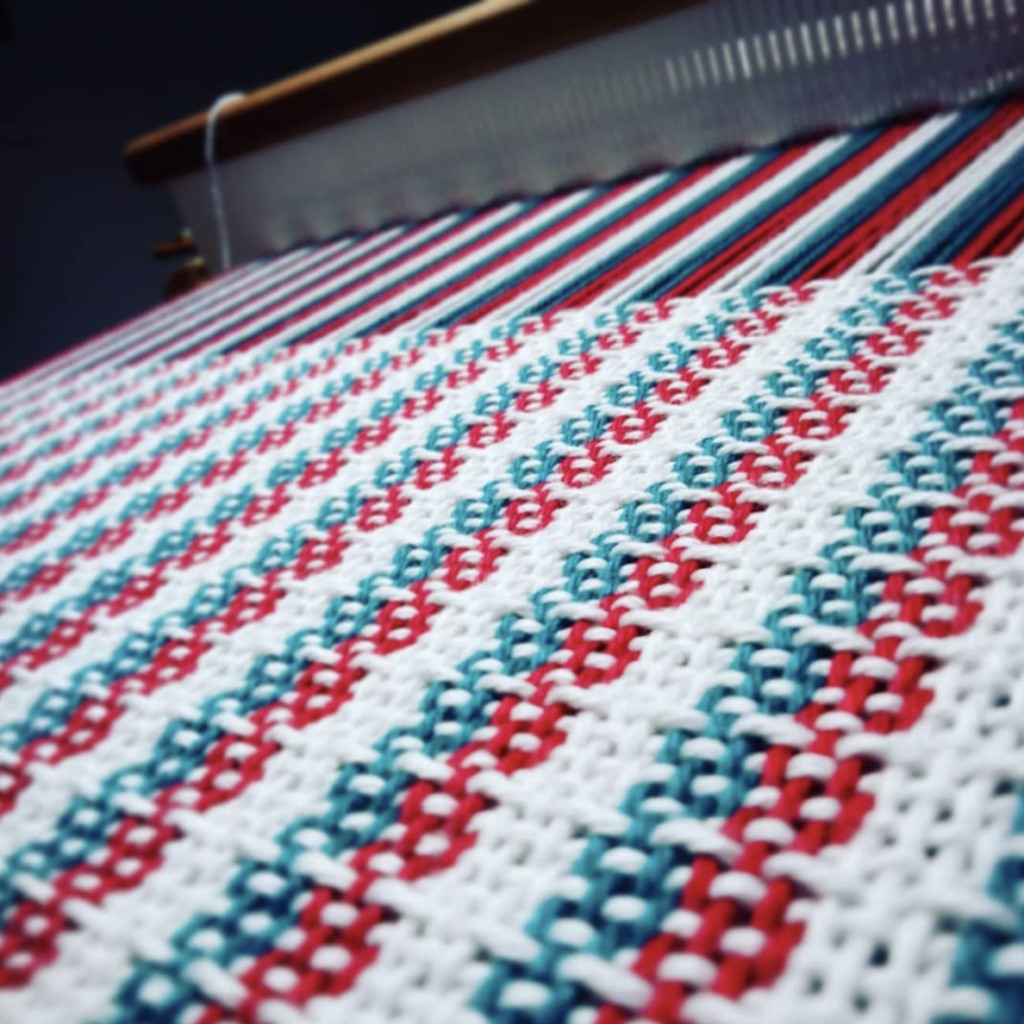
The second towel uses white yarn for the entire weft, with some simple pick up floats, creating a clean and elegant look.

Want to experiment? You can modify these designs with different color sequences or patterns to make them your own.

Color Handling Options

  • Cut and Start: Cut each color after 4 picks (as in Towel 1).
  • Carry Colors Up: For tighter color changes (e.g., 2 picks per color), carry the yarn along the edges instead of cutting.

Watch and Weave

This project includes step-by-step video instructions to guide you through the weaving process. Download the free printable PDF, follow along with the videos, and start weaving these beautiful towels today.

This free class is also available at my Online Weaving School.

Share Your Creations!

I’d love to see your finished towels! Tag me on Instagram so I can share your work in my stories. And if you enjoyed this project, please share it with fellow weavers!

Have questions or comments? Drop them below—I’d love to hear from you.

Until next time…

Happy Weaving!
Help me to keep creating free content here 😀

Filed Under: Rigid heddle weaving, Tutorials, Weaving Tagged With: free project, handwoven towel, towels

Van Gogh inspired freestyle tapestry!

by Kelly 5 Comments

It’s hard to know what to say about the present world situation. Strange. Unprecedented. Uncertain. At times, scary.

Many people throughout the world are in isolation or quarantine – some self imposed, others enforced. Countries in lockdown.

My mind can’t help thinking that it all feels very much like a suspense movie or novel. But no, this is the reality of 2020 and coronavirus for all of us. Strange times indeed!

Beyond the feeling of bewilderment though, is one of hope and unique opportunity. We may be isolated in our homes, but we live in the age of the internet, where it easy to stay connected to others and share burdens. Many people have more time than they usually would, to explore interests and hobbies. My Youtube channel and Online Weaving School are great places to be right now!

With that in mind, I have a new Youtube project that is long, slow and relaxing. We could all use a bit of that right now!

The project is inspired by the wonderful Van Gogh painting, The Starry Night. I have long admired this art work for it’s colours, movement and mood. I thought it would translate really well to a tapestry, not as a replica but as inspiration.

I thought this would be a great, calming project because it is adaptable, doesn’t require much planning, is relaxing and free flowing. Oh, and the idea is to use stash yarns so you don’t need to go out to buy more!

All the materials plus the warp calculations are provided in this printable PDF-

Van-Gogh-inspired-tapestryDownload

Some of my stash yarns included wool, cotton, silk, acrylic and handspun, tencel and metallic. Weights included 8/2, lace weight, fingering, light worsted/dk and aran. My favourite weight ended up being the fingering.

The video/s are mostly in real time, something I have not done before. It means long videos, but I was figuring some people might appreciate sitting and weaving with me at this time – step by step and no hurry. And I know how some of you love to know all the details.

Begin with video one, which explains my aims for the tapestry and shows you the yarns I used:

Some additional resources that are relevant and helpful are:

My first freestyle tapestry series for Youtube –

You may be interested in my online course, Tapestry on a Rigid Heddle Loom to learn traditional tapestry techniques.

Then there is my review of the Mirrix Big Sister Tapestry Loom –

And my Tapestry Necklace project –

Filed Under: Free tutorial, Inspiration, Rigid heddle weaving, Tapestry Weaving, Tutorials, Weaving Tagged With: freestyle tapestry, tapestry weaving, tutorial, van gogh

Best Yarn for Weaving: A Complete Guide

by Kelly 44 Comments

Choosing the right yarn for your weaving project can feel overwhelming—especially when you’re just starting out on a rigid heddle loom. With so many options available, you’d think it would be easy. But when faced with dozens of yarn weights, fibers, and heddle sizes, even experienced crafters can feel unsure. Let me help you to choose the best yarn for weaving, regardless of your project!

One of the most common questions I hear is:
“How do I know which yarn to use with which heddle size—for which project?”
In other words… where do you even begin?

If you’ve ever felt confused by weaving yarn labels, sizing numbers, or what will actually work on your loom, you’re not alone. That’s exactly why I created my low priced online class, What Do All the Numbers Mean?—it’s a practical, beginner-friendly guide to demystifying yarn measurements and conversions, with helpful charts you can refer back to again and again.

In this article, I’ll walk you through how to choose yarn for weaving by looking at real weaving projects I’ve made. We’ll explore what worked, why it worked, and how you can apply the same approach to your own weaving.

*This post contains some affiliate links. For more information please see my disclosure policy.

Try the Snap Test First!

In all weaving, you begin with the warp, so it makes sense to start there. Doing a snap test will help determine whether the yarn you want to use for warp is going to be strong enough – you don’t want broken threads. Yes, they are fixable (this video shows you how) but not so ideal.

The snap test technique is nuanced rather than a hard and fast rule, but it can be a very helpful tool when you’re just starting out in weaving.

You should also be familiar with the drift test when choosing a yarn for your warp. This frequently occurs with an acrylic or wool yarn that is spun with low twist (here is an example). Although this creates a beautiful, soft and lofty yarn, it is better suited to the weft than the warp.

Knitting Yarn

To choose yarn for weaving your first projects, I highly recommend knitting wool. It’s economical, easy to use, accessible and thick. I use Bendigo Woollen Mills Luxury 8 ply a lot, it is a dk weight yarn and pairs perfectly with the 7.5 or 8 dent heddle that comes with most new rigid heddle looms. It is perfect for wearables, as it’s lovely and soft. Which brings me to the next point.

If you intend to wear your woven piece, give it the face brush test. Hold the yarn up against your cheek and lightly rub. If it feels too scratchy, you’re not going to like wearing it and it’s best saved for something else!

Cost effectiveness

Consider the cost of the yarn you intend to use. If you are a less experienced weaver, don’t go for that beautiful, expensive yarn – it will only put pressure on and stress you out. Use something affordable until you have more confidence. I have a handy weaving yarn cost estimator to take the guesswork out of it for you.

This scarf is a good example of a balanced plain weave piece using light worsted/ dk yarn with my 7.5 dent heddle. A piece like this is great for beginners and an excellent opportunity to practice neat edges.

The Right Sett

Before beginning a project, it’s really important to figure out the best sett for your chosen yarn. All you need is an inch ruler and your yarn. Once you have more experience, you may not need to do the test every time, but it’s a must for beginners. Here’s how:

The Weaver’s Toolkit is an invaluable resource for new and seasoned weavers. It includes useful charts that help you to match up the right sized heddle with your chosen yarn, yarn size conversion charts and so much more. Available as a digital download ebooklet, the Toolkit is a valuable asset to any weaver’s library.

I Love Wool!

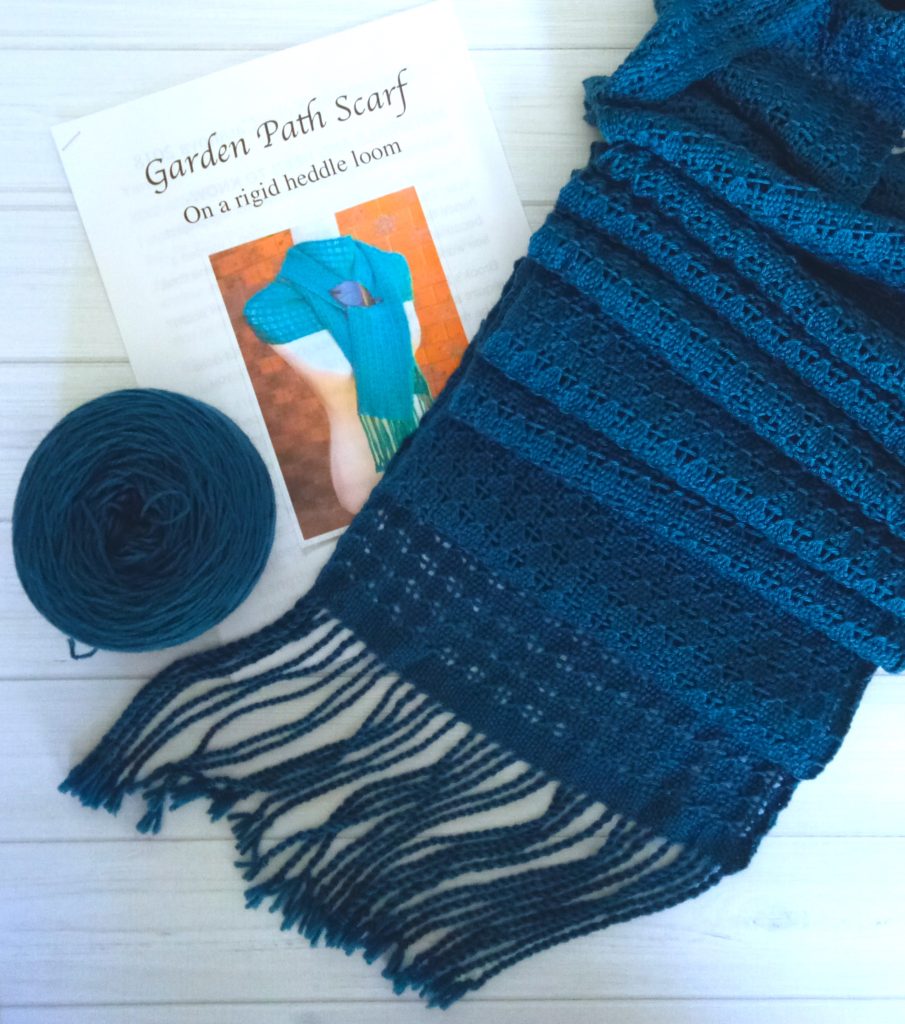
A good example of a project using wool is my Garden Path Scarf pattern. This pattern is my best seller and I myself love to wear my assortment of GP scarves! I love that it looks a bit like lace knitting.

Woven with a lighter 4 ply Australian merino (fingering weight) it is light and airy but still warm to wear, thanks to the wool. I wouldn’t necessarily say that it’s an absolute beginners project, but it is actually not as difficult to weave as it looks!

Blended Yarns

I must give a caution at this point when it comes to blended yarns. Depending on what the blend is, it can make a nightmare out of your project.

For this “special” scarf I use a silk/ merino/ sparkle weft and a baby alpaca warp. All painstakingly hand dyed. I didn’t know until later that often, yarns with a silk blend will not always grip other yarns like, say a wool on wool will grip. So, I ended up with uneven weaving resulting in warp threads showing at the selvedges. It was an expensive mistake, but one that I’ve never forgotten (or repeated!)

Handspun Yarns

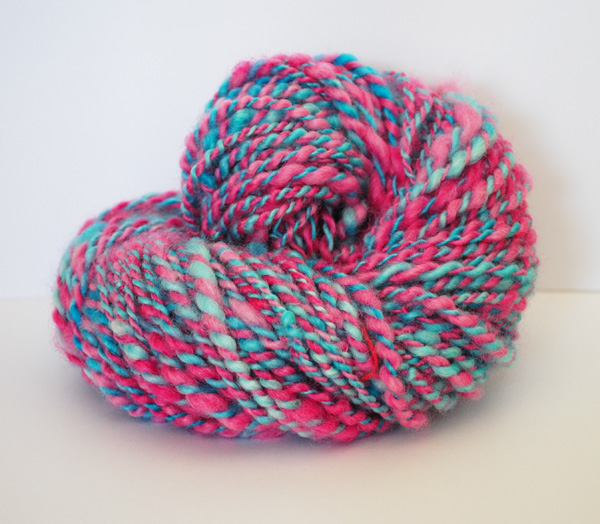
A lot of spinners also become weavers, and what a wonderful progression and integration of one art form into another. Handspun can definitely be used to weave with, and gives a very different look to commercial yarns. The main things to consider with handpsun:

*Does it hold up to the snap and drift test for warping?

*Which heddle is going to suit best?

Spun yarn can be inconsistent, depending on how it has been spun and what the spinner is wanting to achieve, but if you use your inch ruler to determine sett, you won’t have any problems choosing the right heddle.

Cotton Yarns

Cotton is also a great choice, but should be chosen a little more carefully for beginners. In fact, my Beginner Rigid Heddle Weaving course project uses the popular US cotton, Sugar n Cream. It is an aran weight yarn, thicker than light worsted, so it weaves up quickly. It’s pretty affordable to buy too! And, it’s just right for your 7.5 or 8 dent heddle. In Australia, Sugar n Cream is available from American Yarns.

I wouldn’t advise an inexperienced weaver to start out with a thinner cotton, there are too many extra things to consider. Your success is far more guaranteed with a thicker, more manageable cotton.

When you have gained that experience, you may want to explore weaving kitchen towels and other, finer pieces. This is where your 8/2 cotton comes in nicely. It is readily available, reasonably economical, strong and multi purpose. My personal favourite is Maurice Brassard 8/2 cotton because, out of all the cottons I’ve tried, it is the most consistent and reliable. It is unmercerised, which is my big preference over mercerised. In Australia you can purchase Maurice Brassard yarns at the Thread Collective.

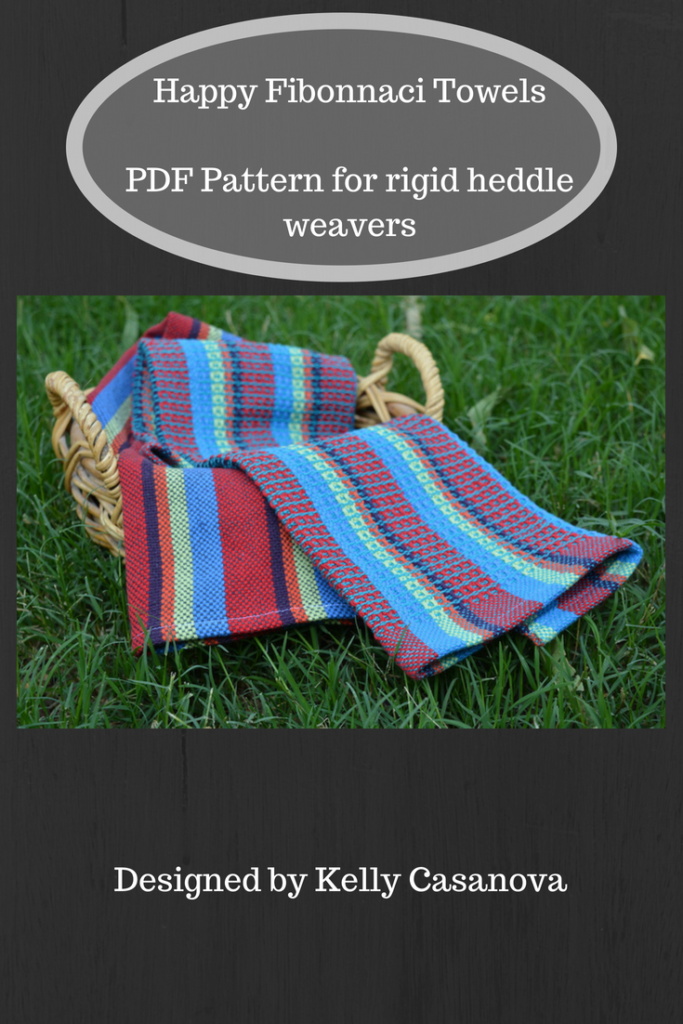
My Happy Fibonnaci Towels project is available as a downloadable PDF and also as an online class.

Cottolin Yarn

I’ll give cottolin a quick mention, because it’s my favourite yarn for weaving kitchen towels. Linen on it’s own can be difficult to manage, but a blend of linen and cotton is a match made in heaven!

You can buy cottolin in dyed, undyed, bleached, unbleached and half bleached – lots of choices! I love the natural look of the half bleached. Once again, Maurice Brassard 22/2 is what I use. Don’t be confused by the numbers, linen is measured differently to cotton, so the 22/2 cottolin is very similar to 8/2 cotton size. Cottolin is so absorbent and after washing, so soft, I love it!

Bamboo Yarn

Now onto another personal favourite, bamboo. It’s available in a number of different sizes. One that I use very often is Bambu 7, which is available in Australia from BB Yarn Supply. A suitable alternative is Valley 5/2 bamboo and for a thinner weight, Maurice Brassard 8/2 bamboo.

I used Bambu 7 for the scarf project for my Table Loom Weaving course. The results speak for themselves!

Tencel Yarn

Another weaving yarn I love is tencel. This is an interesting fibre, manufactured from wood pulp. It is similar to bamboo in that it has a high sheen and is silky. It is very light and even though it comes in 8/2 size, it seems quite thin. I use Maurice Brassard 8/2 tencel. I’ve woven a number of pieces with tencel and have never been disappointed. It also takes dye beautifully. Once again, not a beginner’s yarn!

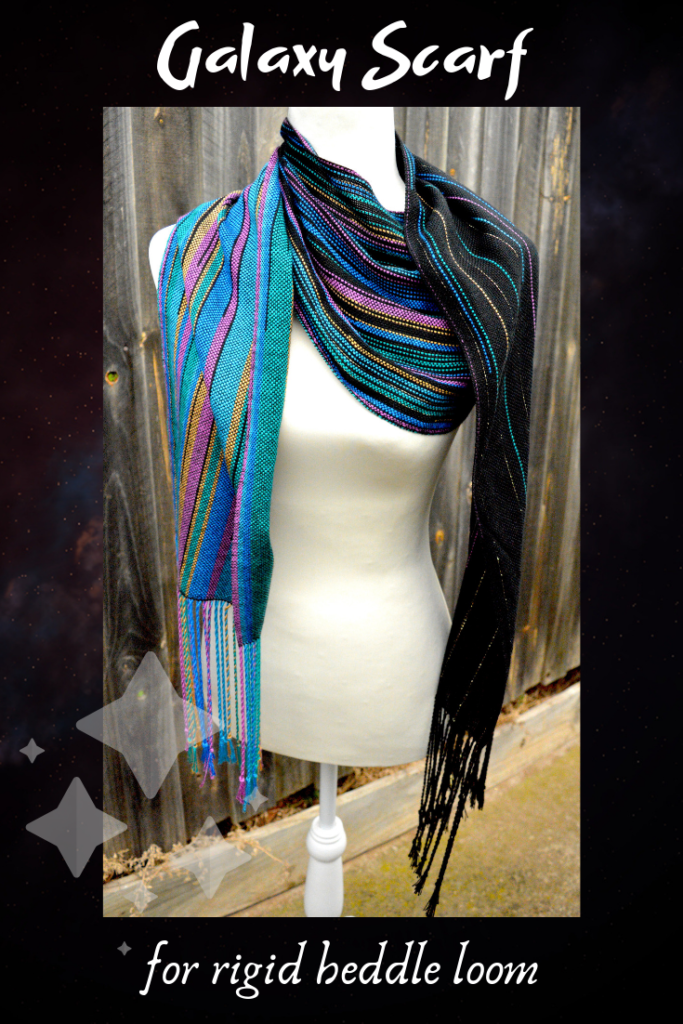
The Galaxy Scarf PDF pattern uses a combination of bamboo and tencel, with great effect! The two yarns together have a beautiful drape and work perfectly for light garments.

Silk Yarn

Last, but not least, we have silk. There is no denying the gorgeousness of silk, but it’s not the easiest yarn to weave with, especially if it’s very fine.

It is extremely light and almost “glows”, particularly if you use certain colour combinations. The project above was woven with 60/2 silk at 40 ends per inch on my floor loom. This yarn in definitely not cheap, so for special projects only.

In the following Youtube videos, I go through lots of my own projects and explain the yarns and heddles used and why. I hope you enjoy them!

Failing to plan is planning to fail

A guaranteed way to not waste yarn through avoidable accidents is to calculate for your project before you start. It’s not as confronting as it sounds!

If mathematics is not your favourite thing 🙋‍♀️ don’t worry. I have calculating resources that take all of the guess work out of it.

Are you a pen and paper kind of weaver? Then check out my free printable calculations sheet for rigid heddle weavers. It even comes with a free mini class that explains everything.

If you’re more of an online/techy weaver, you will love my free interactive warp and weft calculator.

When you’re new to weaving—especially on a rigid heddle loom—choosing weaving yarn can feel like one big guessing game. But as you’ve seen from the examples in this post, it becomes easier with time, experimentation, and a little guidance.

The more you weave, the more you’ll begin to understand how different yarns behave, which sett works best, and how to get the results you’re after. Don’t be afraid to sample, make mistakes, and learn along the way—that’s all part of the joy of weaving!

Need a gentle nudge in the right direction? Check out my Beginner Rigid Heddle Weaving Online Course for step by step instructions. Complete a lovely, practical project and get to know your rigid heddle loom while growing in confidence.

You can do it!

Until next time…

Happy Weaving!
Filed Under: Rigid heddle weaving, Weaving Tagged With: beginner rigid heddle weaving, choosing yarns, rigid heddle weaving, weaving yarns

Why would you weave with two heddles or more?

by Kelly 28 Comments

When you buy a rigid heddle loom, it comes equipped with one heddle – usually a 7.5 or 8 dent, depending on the company you purchase from. So, if there is only one heddle with the loom, why would you weave with two heddles or more?

Heddle or Reed?

Before I go any further, I just want to say that when talking about rigid heddle looms, the terms “heddle” and “reed” are usually interchangeable but mean the same thing. For the rest of this article, I will use the term “heddle”.

*This post contains affiliate links. For more information, please see my disclosure policy.

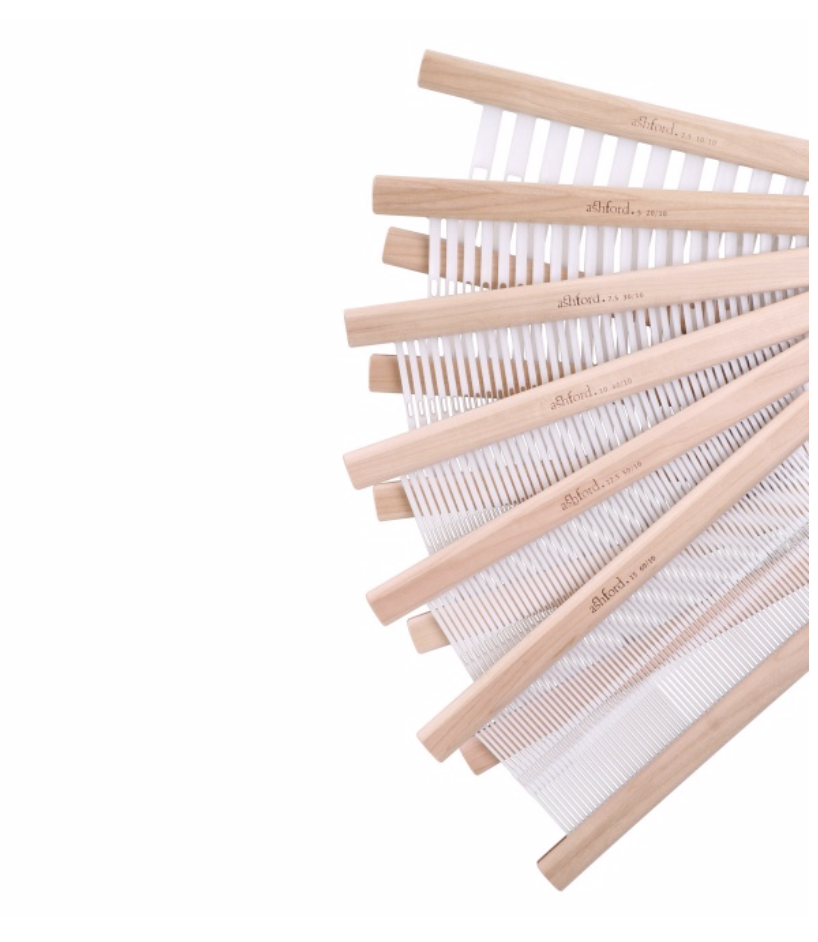
Image from Ashford website

What is a heddle?

The actual “rigid heddle” part of a rigid heddle loom is one of the features that makes it such a great loom for learning how to weave. The heddle is a multi purpose piece of equipment. It spaces your warp, allows you to achieve two different shafts and is also your beater. It’s pretty awesome!

One heddle equals two shafts. The holes are one shaft and the slots are another. So, a rigid heddle loom can be called a two shaft loom, though there are some hot debates about this (Facebook, I keep out of these arguments!) as some people argue that a rigid heddle produces sheds not shafts.

Not really worth arguing over in my opinion, as whatever the case, you can weave 2 shaft drafts (plain weave) with one heddle and a rigid heddle loom.

You may assume then, that when you add a second heddle, you can then weave a 4 shaft pattern, but that is not so.

“What? Didn’t you just say that one heddle equals two shafts? Now I’m confused!”

One heddle does equal two shafts when used on it’s own. BUT, adding an extra heddle does not add two extra shafts, because the slots can only be counted as one shaft.

Before you throw your hands up in frustration and storm away from this page, let me give you an example:

Two Heddle Example

I’m using two heddles. On heddle one, I’m using the holes as shaft 1. On heddle two, I’m using the holes as shaft 2. That leaves the slots for shaft 3.

Think of the threads in holes as dedicated – they’re on one set path that can’t be changed once they’re threaded in. If I lift heddle one, all the shaft 1 hole threads will go up and the slot threads stay down. If I lift heddle two, all the shaft 2 hole threads will go up and the slot threads will stay down.

The only way I can make the slot threads go up would be to put both heddles in the down position, forcing the hole threads down. So you see that the slot threads operate differently to the hole threads and can’t be manipulated in the same way.

The Desire for Exploration

It seems that the desire of weavers to explore and push the boundaries of their looms has been influential in loom production. Many commercially available rigid heddle looms now come with a built in double heddle block rather than just the single they used to be made with. This is a pretty good indicator that weavers want to weave with more than one heddle!

But what can you actually do with more than one heddle? Let’s take a look at the possibilities.

Possibilities

  1. Two heddles to increase your sett.

Say you want to weave a yarn at 20 ends per inch (epi). There is no heddle available that can do that for you, the closest sett available is a 15 (which will give you 15 epi), and that just won’t do when you want to weave at 20 epi! If you use 2 x 10 dent heddles, that will give you 20 epi.

2. Two heddles increase your pattern possibilities.

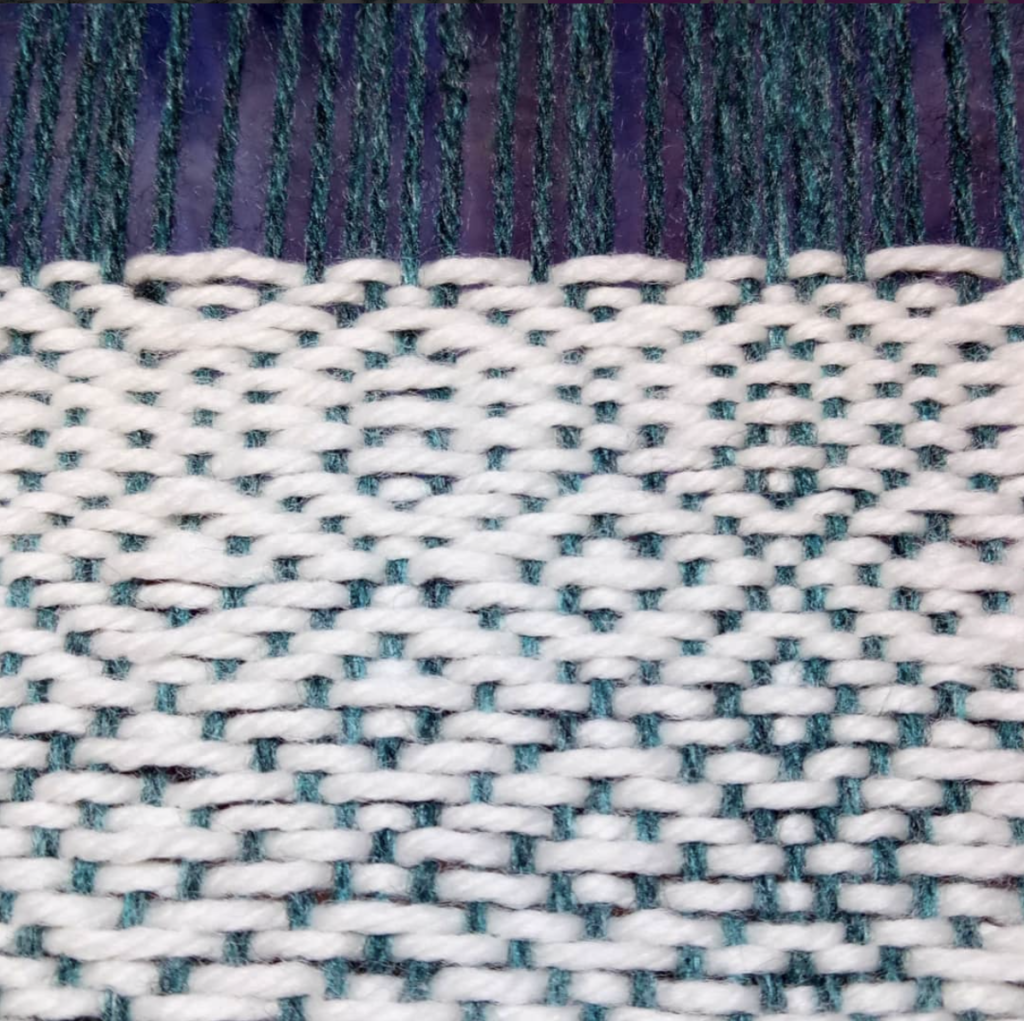
You can set up your loom with an extra heddle instead of a pick up stick to weave all kinds of patterns. You can consider an extra heddle as an extra shaft, so using two heddles will allow you to weave a three shaft pattern. And there are lots of three shaft patterns to choose from!

I really enjoy weaving with extra heddles in place of pick up sticks or heddle rods. The set up time is less and the weaving is more straightforward.

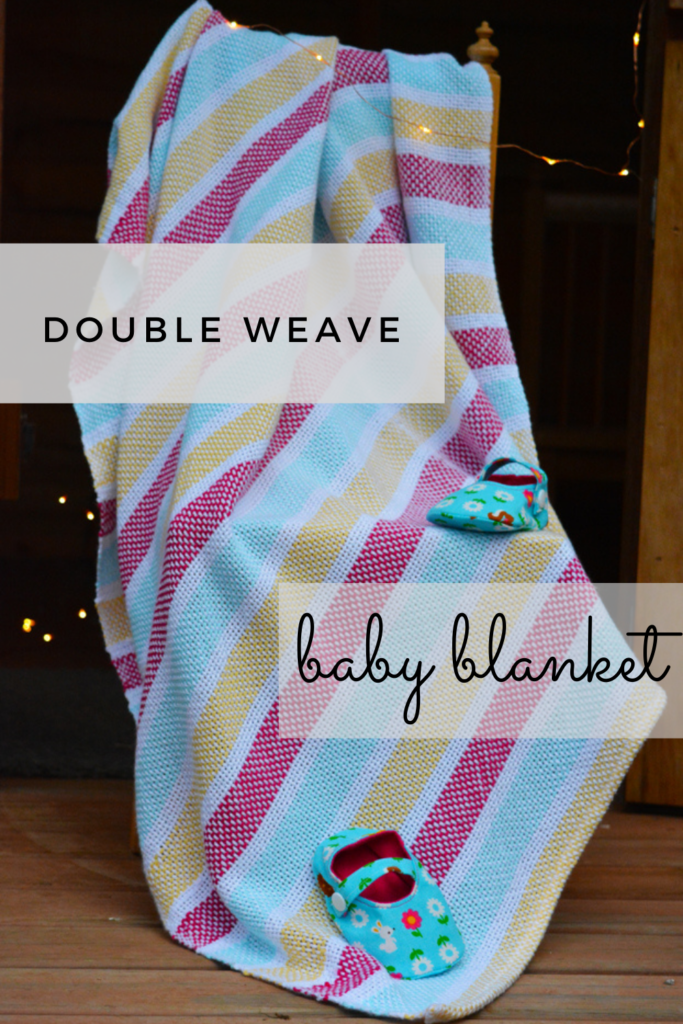
3. Two heddles allow you to weave double width cloth.

This is one of those eye opening weaving revelations that is just so exciting to discover. Your loom is not wide enough for the project you want to weave. With two heddles, you can weave double your loom’s available weaving width. It’s like magic!

Can I Use Pick Up Sticks or Heddle Rods Instead?

Of course! Extra heddles are definitely more of a financial outlay and the same results can be achieved by other means. This article discusses some pros and cons for each method.

Weaving with more than one heddle is such a popular topic that I have several resources available for weavers who wish to explore further:

Online classes-

Weaving with Two Heddles

Doubleweave Baby Blanket

Christmas Table Runner

Krokbragd Bag

PDF Patterns-

Diamond Stripe Towels

The Midnight Shawl

Double Width Blanket Ebooklet

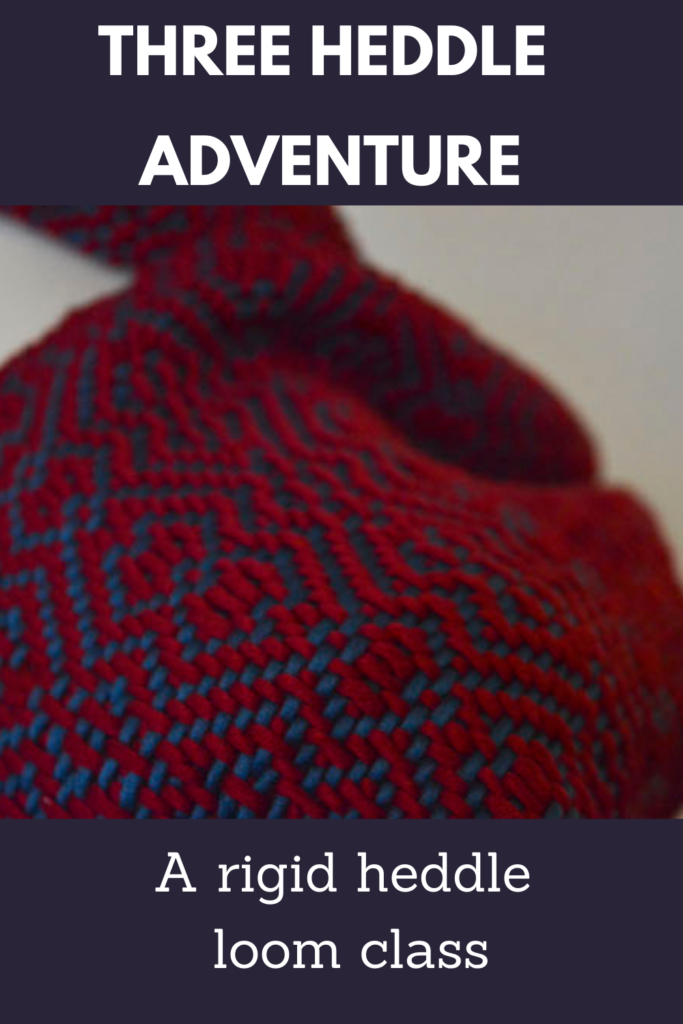
And if you’re up for a challenge, this class will walk you through how to weave on three heddles!

Three Heddle Adventures

I hope this post was interesting and helpful to you, please leave me a comment to ask questions or let me know if you enjoyed this.

Until next time…

Happy Weaving!
Filed Under: Rigid heddle weaving, Weaving Tagged With: rigid heddle weaving, two heddles

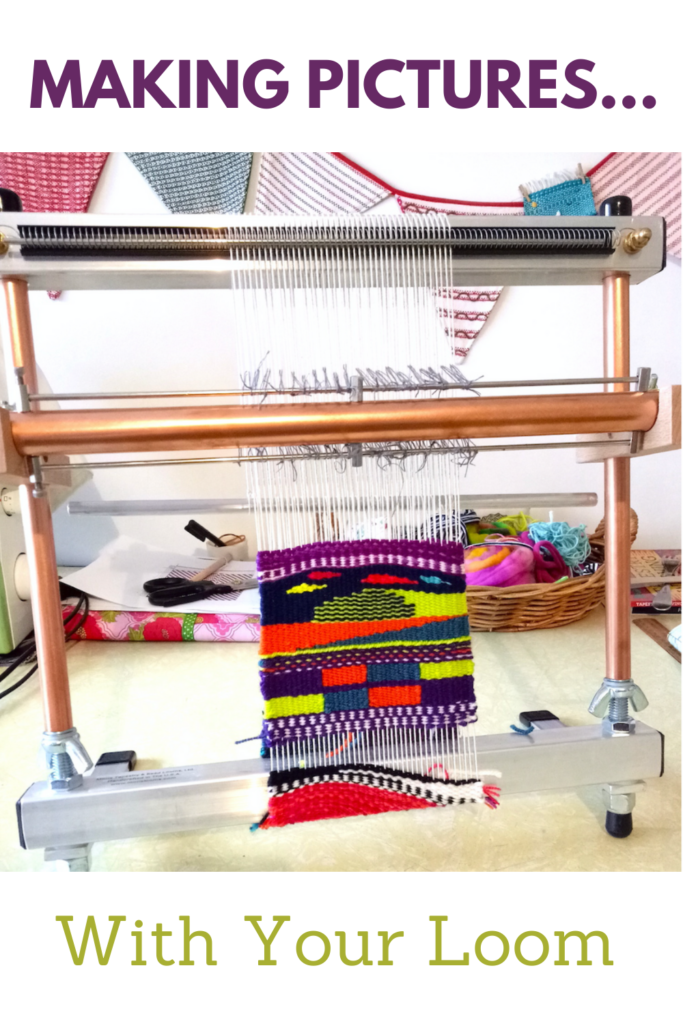
Making pictures with your loom

by Kelly 10 Comments

Something that really captivated me before I even started weaving, was the idea of using artistic creativity in weaving.

When I was younger I loved to draw and paint. In my adult life, I have not made a lot of time to devote to making art, but I have been happy to discover that there is a huge crossover with art and weaving.

This post contains affiliate links.

One of the most obvious forms of weaving that this crossover takes place in is tapestry weaving. In tapestry, the weaver can have total artistic licence through the use of colours and shapes. The shapes can be basic or complex. Colours can be blended on the loom. And, tapestry can be woven on many different types of looms.

I purchased a Mirrix Big Sister last year, as I wanted to develop my tapestry techniques and also have a dedicated tapestry loom. It is an excellent loom for tapestry, as even though it’s small, I find the available weaving room quite spacious and the tension is awesome.

Before I bought the Mirrix, I wove tapestries on my rigid heddle loom.

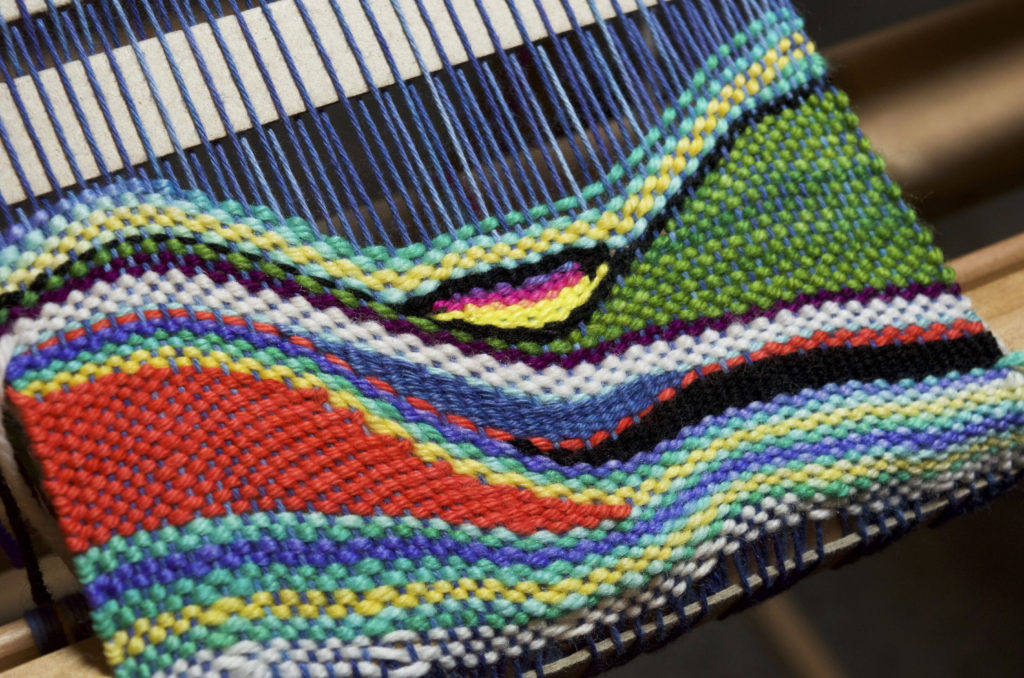
I had a lot of fun using different yarns and styles. My most popular Youtube series details how to weave in a free and unplanned style with a variety of yarns and colours.

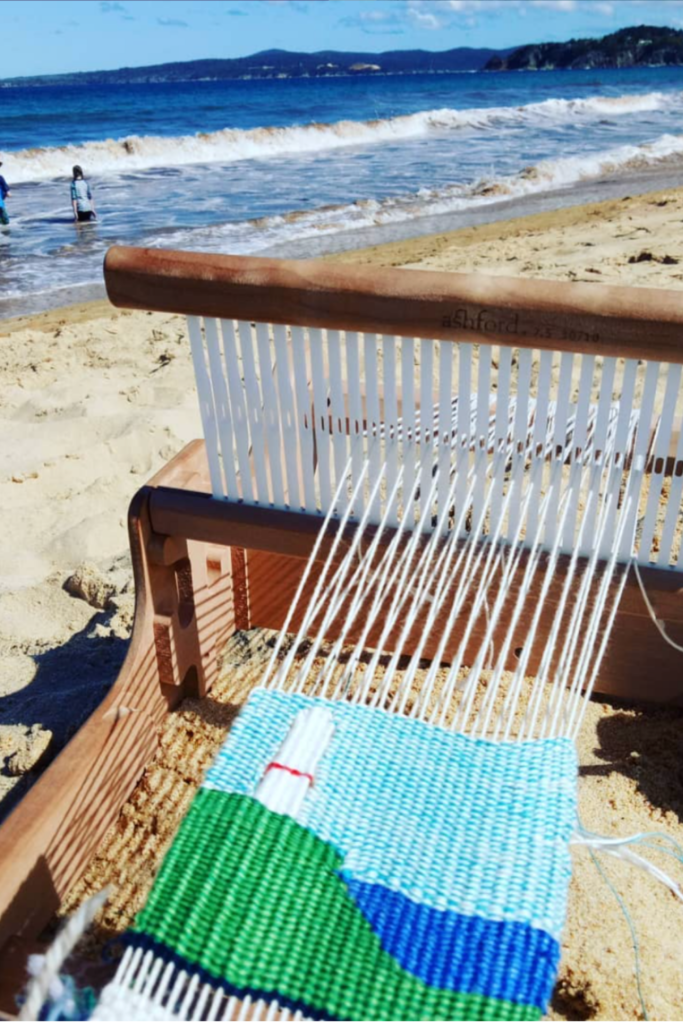
I’ve also explored more tradition tapestry techniques on the rigid heddle loom. I particularly enjoyed taking my Sampleit on vacation, which enabled me to sit on the beach, watch the kids enjoy the waves and weave. What bliss!

My adventures with tapestry on the rigid heddle loom gained so much interest on social media, that I developed a course to show others how to do it! The course includes all the basic tapestry techniques you need to know, plus how to use all of these techniques to weave a finished project. If that sounds interesting to you, the course is available here.

Another way to get started in tapestry without breaking the budget, is with a more affordable tapestry loom. Depending on your budget, you could opt for something like the Schacht Tapestry Loom, or even just an el cheapo like a Melissa and Doug simple frame loom. Some people choose to make their own by building a simple frame or repurposing a wooden picture frame or similar. Just be aware that the more tension the loom holds, the better it is for tapestry and if you go down the cheap route, well, you tend to get what you pay for.

A resource that I found to be great when starting out with tapestry, and still use for inspiration, is Kirsten Glasbrook’s book, The Art of Tapestry Weaving.

Aside from tapestry, are there other ways to make pictures with your loom. Oh, yes indeed!

If I haven’t already gushed about krokbragd on this blog enough times, here I go again! If you’re interested in going down my blog rabbit hole on this topic, start with this post. Krokbragd is a weft based, most of the time but not always 3 shaft, weft faced weave. You repeat the same order of treadling over and over, but can vary your yarn colour combinations to produce simple and complex shapes and images. It is seriously cool, and that is why I’m always gushing about it.

Many of the shapes are open to interpretation, as they can be slightly non specific, but there is really so much to explore. One of my goals for this year is to weave a striking krokbragd wall hanging using my floor loom. Can’t wait for that one! Debby Greenlaw has written a terrific book, Krokbragd: How to Design and Weave.

I have a number of Youtube lessons on krokbragd using my rigid heddle loom, but if it’s new to you, start with the above video.

Boundweave is another weft faced weave that is very adaptable and versatile. It can be woven on 4 or more shafts (so it’s possible on a rigid heddle loom). The picture possibilities are endless. I have been playing around with bound weave on rose path threading and 6 shafts recently on my floor loom.

I’m using Nancy Arthur Hoskins’ Weft Faced Pattern Weaves book for guidance. My goodness, what an extensive book – so much to learn! This was my first attempt and I’ve now branched out with some more random designs, which is all very interesting. Slow, but interesting.

There is a lot more to be said about making pictures on your loom, but I hope this post has inspired you with some of the possibilities. Have you tried any of these techniques? Which is your favourite? Let me know in the comments!

Until next time…

Happy Weaving!
Filed Under: 4 shaft weaving, 8 shaft weaving, Floor Loom Weaving, Krokbragd, Rigid heddle weaving, Tapestry Weaving, Weaving Tagged With: boundweave, pictures, tapestry

Rigid Heddle Loom vs Table Loom: Which is Best for Beginners?

by Kelly 14 Comments

If you’re trying to decide between a rigid heddle loom and a table loom, you’re not alone. It’s one of the questions I’m asked most often by new weavers, and with so many looms available, it’s easy to feel unsure about which one is the right choice.

The good news is that there isn’t a “wrong” answer. Both rigid heddle and table looms are wonderful weaving tools, but they’re designed with different goals in mind. The best loom for you will depend on your budget, the types of projects you want to weave, and whether you’re looking for a simple introduction to weaving or you’re ready to explore more complex weave structures.

Having woven on both types of looms for many years and taught thousands of students around the world, I can honestly say that each has its own strengths. In fact, I started my own weaving journey on a rigid heddle loom before later moving on to a table loom and eventually floor looms. Every step has taught me something valuable.

Rigid Heddle Loom vs Table Loom

In this article, I’ll compare the rigid heddle loom vs table loom, share the pros and cons of each, and help you decide which loom is the best fit for your weaving journey. Whether you’re buying your very first loom or thinking about upgrading, my hope is that you’ll finish this guide feeling confident in your decision.

This post contains affiliate links. If you purchase through these links, I may earn a small commission at no extra cost to you. Thank you for supporting my work and helping me continue to create free weaving tutorials and resources.

Before You Buy Your First Loom

If possible, my number one recommendation is to try weaving on a loom before you buy one. I know that isn’t always practical, but if you have a friend who weaves, a local weaving guild nearby, or a weaving retailer that offers demonstrations, it’s well worth taking the opportunity.

Spending even a short amount of time at a loom can tell you a lot about whether it feels comfortable and enjoyable to use.

When I was choosing my first loom, I kept coming back to three simple questions:

  • How much does it cost?
  • How easy is it to learn?
  • What do experienced weavers recommend?

Like many beginners, I wasn’t ready to make a huge financial investment in a hobby I’d never tried before. I wanted a loom that was affordable, straightforward to use and highly recommended by people who already had experience.

After plenty of research and chatting with other weavers, I chose the Ashford 24-inch Rigid Heddle Loom, and this turned out to be an excellent decision.

💡 If you’re still deciding, you may also find my First Loom Buyer’s Guide helpful, where I compare several popular loom types and explain who each one is best suited to.

Compared to a table loom, I could purchase both the loom and the stand for a fraction of the price. That meant I could start weaving without spending a small fortune, while still investing in a quality loom that I knew would last.

Looking back, I think it was the perfect first loom for me. As a complete beginner, the simple design wasn’t intimidating, and I could focus on learning the fundamentals of weaving rather than feeling overwhelmed by a more complex setup. It gave me the confidence to start creating beautiful projects right from the beginning, and that positive experience is one of the reasons I still recommend rigid heddle looms to so many new weavers today.

Another reason I chose a rigid heddle loom was its simplicity. I was a complete beginner. I could tell just by looking that it was less intimidating than a table loom. It was important to find a loom that would allow me to learn the basics. But without feeling overwhelmed by lots of moving parts and extra setup.

I also reached out to friends in the crafting community who already owned rigid heddle looms. Their positive experiences and recommendations gave me the confidence to take the plunge, and I’m so glad they did. Looking back, I don’t think I could have chosen a better loom to begin my weaving journey.

Of course, every weaver has different goals, and what suited me may not be the perfect choice for everyone. That’s why it’s helpful to understand the strengths and limitations of each loom before making your decision.

So, let’s take a look at the pros and cons of a rigid heddle loom based on my own experience after many years of weaving and teaching others how to weave:

Rigid Heddle Loom Pros

After many years of weaving on a rigid heddle loom and teaching thousands of students, these are the advantages that stand out to me the most.

Lightweight and Portable

One of the biggest advantages of a rigid heddle loom is how easy it is to move around. It’s lightweight enough to carry from room to room, take to workshops or weaving groups, or even pack for a holiday. If you don’t have a dedicated craft room, this flexibility is a huge bonus.

Beginner-Friendly

A rigid heddle loom is one of the easiest weaving looms to learn on. Like any new skill, it takes a little practice to become confident, but with good instruction, enthusiasm and regular weaving, you’ll be creating beautiful projects sooner than you might think.

Quick to Warp and Start Weaving

One of the reasons I still enjoy weaving on a rigid heddle loom is that it’s very quick to direct warp and set up. Compared to multi-shaft looms, warping is straightforward, so you can spend less time preparing your loom and more time actually weaving.

More Versatile Than You Might Think

Although a rigid heddle loom is technically a two-shaft loom, don’t let that fool you. There is so much more you can do than plain weave.

By using pickup sticks, heddle rods, second or third heddles and other simple techniques, you can weave a surprising variety of textured fabrics and even reproduce many three and four-shaft patterns.

If you’d like to explore these possibilities, I have dedicated resources that show you exactly how to:

  • convert 3 and 4-shaft drafts for a rigid heddle loom
  • weave four-shaft patterns using three heddles
  • weave 3 and 4 shaft drafts on a rigid heddle loom
  • master pick up sticks

Many weavers are amazed at just how capable a rigid heddle loom can be once they move beyond the basics.

Very Little Loom Waste

Nobody likes wasting yarn! One thing I really appreciate about rigid heddle looms is that they produce very little loom waste compared to many other types of looms, allowing you to make the most of your warp.

Comfortable to Weave On

I find a rigid heddle loom very comfortable to use. Whether it’s sitting on a stand or resting on a table, I can weave for long periods without feeling awkward or strained. I do recommend purchasing a stand if you can, which allows you to get very close to your loom, providing superior comfort.

An Affordable Way to Start Weaving

For many beginners, cost is an important consideration. A rigid heddle loom is one of the most affordable ways to begin weaving while still investing in a quality loom that can grow with your skills. Even after adding accessories over time, it’s still an excellent value and can provide years of enjoyment.

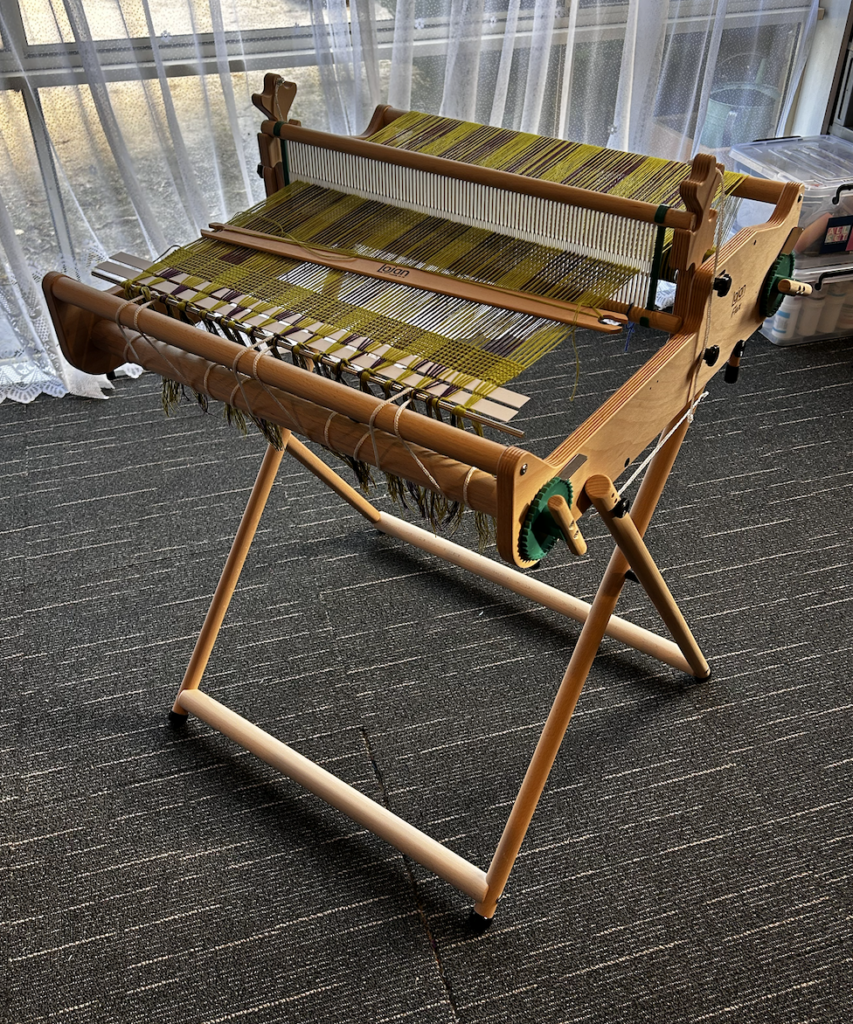
Lojan Flex Rigid Heddle Loom (50cm)

Rigid Heddle Loom Cons

While I’m a huge fan of rigid heddle looms, no loom is perfect. Here are a few things to keep in mind before you decide if it’s the right loom for you.

More Advanced Weaving Requires Extra Setup

One of the biggest strengths of a rigid heddle loom is also one of its limitations. You can absolutely weave far more than plain weave by using pickup sticks, heddle rods, multiple heddles and other techniques. However, these methods require extra setup, research and learning, and a little more planning.

If intricate multi-shaft patterns are your main interest, a table loom is designed to make that process more efficient. With a rigid heddle loom, you’ll simply spend a little more time and introducing more tools for setting things up.

Limited Reed Sizes

Rigid heddle reeds are available in several sizes, but they don’t cover the same range as reeds for multi-shaft looms. For example, the finest standard rigid heddle reed available is currently 15 dpi (dents per inch). Because the reed is made from durable plastic set into a wooden frame, there are practical limits to how fine it can be manufactured.

For many weavers this won’t matter at all, but if your goal is to weave very fine fabrics with fine threads, it’s something worth considering.

Fine Yarns Can Be More Challenging

Although you can weave with fine yarns on a rigid heddle loom, achieving consistently firm warp tension can be more difficult than on a table or floor loom. Personally, I find that rigid heddle looms really shine when working with medium-weight or thicker yarns.

Weaving Width Matters

Before buying any loom, think about the kinds of projects you hope to make in the future.

If you’re mainly interested in scarves, tea towels, table runners and smaller homewares, a narrower loom may be all you ever need. But if you dream of weaving wide shawls, blankets, ponchos or fabric for sewing garments, it’s worth considering a wider loom from the beginning.

Many weavers (myself included!) discover they enjoy weaving so much that they soon want to make larger projects. Buying the widest loom your budget and available space comfortably allow can sometimes save you from wanting to upgrade quite so quickly.

The widest rigid heddle loom currently on the market is 48″ (120cm) and while this is a generous weaving width, some weavers report difficulty in the ergonomics. Working on a rigid heddle loom of this width, having to reach to pass the shuttle and then beat with a large heddle or reed can cause neck, shoulder and back issues for some weavers.

Accessories Can Add Up

One of the reasons rigid heddle looms are so popular is that they’re an affordable way to begin weaving. However, as your skills grow, you may find yourself adding extra reeds, pickup sticks, heddle rods, additional heddles, shuttles and other accessories.

None of these purchases are essential when you’re starting out, and you can build your collection gradually over time. Even with these extras, a rigid heddle loom remains one of the most economical ways to enjoy weaving.

Why Upgrade from a Rigid Heddle Loom to a Table Loom?

A question I often hear is:

“If a rigid heddle loom can do so much, why would anyone buy a table loom?”

It’s a fair question!

For me, the answer was simple – I was ready to take the next step in my weaving journey without making the bigger investment of buying a floor loom.

I’ll admit it… after a few years of happily weaving on my rigid heddle loom, I developed a serious case of loom envy! Everywhere I looked, I saw gorgeous multi-shaft projects and intricate 4 to 8 shaft patterns, and I couldn’t help thinking, “I want to weave that!”

If you’re completely content weaving on your rigid heddle loom forever, I’m genuinely happy for you. I still own and weave on three rigid heddle looms! My interest in a table loom was not about replacing my rigid heddle loom – it was about expanding my weaving journey.

But I was ready for a new challenge. I wanted to learn more about weave structures, experiment with complex patterns, and weave on a loom that was purpose-built for multi-shaft weaving.

That’s when I bought my first table loom: the Ashford 8-Shaft Table Loom (32″).

It turned out to be the perfect stepping stone between my rigid heddle loom and, eventually, my floor looms. I learned so much during that stage of my weaving journey, and I still think a table loom is an excellent choice for weavers who are ready to expand their skills.

So, with that in mind, let’s look at the advantages and disadvantages of weaving on a table loom.

Lojan Flex Shaft Loom (mine is set up for 4 shafts currently)

Table Loom Pros

If you’re ready to explore multi-shaft weaving, a table loom offers a wonderful balance between capability and affordability. Here are the things I appreciate most about weaving on a table loom.

A Great Introduction to Multi-Shaft Weaving

For many weavers, a table loom is the natural next step after a rigid heddle loom. It allows you to explore more complex weave structures without the cost or space requirements of a floor loom.

If you’ve been wanting to experiment with twills, overshot and other multi-shaft patterns, a table loom opens up a whole new world of creative possibilities.

Designed for Complex Patterns

One of the biggest advantages of a table loom is that all of the shafts are already built into the loom. Once you’ve dressed the loom- warped, threaded, sleyed and tied on, you can simply enjoy weaving without needing to add pickup sticks, extra heddles or other modifications to create different weave structures.

Although dressing a table loom takes more time initially, the weaving itself is often more efficient, especially for intricate patterns.

Excellent for Boat Shuttles

Table looms generally produce a generous, clean shed, making them well suited to weaving with boat shuttles. This allows the shuttle to glide smoothly through the warp and makes weaving both enjoyable and efficient.

Compact for Storage

Although table looms are taller than rigid heddle looms, most models are built for portability and have a folding castle. This makes them much easier to store or transport when they’re not in use, especially if space is limited.

Comfortable and Stable to Weave On

One thing I really like about a table loom is that it sits securely on a sturdy table, bench or stand. Once it’s in position, it feels solid and stable while weaving, making it a pleasure to use for longer projects.

Greater pattern possibilities

If you love studying weave structures and experimenting with drafts from weaving books or magazines, a table loom makes that process much more straightforward. Instead of adapting patterns to suit your loom, you can simply thread the shafts and weave the draft as it was designed.

The Floor Loom Experience

A table loom is a great introduction to floor loom weaving, if that is a goal of yours. Although you operate the shafts with levers rather than treadles, if your table loom is set up on a stand, it can feel quite similar to weaving on a floor loom as an immersive experience.

No Treadle Limitations

With many floor looms, you are limited to a certain number of treadles. You can opt for a skeleton tie up or use a treadle reducer to help with this, but with a table loom you don’t have this limitation. Your shaft combinations are not limited by being tied to a treadle or treadles, so you have even more patterning possibilities due to the ease of increased shaft combinations.

Table Loom Cons

As much as I enjoy weaving on a table loom, there are a few things worth considering before deciding if it’s the right loom for you.

You’ll Need a Sturdy Table or Stand

Unlike a rigid heddle loom on a stand, a table loom needs a solid, stable surface to sit on. A sturdy table or bench is important to prevent movement while weaving, especially on larger looms. I haven’t always used stands for my table looms, but when I got my Lojan Flex Shaft Loom I also purchased a floorstand and it has been a game changer!

They’re Less Portable

Although table looms are more compact than floor looms, they’re still considerably heavier and usually larger than rigid heddle looms. Depending on the size you choose, you may need another person to help move it safely.

If portability is important to you – for example, if you like taking your loom to workshops or weaving in different rooms, a rigid heddle loom could be the easier option.

Finding a Comfortable Weaving Position

Some weavers prefer to stand while weaving on a table loom, while others sit. Personally, I’m definitely in the “sit down” camp! My back injury will not allow me to stand for regular periods.

For the most comfortable experience, I recommend using a sturdy, height adjustable chair so you can find a good working position. Because everyone’s height and setup are different, it may take a little experimenting to discover what works best for you.

Dressing the Loom Takes Time

There’s no getting around it. Threading and dressing a table loom is more time consuming than dressing a rigid heddle loom.

Warping, threading the heddles, sleying the reed and tying on all require patience and attention to detail. The good news is that once everything is set up, weaving can be wonderfully efficient, particularly for complex patterns.

Limited Flexibility During a Project

Once your warp has been threaded through the heddles, those heddles remain in place for the duration of the project. Unlike a rigid heddle loom, where it’s relatively easy to introduce pickup techniques or heddle rods as you weave, making major changes to your threading on a table loom isn’t practical once you’ve started.

Smaller Shed on Some Looms

Depending on the table loom you’re using, the shed (the opening created between the warp threads) can sometimes be smaller than you’d like. This may make passing the shuttle through the warp a little slower, particularly when weaving wider projects or using bulkier yarns.

Advancing the Warp

On larger table looms, you may need to stand up to advance the warp as you weave. It’s only a minor interruption, but it’s worth knowing if you enjoy long, uninterrupted weaving sessions from a seated position.

Reading through that list, it might seem as though table looms have quite a few drawbacks! In reality, I simply wanted to give you an honest picture of what to expect. Every type of loom has its strengths and its limitations, and understanding those before you buy can help you make a choice you’ll be happy with for years to come.

Personally, I think table looms are fantastic. Buying my first table loom was one of the biggest turning points in my weaving journey. It challenged me to learn new skills, introduced me to the fascinating world of multi-shaft weaving, and gave me the confidence to tackle more intricate weave structures and patterns.

For me, a table loom was the perfect stepping stone between my rigid heddle loom and my first floor loom. That said, I never saw it as a replacement for my rigid heddle loom. Even today, I enjoy weaving on both because each one offers something different, and each has its own place in my studio.

If you’re trying to decide between a rigid heddle loom and a table loom, I hope this comparison has helped you see that there isn’t a “best” loom – only the loom that’s best for you, your budget, your interests and the kinds of projects you want to create.

Rigid Heddle Loom vs Table Loom: At a Glance

If you…Choose…
Are completely new to weaving✅ Rigid heddle loom
Want the quickest setup✅ Rigid heddle loom
Have a limited budget✅ Rigid heddle loom
Want to travel easily with your loom✅ Rigid heddle loom or smaller table loom
Love complex weave structures✅ Table loom
Already know you’ll want 4–8 shaft patterns✅ Table loom
Want a stepping stone to a floor loom✅ Table loom

The Looms I Personally Own and Use

Over the years, I’ve been fortunate enough to weave on many different looms, but these are the rigid heddle and table looms you’ll regularly see me using in my tutorials, courses and YouTube videos. I genuinely enjoy weaving on all of them because each one has its own strengths.

My Rigid Heddle Looms

  • Ashford 24″ Rigid Heddle Loom – This was my very first loom, and it’s the one that started my weaving journey. It’s still a wonderful size for scarves, tea towels and many everyday projects. You can see my review of this loom here.
  • Ashford SampleIt Loom – Perfect when I want to sample yarns, test colour combinations or weave smaller projects without setting up a larger loom.
  • Lojan Flex Rigid Heddle 50cm – This loom has a unique heddle that is put together in sections, so you can easily swap out sizes when you want to without having to buy a whole new heddle. You can see my review of this loom here. A major bonus of this loom is it can be upgraded to either 4 or 8 shafts with a conversion kit from Lojan.
  • Lojan Flex Rigid Heddle 70cm – New size, 2026 release. Now available.

My Table Looms

  • Ashford 8-Shaft Table Loom (16″) – My first table loom and the loom that introduced me to multi-shaft weaving. It’s been an invaluable part of my weaving journey. I first bought the 80cm width but later sold it to fund a floor loom. Now I own the 16″. You can see my assembly video for this loom here.
  • Lojan Flex Shaft Loom (50cm) – This ranks number one in my table loom collection for the ease of set up and comfortable weaving. I plan to upgrade my 4 shafts to 8 shafts soon. Upgrading is simple with a conversion kit from Lojan. You can see my review of this loom here.
  • Louet Jane 16 shaft (90cm) – My newest table loom acquisition is all about the shafts! This loom is very similar to my Louet David, so learning the set up has been quite simple. I love having the extra shafts to indulge in weave structures like block double weave ❤️ You can see my review of this loom here.

I am a reseller for Lojan Wheels and Looms and also Louet in Australia. If you are in Australia and would like information on any Lojan or Louet products, please reach out 😊

In the USA I am an affiliate for, and recommend Revolution Fibers for Lojan and Louet products.

If you enjoyed this post, you may also want to watch the companion video:

Ready to Learn More?

I hope this comparison has helped you feel more confident about choosing the right loom for your weaving journey. Whether you’re leaning towards a rigid heddle loom or a table loom, you’re embarking on a wonderfully creative craft that can bring years of enjoyment.

If you’d like to continue your research, here are a few resources you might find helpful:

  • New to table looms? Read my in-depth resources guide to table looms
  • Thinking about a rigid heddle loom? I have dozens of articles covering everything from choosing your first loom to warping, troubleshooting and project ideas. Start here to learn more.

Ready to Start Weaving?

If you’ve decided that a rigid heddle loom is the right choice for you, my best selling From Woe to Go! Beginner Rigid Heddle Weaving course will guide you through every step, from setting up your loom to confidently weaving beautiful projects. It’s designed specifically for beginners and has helped thousands of new weavers get started with confidence.

If you’re excited to explore table loom weaving, my comprehensive Weaving on a Table Loom course will teach you everything you need to know, whether you’re setting up your first project or ready to develop your multi-shaft weaving skills.

Whichever loom you choose, I wish you every success on your weaving journey.

Until next time…

Happy Weaving!
Filed Under: Rigid heddle weaving, Table loom weaving, Weaving Tagged With: rigid heddle loom

Which weight of yarn do I choose?

by Kelly 11 Comments

For newer weavers, yarn choice has to be one of the biggest conundrums. We are totally spoilt for choice when it comes to variety of yarns available these days, but there are some important aspects to consider before you start shopping.

I often recommend that newer weavers start out by using knitting yarns. There are a couple of reasons for this.

  • Knitting yarn is readily available.
  • It is usually economical.
  • Many new weavers have a knitting background and therefore will often have a healthy stash of yarn!
  • Knitting yarn often has a nice amount of elasticity and are therefore quite forgiving to work with.
  • And finally, it’s usually thicker than weaving yarn, so for first projects it is an excellent choice – it will make your warping and weaving faster and easier.

*This post contains affiliate links. For more information, please see my disclosure policy.

When you purchase a weaving specific yarn online or in a shop, the recommended sett for that yarn will often be provided. Not so with knitting yarns, which tend to come with knitting needle or crochet hook recommendations instead. But, this is no problem to the savvy weaver who knows how to figure out the sett for her/himself! All you need is your chosen yarn and an inch ruler.

If you’re not familiar with the concept of sett in weaving, I explain it in this video:

And if you need an easy demonstration of how to figure out the sett for your chosen yarn, I recommend this video:

The demonstration in this video refers to balanced plain weave, the twill equation is a little different.

The next consideration after you have figured out the ideal sett is what you’re actually weaving. A scarf, for example may require a different approach to a table runner or placemat, even if you’re using the same yarn.

Let me give an example:

Say I have a light worsted weight (Australian 8 ply, DK) cotton that is lovely and soft. Say that I’ve done my wrap test to determine the sett and it showed me that my 7.5 heddle/reed is the best option. I go ahead with this sett because I want a soft and slightly flow-ey scarf.

I like the yarn so much that I decide to also use it for a table runner. But I want my table runner to have a firmer feel, so that it stays put on the table and is somewhat solid. Given my experience with weaving the scarf at a sett of 7.5, I decide that I’m going to use my 10 dent heddle/reed for the runner, as it will ensure that my warp and weft interlacement is closer than it was with the scarf, giving me a firmer fabric.

Here is a little tip when selecting a yarn for a woven piece you intend to wear eg. a scarf. Hold the yarn to your cheek and lightly rub back and forth. If the yarn feels scratchy or unpleasant to your skin, it will not be suitable to wear. If the shopkeeper and patrons are knitters, crocheters or weavers, they will understand what you’re doing. If not, you may get some odd stares!!

There is another, basic test you can perform if you’re unsure of yarn to heddle/reed suitability.

That is to grab your yarn and thread a single of it through a slot. If the yarn doesn’t fit through the slot, it is too thick. If it doesn’t fit, but you have to encourage it to get through, it is likely too thick. If you rub the yarn up and down in the heddle/reed and it seems a bit squashed, it is likely too thick.

Remember that your yarn has to deal with that friction for the entirety of your project, so if there is too much friction you increase the likelihood of broken warp threads and a less than comfortable weaving experience.

Likewise, if you thread your yarn through a slot and there is a heap of space leftover and your yarn seems very loose in the slot, it may not be the right heddle/reed for your project. Unless of course you are trying to achieve an open and airy fabric!

So, what if you don’t have a heddle/reed that is the equivalent sett for your yarn?

This can happen when using a finer yarn. The finest heddle/reed currently available for a rigid heddle loom is a 15 dent. But the recommended sett for my yarn is 30. Well, you can simply double your ends to achieve the right sett.

Then you have the choice for the weft, if using the same weight of yarn as warp, whether you double the weft as well or not. And this choice comes back once again to the purpose of the project and the type of fabric desired. Which brings me to sampling.

I used to think that sampling was a big waste of time. I’m not sure at what point I became a sampling convert, but it was probably somewhere in the throws of another project that did not turn out as anticipated.

Sampling is an absolutely failsafe method to guarantee the success of your project. It allows you to try the yarn at a particular sett, in particular colours, experiment with weft density, take the project off and wet finish. So, you get a mini glimpse of what your actual project will look like. It’s a very valuable education tool!

There is a lot to cover when it comes to the topic of yarns and this post really only scratches the surface.

If you found this post interesting and want to delve further into choosing yarns and understanding all the numbers, I have an online class that could be just the ticket. This is a short and sweet class that includes PDF charts for selecting the correct heddle/reed for your project and converting yarn terms for different countries.

You can purchase the class by following this link.

I have some other yarn related resources that will be helpful too.

The Weaver’s Toolkit is an ebooklet that includes all kinds of useful charts and information that are invaluable to the weaver.

I also have an “All about Yarn” playlist on Youtube, which includes 11 free videos:

I hope this post has been helpful to you, and as always, comments and questions are welcome.

Until next time…

Happy Weaving!
Filed Under: Rigid heddle weaving, Tutorials, Weaving Tagged With: choosing yarn, rigid heddle weaving, weaving yarn

Colour and Weave Basics for Beginners: Plain Weave Patterns That Pop

by Kelly 12 Comments

Recently I was talking about patterns for the rigid heddle beginner (you can read that post here if you missed it). I briefly mentioned Colour and Weave as an additional technique to jazz up your weaving, but decided that it would need to have it’s own discussion, as it is so versatile and varied.

Firstly, what is colour and weave?

Well, it’s very simple. It’s the introduction of colour, usually in a set sequence, first in the warp and then also in the weft. When you begin weaving, that is when the magic happens!

The prearranged colours cross paths and have a party on your loom 🥳

Plaid, which I discussed recently is a type of colour and weave, as you have set colours in set amounts in the warp and then cross with the same colours and amounts in the weft. Take a look at this post if you want to see some examples of plaids I made on my weaving software.

*This post contains some affiliate links. For further information please see my disclosure policy.

Candy Store Scarf

When the warp and weft colours cross over each other, they can produce some very interesting effects. You can use colour and weave in all kinds of weave structures, but it works great for plain weave and is perfect for the newer weaver. You are still weaving your familiar plain weave, but it can look very different! My Candy Store Scarf is the perfect example of this.

Colour and weave is wonderful for the rigid heddle weaver as it is such a simple “next step” once you have practiced plain weave and are looking for a new and interesting challenge.

Log Cabin

Some of the most famous and popular examples of colour and weave are Log Cabin and Houndstooth. These are often considered a “next step” for weavers venturing out from limited colour plain weave.

Although you can use multiple colours for both of these weaves, it can be a good idea to limit the colours to two that contrast well, otherwise the beauty of the crossing colours can become a bit lost.

Houndstooth colour arrangement is very simple, whereas log cabin is a little more complicated and warping can take quite some time. So, if you are a newer weaver, definitely have a go at houndstooth before attempting log cabin.

Houndstooth

Jane Patrick’s “The Weaver’s Idea Book” is a great resource for getting started with this technique. She has a section on weaving a colour and weave sampler and it includes many examples or suggestions for colour arrangements.

If you’re interested in exploring colour and weave, you have come to the right place! Here is a list of resources I have that can help.

Log Cabin Table Runner Class

Log Cabin Rable Runner PDF

Houndstooth Placemats Class

Candy Store Scarf PDF

The Town Bag PDF

The Weekend Scarf PDF

Pinwheels

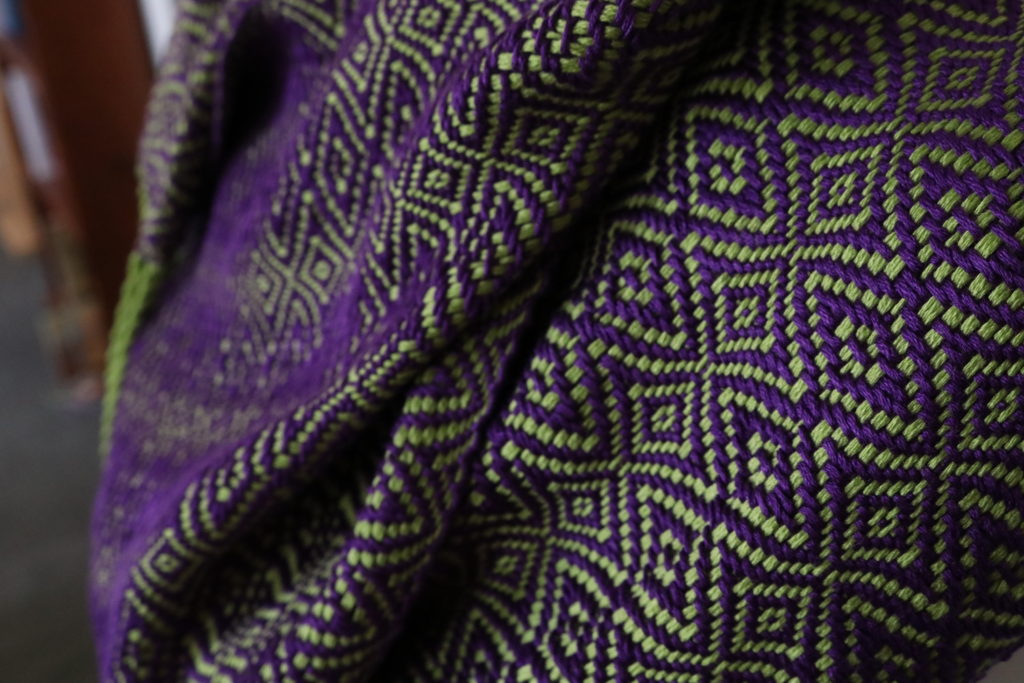
Finally, I want to mention the applications of colour and weave beyond 2 shafts. Pinwheels are an easily recognisable example of this and can be woven on 4 or 8 shafts. Even though there are more shafts, the initial warp colour setup, then weaving colour sequence is still an essential aspect. My Pinwheels Table Topper class shows you how to set up your rigid heddle loom to weave this beautiful 4 shaft pattern.

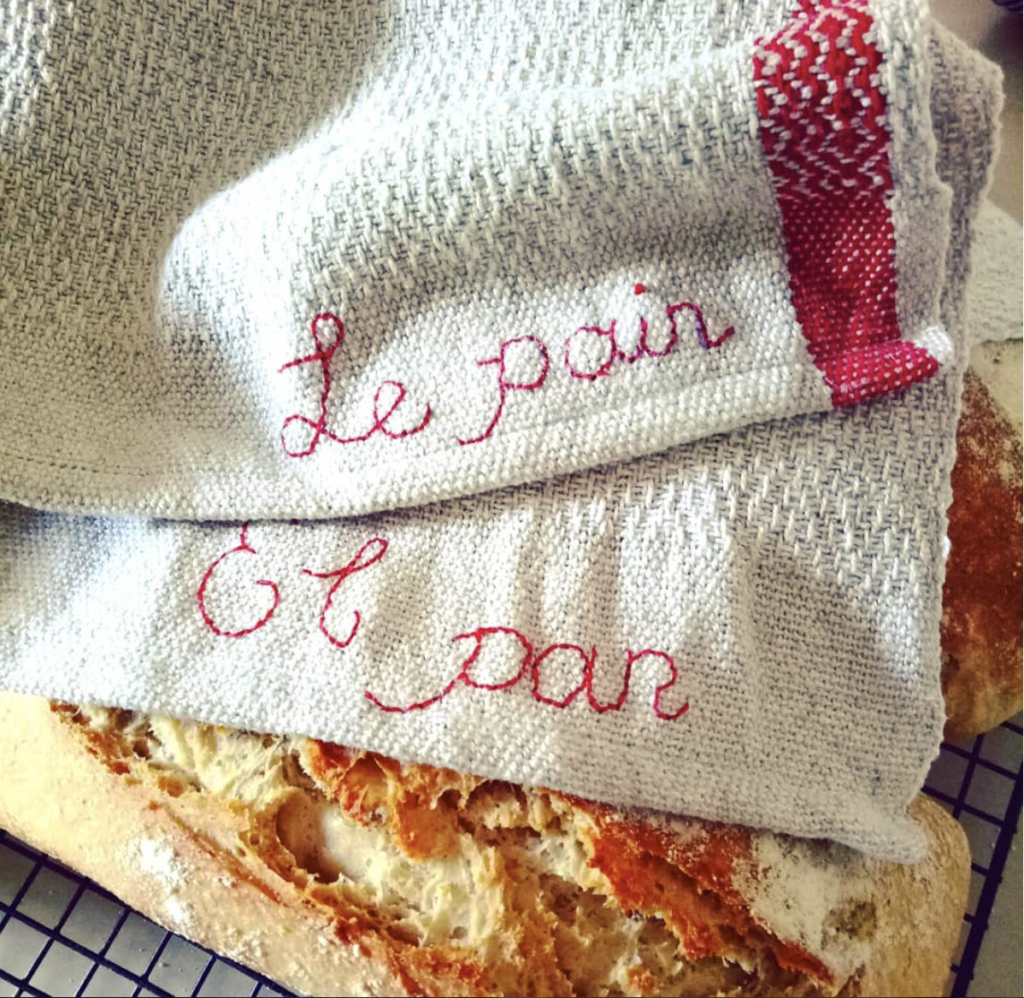
When you get into 4 shafts and beyond, you can play around with your colour placement in the warp and weft in order to highlight certain areas of pattern. When I wove some bread towels for myself, I included a contrasting strip of red in the warp.

This is really not a colour and weave because I had already threaded the loom with the intended pattern – the pattern didn’t appear strictly because of my colour placement.

But I still think it’s worth mentioning to highlight how patterns can appear or at least become more prominent when selective colour arrangement is used. If I had planned this piece better, I would have ensured in the design process that the strip of red was going to be wide enough for one full repeat of the pattern – you can see part of the pattern has been cut off.

Another example from a 4 shaft project for the floor loom or table loom weavers is the Bright and Beautiful Towels.

This project uses a twill weave structure but strategically uses colour in the warp and weft so that they meed at specific points of the pattern AND so that they weave squares. This twill pattern is beautiful to begin with, but playing with the colour arrangement makes it truly unique and eye catching.

I think it’s a wonder that so many fascinating patterns can appear just by the meeting of colour!

I hope you enjoyed this post, and please leave any thoughts of questions you may have in the comments below – I would love to hear from you!

Until next time…

Happy Weaving!
Help Support My Free Content 😀

Filed Under: Colour and Weave, Pinwheels, Rigid heddle weaving, Rigid Heddle Weaving Patterns, Weaving Tagged With: colour and weave, weaving

  • « Go to Previous Page
  • Page 1
  • Interim pages omitted …
  • Page 9
  • Page 10
  • Page 11
  • Page 12
  • Page 13
  • Interim pages omitted …
  • Page 16
  • Go to Next Page »

Primary Sidebar

About Kelly Casanova

Join Kindred Creatives!
Hand crafted boat shuttles

Categories

Archives

Meta

  • Log in
  • Entries feed
  • Comments feed
  • WordPress.org

Copyright © 2026 Kelly Casanova Weaving Lessons on the Foodie Pro Theme