• Skip to main content
  • Skip to primary sidebar

Kelly Casanova Weaving Lessons

  • Hi! I’m Kelly!
    • Disclosure
  • Online Weaving School Class Index
    • Common account issues
    • Common technical issues
    • What do I get with a membership?
  • New to rigid heddle weaving? Start here!
    • Never heard of the rigid heddle loom?
    • How to weave neat edges on the rigid heddle loom
    • Rigid heddle weaving
    • Rigid Heddle Weaving Patterns
  • Patterns
  • Subscribe

Kelly

What are finger controlled techniques?

by Kelly 6 Comments

Just when you thought you had tried everything in weaving, you discover there is more! Finger controlled techniques can add a whole other dimension to the way you’ve been weaving and offers new and exciting possibilities.

So, what are finger controlled techniques?

Also know as “finger manipulation weaving”, finger controlled techniques is a kind of umbrella term for a group of weaving techniques. It basically means that, rather than using just the shafts on your loom to control the threads and achieve patterning, you are also bringing your hands directly onto the warp to perform manipulations.

*This post contains affiliate links. For further information, please see my disclosure policy here.

Often the finger manipulations will involve using a tool of some sort to aid you in holding the pattern created. Some examples of tools used are pick up sticks, knitting needles, threading hooks and crochet hooks.

Why use finger controlled techniques?

There are many good reasons to introduce finger controlled techniques into your weaving.

  • It increases your pattern possibilities.
  • You can achieve patterns that may not typically be associated with traditional weaving.
  • You can weave a drastically different pattern to what you normally might.
  • It is an exciting, interesting and sometimes meditative way to weave.
  • It can be used in small sections or borders to accentuate a plain or other weave structure.
  • It can be incorporated seamlessly into any loom set up.
  • You don’t need extra shafts or a bunch of extra equipment to give it a try.
  • You can set up your loom for plain weave and introduce the finger techniques on the same warp.
  • The techniques are good for an adventurous beginner. Make sure you have a plain weave project or two under your belt first though.
  • There are many different types of techniques to try, all with different effect. And each one has variations!

Which kind of looms work for using these techniques?

That is the beauty of it! Most finger controlled techniques are worked at the front of the loom, on the warp directly in front of you. This means it’s suitable for rigid heddle looms, table looms and floor looms.

Today I’m going to discuss the 3 most popular and well known finger controlled techniques in weaving:

  1. Brook’s Bouquet
  2. Leno
  3. Danish Medallions

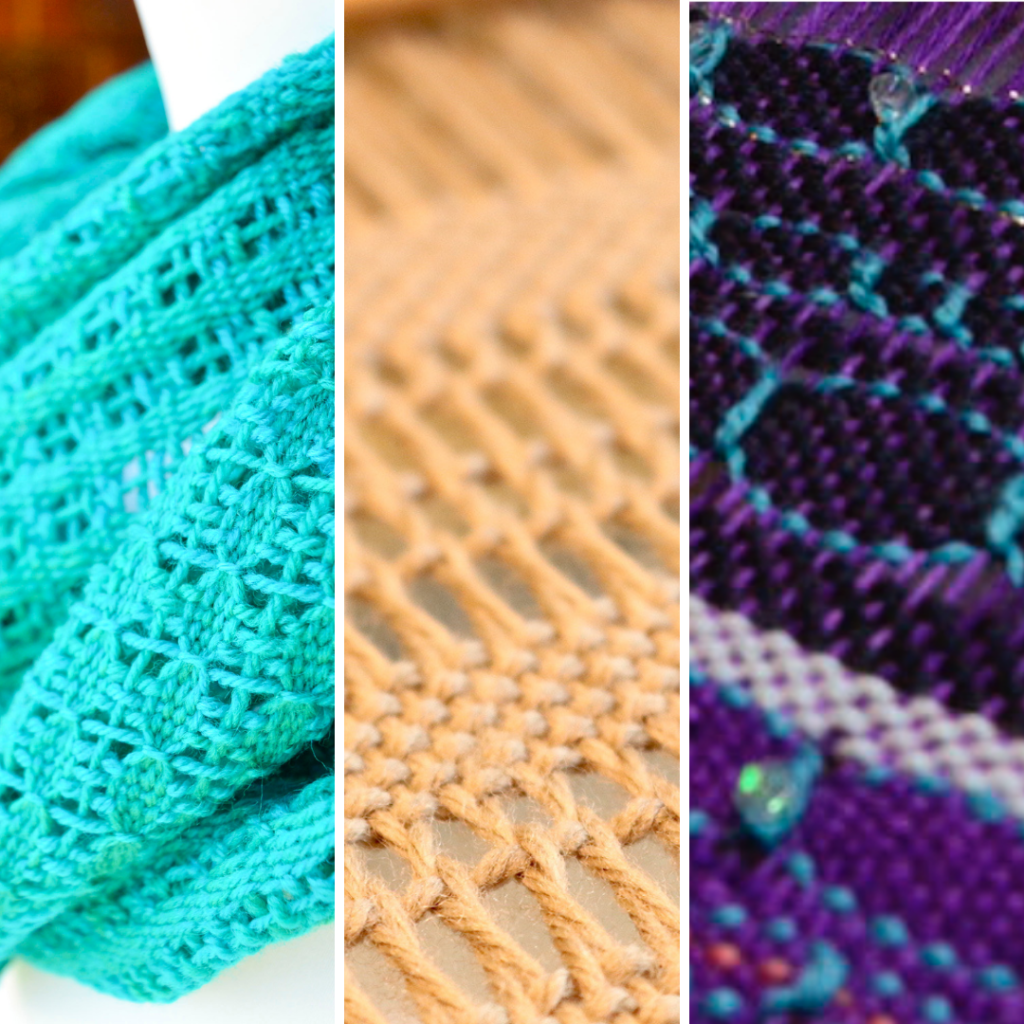
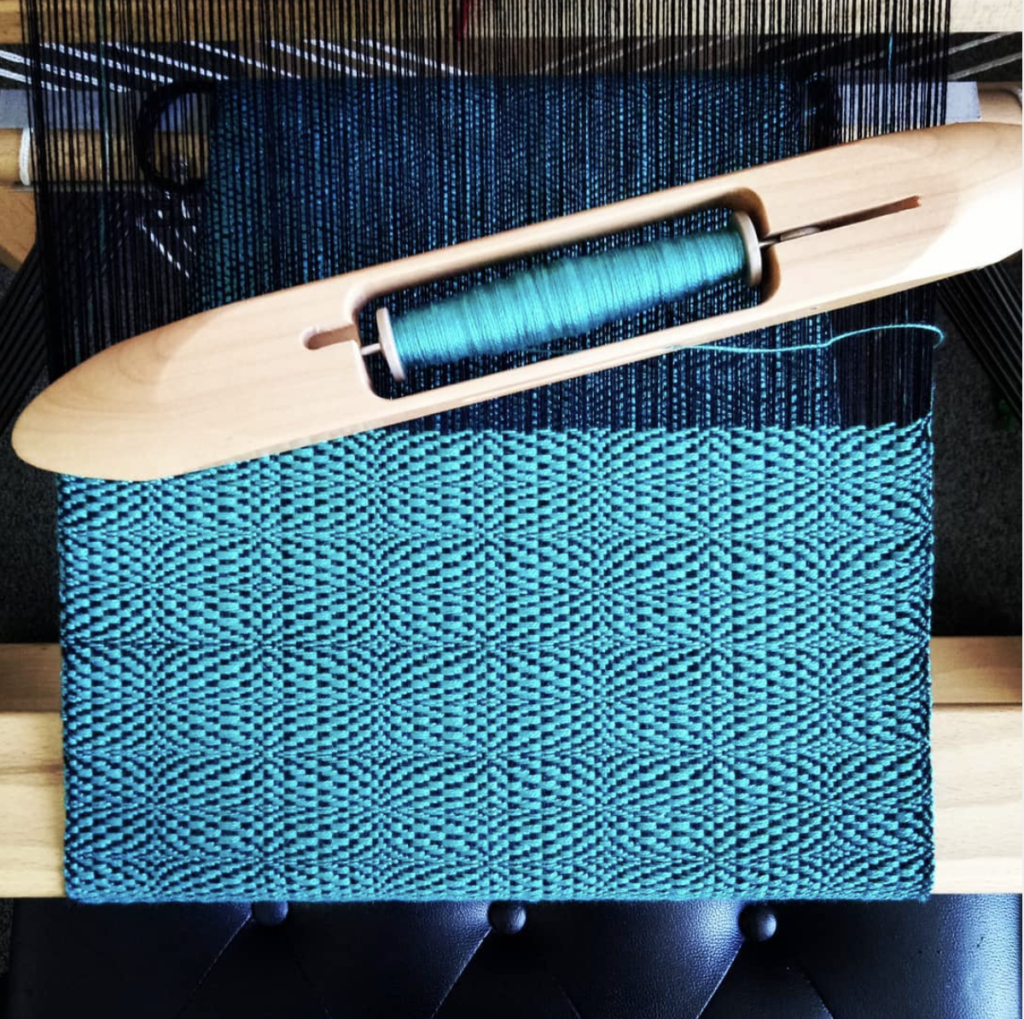
Brooks Bouquet was made popular by Marguerite Brooks when she wrote a book that included variations on this weave structure. You can see the “bouquet” component, where the yarn wraps around bunches of warp threads (the number of threads is adaptable) and pulls in tightly.

Reminiscent of lace knitting, the finished fabric also has some interesting qualities. Most of the time, woven fabric lacks “stretch” but using Brooks Bouquet produces a fabric with definite stretch. It is mildly open and airy, and yet has a beautiful and intricate pattern.

You don’t need any extra tools, just your stick shuttle (the same one you’re using for your weft) to pick up groups of threads in a repeat pattern and loop the yarn around the bunches as you go.
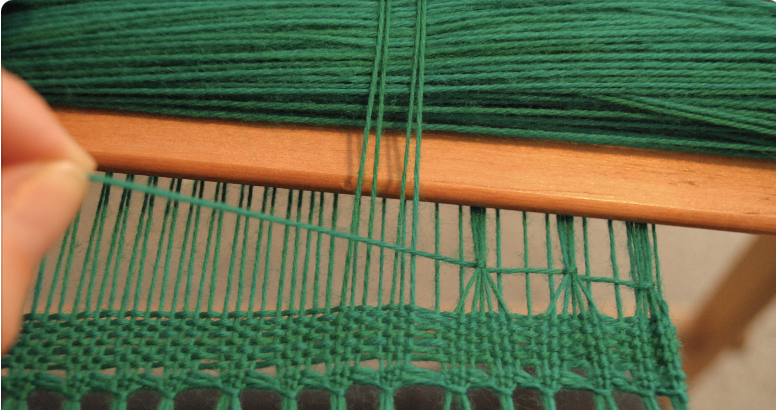
I love Brooks Bouquet in solid colours, using the same yarn for warp and weft, however I’ve seen some really beautiful pieces using variegated yarns too.
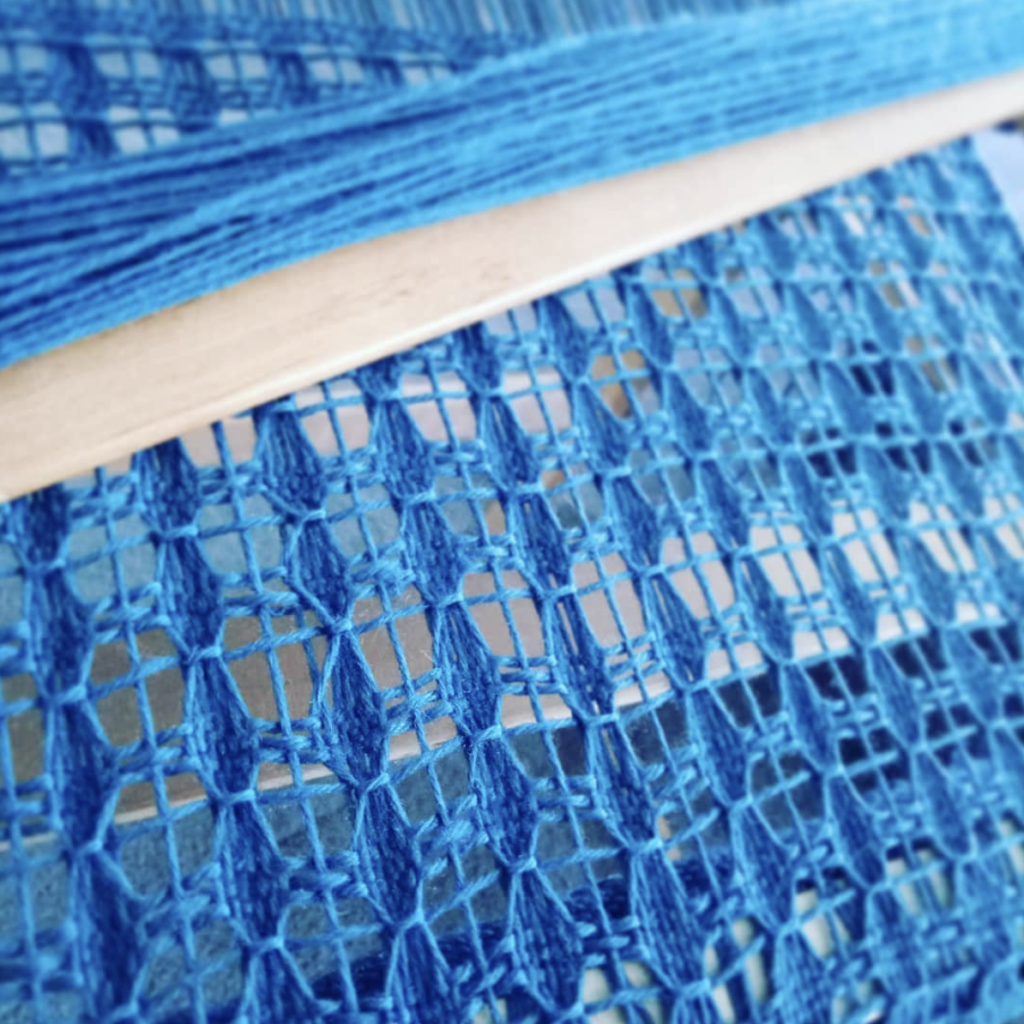
Brooks Bouquet

If you’re interested in trying it out but would like some step by step instructions, the Garden Path Scarf digital PDF download pattern is the perfect place to start. I have included lots of colour photos in this pattern as well as all the yarn and calculation details you need to complete a really beautiful scarf. I’ve woven two Garden Path scarves in merino yarn for myself and they are my go to for cold weather.

The next technique I want to share with you is Leno.

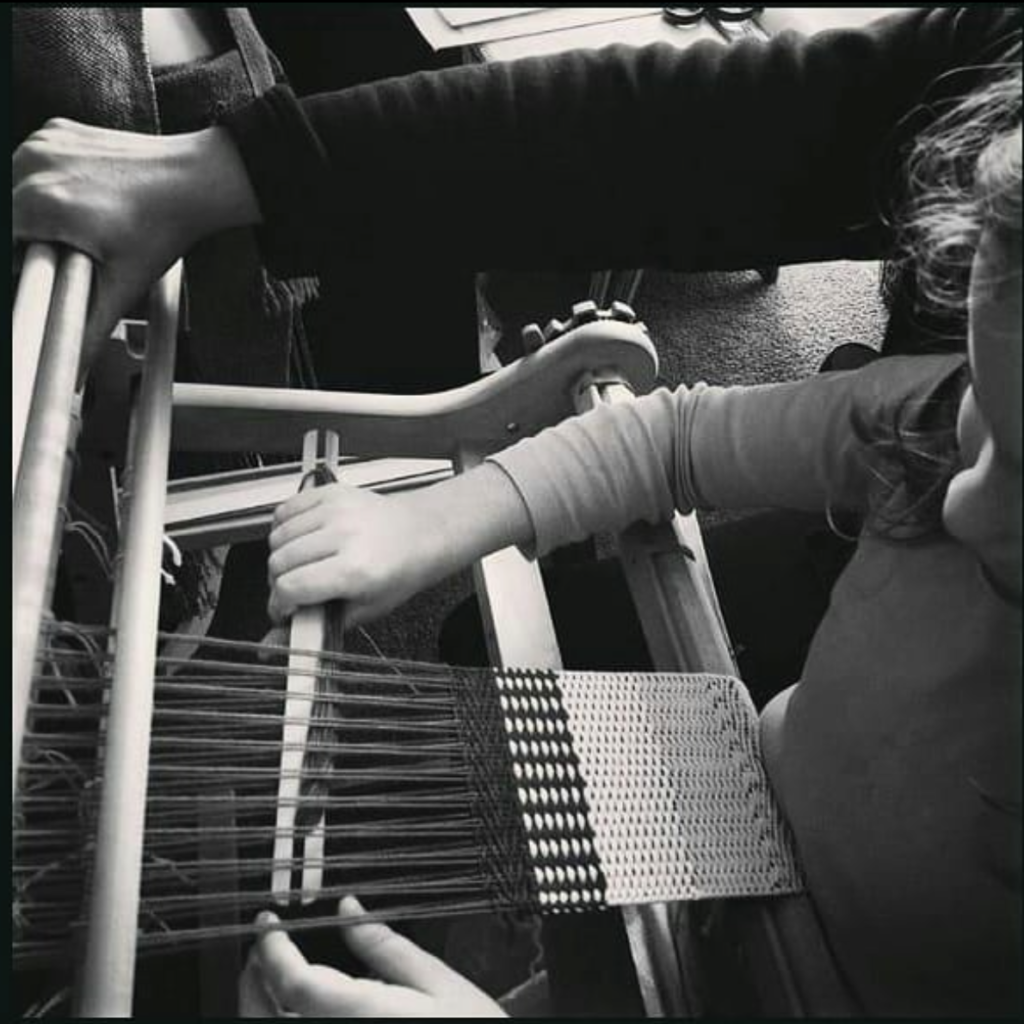
This also creates a light, airy fabric, but even more so than Brooks Bouquet. It is a very slow weave, as you twist threads using your fingers and a pick up stick and then hold the twists in place by beating in the weft thread.
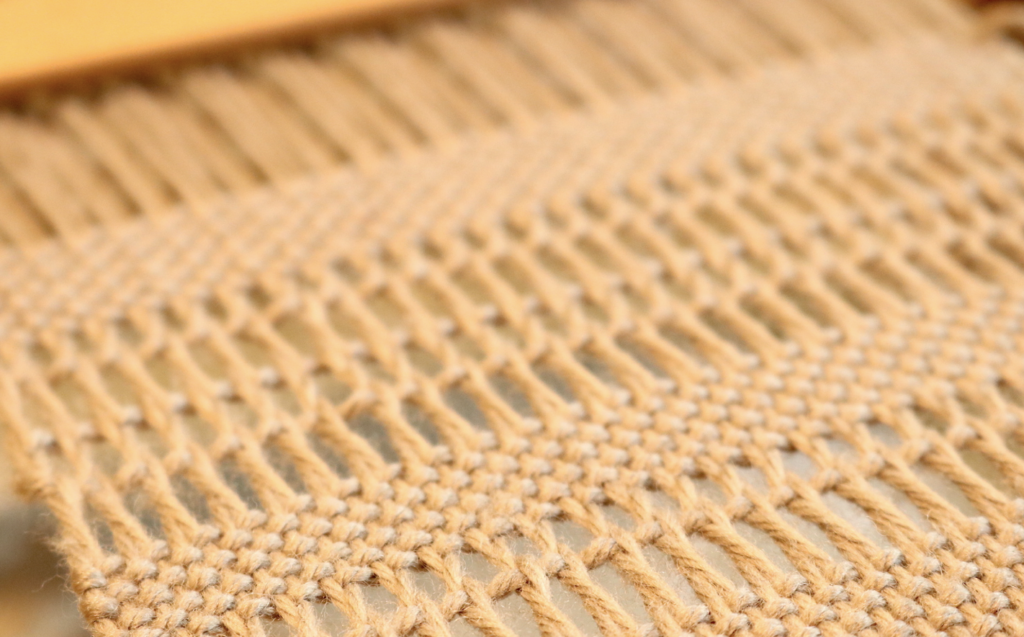
Leno

Leno also has variations, for example, it can be woven on an open or closed shed. You can weave it in rows, with plain weave in between. You can weave Leno for the whole piece or just in border sections (it looks fantastic as bordering on a classic scarf or table runner).

If you like the look of this technique, I have good news for you! I have a complete tutorial on weaving Leno and it’s totally free. It is aimed towards rigid heddle weavers, but is completely adaptable to other looms as well. You can find that tutorial here.

That brings us to Danish Medallions.
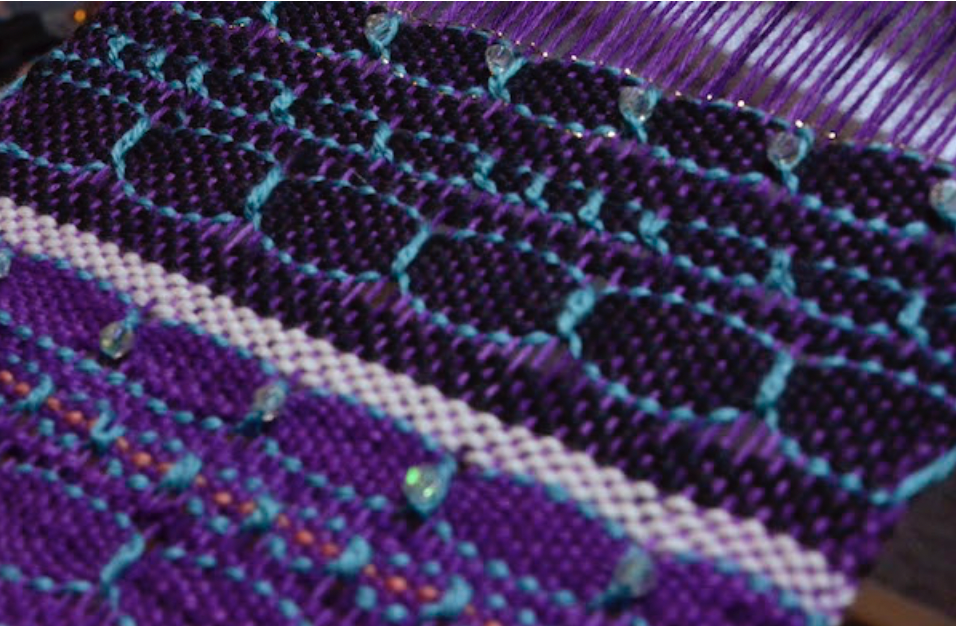
Danish Medallions

This is a highly decorative technique. I love to showcase strongly contrasting yarns to really make those medallions pop out of the piece. It is a really interesting and fun technique to work on your loom.

The basic idea is to run a contrasting weft thread through bands of plain weave in another colour. The width of this band of plain weave will partly determine how large your medallions will be. You then bring in your contrast colour weft, threaded on a tapestry needle (at least, that is how I like to do it).

Using a crochet hook, or my preference, a double ended threading hook, you then hook this contrast yarn by taking the hook through the work at the previous contrast pick and pulling it though. This is where the tapestry needle comes in handy, as you can take it through the loop created.
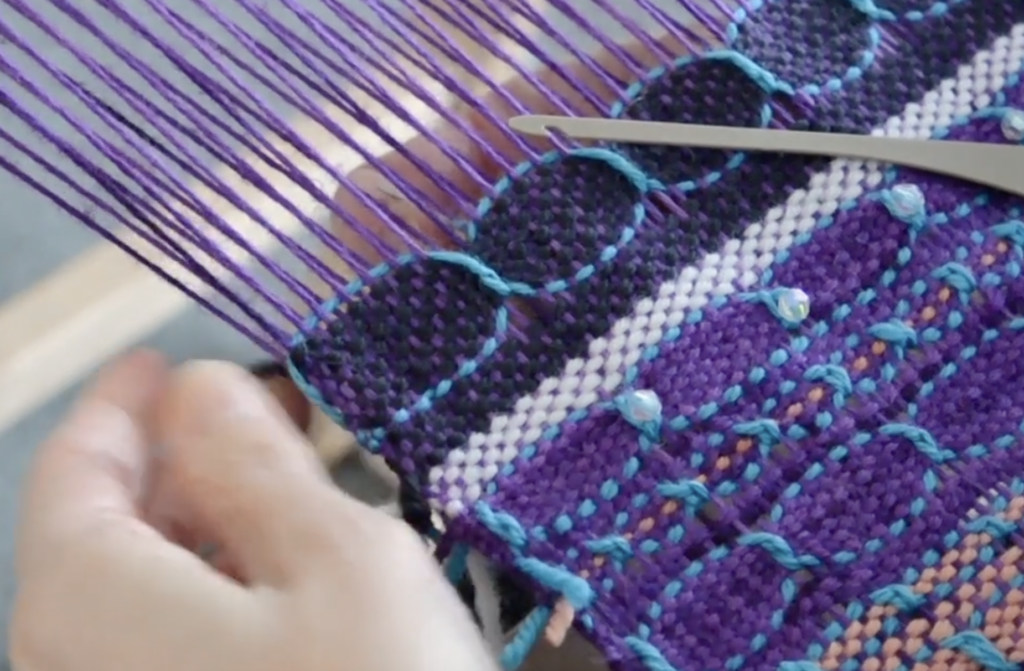
Cinch up this loop and you have your first medallion. How tightly you cinch it will depend on the effect you want. A light cinch will give you medallions that seam to sit on the fabric with some minor gaps in between. A tight cinch will give you more separated looking medallions and will produce an airier fabric.

Both options look beautiful. You will notice in the sample above that I’ve also included beading between some medallions, just for fun. The Danish medallion technique lends itself beautifully to extra embellishments.

If you want to see this technique in action (because it’s so much easier to show it than to tell it) I have a very affordable online workshop that demonstrates both Danish Medallions and Leno, all in one place. Click here to check that out!

I hope that today’s post has helped you to find out more about finger controlled techniques and encouraged you to consider giving them a shot!

It can be fun to put on a short sampler warp, thread up for plain weave, and work your way through these techniques. You might find a really awesome way to combine the 3 to make a unique woven piece!

As always, I love to hear from you here and answer any questions you may have, so please let me know you visited by leaving your comment below.

Until next time…

Happy Weaving!

Filed Under: #weaveforme challenge, Finger controlled techniques, Rigid heddle weaving, Rigid Heddle Weaving Patterns, Weaving Tagged With: brooks bouquet, danish medallions, finger controlled techniques, leno, rigid heddle weaving, weaving

Weaving with a disability

by Kelly 20 Comments

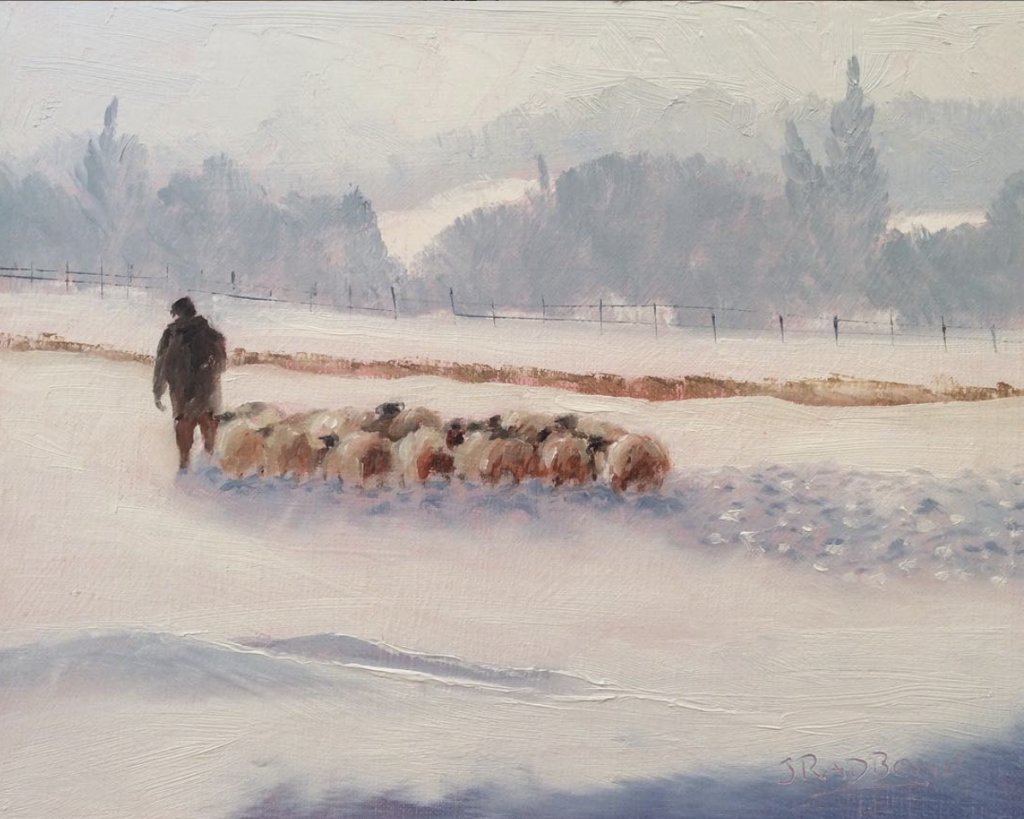
Today’s guest is a very inspiring woman! Jacky is an artist and weaver from a beautiful part of the U.K, surrounded by captivating landscapes and historic buildings.

I have admired her work for some time on Instagram, where she shares wonderful photos of her artist life and her dog, Boo. In fact, when selecting photos for today’s interview, it was very difficult to narrow down to just a few, I wanted to show you so many more!

I particularly wanted to chat with Jacky on the blog so that she could share her story and experience with her physical disability and how that has impacted on her creative life.

I hope that her story will encourage you all to focus on what you CAN do, regardless of your circumstances.

How long have you been weaving? What got you interested in starting?

Just before Christmas three years ago I bought a little frame loom on a whim. I designed a little snowman wall hanging and was surprised by how well it turned out and how much I enjoyed doing it, and that’s what got me started on my weaving journey. I started looking more into weaving and that’s when I first read about rigid heddle looms – I didn’t know if I would be able to use one from my wheelchair, especially doing the warping, so did lots of research on YouTube, which is when I first saw your videos, which have been a real help for me. My Birthday was coming up, so I asked my family if I could have money instead of presents. I was so excited when I opened my first ever rigid heddle loom and couldn’t wait to get started weaving on it!

What loom/s do you own?

My first loom was an Ashford 16” RHL, but after a while I wanted something I could weave wider fabric on. I knew I wouldn’t physically manage to weave on a very wide loom so finally decided on an Ashford 24” RHL and I love weaving blankets on that. Last year I decided to add a 12” Ashford Samplet loom to my little ‘loom family’, so that I could practice more complicated weaving, and I love it! It’s such a joy to use and I can easily carry it anywhere with me. 

What is your favourite fibre to work with? Do you have favourite items to weave?


Wool is definitely my favourite fibre to weave with. I always used to think wool was scratchy to wear, but now of course I have learned that there are so many types of wool, each with their own qualities. Last year I wove a scarf from a handspun blend of Blue Faced Leicester and Rose fibre and that was beautifully soft. At the moment I’m in the middle of weaving a silk scarf on the Samplet, I’ve never woven with such fine silk before and I’m really enjoying it so I think that will become another favourite. 

You also spend time spinning and painting. You love to paint en plein air and I find your landscapes absolutely beautiful. Do you have a favourite location/s for this?


Thank you Kelly. I’m very blessed to live in the Cotswolds which is a really lovely part of the U.K., so I’m surrounded by picturesque villages and beautiful countryside to paint in. I also love painting the sea, and my favourite coastal area is South Wales. I hope to be visiting there again soon now that our present lockdown restrictions are beginning to lift.

Please tell us about your disability and the challenges it presents to you in your creative pursuits.


I’ve been disabled with a neuromuscular illness for about 25 years now. It affects all my muscles, which are very weak, and I use an electric wheelchair to get about the house. It has left me with double vision, but I have strong prism lenses in my glasses which help quite a lot.

My arm muscles are very weak too, which is very challenging when I want to be doing things, but I make sure I take plenty of breaks to rest them for a little while when I’m weaving or painting. As long as I pace myself I usually get things done, it just takes a little bit longer.

I have to take lots of breaks when I’m warping the loom, and I’m always glad when I’ve finished doing it. My husband Phil almost always helps me with winding on the warp – I have used the ‘crank and yank’ method a few times, but it is definitely easier when he helps!

You have a beautiful assistance dog, Boo. How did you he come into your life and how has he made a difference to you?


Boo is an adorable yellow Labrador, and the gentlest dog I have ever known. He became my partner eight years ago thanks to a U.K. charity called Dogs for Good, which trains assistance dogs for people with disabilities and children with autism.

I can’t take my coat off by myself, so Boo comes by my side, gently puts one sleeve cuff between his teeth and pulls at it until my arm is free, then he goes to my other side and pulls that sleeve off too.

He also picks up everything I drop, helps to empty the washing machine and picks up the mail. He loves to come to Church with me and lies quietly by my side through the service. He has a bed in the studio and always comes to lie by my side when I’m weaving, I think he finds it as soothing as I do.

Is any of your creative work available for sale?

Most of my work is available for sale in the U.K. through my Facebook page or in exhibitions. I sell some of my woven items too, mainly scarves just now, again through Facebook.  I have a stash of woven fabric waiting to be made into bags and purses, but I never seem to get round to get the sewing machine out to make them – I’d far rather be weaving!

Thank you so much to Jacky for taking the time to share with us today! I know that many of you would love to follow along with her work and see what she comes up with next. You can follow Jacky here:

Facebook-
Jacky Radbone, artist
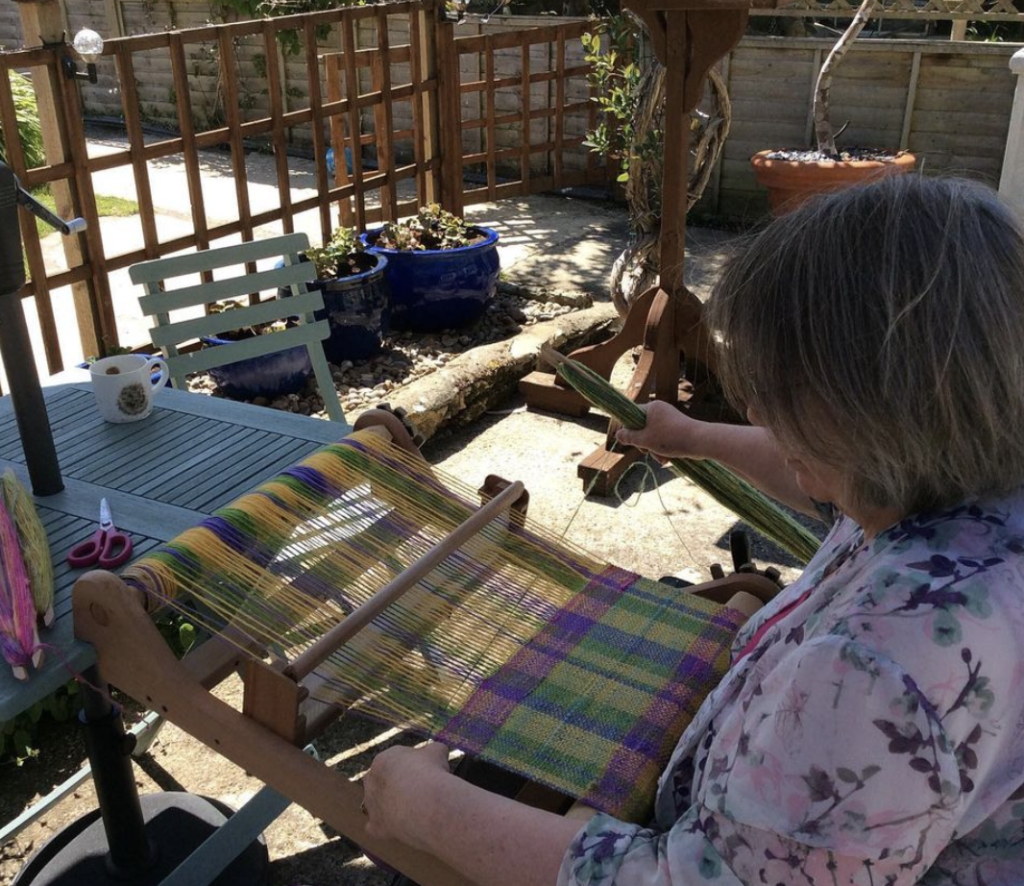
 Jacky Radbone, weaving in the Little Cwtch Studio (‘Cwtch’ is a Welsh word which means ‘ a hug’)

Instagram-

Jacky Radbone

Blog-

A Disable Artist’s Journey

Until next time…

Happy Weaving!

Filed Under: Inspiration, Interviews, Weaving Tagged With: artist, disability, interview

Anzac Biscuit Recipe

by Kelly 7 Comments

This recipe was passed down from my husband’s Grandmother.

There are many Anzac biscuit recipes but I really like this one, and I love to think of my husband’s Gran baking these in a warm kitchen on a wood stove.

*This post contains affiliate links. For further information, please see my disclosure policy.

The story goes that these biscuits were baked by Australian and New Zealand ladies and sent to soldiers overseas during World War I. The biscuits keep very well and the ingredients are pantry staples. They are a great way to commemorate and give thanks for all those who have served our country.

Anzac biscuits are easy for young bakers to make, thanks to the melt and mix recipe.

These ingredients are very familiar to all Australians, but they may not be to you. Golden syrup is made from cane sugar. The most common brand available here is CSR Golden Syrup, but I found Lyle’s Golden Syrup as an alternative.

Desiccated coconut is easy to find here (I grew up on this stuff!) and is an unsweetened, dried and finely shredded coconut. This one looks quite similar to what we have here, but if you can only find shredded dried coconut, that can definitely be used. Your biscuit texture may be a little different, but they will still be delicious.

And by the way, because so many people ask me, The Australian/English “biscuit” means the same as the US “cookie” 🍪

Anzac Biscuits

The classic and traditional Anzac biscuit from a handed down family recipe.
Print Recipe Pin Recipe
Prep Time 10 minutes mins
Cook Time 15 minutes mins
Ingredients Method

Ingredients
  

  • 1 cup plain flour
  • 1.5 cups rolled oats
  • 1 cup desiccated coconut
  • 1 cup white sugar
  • 1 tbsp golden syrup
  • 170 grams (6oz) butter
  • 1 tsp bicarb soda (baking soda)
  • 3 tbsp boiling water

Method
 

  1. Preheat oven to 160 degrees (C) or 320 (F)
  2. Melt butter and syrup together in a saucepan or in the microwave.
  3. Mix dry ingredients together in a large bowl.
  4. In a cup, pour the boiling water over the bicarb soda and mix.
  5. Pour water and soda mix into melted butter mixture.
  6. Pour combined wet ingredients over the dry ingredients and mix well.
  7. Use a dessert spoon to portion out the dough onto a baking tray lined with baking paper. Allow room for spreading between biscuits.
  8. Bake for 15 – 20 minutes.
  9. Remove from oven and allow to cool on the tray intil firm enough to transfer to a baking rack.

Anzac biscuits are wonderful when enjoyed with a glass of milk or cup of tea.

I hope you enjoy them too!

Filed Under: Recipes Tagged With: Anzac biscuit recipe, Anzac biscuits

Photography for Weavers

by Kelly 8 Comments

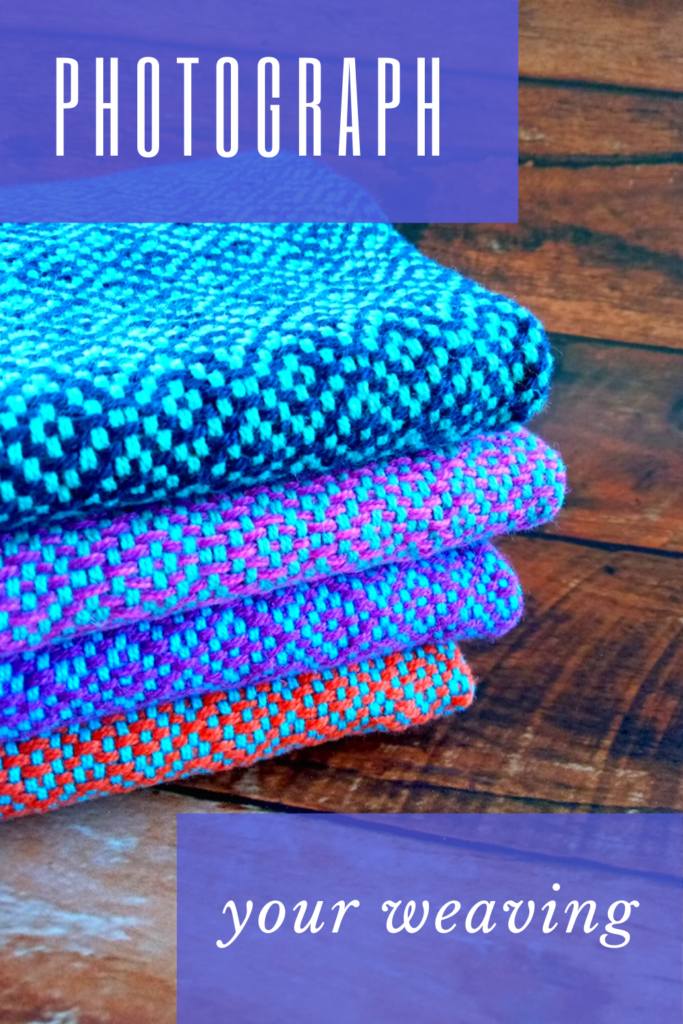
You spend countless hours warping, weaving and finishing your unique hand woven pieces. It only seems right that you honour that process with some photos that show how beautiful your finished products really are.

Whether you want to take photos to share on social media, with friends and family or whether you sell your weaving online and want to present your pieces in their best possible light, it is well worth taking a bit of time to learn a few basic photographic principles that will help you level up with your photos.

*This post contains affiliate links. For further information, please see my disclosure policy.

The good news is that, these days you don’t need a super duper fancy camera to take good photos. I do use my DSLR camera when I want to take photographs for classes and my patterns, however for everyday use and social media, I always use my phone.

Phone cameras are now way more advanced than they used to be and can make your “photo to platform” experience really quick and seamless. Considering most of us possess a fairly modern phone, (though at nearly 5 years old, I’m not sure my phone could be considered modern any more!) it makes sense to be familiar with your phone camera and make the most of it.

I’ll start with what I consider 3 essentials to taking a good photograph:

Light

Clarity

Composition

We’ll begin with light. If you’re taking photos indoors, try to choose a sunny rather than dark or overcast day. Set up close to a window at a time of day where the sun is not shining directly onto the area you want to photograph. This will avoid too much shadow and the possibility of patches of light and dark.

I often use my studio lights for filming classes but rarely for photography. This is because natural light will always trump artificial, and give lovely tones to your photo without harshness of light and shadow.

Next is clarity. This is so important! No one wants to look at a blurry photo. Hold your phone or camera still or, if this is a challenge for you, use a tripod to unsure stillness. Also, if you have enough light, this greatly decreases the chances of your photo lacking sharpness.

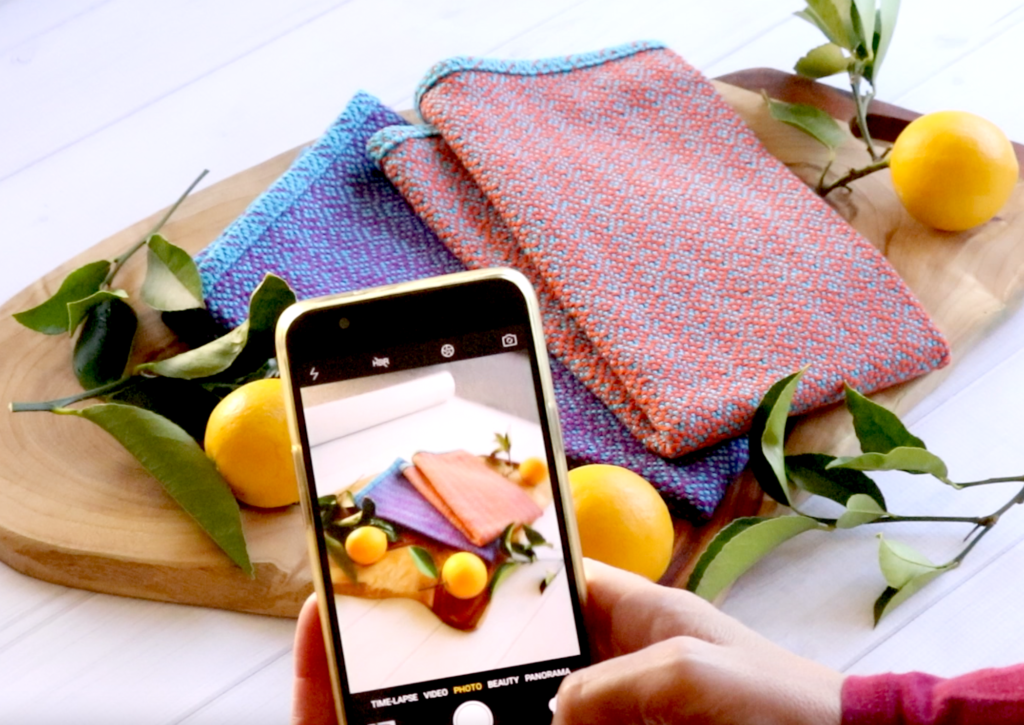
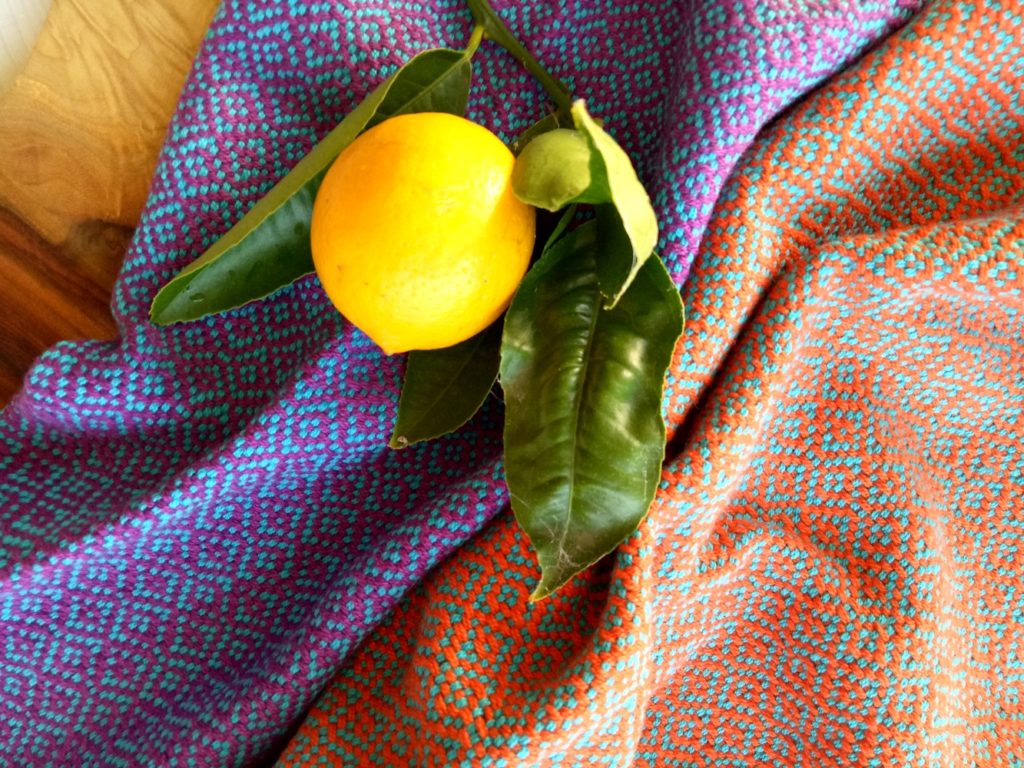
Composition is something you can practice to improve on if it doesn’t come naturally. It’s basically about arranging and framing your “scene” so that it is visually pleasing and balanced. Try out lots of arrangements. Introduce some props to add interest and relevance to your photos eg. lemons with kitchen towels. Try folding, draping, scrunching your hand wovens. Have fun and don’t worry if some of your photos don’t look so great, that’s the point of experimenting – to find out what you like.

A word about editing.

Editing is a great photography tool and an excellent way to finish off and give that final polish to your photos. But it should never be relied upon to “fix” a photo. The aim is to get the best photo that can, in camera, so that when it comes to editing time you hardly have any work to do.

Photography for sellers.

If you are selling your hand woven pieces, good photography is really crucial. Remember that your potential customer can’t see and touch the items the way you can. You want to be able to bring them as close to “knowing” the piece as possible. Provide as many photos as you can from different angles. Include close ups with detail as well as distance shots.

Ensure you have an appropriate backdrop. Carpet and tiles are not a good look. If you think about it, if you were buying some beautiful hand woven towels, would you find them as appealing if they were photographed on a bare floor? I use professional vinyl photography backdrops for many of my photos. These are expensive, but well worth the investment if you are taking a lot of product photographs. I bought mine from Oz Backdrops and Props in Australia, but these backdrops are very similar.

If you are interested in learning more about photographing your hand wovens using your phone, check out my 49 minute Photography for Weavers Workshop. In this workshop, I take you through exactly how I set up product photos for my Diamond Stripe Towels and show you other arrangement possibilities to inspire you. I also take you into the free weaving software Canva, and show you how it can be used for basic editing.

Did you enjoy this post? Let me know in the comments below, I would love to hear from you!

Until next time…

Happy Weaving!

Filed Under: Free tutorial, Inspiration, Online Weaving School, Photography, Tutorials, Weaving Tagged With: photography, photography for weavers

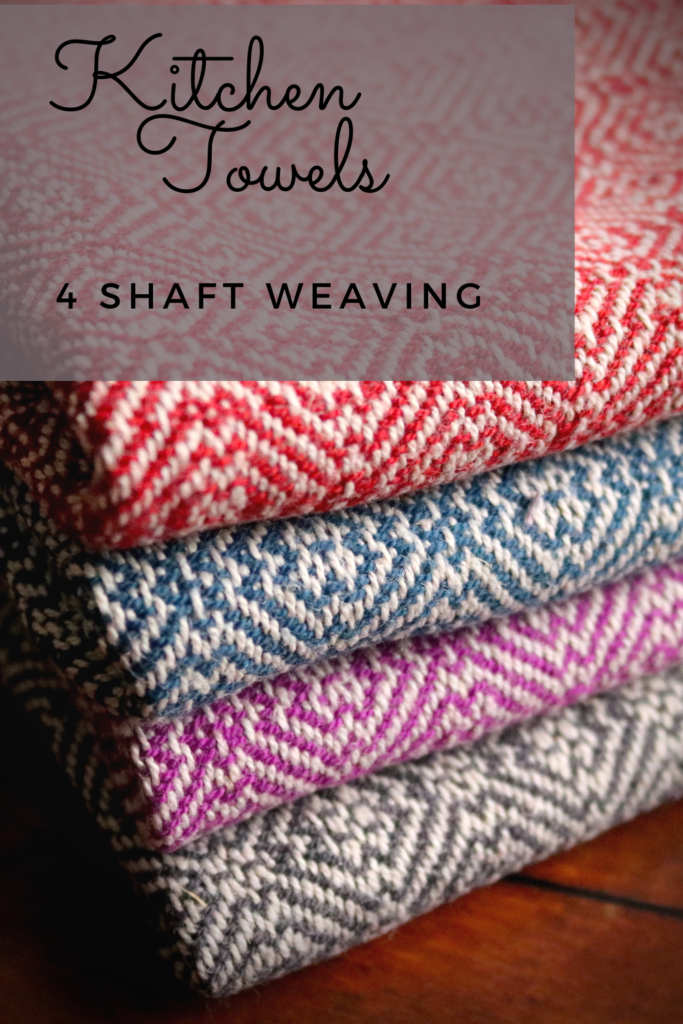
New towels for our new home!

by Kelly 19 Comments

I had two reasons for warping up my floor loom for some new towels recently.

With our house moving date looming closer, I felt the need for a “sanity project”. While all of my yarns and equipment were being packed away, I kept a few cones aside so that I would have something to weave during the in between time of packing up house and moving to the next one.

*This post contains affiliate links. Please see my disclosure policy for further details.

I also wanted to have some brand new kitchen towels to adorn our “new to us” kitchen, as all my current towels are ageing and starting to look a little shabby. I wanted special new towels for our special new place. This project turned out to be special in another way, but I’ll tell you about that shortly.

I chose one of my all time favourite drafts for kitchen towels, a 4 shaft twill on M and W threading. I love the design and I love the resulting fabric so I didn’t have to think too hard on that one!

The threading for this draft is not difficult and the tie up is a regular twill tie up – all things that I’m very familiar with and that make the process easy for me. I used my Louet David 2 Floor loom (link is for the new David 3), which has 8 shafts but for this project I wove on 4 shafts.

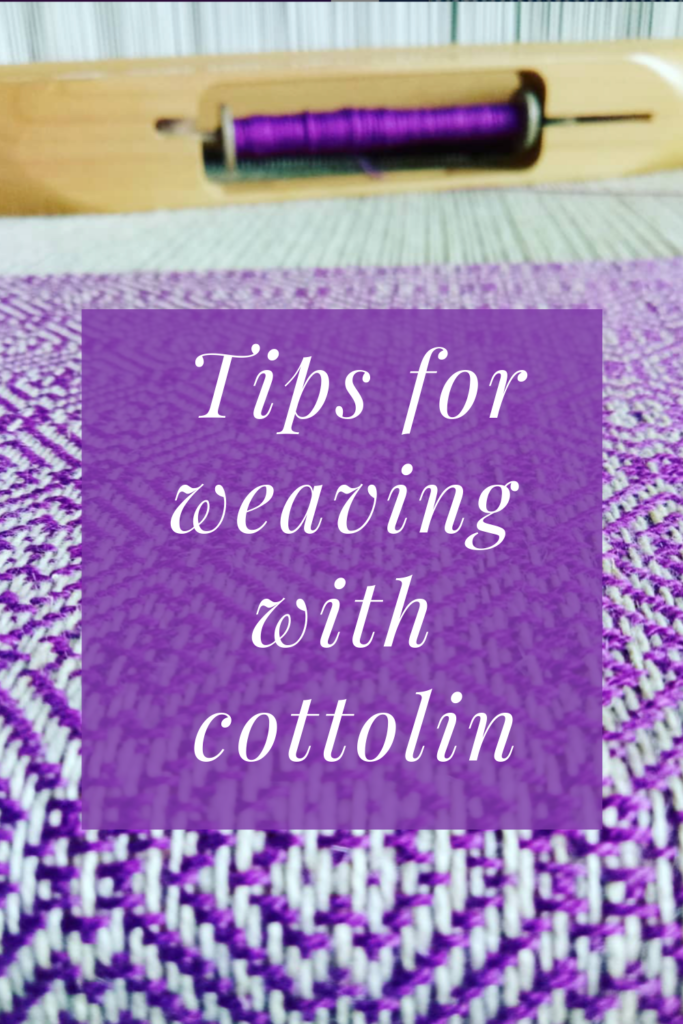
Having woven kitchen towels with this draft before, I was also sure of the yarn I wanted to choose. My favourite weaving yarn for soft and absorbent tea towels is 8/2 cottolin. The cottolin I use is 60% organic cotton and 40% linen. It’s a great yarn for those who want to incorporate a little linen but want something that is a bit easier to use than 100% linen.

For the warp I used:

Maurice Brassard 8/2 cottolin in Blanchi

For the wefts I used (one colour for each towel):

Maurice Brassard 8/2 cottolin in Charcoal

Maurice Brassard 8/2 cottolin in Magenta

Maurice Brassard 8/2 cottolin in Royal

Maurice Brassard 8/2 cottolin in Brick

…………………………………………………………………………………………………………………………………………………………..

Tips for working with cottolin:

  • Cottolin sheds a lot of fibre whilst on the loom. It is a more course yarn than just cotton on it’s own, which is very smooth. I sometimes opt to wear and apron while weaving and try not to wear anything black! The shedding nature may be irritating to some who are sensitive, it’s not a big problem for me but does make me sneeze sometimes! It also means that you will want to vacuum your loom when your project is finished or even during the project if the tiny stray fibres bother you.
  • It feels quite stiff on the loom. I remember the first time I wove with cottolin, I felt disappointed that the towels felt a bit rough. A hot machine wash was like a touch of magic – the towels softened up and the pattern came together beautifully. This is another thing that I love about cottolin, it softens more with each wash.
  • Your first one or two uses of your towels to dry dishes will not be optimal. The cottolin can leave small fibres on your dishes initially, and the towels are not as absorbent as they could be. Don’t lose faith! With a bit of use and a couple of washes, they will become a huge asset to your kitchen!

…………………………………………………………………………………………………………………………………………………………………

C

I tried some different techniques in the weaving of these towels, to help counteract some of the issues arising as I wove.

Firstly, I doubled my floating selvedges – something I haven’t done before. My reasoning for this was that for the towels I’ve woven in the past, the first place they would start to wear down was at the edges. A doubled floating selvedge gave a more defined, and stronger edge to the fabric.

Secondly, I switched to beating on an open shed. It is very much my habit to beat on a closed shed, but my beats were feeling a little stiff and the weft wasn’t settling as nicely as I would like. As soon as I switched to open shed beating, everything settled down and became much more fluid. Lesson learned – Don’t be stuck in your ways, be open to experiment from project to project as needs dictate 😉

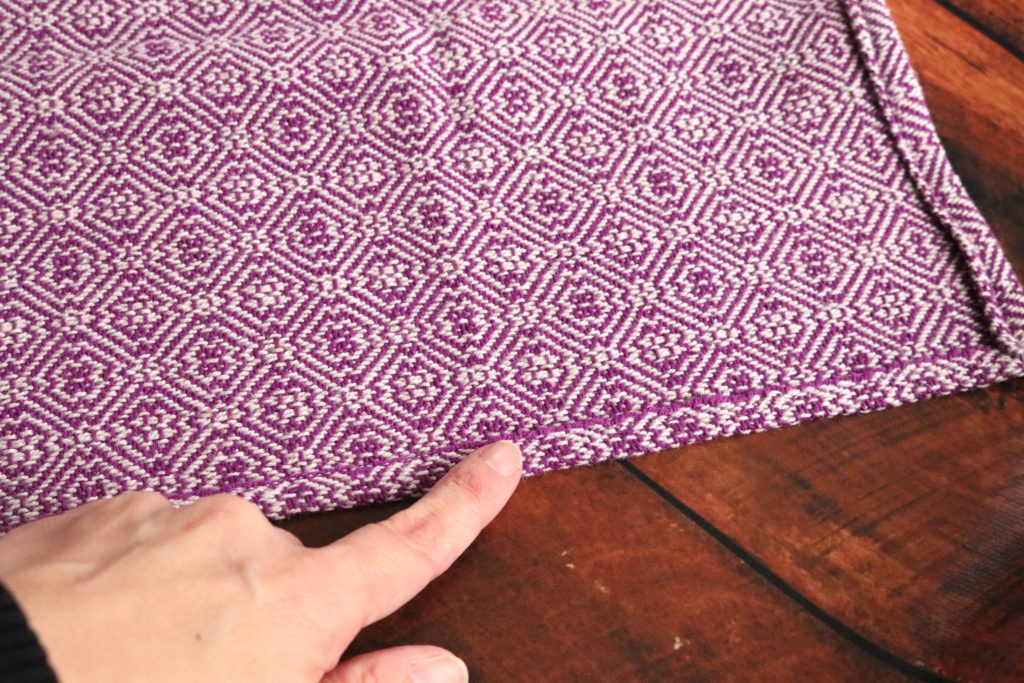
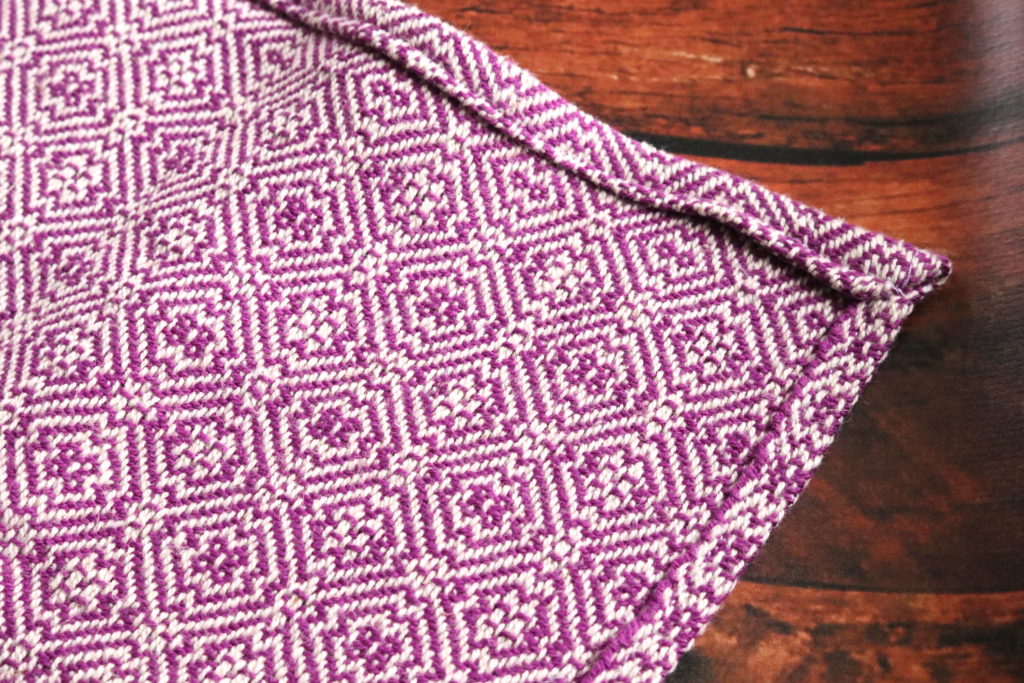
And thirdly, when hemming my towels, I decided to also hem the long edge. I have never done this before, but as I already mentioned, the edges are susceptible to wearing and I think this single turned hem will make a difference. Time will tell, but perhaps I will make this a regular technique for my towels.

Hemming the long side of the towel with a single fold hem.
Finished hems. The ends of the towel have a double fold hem.

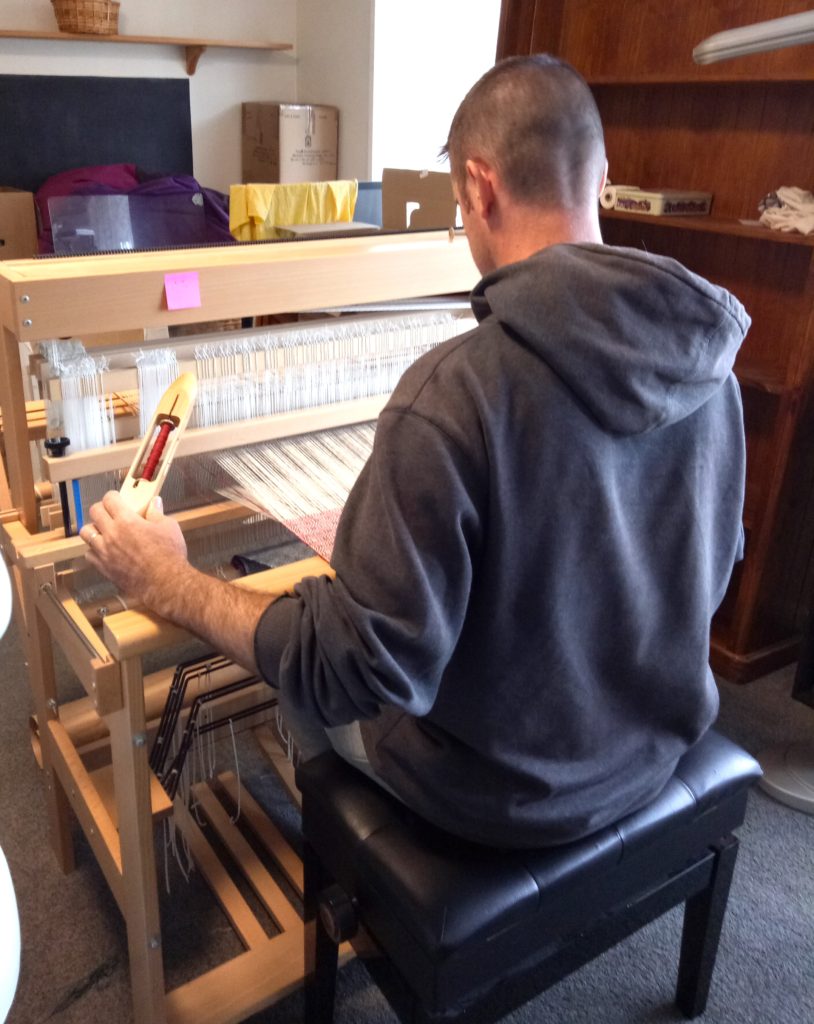
I mentioned that this project turned out to be special in another way. My husband has been interested in having a go on the floor loom for some time now, so I decided the last towel of the warp would be a good opportunity. I wasn’t too worried if it didn’t turn out well, as it was just for us.

Imagine my surprise when he took to it like a duck to water, quickly declared that it was “fun” and promptly finished off the second half of the towel I had started on! After giving him a few basic pointers, he surprised me with how quickly he picked up the steps. Now he is very interested in weaving more and even learning how to dress the loom. Victory! 😀

If you love this pattern draft as much as I do, you can find it on page 88 and 89 in Anne Dixon’s Handweaver’s Pattern Directory – a most excellent book and awesome resource for 4 shaft drafts.

I also recommend Patti Graver’s Next Steps in Weaving for weaving at this level.

If you’re interested in getting started in floor loom weaving, check out my Introduction to Floor Loom Weaving, my Follow Up Floor Loom Weaving, or save by purchasing a bundle of the two courses together.

I made a little video to compliment this blog post to help you feel confident about cutting your hand woven fabric. I explain my 3 Key Ingredients to cutting without fear:

If you have any questions about my towel project or using cottolin, let me know in the comments below!

Until next time…

Happy Weaving!

Filed Under: 4 shaft weaving, Cutting Hand Woven Cloth, Inspiration, Neat edges, Weaving, Yarn Tagged With: 4 shaft weaving, cutting cloth, cutting hand woven cloth, floor loom weaving, hand woven towels

Krokbragd Patterns Interview and Giveaway!

by Kelly 287 Comments

Have you all met Debby Greenlaw before? I hope you have, but if not, you may want to read over this post where I reviewed Debby’s first book, the wonderful “Krokbragd – How to Design and Weave”.

*This post contains affiliate links. For further information, please see my disclosure policy.

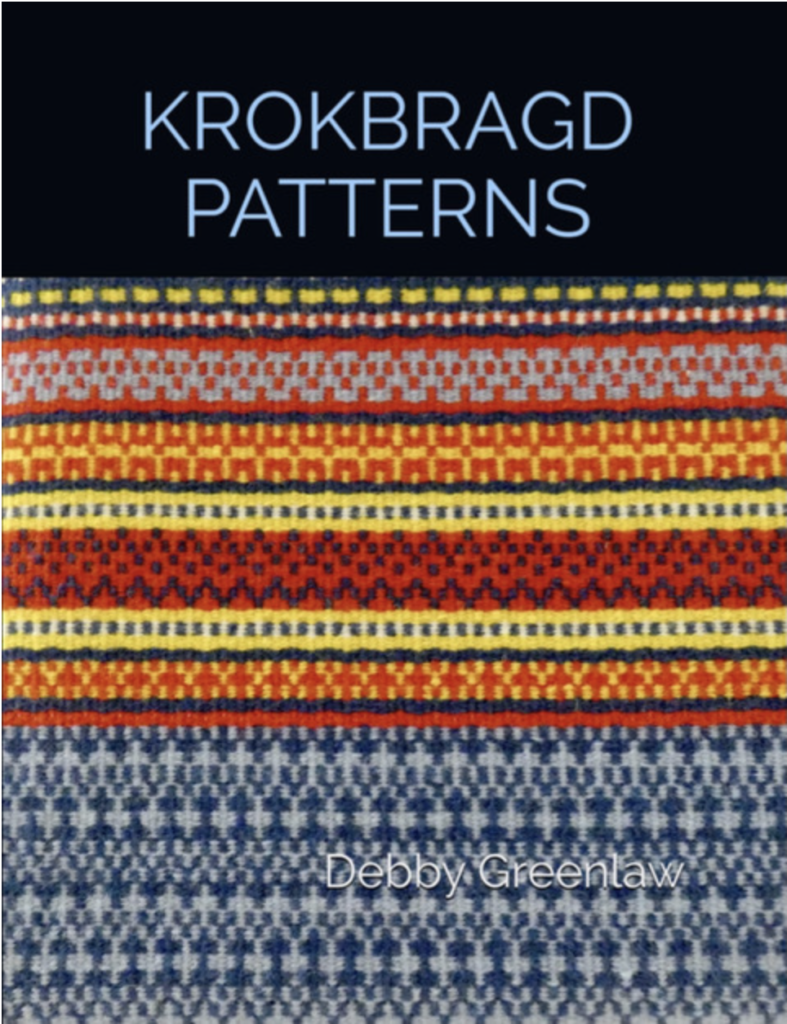
I am so excited to share the news that Debby has written and released a brand new follow up krokbragd book, titled “Krokbragd Patterns”.

I am doubly excited to announce that, thanks to Debby’s generosity, one of you lucky readers will have the chance to win a personally signed copy of Krokbragd Patterns! Entry details are available at the end of this post.

I thought it the perfect time to have a chat with Debby so that you can all get to know her a little better and find out more about the new book, so grab a cup of tea and get comfy!

Thank you for taking the time to be my blog guest today 😊 Can you start by telling us a little about your weaving journey so far?

“Weaving was my entry into the wonderful world of fiber arts. I am a relatively “late bloomer” in this area, not starting the journey until I retired in 2016 after a 40+ year career as a nurse/nurse practitioner. I purchased an Ashford Sampleit loom at a local fiber festival just to see if I would like this weaving thing . . . I loved it. That lead to a floor loom, a dye garden, a spinning wheel, and eventually knitting needles and crochet hooks!”

What looms do you have and which one gets the most use?

“I have a Leclerc Nilus 4-shaft floor loom, a Kromski Harp Forte rigid heddle, and a Louët Jane 8-shaft table loom. By far the Jane gets used the most!“

You are perhaps most well known for your krokbragd weaving. What is about krokbragd that you love?

“First, I’m drawn to the Scandinavian aesthetic. My heritage says I’m German through and through, but I think there must be some Norse hidden in there. I love the simplicity of design and the color combinations of Scandinavian weaving. Krokbragd embodies both of those characteristics.”

Your first book, “Krokbragd: How to Design and Weave” had been immensely popular. What lead you to write a book all about krokbragd?

“Simply, there wasn’t a book written on the subject. In fact, several years ago, there were very limited resources available on krokbragd. I saw a social media post that said, “someone should write a book,” and I thought I can do that!”

You are just about to release your second book, “Krokbragd Patterns”. Did you decide to write a follow up book based on the feedback received from your first book? What excites you the most  about this book?

“You’re absolutely correct.  I received emails, comments, and even a review asking for a krokbragd pattern book.  

Hmmm . . . what excites me the most. It would have to be the test weavers. Eighteen delightful women answered my request to be test weavers for the book’s projects. Seeing my designs come alive in their talented hand was so exciting. Their feedback, enthusiasm, and encouragement were invaluable to me during the designing and writing process.”

You are blessed to live in a beautiful location. How do you most enjoy spending your days? What should visitors to your region look out for as a “must do”?

“God has graciously blessed my husband and me with a beautiful place to live, a small farm in rural South Carolina. We share our space with 21 dairy goats, a mini donkey, chickens, a barn kitty, and a playful pup! There are many routine farm chores to keep up with, along with the occasional urgency/emergency. I’ve found my nurse practitioner skills translate well to farm animals! In addition to fiber arts, I also like to garden.  

South Carolina is diverse in natural beauty. It is one of the smaller U.S. states but stretches from the seashore to the mountains. It is also rich in history and historical sites and gardens.”

You can find more great weaving information on Debby’s blog, Flora & Fiber. Books can be purchased through the blog, on Amazon or in selected stores.

Purchase Krokbragd – How to Design and Weave

Purchase Krokbragd Patterns

Now, about that giveaway! To enter, leave a comment below that describes why you would love to win a signed copy of Krokbragd Patterns. If your comment doesn’t show up right away, don’t worry, I will approve it when I see it (I have to keep those spammers at bay!)

Open to anyone worldwide.

I will draw the lucky winner on the Saturday 17th of April, 2021.

  • THE GIVEAWAY HAS NOW CLOSED. CONGRATULATIONS TO THE WINNER, CHERI SUTHERLAND!

Until next time…

Happy Weaving!

Filed Under: Gift Guide, Giveaways, Inspiration, Interviews, Krokbragd, Weaving Tagged With: giveaway, interview, krokbragd

What can I weave on a small loom?

by Kelly 15 Comments

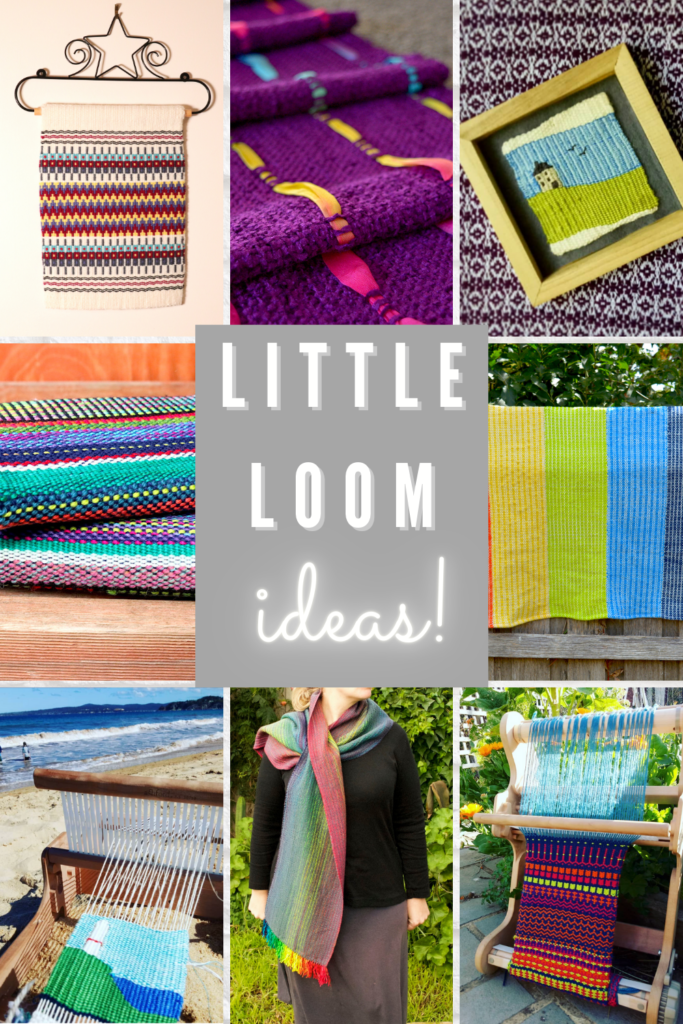
Small looms may be compact, but they’re full of creative potential! Whether you’re just starting out or looking for portable weaving ideas, there are so many possibilities! But you may wonder – What can I weave on a small loom?

From quick projects like bookmarks and mug rugs to more advanced pieces like scarves or artful wall hangings, a small loom is a wonderful way to explore weaving without needing a large space. In this post, we’ll look at inspiring project ideas to help you get the most out of your little loom.

Today I’m going to be talking specifically about the smallest rigid heddle looms available.

Why Choose a Smaller Loom?

There are many reasons why weavers opt for a smaller loom. Some of these may include:

  • Affordability – a small loom is also a smaller financial investment to get started with.
  • Portability – you can literally pick these little looms up with one hand and take them with you
  • Space – some people have very limited space for storing a loom.
  • Testing it out – a small loom is a great way to test out weaving to see if it’s something you really want to pursue.
Ashford Sampleit 10″ rigid heddle loom

*This post contains affiliate links. For further information, please see my disclosure policy.

Many small loom weavers will later upgrade to a larger loom. Or some, (like myself!) will purchase a smaller loom later on, in order to have an extra loom on hand or just for sampling new ideas and designs.

Let’s have a look at the small rigid heddle looms currently available for purchase:

Ashford Sampleit 10″ (also comes in a 16″ weaving width)

Kromski Presto 10″ (also comes in a 16″ weaving width)

Schacht Cricket 10″ (also comes in a 15″ weaving width)

Beka beginners rigid heddle loom, available in 4″ and 10″ weaving width

I’ve come up with a list of finished items you can weave on a little loom as some ideas for getting started:

Get Sampling!

The number one function that a smaller loom serves is to make samples. If you are one of those people who think that sampling is a waste of time and yarn, I get it – I used to be exactly the same. But, throughout my weaving journey I have learned the true value of sampling before committing to a project.

In some cases, its actually a false economy to not sample and that is because the sample teaches you what you should and shouldn’t do for that project. In short, it guarantees the success of your project!

Make Your Own Clothing

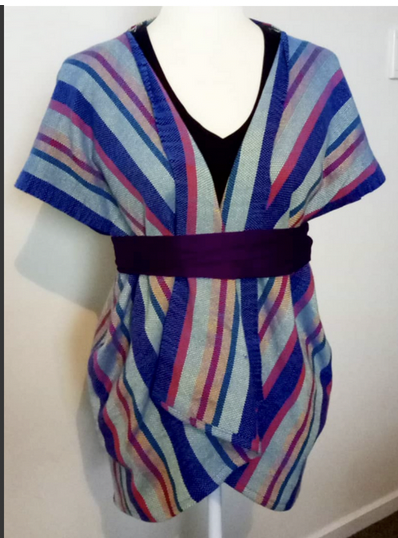
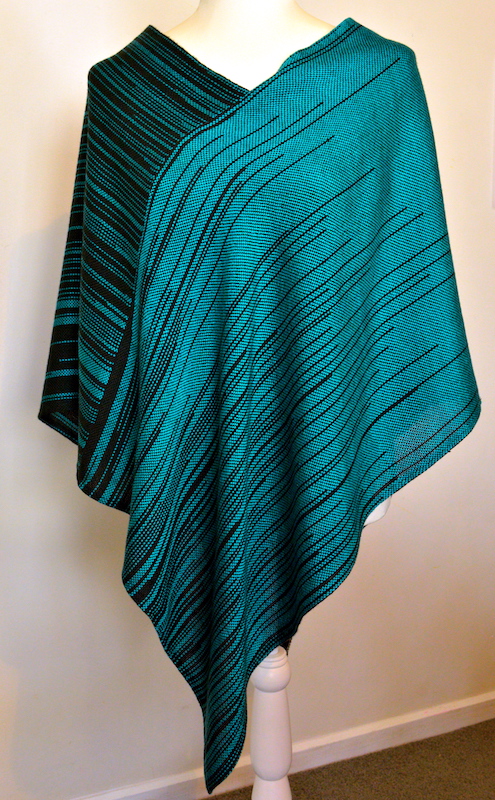
You can make garments, even with a small loom, with a bit of creative design. Strips of woven cloth can be seamed together in order to make larger pieces of fabric, which can then be cut and sewn into garments. People often have the idea that only large, drapey garments (like a ruana) can be sewn with hand woven fabric, but that is not so. All kinds of clothing, including fitted pieces can be made, with a bit of planning ahead of time to ensure you are weaving an appropriate weight of fabric, with appropriate yarns for the garment you want to make.

In my Rigid Heddle Garment making class, we weave and then sew a loose fitting, open front cardigan. The class is not specifically for small looms, but it is easy to see how you can build a garment by building panels to seam together. A woven fabric with vertical stripes incorporated into the design would be perfect for camouflaging seams.

The Clasped Warp Quechquemitl class is another example of panels sewn together to construct a beautiful garment. Again, the class is not specific to small looms but the weaver could opt to weave 4 panels to join rather than the 2 demonstrated in the class.

The most obvious garment choice for a little loom would have to be a scarf, as you don’t need a wide width and you can wind on a warp that is long enough for one or two scarves.

Produce Art

I have created a variety of art pieces on my 10″ Sampleit loom. A small loom is perfect for a petite sized wall hanging, tapestry or framed piece. I discovered an added bonus to my Sampleit for weaving art recently. When not in use, I store this loom by hanging it on the wall. I was working on some krokbragd recently and noticed when I hung the loom up for the day, that it was a perfect way to display the work on the wall while it’s being completed!

Another thing I have not yet done, but desperately want to, is to frame some of my smaller woven pieces. I love the way krokbragd looks in a beautiful frame.

Tapestry can also be woven on a little loom. You can see a few of my small tapestries in this post. I will freely admit that nowadays I weave tapestries almost exclusively on my Big Sister, but prior to the purchase of that loom I honed my tapestry weaving skills on my Sampleit. I even made a class about weaving Tapestry on a Rigid Heddle Loom!

Freestyle tapestries are great on a small rigid heddle, as they are more of an “anything goes” project. They can be very planned or completely unplanned. My Freestyle Tapestry series and Van Gogh Inspired Tapestry series are both great starting points for some inspiration.

Craft Accessories and jewellery

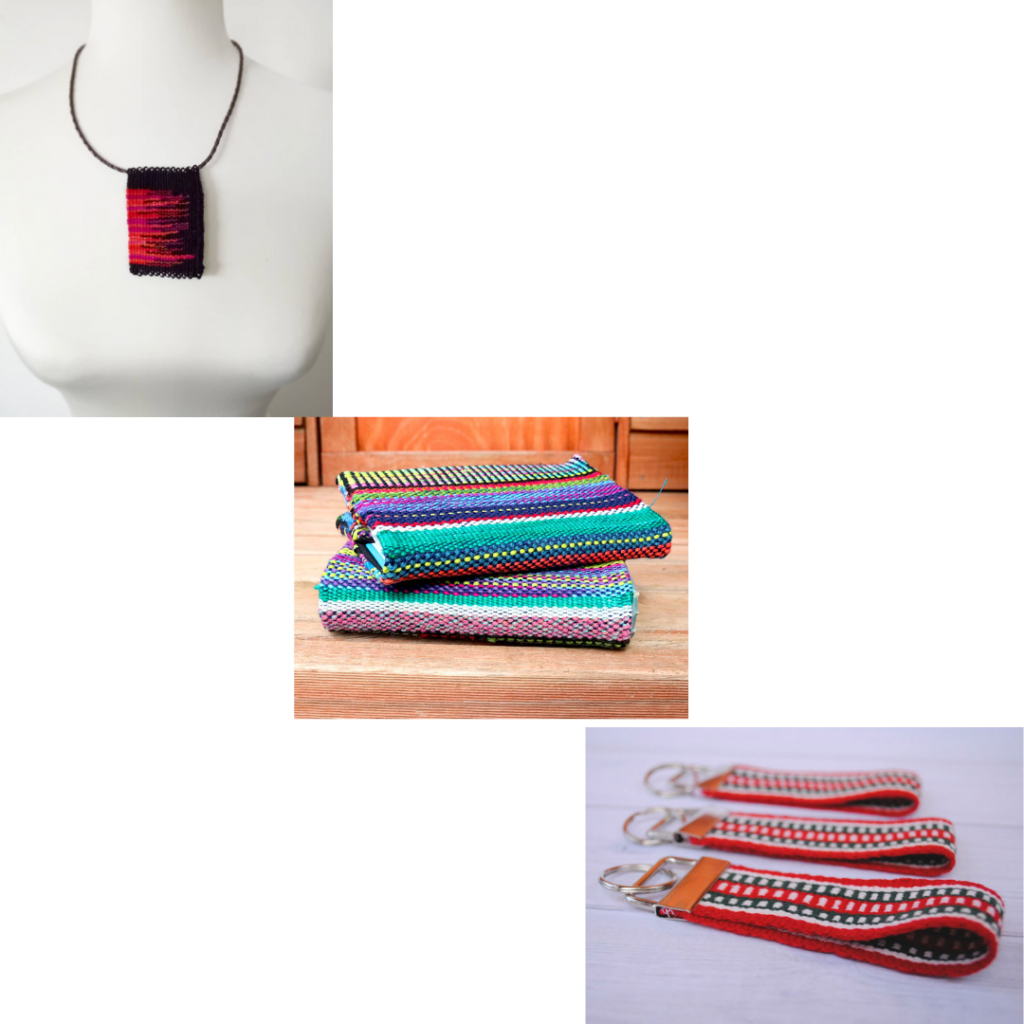
You can weave some awesome gifts on your little loom. A bookmark is a quick project and a fantastic way to use up leftover yarn.

I wove a tapestry necklace on my tapestry loom, but the same could be done on a rigid heddle loom. A wrist cuff is a great small loom project and very straightforward to make.

I’m often asked if inkle bands can be woven on a rigid heddle. I have not done it myself, but I have seen bands woven by others. My advice would be – if you want to weave a lot of bands, make the investment in an inkle loom. They are quite affordable and they hold the amount of tension required for weaving really neat bands. Click here if you want to find out more about inkle weaving.

Notebook covers are fun and useful to weave. You can make them to fit your notebook, like I did for my Stashbuster Notebook tutorial series. You can also view that series here:

Some more accessory ideas could include:

A clutch, a purse or small bag, a phone case or wallet, glasses case, gadget case, pouches, or a drawstring bag.

Get Into Homewares

The range of projects you could complete in this category really narrow down to how comfortable you are with seams in your finished piece (though I will mention double width weaving shortly!)

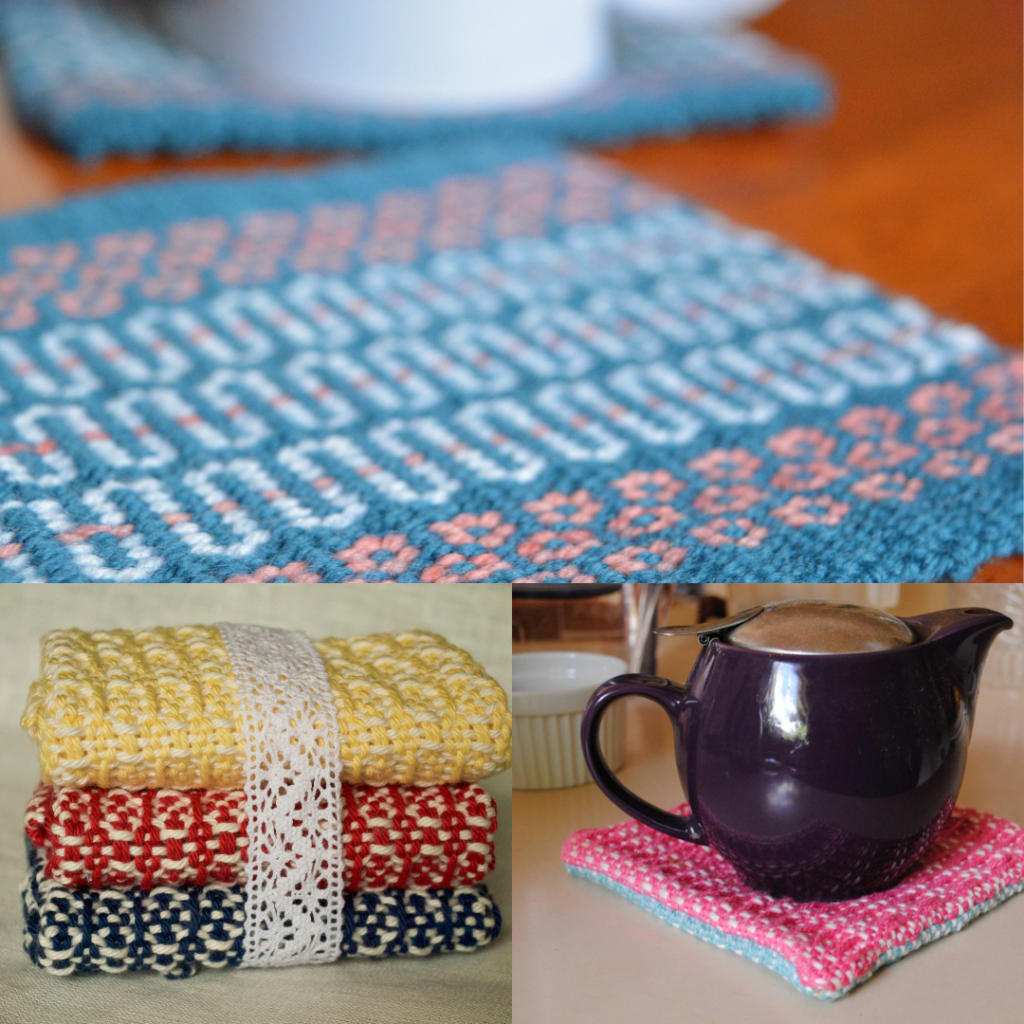
Small items could include kitchen cloths, drink coasters, mug rugs, small placemats, teapot rests, and napkins and pot plant or coffee mug holders.

If you don’t mind the idea of seaming pieces together, you can expand on this list of projects to include:

Cushions and pillows, kitchen towels, table runners, throws and blankets. My Rainbow Blanket project is the perfect of example of how seaming panels together to make a larger project can really work. It was woven entirely on my 10″ Sampleit loom. It is lap blanket sized, but could easily be expanded to become bed sized! I woven panels and hand seamed them together.

Weave For Children

Options for woven items for children could include little hats, vests, pants, baby blankets, toys and plushies.

Double Your Fun with Double Width Weaving!

I couldn’t possibly finish up without mentioning that you have the ability to weave double width on your rigid heddle loom. For my 10″ Sampleit, this means that instead of the 10″ weaving width available, I would have 20″ instead! Just to temper that statement, this doesn’t include draw in, so the actual finished piece would be narrower than 20″ – but you get the idea. Weaving double width is just that – you increase the width of your finished item to twice the size it would have been.

This is a great option to small loom weavers who do not have the option of upgrading to a larger loom but would love to weave larger items. Does double width weaving sound like some kind of sorcery to you? Well, it’s actually very practical and with the right steps, is very doable. I have some resources that can help you get started:

Weaving with Two Heddles Online Class

Doubleweave Baby Blanket Online Class

I’m sure I haven’t covered all the ideas that are possible on a smaller loom, so if you have any other thoughts for projects, please share with other readers in the comments below.

Until next time…

Happy Weaving!
Filed Under: Inspiration, Rigid heddle weaving, Rigid Heddle Weaving Patterns, Tapestry Weaving, Weaving Tagged With: little loom, small loom, small weaving projects

What is your excuse?

by Kelly 20 Comments

Many years ago, there was a beautiful little yarn and embroidery shop in an upmarket seaside suburb around 30 minutes drive from my home. Visiting was a treat, as the shop was in an historic stone building, had several rooms and was wonderful just to look at.

I couldn’t afford to spend much on yarn or supplies back then, but I once splurged on some beautiful cashmere yarn to knit a hat for my newborn, and I even once went to the extravagance of buying a pretty floral handkerchief for each of my girls, just because I wanted them to have something pretty.

*This post contains affiliate links. For further information, please see my disclosure policy.

One time, my husband drove past this shop with a new work colleague. She pointed at the shop and said “that’s for people with too much time on their hands”.

My husband was slightly bemused, knowing that I was a customer of the shop. He also knew that, at that moment, I was at home, caring for and homeschooling our 4 young children. On a good day, I was able to take 30 minutes to 1 hour to work on a craft project. Many days, I was either too busy or too exhausted to even consider doing something creative. I certainly didn’t fit the profile of someone with too much time on her hands!

Time is a funny thing. Our ideas and beliefs about time are funny too. Often when people say they “don’t have time” to do something, it is really just a bit of a cover up. An excuse.

An excuse to not have to exert effort in order to learn something new. Maybe they know they have to save some money to buy the necessary materials to start learning and that is something they don’t want to do. Maybe (and I think perhaps this is the most common reason people make excuses) is to hide the fact that they are afraid of failing.

Since I started my Online Weaving School almost 4 years ago, I’ve heard from thousands of weavers all over the world from all walks of life. Many are brand new to weaving, some have been weaving for some time, and others have not yet begun but have a desire to start.

I’ve heard frequently from people who say they have been wanting to learn to weave for 20, 30, 50 years! Overwhelmingly, new weavers have told me that they wish they had started earlier instead of waiting for “the right time”.

You see, the majority of people live their lives in a box of societal expectation.

Finish school. Go to college. Get married. Have a family. Somewhere in amongst all of that, buy a house. A couple of cars. Work. Raise your family. Keep working. Kids are grown up and left home? Now you have more time to work! Accumulate more stuff with the money you earn from working. Indulge in expensive holidays in an attempt to recuperate from working. Go back to work, after all, someone has to pay for the lifestyle I’ve just described. And then…. one day, finally, you get to retire! THEN you have the time to do all the things you have been really wanting to all these years. You’re likely in your early 70’s by this stage.

None of the above are bad things, they are good things. It is good to get married and raise a family (in fact, I think it’s one of the best things anyone can do!) It is good and necessary to work. Holidays are lovely. Having things you want is nice. But these things are not exclusive, and they don’t have to be compartmentalised.

I have not approached my life as a checklist of things to be done before I can invest in myself and my passions. I am raising children right now, still homeschooling, caregiving and providing. My role as a wife and mother are very important to me. And yet, it is also very important that I get time to be creative and work on things I love. Doing so makes me a better wife, mother and person. It’s part of who I am.

When I began weaving, we had small children and very little money. Yes, I too had my mental excuses as to why I couldn’t learn to weave. Not enough time. No spare money. I needed to wait for the right time. I might not be smart enough to do it.

But, with my husband’s help, I became convinced that it was a good thing to do, and we worked past the excuses to make it happen. To say that the decision to save for and purchase my first rigid heddle loom has been life changing would be putting it very mildly!

And it’s not just me, only yesterday a student told me that learning to weave has been “life affirming” for her.

If you have been wanting to learn to weave, but for “some reason” have not started, I encourage you to look at your situation realistically. Are your reasons actually excuses? Are they a cover up for something else?

I want to talk just a little more about time. We all have the same 24 hours in a day. We also have choices about how those hours are used. Do you work all day, get home and collapse in front of the tv? This might seem a little harsh to some, but I am sure that if you have time to watch tv, you have a lot more free time than you might think. Do you spend hours surfing the internet or on social media? Then, guess what? You have time to learn something new!

Overrun with little kids? Yep, I’ve been there and I would use their nap or sleep times in order to do something creative. If that didn’t work out, I would involve them in what I was doing in order to get that time for myself. Sometimes that would be having a child sort through my button or ribbon collection, which they thought was awesome fun. Sometimes it would be having a child sit on my lap while weaving to “help” me beat.

Last year, I wrote a post about planning and prioritising in your days so that you could make time to do the things you really wanted to. I included a printable daily planner that I hope some of you might use to make some plans and goals.

What I want you to get out of this post at the very least is that you don’t know what you don’t know. You need to take that first step of trying and then another step, and then another. The point is to make a start, because retirement could be a long time away!

……………………………………………….

One more story that struck me when I read it in a magazine and has stayed with me for years. An older woman was sitting in a doctor’s waiting room. She was knitting while she waited.

A man who was also waiting and had been observing her, suddenly asked “Why do you waste your time doing that?”

The woman replied “When I leave here, I will have half a dish rag, what will you have?”

……………………………………………………

What I want you to get out of this at the very most is that you are worth it. You’re worth the time, money and effort investment and I know that if you truly want to, you can do it!

If you would like to view this post in video format (and watch me weave), I invite you to watch here-

Until next time…

Happy Weaving!

Filed Under: Weaving Tagged With: encouragement, learn to weave, weaving, what is your excuse

How to fix a weaving float

by Kelly 14 Comments

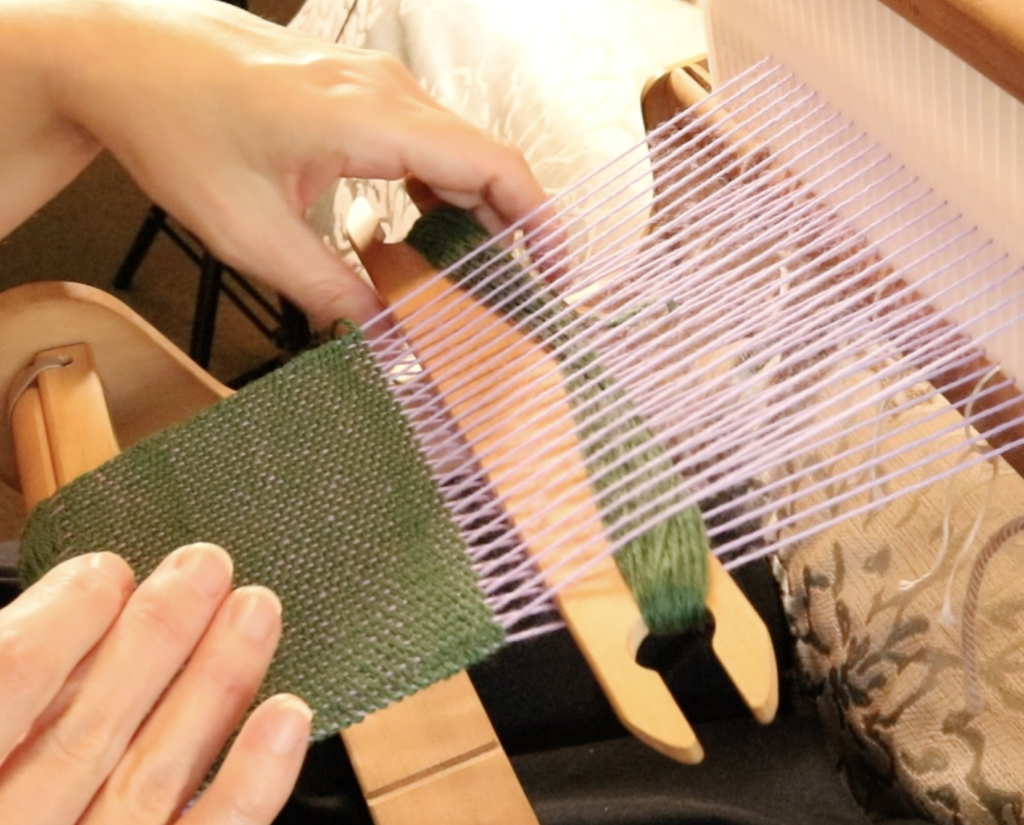
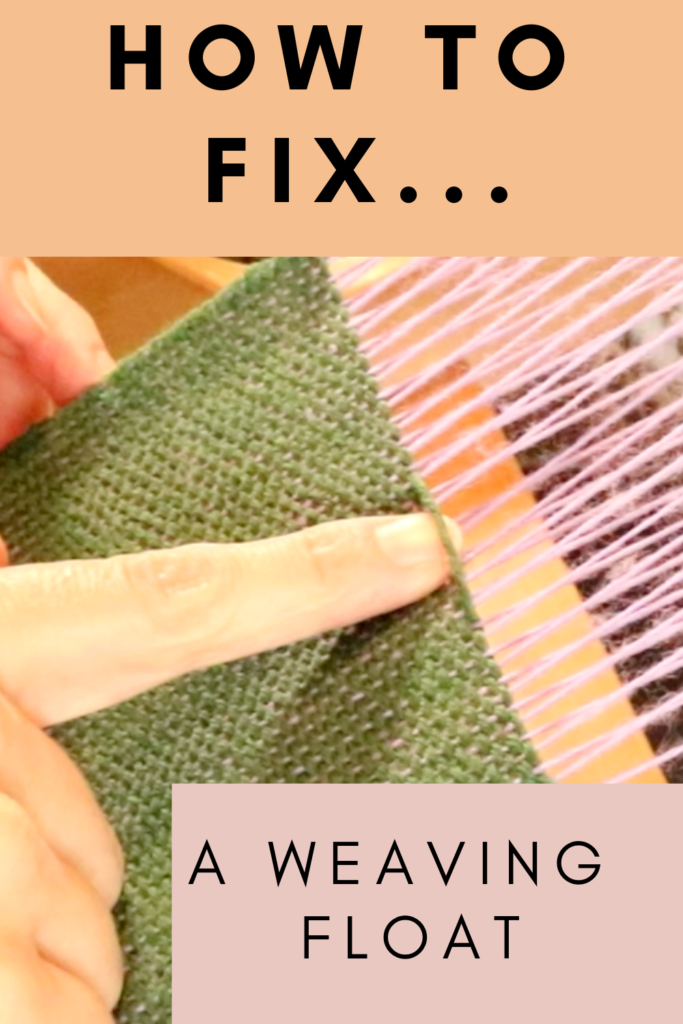
A “float” in weaving is a skipped thread or threads.

They usually occur at the back of the fabric and therefore are not noticed until you remove your piece from the loom.

While the discovery of a float can be disappointing for the weaver, thankfully they are fixable without too much trouble.

*This post contains affiliate links. For more information, please see my disclosure policy.

I’m using a plain weave sample, as it is the most straightforward to fix and so makes a suitable introduction to a weaver who hasn’t come across floats before. I’m weaving on my Sampleit Rigid Heddle Loom for the purposes of this tutorial, but floats can occur in any type of weaving.

We’re going to look at the three main culprits for a float happening in your weaving:

  • Loose or inconsistent warp tension
  • The angle of your shuttle as you enter the shed
  • Sticky threads

WARP TENSION

I know, I talk all the time about warp tension, but that is because it is SO important on so many levels to the success of your project. In relation to floats, a warp tension that is either too loose or has loose sections is a place for your shed to get messy. If your shed is not well tensioned and clean, that invites the potential for your shuttle to go over or under threads that it is not supposed to.

SHUTTLE ANGLE

This relates pretty closely to my first point about warp tension, because if your shuttle is at a weird angle when it enters the shed, it may either snag on a warp thread or just skip over it entirely, and then you have yourself a float. Again, we want to aim for a clean shed that leaves no guess work about the path your shuttle should be taking.

A messy shed can cause floats!

STICKY YARN

This is a bit of a pet topic for me it seems, but once again, it has a huge impact on the success of your weaving. Sticky yarn will cause all sorts of trouble and floats are definitely one of them. If you want to know more about which yarns have the potential to give you a rather large headache, check out these posts:

  • 3 YARNS BEGINNER WEAVERS SHOULD NEVER USE
  • CHOOSING AND USING YARNS IN WEAVING

Tip for dealing with sticky yarns:

Use a spare pick up stick or shuttle to “clear” each new shed as you open it. This will force any threads that are sticking to one another back into their natural positions.

Now that we know the reasons why you might see floats occurring in your work, let’s get on to how to fix them!

*Note – Any float fixing should be done prior to wet finishing. If you have already wet finished but want to fix some floats, you can, the results just may not be quite as good.

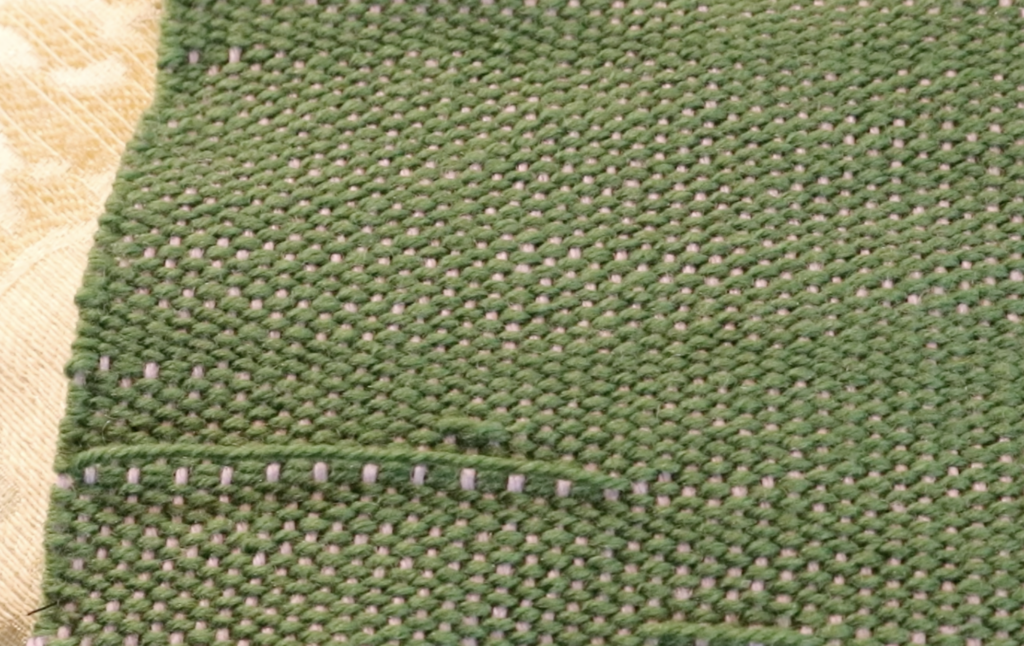
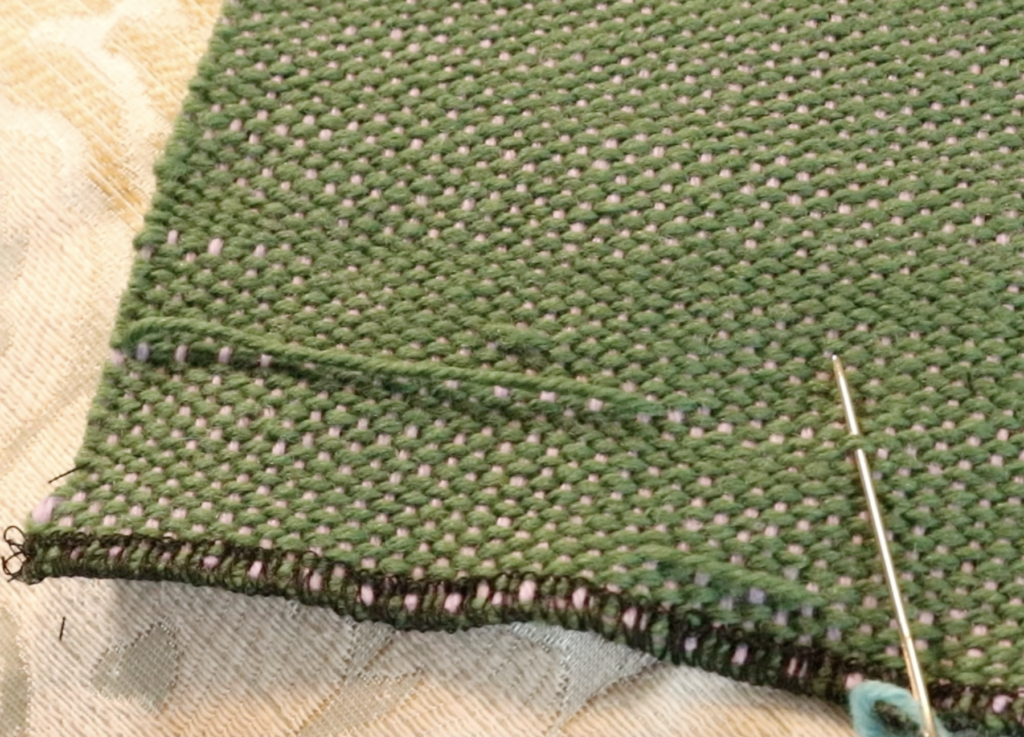
You will need a tapestry needle and a length of your weft yarn. I used a blue colour instead of my weft green, but only to make the tutorial super clear. You should use the exact same yarn in the exact same colour as your weft.

Normally, I would use my favourite tapestry needle, my Clover Bent Tip Needles, but as we are currently packing up our home to move, I couldn’t find them and just used an ordinary tapestry needle.

There is no need to knot the end of your threaded yarn.

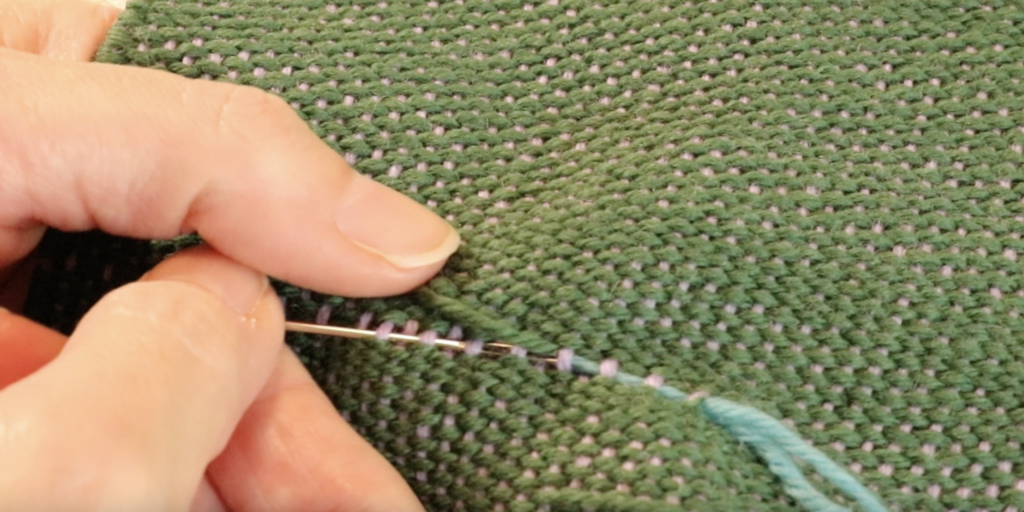
Begin by locating the path that your float yarn is travelling, around an inch away from the actual float. You can see that initially the yarn travels on the over/under path of plain weave, and then we have all those skipped threads where the weft strayed off course. We want to replace that section with a weft thread that is on course.

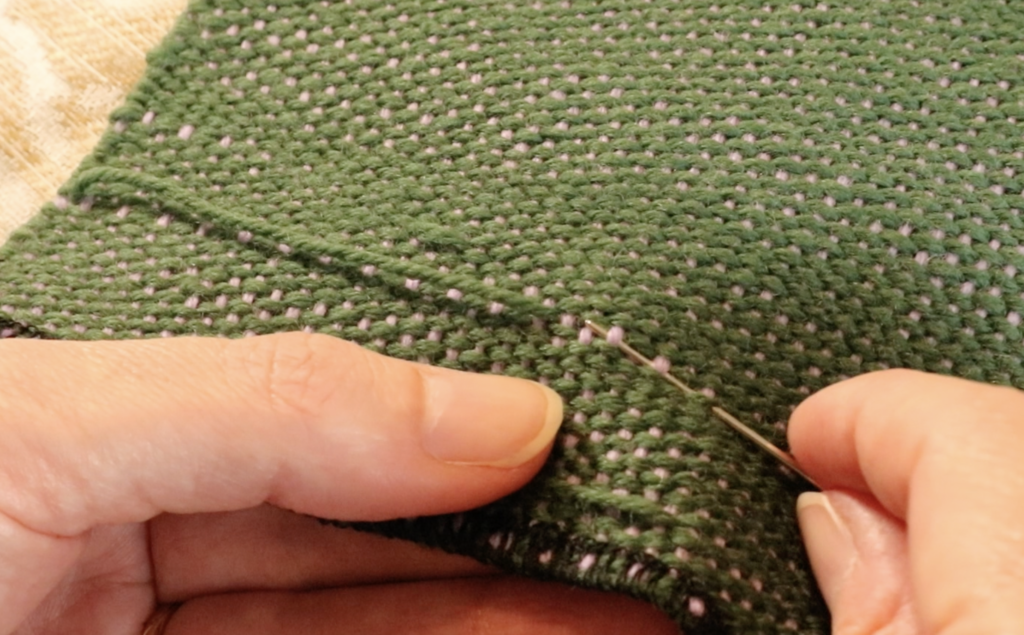
Next, we want to follow or mimic the exact same path that the weft was taking before it strayed off course. Keep your eyes on the correct weft thread and copy it exactly with your needle, right up to where the float begins.

When you run out of needle, pull your yarn through, but leave a tail of a couple of inches hanging out from where you began. Don’t cinch the thread up tightly, just pull it through so that it lays in place.

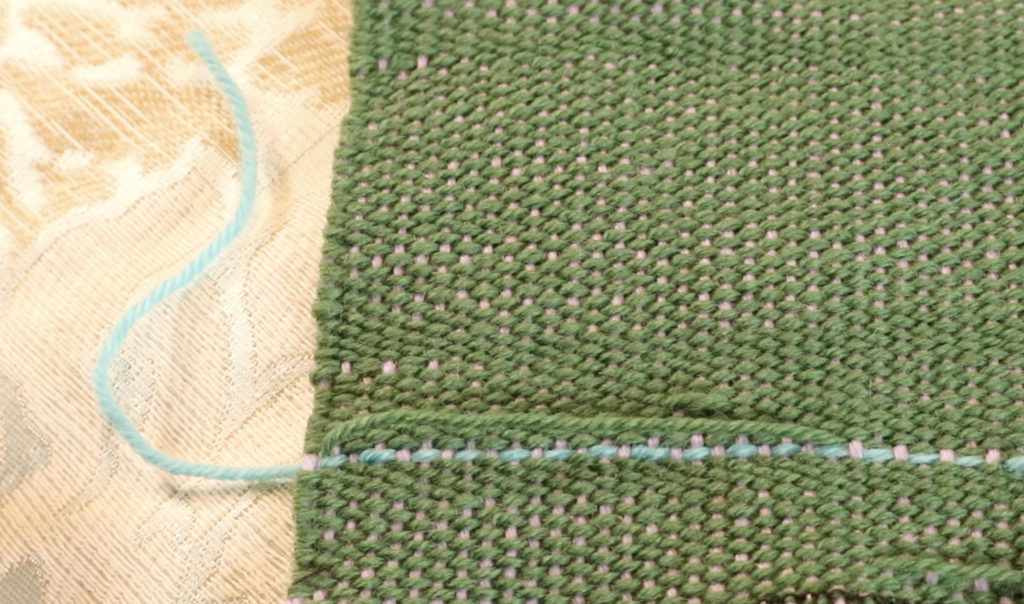
When you reach the float, push it aside so that you can see and continue following the over/under path based on where you were up to. Was your last thread under a warp thread? Then the next one should travel over – or vice versa. What you are doing now is placing the thread where it should have been in the thread, before the skipped threads happened.

When you reach the end of the float, continue to needle weave for another inch or so. This picture is not the best example of this, as my float was close to the edge of the work. Whatever the case, continue needle weaving past the end of the float, then leave a tail of a couple of inches like you did at the beginning.

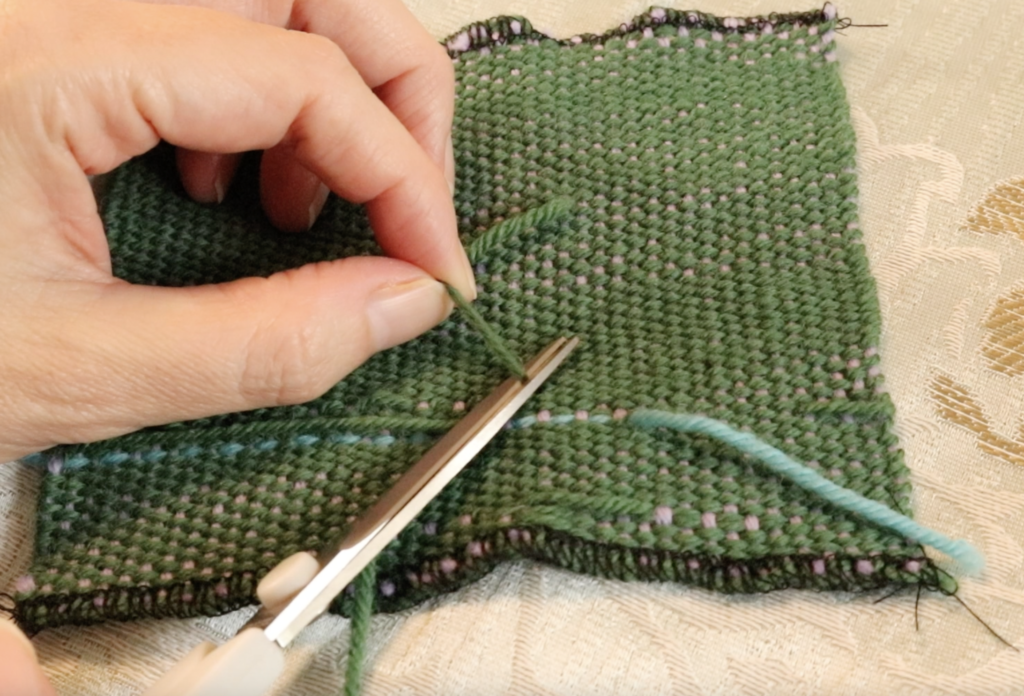
When you have repaired all your floats in this fashion, it’s time to wet finish. Do not cut your tails or floats at this point, leave it all just the way it is. Wet finish and dry completely.

When your weaving is completely dry, it’s time to cut the tails. Use a small, sharp pair of scissors and cut close to the fabric, being very careful not to cut the fabric itself! You can also cut the floats at this point, in the same way you cut the tails.

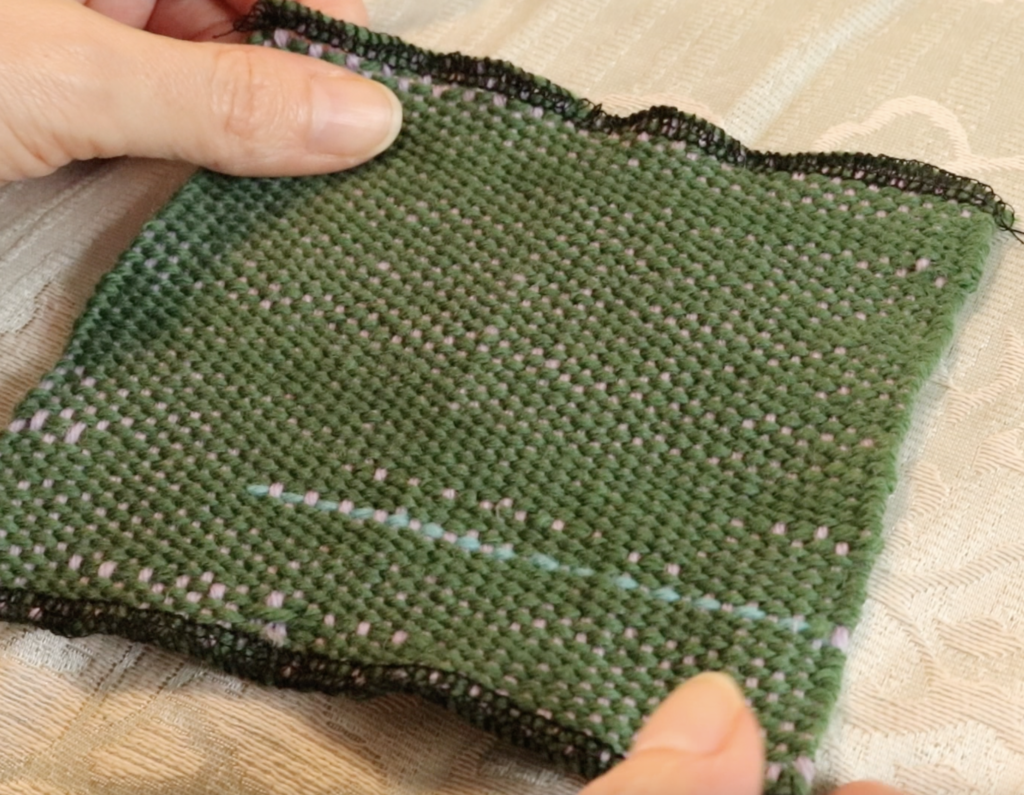
And that’s it, floats are fixed. I left one float in place over at the left edge for comparison.

If you would like to see this tutorial in a step by step video format, please visit my Youtube channel.

Until next time…

Happy Weaving!
Filed Under: Free tutorial, Online Weaving School, Rigid heddle weaving, Sewing, Tutorials, Weaving, Yarn Tagged With: fixing floats, how to fix a float in weaving, weaving floats

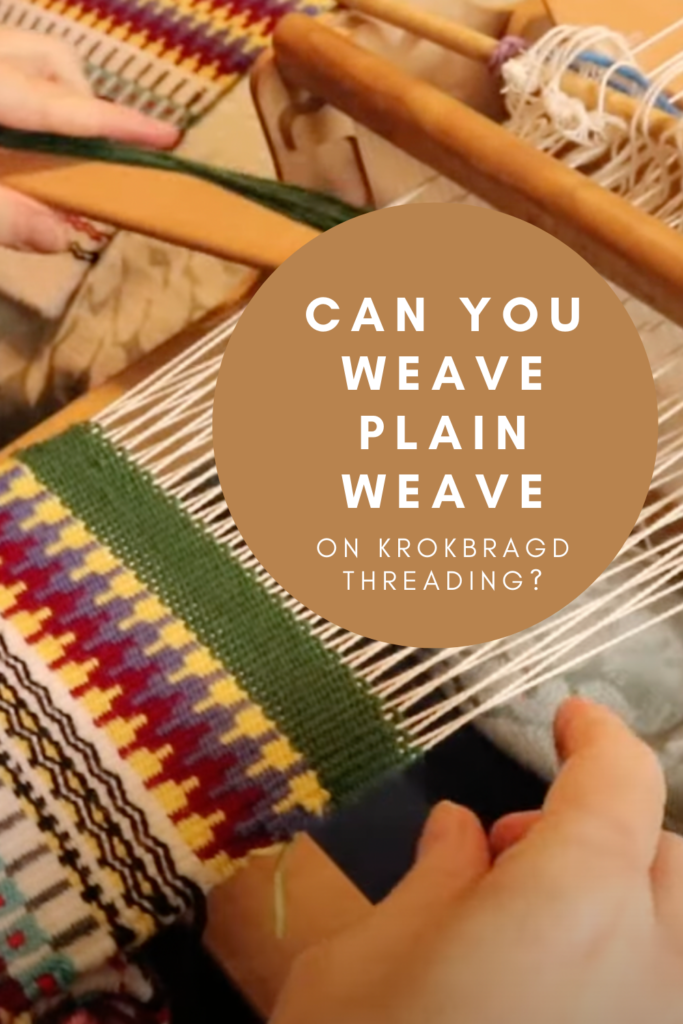
Can you weave plain weave on krokbragd threading?

by Kelly 9 Comments

My answer to this question is: “Yes… but are you sure you want to?”

There are times when you’re weaving krokbragd and you want to have a little area of just plain colour, whether it’s to break up a busy design or as a border section.

*This post contains affiliate links. For more information, please see my disclosure policy.

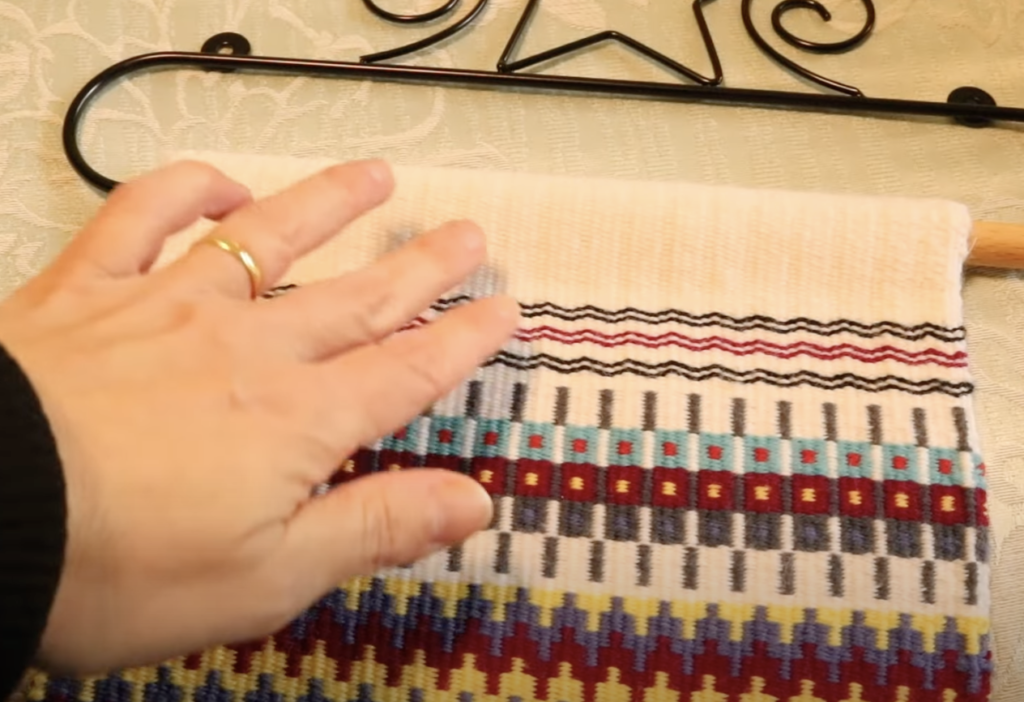
My wallhanging piece pictured above has some larger bands of solid white at the top and the bottom to act as borders. The top section was also woven in order to fold over and form the sleeve for my quilt hanger.

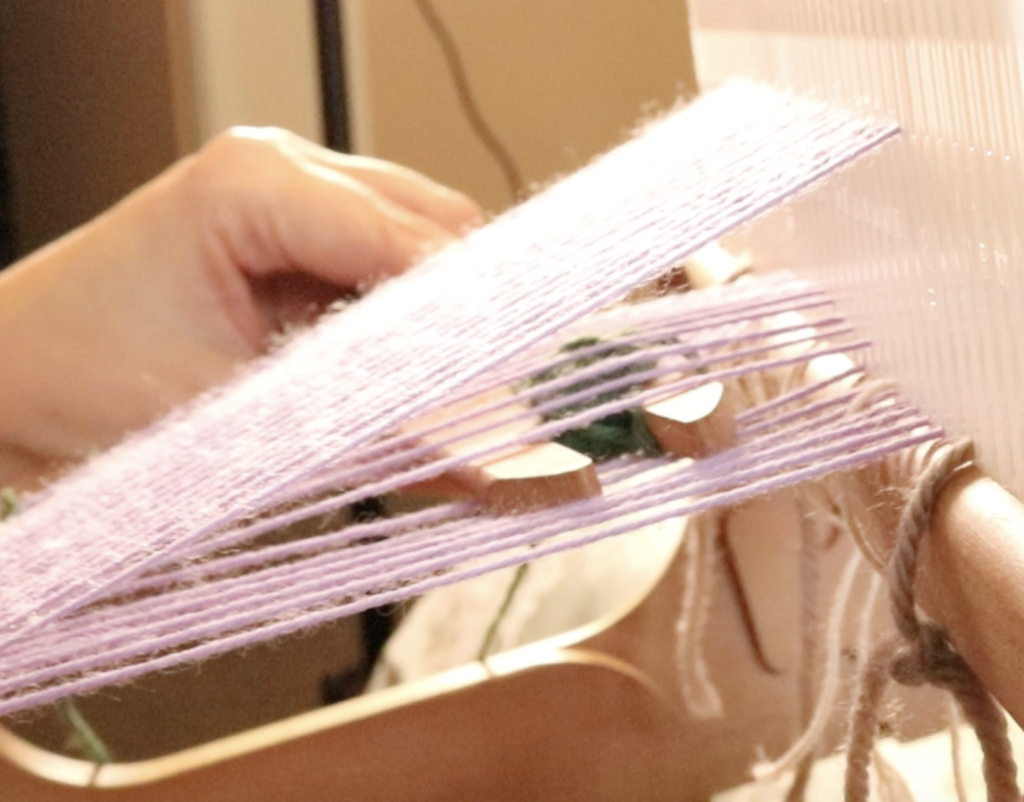
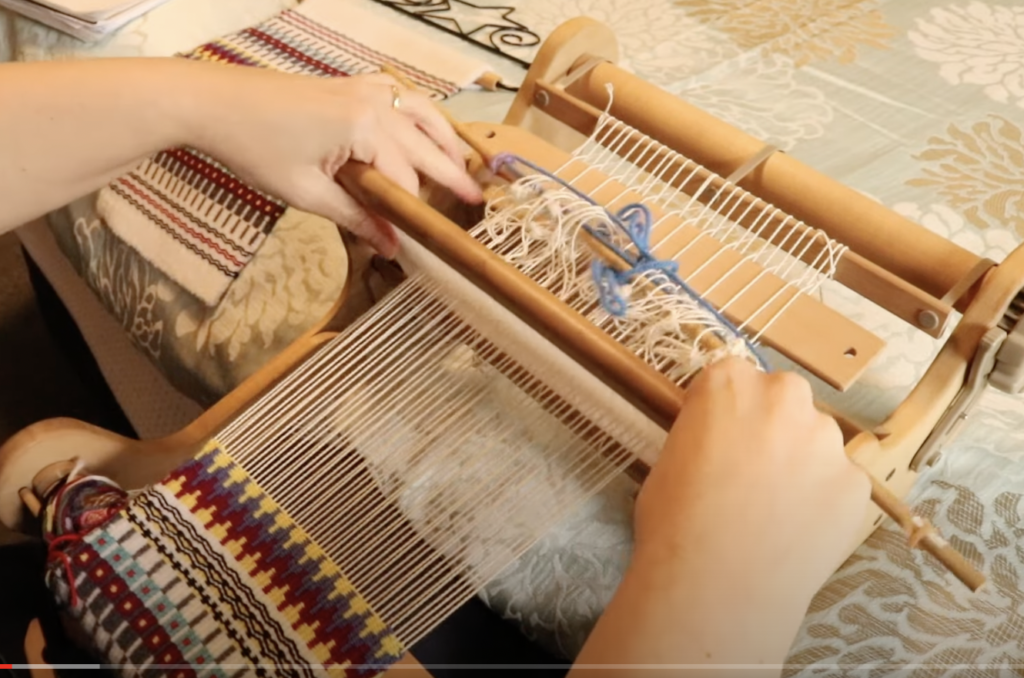
You might naturally think that for weaving a solid band of colour, you would choose plain weave. If you have your rigid heddle loom set up with a single heddle, heddle rod and pick up stick, plain weave is easy.

Single heddle, heddle rod and pick up stick loom setup

All you have to do to achieve plain weave on this setup is:

  1. Heddle up
  2. Heddle down

However, plain weave is definitely not the best option (in my opinion) and I’m going to tell you why.

Plain weave is a balanced weave

By it’s very nature, the amount of warp showing compared to the amount of weft showing is equal, ie. balanced! Now, consider the very weft faced krokbragd you have been weaving all this time. The weft completely covers the warp so that all you see is the colours of the weft forming patterns. If you suddenly throw a band of plain weave in there, it’s not going to match up so well with the krokbragd.

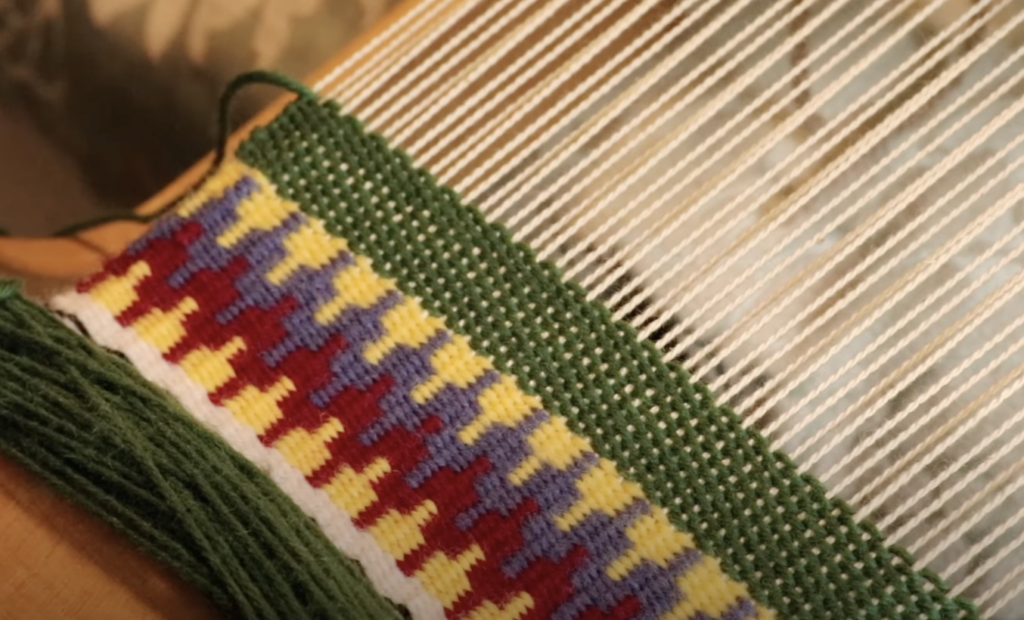
Compare the band of green plain weave just woven with the rest of the krokbragd underneath. See the problem?

The warp is showing through, and considering we have spent the rest of the piece carefully beating down the weft to cover the warp, the plain weave now sticks out like a sore thumb! If the entire piece was plain weave, it would be desired that the warp is showing through at the same rate as the weft, but not for krokbragd.

Plain weave is a lighter weave structure

It’s not only the visual aspect of the plain weave that is different to the krokbragd either. Weft faced fabrics are generally quite stiff and dense. There is a great difference in texture between the two weave structures on this piece, with the plain weave section being thin and light.

Changing the weave structures changes your edges

This difference in weight of the woven piece affects the fabric in other ways too. Krokbragd has more draw in than plain weave, so suddenly my edges are no longer consistent and look slightly bulgy in the plain weave section.

So, how do we solve this problem?

Thankfully the answer is extremely simple. All you have to do is keep weaving krokbragd!

Just use the solid colour that you want for your band of colour and move through the 3 step krokbragd weaving sequence. Don’t change your colour until you have the desired amount of weaving.

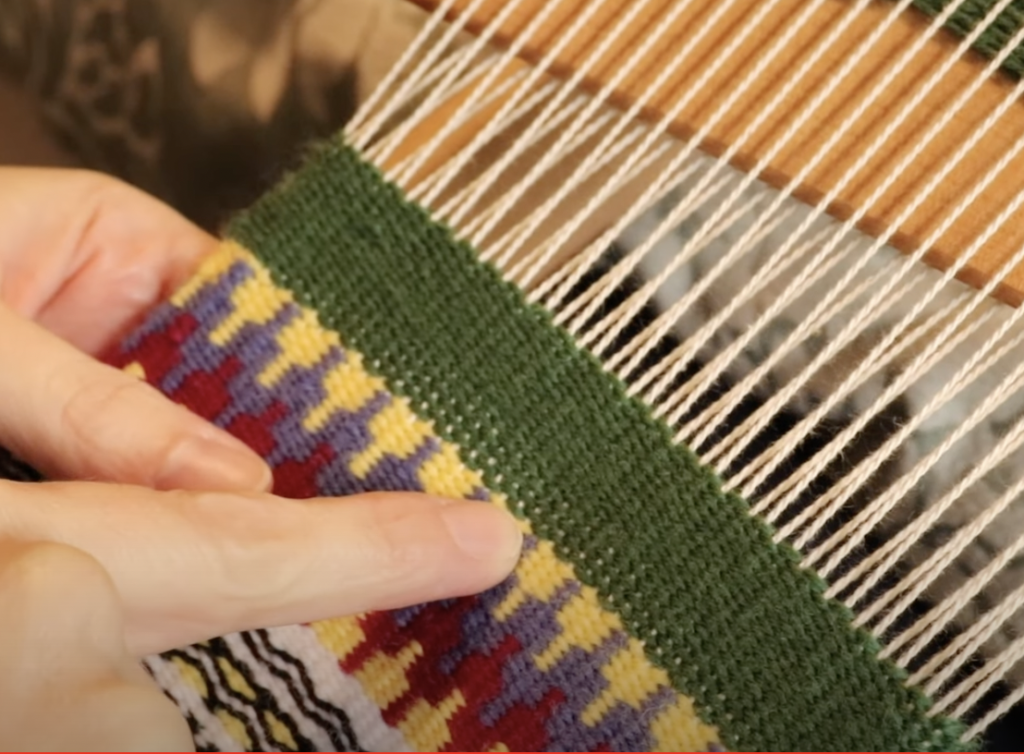
You can now compare the two sections of weaving in green – the part where the warp is showing is the plain weave and the more uniform looking part on top is the krokbragd. Also, because the green krokbragd follows the previous weave structure, it looks much more uniform and “like it belongs” there.

If you want to learn more about weaving krokbragd on your rigid heddle loom, check out my Krokbragd 101 online course.

If you would like to view this blog post in video format, please view here:

I hope you enjoyed this article! Perhaps it gave you some new ideas for krokbragd design? Or perhaps it has inspired you to give krokbragd a try? Let me know in the comments section below!

P.S. Have you seen the share buttons at the top of this post? You can easily share this article to Pinterest, Facebook or via email with one click. The more shares, the more weavers I can help! Thank you!

Until next time…

Happy Weaving!
Filed Under: Krokbragd, Neat edges, Online Weaving School, Rigid heddle weaving, Rigid Heddle Weaving Patterns, Tutorials, Weaving Tagged With: krokbragd, plainweave, rigid heddle weaving

  • « Go to Previous Page
  • Page 1
  • Interim pages omitted …
  • Page 12
  • Page 13
  • Page 14
  • Page 15
  • Page 16
  • Interim pages omitted …
  • Page 115
  • Go to Next Page »

Primary Sidebar

Hand crafted boat shuttles

Categories

Archives

Meta

  • Log in
  • Entries feed
  • Comments feed
  • WordPress.org

Copyright © 2025 Kelly Casanova Weaving Lessons on the Foodie Pro Theme