• Skip to main content
  • Skip to primary sidebar

Kelly Casanova Weaving Lessons

  • Hi! I’m Kelly!
    • Affiliates Disclosure
  • Online Weaving School Class Index
    • Common account issues
    • Common technical issues
    • What do I get with a membership?
  • New to rigid heddle weaving? Start here!
    • Never heard of the rigid heddle loom?
    • How to weave neat edges on the rigid heddle loom
    • Rigid heddle weaving
    • Rigid Heddle Weaving Patterns
  • Patterns
  • Subscribe

Rigid heddle weaving

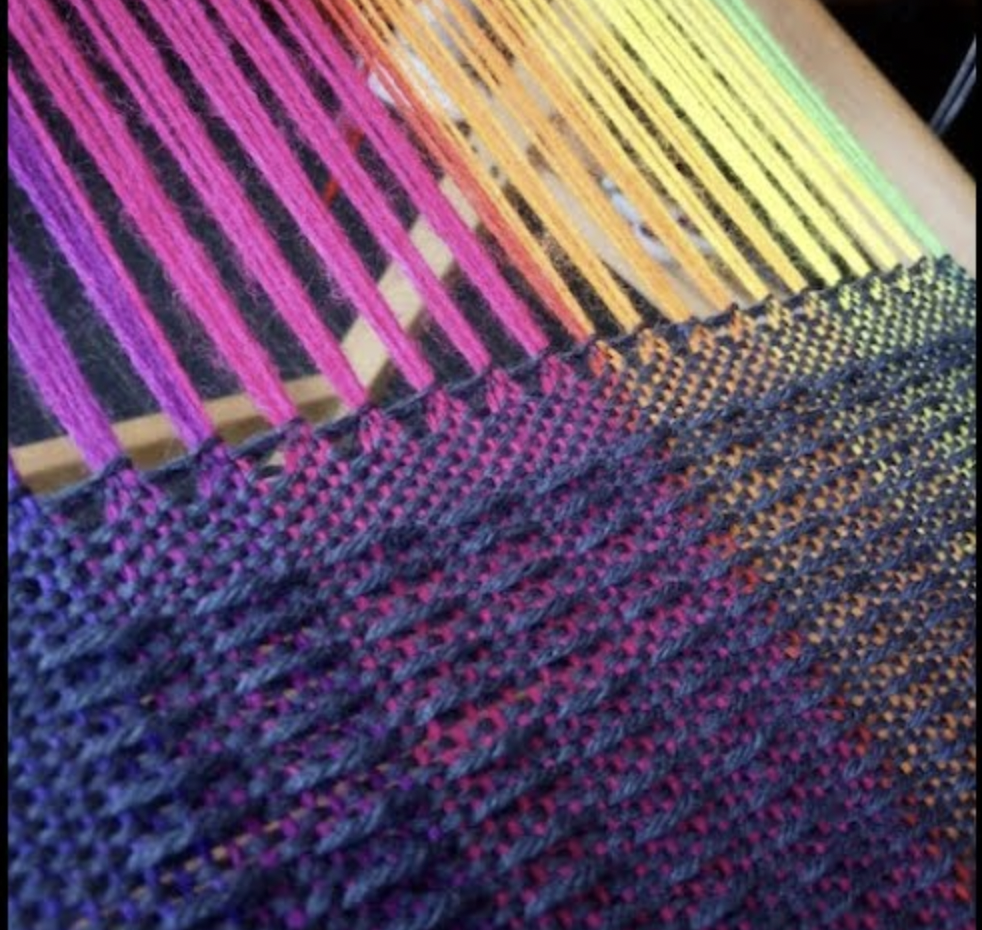
What is art cloth?

by Kelly 10 Comments

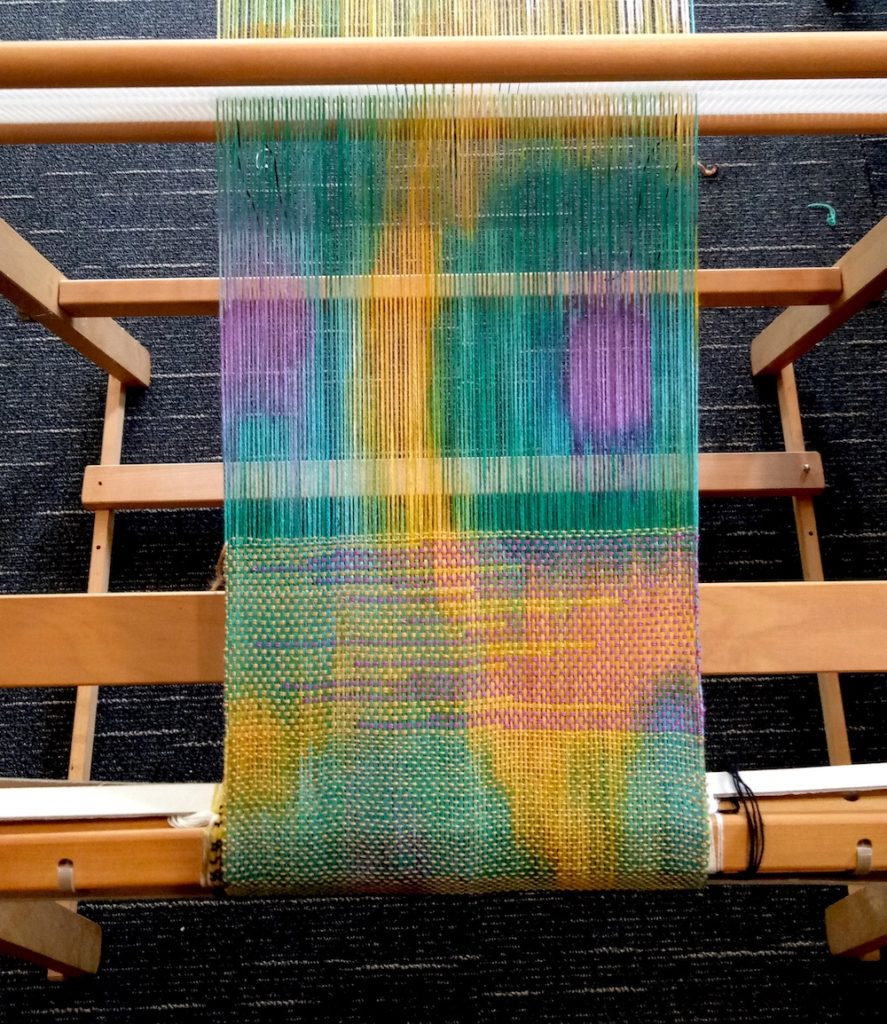
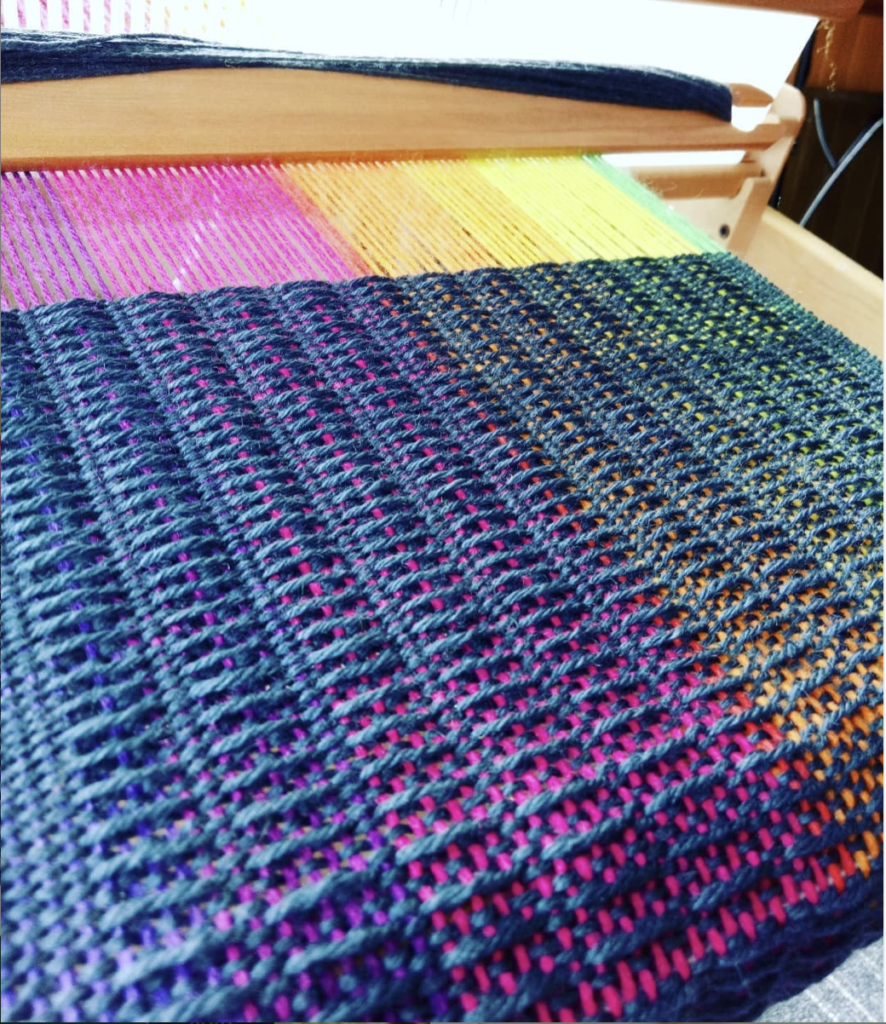
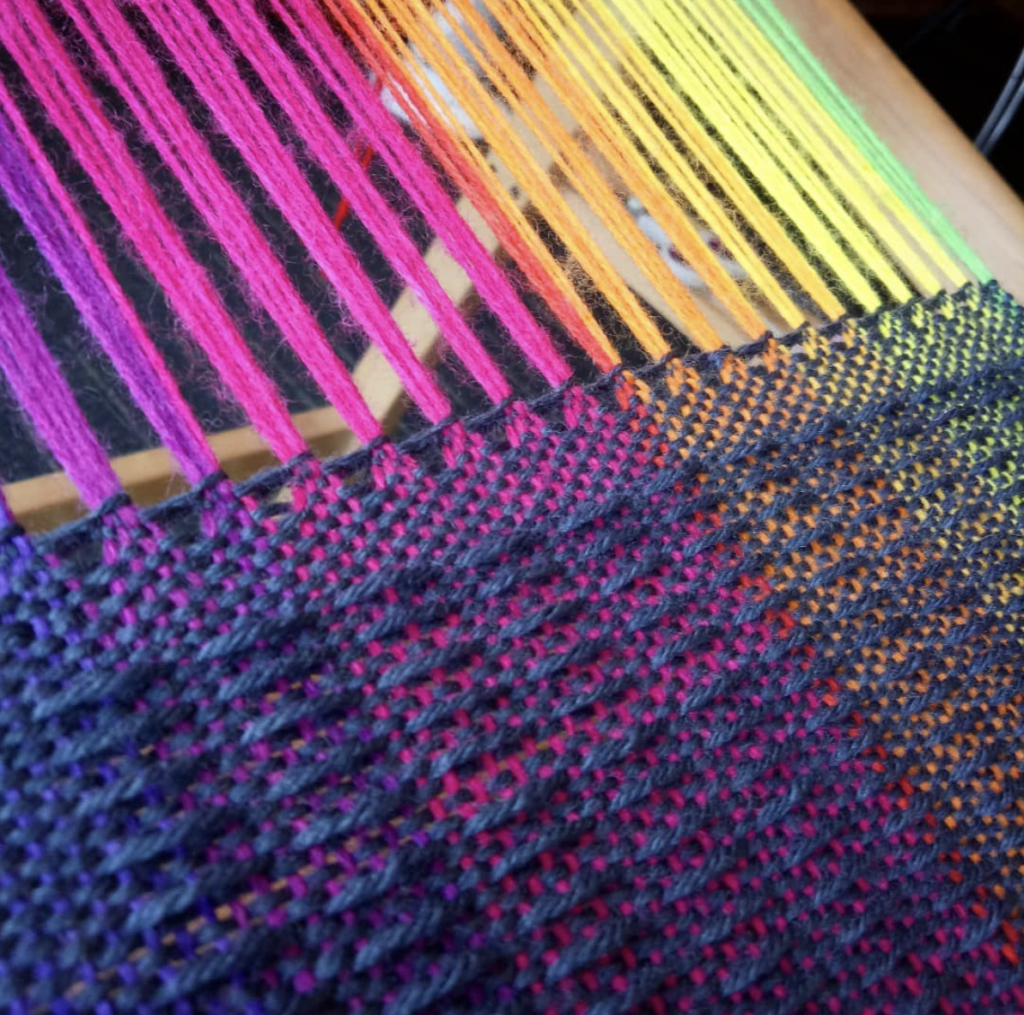
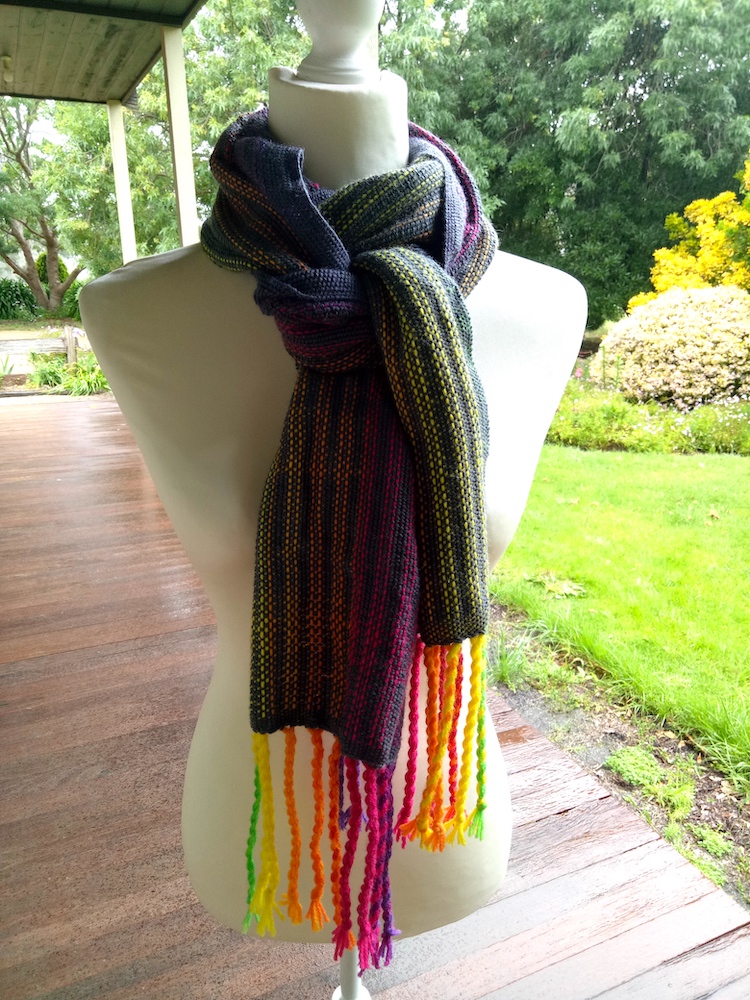
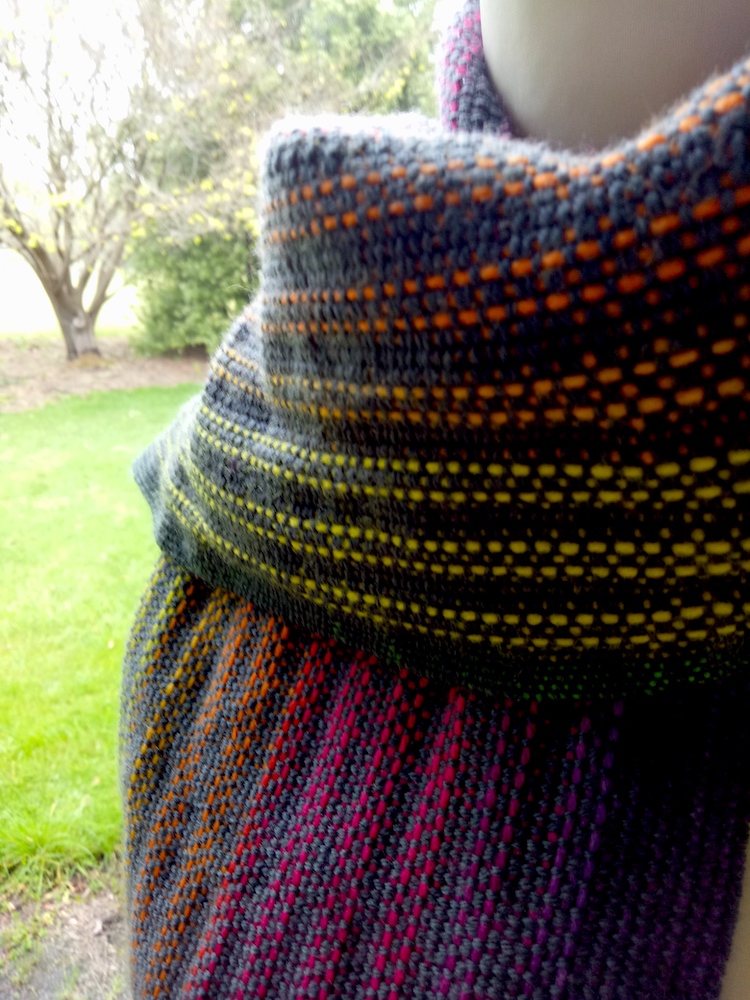
I think of art cloth as a happy meeting of art and weaving.

It doesn’t have to be anything set or particular, art is a difficult topic to distinguish as it can be so incredibly broad.

Usually, when we plan a new woven piece, we start with calculating, sourcing materials, deciding on pattern and colour, and visualising how the finished project might look. It is already an artistic process by default.

This post contains affiliate links. For more information, please see my disclosure policy.
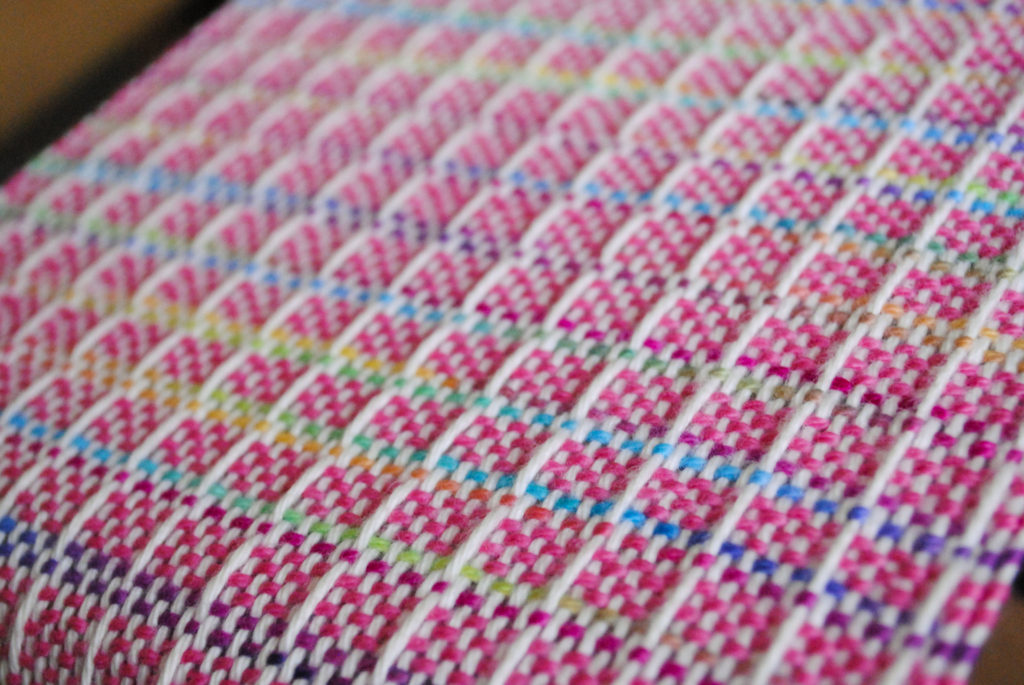
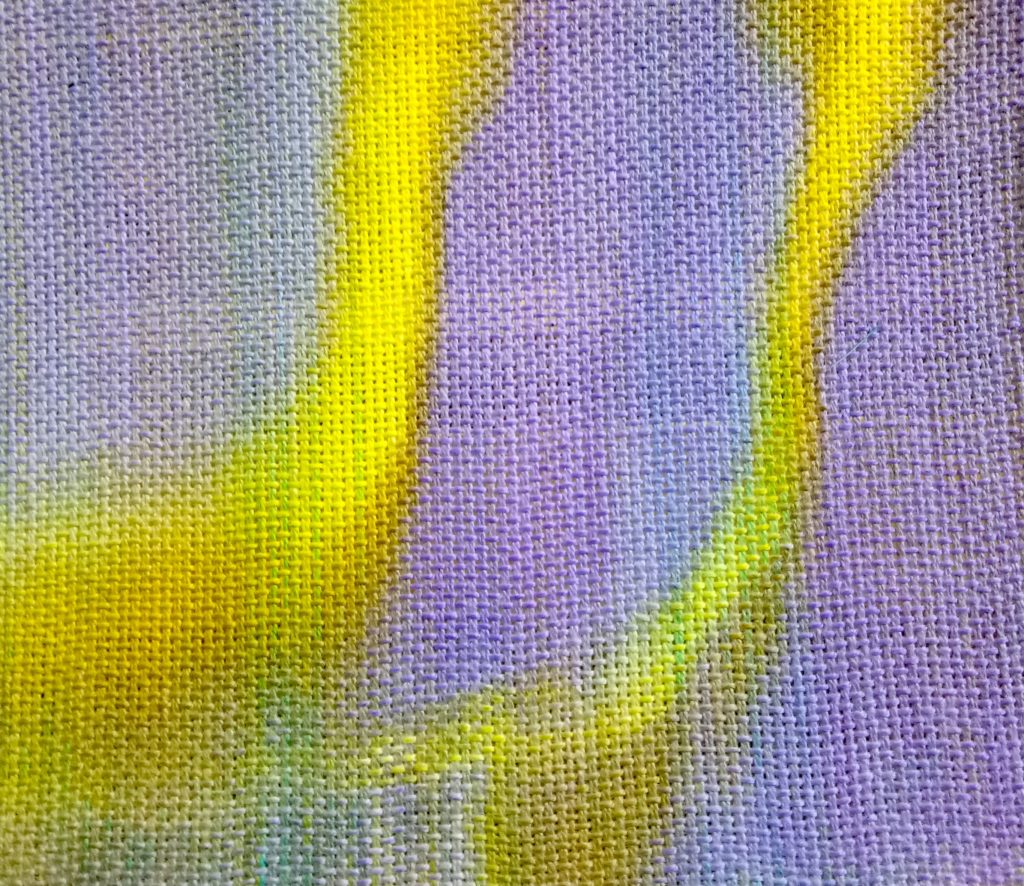
But when I think of art cloth, I think of a piece that is truly my own. I think of multi media techniques and the introduction of tools and materials that I might not ordinarily use in my weaving. I think of creating a piece that will not look like any other, it will be completely unique and original.

What an exciting concept!

I have just completed filming my new class, Art Cloth Workshop.

I’ve been spent a lot of time sampling and exploring, carefully considering what techniques I might like to share with students, testing to ensure quality control and choosing what I think gives great results and is achievable for anyone.

The curriculum plan includes some of the following techniques:

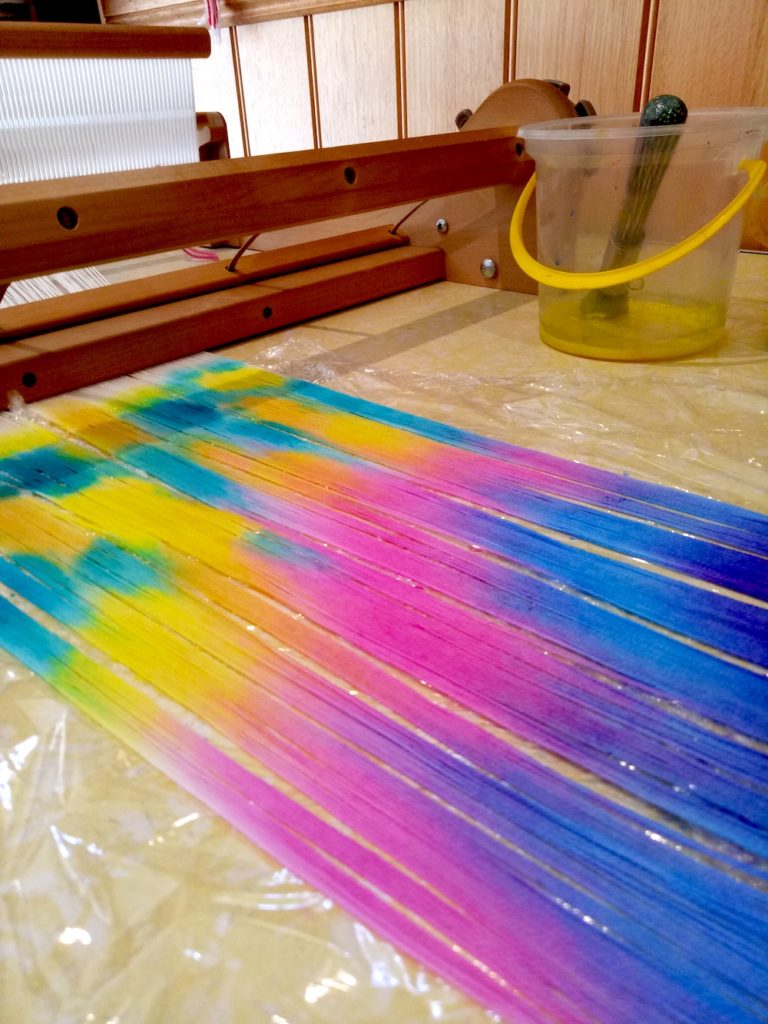
  • Warp painting
  • Inlaid overshot
  • Clasped weft
  • Sun printing
  • and more!

This workshop is a little different to many of my classes in that it is not specifically project based. I do provide project ideas along the way, but the focus is more on sampling to explore the techniques. Once you have learned how to implement them, you can decide whether to go ahead and use them in a project.

The class is filmed on my 24″ Ashford rigid heddle loom. We use a wide variety of materials, and details of these are provided in the class.

The workshop is completely pre-recorded so that you can learn in your own time.

If you are a member of the Online Weaving School, you will have free access to the workshop.

The class is also be available for single purchase.

To view the introduction video to the workshop, click below.

If you are ready to access the workshop, click on this link to enrol.

Until next time…

Happy Weaving!
Filed Under: Art cloth, Online Weaving School, Rigid heddle weaving, Weaving Tagged With: art cloth, new class, online weaving school, rigid heddle weaving

How to use floating selvedges

by Kelly 4 Comments

In my last post I talked about what floating selvedges are, how they can benefit your weaving and included a photo tutorial for how to install them.

Today, we’re going to have a look at how you actually use floating selvedges in the weaving process.

It’s very simple, but there are a few little rules and things to remember:

  • “Over, under”. This is going to be on repeat in your mind as you weave with your floating selvedges in place. The photo tutorial will show you how this works.
  • You will need to adjust your weights as you weave and advance the warp. This is because your floating selvedge (FS) threads will roll on to your front cloth beam along with the warp threads as you advance.
  • The weft should always wrap around the FS on each side. This also relates to the “over, under” action and will be clear for you to see when you’re weaving.
  • The yarn that you use for your FS can be the same yarn as either the warp or weft. Most of the time, I will use the exact same yarn for the FS as I’m intending to weave with (weft). But, if I have frequent colour changes and more than a few colours in the weft, I will use the warp yarn to set up my FS.

In this tutorial, I’m imagining that you have already set up your floating selvedges and you’re ready to start weaving. If you haven’t done that yet and need a step by step tutorial, please view this post first.

*This post contains affiliate links. For further information, please see my disclosure policy.

This tutorial is specifically for rigid heddle weavers, but I also have a video tutorial for table/floor loom weavers.

I am starting with my shuttle on the left and my heddle is up. (It doesn’t matter which side your shuttle is on or which shed you’re in, but I wanted to be specific so that the photos make sense!)

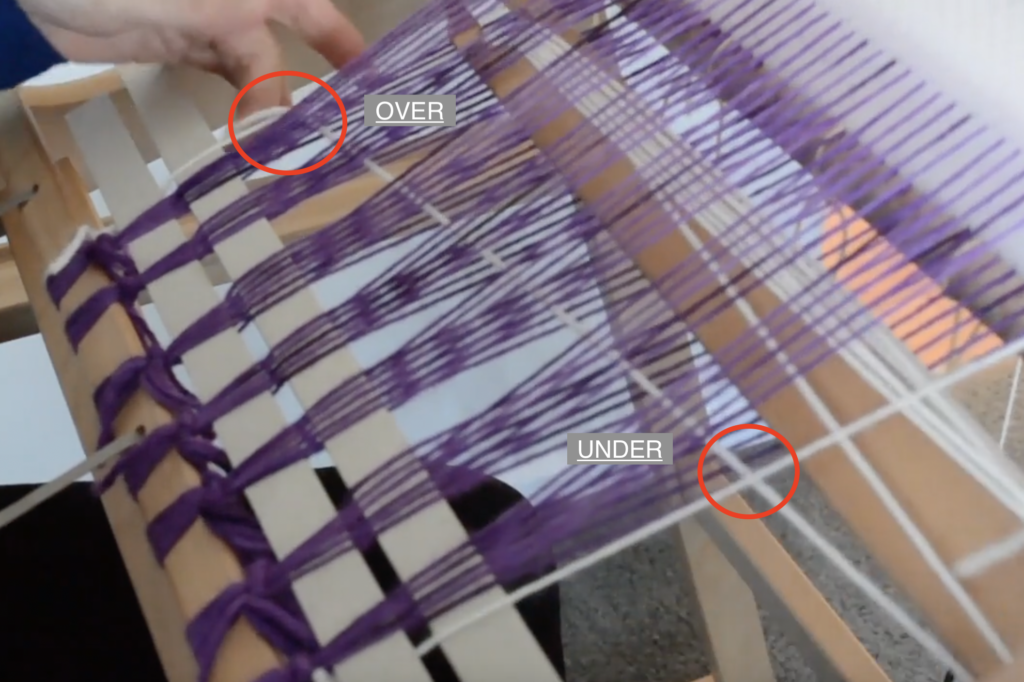
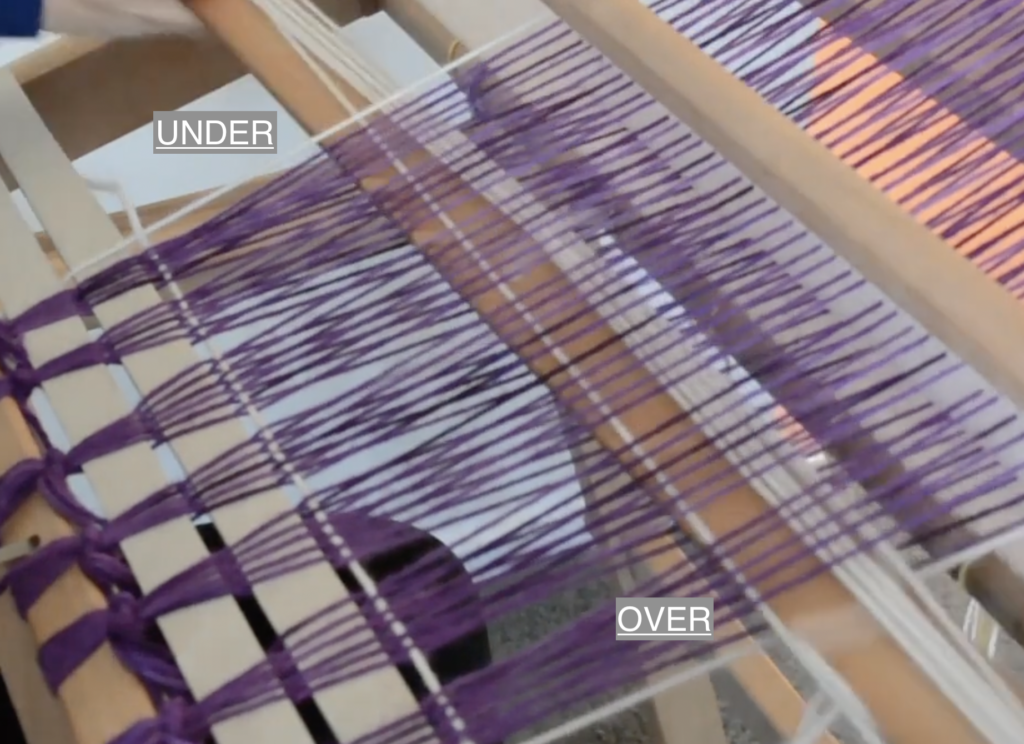
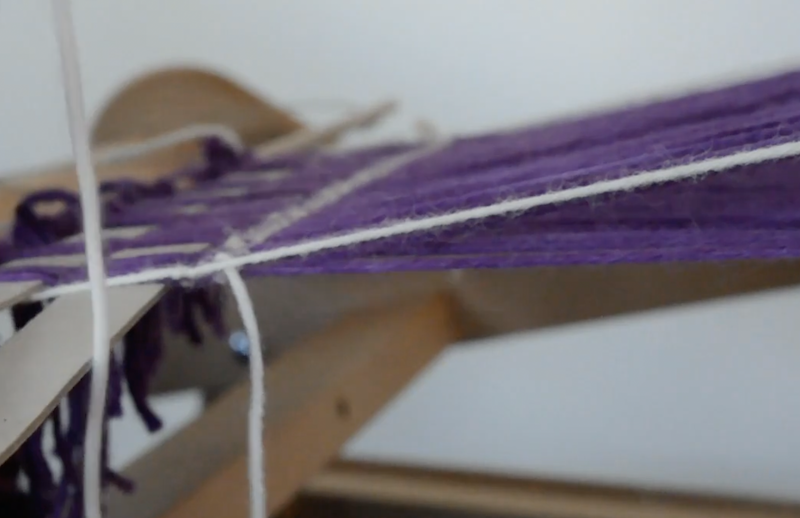
When I enter my shuttle from the left, my shuttle (and therefore my weft yarn) goes OVER the floating selvedge. As my shuttle exits the shed on the right, it goes UNDER the floating selvedge. Beat.

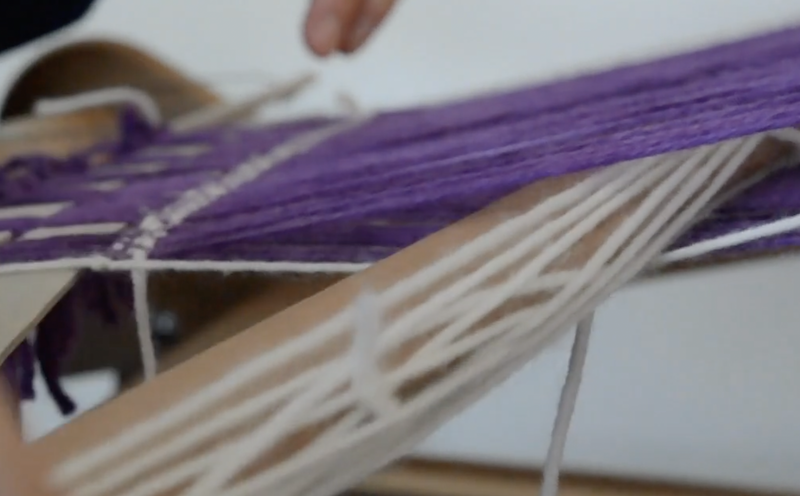
Now I change my heddle to the down position. As my shuttle enters the shed from the right, it will go OVER the floating selvedge. As it exits the shed on the left, it will go UNDER the FS. Remember, OVER, UNDER. Beat.

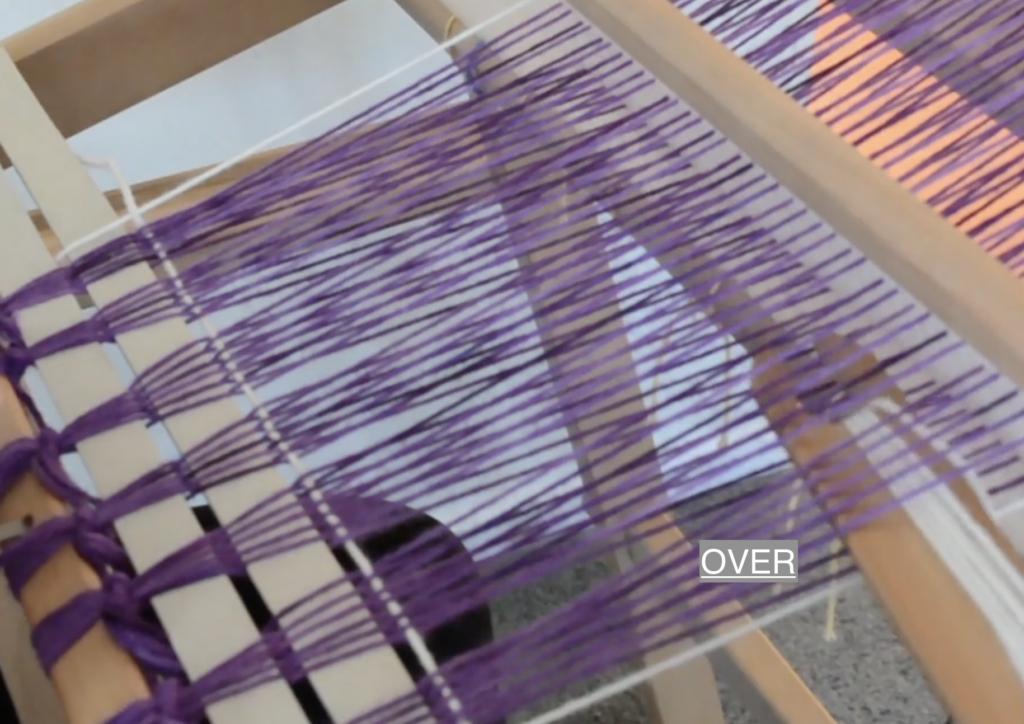
Here is how your shuttle should look for that second pick (weft row).

Back to the up position for the third pick. The shuttle will go OVER the FS on the left and come out UNDER on the right.

It’s important to note that using floating selvedges does not change the way we weave. We still need to arrange and tension our weft picks to ensure neat edges. If you are not familiar with my pinching technique, I have a free video tutorial that will make a huge difference to your edges:

If you are having trouble remembering whether you are supposed to be taking the shuttle over or under the FS in your next shed, you only need to look at how your last weft pick is sitting.

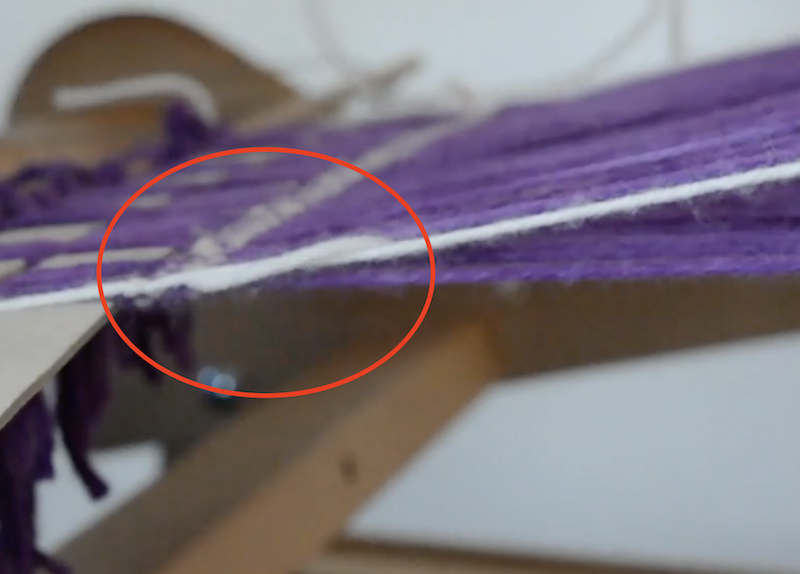
For example, you can see clearly in this photo that the last weft pick is sitting UNDER the floating selvedge. This tells me that, to ensure the weft yarn wraps around that FS edge, I will need to take it OVER the FS as the shuttle re-enters the shed.

When your heddle is in the up shed, you can see that the floating selvedge also sits up a little with the warp. The easy way to weave is to just depress the FS with the tip of the shuttle as you enter the new shed.

See how the weft yarn wraps around the FS as it you enter the shed?

As you weave, the FS becomes a part of the fabric and provides a straight edge. The floating selvedges are not removed when you finish weaving, like you would remove fishing line if using the Lifeline Technique, they are truly a part of the piece and that is why we match the yarns when we set up our FS in the beginning.

Continue to tension and angle your weft as you weave. I think you will be very pleased with the results!

If you would like to see me weaving on the table loom using floating selvedges, please view this free video tutorial:

I hope you found this tutorial valuable.

Until next time…

Happy Weaving!
Filed Under: Floating selvedges, Free tutorial, Neat edges, Rigid heddle weaving, Table loom weaving, Tutorials, Weaving Tagged With: floating selvedges, table loom weaving

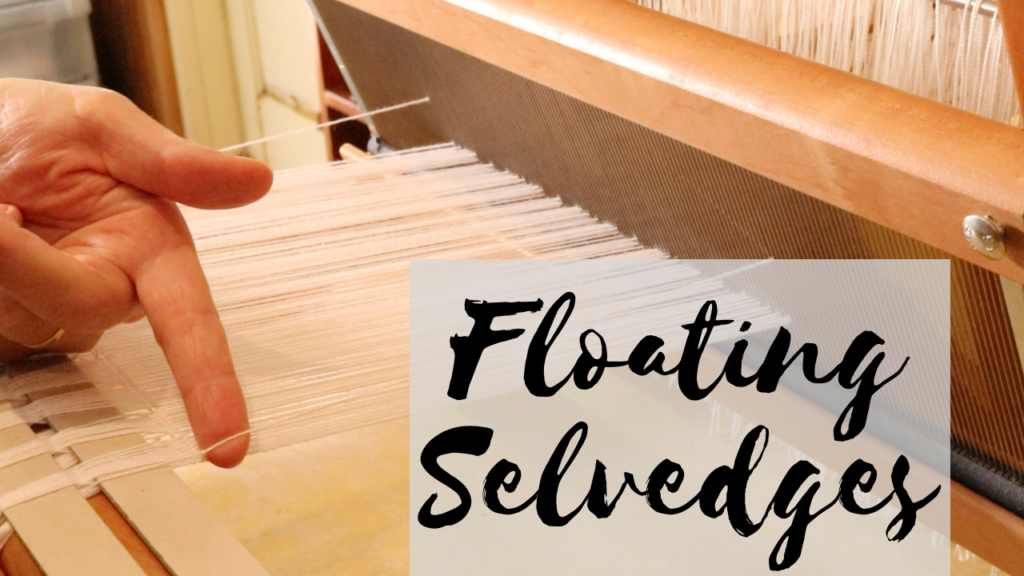
What are floating selvedges?

by Kelly 17 Comments

If you’ve been weaving for a little while now it’s very likely that you’ve come across the term “floating selvedge”.

What is a floating selvedge?

Floating selvedges (FS) are used on either side of a warp and are replacement threads for the original edge warp threads. This may lead you to wonder why you would want or need to replace your edge threads?

When weaving a simple plain weave, the interlacement of weft and warp doesn’t change. You alternate between the two plain weave sheds and the weft thread always naturally wraps around the outer most warp threads.

*This post contains affiliate links. Please see my disclosure policy for more information.

But when you are weaving something other than plain weave, you will often find that the weft skips the outer warp thread – either in every shed or, more likely just in certain sheds. If you don’t do anything to combat this problem, the result will be messy edges and a cloth that lacks integrity at the selvedges.

Now, there is a manual method you can use to prevent this from happening, but I find it easy to install floating selvedges and I also love the neat edge finish this gives me.

How does the floating selvedge work?

A floating selvedge will provide you with an unchanging edge thread, unlike your natural edge thread that may change according to the pattern, or the way you have threaded your loom. The path of the weft thread is determined by your action with the shuttle when you begin weaving, ensuring that every edge warp thread (now your floating selvedge) is wrapped with weft yarn.

When we install floating selvedges, they are usually not a part of the original warp. They are always threaded into an empty slot next to the last naturally occurring warp thread. This makes them independent of your warp and pattern, and means that we can adapt them to our own purposes.

Although floating selvedges are not necessarily a part of the original warp, they do become a part of the finished woven piece – they are not removed afterwards.

For this reason, it’s important to choose a colour that will blend well with the project. If I am weaving my piece with just one, solid coloured weft, I will choose that same yarn and colour for my floating selvedges.

If I am going to be changing the weft colour multiple times within that one piece, I will choose the same yarn and colour as my warp.

The idea is that, once your piece is off the loom and finished, you won’t be able to tell that there was a floating selvedge introduced (other than the fact that your edges will look really nice!)

Can you use a floating selvedge on any loom?

Pretty much. I use them mostly on my floor loom and table loom, and on my rigid heddle loom if I’m weaving something other than plain weave.

Today’s tutorial is specifically for the rigid heddle loom. Scroll to the end of this post to find a video tutorial specifically for table loom floating selvedges.

I like to install my floating selvedges when the warp is all tied on and I’m almost ready to weave.

The photos from this tutorial are taken from my member’s only Floating Selvedges on a Rigid Heddle Loom class.

I most often use the same yarn for my floating selvedges as I use for my weft. So, in the example above, I will be using a white weft.

I don’t do this every time though. If I am weaving a project where I intend to have multiple and frequent weft colour changes, I will use the same yarn that I used for warp for my floating selvedges.

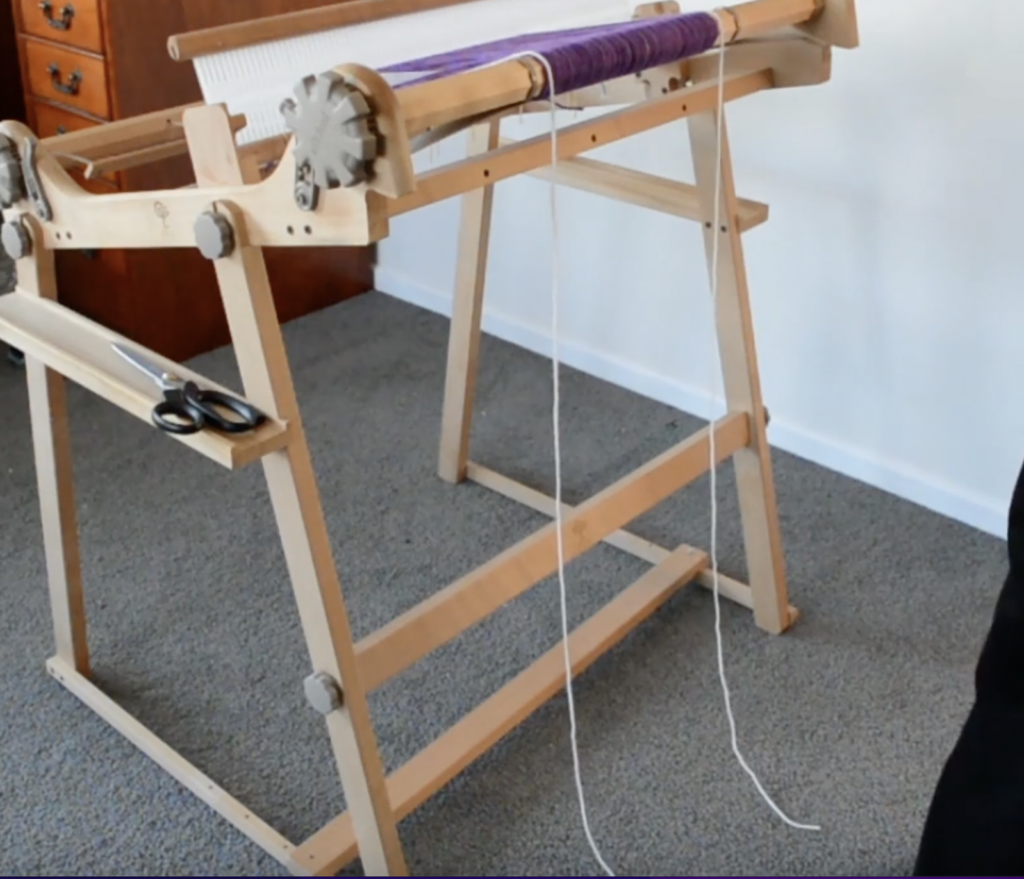
Step 1. is to measure out a length of yarn that is similar to the length of your warp. A little more is fine, a little less is not so great, as then you may have to install the floating selvedges again in the same project. It’s doable, but preferable to have a little more than you need so you don’t run out.

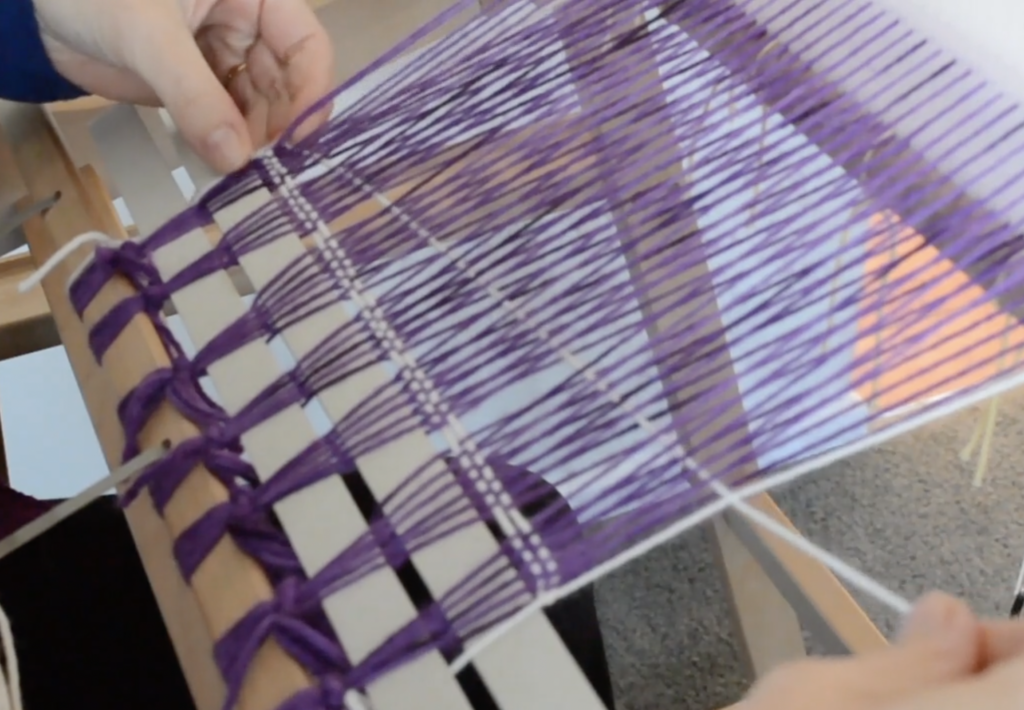
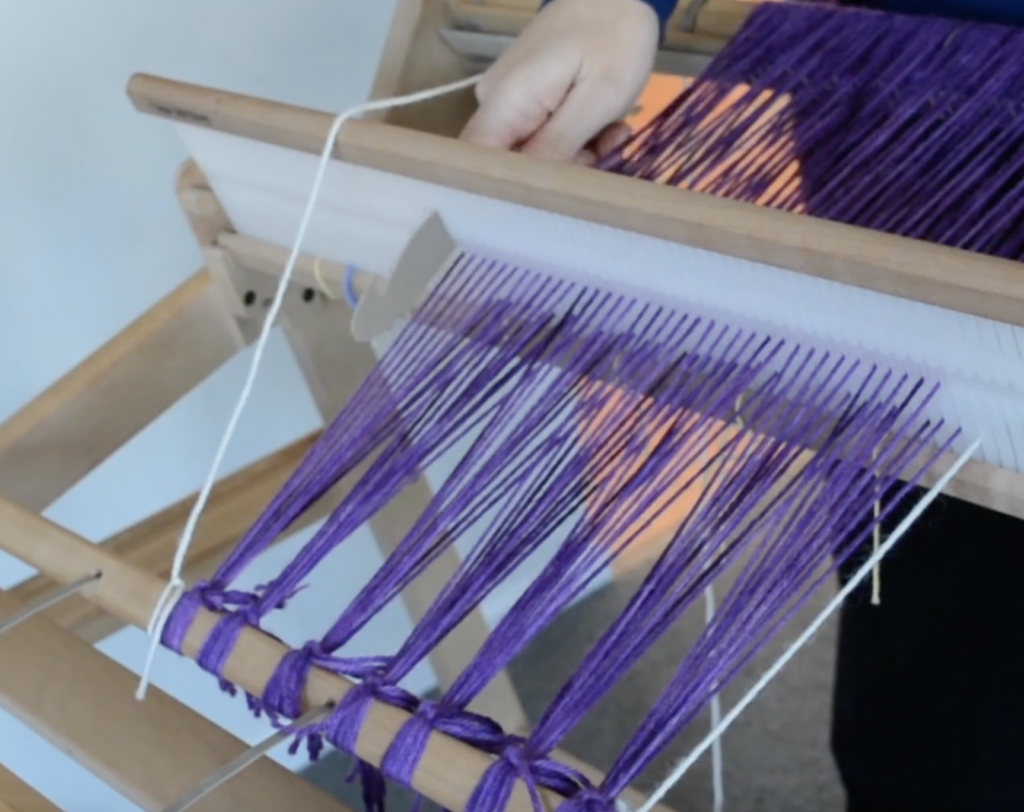
Cut your length of yarn and tie one end in a secure, double knot to the front apron rod on one side of the warp. It makes no difference whether you do the right or left side first.

Drape the tied yarn over the top of the heddle. It doesn’t really matter what position the heddle is in at this point, but it make sense to have it in the neutral or resting position.

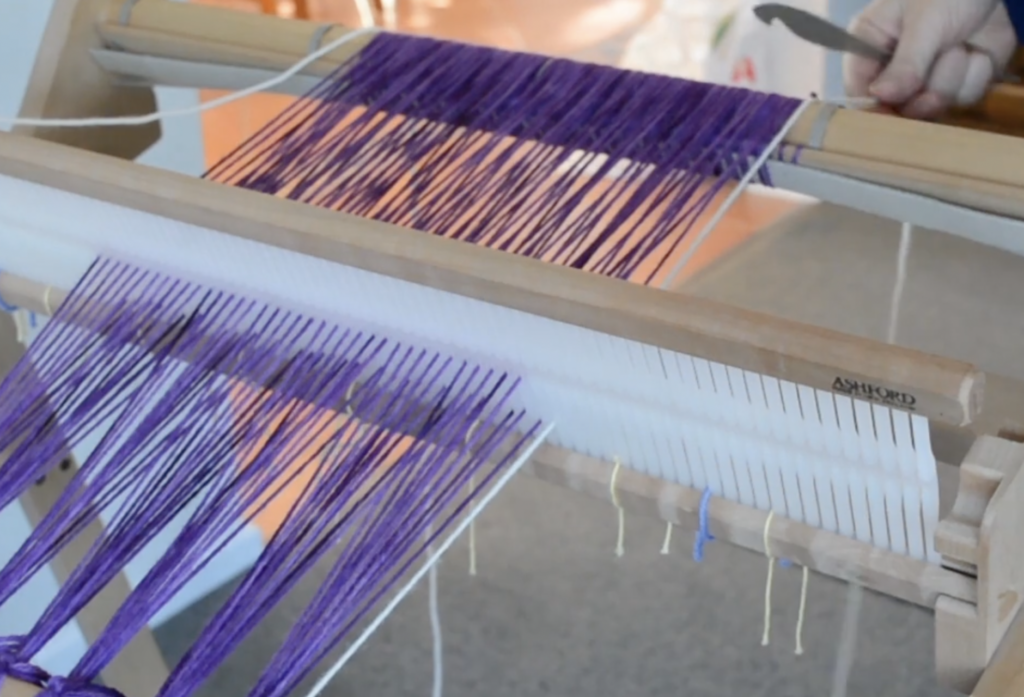
Find the next slot, next to your outer most edge warp thread that is empty. This is the slot you will thread your yarn through. Having the floating selvedges in a slot makes them a “free agent” that we can then manipulate in the weaving process to ensure that our edges are always wrapped with a weft thread.

Pull the thread right through the slot and over the back beam and leave it hanging.

Now repeat the exact same steps on the opposite side of the warp.

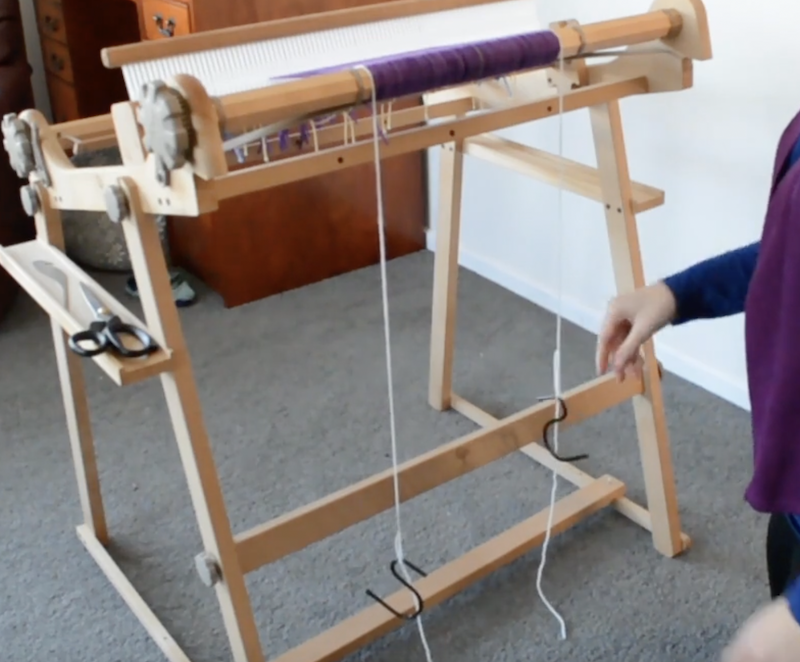
Now you have two threads in slots on either side of your warp and they are ready to be weighted. If you don’t weight them, they won’t work, they need to be under tension!

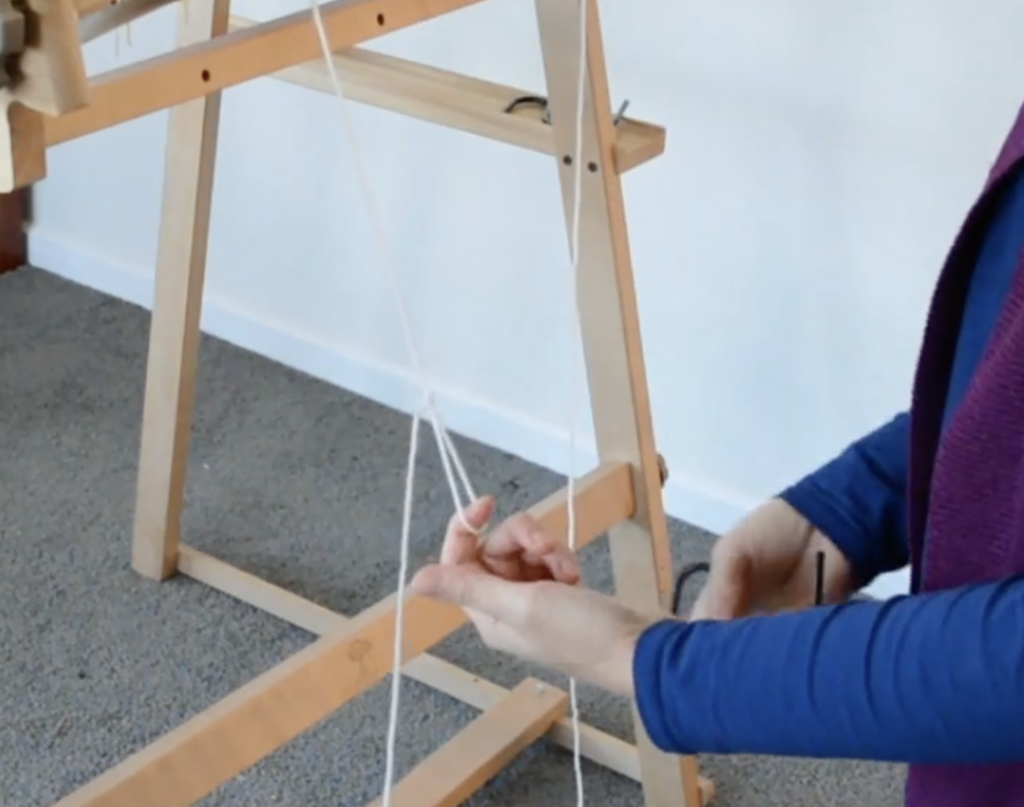
Make a slip knot in the hanging thread. You can do this half way down, or further towards the floor, the main thing is that the weights are not resting on the floor, you want them to dangle and place tension on the thread.

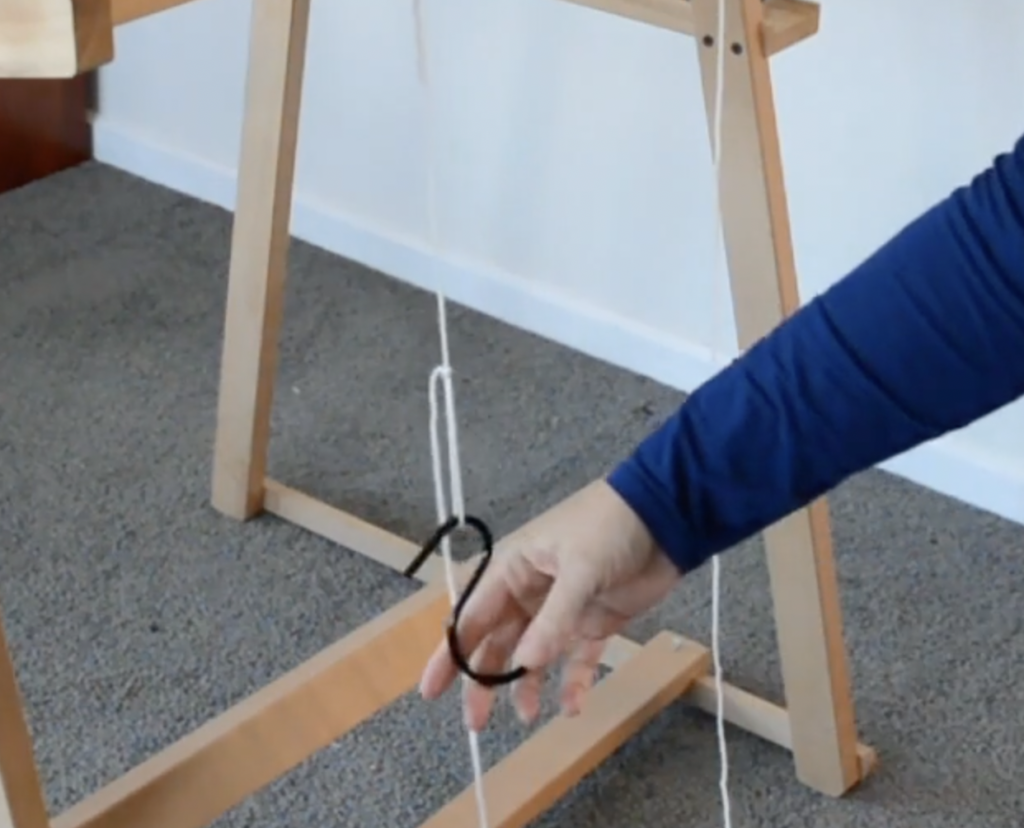
Place an “S” hook or something similar through the loop of the slip knot and allow it to hang. You can tighten up the slip knot to prevent your hook from jumping out of the loop. I have a bunch of S hooks, they are so handy for tensioning broken or loose threads and I always use them on my floating selvedges.

Do the same for the other floating selvedge thread, and you’re ready to start weaving!

As a side note – this method is not the only way to install floating selvedges. Some weavers prefer to allow for the additional two threads when calculating the warp, and then roll the FS on with the rest of the warp. They would then thread the FS threads through an empty slot rather than threading as part of the pattern.

If you’re interested in knowing more about floating selvedges and viewing a tutorial for installing them on a table loom, please view this video:

In the next post I will have a tutorial for how to actually use the floating selvedges when weaving, so look out for that one.

Until next time…

Happy Weaving!
Filed Under: Floating selvedges, Floor Loom Weaving, Free tutorial, Neat edges, Rigid heddle weaving, Table loom weaving, Tutorials, Weaving Tagged With: floating selvedges, rigid heddle loom

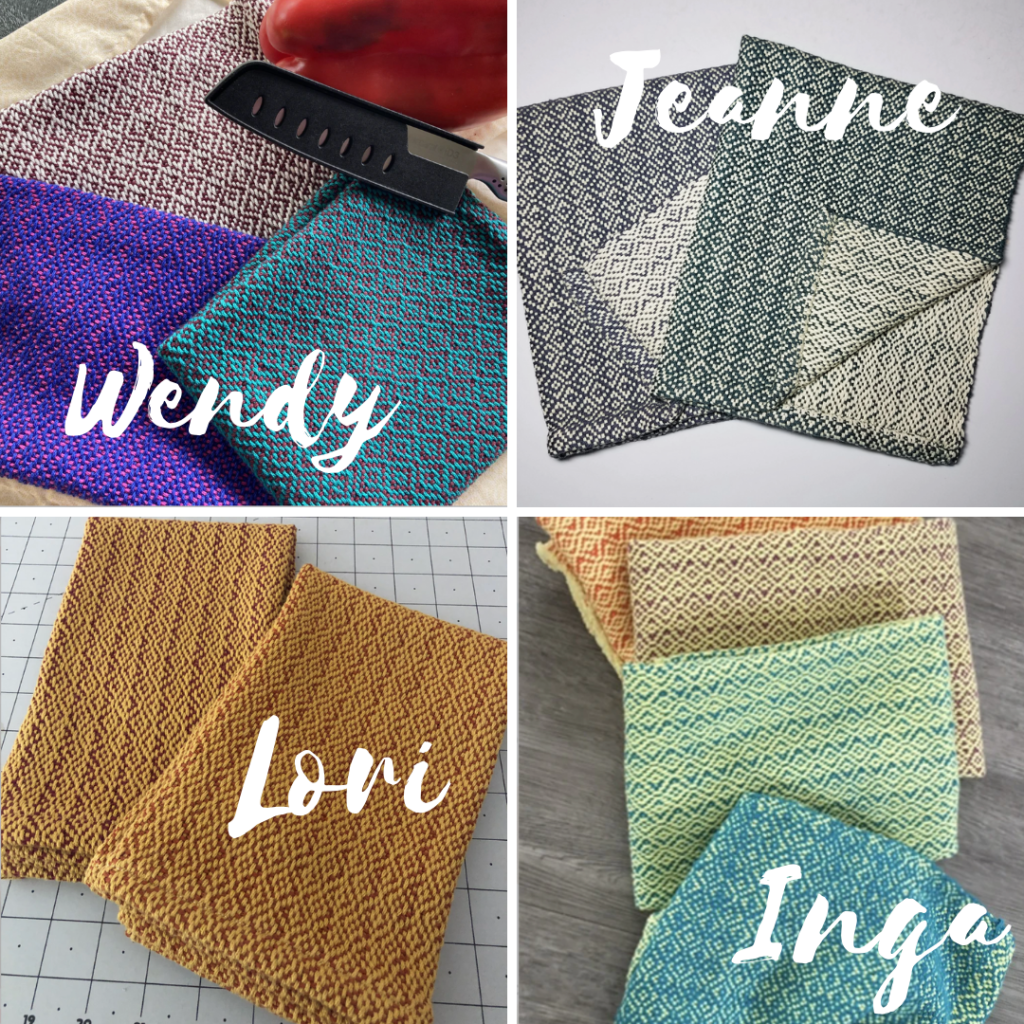
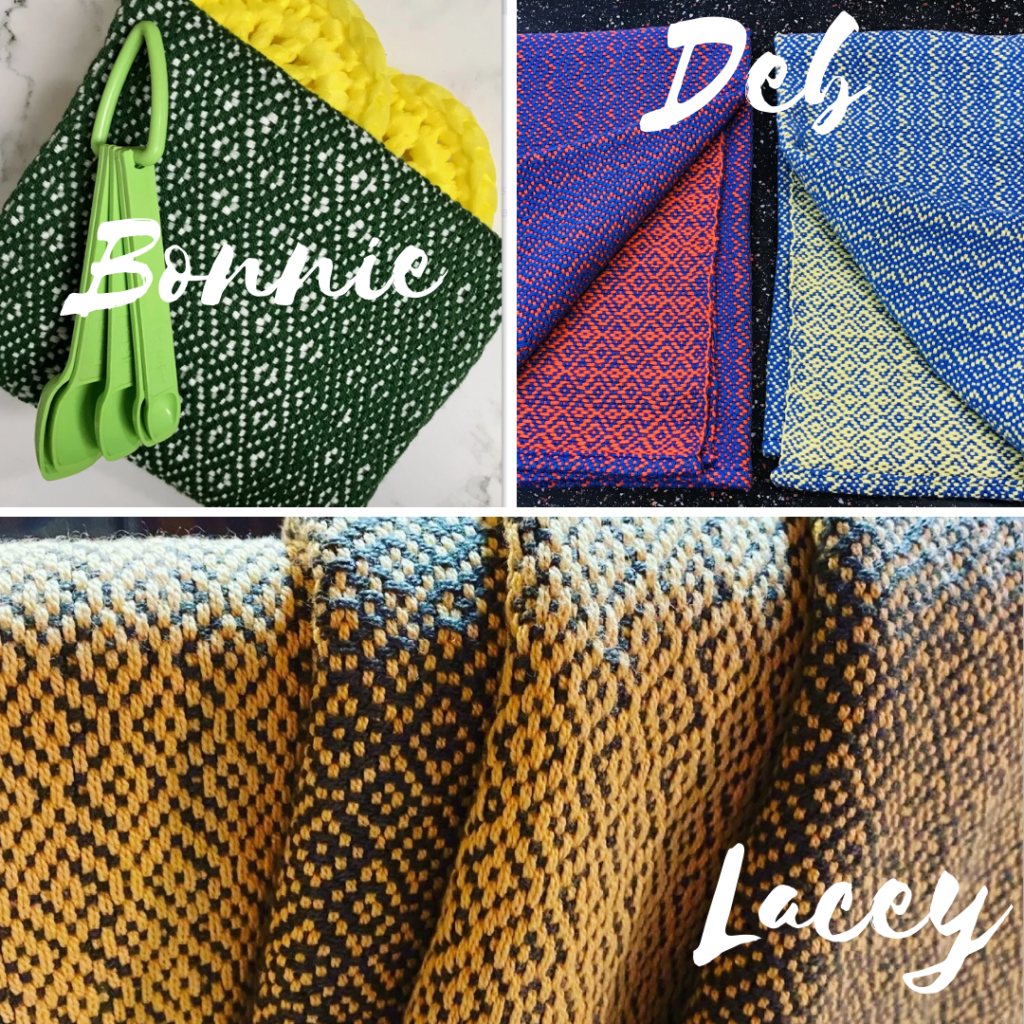
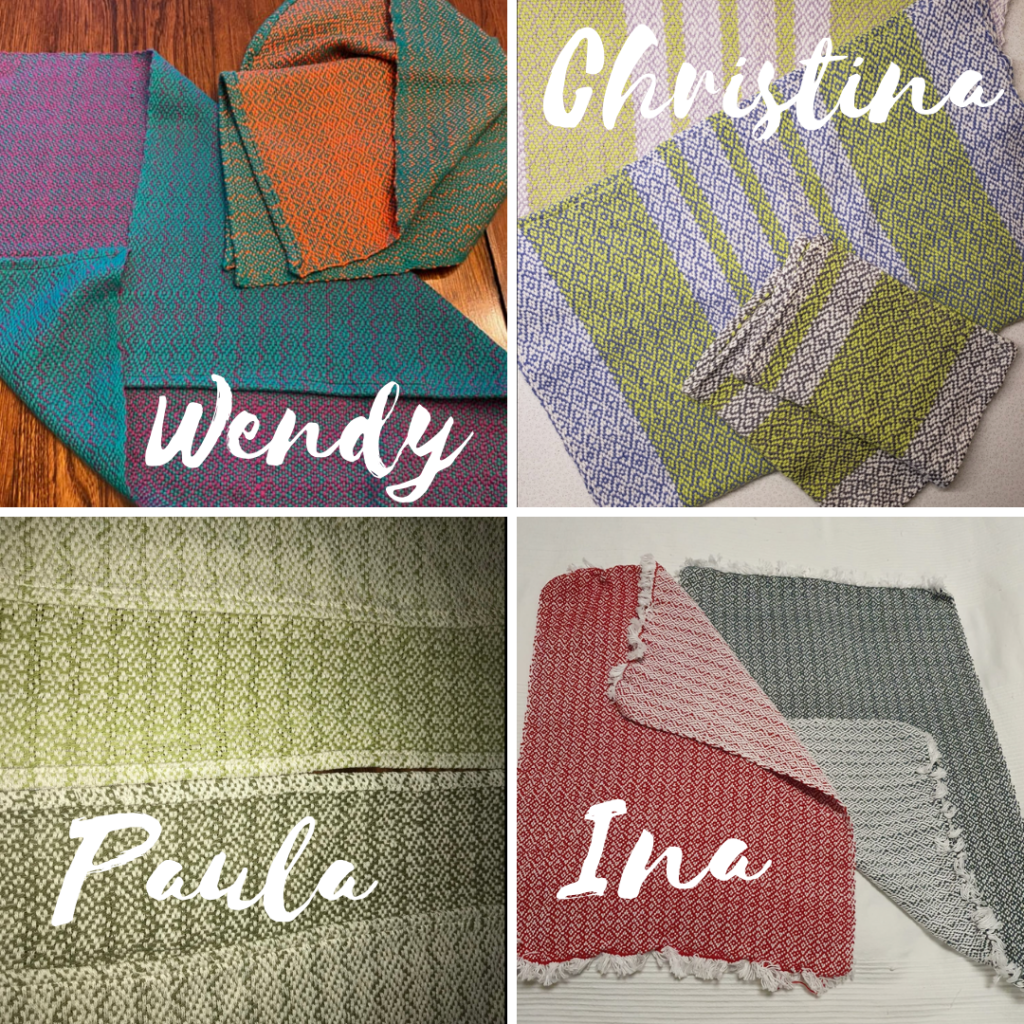
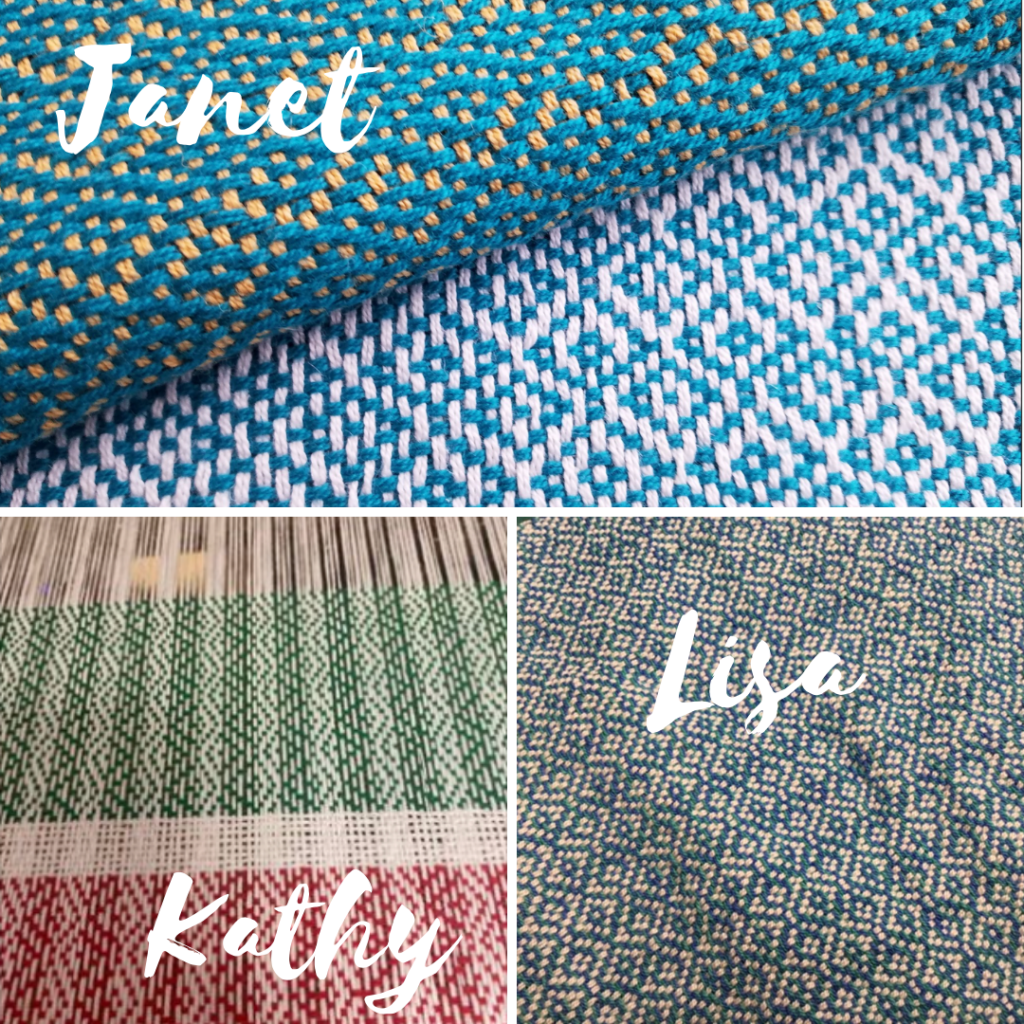
Diamond Stripe Towels Weave Along Gallery

by Kelly 2 Comments

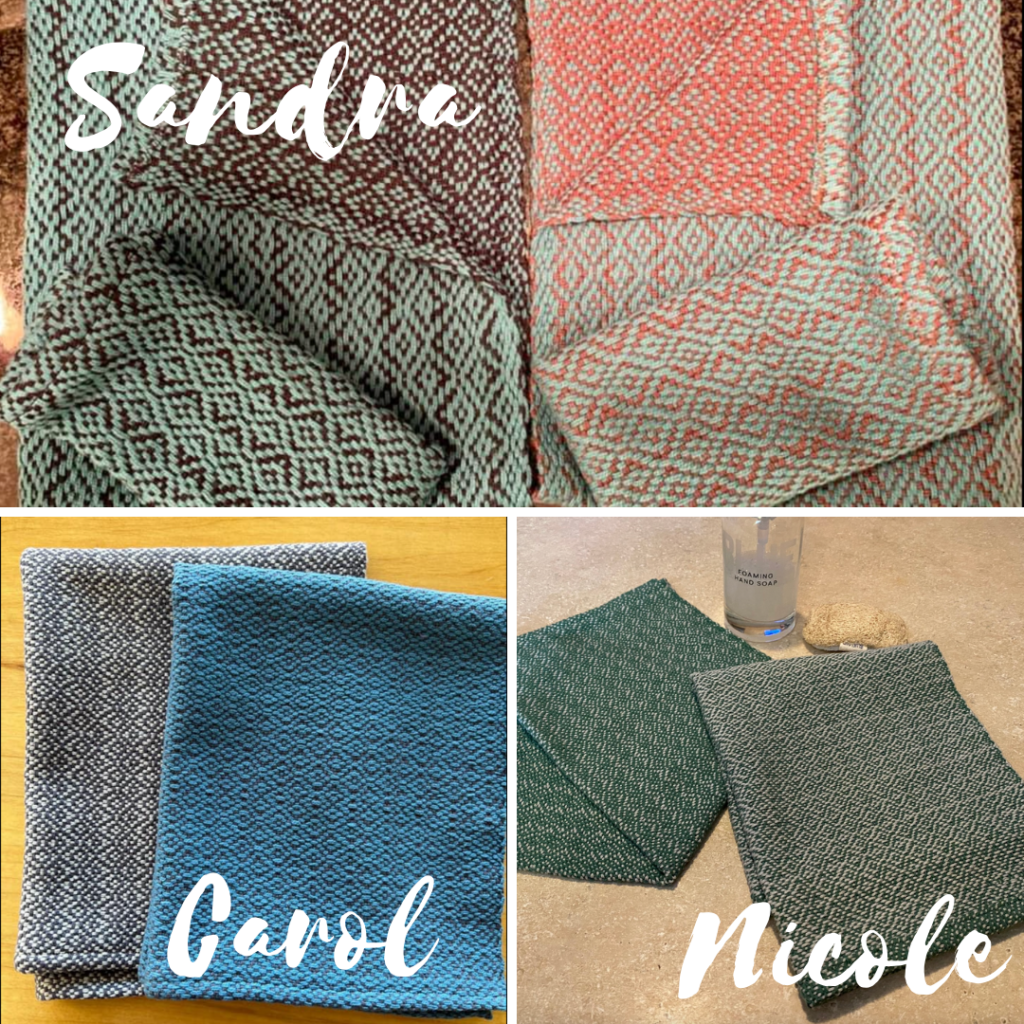
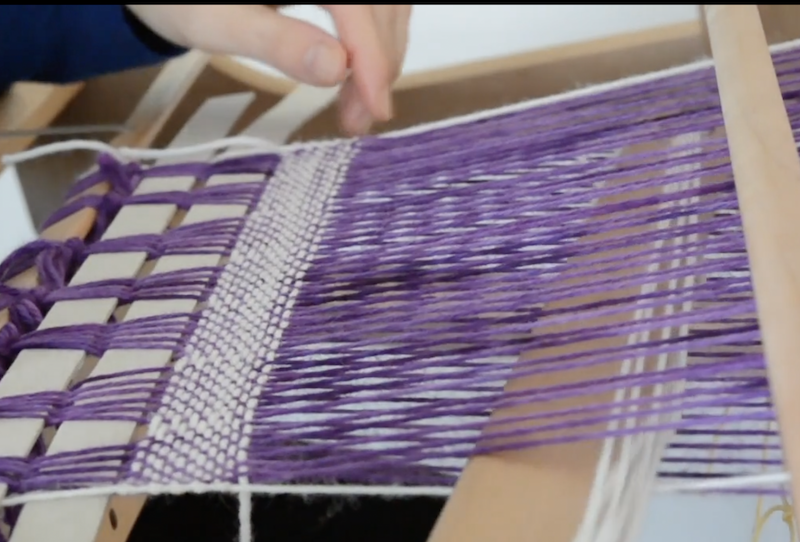
Last year I ran a Weave Along based on my Diamond Stripe Towel pattern.

This rigid heddle pattern is a best seller in my Etsy shop (over 1000 copies sold at the time of writing this article!), but many weavers requested that I put together a class or weave along to compliment the PDF pattern.

The first Weave Along was such a huge success and I had so many students ask me to run it again this year. The second weave along ran throughout January 2022 and just like the first one in 2021, was a raging success.

*This post contains affiliate links. For further information, please see my disclosure policy.

Similar to the Wash Your Hands Towels Gallery, I wanted to be able to showcase some student’s beautiful work from the weave along.

The individual choices of colours and styles is so impressive and inspiring!

In this project we use two heddles to create the diamond pattern. It is a challenging technique, but so many participants completed their towels successfully.

Many participants told me that finishing the Diamond Stripe Towels and weaving with two heddles has opened up a whole new world of weaving for them. That is so exciting to hear!

In addition to the community interaction at the Online Weaving School, participants were also invited to join a private Facebook group to share and troubleshoot. This is a wonderful group with a true spirit of willingness to help.

In the first weave along and in the pattern, there was only the option to use 8/2 cotton for the towels. Following feedback from the first participants, I updated the information to include a supplement video section for those who wished to use 8/4 cotton instead. This has allowed weavers to use what is readily available to them, either from their stash or from local suppliers.

*Please note, these cottons are available in Australia from Thread Collective.

The 2022 Diamond Stripe Towel Weave Along is closed for enrolments, but here is the good news.

If you are a Gold Member of the Online Weaving School, this Weave Along is available to you at any time, following the purchase of the pattern.

And who knows? Maybe if I start to get requests, I will run this weave along again sometime in the future šŸ˜‰

I hope you enjoyed viewing all of these beautiful towels.

Until next time…

Happy Weaving!
Filed Under: Rigid heddle weaving, Rigid Heddle Weaving Patterns, Weave Along, Weaving Tagged With: diamond stripe towels, rigid heddle weaving

How to double your weft thread

by Kelly 16 Comments

There are times that you will want to double your weft thread in order to achieve a balanced sett. Or, you may just be wanting to make the weft stand out and feature more.

If you only have one cone or ball of yarn to work from, you will need to think around how you’re going to load the shuttle to be double, rather than single stranded.

*This post contains affiliate links. For more information, please see my disclosure policy.

Today I’m going to show you how to easily double your weft when using a stick shuttle. I’ll cover a couple of different methods.

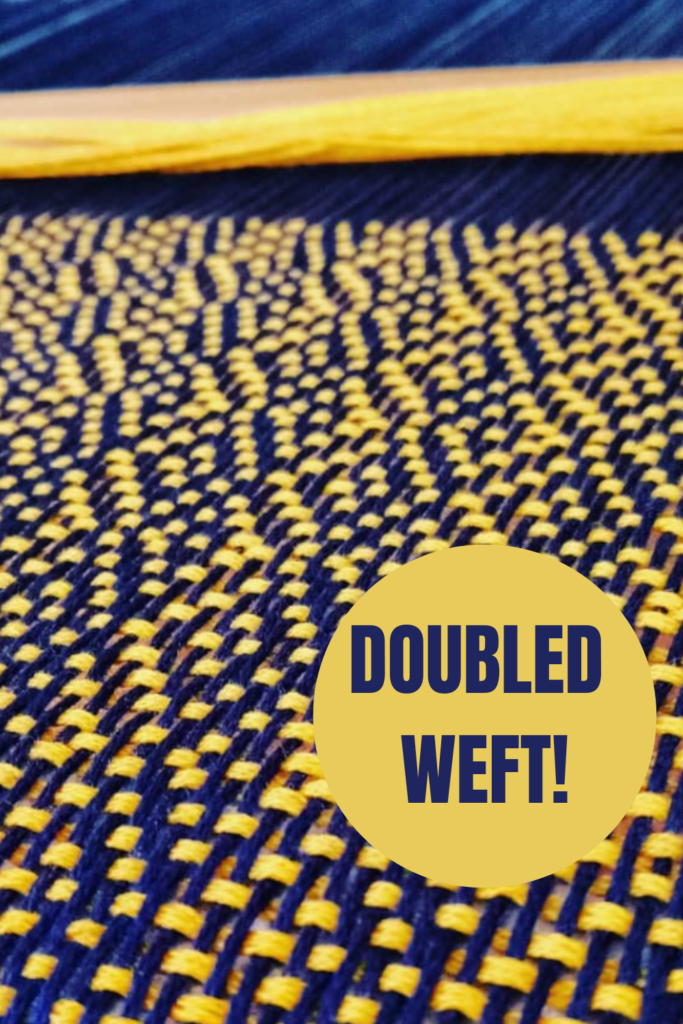
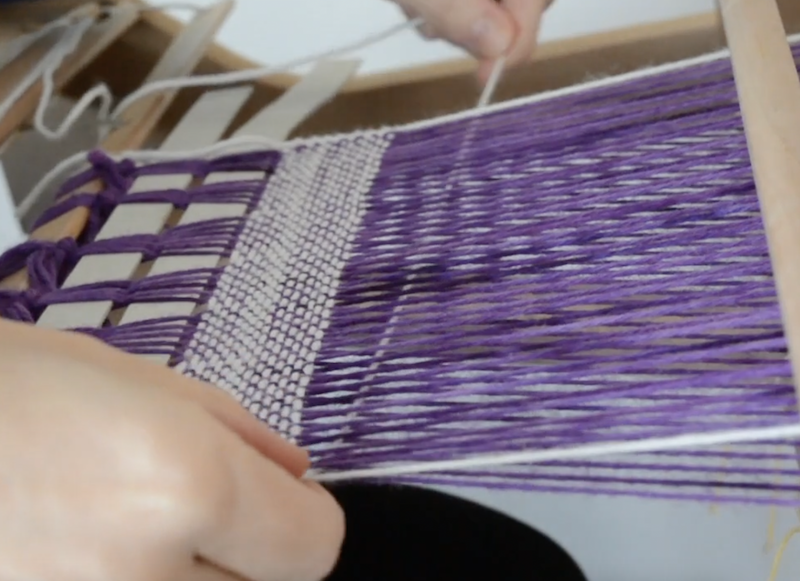
In my example piece, my warp is 8/4 cotton. For my weft, I want to use a lovely, bright yellow, I received recently from the brand new Australian cotton range from Thread Collective. This yarn however, is 8/2 cotton – quite a bit lighter than the 8/4 warp.

Considering it’s important to me that my pattern stands out and is nice and bold, the 8/2 as a single weft would not have the impact I’m wanting to achieve. I decided to double the weft.

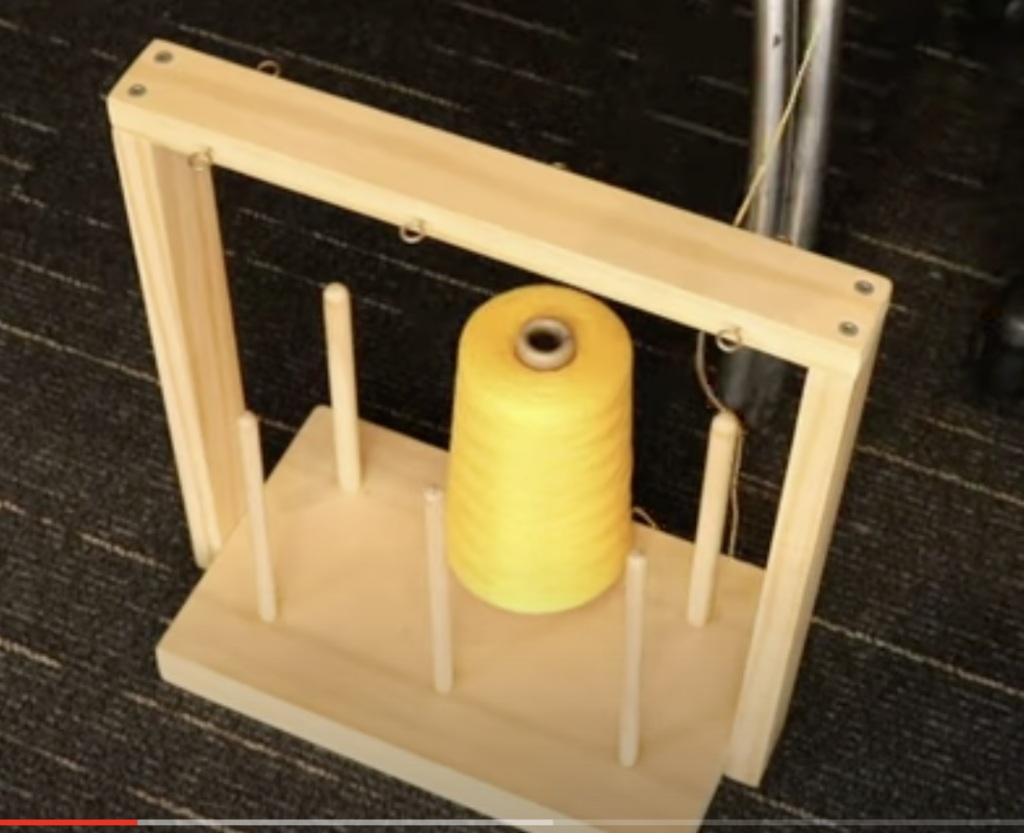
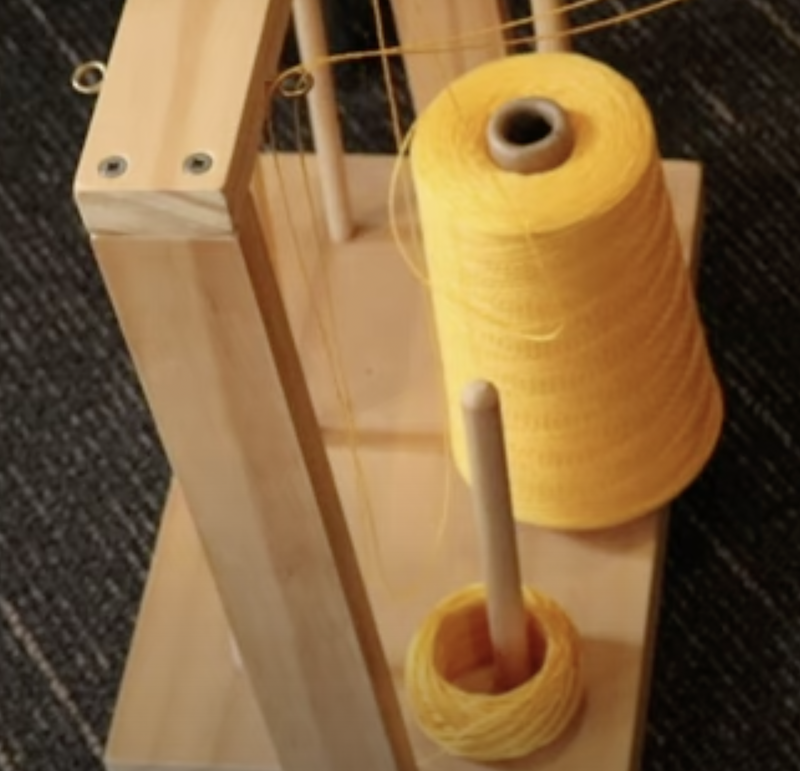
I start by placing the cone of yarn that I want to use for weft on the floor next to the table I’m sitting at. I use my cone warping stand to hold the cone steady and to feed the yarn off freely. You can also stand your cone in a box or empty cylinder of the right size – whatever stops the cone from rolling all over the floor while you’re trying to feed yarn off it!

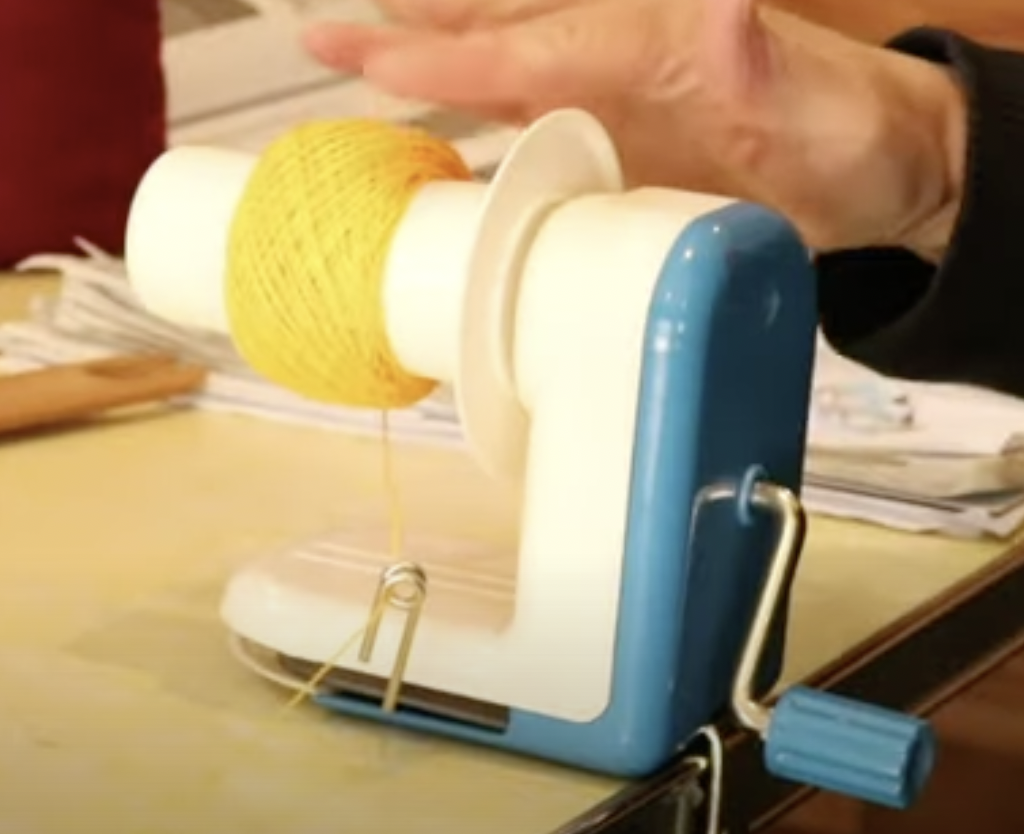
I’m going to be using my ball winder for this tutorial, but you do not have to have one in order to successfully load your shuttle with doubled weft.

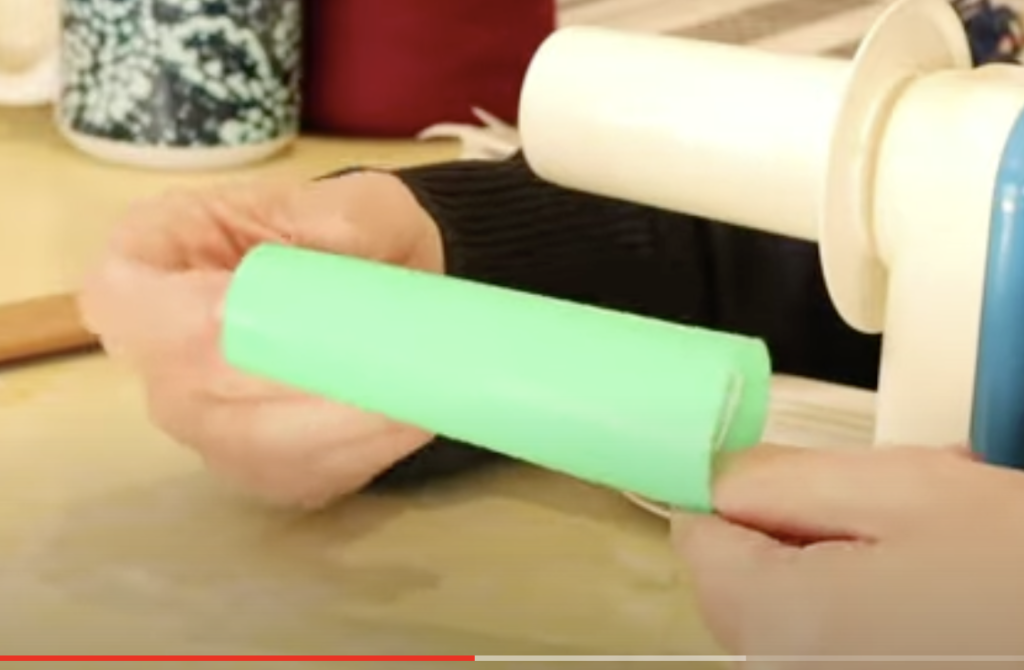
Another suggestion is to use an empty cone cylinder to wind the yarn off your full cone by hand. This plastic one is handy because it has a grip, so it’s easy to wind fast by hand, but empty toilet paper rolls are also great. You can even wind off an amount of yarn just onto your hands, though that may be a more potentially tangly method.

A ball winder is simple to use and does the job really quickly. I just clamp the winder to my table, thread the yarn in through the side loop, up over the central cylinder and into one of the notches, which holds the yarn in place initially and also creates a centre pull ball once you’re finished.

You then just wind manually, using the handle until you have a quantity of yarn. A couple of tips I have for successfully ball winding:

  • Keep some tension on the yarn as it’s feeding off the original cone, but don’t make it really tight. This is a mistake I made initially, and it caused problems with the yarn rotations slipping off the ball and tangling. Now I keep it a bit looser and never have that issue.
  • Hold the yarn tail for the first few rotations (particularly if you’re using a finer yarn) so that it doesn’t slip out of the notch. After the first few rotations, you can let go and it will be fine.
  • When I’m using the ball winder for doubling my weft, I usually wind off relatively small amounts at a time. I can always come back and wind off a little more if I need to.

Now you have 2 sources of yarn to feed from. I place the yarn cake on the cone stand, next to the original cone and feed it up through it’s own round hook.

Yarn Donation

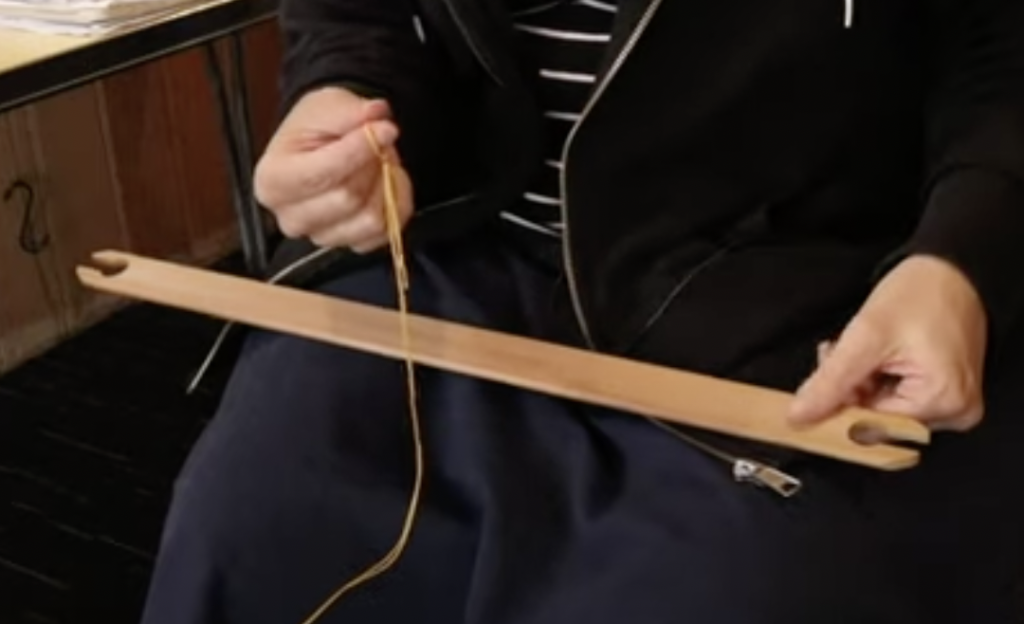
Now things get super easy! I just slip knot the two yarns together at the ends, ready to start loading onto my stick shuttle.

From this point on, you can treat the two yarns as though they are one, and simply wind them on together.

If you need help with how to wind a stick shuttle in a figure 8 (my favourite method), watch this video:

When you are ready to start weaving, you also just use the two yarns together as though they are one. So, each pick will have two threads instead of one.

This tutorial is available in video format, if you’re interested, click on the video below:

I hope this tutorial was helpful to you, leave your questions or comments down below.

Until next time…

Happy Weaving!
Filed Under: Free tutorial, Rigid heddle weaving, Weaving, Yarn Tagged With: double weft, doubling weft, weaving tutorial

How to lash on your warp to your loom

by Kelly 14 Comments

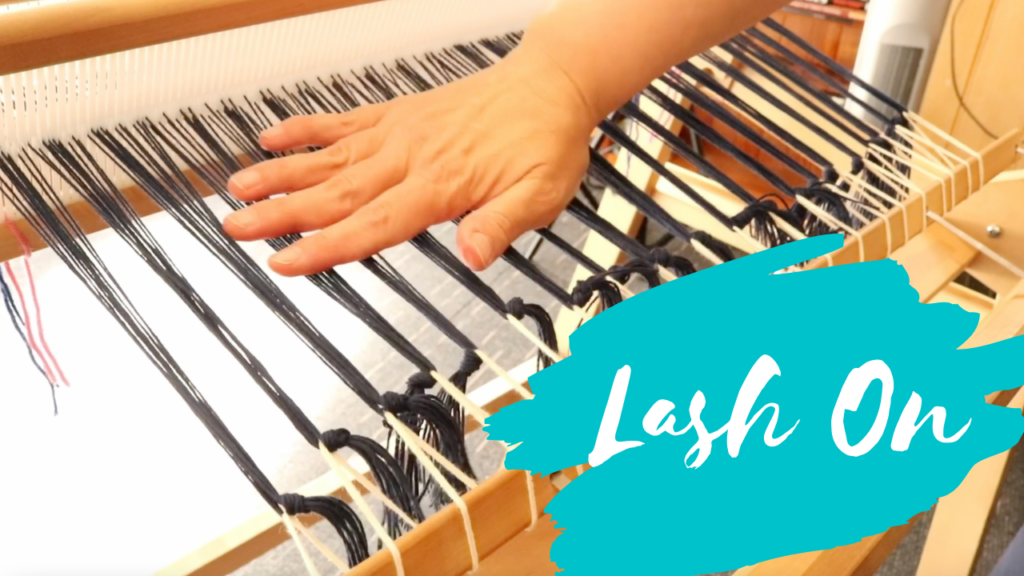
Lashing on your warp to the loom is an alternative method to a direct tie on.

I’m going to show you exactly how to do that in a moment, but first I want to talk about why you would choose to lash on rather than tie the warp directly to the front apron rod.

There are certainly advantages and disadvantages to both methods and usually it comes down to a matter of personal preference.

  • This post contains affiliate links. For further information, please see my disclosure policy.

Firstly, let’s go over the pros and cons of each method.

Lashing on pros:

  • You can achieve excellent, consistent tension across you warp, regardless of the warp width.
  • The tension is very adjustable and simple to tweak
  • It’s the perfect method for dealing with slippery warp threads that don’t want to hold their direct tie on knots
  • It is very yarn efficient

Lashing on cons:

  • It takes additional time before you can begin weaving
  • You need a long length of strong cotton as the “lash on” yarn. This long length can be a bit of a handful when you’re threading it through your knotted bunches.

Direct tie on pros:

  • It’s fast and easy
  • If you tie on with surgeon’s knots, these will be adjustable
  • Works very well for most yarns

Direct tie on cons:

  • Slippery yarns (like silk or tencel) may not hold their knots. They can slip on the apron rod and come undone.
  • You have more warp waste because you need that extra length of warp to go around the apron rod and tie on. This is not a problem if you are planning to have fringes, as the tie on knots can be included in fringe allowance.
Yarn Donation

Now let’s have a look at the steps involved in lashing on.

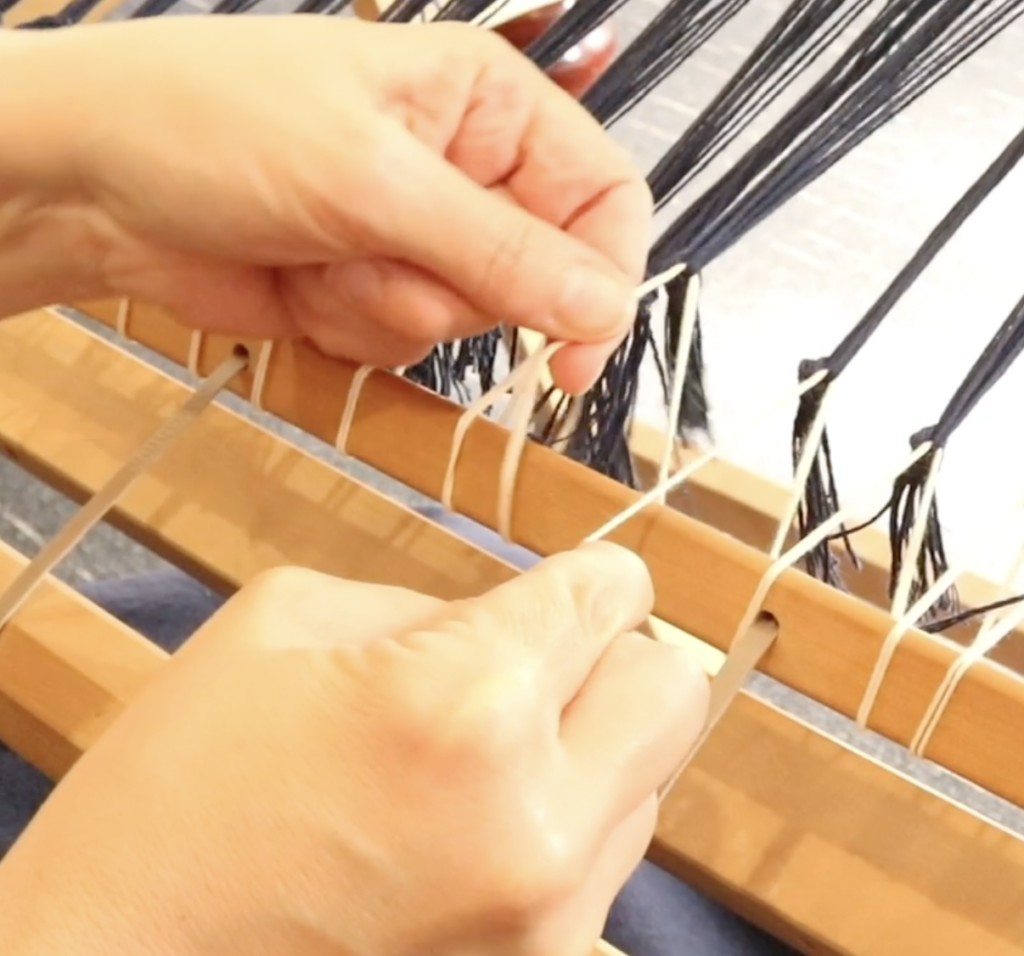
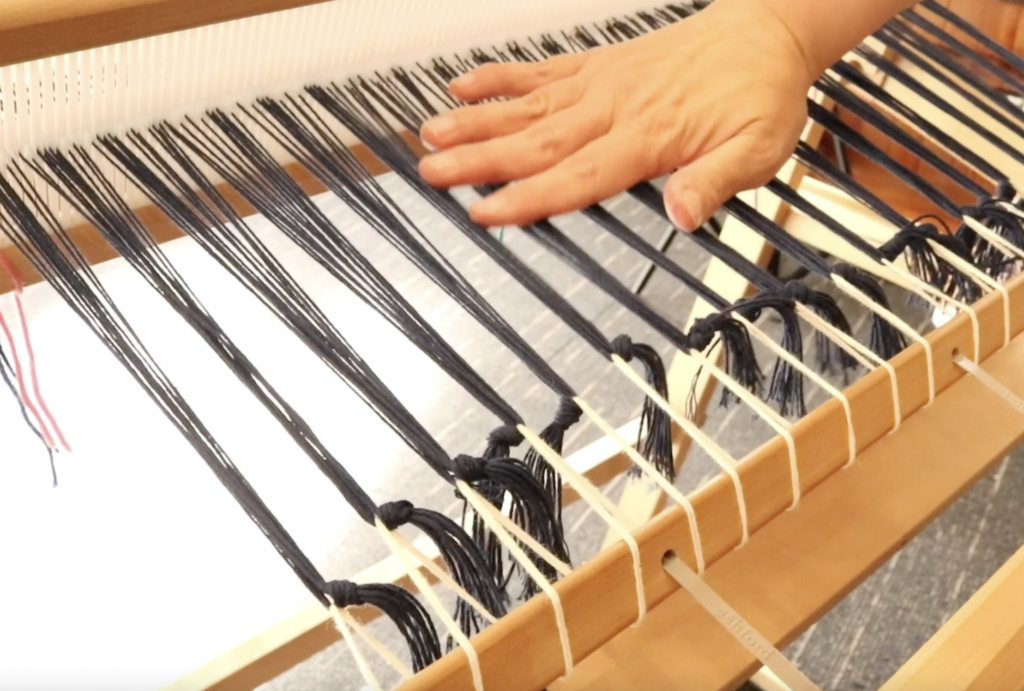
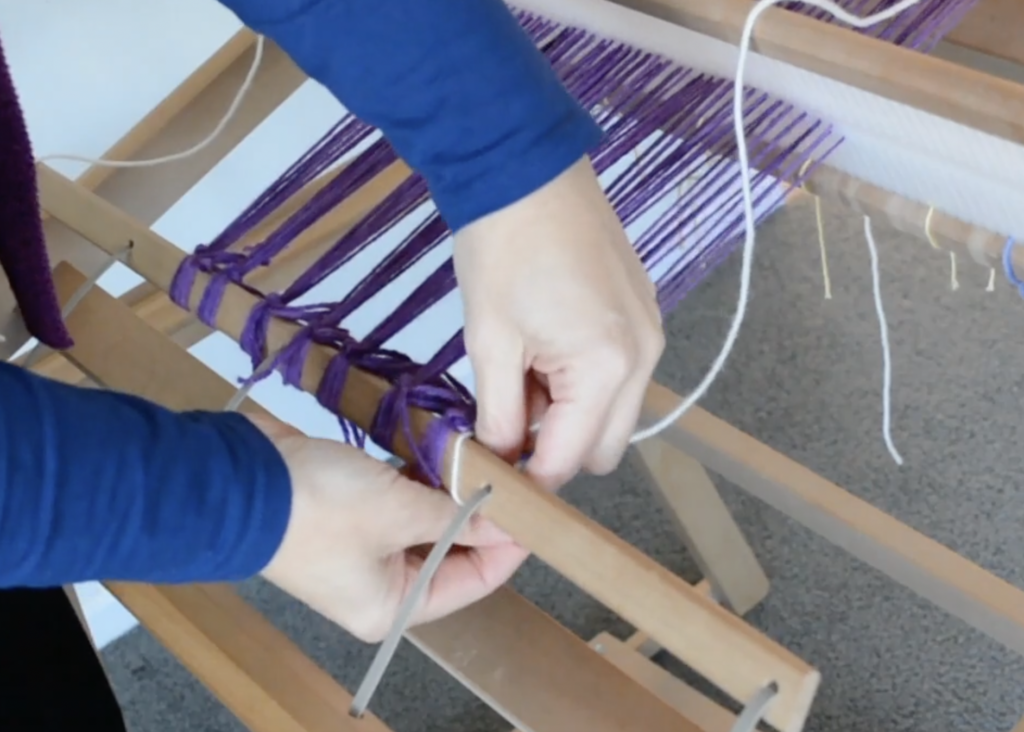
Working from one side to the other, take approximately one inch sections fo warp and make an overhand knot, leaving a couple of inches of tail.

When you full extend your front apron rod, you don’t want the ends of the knotted bunches to touch it, as you need a bit of distance between the bunch and the rod for effective tensioning.

Try to make your knots at about the same place on the bunch each time, it’s helpful to compare the new bunch with the last knotted bunch to try to match up your knots.

Wind off some tapestry cotton or similar yarn to use as your lashing on yarn. You want this yarn to be strong and not elastic.

Measure around 6 times the width of your warp, and then double that over.

Place the fold of the doubled up yarn on the apron rod. Make sure your front brake is on!

Lift up your first knotted bunch. As you do, you will notice that some threads separate from others, giving you an opening. Insert your index finger into this opening to hold the place.

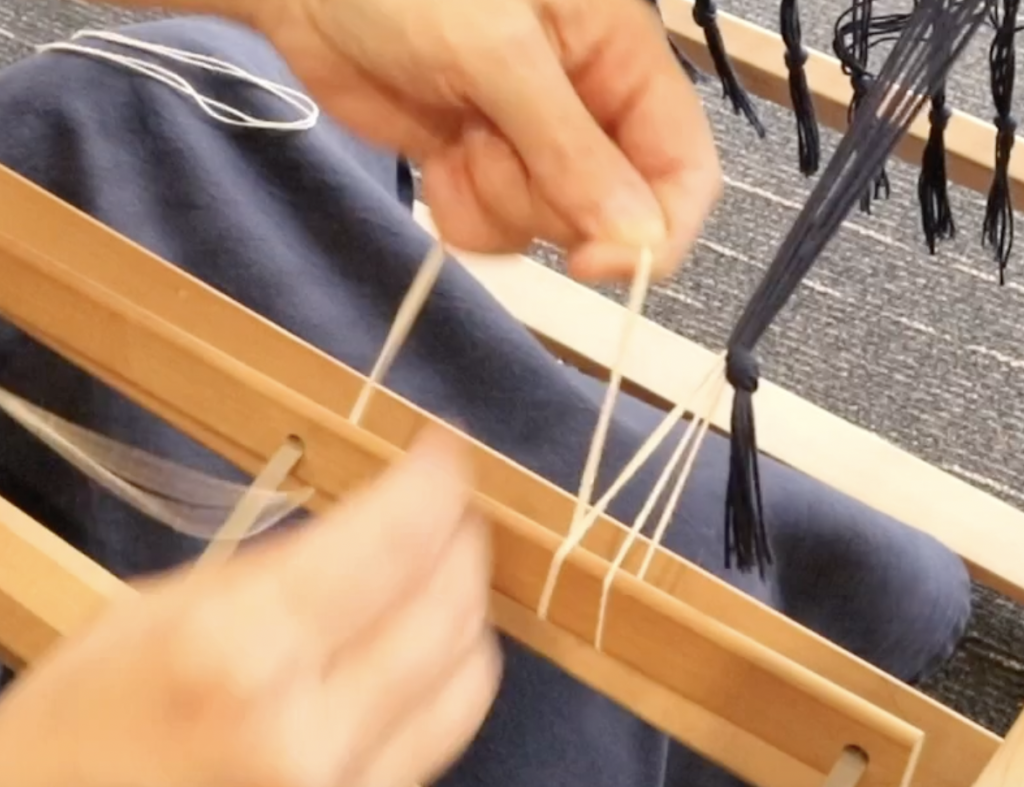
Take the cut ends of your lashing on yarn through the space and pull all the way through.

Take the waste yarn over the top and then underneath the apron rod, ready for the next bunch.

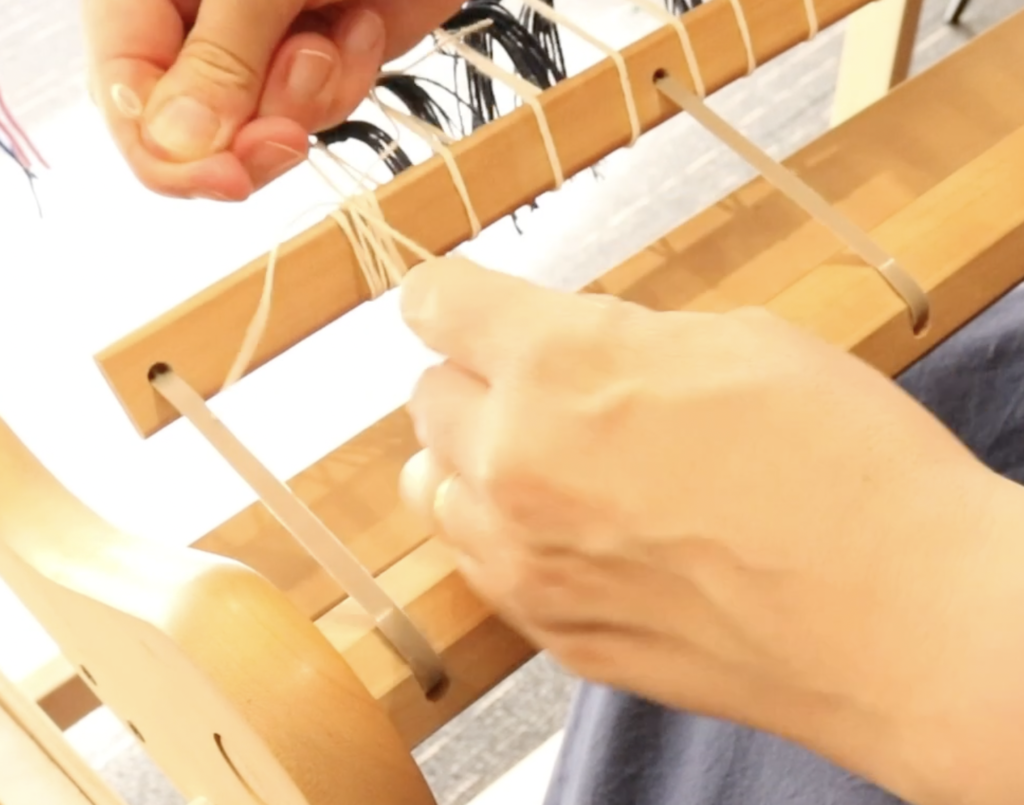
The lashing on yarn goes underneath the apron rod each time.

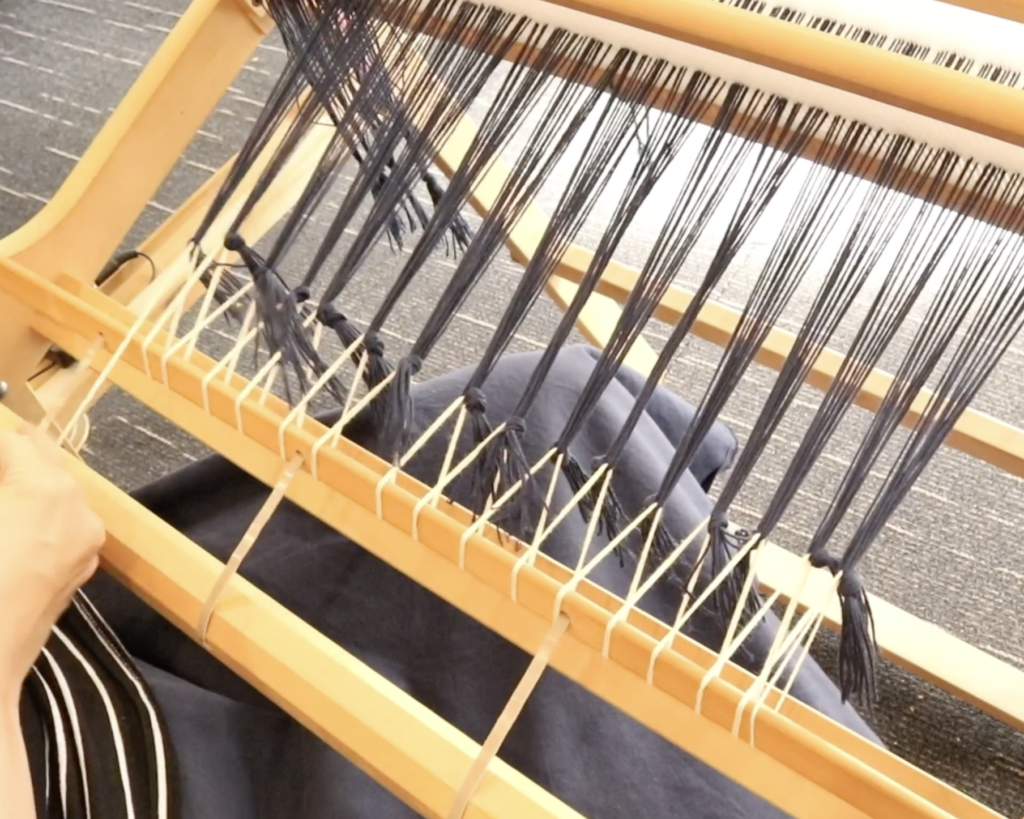
Continue going though your bunches and under the apron rod all the way to the other side of the warp.

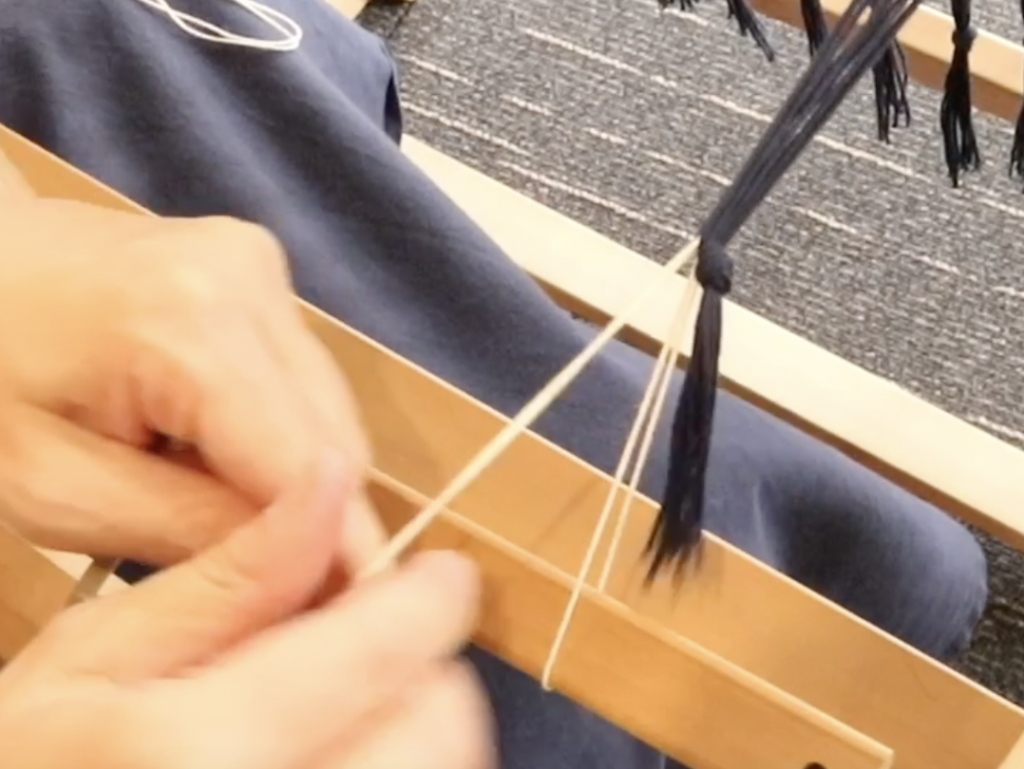
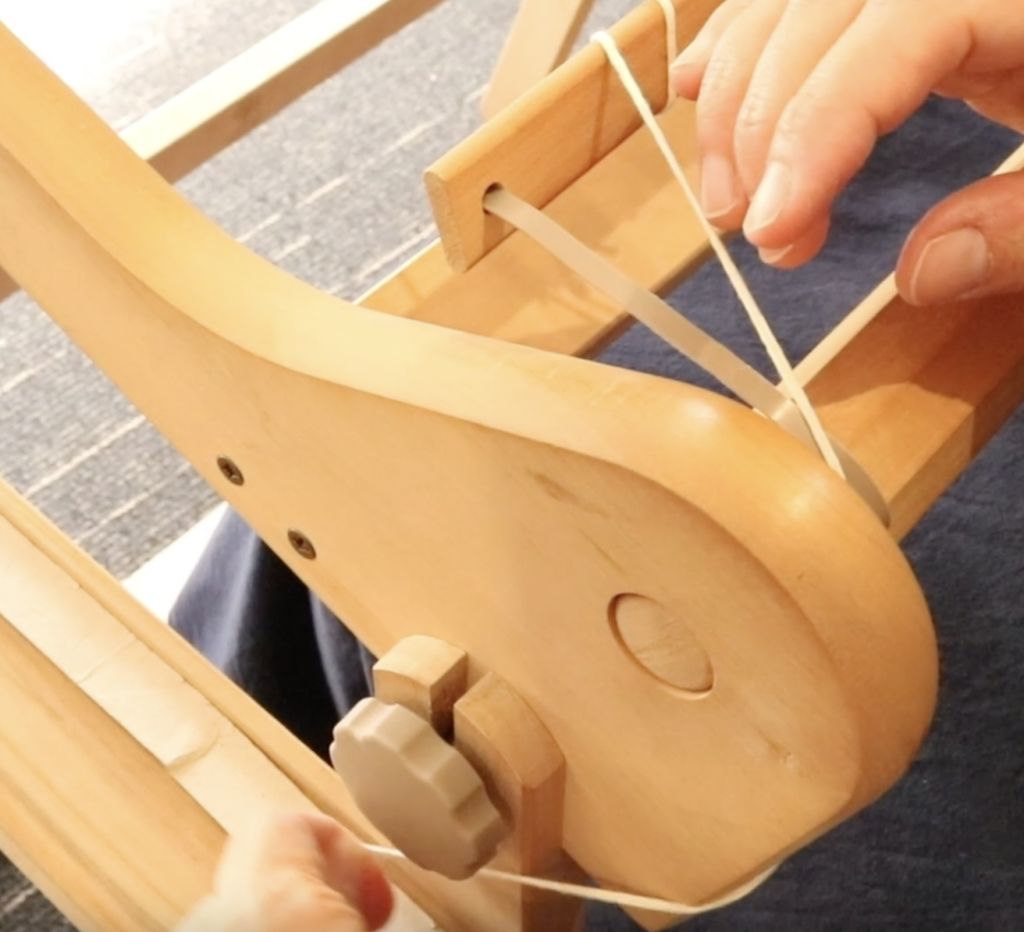
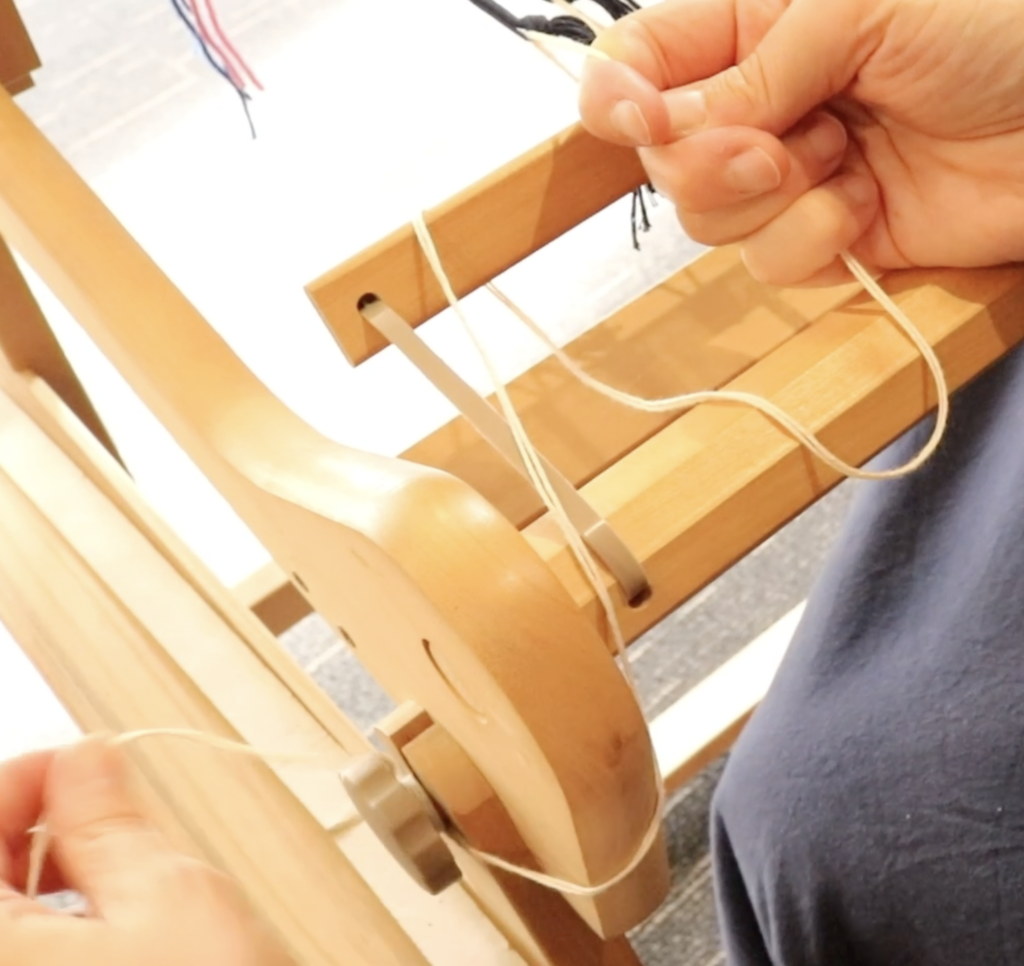
To temporarily secure your lashing yarn, if you have a stand, you can take the yarn under the edge of the loom then around the side knob a couple of times.

Now is the time to perfect that tension! Starting at the right (or which ever side you made your first bunch) pull down on the lashing yarn firmly, the slack will transfer to the next bunch. Still holding the lashing yarn at the first bunch (to prevent losing that great tension), pull down on the yarn at the second bunch. Hold the tension there, while you go on to the next bunch and work your way across.

When you reach the other side, you should have a good bit of slack on the lashing yarn, and your tension should be nice and uniform across the warp. Don’t let go of the yarn at the end here until you have it fully secured.

This part is much easier to show than to explain, so definitely check out the video below. Basically, you are knotting and securing the end of the yarn to the apron rod in a way that is a very firm hold, but is undoable in case you need to adjust your tension again.

When you bounce your hand from one side of the warp across to the other, all the bunches should feel like they are under the same amount of tension. It feels like a nice light, bouncy trampoline. If you have any loose parts, adjust the tension again by pulling the lashing yarn at the loose section, and transferring the slack as before.

If you would like to see all this in action, check out the video I made for you:

Equipment used in the making of this tutorial:

Ashford Rigid Heddle Loom 24″

Ashford Tapestry Cotton

For detailed weaving lessons, check out my Online Weaving School.

I hope this is helpful to you, leave your questions or comments below.

Until next time…

Happy Weaving!
Filed Under: Free tutorial, Rigid heddle weaving, Weaving Tagged With: how to lash on, lash on, lashing on

The Heart Scarf Free Rigid Heddle Weaving Project

by Kelly 12 Comments

The Heart Scarf is my free rigid heddle weaving project for the year of 2021. Let me give you a little bit of background as to why I’m doing this and how I came about designing this project.

When the pandemic of 2020 hit, I released the Wash Your Hands Towels project, which was a hugely popular project. I know that all of you appreciated so much, having something concrete, beautiful and creative to be able to fix your minds on in a time where there was such uncertainty.

I loved doing that project so much for you that I wanted to do something similar this year. And something that has really been on my heart and in my mind for most of this year in particular, is that I know there are so many people out there that as a result of everything that’s been happening in the world are chronically lonely.

*This post contains affiliate links. For further information, please see my disclosure policy.

What Is The Heart Scarf Project?

So I wanted to create a project whereby you as the weaver would be weaving this beautiful scarf called The Heart Scarf. And you’d be weaving it with someone in particular in mind, someone who may be struggling with loneliness, perhaps they’re not able to get out and see their family and friends like they normally would.

Or you might know someone who’s struggling, feeling down, perhaps they live alone, or they have some other difficulties that cause them to feel that loneliness, really, that’s one of the most heartbreaking things for me to think of is that there are people out there who are just desperately lonely.

Making Someone’s Day Brighter

If we, as the makers of beautiful things, can do anything to make someone’s day a little bit brighter, then that’s definitely something that I want to be a part of. And I know that many of you would want to as well.

I’ve written a short poem from my heart. This poem is available to print out in either cursive or print, along with the free pattern. Once you’ve finished your scarf, you can package it up with the poem if you so choose, or perhaps with something that you want to write yourself and send it off to the recipient.

Perhaps you’re feeling really lonely yourself, perhaps it’s been an awful year for you, perhaps you’re having a hard time for other reasons. If that’s the case, I would love for you to weave this scarf for yourself and you can consider the words of the poem from me to you.

Let’s get down to the nitty gritty and go over the project details, starting with what you need to complete this project:

A rigid heddle loom.

Now, the width of my scarf on the loom is 11″ and I used my 24″ rigid heddle loom. BUT, if you have a smaller loom, you can absolutely weave this scarf. If you have a 10″ Sampleit or a Cricket, just warp the full width of the loom for a slightly narrower, but equally lovely scarf.

A 7.5 dent heddle/reed.

Again, this doesn’t have to be sett in stone. (Get it? Sett in stone?) If you don’t have a 7.5 dent heddle, you can use your 8 dent. If you want to change the heddle size completely, yes, you can – but you would also need to change to a more appropriate yarn size, so just bear that in mind.

Pick up stick

We use a single pick up stick to create the beautiful, textural scarf pattern. The pattern is simple to pick up with your stick and also simple to weave with a 4 step repeating weaving sequence. You can learn more about weaving with pick up sticks here.

Stick shuttle

You only need one stick shuttle for this project, as we use the same weft yarn and colour throughout the project. As long as it’s wider than the width of the piece on the loom (11″), you’re good to go.

Tapestry needle

This is an essential for hemstitching. My favourite tapestry needle of all time is the Clover Gold Bent Tip Needle. I’ve talked about these needles before, but I love them for several reasons:

  • They slide through hand woven fabric beautifully
  • The bent tip makes it really easy to dive down and come up through the fabric without having to perform hand contortions!
  • They are affordable
  • They are gold! Who wouldn’t love that?! (And if you’re prone to, ahem… losing things, the gleam of the gold is quite helpful!)

Fringe Twister

Whether you twist your fringe or not is optional, but it is a beautiful way to finish your scarf. I talk about some other options for fringes in the finishing video if you want to choose a different way. There are many brands of fringe twisters available, I have had a LeCLerc Fringe Twister for many years and have been very happy with it.

Reed and threading hook

Most rigid heddle looms will come with one or both of these, but I would like to recommend the Ashford Doubled Ended Hook for it’s durability, ease of use and affordability. I have a whole bunch of these little hooks around my studio and my old metal threading hook that used to split all my threads doesn’t get a look in anymore.

Yarn

To see all the yarn details, please download the pattern. For the warp, I used Lion Brand Mandala yarn in Gnome, dk weight. This yarn is an acrylic, but I have some other suggestions in the pattern if you prefer to look at other options. My weft yarn was a super wash wool in dark grey in a fingering weight.

What Weaving Skill Level Is This Project For?

I designed this project to be achievable for beginners but interesting enough for more experienced weavers. If you are an absolute beginner, I recommend that you take my Woe to GO! Beginner’s class before attempting a project like this.

How To Get The Pattern

The file underneath has a “download” button at the bottom. Click on that to download, then choose either to print the file or view it on your screen. The pattern PDF includes all the details you need for the project, including yarn amounts, materials, pick and weaving sequences plus the poem in either cursive or print – your choice!

The-Heart-Scarf-Free-Pattern-1Download

You can view the first of 6 videos on Youtube –

The full video lessons and printable pattern are also available all in one spot at the Online Weaving School if you would prefer to watch there.

I hope you love this project and bring joy to someone’s life (or to your own!) by taking part.

Until next time…

Happy Weaving!
How To Use Pick Up Sticks – Printable Resource

Filed Under: Free Pattern, Free tutorial, Online Weaving School, Rigid heddle weaving, Weaving Tagged With: free project, freeweavingproject, rigid heddle weaving patterns, rigid heddle weaving tutorial, the heart scarf

Better Warp Tension With Targeted Wedging

by Kelly 19 Comments

Achieving even warp tension on your loom can feel like one of the biggest challenges in weaving – especially when working on a rigid heddle loom. Uneven warp tension can lead to messy looking selvedges, inconsistent beat, floats or skips and frustration during weaving.

While careful warping technique improves with practice, even experienced weavers can run into warp tension problems.

In this article, I’ll show you how to improve warp tension using a simple technique called targeted wedging. This practical method can help you correct uneven tension on the loom without re-warping your entire project.

Even for the seasoned weaver, there can be the occasional curve ball just to keep us humble šŸ˜† For me, that was a recent double width project on my rigid heddle loom.

*This post contains affiliate links. For further information, see my disclosure policy.

I warped independently, which is do-able but not 100% ideal when you’re using thicker threads and those threads are doubled. When I started weaving, I found that my tension was firmer in the middle than on either side.

This began interfering with the “cleanness” of my sheds, meaning that not all my warp threads were settling into position well when I changed sheds. And for double width weaving, that can be a huge headache!

What Is Wedging?

I’ve covered wedging before, as you can see in this video:

But I also wanted to get a bit more specific about wedging problem areas in your warp. This is very quick and easy to do and can make a big difference to your tension.

Identifying The Problem Areas

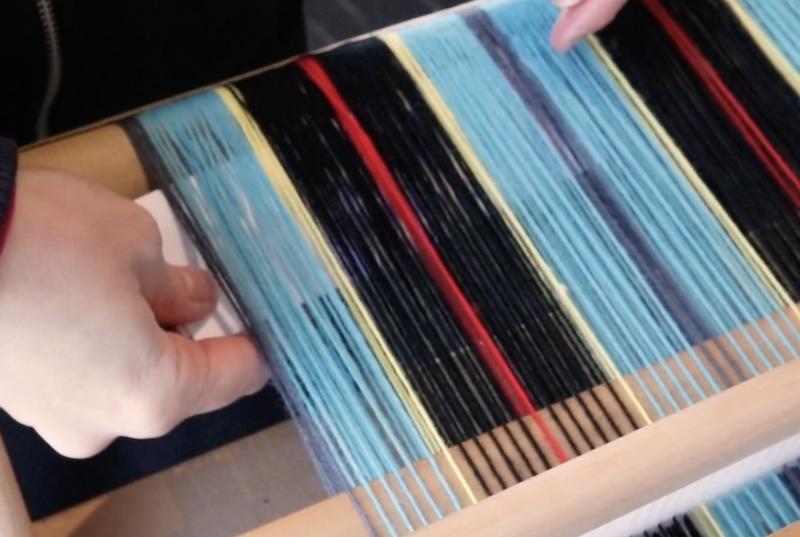
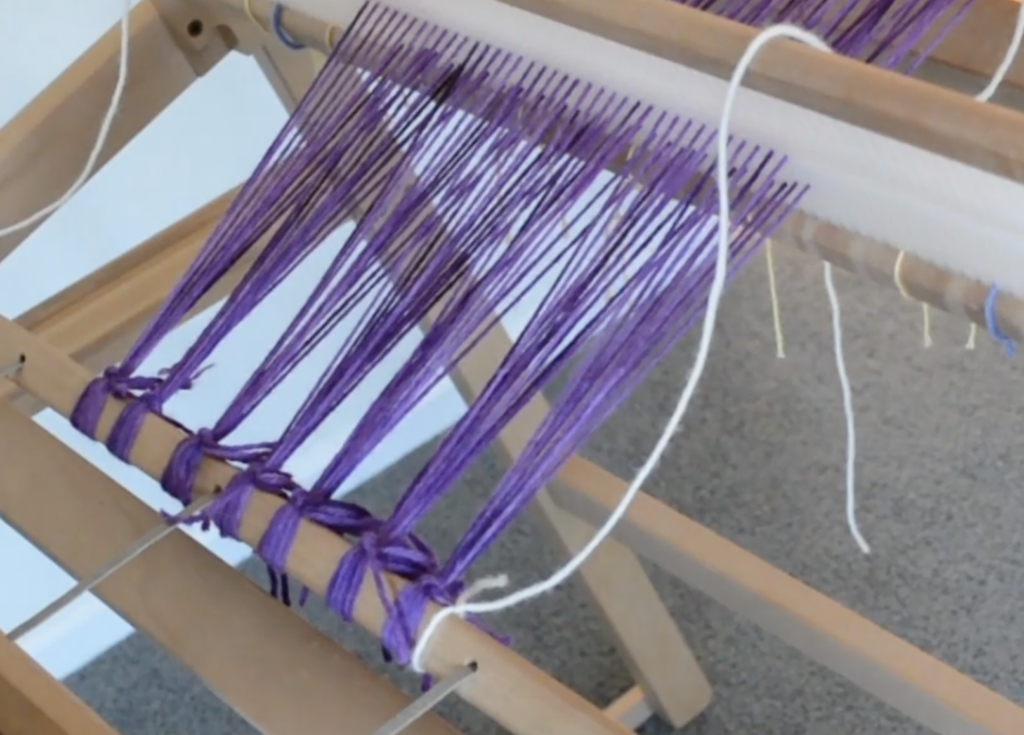
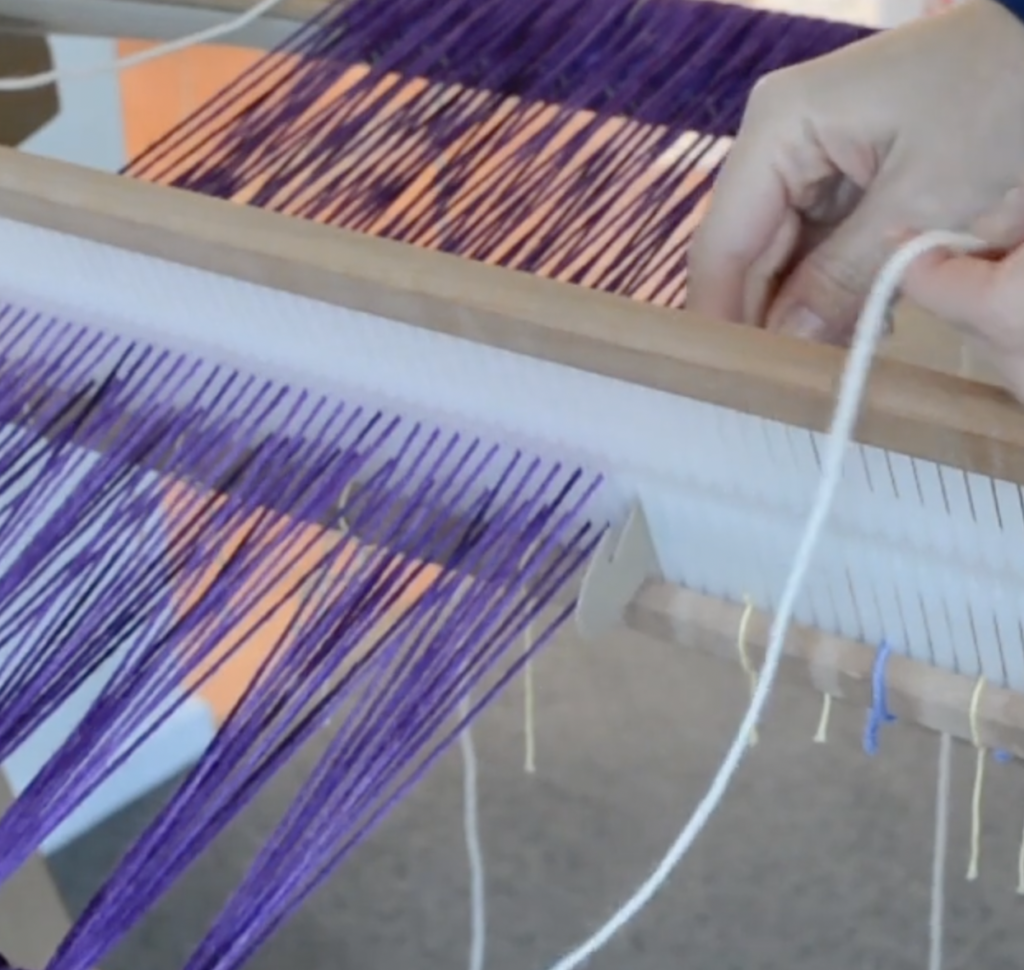
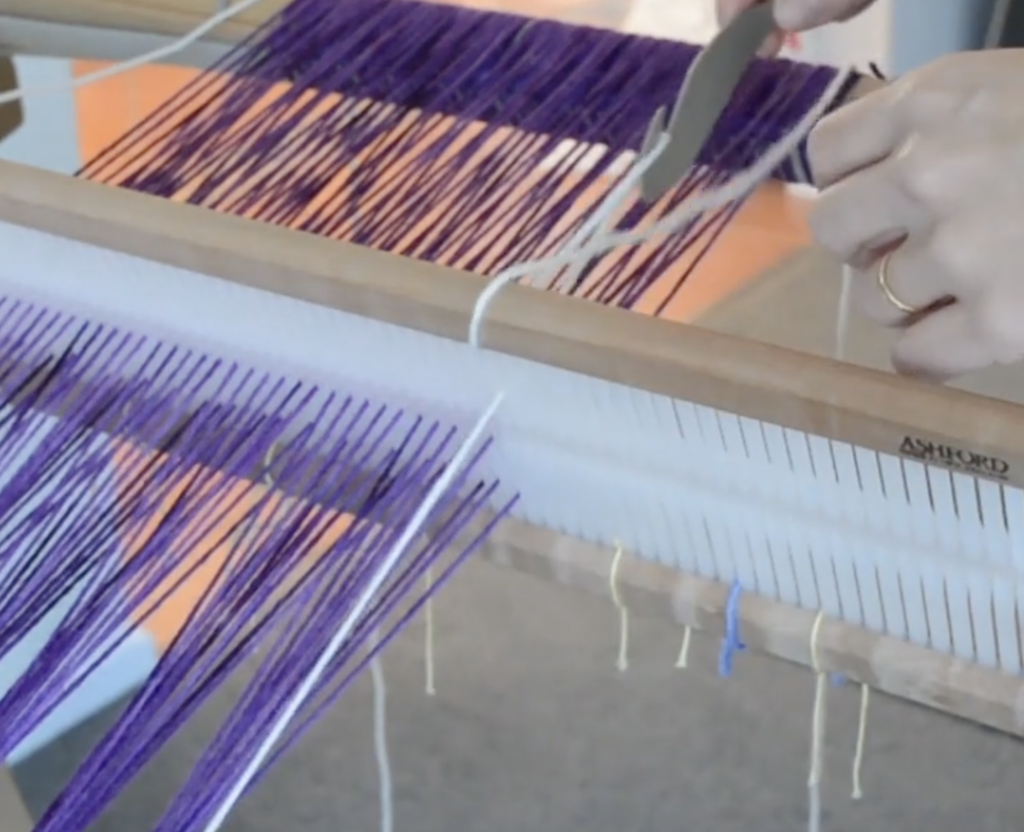
I start out by identifying the areas that need help. For me, that was either side of the middle section, towards the edges. If I wedged all the way across the warp at this point, that would also increase the tension in the mid section, where it is not needed.

Grab Some Basic Materials

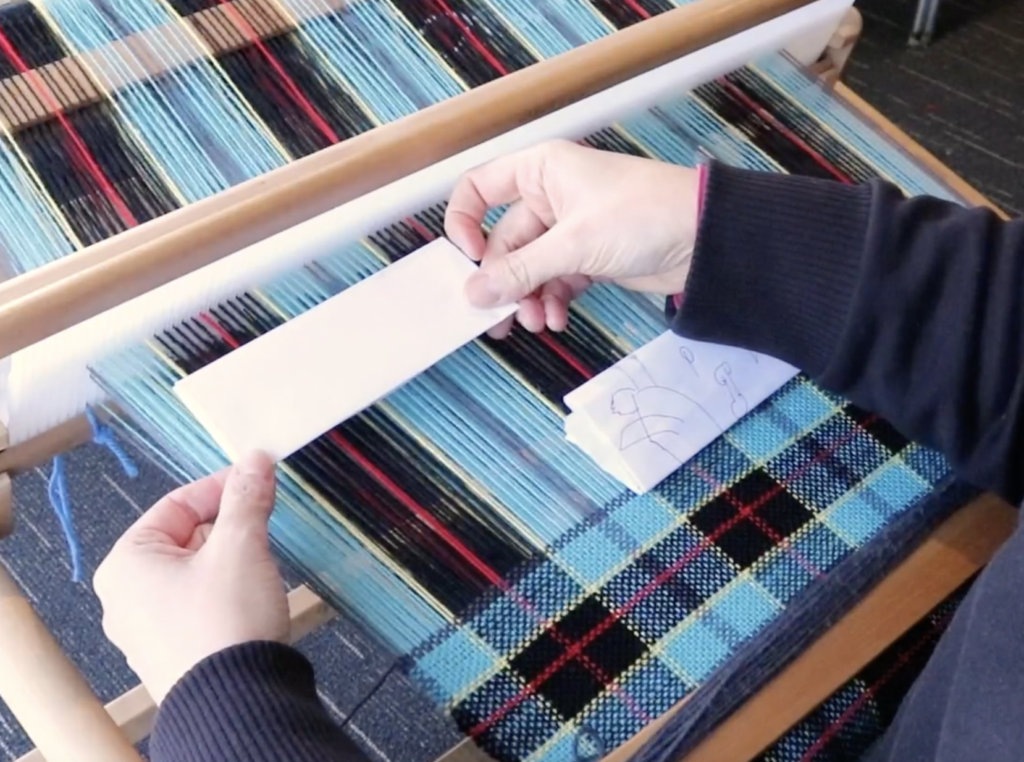
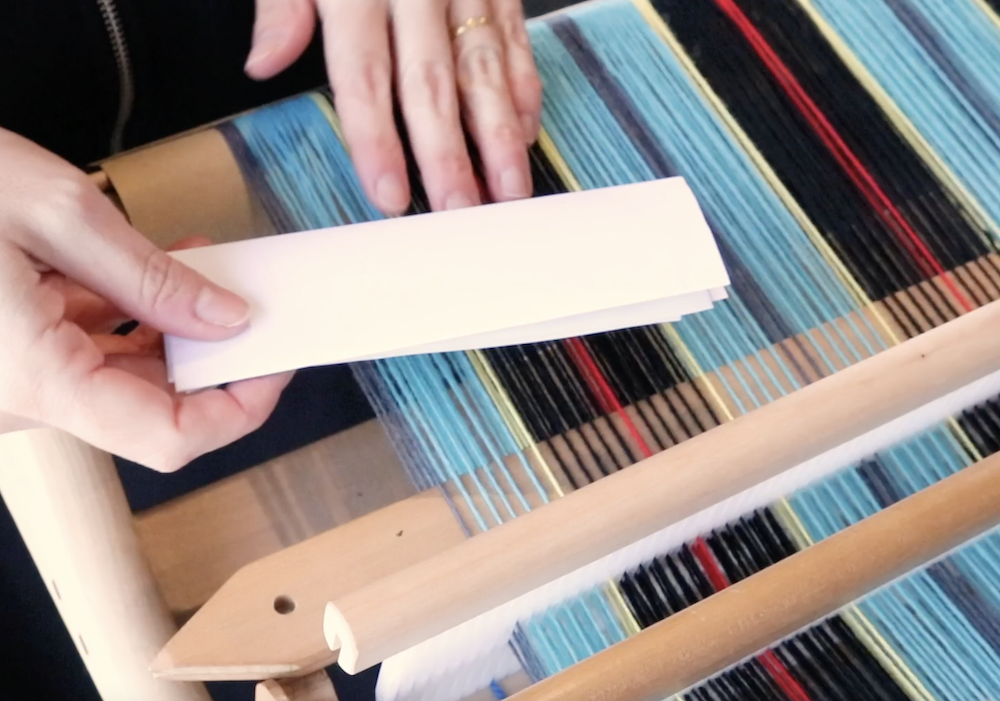
There are several materials you can use for wedging (like cardboard separators, cut to size) but I chose to use everyday A4 printing paper. I folded the paper to the approximate width of the loose warp section so that the paper had been folded about 4 times. This provided me with a bit of thickness, but not too much.

It may be easiest for you to pop around the back of your loom with the paper to get close to the warp.

Take the paper underneath the entire warp (both heddles are in neutral at this point) and start to wiggle and jam it into place.

Push the paper in towards the back of the loom. You will feel resistance from the threads and this is good, because you are tightening everything up. There is no set amount for how far back the wedge should be pushed, just until you can feel that the threads have increased in tension in that section.

Move The Wedges As You Advance The Warp

As you weave and advance your warp, your wedges will move out of place and you will need to reposition them at each advance. This is actually a good thing, because it ensures that your looser threads are constantly being re-tensioned!

If you would like to see the way I place the wedges, please check out this video:

I hope this short tutorial was useful to you! Have you used targeted wedging before? Has it made all the difference to your project? Let me know in the comments, I would love to hear from you!

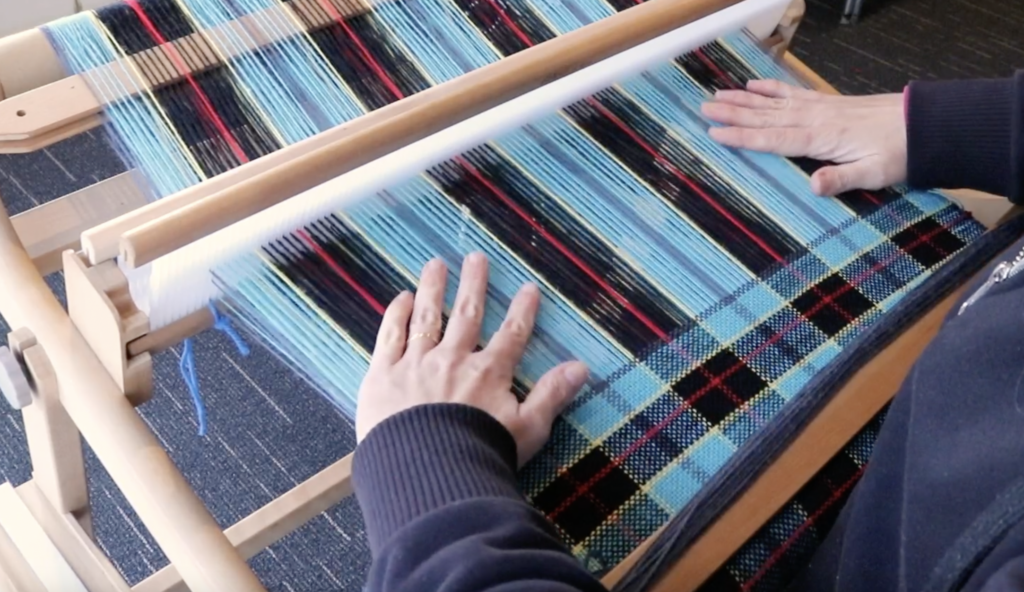
Do you love the look of the project I’m working on in this tutorial? This is from my Plaid Double Width Blanket Ebooklet, which is available now.

Until next time…

Happy Weaving!
Filed Under: Free tutorial, Rigid heddle weaving, Tutorials, Weaving Tagged With: free tutorial, improve tension, rigid heddle weaving, targeted wedging, wedging

What is a rigid heddle?

by Kelly 16 Comments

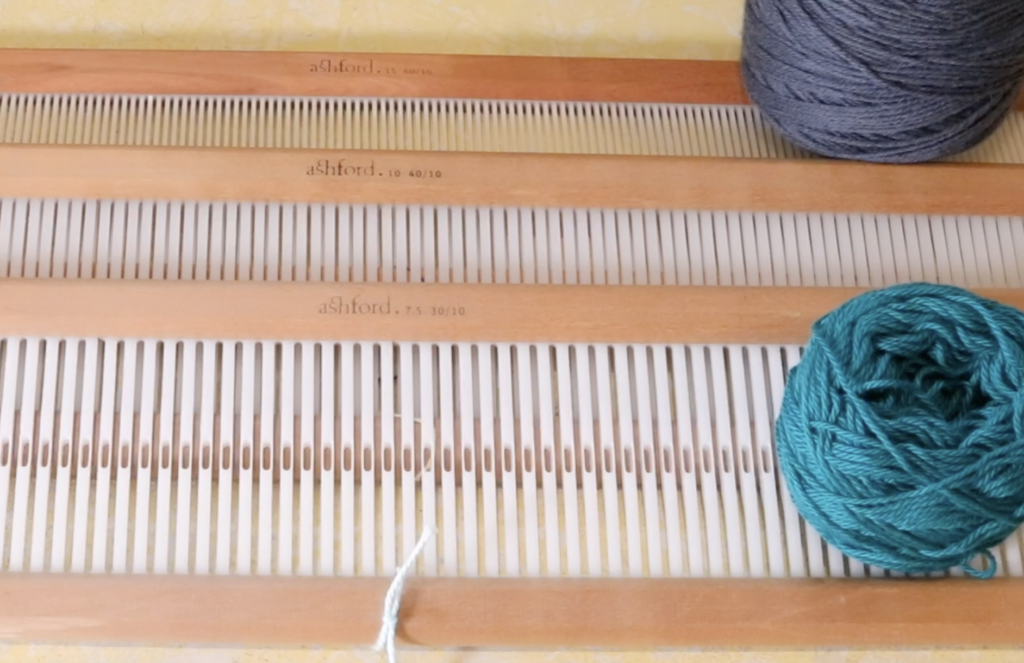
I’ve talked a lot about rigid heddle looms in general here, but today I’m going to focus on the actual rigid heddle.

I’m going to explain what it is, what the measurements mean, how you can match up different sized yarns with different heddles, and basic care of your rigid heddle to ensure longevity.

*This post contains affiliate links. For more information, please see my disclosure policy.


Sometimes you will see a rigid heddle referred to simply as a “heddle”, and
sometimes you’ll see them called a “reed”. I usually refer to it just as a heddle to simplify.


They’re actually a combination of both, because the frame contains a way for you to thread your yarn and also doubles up as your beater, for beating in the weft. This is really a very unique piece of equipment.

For more traditional or multi shaft weaving, the heddles are made of string, texsolv, or metal, and they are movable. Every single thread has its own heddle.

But a rigid heddle is basically just what it sounds like. The heddles, or the spaces through which the threads go are set in the frame and don’t move.

Generally, a rigid heddle is constructed from wood for the frame and plastic for the heddles and slots, though the entire heddle can be made of wood. You will find some “toy” style rigid heddle looms made entirely of plastic, and some folks are utilising 3D printers to print their own rigid heddles these days, which is pretty cool!

This article was prompted by a student question, which was “what does the dent mean“.
Well, when we’re referring to rigid heddles, we talk about the dent as basically a space through which
your thread can go.

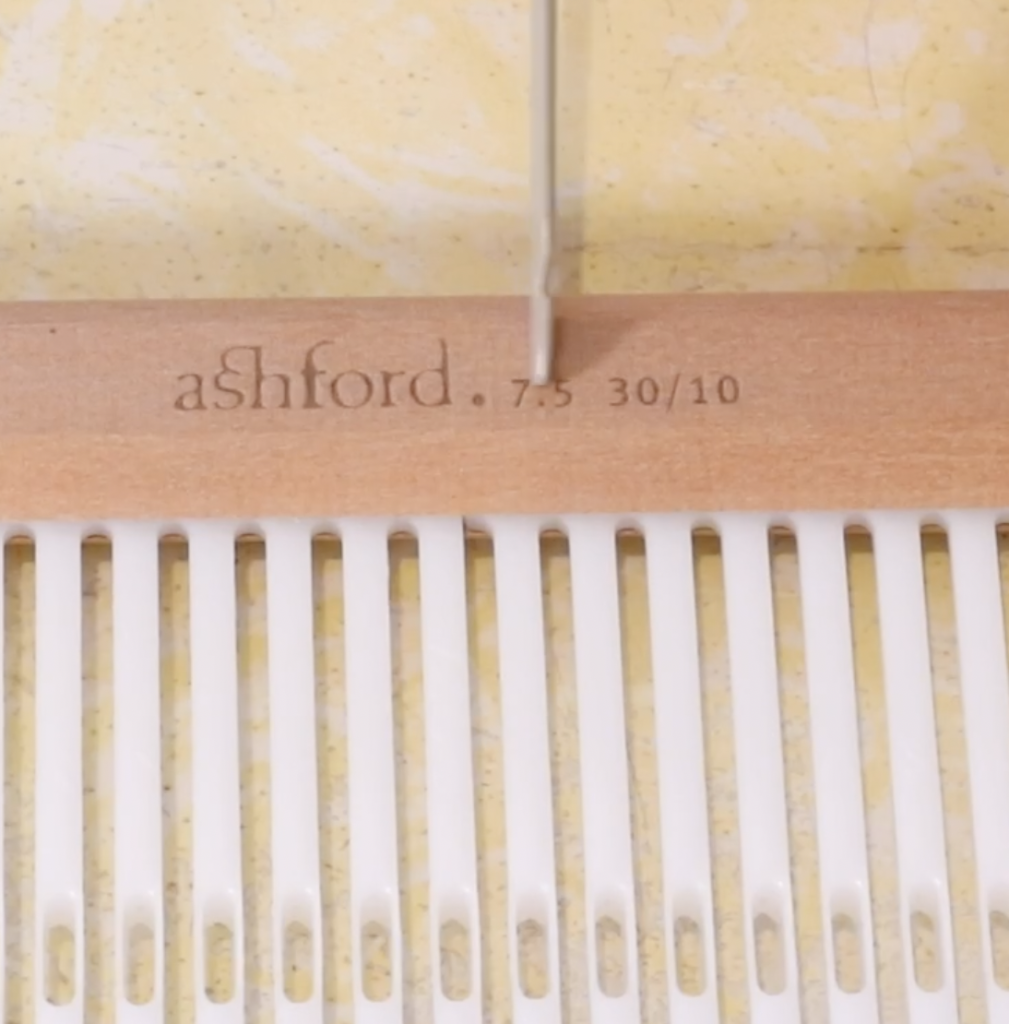
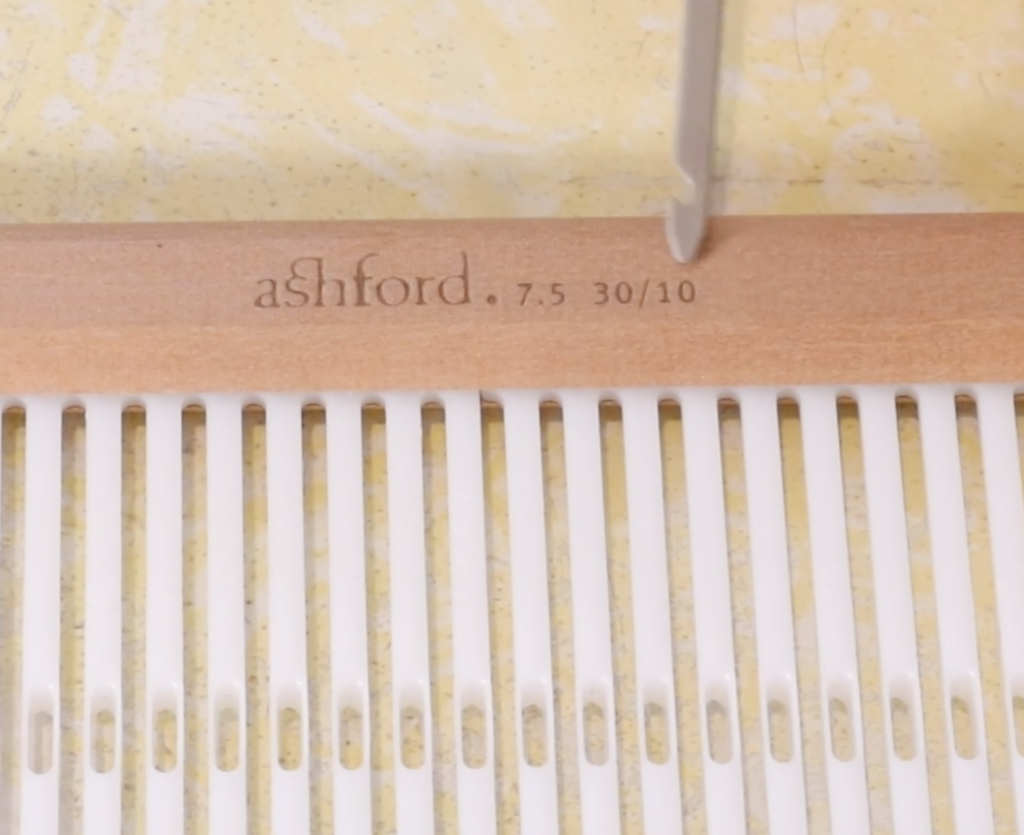
If you look up to the top of your own rigid heddle there will probably be some numbers. This depends on the manufacturer, as some loom companies leave their heddles blank. (It’s much easier if the numbers are there, in my opinion!)


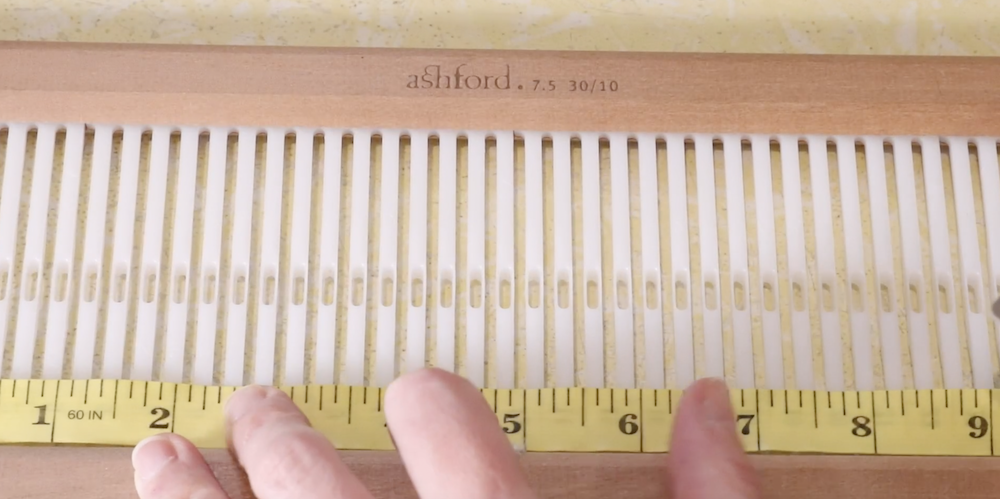
This one says 7.5 at the top, and that tells me that it’s a seven and a half dent heddle. But what does
that actually mean to you as the weaver?


Well, it means that if you use this particular heddle, you can achieve 7.5 ends per inch. This is one of the differences between a rigid heddle loom and a different kind of loom. The sett or the ends per inch are already set in place by the size of your heddle.

So, you choose a heddle that suits the type of yarn or the size of the yarn that you want to use at any time. I’ll
talk about that a little bit more in a minute, but first I want to show you how the measurements on your heddle work.

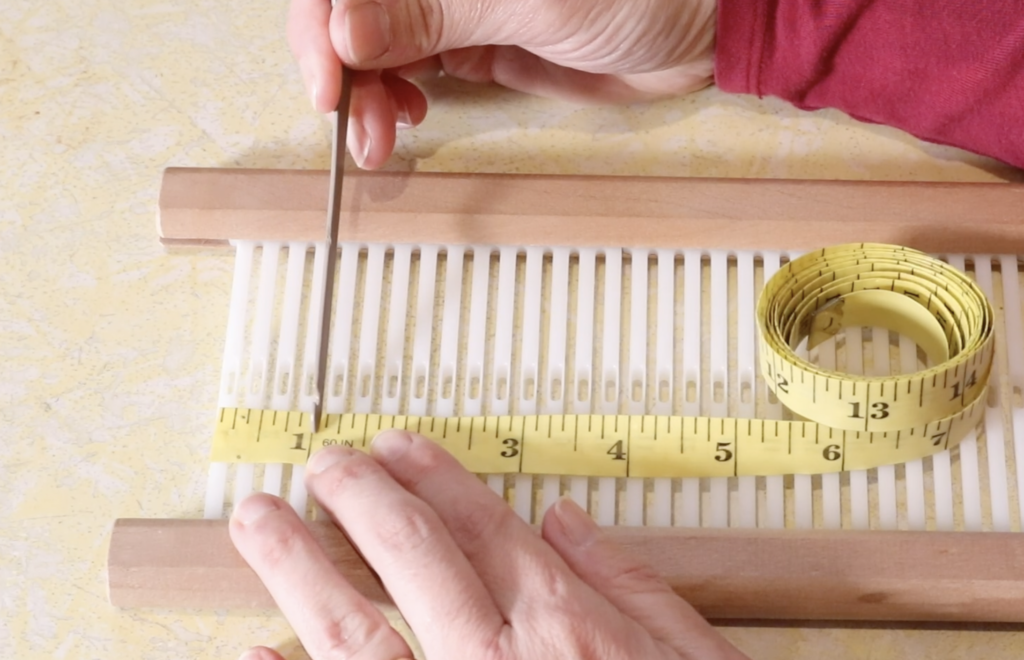
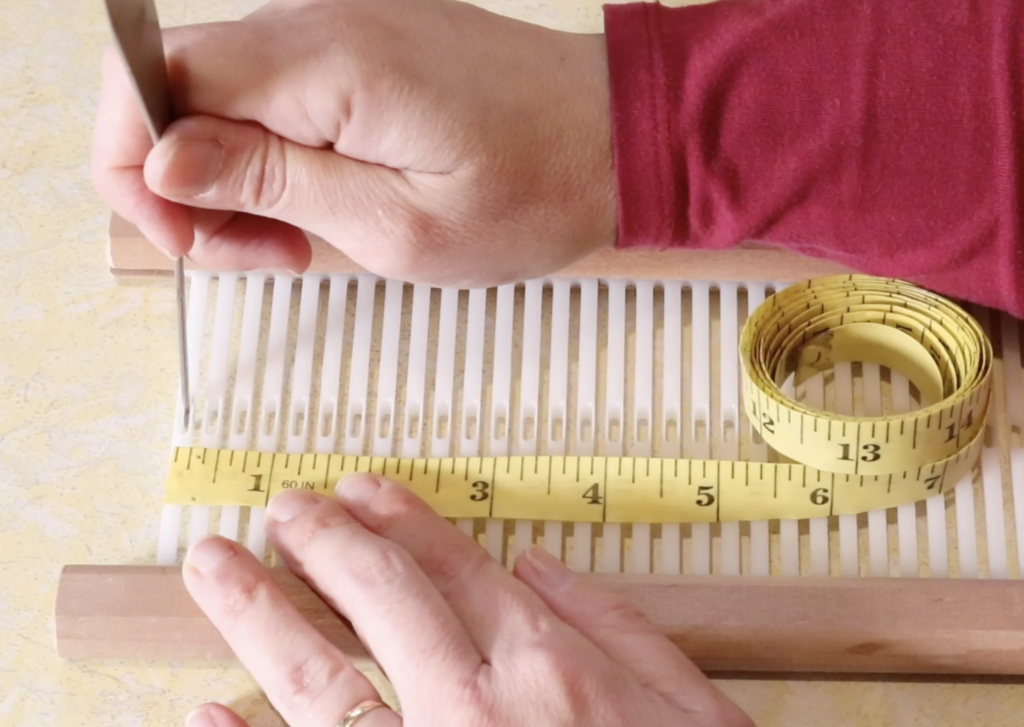
I mentioned that this is a seven and a half dent heddle. So, looking at my tape measure over about an inch, I’m
going to count every single space through which a thread can go on this heddle.

I’m counting the holes because we use both the holes and the slots on the rigid heddle for a balanced plain weave.


I begin by counting from the first hole at the start of the tape measure, and continue to count every hole and slot until I reach the one inch mark.

Because this is a 7.5 dent heddle, I won’t count the last slot at the one inch mark as a full slot, but as a half. This is reflected in the fact that the counted holes and slots don’t fit evenly within the inch measurement. For a heddle that has a rounded number, for example, a 10 dent heddle, you will find that you can measure exactly 10 spaces in the inch.

So, how does this information actually translate to the loom?

Well, it’s extremely important that we match the right yarns to the right heddles. Let’s say that
hypothetically, I wanted to do a balanced weave on my seven and a half dent heddle. The first thing you need
to do is your sett test.

If you’re not familiar with sett, or you’re not sure how to figure out the sett for your
particular yarn, I have two videos that will help:


What is sett?

How to determine sett.

Once you know about sett you have such freedom, something will click in your brain and you will suddenly
understand so much better how yarn size relates to the size of your heddle.

Here is an example of how they tie together:


I wrap the yarn I want to use around my inch ruler and find that it has roughly 15 wraps per inch. Divide the wraps in half for a balanced plain weave. This gives me 7.5.

Now I know that if I want to do a plain weave on my rigid heddle loom, the 7.5 dent heddle is almost perfectly
matched to this particular yarn.


When you have a heddle size that doesn’t exactly match the sett that you’ve determined for your yarn, then
you can start making decisions. The decisions will usually be based on the project itself and how you want it to turn
out.

If the sett you determine for your yarn is not exactly the same as any of your heddle sizes, but is very close, you may choose to either go up or down in heddle size.

As an example, imagine that the wraps per inch for my chose yarn comes to 18 wraps. Divided in half, this will be 9 ends per inch (or a sett of 9.)

There are no loom companies that make a nine dent rigid heddle. But that’s okay, because we can compromise, based on what the planned project is. Do I want a lighter, airier and softer fabric? Or do I want a firmer and denser fabric?

For placemats or a table runner I would be looking for a firmer fabric, for a scarf or wearable I would be hoping for something softer and lighter. For the firmer option, I would choose to weave the yarn with a sett of 9 in a 10 dent reed. For the softer option, I would choose the 7.5 dent heddle.

These decisions become easier over time and experience with all different yarns and different types of
projects.

There are a couple of other things that I want to point out about your rigid heddle. When you have a look at the information at the top of the heddle frame, you’ll notice that, at least on an Ashford, there are some other numbers printed. In the case of the 7.5 dent heddle, the other printed figures are 30/10. This is metric information rather than Imperial. The 30/10 just means that over 10 centimetres, you will fit 30 threads in that 10 centimetres.


Also, if you look in between where it says “Ashford” and “7.5” you’ll see a dot. That dot means that directly underneath this is the very middle of your rigid heddle. This is really handy information!

I like to keep a piece of waste yarn tied at this middle marker for easy visual reference. It also makes measuring out your intended project before you begin warping. Simply place a measuring tape and line up the half way measurement with the half way mark on the heddle.

For this 10″ wide piece, I line up the 5″ mark with the centre of the heddle. I can then mark the start of the tape measure and the 10″ mark with more waste yarn tied onto the heddle for quick and easy warping.

The last thing I want to go over with you today is some tips on the care of your rigid heddles for their longevity.

New heddles are not cheap to buy, especially if you want to have a lot of sizes.
If you’re getting into weaving with two and three heddles you will be looking at quite an investment. Some basic care will help prolong the life of your heddles.

The first thing is to not store heddles in a place that is damp. Doing that will probably warp your wood over time and may render the heddle unusable.

Another thing is to not keep heddles in a place that is too hot. We are dealing with plastic here, so if it gets too hot, or it gets near a source of heat too much, the plastic component can melt and warp as well.

The third point is to go easy on your heddle. Don’t be overly rough on it when you’re threading. I know that might sound a little bit silly, but a heddle like a 15 dent heddle is very thin and not as strong as a larger sized heddle. Rough threading could bend or break the plastic.

The basic moral of the story is that if you treat your rigid heddles right, they will treat you right!

If you would like a handy guide for your rigid heddle loom, I recommend The Weaver’s Toolkit. It includes information such as the right yarns for the right sized heddles, yarn conversion sheets, calculation sheets and many more useful guides.

The Weaver’s Toolkit ebook is available for purchase here.

Would you like to view this post in video format?

Until next time…

Happy Weaving!
Filed Under: Rigid heddle weaving, Weaving Tagged With: rigid heddle, rigid heddle loom, rigid heddle weaving, sett

Double width weaving tips for rigid heddle weaving

by Kelly 18 Comments

Double width is one of those weaving techniques that can seem like some kind of sorcery to a new weaver.

It can be both very exciting and extremely daunting, all at the same time!

*This post contains affiliate links. For more information, please see my disclosure policy.

I remember how overjoyed I was early in my weaving journey to discover that my 24″ rigid heddle loom was actually capable of weaving fabric twice as wide. Wow, what a revelation!

With two heddles of the same size and two pick up sticks, you too can weave cloth double width.

If you’re interested in knowing more about what weaving with two heddles can achieve, I’ve written a previous article with details and examples of all the various things you can do with two heddles. You can read that article here.

My Weaving With Two Heddles class is one of my Online Weaving School best sellers, and it’s not hard to see why. Weaving double width can open up a whole new world of possibilities on any size rigid heddle loom.

Although weaving double width can be a challenge, I believe it is very achievable with the right tools and knowledge. And practice, of course!

Over the past few years, I’ve heard all of the common problems that students run into when attempting this technique. I’ve run into most of them myself at some point too.

So, today I want to give you my best tips for successful double weaving to help you have the best experience and hopefully avoid some common frustrations.

I’ll start with one common misconception from newbie double weavers:

Technically, your cloth will not be twice as wide.

Let me explain!

My rigid heddle loom is a 24″. The assumption then, is that if I’m weaving double width, I will end up with a 48″ wide piece of fabric. Not so. The 48″ figure does not allow for draw in and shrinkage. Just as I do when I weave a single layer of fabric on my 24″ loom, I have to calculate and allow for these differences. Depending on my yarn, I could have up to a 20% loss. This would make my double width cloth closer to 38″ in width.

This is something to consider in the planning stages of your double width piece. You may find it worth the time to weave a smaller sampler first, putting it through the wet finish and drying process and recording all the measurements before and after in order to determine the shrinkage and loss for your particular yarn.

And now for my tips!

Great warp tension makes all the difference.

I will say this for any weaving project, but it becomes all the more important for double width. Get you tension as good as you possibly can while winding on your warp.

This doesn’t mean get the warp as tight as you can, but more as firm and consistent as you can. This might mean that you need a helper to assist you in holding the warp while you wind on. It might mean using weights on the warp while you wind on. It will certainly mean packing the back beam very well as you wind (I would recommend a roll of craft paper that fits the width of your loom for this).

If your warp tension is not consistent enough, when you try to adjust the tightness to begin weaving, you will find some threads are tight enough and others are loose. Threads will not all be in their correct sheds, and you may be confused about thread positioning.

This can be super frustrating but is avoidable by taking extra time and effort over your warping process. Trust me, it’s worth it!

Choose your yarn carefully.

Choosing the right yarn for your double width project is going to save you a lot of headaches later on!

Firstly, you need a yarn that is a suitable size for the heddles you are using.

Next, you DO NOT want a sticky yarn for this weave structure. A yarn that sticks to itself too much, is frizzy or fluffy, will interfere with the cleanness of your sheds and turn you into one very frustrated weaver!

To find out more about different types of yarns, some I do or don’t recommend, and more general weaving yarn information, you may want to check out these articles:

Choosing and Using Yarns in Weaving…

3 Yarns New Weavers should never use!…

You also want to be careful about a yarn that has too much stretch. I like to use wool for double width weaving because it’s elastic, but bounces back, so it’s very forgiving.

If your yarn is elastic, but stretches without returning or bouncing back, then you have a problem. It will be next to impossible to maintain proper tension on the loom. This will make droopy sheds and you won’t be able to properly see which threads are in the right sheds or not.

Your fold may not always be the same.

The fold is kind of a big deal in double width weaving. This is because, once you remove your piece from the loom and open it up, that fold is on display for all to see! You can certainly weave a next to invisible fold, but there are some things you need to know first.

Yarn. Again, the yarn you use will impact on how your fold turns out. For example, I have found that a cotton will bunch together more tightly at the fold than wool does. This is because cotton is more rigid and less lofty/bouncy. So my strategy at the fold changes according to the yarn I’m using. I need to be less firm at the fold when using a more rigid cotton, to give it a little more space to settle into place. Again, a sample can be your best bet to success.

Consistent weft tension at the fold is really important. Try to find a good rhythm and stick with it. Not too tight, not too loose. Practice, practice, practice! You won’t get to really see your fold until you remove the piece, so it is challenging to know how it’s going to turn out. But practice will give you a good feel for what is too much or too little weft tension.

Clear your sheds if you’re concerned about floats.

Coming back to the possibility of sticky yarn or threads being in places they shouldn’t, it could be a good idea to use an extra stick shuttle or pick up stick to clear sheds before weaving them. You could do this for every shed if you need to, or just for those you have determined to be troublesome. When you open a new shed, insert your extra stick and wave it around. Or place it in flat and pull it towards you then slide up towards the heddle. This should sort out any naughty threads.

If things still don’t seem right, you can place the stick behind the heddle when the new shed is open and slide the stick up towards the back beam, then take it out. As long as your threading is correct, this works very well for putting threads in their correct places.

To check for floats, you will want to view your work from underneath at intervals. You can’t see how things are looking underneath as you weave, so either use a mirror or your phone to check. If you’re feeling energetic, you can hop off your chair and pop under the loom for a look. I’ve done all of these, and they all work fine, the main thing is to do checks periodically to see if you’re getting floats or to know if anything looks a bit off.

Now I want to address a question I get a lot.

Can I weave patterns or other weave structures in double width?

The very short answer is yes.

But…(there had to be a but, right?) the rigid heddle loom is best suited to double width in plain weave. There is a good reason for this.

A rigid heddle loom is a two shaft loom. When we weave double width, we are using 4 shafts (which is why we need two heddle plus two pick up sticks). Quite doable on a rigid heddle.

But, if you want to weave another pattern, that will often require 4 shafts to begin with. A rule of double width weaving is that you must have twice the number of shafts initially required. So, that 4 shaft pattern just became 8 shafts.

If you’re on of those thrill seeking rigid heddle weavers, and want to adapt 8 shafts for your loom, I wish you all the best. It can be done, but that is one thing I choose not to do myself. Although a voice in the back of my mind keeps telling me that I will and must do it one day, just for the challenge. Most of the time I try to keep that little voice at bay, it asks too much of me sometimes šŸ˜†

Suffice to say, setting up for a 4 shaft double weave on a rigid heddle loom is no picnic in the park. But, I do have another suggestion that I think you will like.

Colour and weave! If you’re unfamiliar with the term, check out this article. To explain it simply, colour and weave uses colour techniques to create interesting fabric and can easily be done on plain weave threading. You can combine warp and weft colour combinations to weave really beautiful items that look more complicated than your everyday plain weave.

This can easily be applied to your double width project. In my Doubleweave Baby Blanket class, I employ the use of weft stripes, but you can take that further by introducing more colour to warp as well.

The only thing you really need to know is that you will have to be particular about the colour placement at your fold, remembering that a warp stripe placed at the fold will be twice as wide as a single layer fabric.

Double heddle slouchy bag

That brings me to my very last tip.

If you find the fold challenging, incorporate a distraction!

So, you’ve been practicing folds for a while, but you’re still not happy with your results? Or you find that the fold is always too visible?

Try doing what I just mentioned, and add stripes to your warp, or colour arrangements. Ensure that these are arranged correctly at the fold. My reasoning behind this is that a piece of fabric that has colour or pattern will be “busier to the eye, and distract the view away from any less than perfect aspects of the piece.

Now I have some additional resources for you if you’re eager to start your own double width journey.

Book:

Jane Patrick’s “The Weaver’s Idea Book” has a whole chapter dedicated to many aspects of double weave. I highly recommend this book for any rigid heddle weaver, it is so comprehensive and inspiring!

Classes:

Weaving with Two Heddles

Doubleweave Baby Blanket

Members only classes:

Slouchy double heddle bag

Wrist Warmers

The Plaid Double Width Blanket Ebook is a fantastic 44 page resource that includes a beautiful blanket project plus a ton of comprehensive and useful information:

Plaid Double Width Blanket Ebook

So tell me, have you tried double width weaving yet? Perhaps these tips have inspired you to give it a go? Let me know in the comments below, I would love to hear from you.

Until next time…

Happy Weaving!
Filed Under: Rigid heddle weaving, Weaving Tagged With: double width weaving, rigid heddle weaving

  • « Go to Previous Page
  • Page 1
  • Interim pages omitted …
  • Page 4
  • Page 5
  • Page 6
  • Page 7
  • Page 8
  • Interim pages omitted …
  • Page 16
  • Go to Next Page »

Primary Sidebar

About Kelly Casanova

Join Kindred Creatives!
Hand crafted boat shuttles

Categories

Archives

Meta

  • Log in
  • Entries feed
  • Comments feed
  • WordPress.org

Copyright © 2026 Kelly Casanova Weaving Lessons on the Foodie Pro Theme