Last year I quite suddenly became intensely interested in the idea of painting. It’s not uncommon for me to fall down a rabbit hole when it comes to creative pursuits, but this time I was really looking for something I hadn’t tried much previously.
I have dabbled in drawing and watercolour painting and pencils over the years but never really committed seriously to sticking with any particular discipline.
Why Pastel Painting?
My girls had some cheap pastel supplies leftover from art classes they took with a homeschool co-op, many years ago. I thought I might as well try them out and see if I like them.
So I did try them out and I didn’t like them.
I should explain though. It wasn’t the art of pastel painting that I didn’t like, it was the materials themselves! I did a few Youtube tutorials to get me started and found my results were very disappointing.
First Attempts

For these first attempts I was using Mont Marte pastel paper and Mungyo Soft Pastels. Now, I wasn’t sure if the problems was my inexperience or the materials (or a combination of the two felt more likely!)
Honestly, these cheap materials, in my opinion are not worth the effort. I would so much rather recommend quality materials to a beginner because the cheap stuff is a big turn off.
I remained undecided about buying good quality materials because, let’s face it – they are really expensive! I didn’t want to invest in new materials only to find that I was not as interested in pastel painting as I thought.

I continued to persevere with the cheap materials for a couple more paintings and did see some improvement. But I wasn’t enjoying investing my time for mediocre results. The paper was so grainy, pilling at times and the pastels were hard, chalky and not very blendable.
Upgrading Materials
So I came to the crossroads. Either I was giving up pastel painting or I was going to invest in good materials and give it a proper go! I think you can guess what I decided.

Firstly I did some research, looking at my favourite pastel artists and the materials they use. I decided on a Landscape Set of 30 half pastels from Sennelier (I wish I had got the set of 80 for even more colours!) and PastelMat Paper from Clairefontaine. I also got a set of pastel pencils from Stabilo.

My first attempt with the new materials was still not super thrilling but the difference in the way it felt was amazing! The paper, even as a sanded paper, is smooth and beautiful, the pastels feel like butter as they glide across the paper.
The colour coverage is excellent and blending is a joy, using either fingers or blending tools for a bit more push. You can get a lot of pigment on the paper before it fills.
Something else I invested in at the same time as these new materials is classes. I joined the Patreon for one of my favourite artists and started learning!
Starting to Improve
My next results were so much closer to what I really aim to do in pastel painting.

Completing this piece gave me the confidence to keep going and to feel that it just might be possible that I could produce the kind of art work that I really love.


At this point I felt ready to try going out on my own with my own reference photo (I have an insane amount of landscape reference photos – mostly on my phone camera roll!)
Ready to Try On My Own!
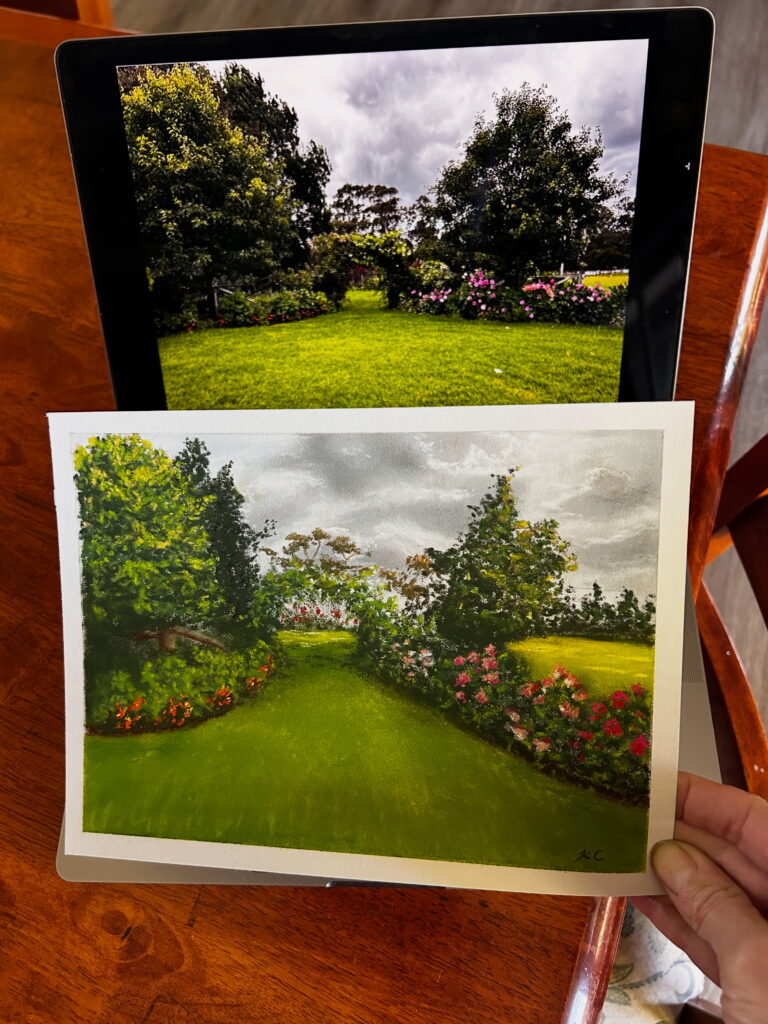
I chose a particularly lovely photo from our garden that includes a lot of green (I love painting with greens!) I quickly realised that I need to add more greens to my collection for more dynamic paintings.
So, after many hours I finished and, all things considered, I’m pretty happy! Obviously there is much room for improvement but I’m feeling really excited about my next piece. Next I want to practice skies and clouds, they are challenging but so beautiful.
Books I Have Found Helpful
Painting Pastel Landscapes by Jeremy Ford
Painting with Pastels by Jenny Keal
Painting the Landscape in Pastel by Albert Handell
Did I Make the Right Decision?
So, am I happy with my decision to spend more on quality materials? Well, yes… and no!
Why no? Because now I want to buy all the colours! I want every pastel set that exists! I want to try out Pan Pastels and more papers. Oh, and I need to find more hours in the day to be able to fit in all the creative things I want to do 😆
So tell me, have you ever tried soft pastels? Or a different medium perhaps? Let me know in the comments below ⬇️
Until next time…
Happy Painting!