• Skip to main content
  • Skip to primary sidebar

Kelly Casanova Weaving Lessons

  • Hi! I’m Kelly!
    • Disclosure
  • Online Weaving School Class Index
    • Common account issues
    • Common technical issues
    • What do I get with a membership?
  • New to rigid heddle weaving? Start here!
    • Never heard of the rigid heddle loom?
    • How to weave neat edges on the rigid heddle loom
    • Rigid heddle weaving
    • Rigid Heddle Weaving Patterns
  • Patterns
  • Subscribe

Online Weaving School

Frequent weft colour changes

by Kelly 20 Comments

Changing weft colours frequently in one project usually occurs when you’re weaving stripes, blocks or bands of colour.

Today I’m going to talk about the problems that can spring up and show you three different options you can use when you need to change your weft colours often.

Here are some common questions and confusions surrounding weft changes:
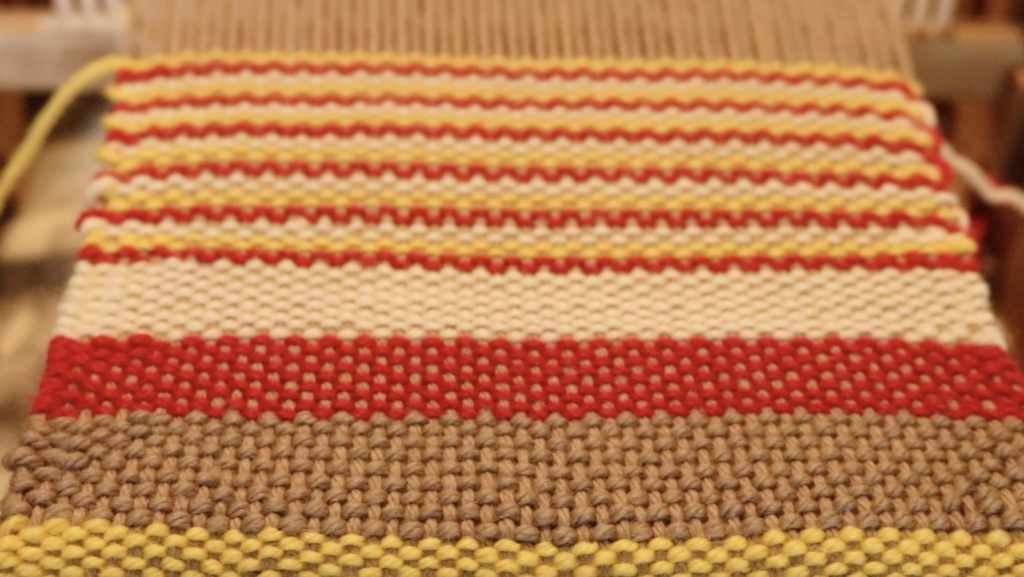
“Should I cut the old colour when introducing a new one? If so, what do I do with the cut tails?”

“Should I not cut the colours, but weave them continuously, swapping shuttles as I go and carrying the colours up the edges?”

You may be wondering about which method is the best?

Well, that all depends on how wide the stripes or each band of colour are going to be. I’ll explain further.

If you are weaving wide bands of colour, it will likely not be practical to carry the yarns up the selvedges as you weave. This will create long floats. Now, floats at the edges can look great as a design feature, but the length does need to be practical. Floats that are too long will get caught or snagged once the woven piece is in use – they will get stretched and end up looking, well, a bit ragged!
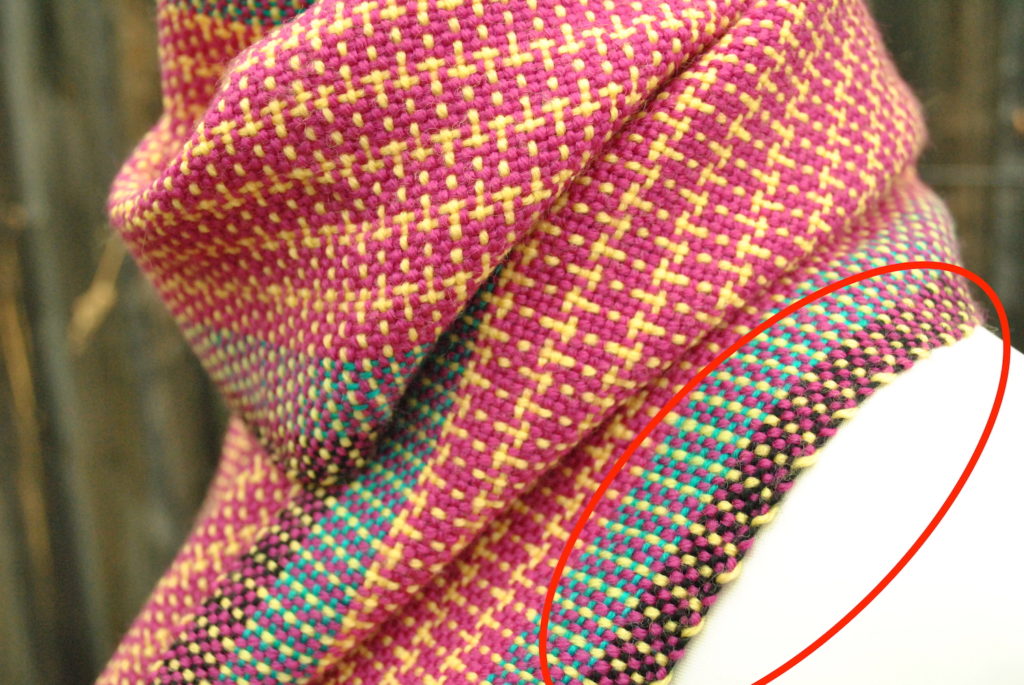
Weft floats a design feature in the Candy Store Scarf.

There is no hard and fast rule with what length of float is too long or how wide a stripe should be before deciding on which method is best. But, one example that I use would be, if I’m weaving with light worsted weight yarn and intended to carry the yarn up the side, I wouldn’t make my stripes more than 4 picks wide.

Another example might be that I’m weaving 3 picks of a colour before changing, weaving another 3 picks in a different colour and then going back to the original colour. For this situation, I would choose to keep the yarn colours continuous and carry them up the sides.

Let’s have a look at what the basic method for thicker stripes would be:
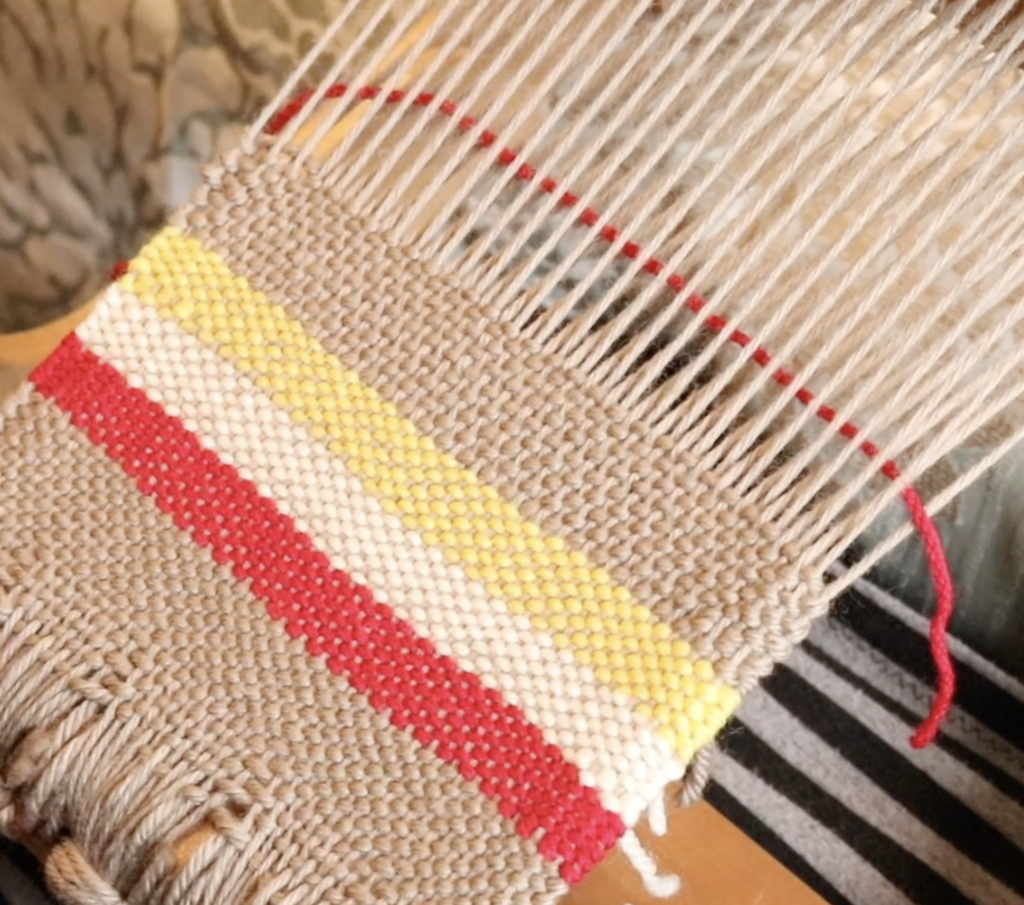
Introduce the new colour and leave a tail of a couple of inches on the cut end. Weave that pick and change to the next shed.
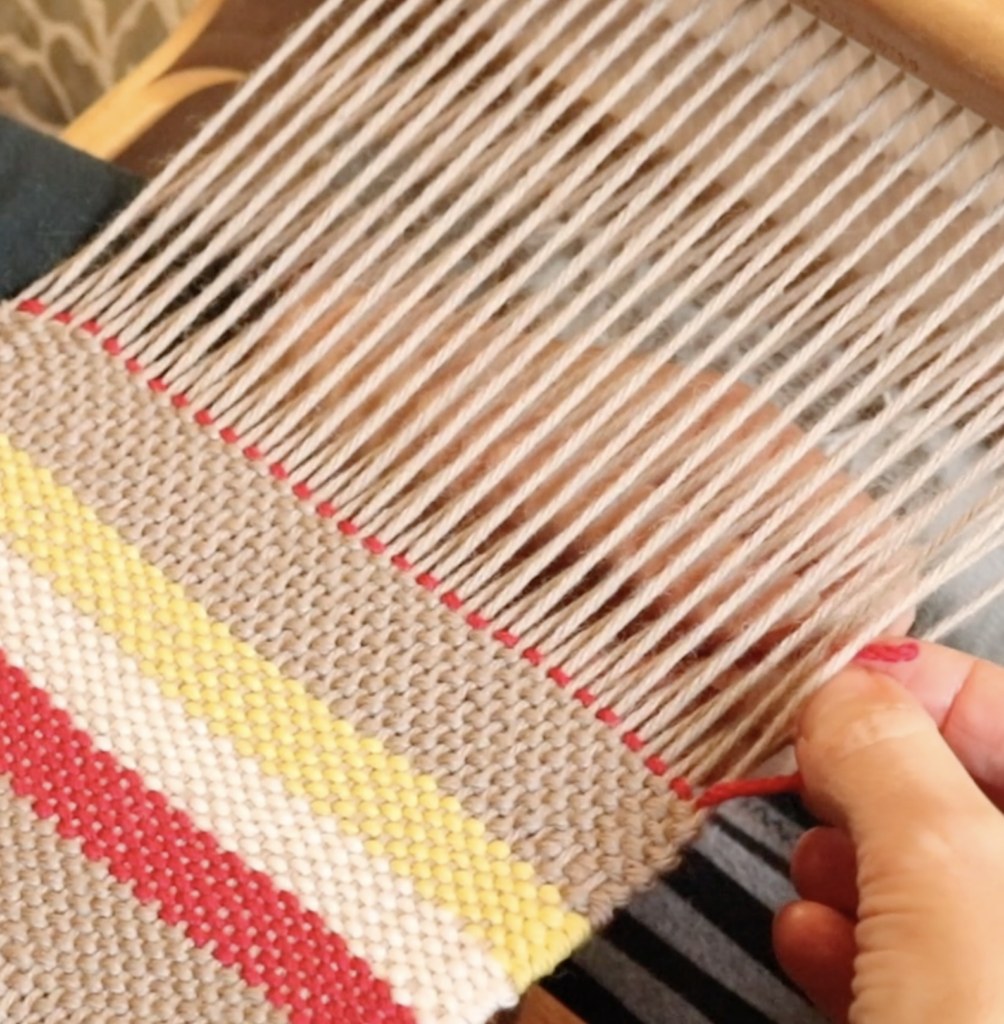
Take the cut tail around the edge warp thread and into the new shed, around 3 warp threads deep. Pull down to the back of the warp, making sure that it is nicely arranged at the edge warp thread.
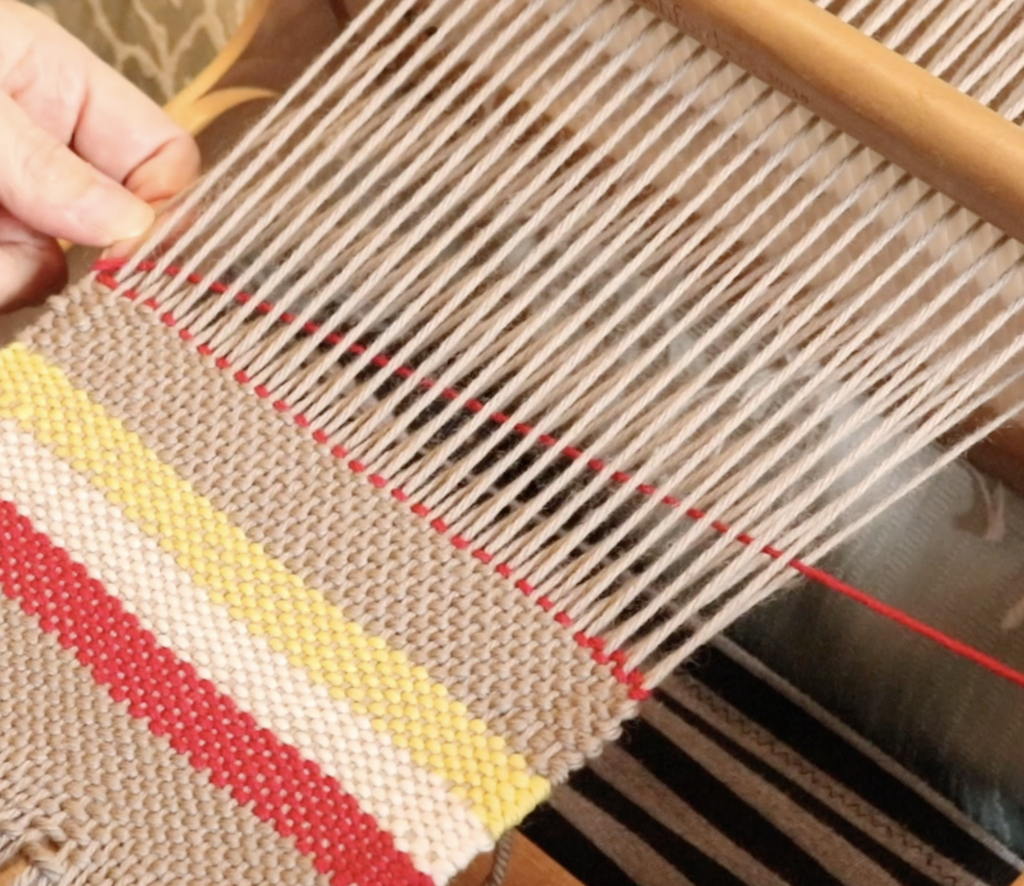
Weave the new pick, and continue to weave until your stripe or band of colour is as thick as you want it to be. Finish the pick on the opposite side to the one you introduced it on.
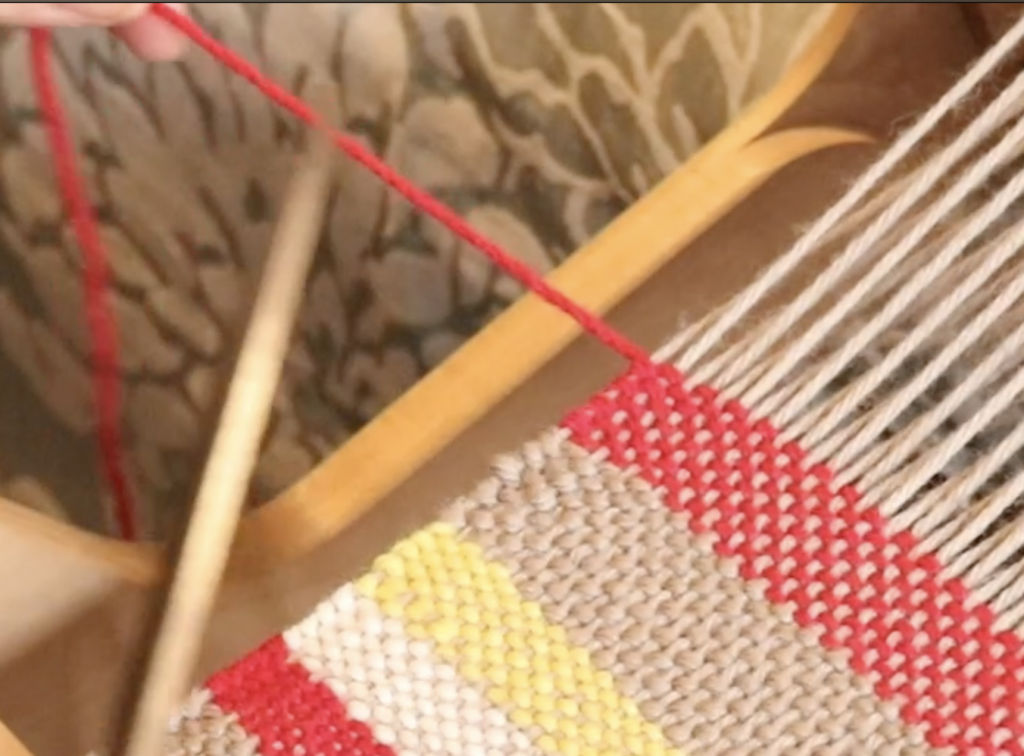
Cut the yarn, again leaving a tail of a couple of inches. Change to the next shed.
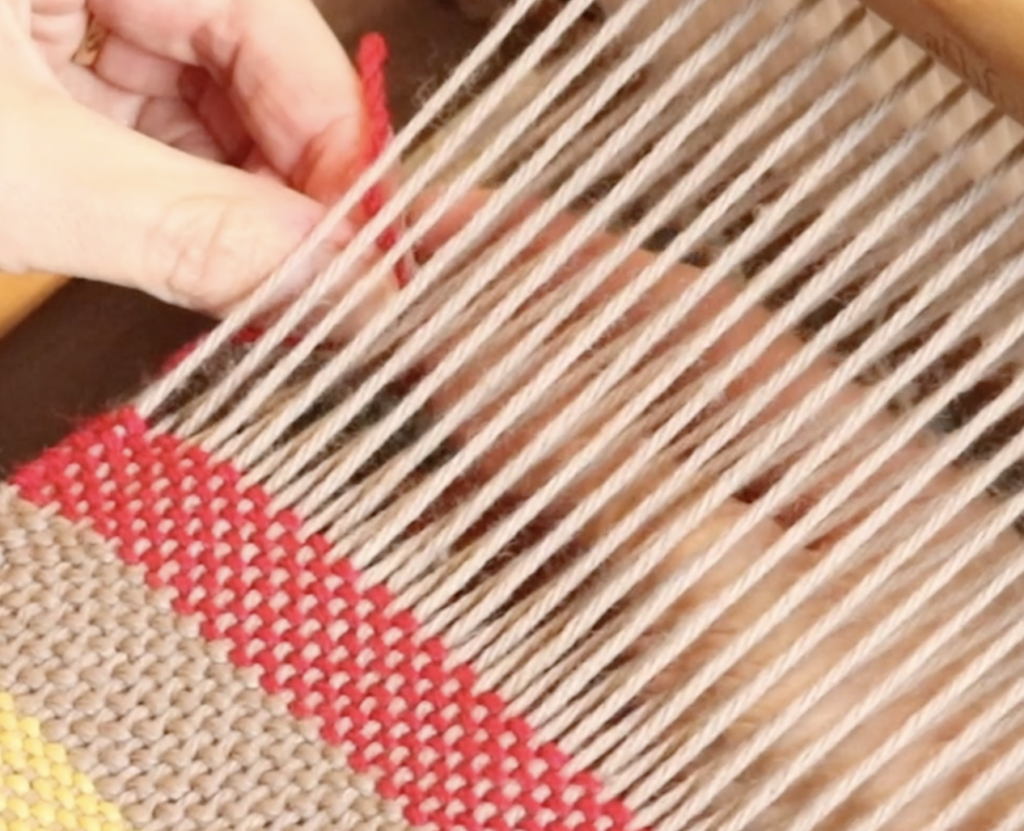
Tuck the tail into the new shed as before.
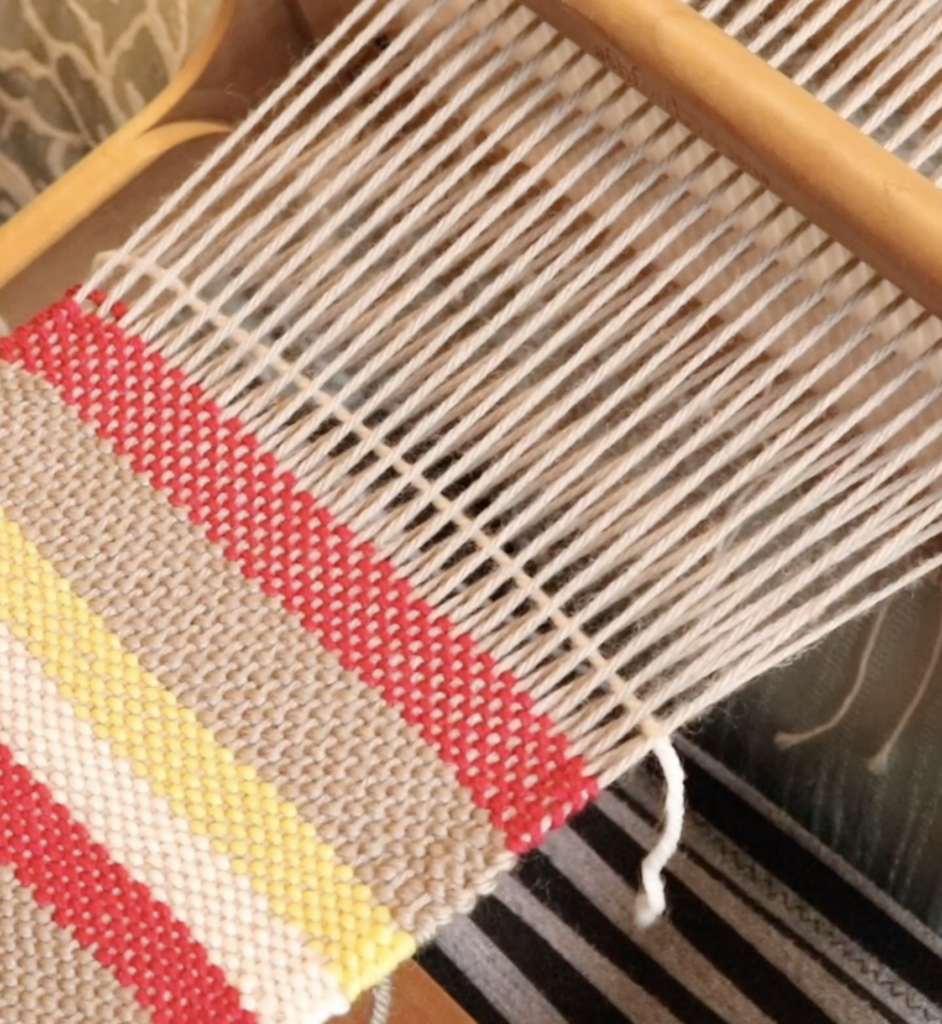
Bring the new colour in, ensuring the tail is on the opposite side to where you finished the last colour. Continue with the initial steps for each colour change.

Pretty straightforward?

The only thing you need to pay particular attention to here is to alternate the sides that the tails are on to prevent a build up on one side. Leave the excess parts of the tails hanging from the back as you weave (they don’t get in the way) and when your piece is wet finished and dried, cut them close to the fabric, being careful not to cut the fabric itself.

Now let’s go over the two methods you can use when your stripes and thinner or colour changes are more frequent:

In my demonstration I’m using 3 different colours and weaving 2 picks of each colour.
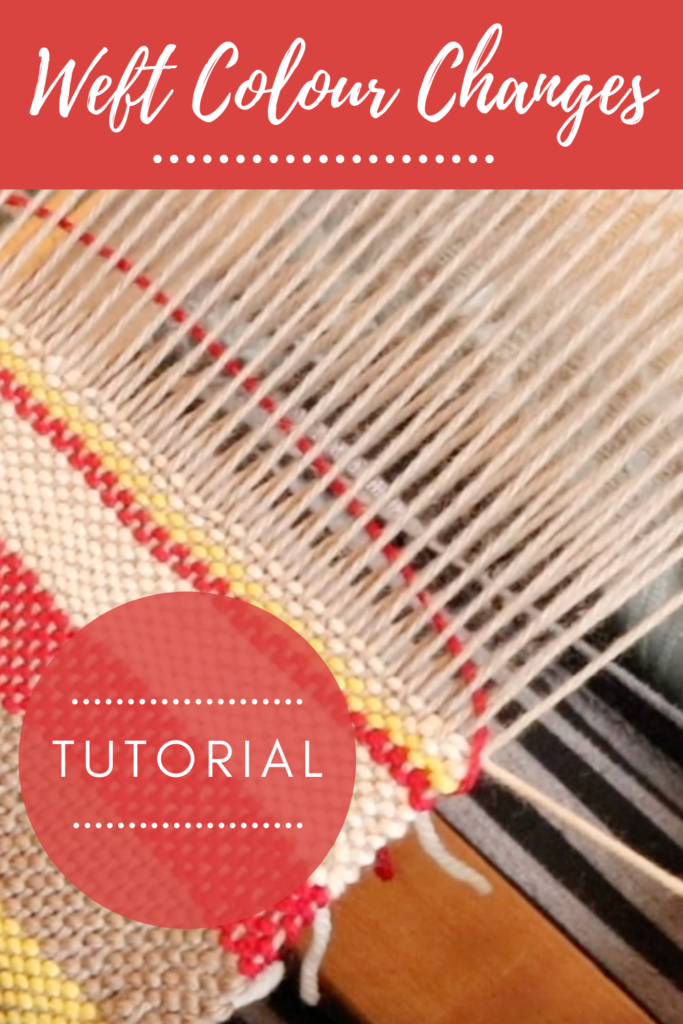
The first technique is to make the colours go around each other at the edges. This ensures that every colour is carried up the edges while it’s not actively in use.
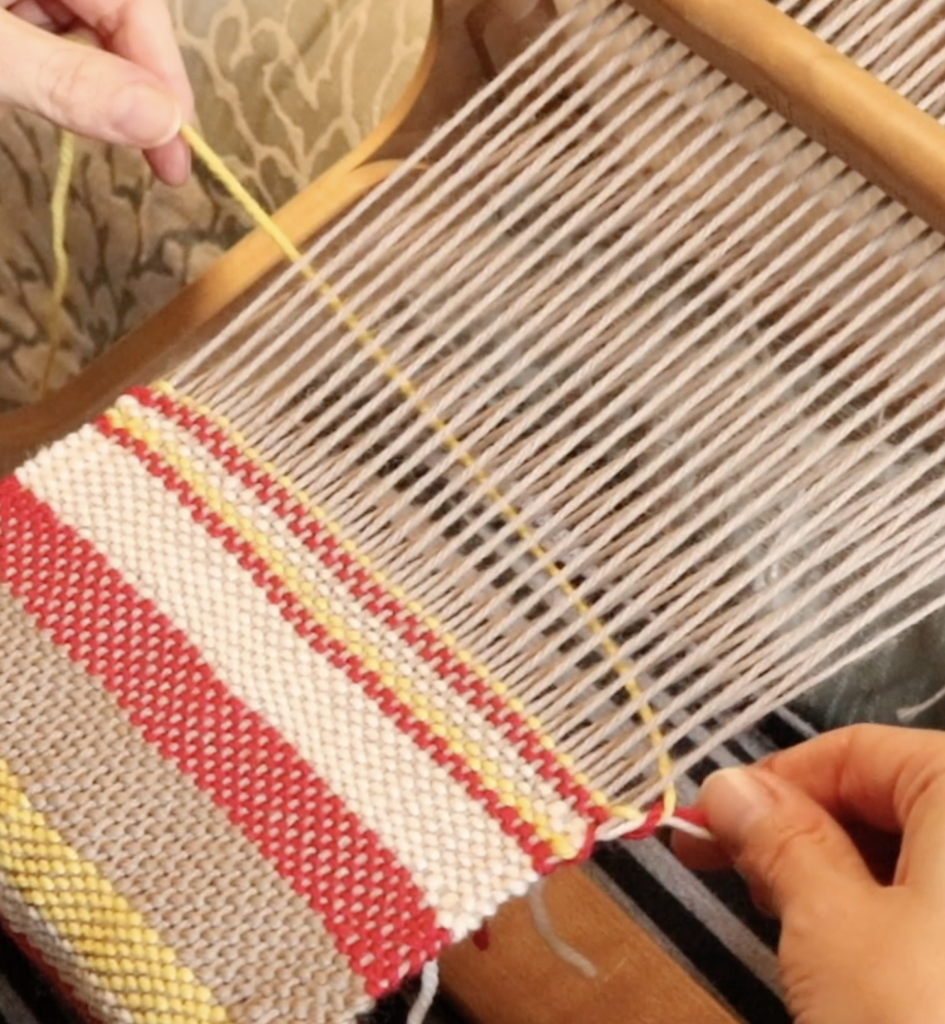
This method does have its drawbacks. I was using 3 weft colours for my stripes and found that, for the picks where all 3 colours were on one side, carrying up the side created bulkiness in the form of a noticeable bump where all the colours meet.
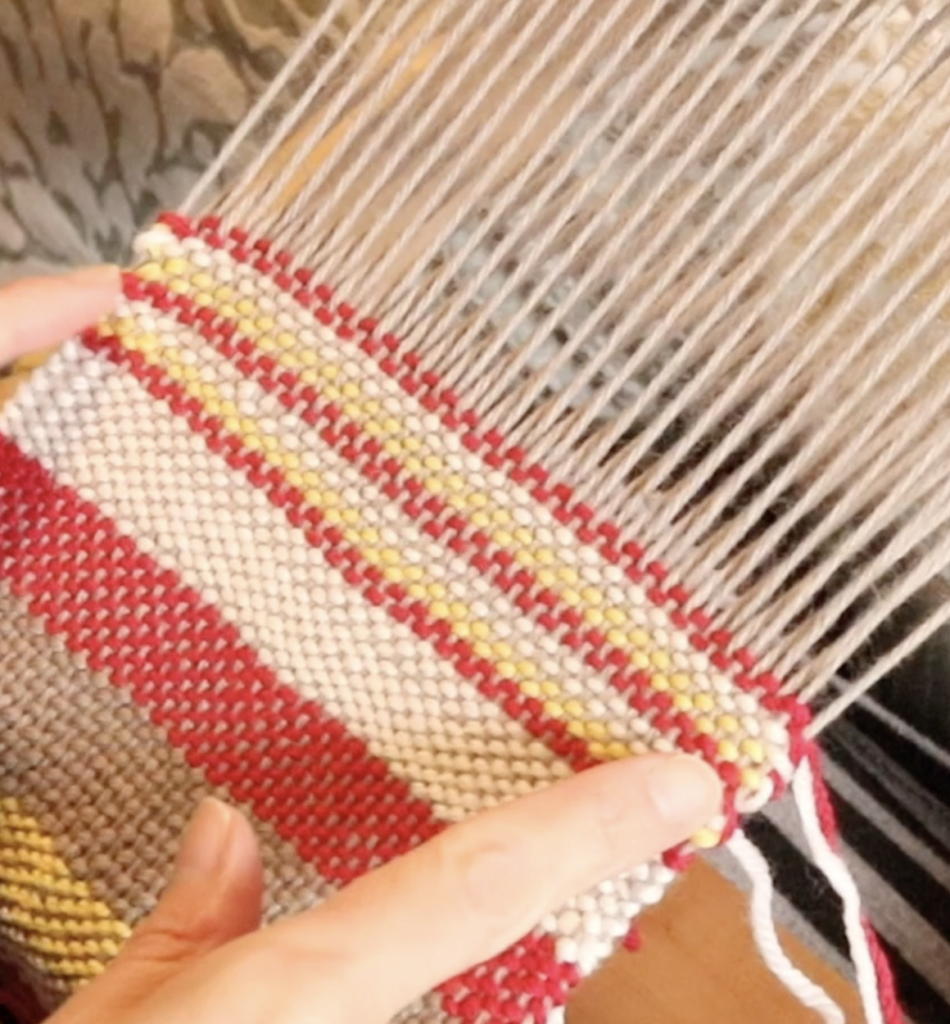
While this method would work well for 2 weft colours, for 3 it is not the method I would naturally choose. I can’t live with those bumps – to me they just stick out like a sore thumb!

So, for my 3 weft colours, this is my preferred method:
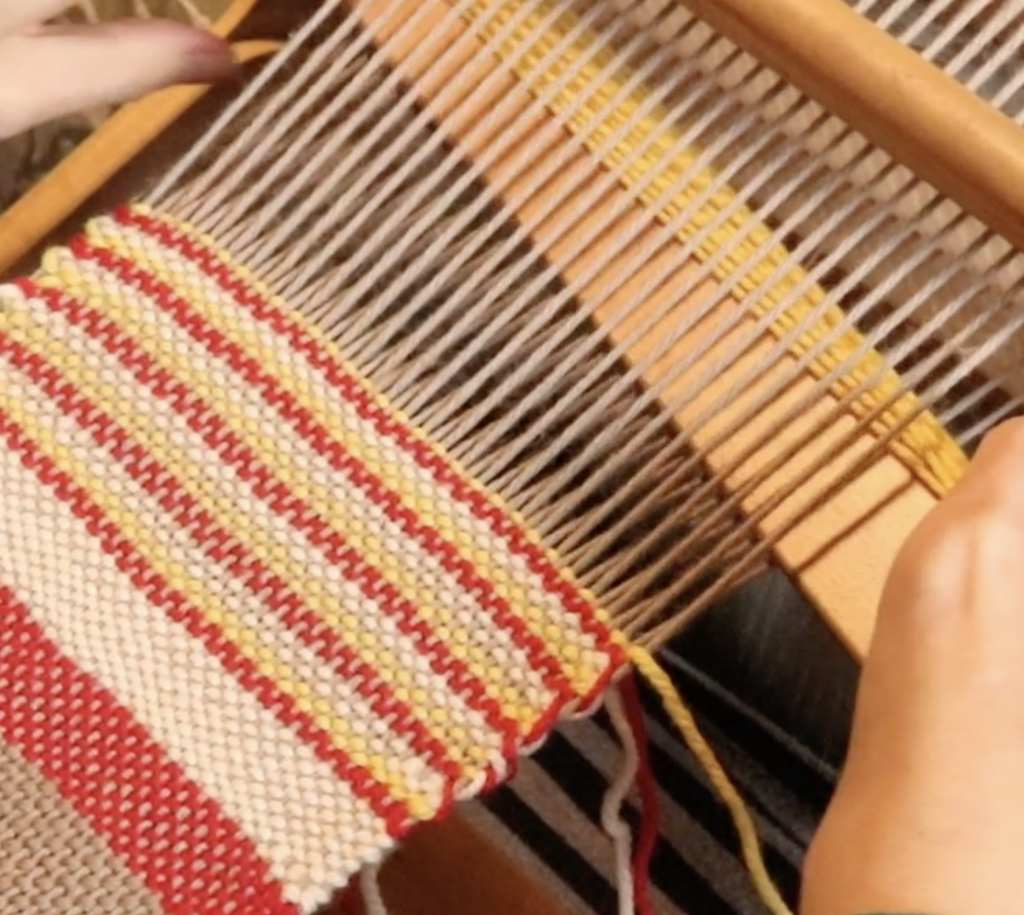
Weave the weft colours in the same way but don’t make them go around each other at the edges. Just weave them independently of each other and ignore the colour that you’re not using at the time, let it just sit where it finished off and wait.
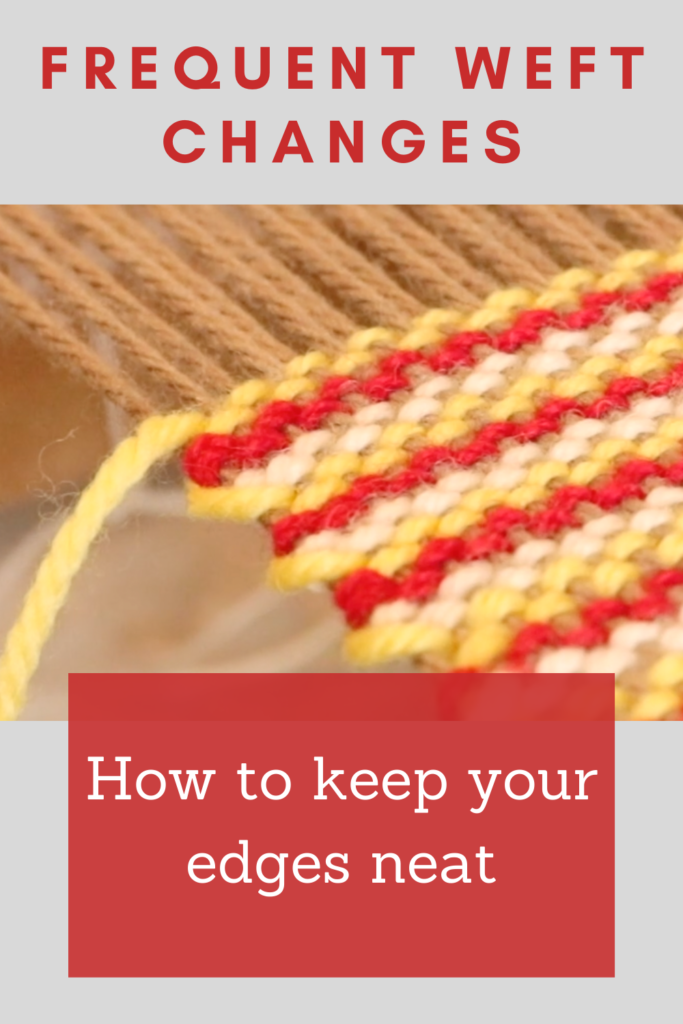
When you’re ready to weave a new colour, you can just pick up the colour you want and continue weaving. Obviously, this works best for repetitive colour patterns so that your edge floats look harmonious and continuous.
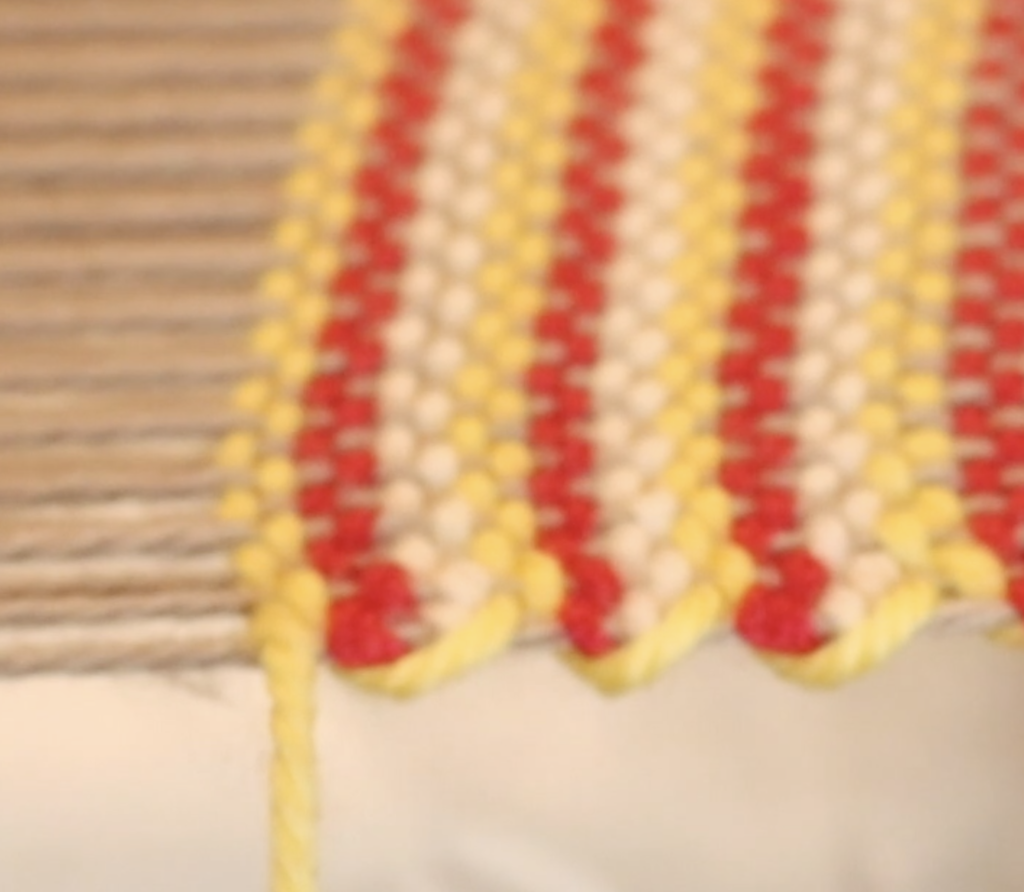
I find this method gives a very neat and pleasing finish to the edges.
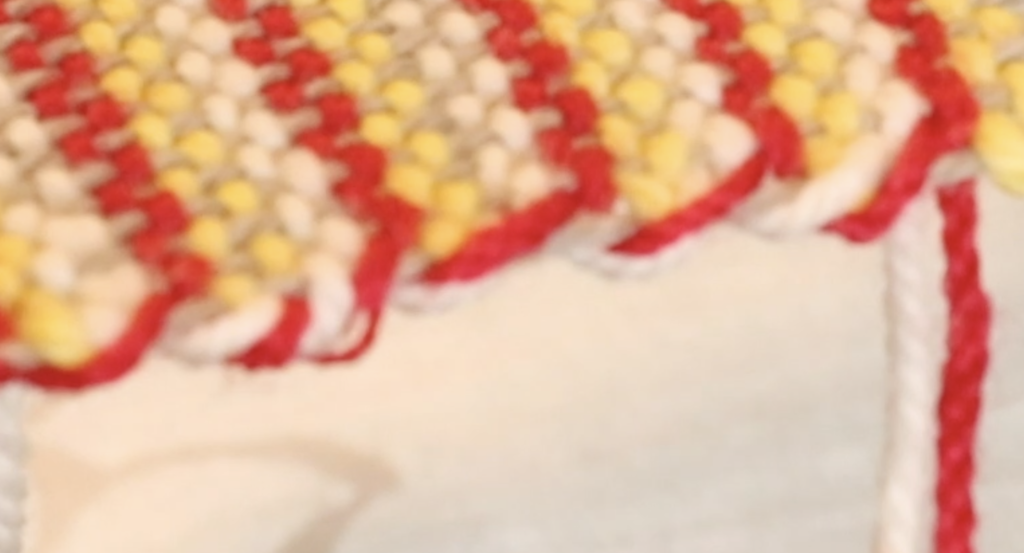
To the left you can see the first method I used of taking the colours around each other. On the right is how the second method looks – much neater, I think!

When you are using a thinner yarn (say an 8/2 or 10/2 cotton) it is much easier to hide what you’re doing at the edges and it won’t be very noticeable in your finished piece. But for thicker yarns, like the light worsted I’ve used here, these techniques are a “must know”.

If you’re interested in exploring these techniques further, I have a detailed video demonstration available in the Weaver’s Knowledge Library. I have put this library of “bite sized” classes together for members of my Online Weaving School. It is a great new space where members can learn new techniques quickly and effectively – and of course, refer back to them over and over. I intend to build up a lot of classes in this library in the coming years.

As an additional resource, you may find this video helpful. It shows how I weave the wefts for log cabin:

Have you tried any of these techniques? Which one do you prefer and why? Let me know in the comments, I love to hear from you!

Until next time…

Happy Weaving!

Filed Under: Colour and Weave, Free tutorial, Online Weaving School, Rigid heddle weaving, Tutorials, Weaving, Yarn Tagged With: colour changes, weaving techniques, weft

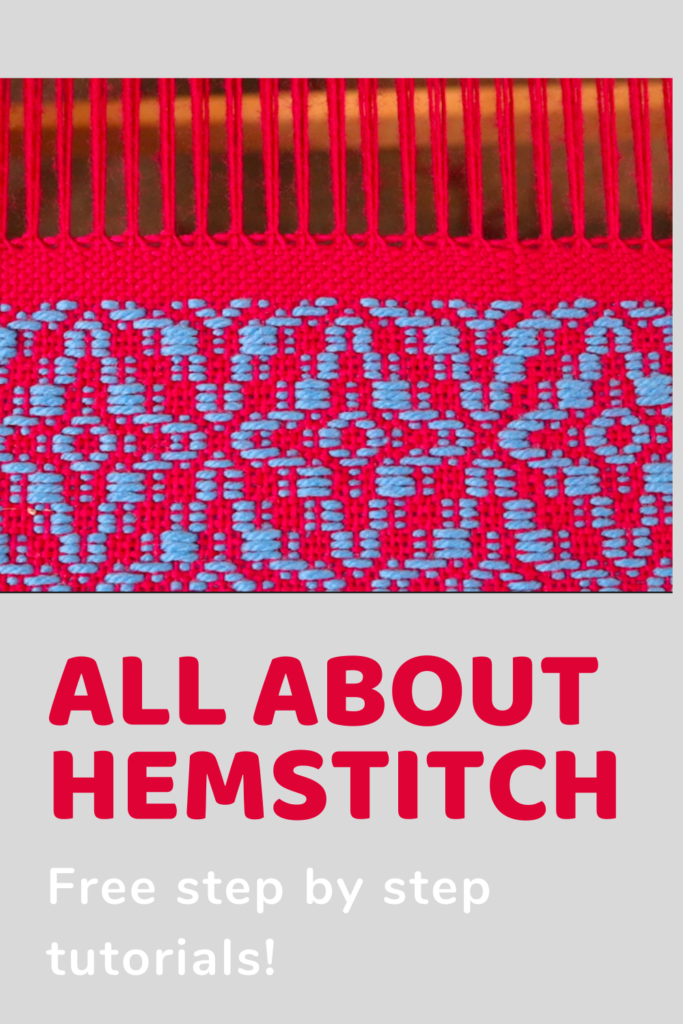
All about hemstitching

by Kelly 10 Comments

I learned how to hemstitch early on in my weaving journey and use it now in most of my hand woven pieces.

I love that it is so decorative but entirely practical as well – that suits my tastes perfectly!

There are many things to love about the humble hemstitch, it is easy to learn, it looks lovely, it allows your woven piece to sit really flat once off the loom (great for table linens), it is very strong and secure and it can be used as a feature within your weaving, not exclusively at the start and end of your piece.

This post contains affiliate links. Please see my disclosure policy for further details.

So, what is hemstitching?

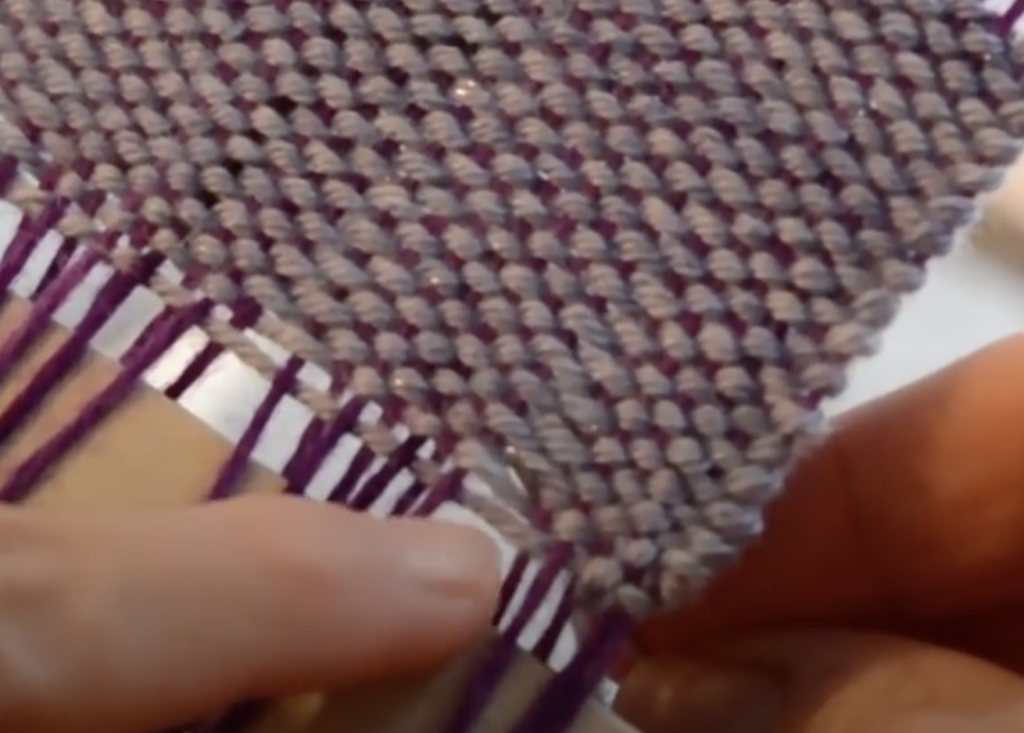
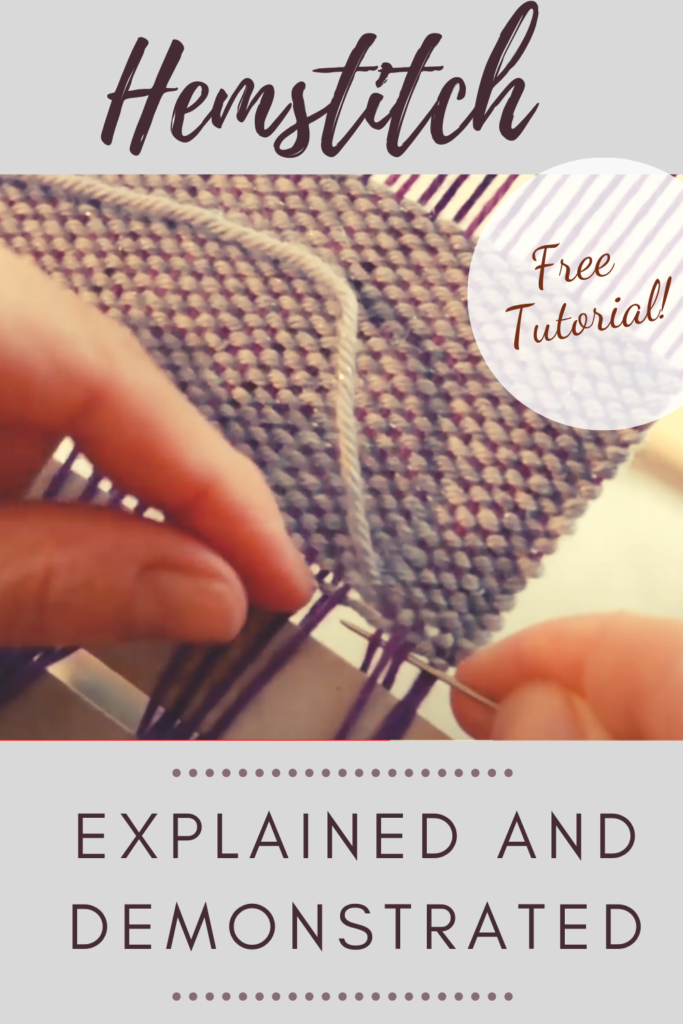
It is a way to secure your warp ends in order to remove your weaving from the loom. It is worked by hand, with a tapestry needle and while your piece is still on the loom (not absolutely necessary, but boy, does it make life easier!)

When you remove your piece from the loom, the weaving will naturally begin to unravel (at different rates, according to the yarn and the project). You need to either secure those warp ends on the loom or promptly after removing from the loom.

Do I have to leave a fringe if I hemstitch?

Not necessarily. It is most common to leave some sort of a fringe when you have hemstitched your ends. A twisted fringe looks stunning with hemstitch but a medium to short fringe is also lovely.

But if you don’t want a fringe at all, don’t have a sewing machine and want those ends secure you can hemstitch on the loom, then needle weave the warp ends (or fringe) back up and into the work. I have used this approach for some of my tapestry projects and on these mug rugs. It gives a very neat and attractive finish – it takes a while to weave all those ends in with a needle though!

Let’s get down to the nitty gritty and have a look at how hemstitch works.

You begin by choosing the number of warp ends you want in each bunch and how far into your weaving (how many weft picks) you want each stitch to go.

My go to is a 4/1 hemstitch, which means that there are 4 warp threads in each bunch and I stitch in 1 weft thread deep. There are all different number configurations you can do depending on the effect you want, the project and the thickness of yarn you have used.

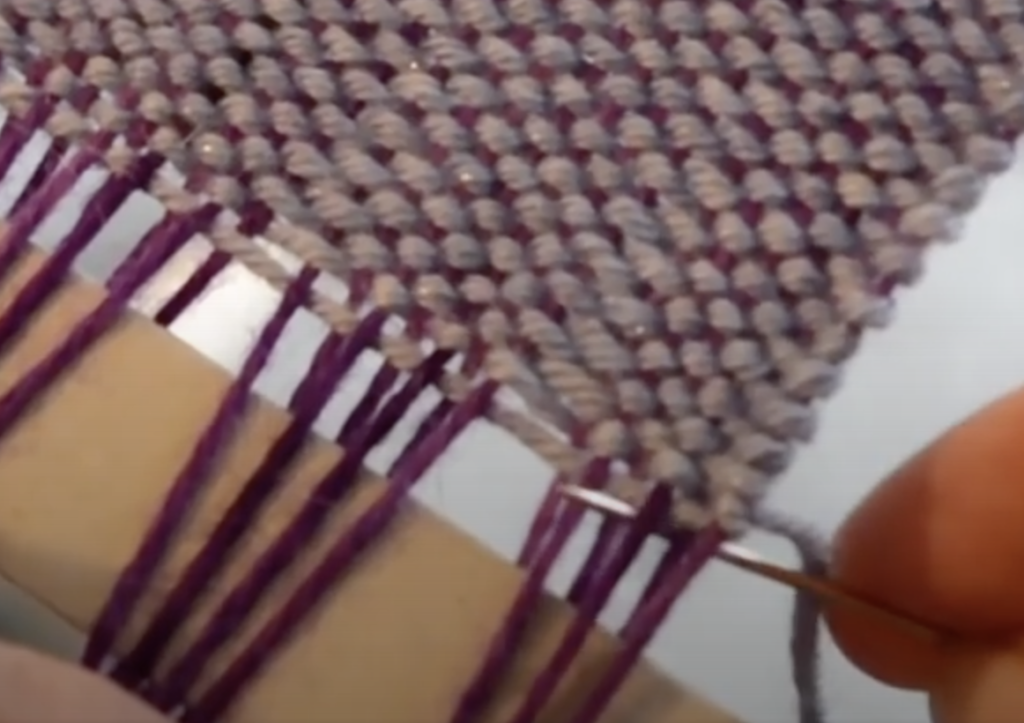
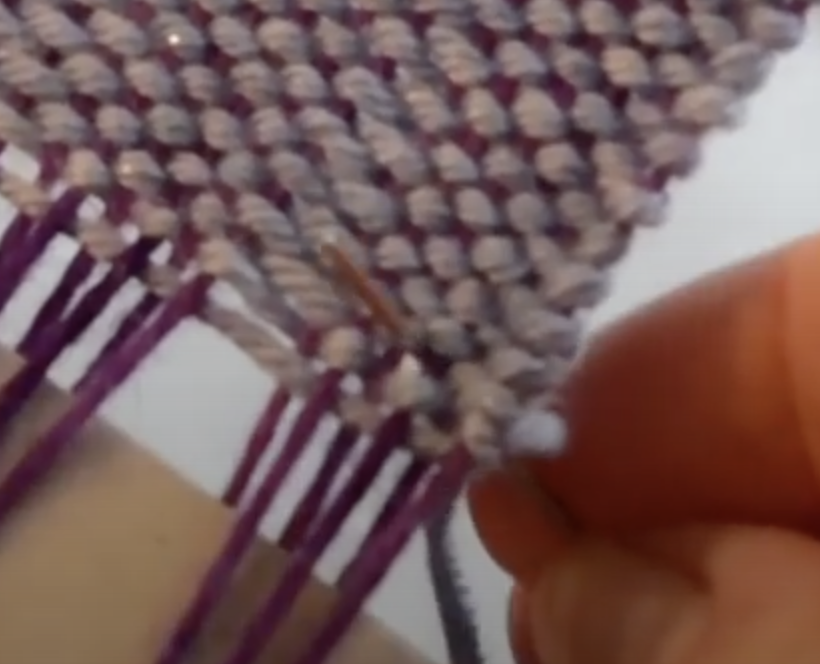
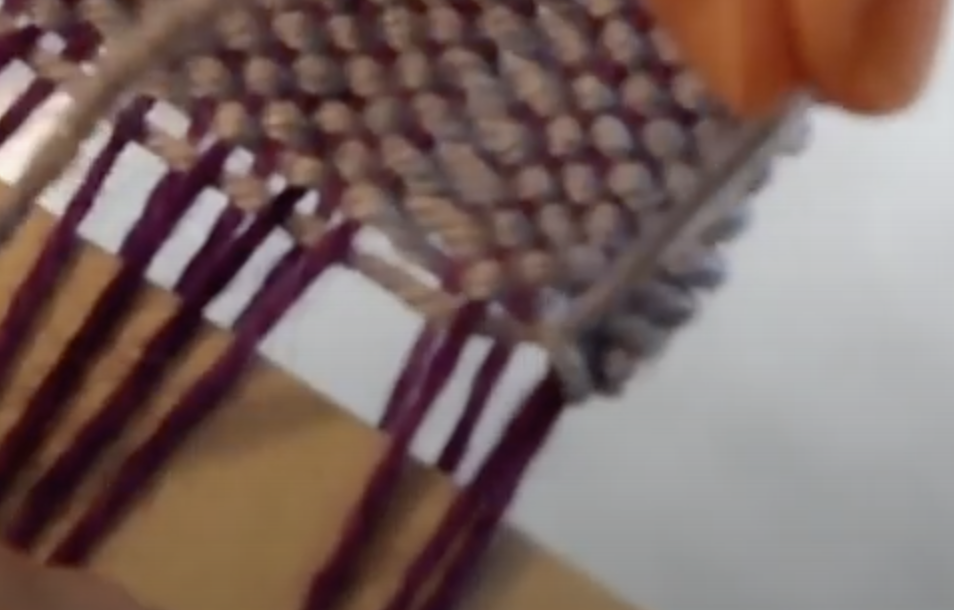
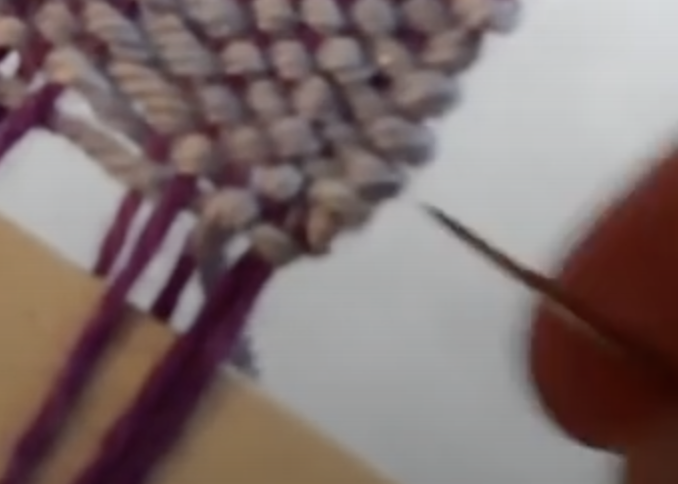
In this picture I am working a 3/2 hemstitch. I count off 3 warp threads at a time, and bring the needle up 2 weft picks deep.

Here is a breakdown for how to work hemstitch, step by step. Heddle is in neutral. Ideally, you have left a long tail of weft yarn (around 4 x the width of the project) on the right hand side (left side if you are left handed). Thread this yarn in a tapestry needle.

Remember, in this demonstration I’m doing a 3/2 hemstitch.

  1. Take the tapestry needle underneath the first 3 warp threads.

2. Count up 2 weft threads and bring your needle through the space that aligns with the 3 warp threads you counted in.

3. Pull the full length of the yarn through.

4. Take the needle back to the start of the initial 3 warp threads and underneath, coming up on the left hand side of the 3rd thread.

5. Pull the yarn through, making sure that the needle goes under the tail yarn on the left so that a loop is created. Pull the loop firmly to make your first bunch.

6. Take the needle down in between the first bunch and the next group of 3 warp threads and repeat the steps.

You can see a video of this tutorial here-

I mentioned that hemstitch can also be used decoratively within your weaving, not just as a hem securer.

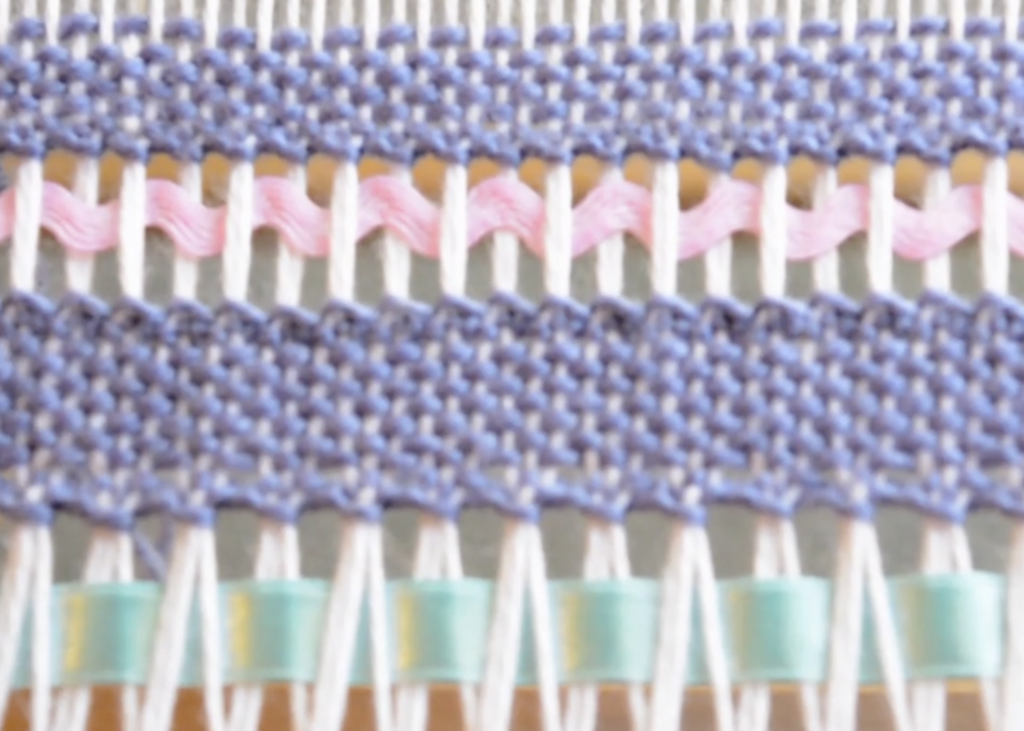
In this image I have worked adjacent rows of hemstitch on bands on plain weave, leaving a gap between the bands. I’ve then woven in some ric rac and ribbon as a feature. This can give a very pretty and unique look to your woven piece. This demonstration is available in a member’s only class – Hemstitching as a Feature.

Do I hemstitch both ends of the piece in the same way?

Yes and no. You are still using the same hemstitching technique, but when you hemstitch the first end you are stitching underneath the weaving and when you stitch the final end, you stitch on top of the weaving.

In my earlier days of weaving, I would take my loom off the stand, turn it around to face the other direction and then replace it on the stand. That way, I had the weaving facing me in the same way that it does at the start of the piece and I didn’t have to change the way I stitched at all.

These days, I have a different technique for hemstitching the other end that means I don’t have to rotate the loom and is just as fast and easy as the beginning of the piece hemstitch.

I’ve made a video to share with you how I do this. You will see that its not difficult and just as effective:

Does hemstitching only work on certain types of weaving?

I have used hemstitching on all different types of weaving, even tapestry. I’ve used it on my rigid heddle loom, table loom, floor loom and tapestry loom. I haven’t used it with my inkle loom but inkle bands don’t unravel in the same way and the warp threads are so close together that hemstitching would be quite difficult!

Does the type of tapestry needle matter?

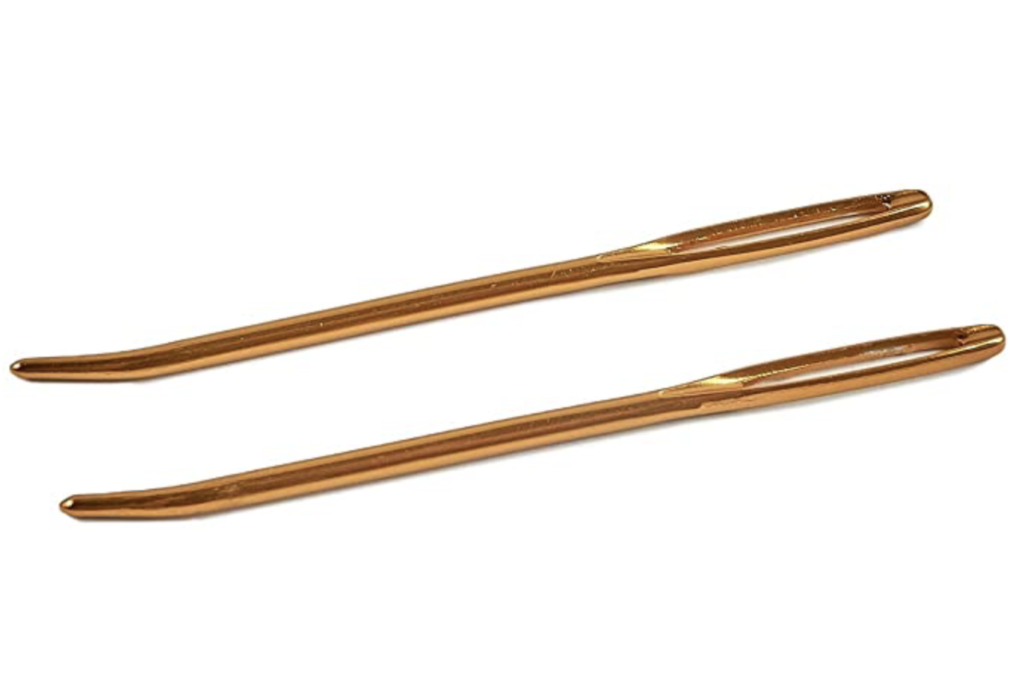
You can use any ordinary tapestry needle. A larger one is easier to thread and use. I recently bought some of these Clover bent tip jumbo tapestry needles, and they have been a game changer! They are large and smooth plus the bent tip is just perfect for hemstitching. Plus they are gold, so hopefully I’m less likely to lose them!

I think a lot of new weavers and a bit overwhelmed by the thought of hemstitching, I mean, it does look quite intricate and complicated on the piece.

Hopefully, by breaking the steps down and making these videos, I will convince you to have a go at hemstitching. Maybe you will find that you love it just as much as I do!

Oh, and by the way, I’ve talked today about basic hemstitch but there are variations that are even more decorative. A great resource for this is The Weaver’s Idea Book, which has a whole section dedicated to hemstitch and it’s variations and possible applications.

All this information plus an extra page of tips and links to 3 hemstitching videos is now available in one convenient e-booklet. The Hemstitch Basics Guide can be purchased in my Etsy shop.

Be sure to leave any questions or comments below, I love to hear from you!

Until next time…

Happy Weaving!
Filed Under: Books, Floor Loom Weaving, Free tutorial, Inkle Weaving, Online Weaving School, Rigid heddle weaving, Table loom weaving, Tapestry Weaving, Tutorials, Weaving Tagged With: hemstitch, how to hemstitch

What is a heddle rod? Part 2- how to install the rod

by Kelly 4 Comments

Last week we talked about how invaluable a heddle rod is to the rigid heddle weaver.

I showed you how to make string heddles for the heddle rod. If you missed that post, please click here.

*This post contains affiliate links. For more information, please see my disclosure policy.

Now that we know how to make our own string heddles, we can learn how we use them on a heddle rod.

The actual rod needs to be wider than the width of the piece you’re weaving. It can be either flat or round. It should be fairly lightweight and not so large that it is difficult to pick up. It should be smooth but not slippery.

For this tutorial I’m using a smooth but not lacquered wooden dowel measuring 9mm (3/8 of an inch) around. The dowel was purchased at a local hardware store.

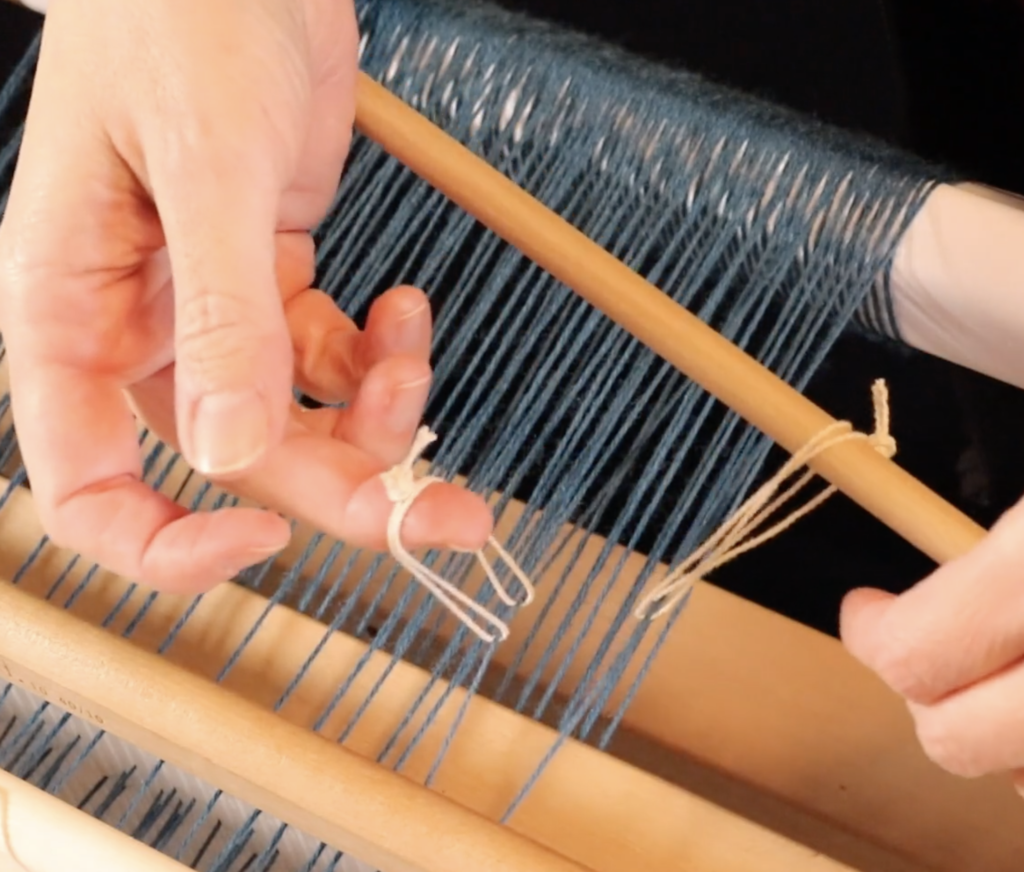
Begin by picking up the threads you want to place on the heddle rod according to the pattern or instructions you’re using. It is easiest to pick up the threads in front of the heddle first using a pick up stick. Make sure your heddle (or if you’re using more than one, heddles) are in the down position. This brings slot threads up, and it’s the slot threads we want to pick up.

Once your threads are picked up, slide the front stick towards the heddle and place it on it’s edge. This props up the heddle rod threads at the back of the heddle and differentiates them from all the other threads.

Now you can insert another pick up stick (or stick shuttle if you don’t have the extra pick up stick) into the shed that has been created by the propped up threads behind the heddle/s.

You will need your piece of dowel or whatever you’re using for the heddle rod plus your string heddles handy.

You may find it easier to sit or stand behind the loom for this next part. Working from either right to left (it makes no difference) pick up the threads in order from one side to the other. Keep your pick up stick in place as your visual guide – you can clearly see which threads need to be picked up. Have a string heddle ready at this point.

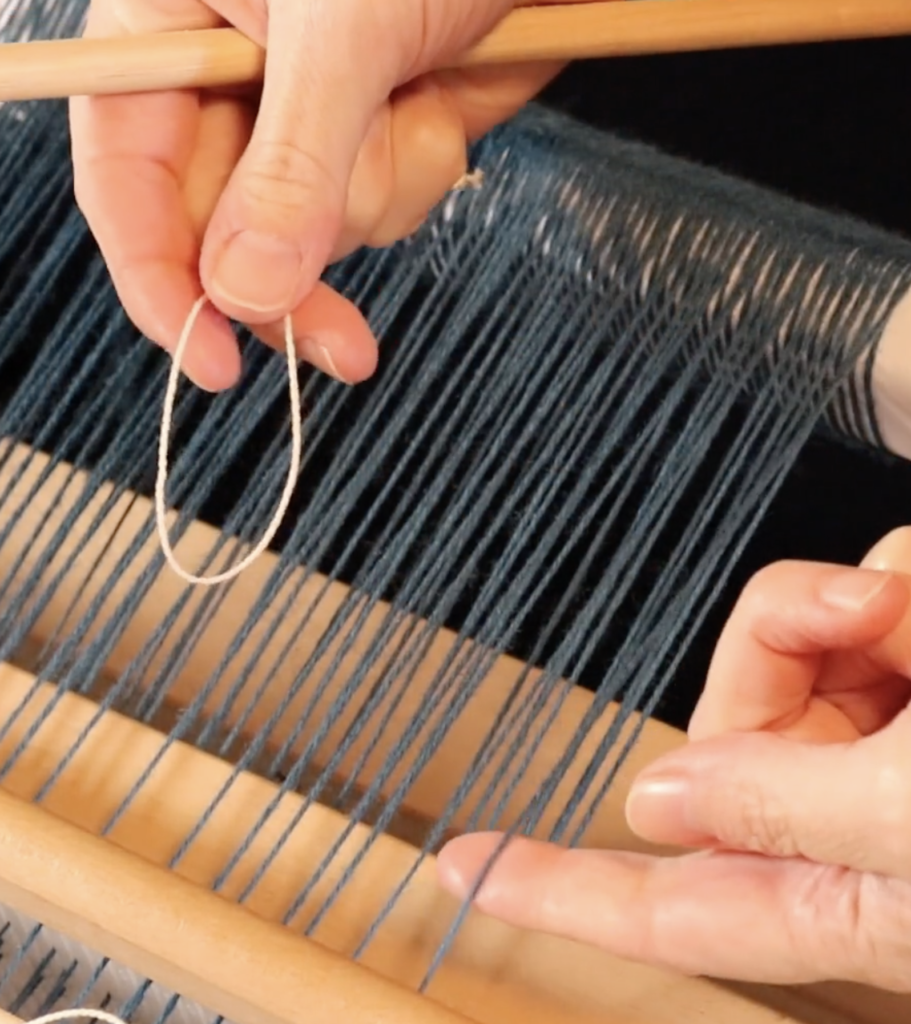
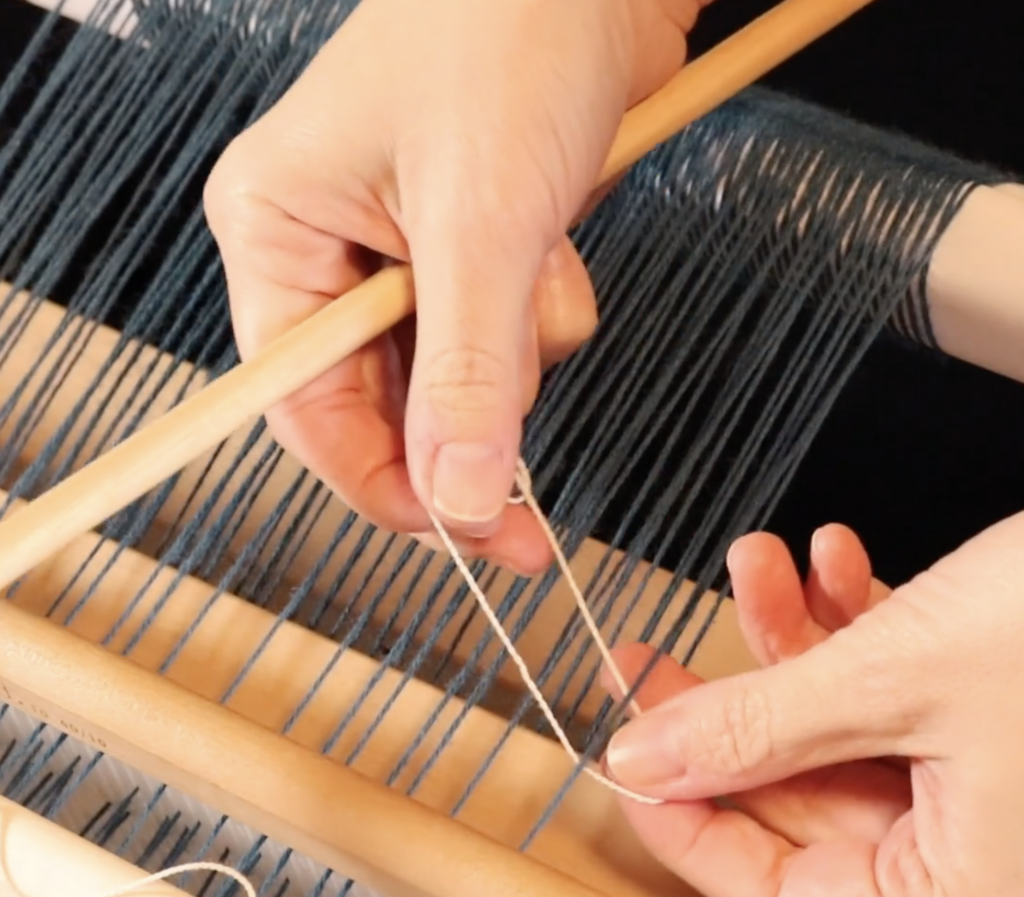
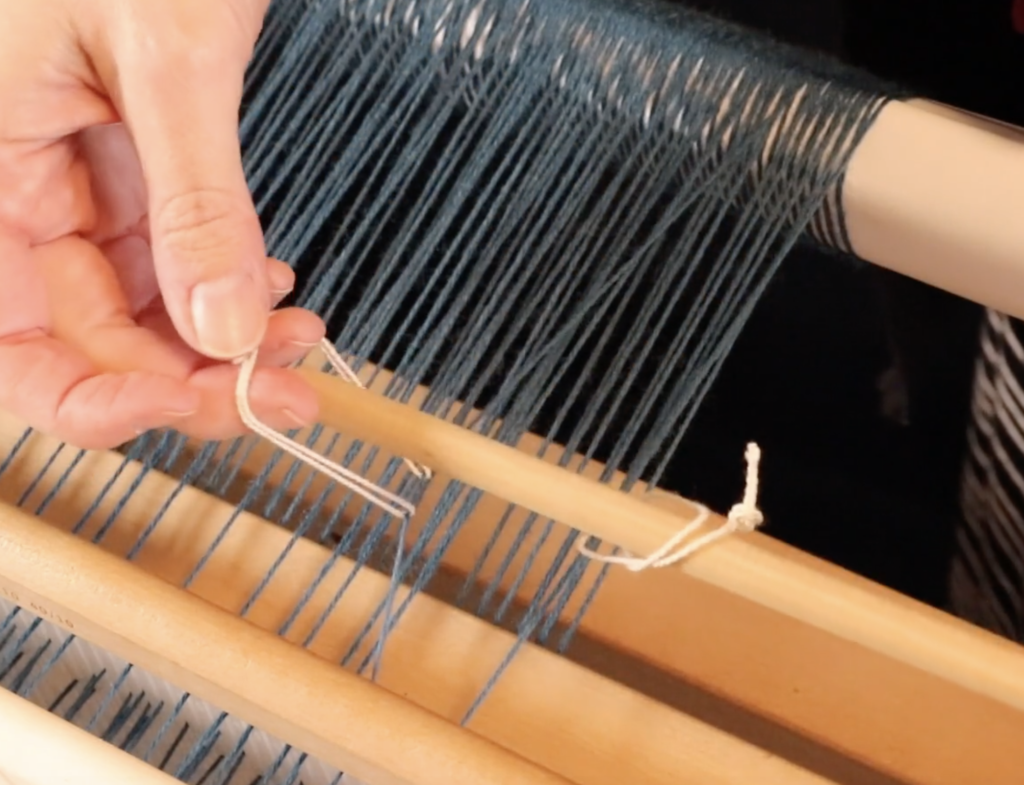
Bring a string heddle underneath the first thread so that it has a loop on either side of the thread. One loop will be smooth, the other will contain the knot. It is very much preferable not to have your knot near the thread. You want to arrange it so that it will sit on top of the heddle rod.

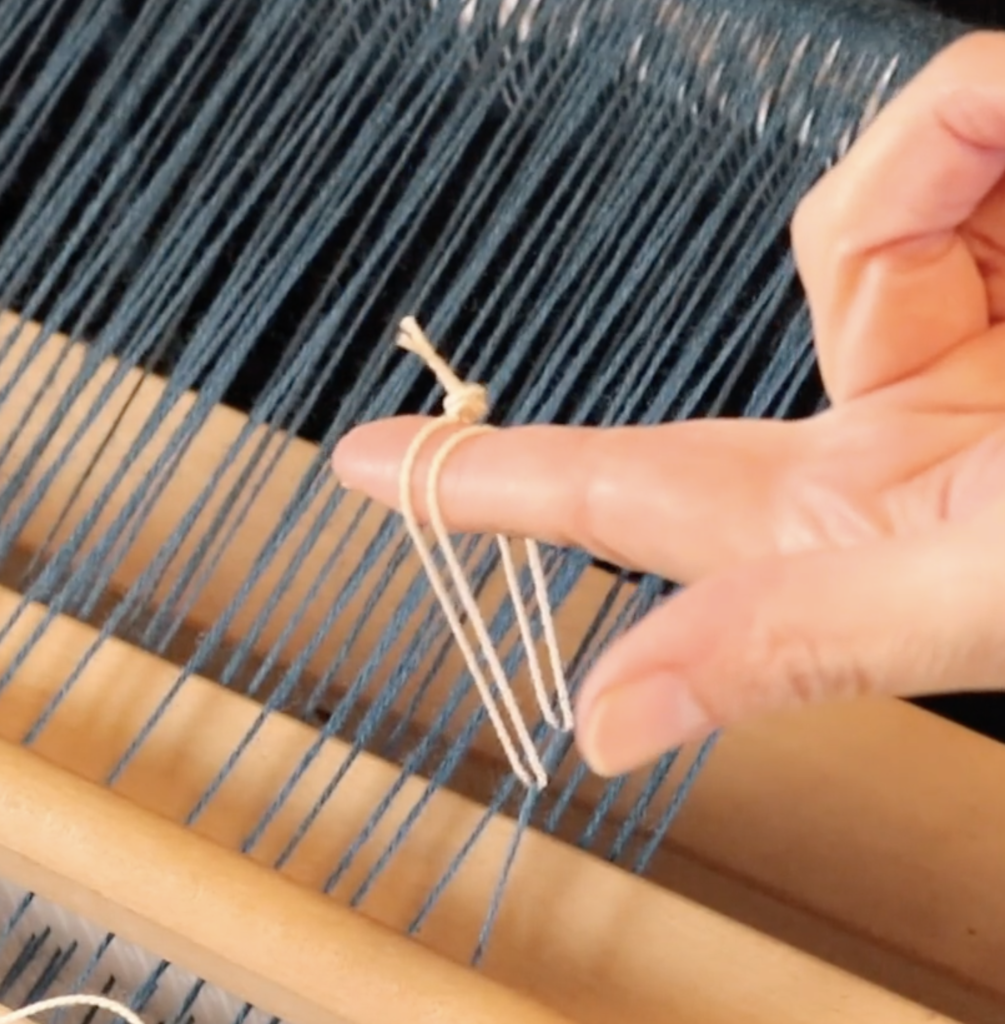
Bring the two loops of the string heddle together at the top. Note how my knot is sitting at the top rather than at the bottom or underneath the warp thread.

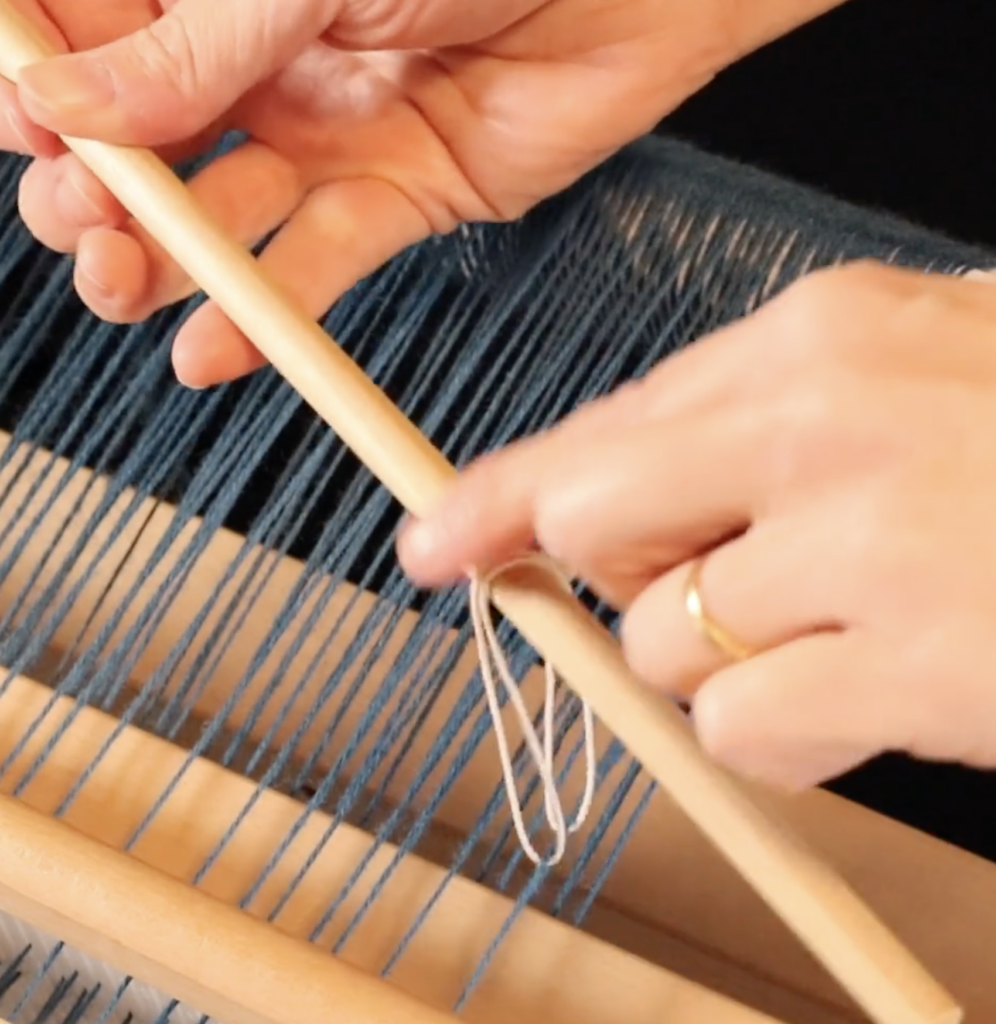
Bring in the heddle rod and slip the loops of the string heddle over it.

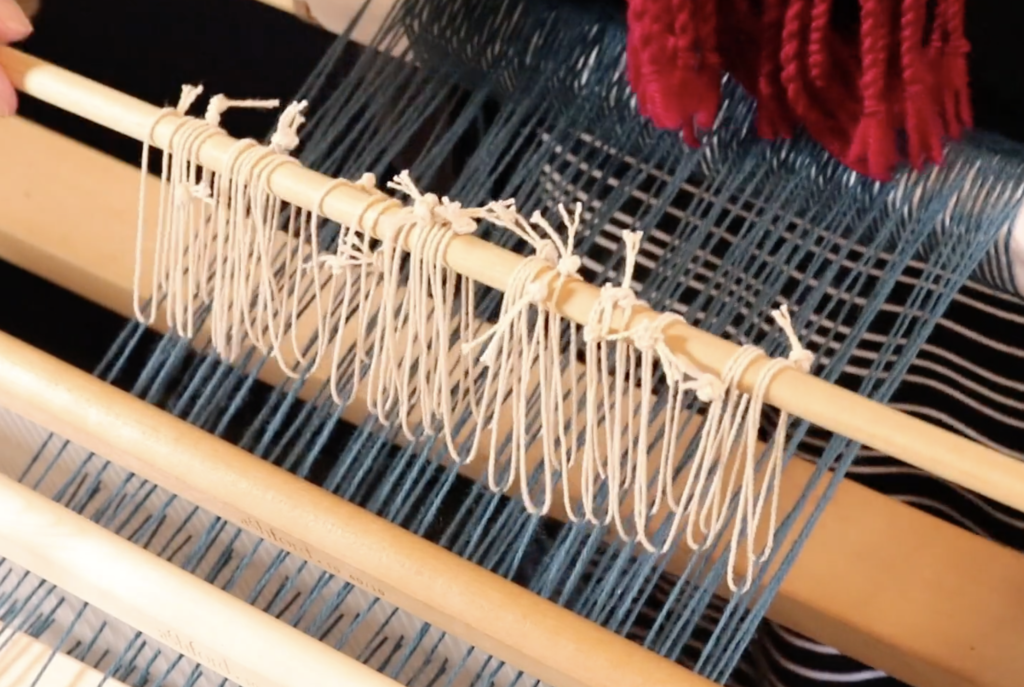
Now repeat this step with each warp thread that is sitting on your pick up stick, sliding them onto the heddle rod as you go.

Some of you may like to put the rod down on top of the warp as you organise each string heddle, I like to keep the rod in my left hand while managing the string heddles with my right. It’s a bit fiddly, but I do find it faster. You might need a bit of practice under your belt before you use my approach this though.

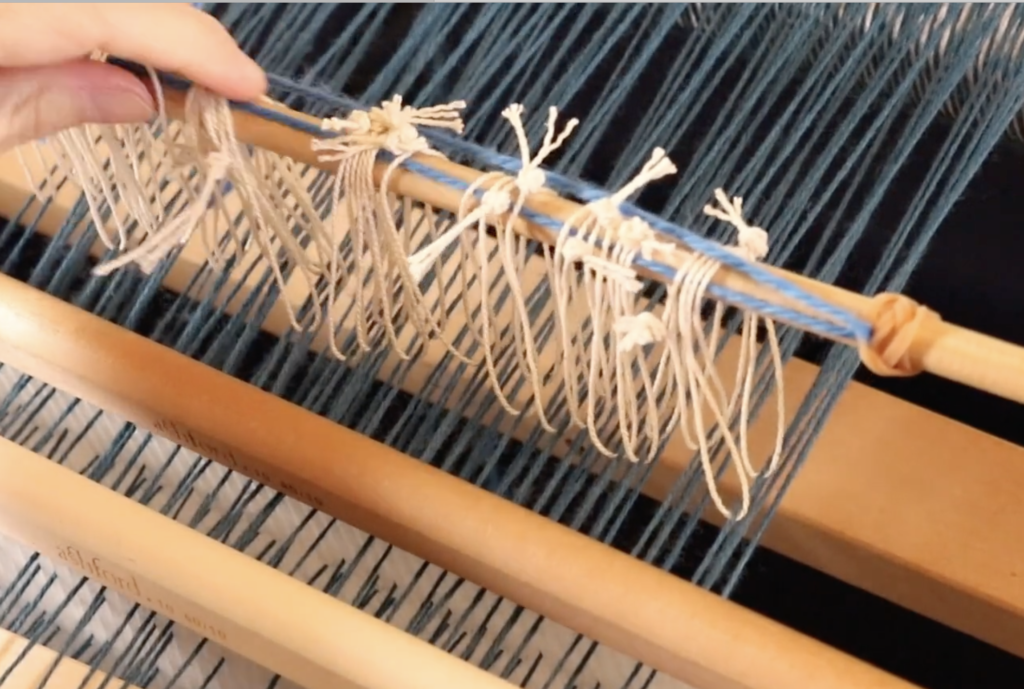
Once you have all your string heddles on the rod, you will want to secure them as it is all too common for that heddle rod to slip and then you lose all your hard work!

Some weavers like to use some masking or painter’s tape and place it across the top of the heddle rod.

I have a different and perhaps peculiar method, but it sure does work! I place a rubber band on each end of the rod, close to the string heddles.

Then I run a piece of waste yarn right through the middle of the string heddles, pulling each end of the waste yarn through a rubber band on each end. Then I pull the cut ends of the waste yarn up and tie a bow.

Using this method, my string heddles don’t move and are completely secure on the rod. And no annoying, sticky tape.

If you want to see a video tutorial of this process, you can watch here-

I have a number of classes that make use of heddle rods:

Converting Drafts to a rigid heddle loom

Overshot on a rigid heddle loom (coming soon)

Pinwheels on a rigid heddle loom

All of my free Krokbragd videos on Youtube are set up with a heddle rod too-

I hope you enjoyed this two part heddle rod series, don’t forget to catch the first post on making string heddles here if you haven’t already.

Be sure to leave any questions or comments below, I love to hear from you.

Until next time…

Happy Weaving!

Filed Under: Free tutorial, Krokbragd, Online Weaving School, Pinwheels, Rigid heddle weaving, Rigid Heddle Weaving Patterns, Tutorials, Weaving Tagged With: heddle rod, rigid heddle weaving, weaving tutorial

How to make the most of your membership

by Kelly 2 Comments

Have you ever purchased a gym membership?

Let me guess, when you signed up you imagined yourself on the treadmill or pumping iron regularly. A few days a week, if not every day! You took out a 12 month membership because everybody knows that this will be the clincher – once you’ve paid you have to get your money’s worth!

A gym membership (you thought) was just the motivation you needed to get going and finally get fit and stay fit.

Young woman exercising at the gym with weight

What happened next? One of two things:

  1. The first day you went was great, you felt awesome and on top of the world. Day 2, rolling out of bed early to fit in a session, you didn’t feel so crash hot about the whole thing. Day 3, you decided you really needed that sleep in, but you would definitely get back to the gym tomorrow. That was 6 months ago.

2. You made a plan and started slowly. You decided that 3 sessions a week was realistic for you and that you needed some guidance to start with. You wanted to build gradually towards a good level of fitness, free of injury or exhaustion. 6 months later, you maintain this plan and feel really great about your health and the steps you took to achieve your goals.

All of this is hypothetical of course, especially considering that I myself have never so much as stepped inside a gym – the very notion makes the hairs on the back of my neck stand up. Give me a healthy walk in the fresh air any day!

But I wanted to use the gym analogy today because it coincides pretty well with what I want to say about my Online Weaving School.

What does working out have to do with learning to weave? Quite a bit, actually.

  • Both require a commitment. And not short term, just as you don’t achieve fitness overnight, you don’t become a great weaver overnight.
  • Both take effort and patience.
  • Both involve goals setting and time investment.
  • Both are extremely rewarding and produce wonderful results if all of the above are adhered to.

I will be the first to admit that I absolutely love the fact that memberships in my Weaving School are thriving at currently over 800 students. I’m amazed and so grateful that so many new and seasoned weavers want to learn with me.

But, I have to tell you that the figure of over 800 students is only a vanity metric if most of those students are not actually engaged, making the most of their memberships and learning exciting new techniques.

Because this is not all about how much money I can make from the volume of students I have. That is not why I started all of this (you can read more about my story here and a more recent version here) and it’s not why I work so hard to make my school the best it can be.

The thrill and enjoyment that I get seeing a student have a lightbulb moment, weaving something beautiful or falling hopelessly in love with this craft, is why I do what I do. You really can’t put a price on that.

If you are already a member, please, use the tools that I’ve provided to make your membership the very best learning experience I can provide. Join the membership community, interact with the other students, plan your class list and start working though them.

Know that if you are having trouble, there is support available. Members receive personal support from me when needed, and also from the community of other members.

So, what will you get with a membership?

You will get a HUGE variety of weaving classes to choose from that you can work through in your own time, in your own way. You can stop the videos any time you need to and rewatch again and again. There are countless printable PDF information sheets.

You will get to join a friendly and helpful community of weavers at all different levels. Some are absolute beginners, others have been weaving for years. And they will all cheer you on!

What won’t you get with a membership?

You will not get a babysitter. I don’t mean that to sound harsh, but just like a gym membership, the results are up to you. You will see improvement and success if you put in the time and effort it takes. But you have to show up, have a positive attitude and be ready to learn.

If you are interested in taking out a membership or perhaps checking out one of the free classes available at my weaving school, here are so links for you to have a look at:

Gold Membership

Yearly Membership

Monthly Membership

6 Monthly Membership

Free classes:

Stashbuster Notebook Covers

Kitty Cats on a rigid heddle loom

Waffle Weave for rigid heddle loom

Wave and Zigzag shuttle weaving

Heart wallhanging

Calculating Warp for the rigid heddle loom

Honeycomb on a rigid heddle loom

Cardboard Loom tutorial

Honeybee Cushion

Do you have a membership already? What are your strategies for ensuring you make the most of it? Share in the comments below, I would love to hear from you!

Until next time…

Happy Weaving!
Filed Under: 4 shaft weaving, Floor Loom Weaving, Inspiration, Online Weaving School, Rigid heddle weaving, Tutorials, Weaving Tagged With: learn to weave, membership, online learning, online weaving school

Japanese Journey Masterclass!

by Kelly 10 Comments

The Japanese Journey Masterclass grew from a love of Japanese textiles and a desire to know more about processes and historical fibre arts in Japan.

This idea has been forming in my mind over almost 2 years. I knew that it would not be possible for me to take a physical trip to Japan but I very much wanted to undertake research and combine my previous explorations into Japanese arts with my handweaving.

So I decided that a virtual textile journey to Japan would be the best option to satisfy my fascination and explore ideas. When I mentioned the idea to others in my weaving community, I discovered that many of them were very eager to take the journey also – and so a year ago I began putting together this virtual journey that became a Masterclass!

There are three projects in total to complete in the course, multiple printable PDF’s and extra slide videos that delve into Japan’s textile past.

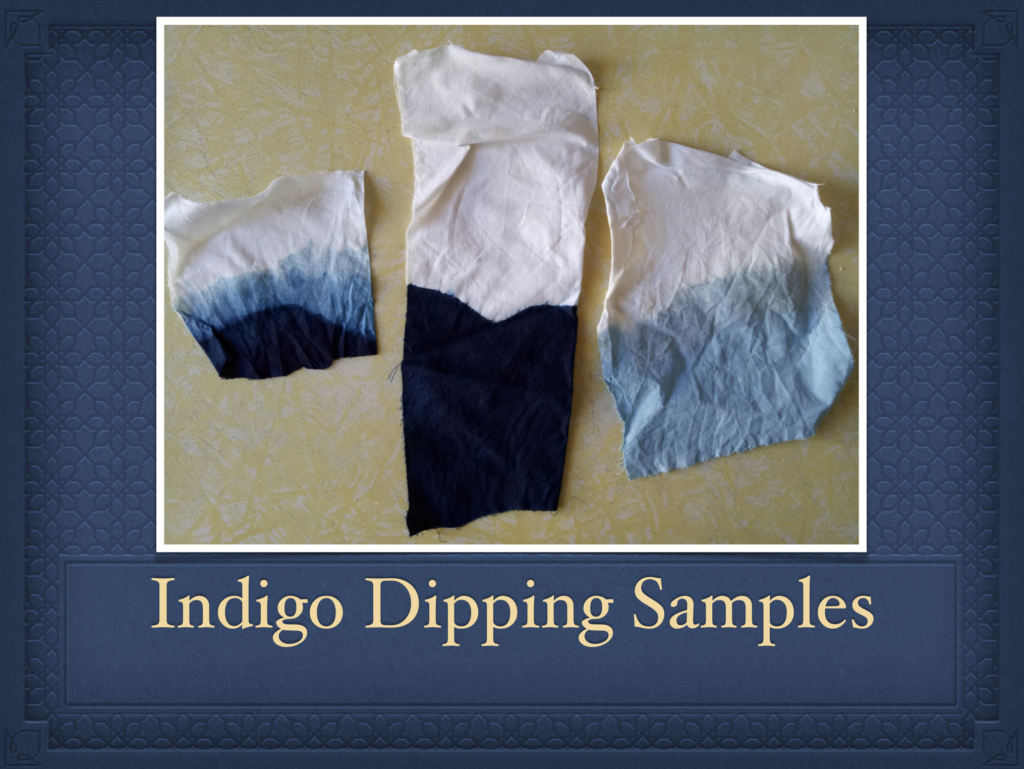
The first section of the Japanese Journey Masterclass is all about indigo. We talk about the origins and uses of indigo in Japan. Then we use the modern conveniences of indigo powder to make our own indigo vat.

All three project are dyed with indigo, however I do provide alternatives for those who don’t feel ready to venture into indigo dyeing.

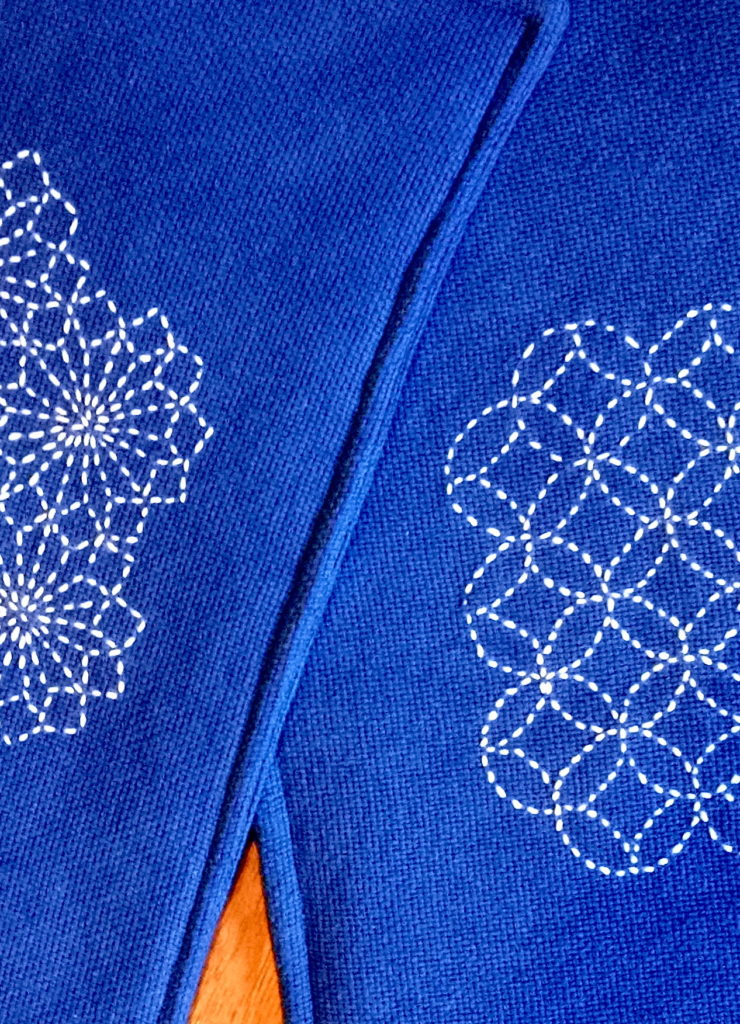
Project 1 is the Sashiko Placemats. We begin by weaving the cloth, dyeing it with indigo, embroidering designs onto the cloth using the stunning sashiko (which translates to “little stabs”) techniques, and finally sewing the unique and striking placemats. I know these will become a feature of anyone’s dining table as well as a conversation piece.

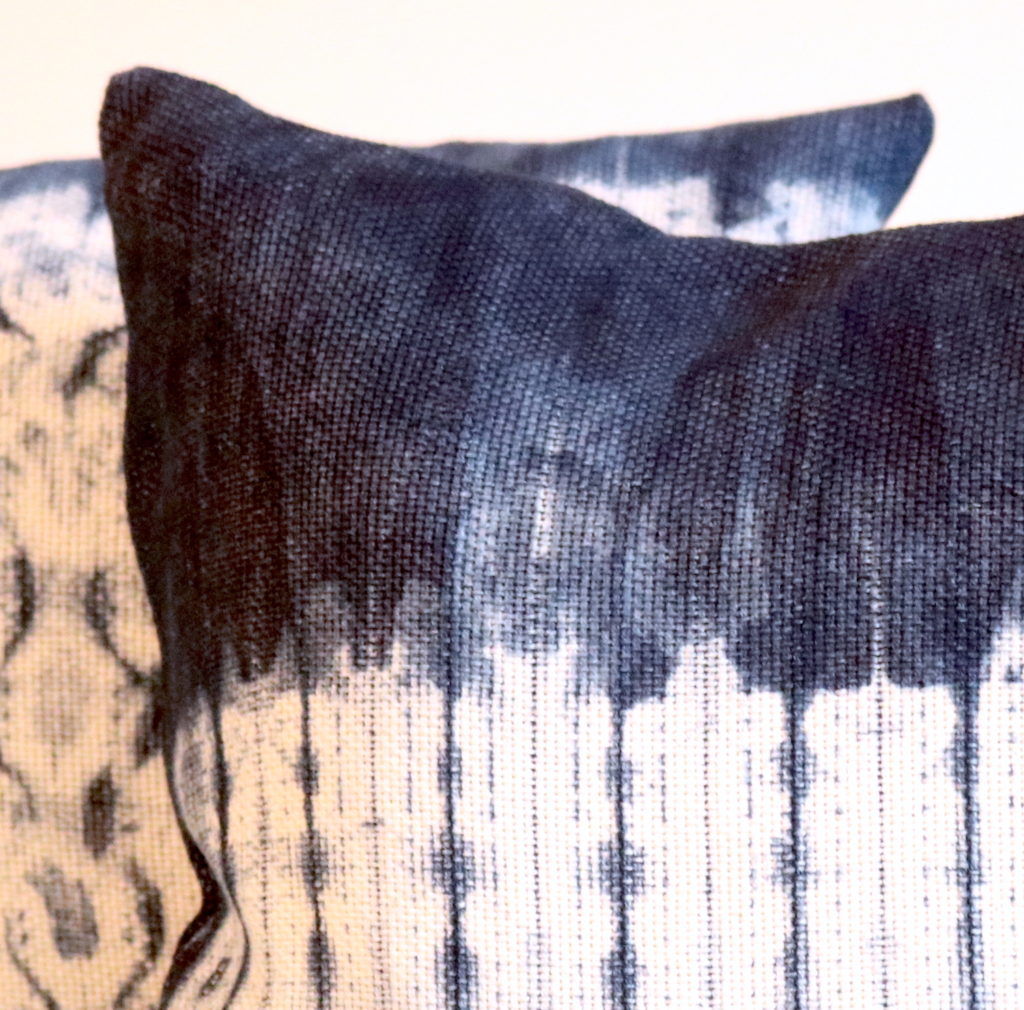
Project 2 is the Shibori Pillows. Once again, we begin with weaving the cloth, but this time we learn the art of woven shibori. Shibori is a method of resist dyeing and can be achieved in a variety of ways with a variety of results. For us weavers, we have the additional fun of being able to weave out resist designs into the cloth to use later in the dyeing process.

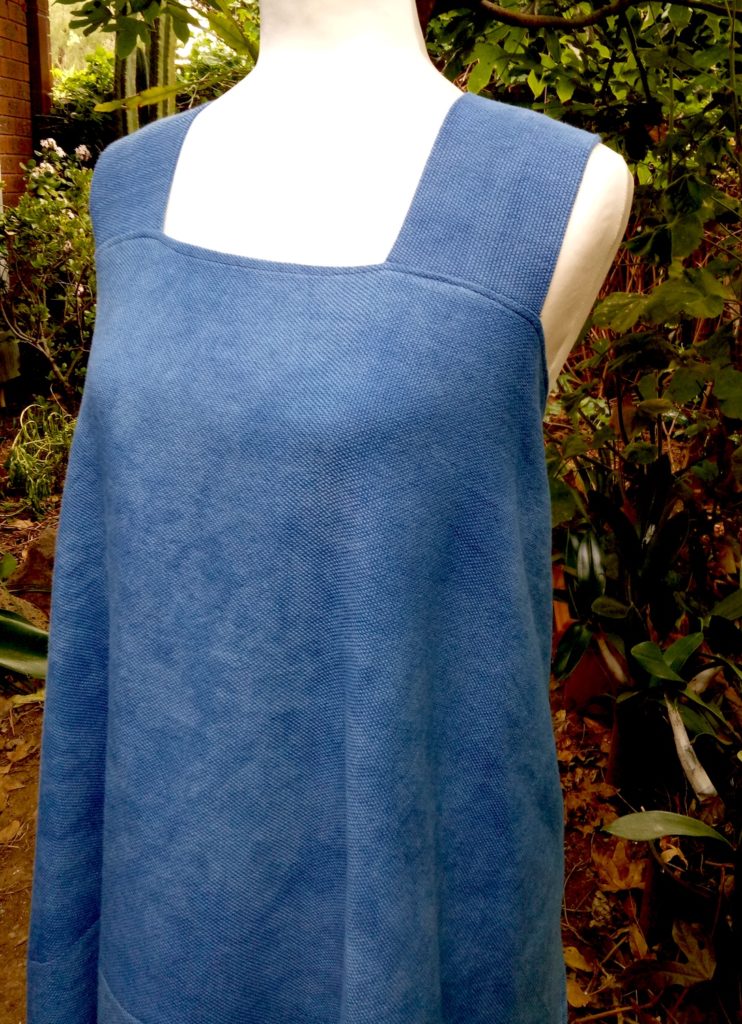
Project 3 is the Japanese Apron. This is the largest project but very achievable. The simple crossover style of the apron makes it a sewing project that is simple enough for beginners. It is also an elegant and useful finished piece – I intend to use my apron to catch all those pesky fibres that fall onto my clothes while I’m weaving!

What skill level is this course for?

This masterclass is aimed at those who are familiar with and confident with their loom. Although the projects are all plain weave, we do use fine threads, which can present a challenge for newer weavers.

You also need to be familiar with basic sewing on your machine.

Other skills (sashiko embroidery, indigo dyeing) are taught in the class and are intended to build and expand your current skill set.

What do I need to complete this course?

A sense of adventure, first and foremost! Some of the skills you will learn in this course are challenging and take practice. But I know that, with the right attitude you will find it very rewarding to learn these new skills and add to your creative repertoire!

What equipment will I need to complete the course?

All the fabric for the three projects can be woven on a rigid heddle loom, as we use the classic and beautiful plain weave for every project. I wove my apron fabric on my floor loom, but this was a matter of practicality so that I could be more time efficient in making the course.

What size does my loom need to be?

I used my 24″ loom but as always, projects can be adapted to suit smaller sized loom. A 15″ or larger is preferable though.

What other things will I need?

A full materials list will be available upon purchase of the course. However, to complete all the projects you will probably need to purchase some extra tools. Dyeing equipment, embroidery hoops (optional), sashiko supplies and things of that nature will be needed. I’ve tried to provide affordable options and sources for additional equipment where needed.

Will I need a sewing machine and serger?

A sewing machine – yes. Every project is sewn together on a machine. Basic sewing skills are needed.

A serger – I consider this a luxury item – if have one, brilliant, if you don’t, you will get by. You will need a way to secure raw edges of hand woven cloth, you can do that with a zig zag stitch on a sewing machine though.

The course includes almost 8 hours of video content and 6 printable PDF’s.

You can complete the projects in whatever order you please, though I do recommend that you work through them in order to build those skills as you go and follow the lessons with ease.

I am so very pleased to announce that this course is fully closed captioned. This is part of my commitment to make online learning more accessible to the hearing impaired and challenged.

Gold members already have full access to this course as part of their membership.

The course is also available at full price as a single purchase.

To receive a notification of the course opening, ensure you are on my mailing list.

To enrol in the masterclass, please click here.

If you have any questions, I’m more than happy to help, just leave a comment below.

Until next time…

Happy Weaving!

Filed Under: Inspiration, Online Weaving School, Rigid heddle weaving, Weaving Tagged With: Japanese journey masterclass

How to weave more stunning patterns on a rigid heddle loom!

by Kelly 9 Comments

Making patterns on your rigid heddle loom is a very popular topic, particularly among newer weavers who are experimenting to see just what they can achieve on a rigid heddle loom.

*This post contains affiliate links. Please see my disclosure for further information.

Last week I made a tutorial that demonstrated 3 ways to jazz up your plain weave.

This is part two of a tutorial on how to jazz up your plain weave. Part one showed you how to use stripes, dots and dashes, loop pile and butterflies to add some extra pizazz. If you missed part one, please start here and progress on to tutorial two afterwards.

You will need a rigid heddle loom to weave this sampler. In the video, you can see that I’ve used my Sampleit loom.

This downloadable PDF has all the information you need to follow this tutorial in conjunction with the video:

More-Ways-to-jazz-up-plain-weave-part-2-copyDownload

For instructions to part one of the tutorial, don’t forget to check out the first article here.

There are so many simple ways to push past plain weave. As I was weaving the sampler I found it hard to limit the number of techniques so that I didn’t end up making this series a year long!

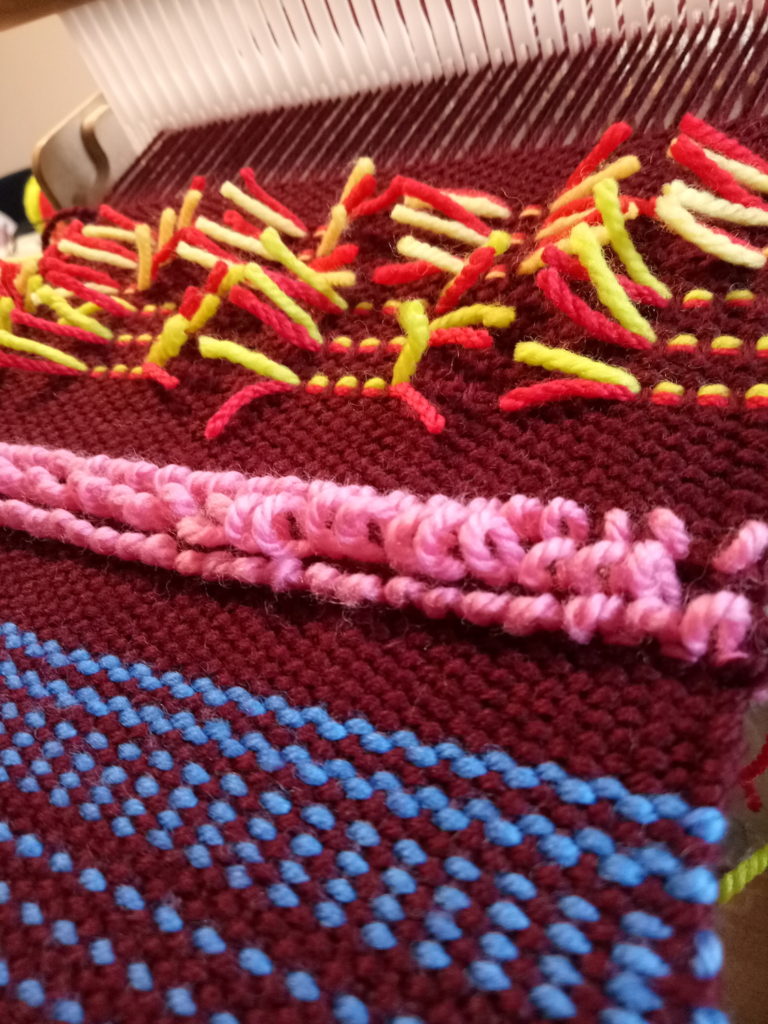
Part two of the tutorial covers and additional 3 techniques that you can use to make your plain weave more exciting or just for fun to explore.

All of these pattern techniques can be worked on a rigid heddle loom that is already set up for plain weave – that is, every hole and slot is threaded.

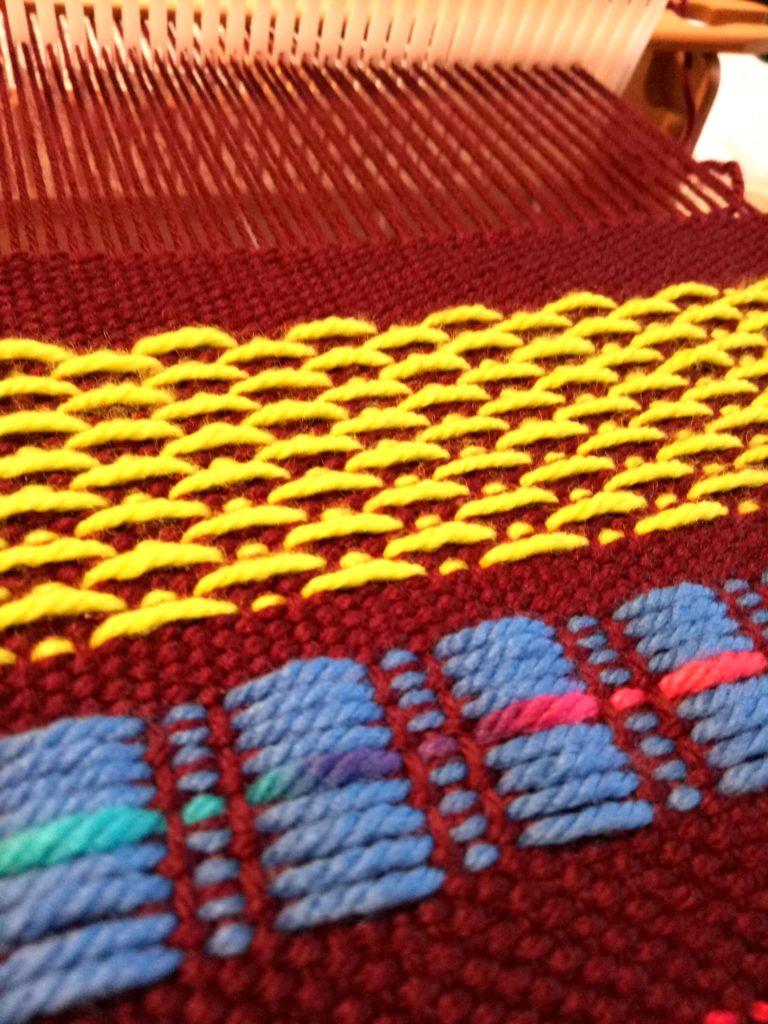
  1. Doubled Weft (pictured above).

The first technique is straightforward and simple but gives a very cool effect that really pops against the background, contrast colour.

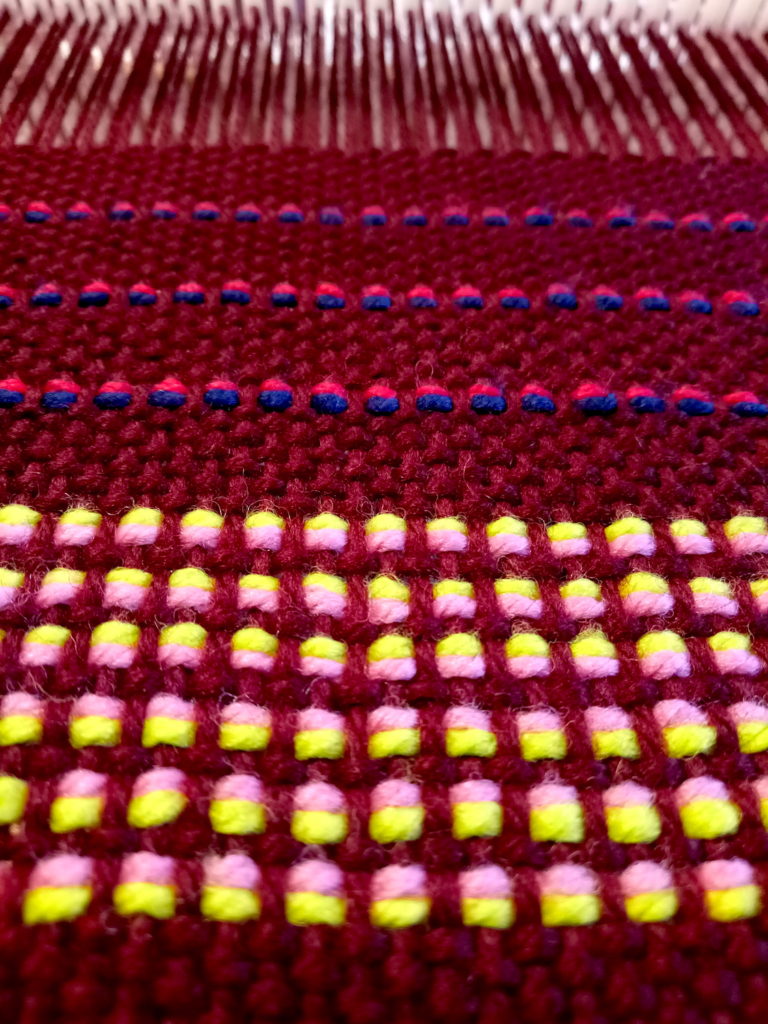
2. Pick Up Rows (the blue blocks below)

This is such a simple concept. I made a pick up pattern and repeated it over and over (with the blue yarn) and only one pick of plain weave (maroon) in between). What you end up with is towers and dots. I had a very small amount of hand dyed rainbow yarn left, so I threw in just one pick in the middle of all the blue, to break it up and create more interest.

3. Staggered Pick Up (the bright green that actually looks like yellow, pictured above).

This is a 2 pick up stick pattern. In the video, I used just one stick and took it out each time I wanted to pick up the other pattern. But, I wouldn’t recommend that unless you’re only weaving a couple of rows, it’s way too tedious. If you want to weave a larger amount of the staggered pickup, a heddle rod is definitely the way to go! Check out this video for how to do that:

And of course, don’t forget to watch video two so that you can see exactly how I worked these techniques:

If you enjoyed this two part series, you will love my Online Weaving School! With over 60 classes currently available, there really is something for everyone. I would love to see you there!

Until next time…

Happy weaving!

Filed Under: All about looms, Free Pattern, Online Weaving School, Rigid heddle weaving, Rigid Heddle Weaving Patterns, Tutorials, Weaving Tagged With: beyond plain weave, rigid heddle weaving, rigid heddle weaving patterns, rigid heddle weaving tutorial

10 Tips to improve your weaving today

by Kelly 19 Comments

Learning to weave is a real journey and it takes time. There is no magic potion or secret ingredient to becoming a better weaver. It takes persistence, time and dedication.

I’ve written a post addressing these facts already – 5 Steps to Successful Weaving, but today I want to give you some short and simple tips that you can do today to improve your weaving.

*This post contains affiliate links

Let’s launch right in!

  1. Don’t run before you walk.

It’s easy to look too far ahead in your enthusiasm. Enthusiasm is great, in fact, it’s essential, but don’t let it blind you. Start at the level you’re at and work your way up. If you choose something too difficult for your weaving level, you may be setting yourself up for frustration.

2. Don’t choose the best yarn for your first project

The temptation of a gorgeous yarn with a big price tag is real. A beautiful yarn can be the perfect inspiration for a new project. But not as a beginner. And not until you’re confident that the picture you have in your head of your next project is likely to turn out how you want it to. Once again, the frustration will kick in if all doesn’t go as smoothly as you hoped. You have the extra pressure of the yarn price tag hanging over you. Keep the fabulous yarn for when you’re ready.

3. Begin with yarns that have some elasticity

It just makes beginner weaving life so much easier. A yarn with some elasticity (a woollen knitting yarn is perfect) will stretch just enough and is so forgiving that you should not have real issues with tension. Rigid yarns eg. cotton is much harder to tension on a rigid heddle loom. Wool, on the other hand, works with you, rather than you feeling like you’re working with (or for) it.

4. Start with thicker yarns – knitting yarns are perfect.

A thicker yarn (I recommend a light worsted/dk/ Aussie 8 ply) is great to begin with for a couple of reasons. The thickness is usually the perfect match for your standard 7.5 – 8 dent heddle/reed that came with your loom. So, no need to purchase extra sized heddle/reeds right away. It also weaves up much faster, and I think it’s important to make your first few projects very achievable and not be a massive time commitment. This will make you feel better about tackling the next project.

5. Commit regular time intervals to learning by doing

If your loom sits in a cupboard or your garage, guess what? You’re not going to learn how to weave. You’re not going to improve. And you will probably feel bad about it. If you are a busy person (let’s face it, who isn’t?!) then you may even find it beneficial to plan and schedule your weaving time so that it’s enough of a priority that you will weave regularly. I’m of the opinion that it is more beneficial to your learning journey to weave little and often than a big chunk of time occasionally. You’re training your brain to do new things, so consistency is important! Also, if you can have a dedicated space or at least not have to completely pack up everything after every weave session, that will be a great help and motivator.

6. Expect little – you might surprise yourself.

Hope for the best, but don’t place unrealistic expectations on yourself. Learning new skills takes time and patience, there is no way around that. Yes, some will learn quickly and some will take longer and that’s completely normal. If you haven’t seen my Slow Learning video, you should check it out:

7. Record your project information

You’re not being your own best weaving friend if you don’t take the time to record information from your projects to refer back to. You may think you will remember all the details, but chances are you won’t. I learned early on to write things down before, during and after my project. It is so worse the time. It helps you to not repeat annoying mistakes but also allows you to repeat the things that were desirable. My Weaver’s Toolkit downloadable e-booklet is a great help for recording purposes, it includes warping and weaving calculations sheets plus a project record sheet.

8. Sample.

It took me a while to become a true sampling convert. I do it often now. It’s a guaranteed way to know that your project will turn out well. You have to invest a little yarn and time, but it is very satisfying beginning a project with that kind of confidence.

9. Find the right resources for you.

If you need help, find help. The kind of help will be different depending on your needs. You may find weaving books really helpful, (check out my Amazon shop for my favourites) you may want to access some online lessons, or you may be lucky enough to either live near to face to face classes or know someone who weaves already.

10. There is almost always a fix

If you mess up, it’s not the end of the world! Most mistakes can be rectified. You may need to find extra resources when you encounter a problem but that is a positive part of your learning process. I always say that if I hadn’t made so many mistakes I wouldn’t have learned as much as I have. Make sure you’re subscribed to my Youtube channel where I have many, many videos that can help you out of a tricky situation.

11. Do not use sticky yarns if you are a beginner. I repeat, Do not use sticky yarns if you are a beginner!

I know, I said “10 tips” and this is number 11. But I must make this point, it’s that important.

Please! Just don’t do it!! You wouldn’t believe the number of emails I get from students stuck (pun intended) in their project because of a sticky yarn that won’t let them get a clear shed and causes all kinds of angst and hair tearing activity. Even bad language, so I’ve heard.

So, just don’t do it. No fluffy, sticky yarns (just forget all about that mohair for now). Save the stickies for later (if you really want to – I just generally prefer to avoid them!) and plan the project carefully.

If you need more information on choosing appropriate yarns, check out these other articles I’ve written on the topic:

Choosing and Using Yarns in Weaving…

3 Yarns Beginner Weavers should NEVER use!…

What is Superwash Woollen Yarn?…

I hope these tips are useful to you! If you have any questions, please leave me a comment, I love to hear from you.

Until next time…

Happy Weaving!

Filed Under: Inspiration, Online Weaving School, Rigid heddle weaving, Weaving Tagged With: how to weave, learn to weave, rigid heddle weaving, weaving tips

How to deal with warp colour changes

by Kelly 34 Comments

Changing colours in your warp allows you to jazz up your weaving, even if it’s a plain weave project. In this article, I’m going to troubleshoot some of the issues that may arise when you want a colourful or stripey warp when direct warping your rigid heddle loom.

*This post contains affiliate links

I’m specifically speaking to rigid heddle weavers who choose to direct warp today, as these issues either don’t occur or are more simply dealt with when using a warping board, or indirect warping.

The two main issues I want to discuss today are how to most effectively deal with a warp that has a lot of colour changes and what to do when your ends are uneven in number.

If you’re not sure of the difference between direct and indirect warping, I’ll briefly explain.

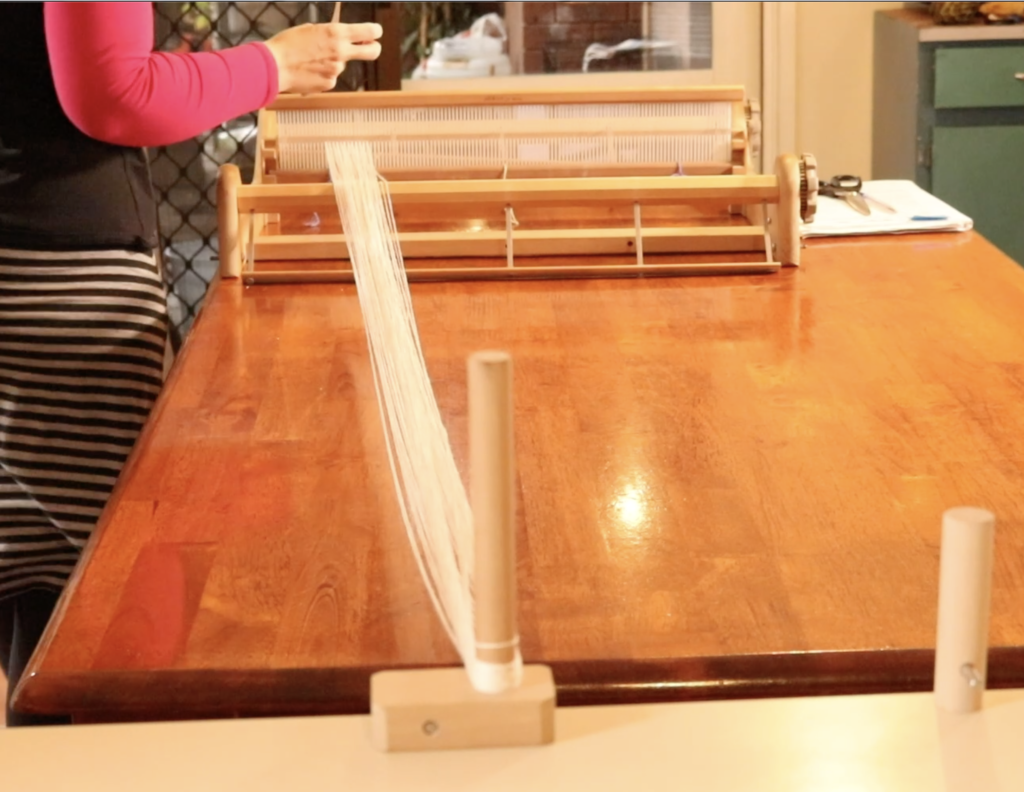
Direct warping your rigid heddle loom involves tying your yarn end onto the apron rod at the back of the loom, taking the yarn through a slot, around a wooden warping peg that is clamped at the desired distance of the warp away, back through the same slot and around the apron rod again. The process then repeats.

In this photo I’m warping a wider warp and am using 2 x pegs in order to spread the warp more evenly and achieve better tension.

I personally love the direct warping method for my rigid heddle loom because it is such a quick and easy process.

Indirect warping is when you make your warp away from the loom, usually on a warping board or warping mill. You then transfer and “dress” the loom with the warp. It takes longer to warp away from the loom, but is necessary for floor and table looms.

If you’re interested in seeing a warping board in action, check out this video:

Let’s talk about the first topic I mentioned, the use of multiple colours in a direct warp. When you want to make a warp with stripes, you will need to warp sections of colour. This usually involves repeating sections of colour in a sequence, so even though you’re changing colours frequently, you are often coming back to a colour you’ve already used. Many weavers ask me the best way to do this – change warp colours frequently.

There are several options.

  1. Tie the colours as you need them on to the apron rod, go through the direct warping process, tie on new colours as you need them but don’t cut them off when you’ve finished with one section. Then when you need to repeat a colour, you pick it up where it was last used and continue on.

2. Tie on each colour to the apron rod and then cut and tie it off on the apron rod when you’ve finished that section. Tie on the new colour to the apron rod, then tie off again when finished with that colour. Continue on across the warp.

3. Tie on to the apron rod and begin to warp, when you need to change colours cut the existing colour close to the apron rod and tie on the new yarn to the old yarn, making a firm knot. This way your thread is continuous even though you are changing colours.

I’ll share which is my favourite option and why. Number 2, wins for me, hands down. Some people are surprised to hear this and wonder why I would take the extra time to do all that cutting and tying on rather than choose to run continuous threads.

It’s a fair question and some are still not convinced when I give my reasons, but that’s ok, we’re all different in our preferences and I encourage you to do what suits you the best.

There are two main reasons why I like the tie on/ tie off method. No crossed threads. I don’t like crossed threads behind my heddle. They are messy and can cause issues like holding some threads down when they should be up and messing up my tension by crossing over the back beam in a higgledy piggledy manner – not my style at all! I can’t even show you a photo of what this looks like, as you will never see it on my loom. The second issue, as I mentioned, is the tension – I believe that my tension is compromised when those warp threads are all over the place at the back beam.

Having said all of that, there is one instance where I would consider using method one – if my colour repeats were extremely short. For example, if I was alternating between two colours every 2 ends, then I would look to decrease my warping time by continuous warping.

But I have found that most of my warps have been larger blocks of colour than that, so I always tie on/ tie off.

A perfect example where my favourite method is employed is in my Log Cabin Table Runner class. Yes, there is a lot of tying and cutting, but look at that tension! Another great example where I use the same technique is my free Wash Your Hands Towels project. I’ll readily admit that this method takes a great deal of extra time, but I also declare that the results are worth the trouble. Perhaps it’s because I’m also a floor loom weaver, and dressing the loom takes a really long time, that using the cut and tie method doesn’t feel excessively long to me. I always say to my students that extra time spent in getting a warp right is never time wasted – it will save you time later with mistakes or hiccups and you will be more pleased with the end results. Each tied section on the apron rod is like it’s own little warp with it’s own individual tension. When you come to wind them on as a whole, the tension is quite beautiful! All of those knots are on the apron rod and won’t move or affect your weaving as you advance the warp.

I didn’t tell you my thoughts on method three. I can speak from experience that it’s less than ideal. Firstly, the knots can slip or come apart, yes, even if you do them tightly. If your yarn is even slightly slippery (as in a soft cotton) you will likely have trouble. Secondly, tying yarn pieces together is more fiddly, in my opinion than tying on and off the apron rod. So, although I’ve tried this option, I now avoid it.

Now let’s discuss the second issue that frequently crops up when direct warping your rigid heddle loom, and that is what to do when your ends are uneven in number.

Sometimes you will come across a pattern or warping chart for your rigid heddle loom that may look something like the following colour sequence:

Blue – 12 ends

White – 8 ends

Red – 11 ends

White – 8 ends

Blue – 12 ends

Repeat from the beginning until you have _____ (however many ends the project calls for) ends.

It all looks good until you come to the “red – 11 ends”. 11 is an uneven number and it means that you can’t just make a loop of your thread for the last end, because then you would have 12 ends instead of the 11. Make sense?

The easiest way to get around this problem when direct warping your RHL is to not warp uneven numbers of ends! If you are designing the warp yourself, just ensure that every warp number is even so that you can loop every single thread. It might mean a little mathematical adjustment here and there, but it’s not hard and only requires basic math to figure out (I don’t say this lightly, you’re talking to a mathematics hater here!)

But what if you’re using somebody else’s patterns or instructions (by the way, you will notice that none of my patterns or classes have odd numbered ends 😉). Many patterns might be written for indirect warping, hence the odd numbers. Well, you can still adjust that pattern to custom fit it to your requirements without too much trouble.

Going back to my example colour sequence above, it would be a simple matter of rounding the “11” for red down to 10 or up to 12. Yes, you will have to rejig your initial pattern a little to allow for extra or less ends, but as I said, it’s not all that difficult.

But, if you really want to stick to the original pattern with the odd ends, there is something else you can do with your direct warp. If you warp the single colour end by itself, you will have trouble when it comes time to thread the holes. The hole thread will be missing in the place where you only took that single thread through the slot! This means that you have to use the thread from the slot, then shuffle over other threads in order to make sure all the holes and slots are threaded, thus reducing your warp size and possibly messing up your pattern if it’s meant to be threaded in a particular order. There is another way, but it has it’s own set of problems.

You take your single thread (say we’re doing the red and it’s thread 11) to the warping peg through the slot as normal. When you get to the peg, you cut the thread, leaving some spare to go around the peg and tie off. Tying off loosely with a gap is preferred, so that it comes off the peg easily when you want to wind on the warp. Then, instead of going straight back to the loom, you tie the next colour on to the peg. Following our example, that would be white. Take the white back through the same slot that the red was brought through, then back around the apron rod.

Hold up, what’s the problem with that? Well, if we take the white back from the peg, it then becomes a single. We need 8 ends of white, but now we’re going to end up with uneveness again! Further mathematical adjustments would be required or the warp will not be the width you planned for in initial calculations and once again, the pattern may be off.

You see what I mean? Isn’t it just way more simple to even out all of those numbers and save yourself a big headache? I surely think so, but if you have a different opinion or another workaround for the issue, I’d love for you to set me right by leaving me a comment 😄

OK, weavers, I think that’s quite enough for today, I hope I’ve helped rather than boggled your minds with all this!

If you haven’t already, you may want to check out my Online Weaving School, where there are many classes or memberships to choose from and catering to all different weaving levels. You will also find a range of digital download PDF weaving patterns in my Etsy Shop.

Maybe I should aim for a brief and easy going post next time!

Until then…

Happy Weaving!

Filed Under: Free tutorial, Online Weaving School, Rigid heddle weaving, Weaving Tagged With: color changes, rigid heddle weaving, stripes, warping

How to show off a multi coloured warp

by Kelly 8 Comments

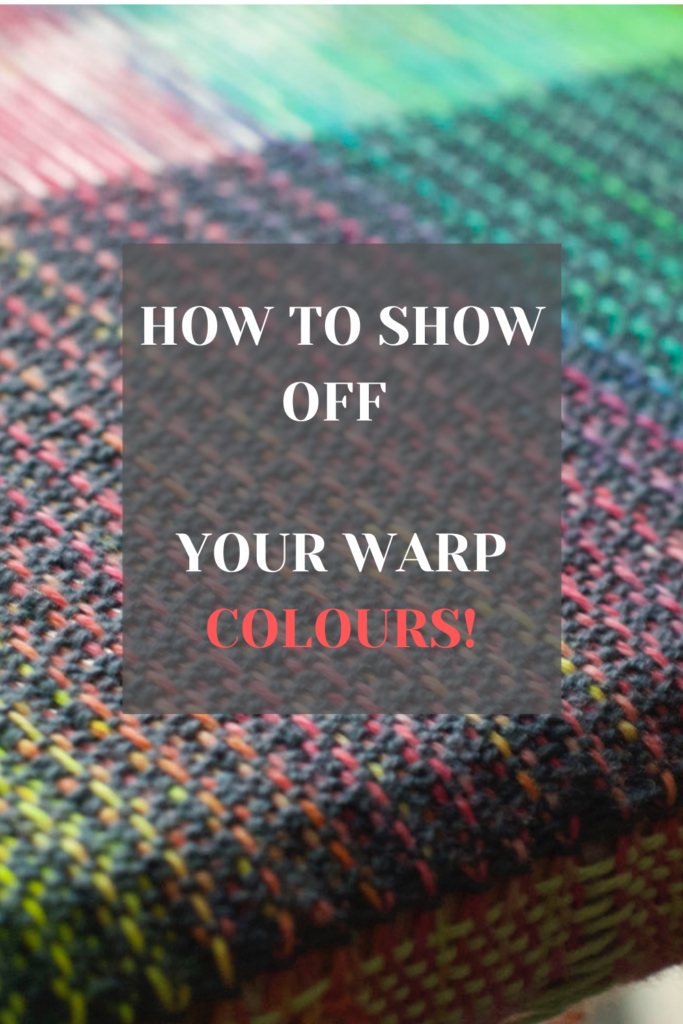
A frequently asked question is “how do I best show off my warp?” and it’s usually asked in relation to having bright colours, lots of colours or a gradient in the warp.

If you have spent a lot of time on your warp to arrange the colours just the way you want to, you certainly don’t want to obscure all that beauty by weaving with an inappropriate weft.

In the planning stages of your warp, you will want to think a lot about how your warp colours will look side by side. There are several ways to visualise this. You can use colouring pencils to just draw and colour in bands of colour next to each other on a blank piece of paper to see if they look pleasing to you.

You can also grab some short lengths of the intended colours in the yarn you are using and twist them together a couple of times. They will twirl around each other and give you an idea of how they will behave side by side.

You can also do a wrapping as I have here, which gives a great visual representation of colours and thicknesses of stripes. I teach you how to do this in my members only Gaining Confidence with Colour class.

It is best that you also plan which weft you will use, but it can be hard to know how different colours and yarns will look on the loom. I highly recommend that you take the time and a little extra yarn to warp up a sampler, which will take all of the guess work out of the project.

In this article, I am sharing some of my samples from my new members only Options for Showing Warp Colours class. The class goes into plenty of detail with yarns used, weaving structures and demonstrations that will give you lots of ideas for your next colourful warp.

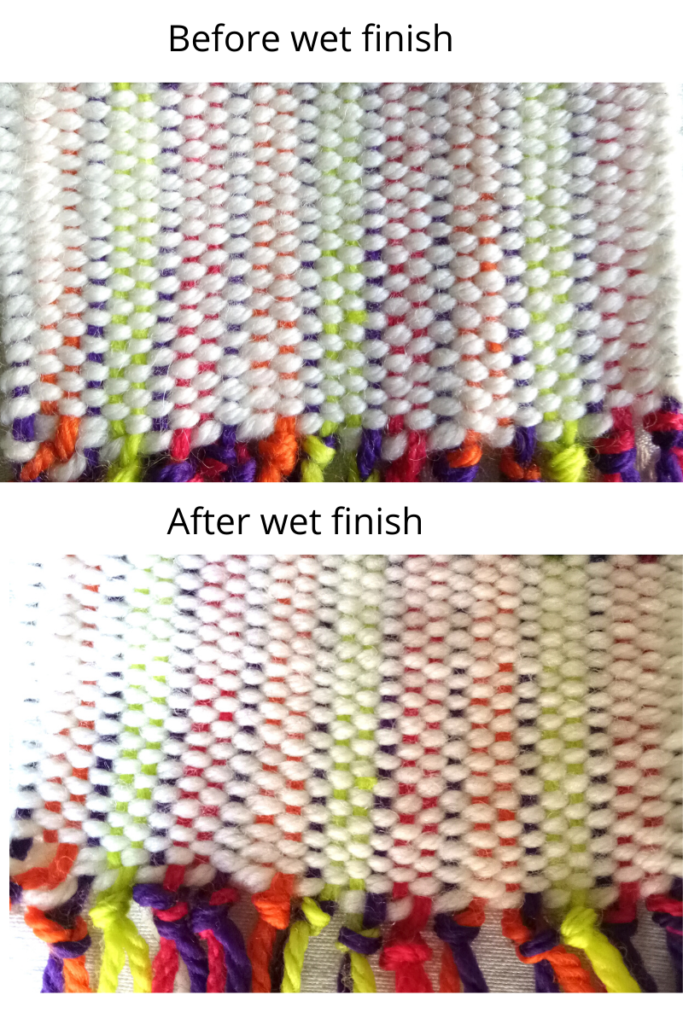
All my samples, excepting one, were woven with woollen yarn but not all in the same thickness. My first sample was a white wool. I particularly wanted to show you how a white weft has the effect of toning bright colours right down. That can be desirable in some circumstances, and not in others. It’s best to know these things before you begin your project to avoid disappointment!

I’ll readily admit that this sample makes me cringe, but perhaps for another weaver it might be just to their taste. Once again, sampling is invaluable in helping to reveal your own personal likes and dislikes. So, while this balanced plain weave sample doesn’t appeal to me in the slightest, that doesn’t mean that I’m against all white wefts!

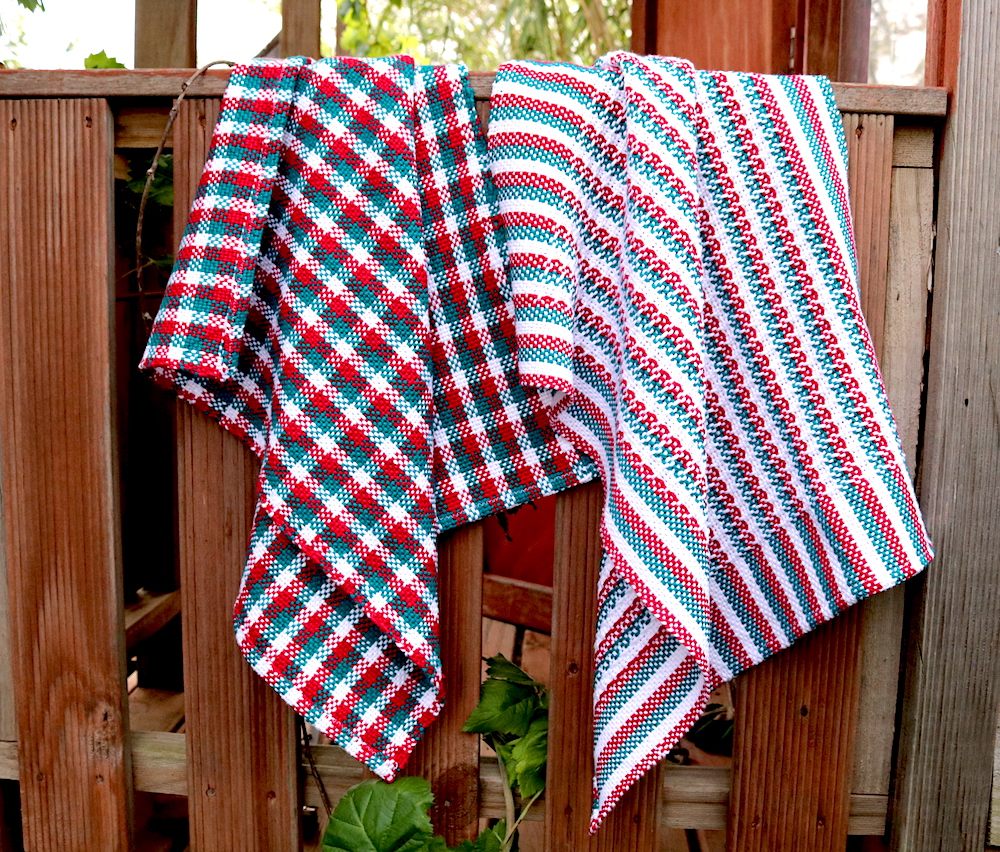
For my second Wash Your Hands Towel I also used a white weft, but look at the difference! In this case, due to the arrangement of colours in the weft and a lovely pick up pattern, white really makes this towel pop in a way that I love.

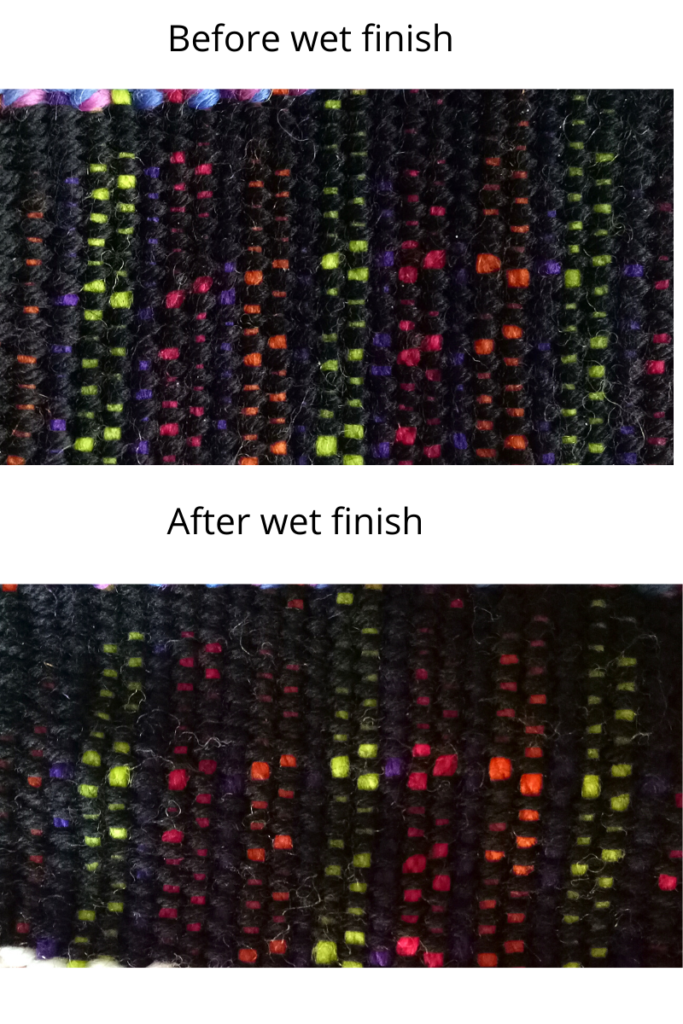
The second sample is the opposite of the first in that it uses black as the weft. I didn’t have any black in the same weight as the warp, so I used a lighter weight. I had to be careful to beat gently to avoid obscuring the warp altogether. I don’t often use much black in my weaving, as it tends to be so dominant. It can be perfect when pairing with another solid, contrasting colour and an interesting pattern, but for plain weave, once again, I’m not a fan.

I don’t mind the way the black has little pops of the warp colour, but I do feel that it just wants to take over all those colours I spent time carefully warping!

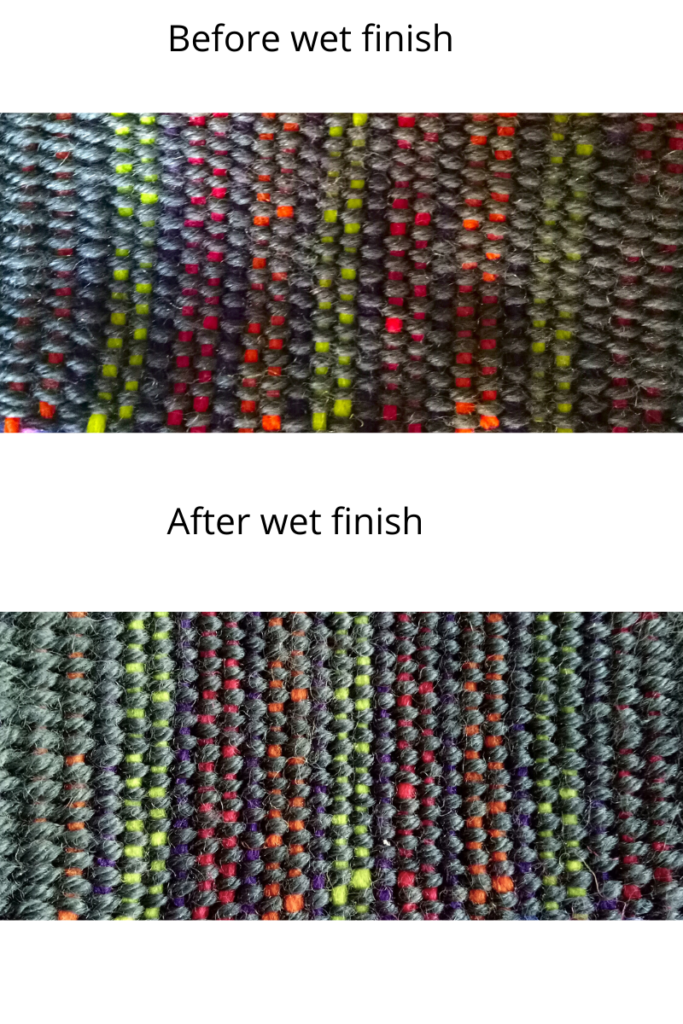
The third sample was a plain weave in dark grey. Dark grey is my preferred option for when I want my warp colours to shine. It seems to harmonise and compliment rather than dominate.

Now on to my favourite option – grey with pick up. This is a total win win situation in my opinion. You have the non obtrusive grey and the openness of the pick up to allow that warp to shine. I find this the most complimentary combination of weft and warp.

These have both been wet finished.

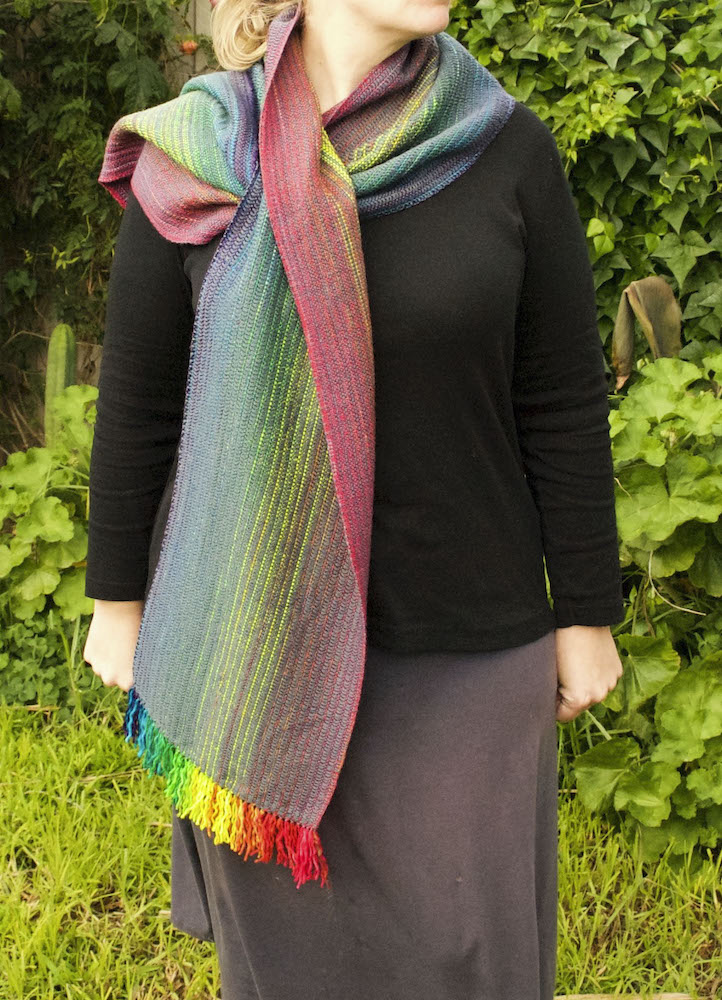
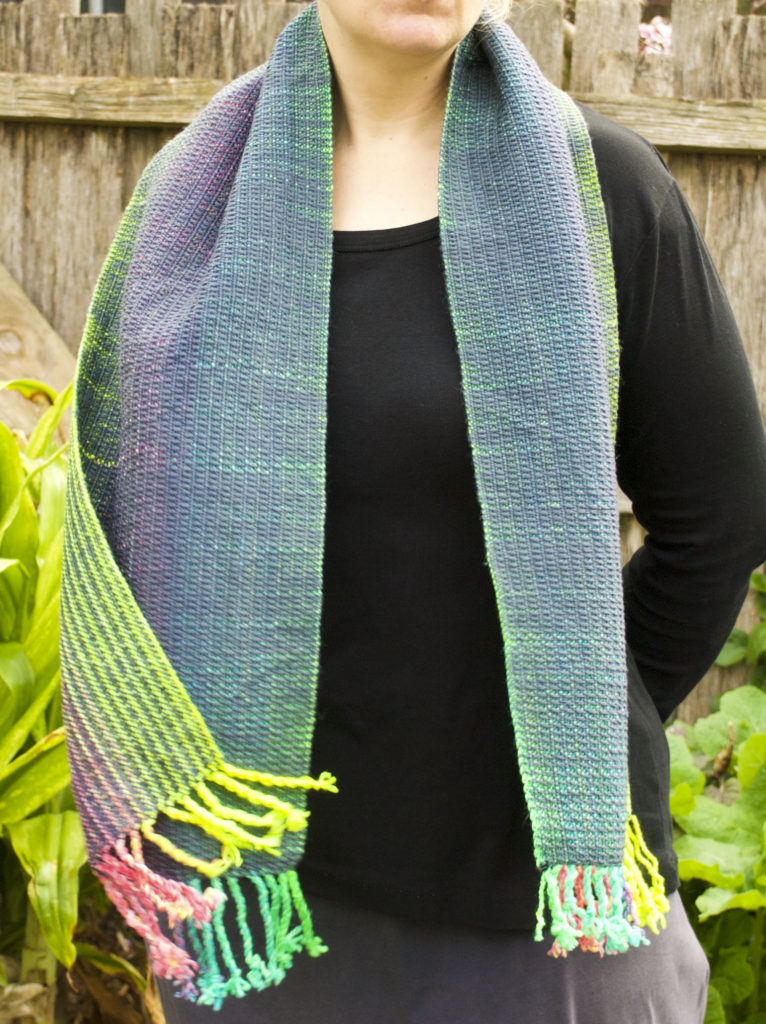
Before I go, I want to show you some of my favourite projects woven with colourful, gradient warps and grey weft in pick up patterns, just to inspire you!

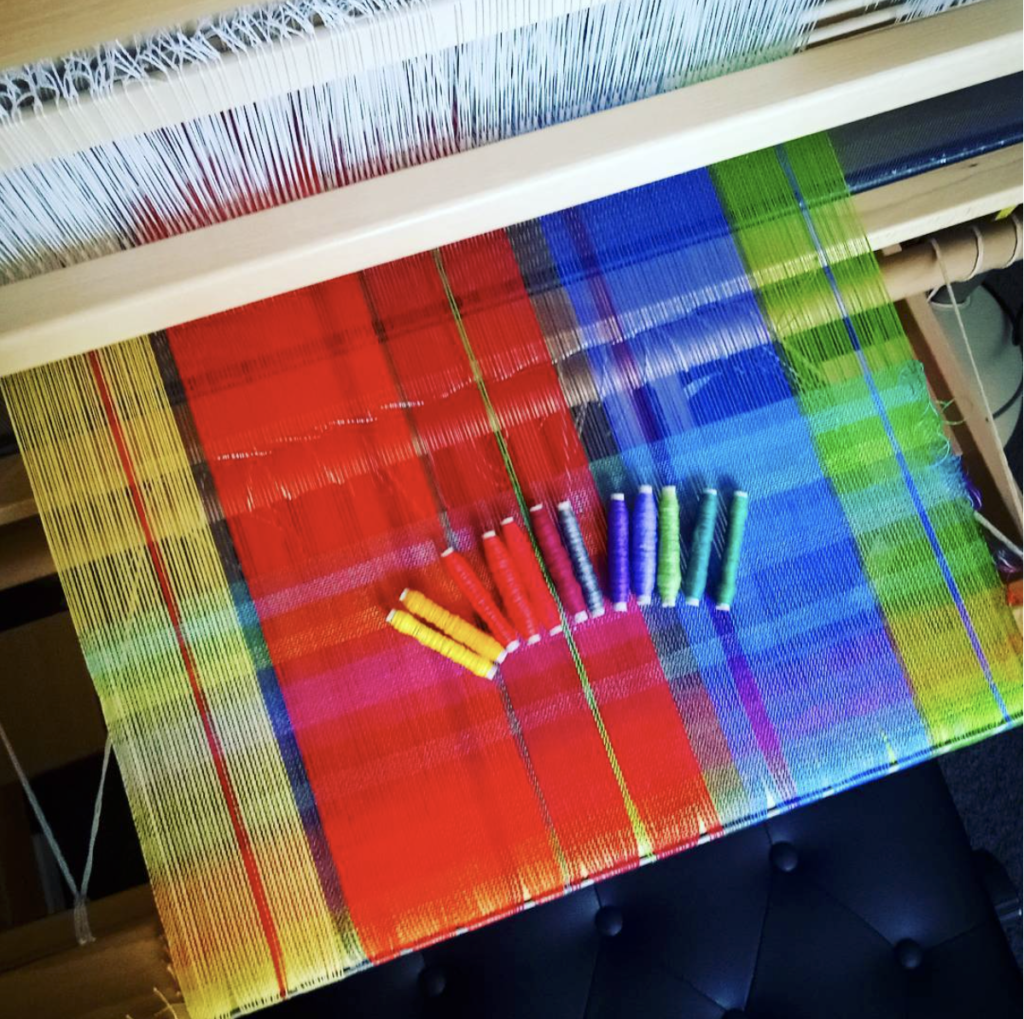
This one is my favourite. It took me a long time to dye that rainbow gradient warp!
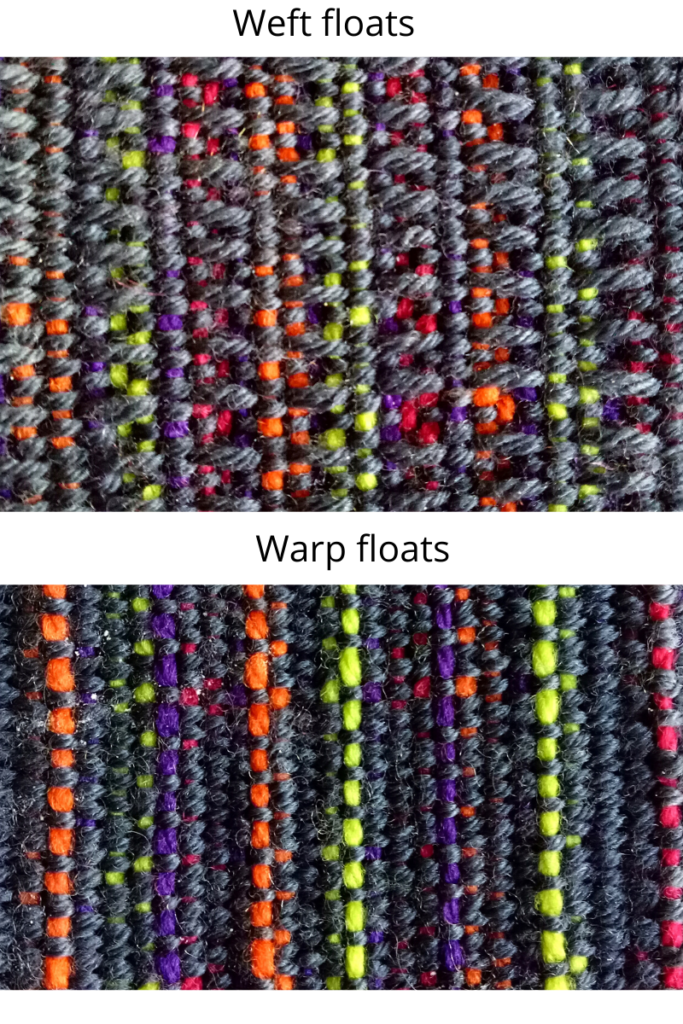
Note the reversibility of the design – one side shows weft floats while the other shows warp floats. Pretty cool huh?

I hope this post has helped you to think about ways that you might use wefts to make your warp a stand out. If topics like this are interesting and useful to you, I’m sure you will love my Online Weaving School. There are single classes or memberships available for purchase.

If you are interested to know more about pick up sticks, you will find this article very useful.

As always, if you have any questions or if you enjoyed reading this, please leave me a comment, I love to read them!

Until next time…

Happy Weaving!
Filed Under: Inspiration, Online Weaving School, Rigid heddle weaving, Tutorials, Weaving Tagged With: colour, warping options, weaving advice

Online Weaving School 3 year anniversary giveaway!

by Kelly

It’s hard to believe that 3 years have passed since I began my Online Weaving School. Many of you have been with me for all of that time and longer, but if you’re new here, I’d like to tell you a little about my teaching journey.

*This post contains affiliate links

I’ve always been a creative person but making things with my hands became more important to me when I found myself an at home Mum with 4 children. The urge to relax and create became very strong and somewhat vital. I needed that quiet, meditative time away from my regular daily duties.

I started with embroidery after my mother in law gifted me with some vintage supplies. Then I got a sewing machine and started sewing clothes for my kids. From there I started making dolls. This began my relationship with Etsy, where I sold my dolls. Then bear making, quilting, knitting, spinning, dyeing and weaving. Many of these were learned books, some from just teaching myself and some (especially knitting) from Youtube. Youtube was just becoming a thing at that time. When I came to weaving, I found it the perfect culmination of so many of the arts and skills I had already been practicing for years. When I found weaving, I felt like I had come home.

After I had been weaving for some time and felt very confident at my rigid heddle loom, I felt that I really wanted to share some of the wonderful things I had learned. I was almost bursting with excitement and passion but I didn’t know any other weavers at all.

So I made a video and uploaded it to Youtube. I didn’t know anything about how to teach or how to use Youtube. My son helped me to film and edit to make the video passable. I expected nothing, I didn’t even think about whether anyone would be interested. I just thought it might help someone and I wanted to share.

As it turns out, that video is still helping weavers, 5 years later! People loved the video and asked for more. I made more. And I loved it. It was so rewarding to know that I could help others and share this passion for weaving.

After a while, my Youtube hobby was starting to cost a lot of money in materials and the meagre income from Youtube ads didn’t even begin to cover the expense. I was a stay at home Mum, homeschooling her children and relying on my husband to earn enough income to keep us fed and clothed.

So, using a Youtube paid channel, I started to (gasp! how could I even dare to!) charge for classes. This was a big mind shift for me. People wanted to pay me in exchange for classes!! I still ran my free channel, but the paid channel was a huge blessing. Now at least I could cover my expenses, even if I still wasn’t really earning anything extra. When the Youtube paid channels ceased to exist, I had a fairly sizeable following of enthusiastic weavers. And they still wanted more! So, I found Teachable and set up my tiny Online Weaving School and community.

3 years later, that “tiny” weaving school has grown to over 4000 registered users and 750 paid memberships and is still growing! I am still pinching myself. Thanks to the constant support from my wonderful and loyal students, I now provide the income for my family of 6. This is something I never would have dreamed could happen and I have learned so much. I would go so far as to say that having my weaving school has transformed me as a person – or perhaps better to say, it has formed me into the person I was meant to be.

Aside from all of the obvious benefits the success of the school has brought me are the less obvious blessings. The beautiful friendships and relationships I’ve encountered with weavers all over the world. The ability to help others not just to learn to weave, but to share other difficult life burdens. It is amazing to be in a position where you feel you can truly make a difference to the lives of others!

If you already know or follow me, then you will be aware of my recent free project, The Wash Your Hands Towels. I designed these towels in the time of uncertainty while the world was suffering from the effects (and still is) of the coronavirus pandemic. This has been a hugely popular project and seemed to come at just the right time for many weavers at home under lockdown. I’ve seen lots of different versions completed in a big variety of colours, it’s been wonderful to see.

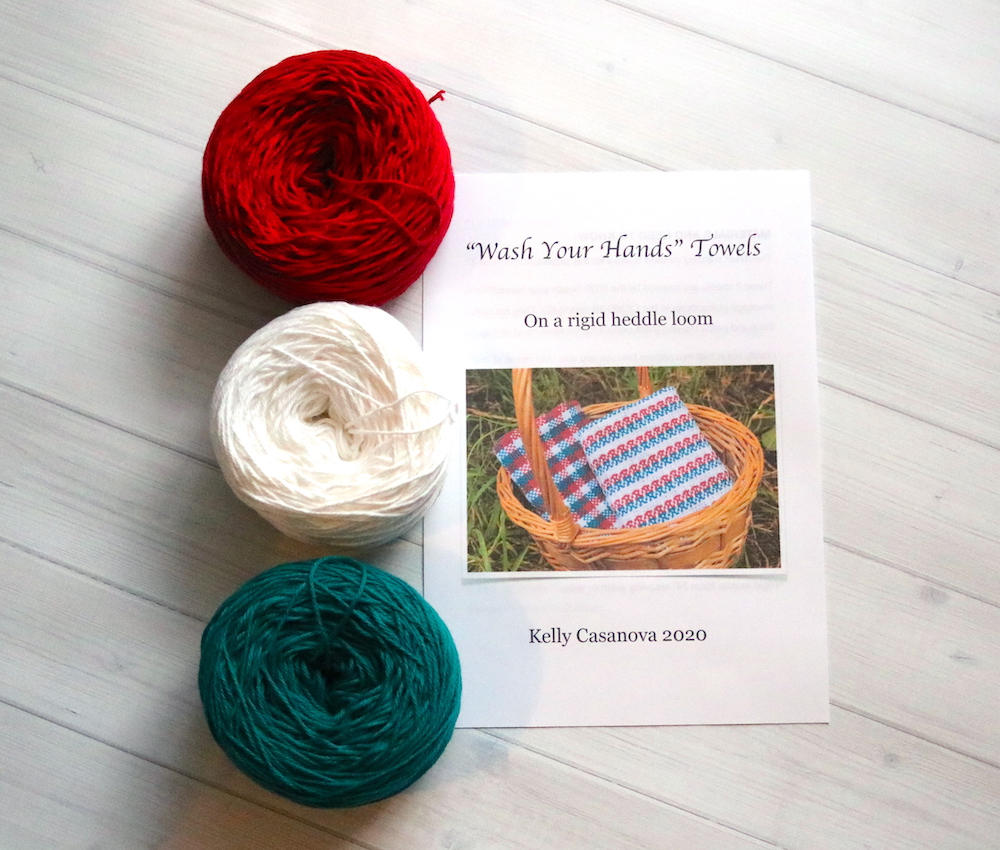
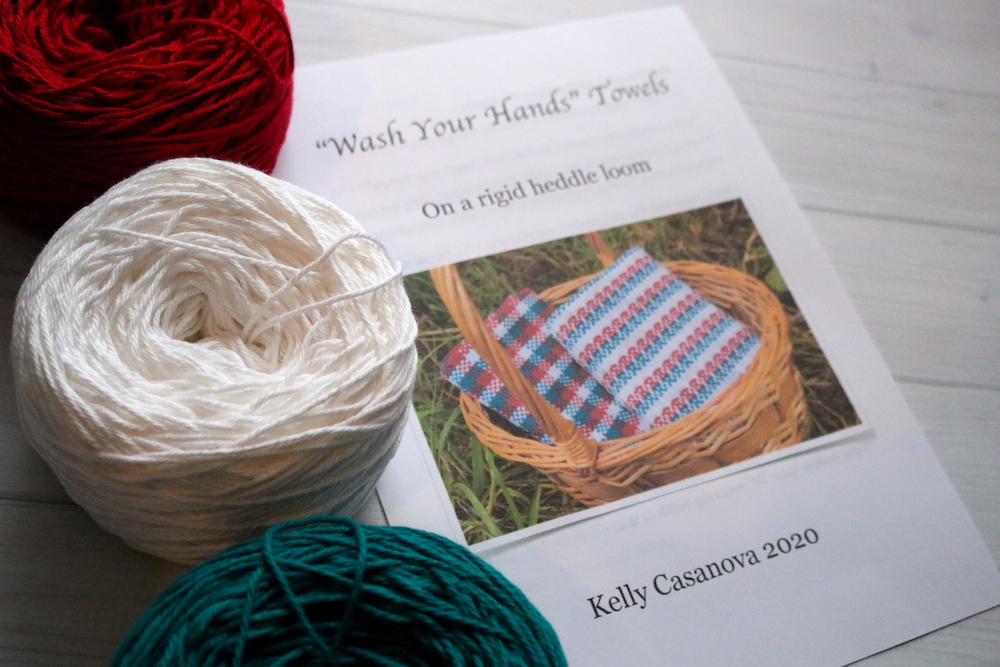
So, I thought a very appropriate way to celebrate this 3 year milestone would be to give away a Wash Your Hands Towels Kit. This kit will be a one off, as I don’t have plans to make kits available for sale.

Included in the kit is all the beautiful Australian cotton yarn you need to make two towels plus a paper printed PDF. You use the PDF in conjunction with the video tutorial. If you wish to know what you need to complete this rigid heddle project, read this post that has all the details.

This giveaway is open to all, wherever you happen to be in the world. Entries are open until the end of this month of May 2020.

To enter the giveaway, please leave me a comment here (only comments on this blog post will be considered entries) and tell me why you would like to win.

Make sure you are on my email list to keep up to date with the giveaway and for the winner announcement.

I look forward to reading all your comments and drawing a winner!

THIS GIVEAWAY IS NOW CLOSED. CONGRATULATIONS TO THE WINNER – VEENA RAGHAVEN!

Until next time…

Happy Weaving!
Filed Under: Free Pattern, Free tutorial, Giveaways, Inspiration, Online Weaving School, Rigid heddle weaving, Weaving Tagged With: anniversary, celebration, giveaway, kit, online weaving school, rigid heddle weaving tutorial, wash your hands towels

  • « Go to Previous Page
  • Page 1
  • Page 2
  • Page 3
  • Page 4
  • Page 5
  • Go to Next Page »

Primary Sidebar

Hand crafted boat shuttles

Categories

Archives

Meta

  • Log in
  • Entries feed
  • Comments feed
  • WordPress.org

Copyright © 2025 Kelly Casanova Weaving Lessons on the Foodie Pro Theme