• Skip to main content
  • Skip to primary sidebar

Kelly Casanova Weaving Lessons

  • Hi! I’m Kelly!
    • Disclosure
  • Online Weaving School Class Index
    • Common account issues
    • Common technical issues
    • What do I get with a membership?
  • New to rigid heddle weaving? Start here!
    • Never heard of the rigid heddle loom?
    • How to weave neat edges on the rigid heddle loom
    • Rigid heddle weaving
    • Rigid Heddle Weaving Patterns
  • Patterns
  • Subscribe

Weaving

What do I need to get started in rigid heddle weaving?

by Kelly 9 Comments

I’m going to make a bold statement. 2020 is the year of the weaver!

Yes, this year has been very difficult, very strange, and frequently lacking in positivity. But as I’m the kind of person who likes to look for the good things in the face of adversity, I think in many ways it has been a really wonderful year, full of opportunity and promise!

*This post contains affiliate links. For further information, please see my disclosure policy.

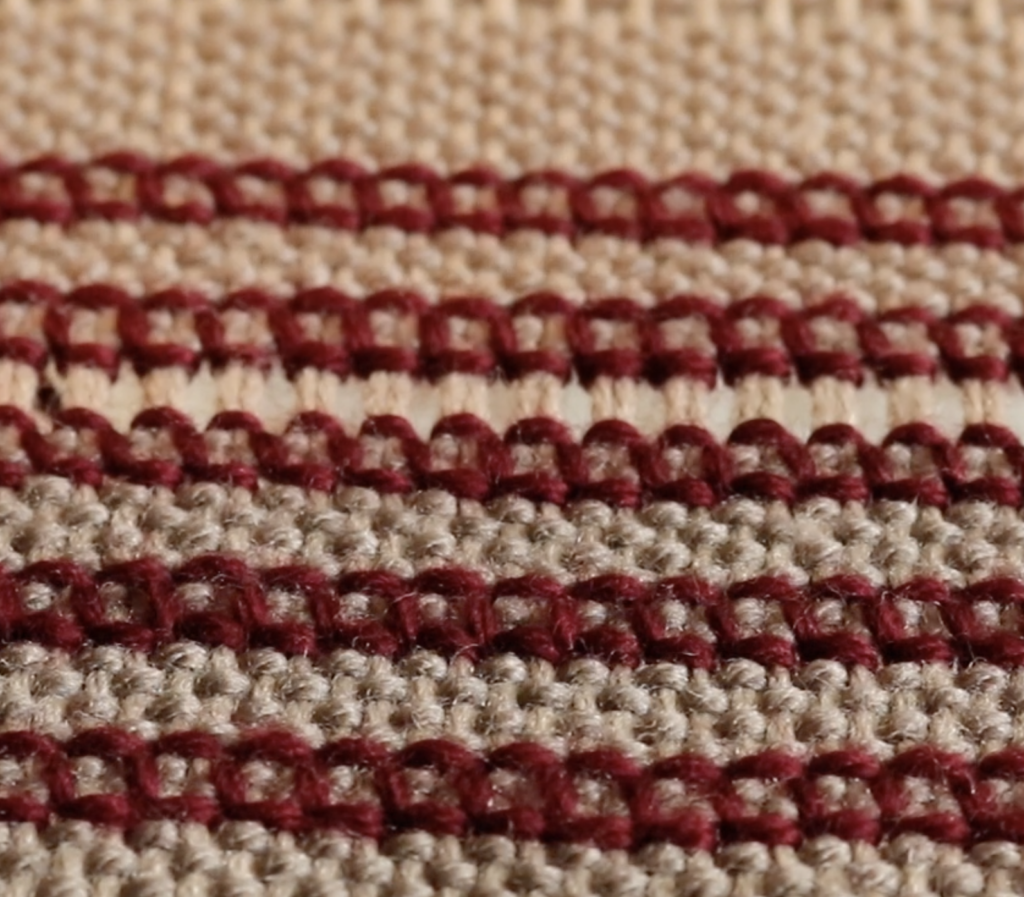
I don’t have any exact figures, but I know that weaving, and rigid heddle weaving in particular has seen a massive popularity surge this year.

It totally makes sense. Most of us have been through some sort of lockdown (some of us multiple lockdowns!) and have found ourselves shut in our homes with a lot of extra time on our hands.

I’m so happy to see that so many people have used this unprecedented time to start something new or to dive in to something they always wanted to do.

Perhaps we can use this as life inspiration for going forward. So many of us are waiting for just the right time to do what we truly love. The fact is, for some, that right time may never come. If we have learned anything this year, I think maybe it should be – DON’T WAIT! START NOW!

So, if you are one of the many who have started weaving this year or are waiting on your new loom to arrive, welcome! It’s so good to have you on the journey.

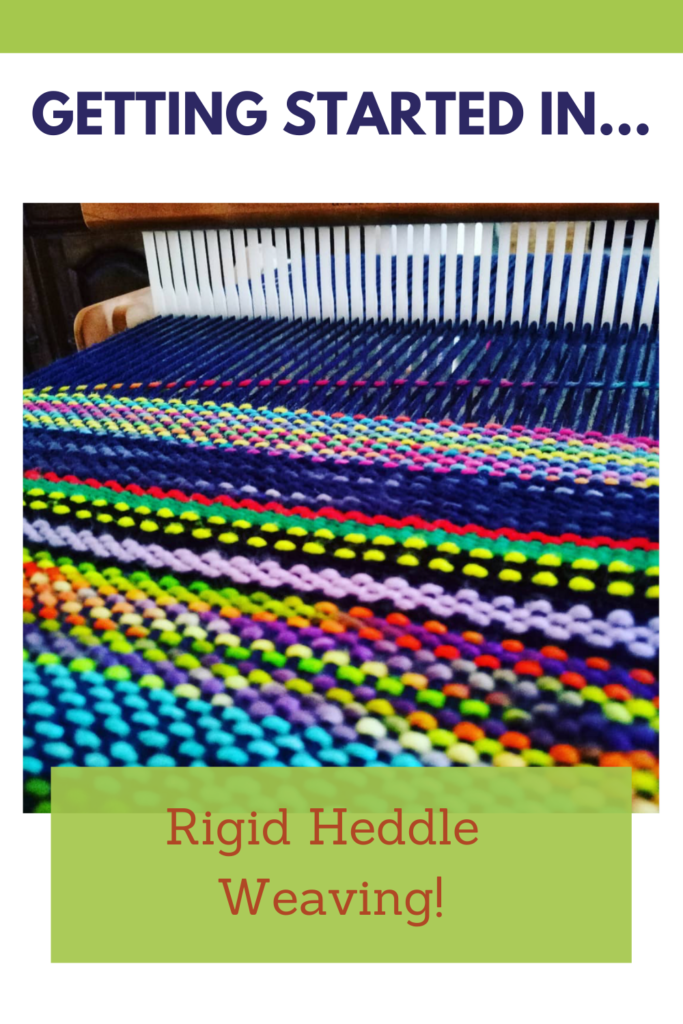
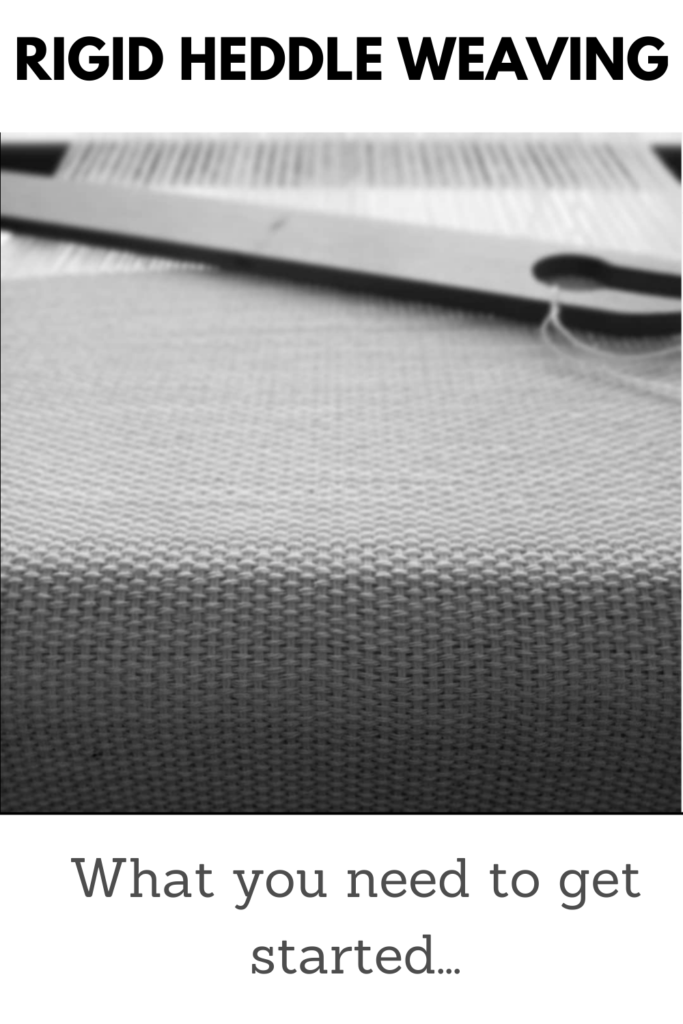
I thought that it might be useful today, to look at the bare basics you need to get started in rigid heddle weaving. I’ll break down and explain each item you will need to get up and running.

  1. A rigid heddle loom

That’s a can of worms right there! There are a lot of choices and in the interests of not keeping you here for the next 3 days, I’m going to keep this section brief and refer you to further learning resources if you need them.

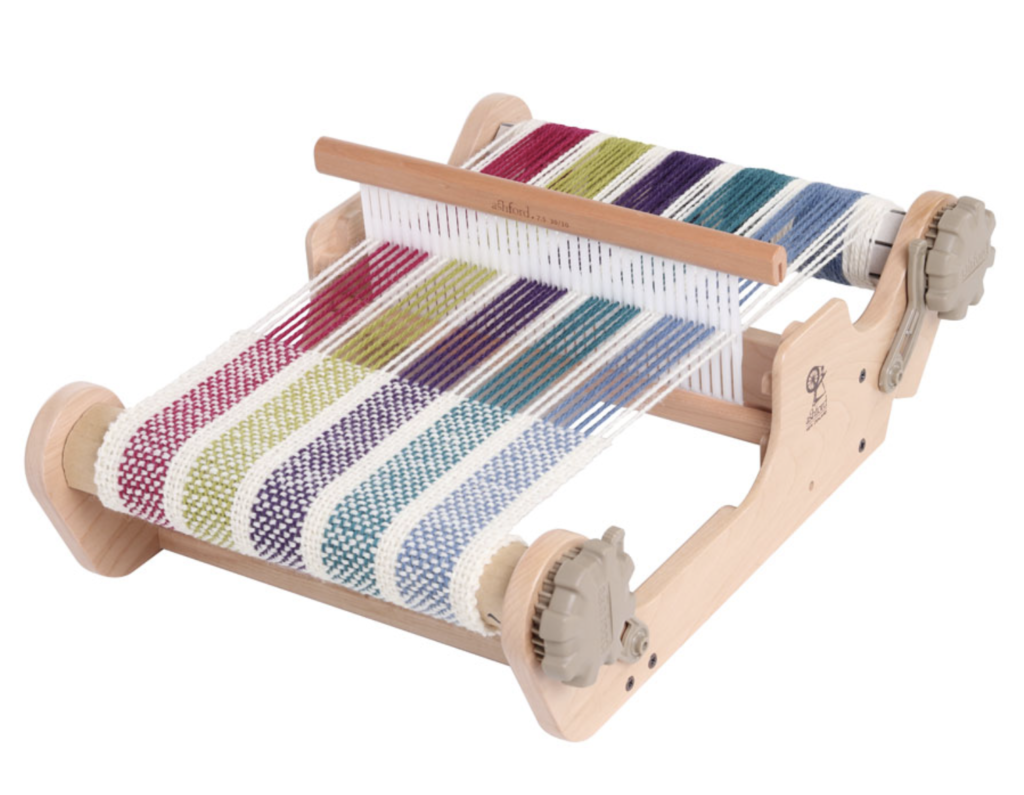
I do want to say, you do not need the biggest, most expensive loom if you’re just starting out. If you’ve never used a rigid heddle loom and are not sure what to expect, start out small. A Sampleit (I have one of these!) or Cricket is a perfect size for practicing weaving, and you might be surprised at the range of items you can weave, even on a small loom.

If you have already tried out a loom and have goals for the types of items you want to weave, you may want to go with something larger. As a general guide, a 24″ loom is great for scarves, towels, table runners and bags. A 32″ and larger is great for large shawls, baby blankets and yardage fabric.

For a larger loom you will also want to consider purchasing a stand for ease of use.

If you want to know more about various looms available, how to choose a loom that will suit you and what you can achieve with a rigid heddle loom, go here.

2. A heddle/reed

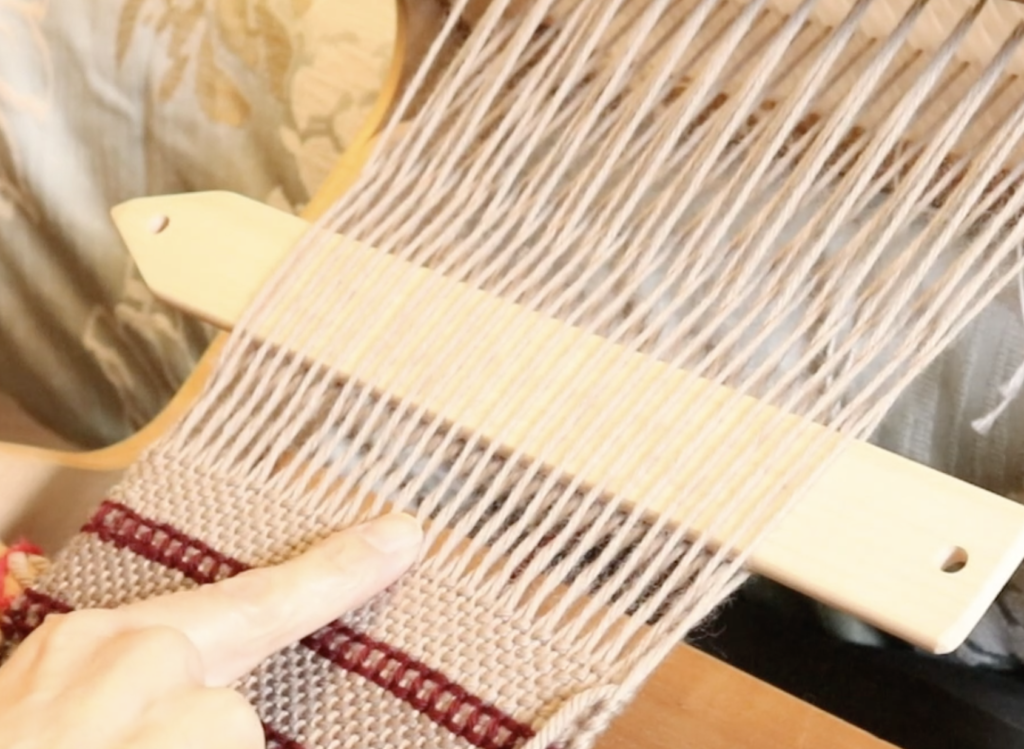
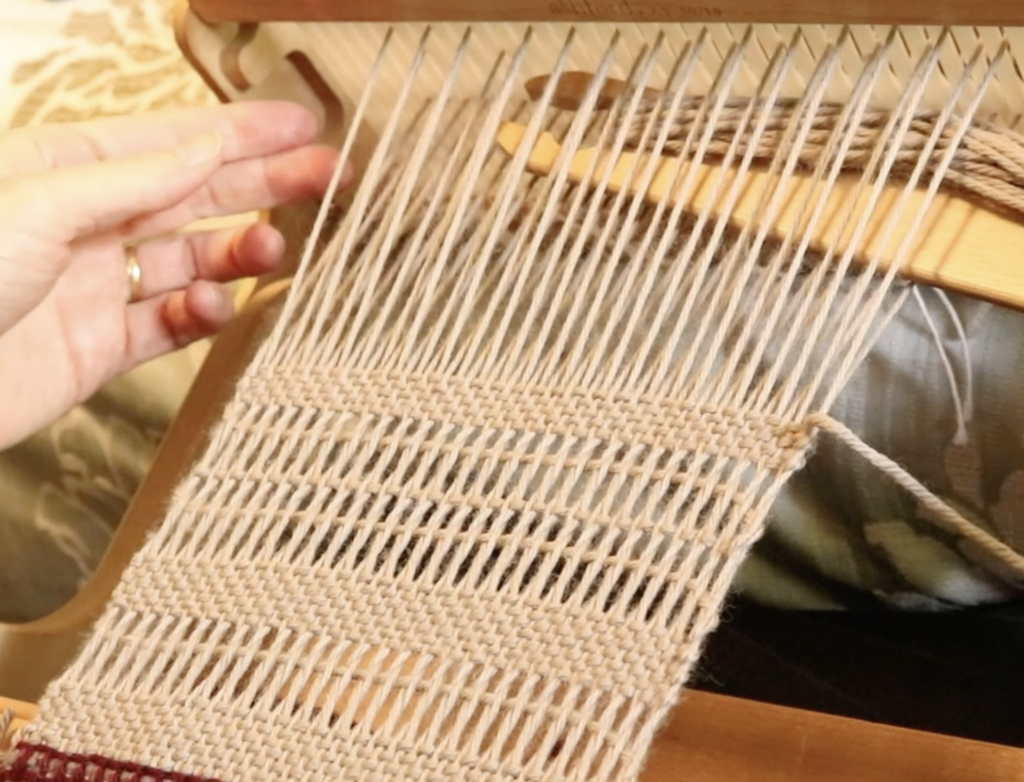
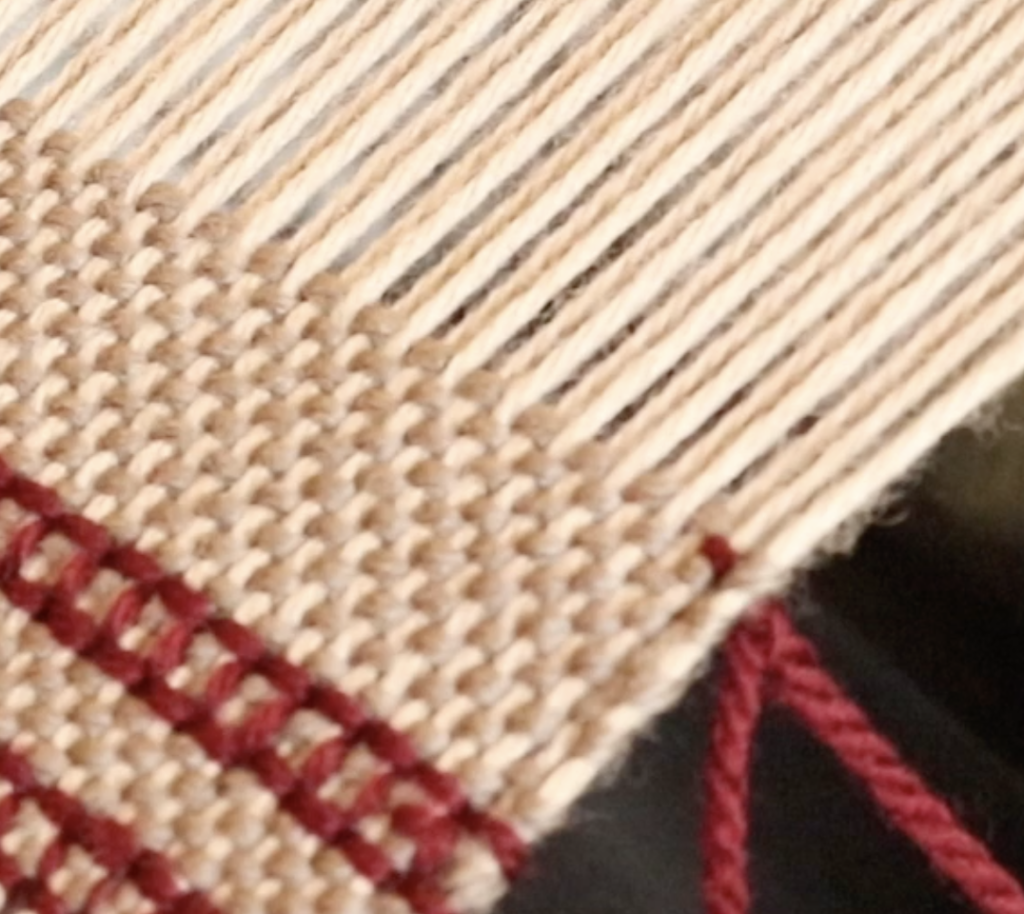
You will receive a heddle/reed with your rigid heddle loom. It will either be a 7.5 or 8 dent, depending on the brand. This is a great size to start out with and you don’t need to purchase any other sizes initially unless you are really keen to work with some lighter (fingering weight, 8/2 weight) yarns.

If you do want to grab an extra heddle, I recommend a 10 dent – it’s a great all rounder.

3. A stick shuttle

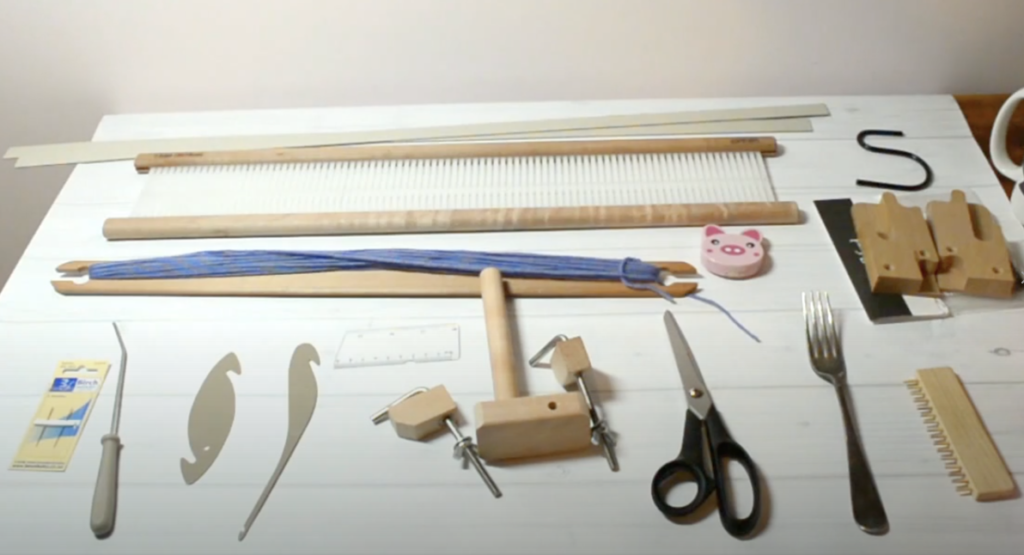
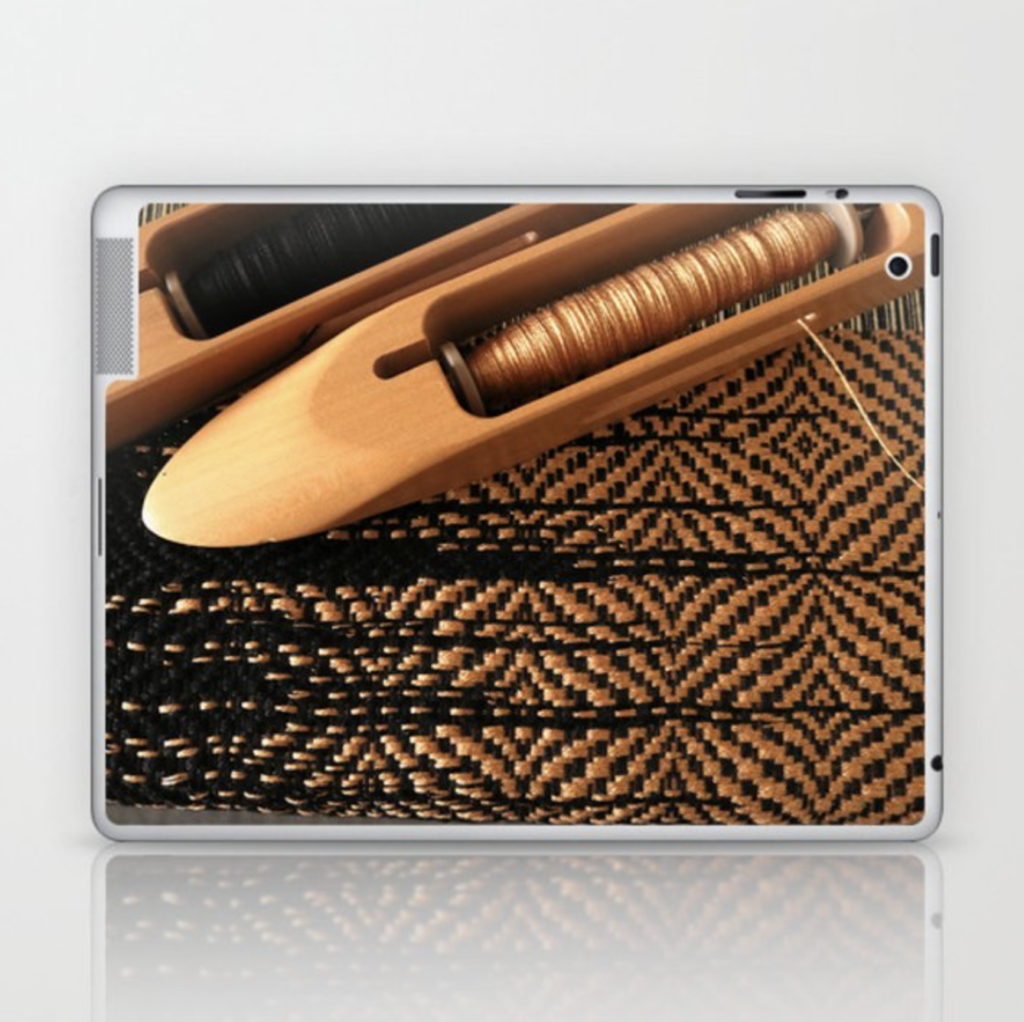
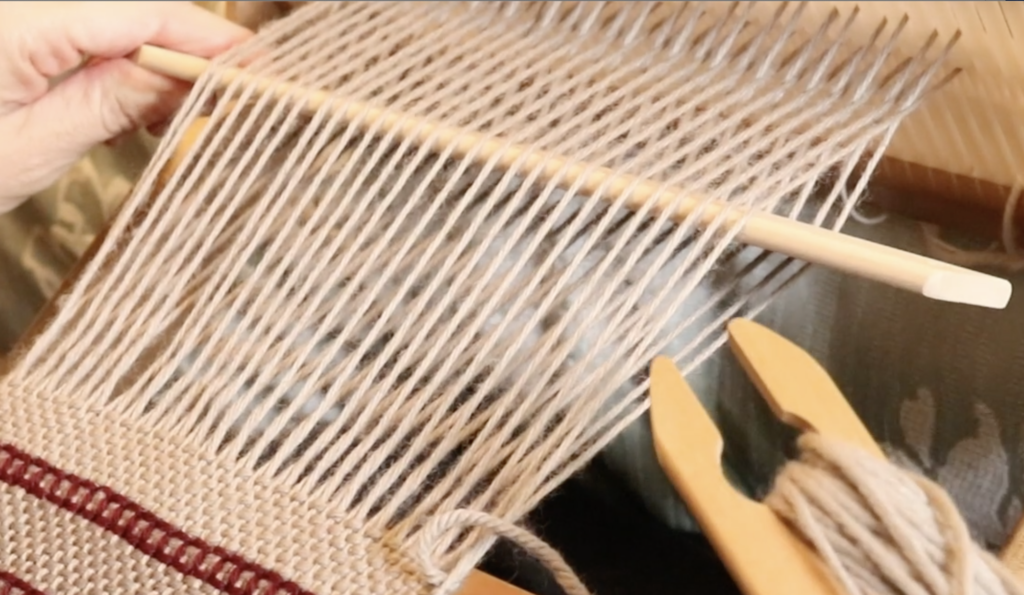
You should also receive a stick shuttle appropriate to the size of your loom when you purchase. This is what you wind your weft yarn on to in order to weave.

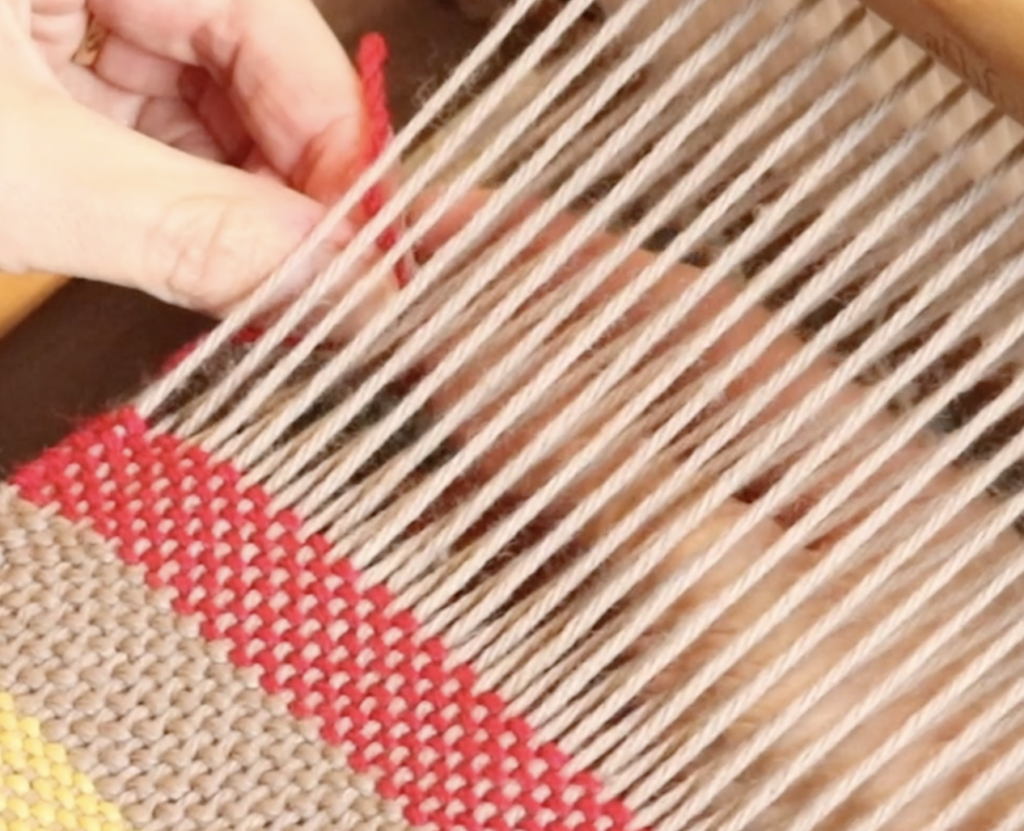
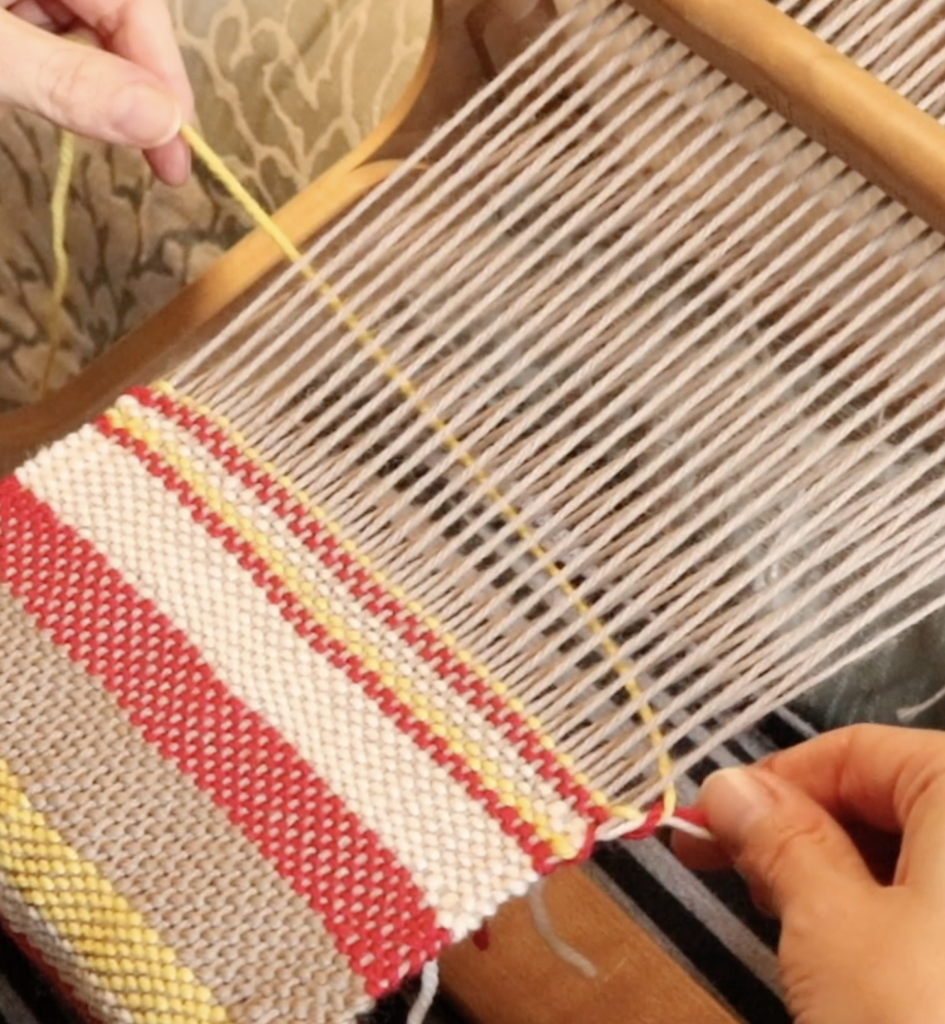
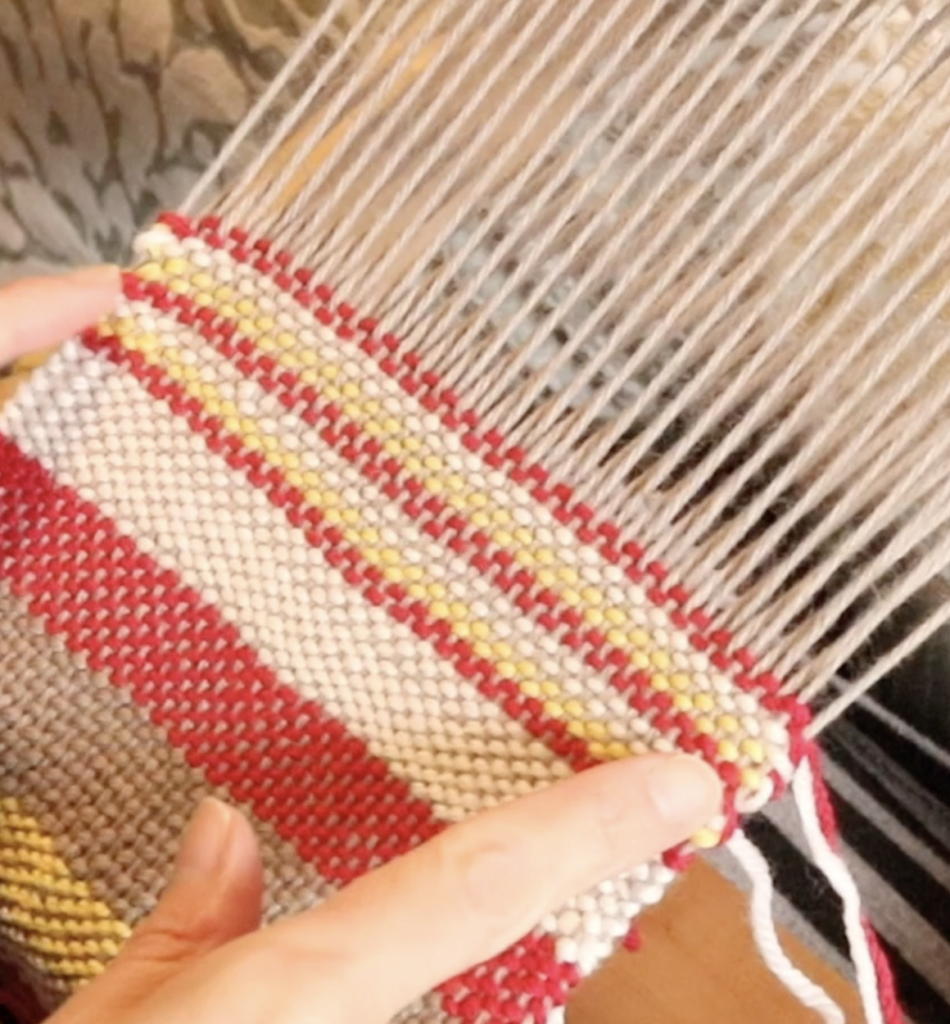
If you want to weave with more than one weft colour (say if you’re weaving stripes) you will want more than one stick shuttle. They are quite affordable, and some weavers even make their own.

If you need to know how to wind a stick shuttle, check out this video:

4. A threading/reed hook

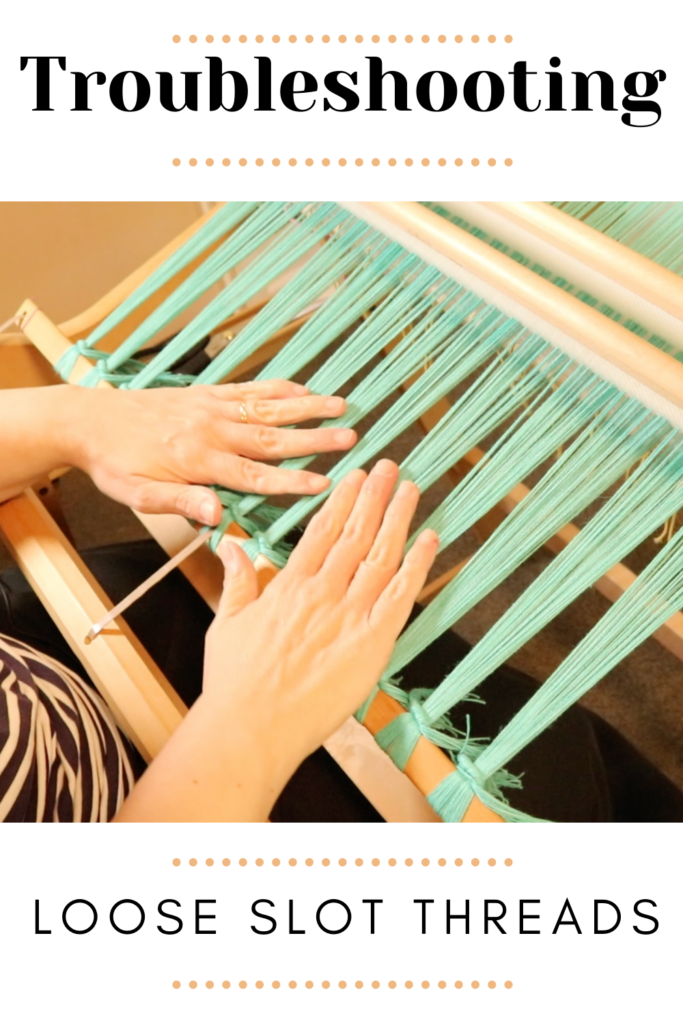
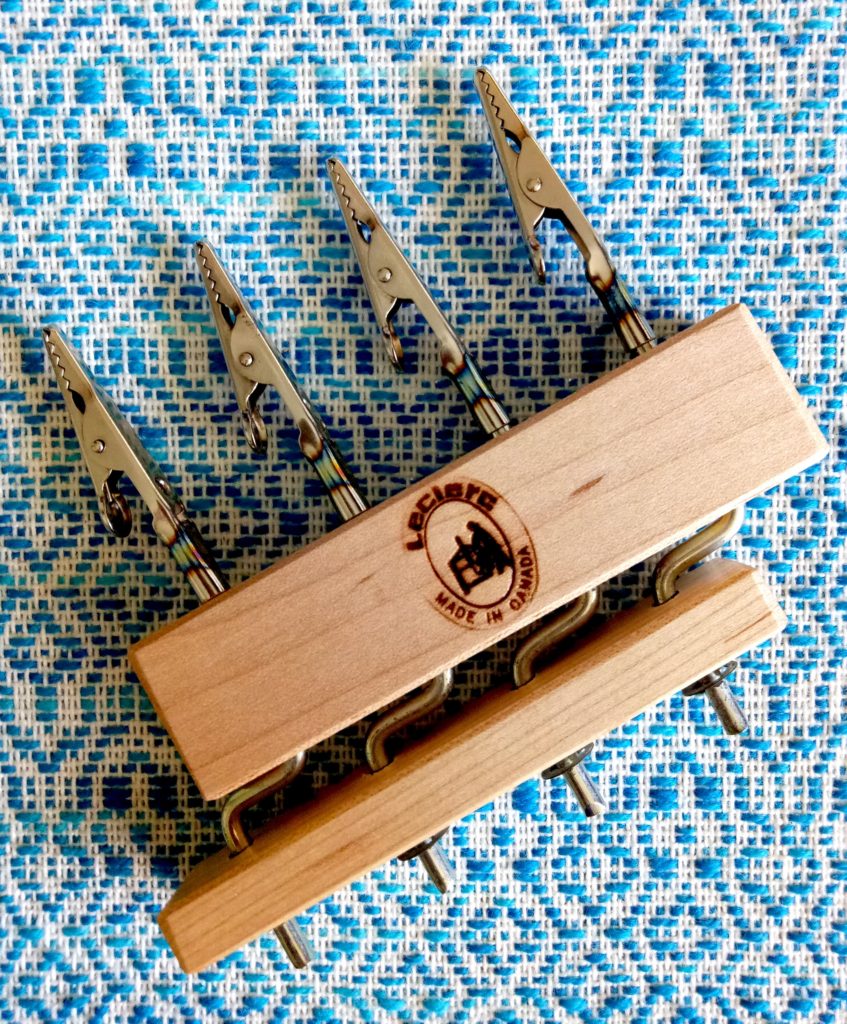
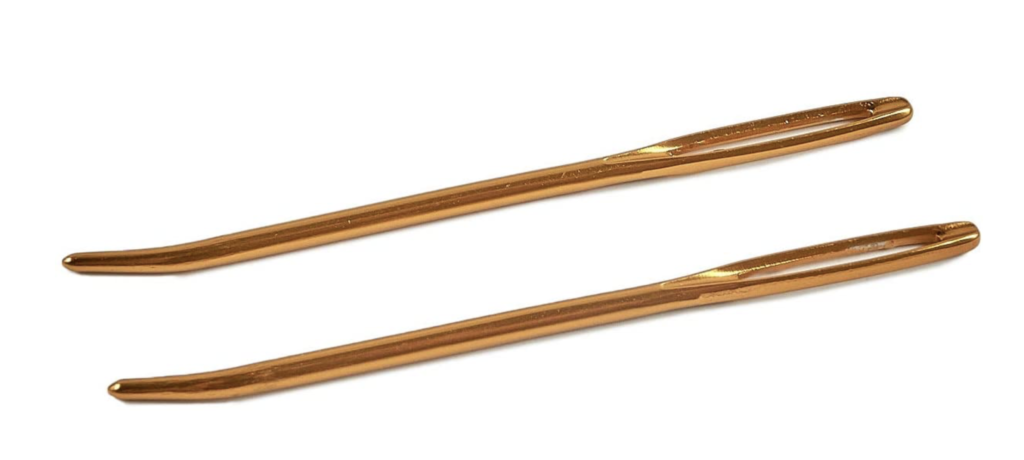
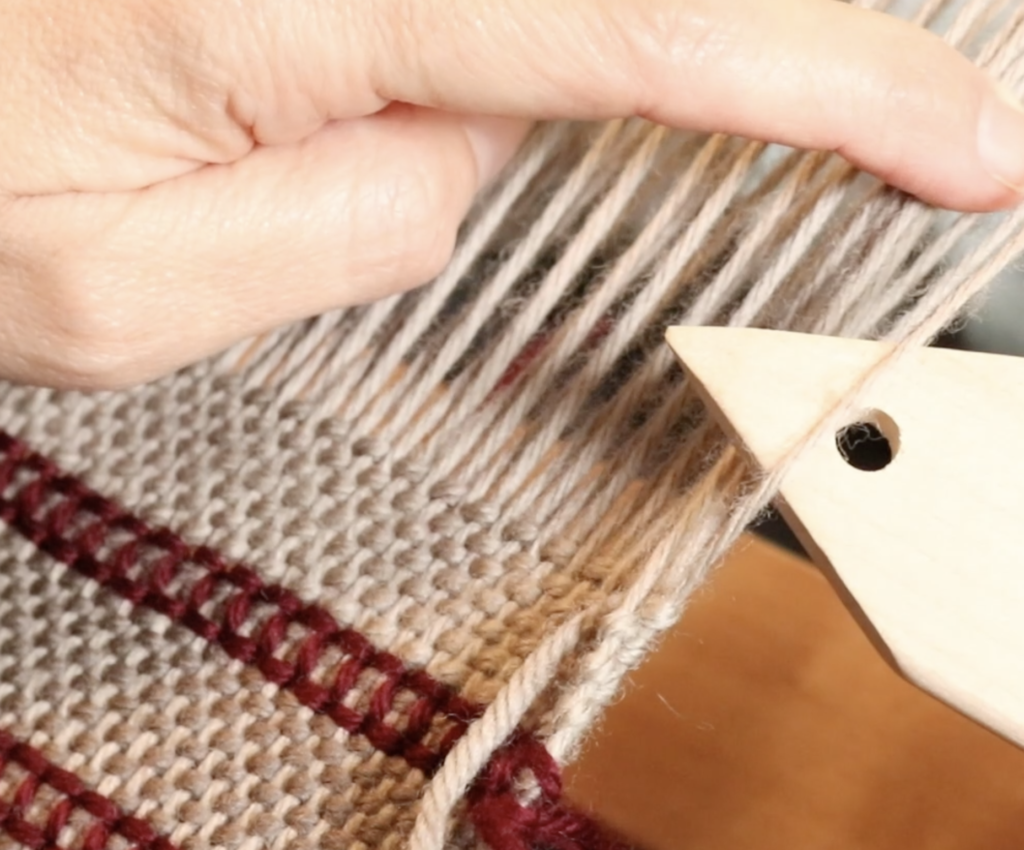
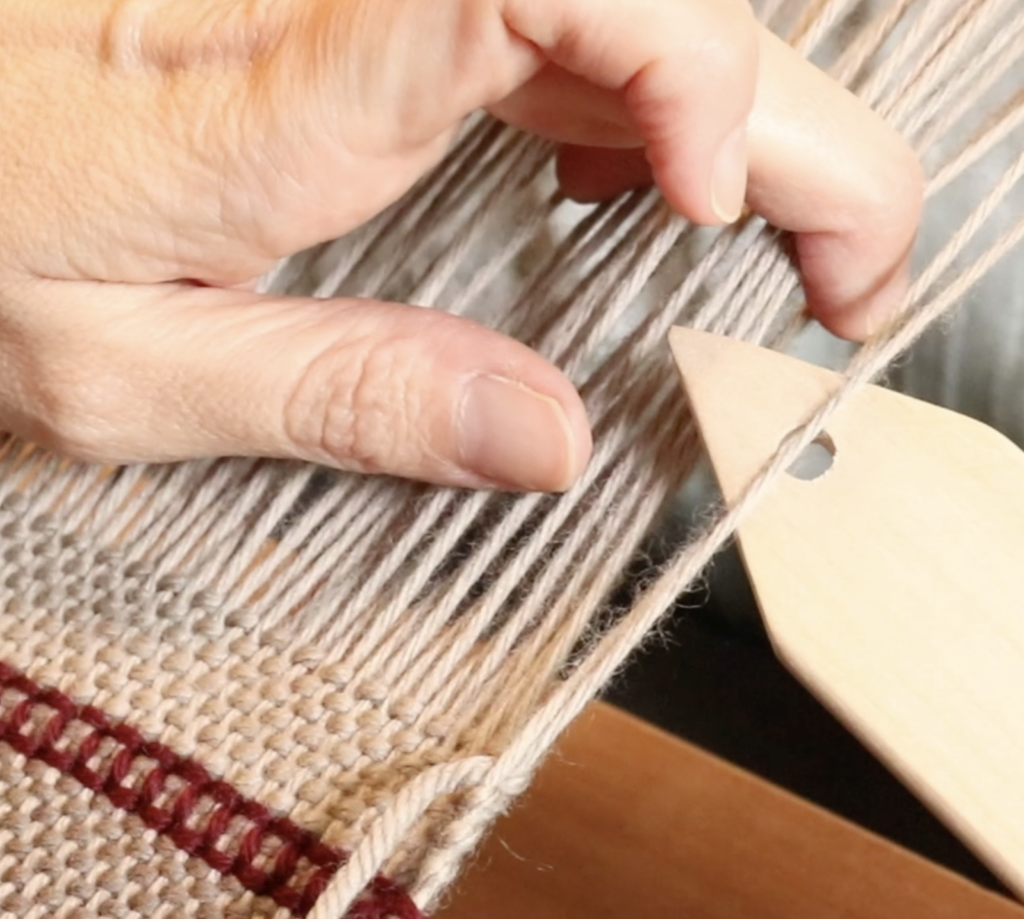
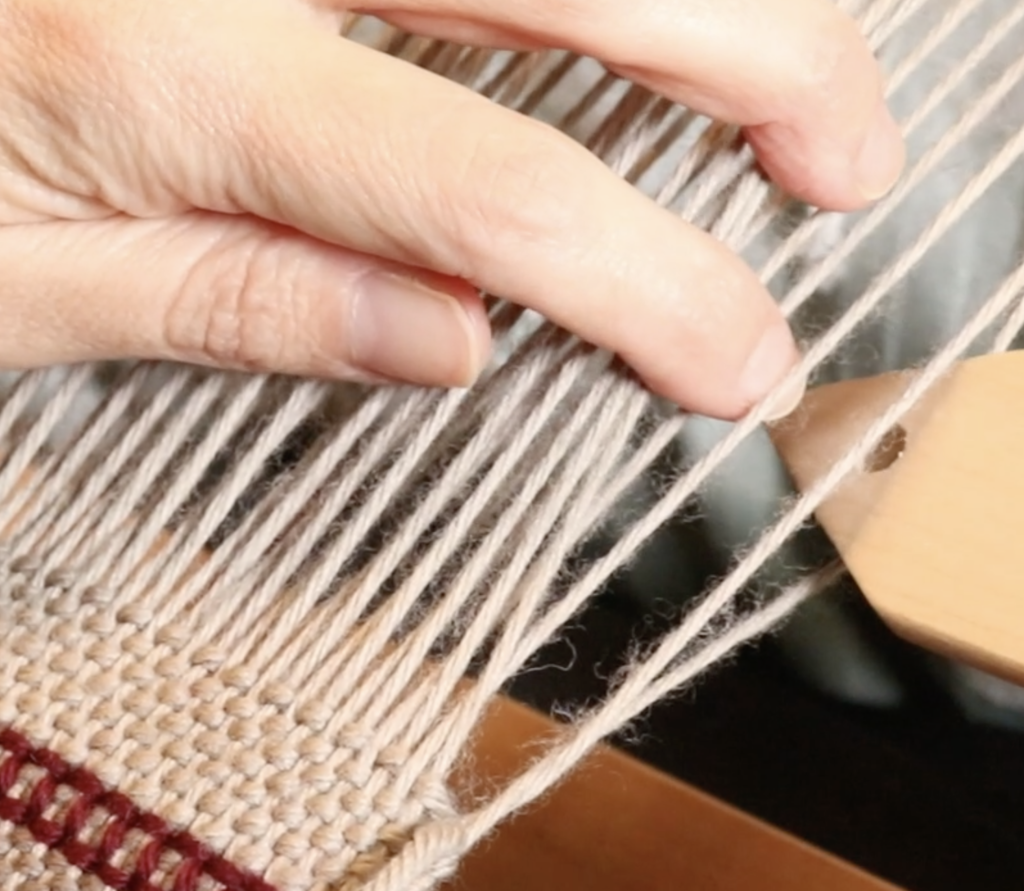
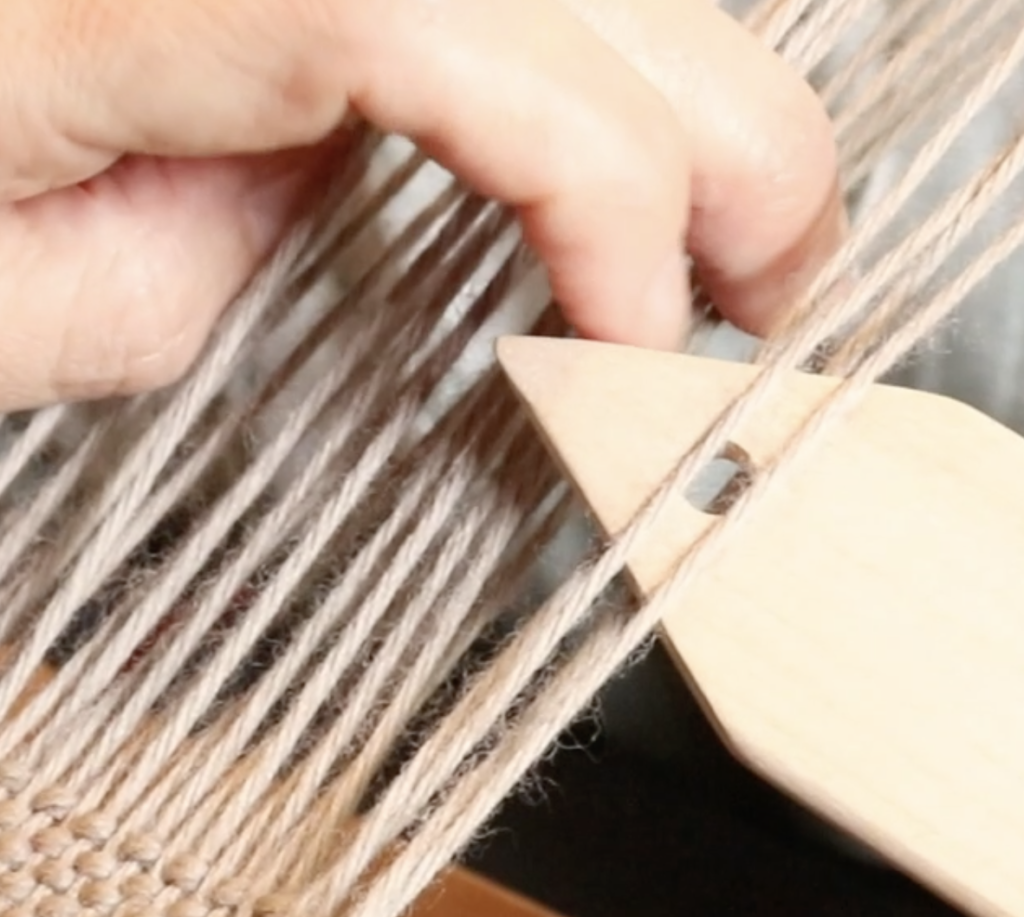
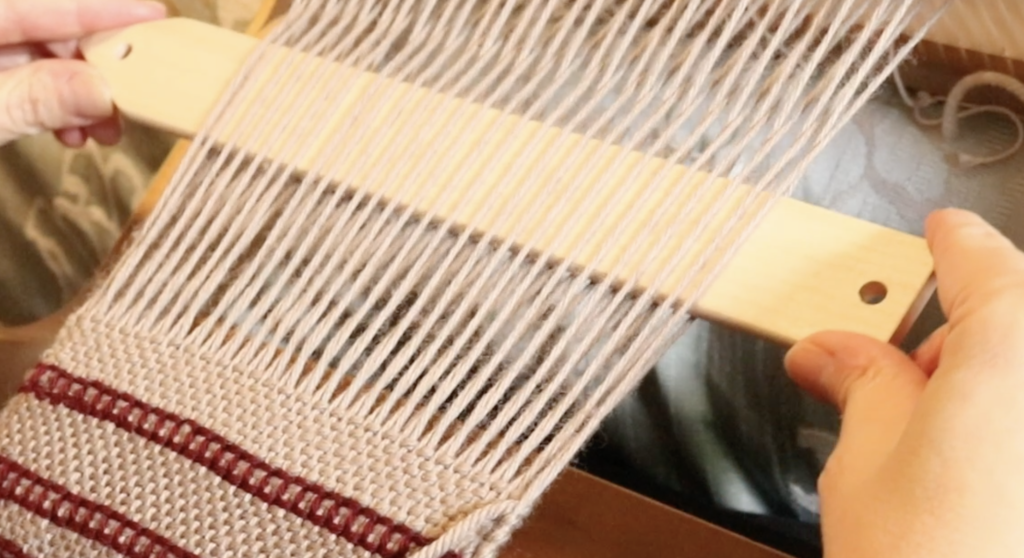
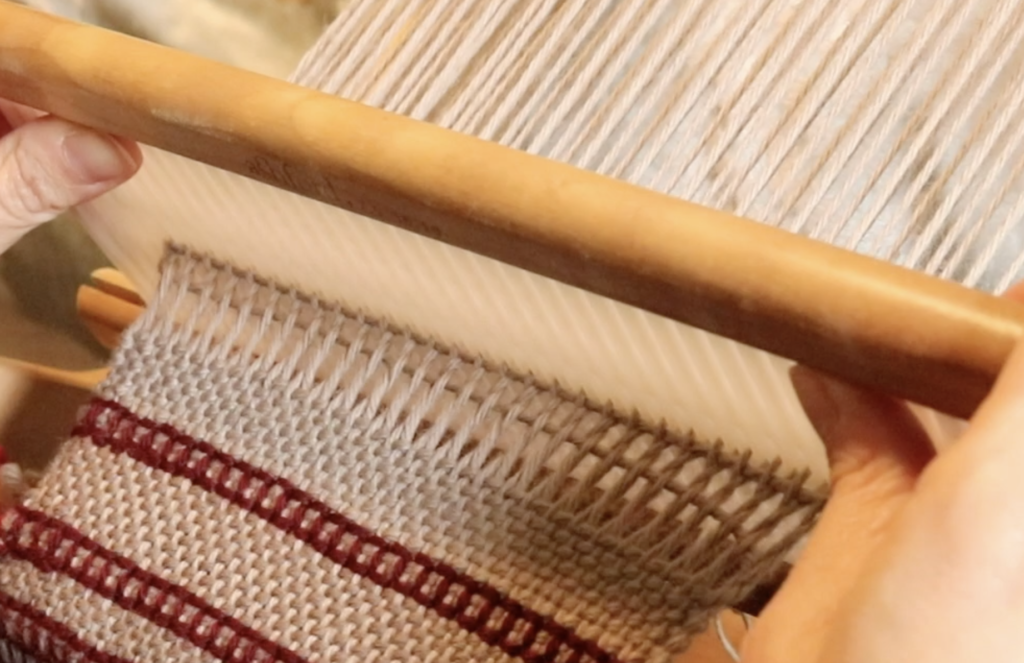
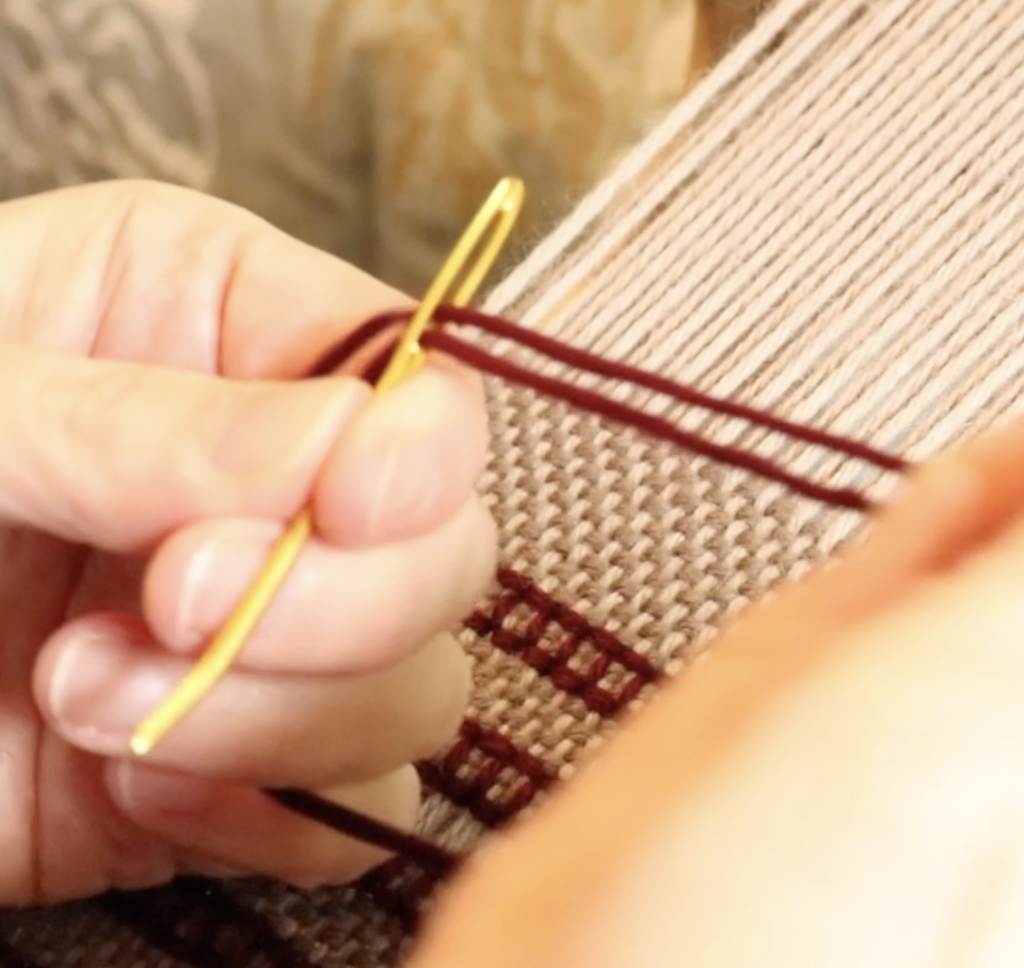
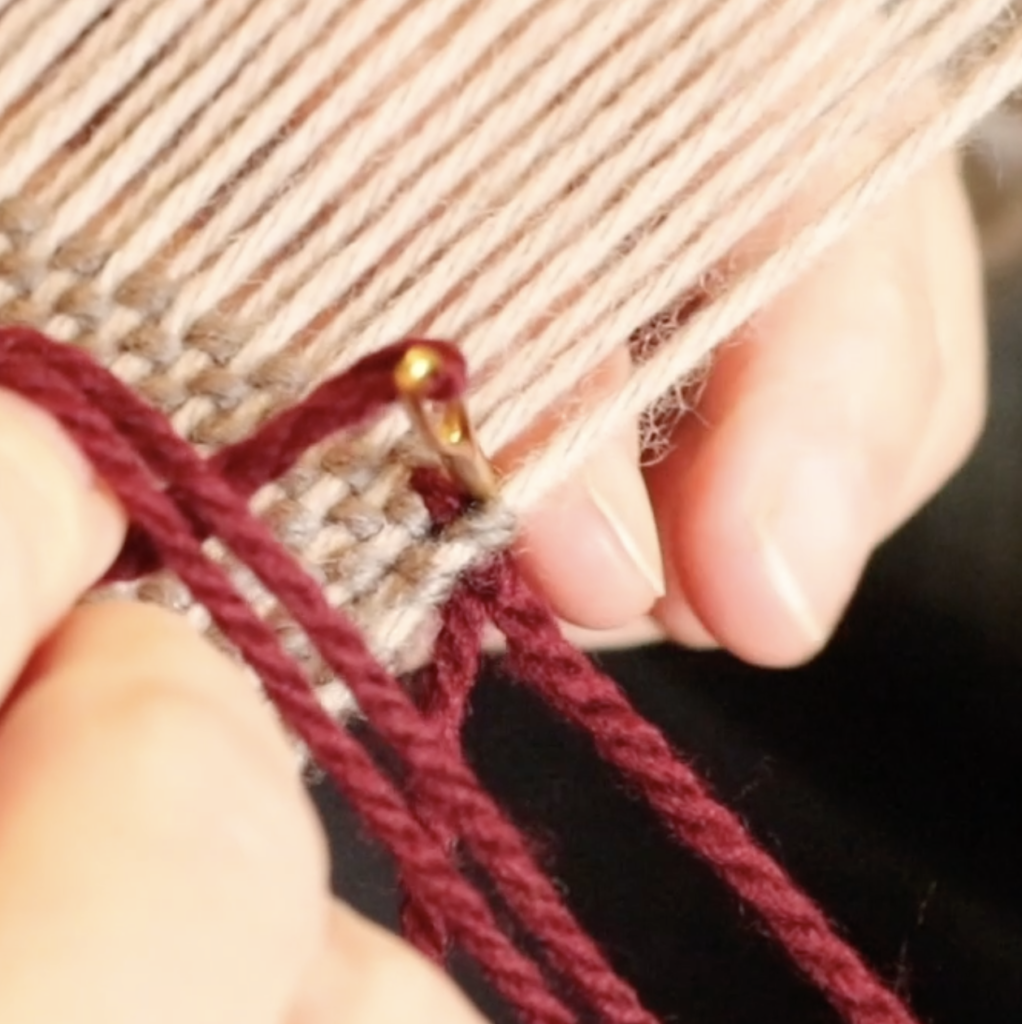
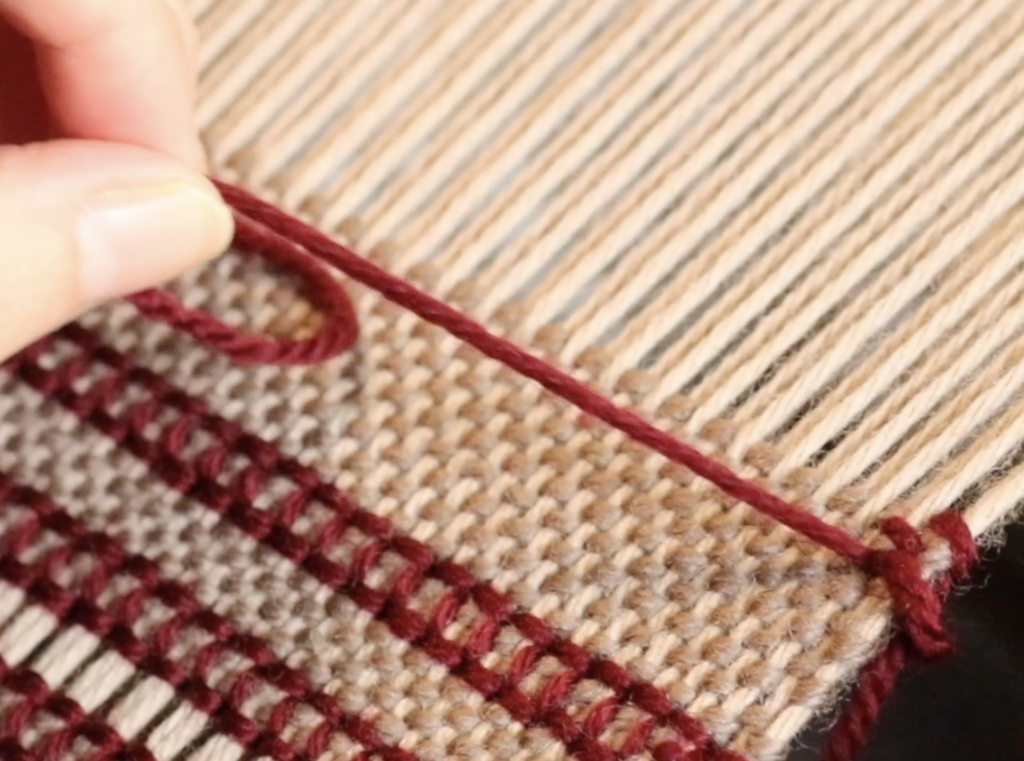
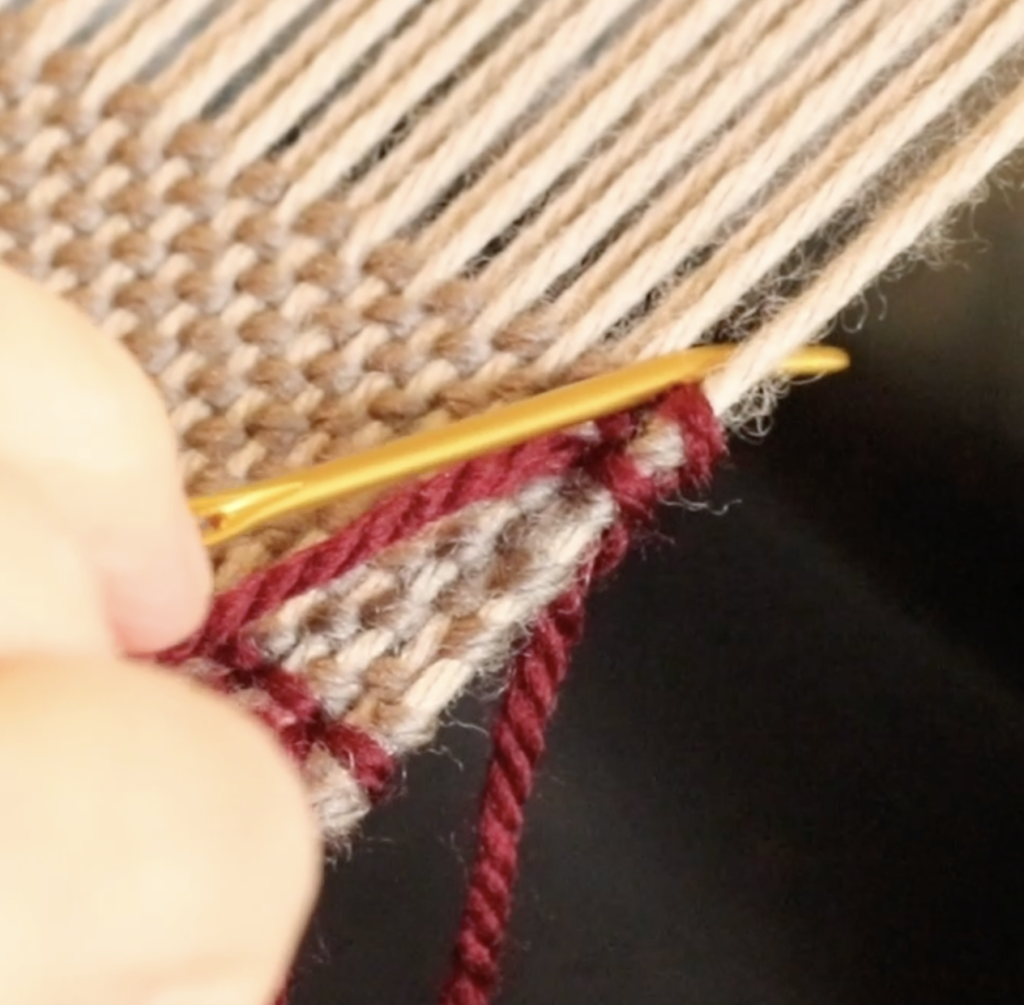
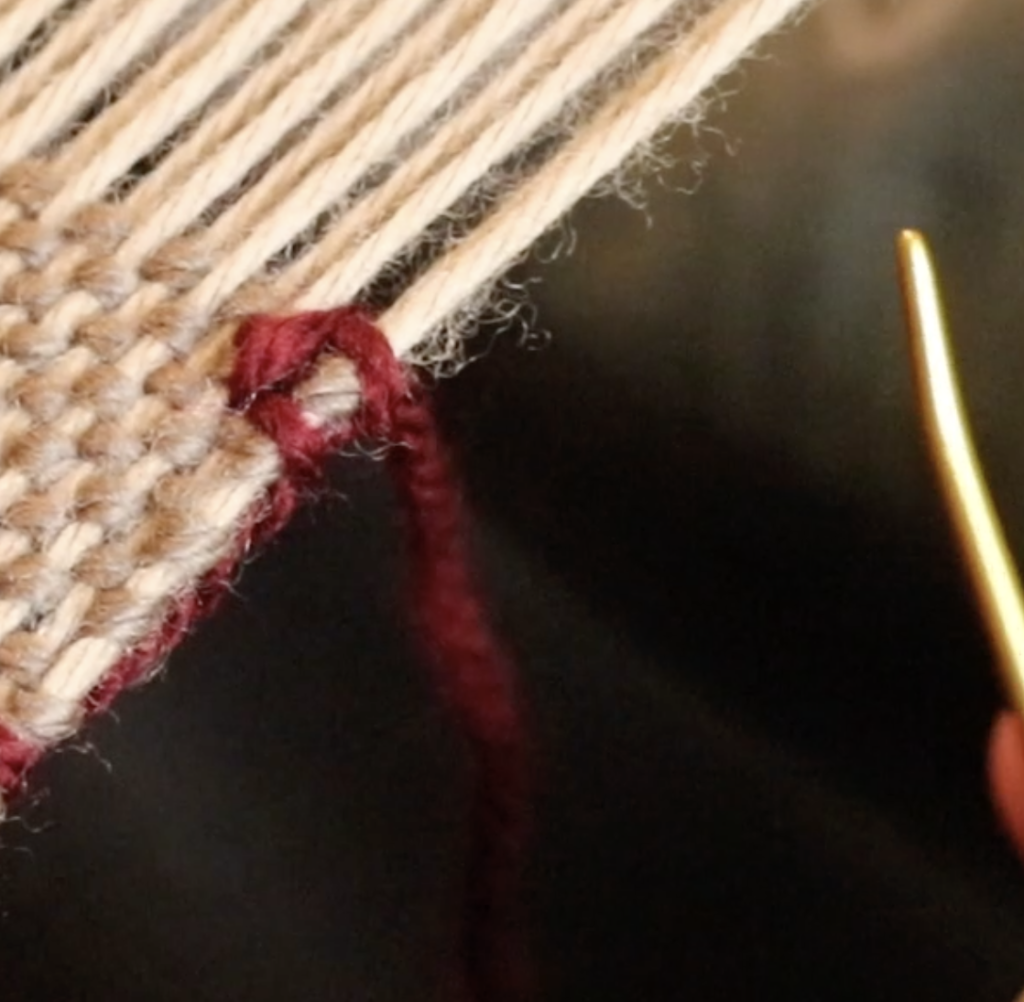
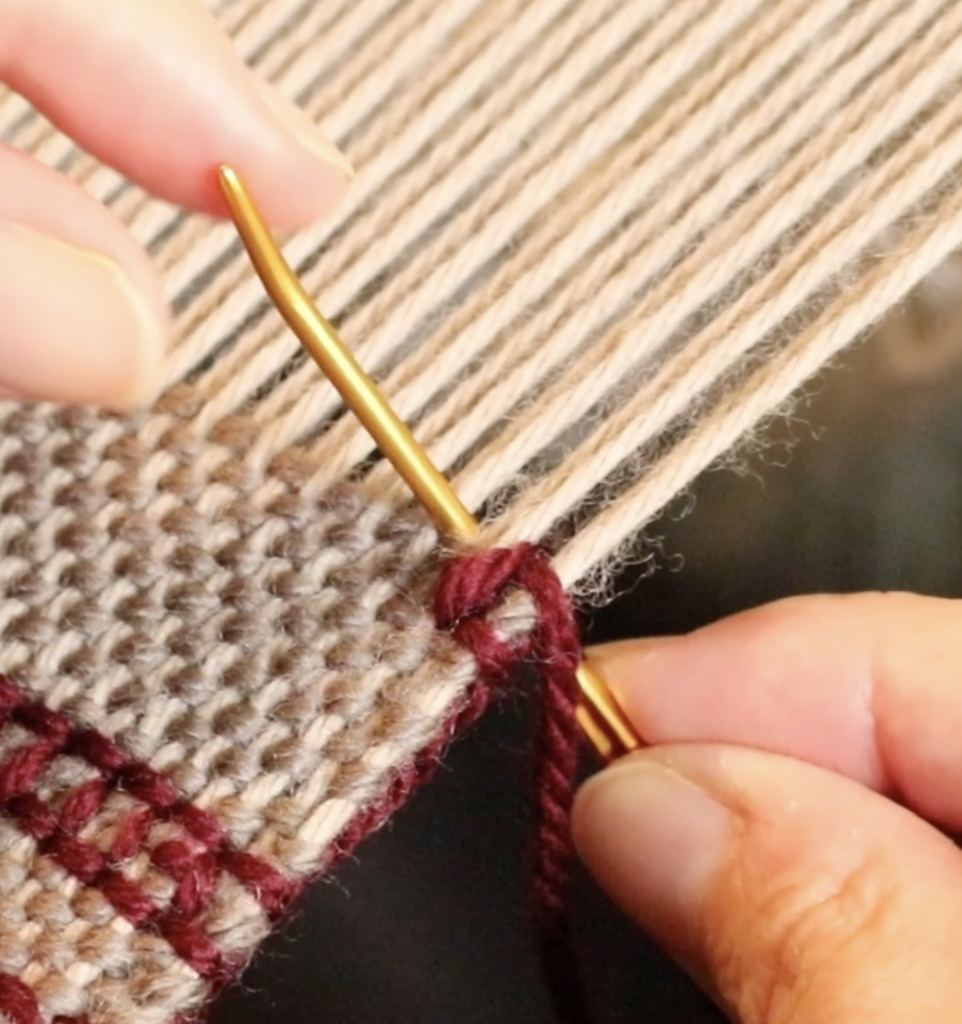
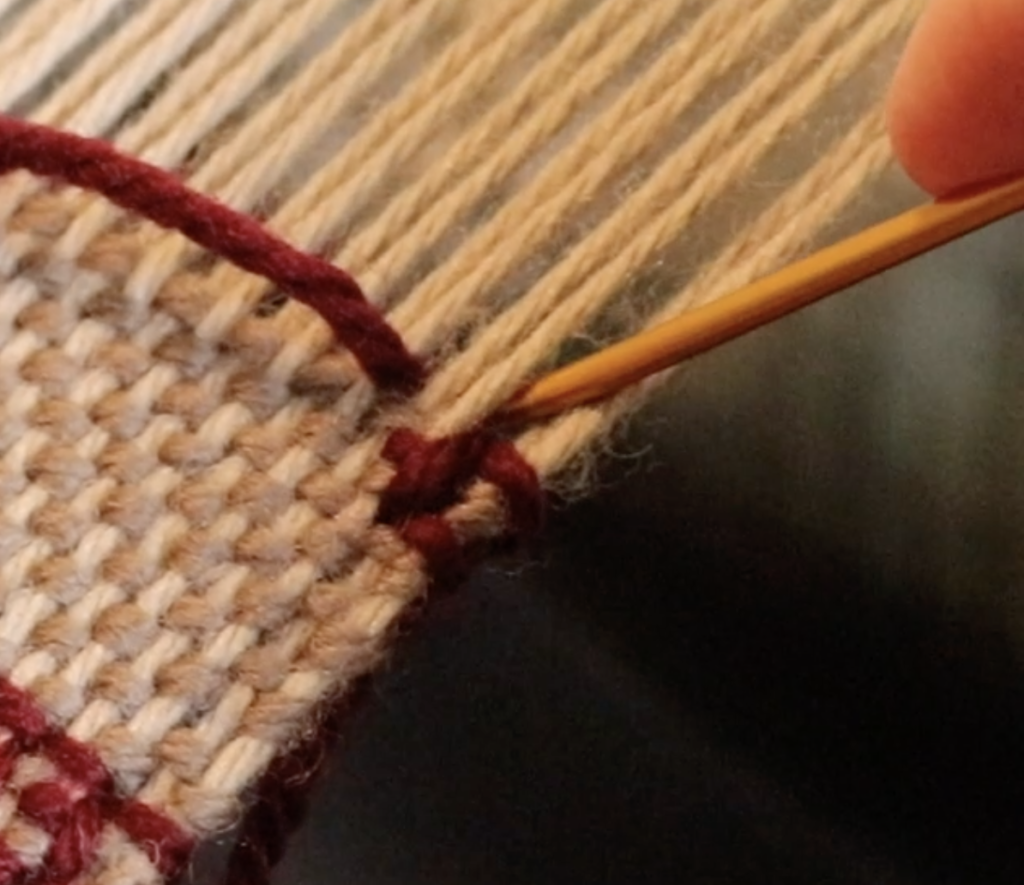
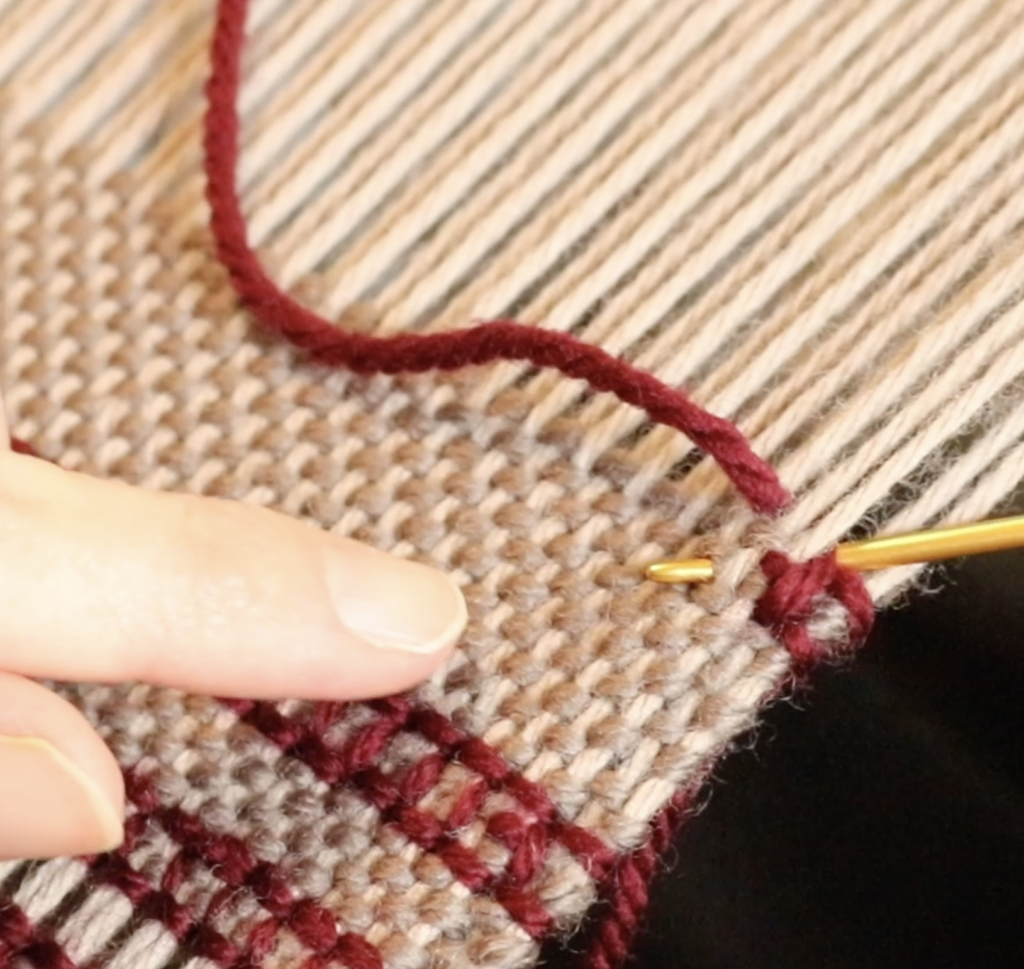
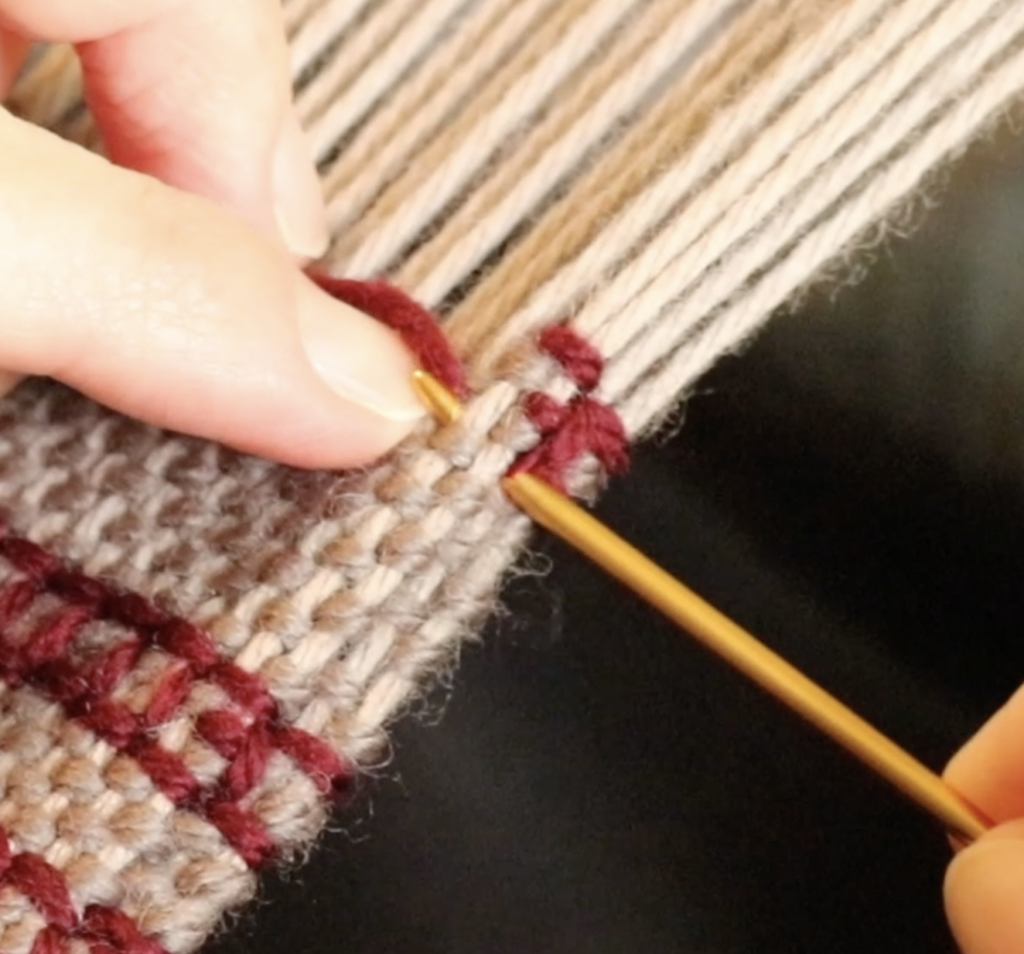
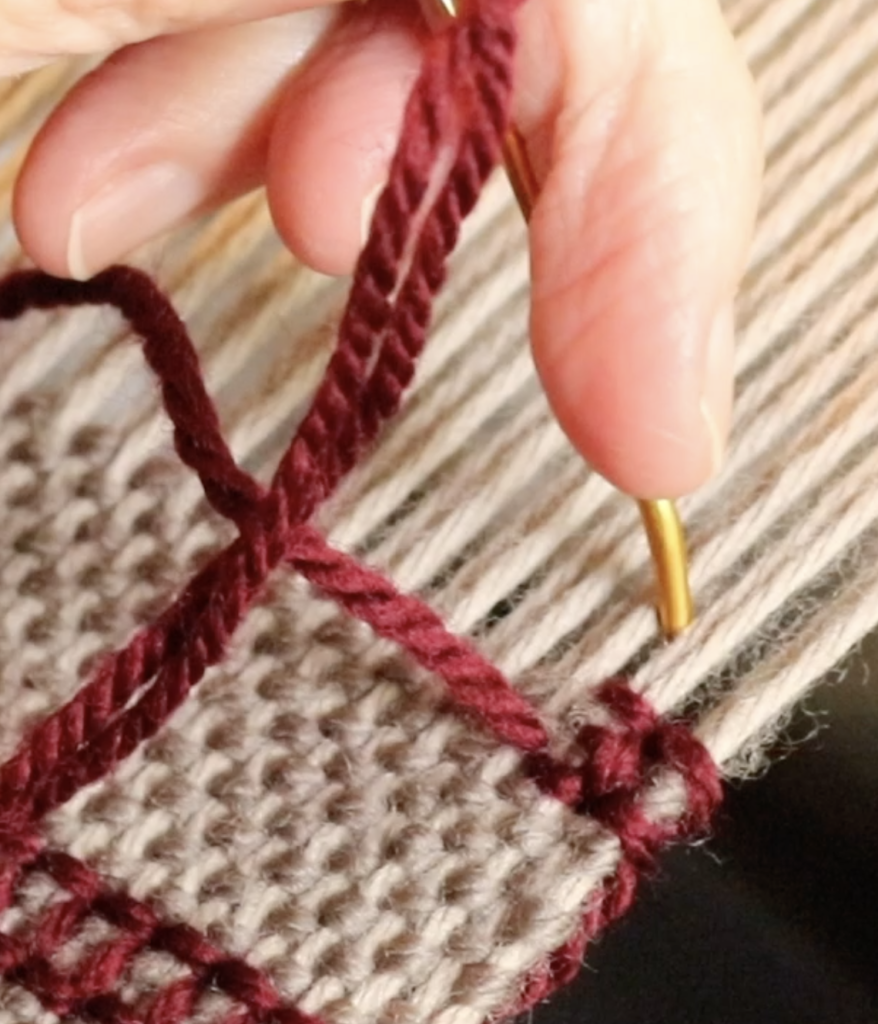
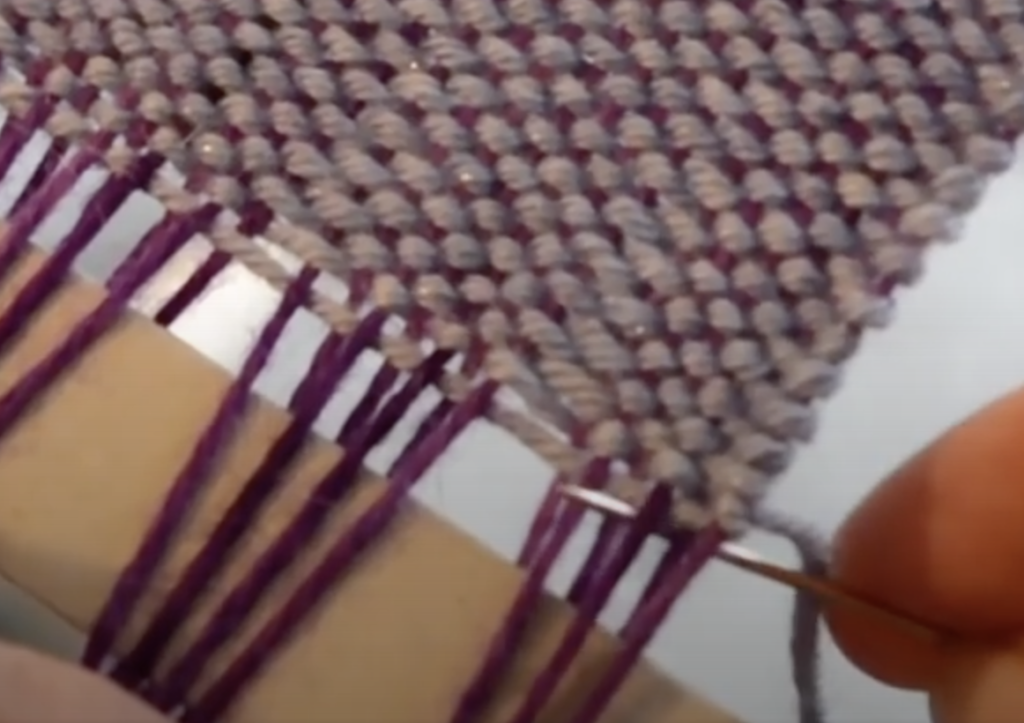
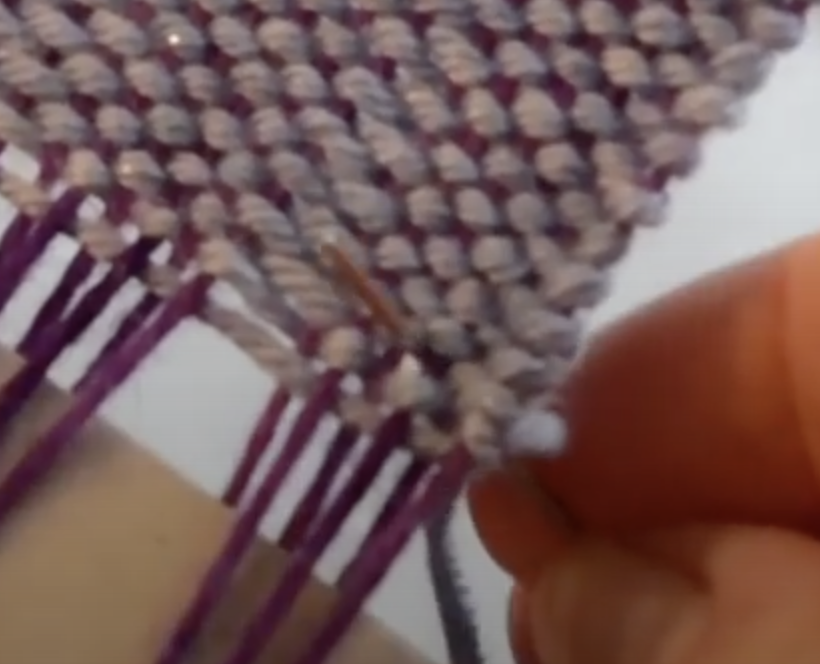
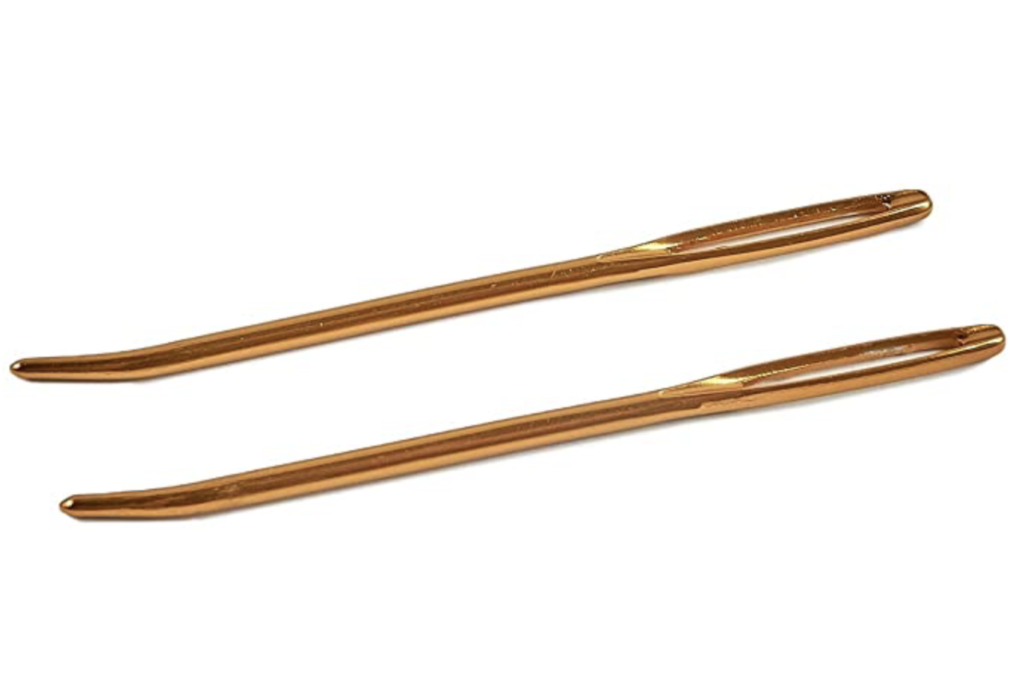
You may or may not receive a threading and reed hook with your loom, but you will definitely need them! They can be purchased as a separate threading hook or reed hook, but I love to use my double ended heddle hook.

These are two tools in one, they are cheap, I like that they lie flat and don’t roll off surfaces and I find the flexibility of the plastic great when threading. I have also found that metal hooks tend to split my yarn when I’m using a thicker yarn, whereas the plastic is a little kinder.

If you need tips on how to thread your rigid heddle loom, check out this video:

5. Separators

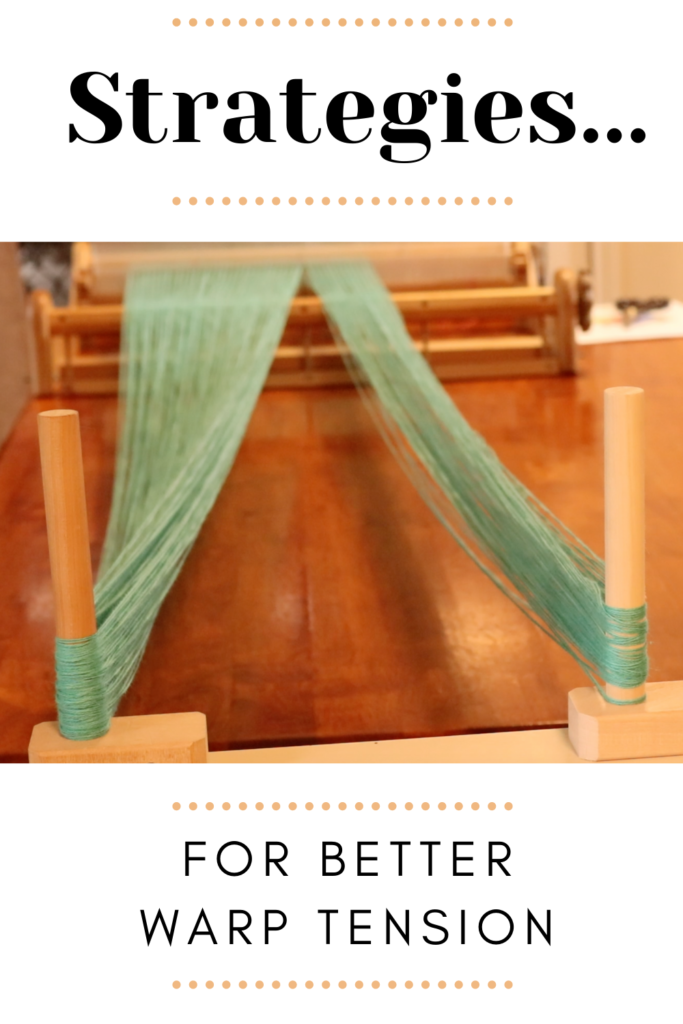
You will need something to separate your warp with when rolling it on to the loom. This is crucial for good tension. You have a few options for separators.

  • Cardboard stick separators
  • Corrugated cardboard
  • Roll of thick paper (this is my favourite)
  • Drawer liner

6. Warping peg

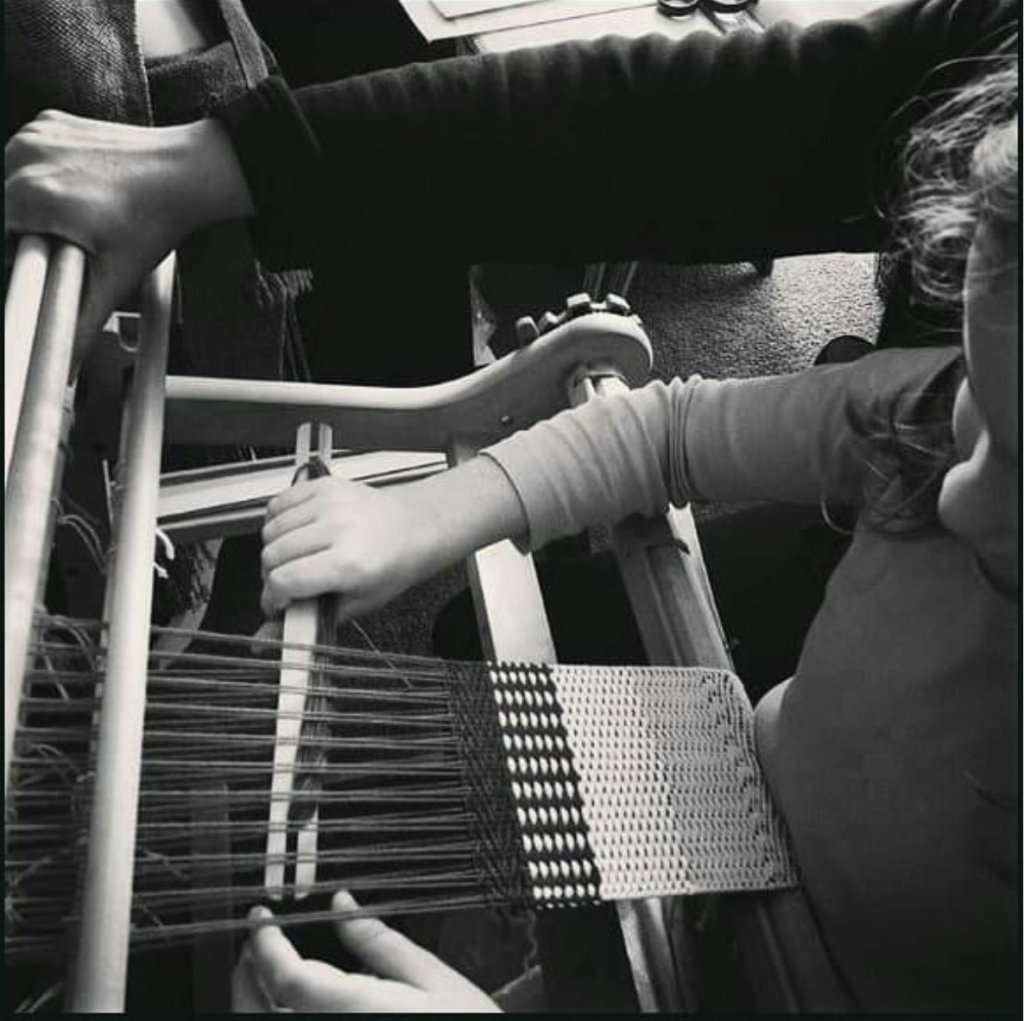
Most weavers start out warping their looms directly, using a warping peg. This is a really fast and easy way to warp and also means you don’t have the added expense of a warping board, frame or mill. A warping peg and clamp may come with your loom, as well as an extra clamp for fixing your loom to a table.

7. Inch ruler

This is used to determine the correct sett of your yarn. This is particularly important when you’re starting out and getting to know how different yarns behave in different projects.

You could also use a wraps per inch tool or yarn gauge or a sett checker.

If you need to know how to determine sett for your yarn, have a look at this video:
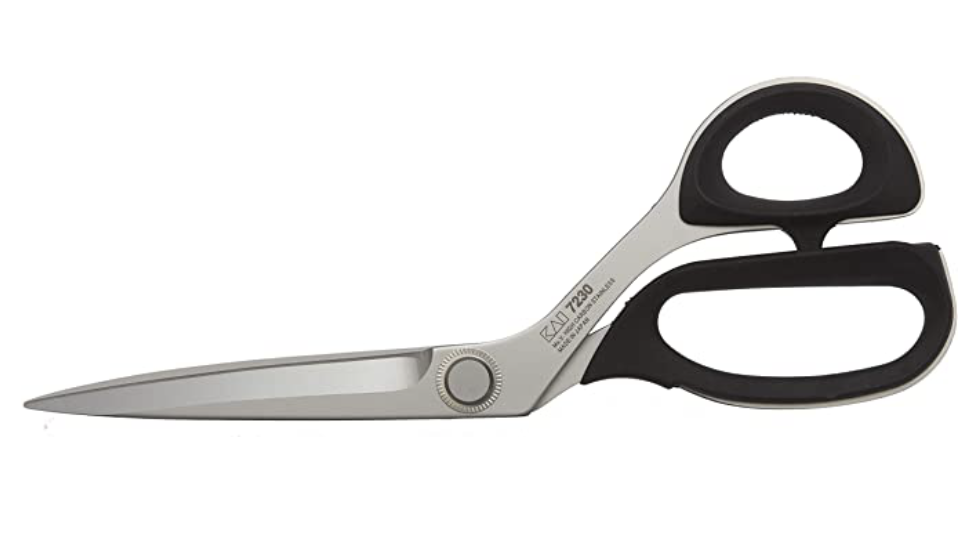
8. Scissors

A nice, sharp pair of scissors will save you a lot of headaches. I have a large pair of dressmaking shears for cutting off the warp and cutting my handwoven fabric and a smaller, embroidery sized pair I keep close to the loom for snipping weft threads. Some weavers like to use thread snips as their smaller pair.

9. Tape measure

You will need a tape measure to measure out your warp length and to measure your weaving as you advance your warp. I am frequently seen with a tape measure hanging around my neck, I use them so often!

They are very affordable, so I like to have a few that I can leave in different places and always have one near at hand.
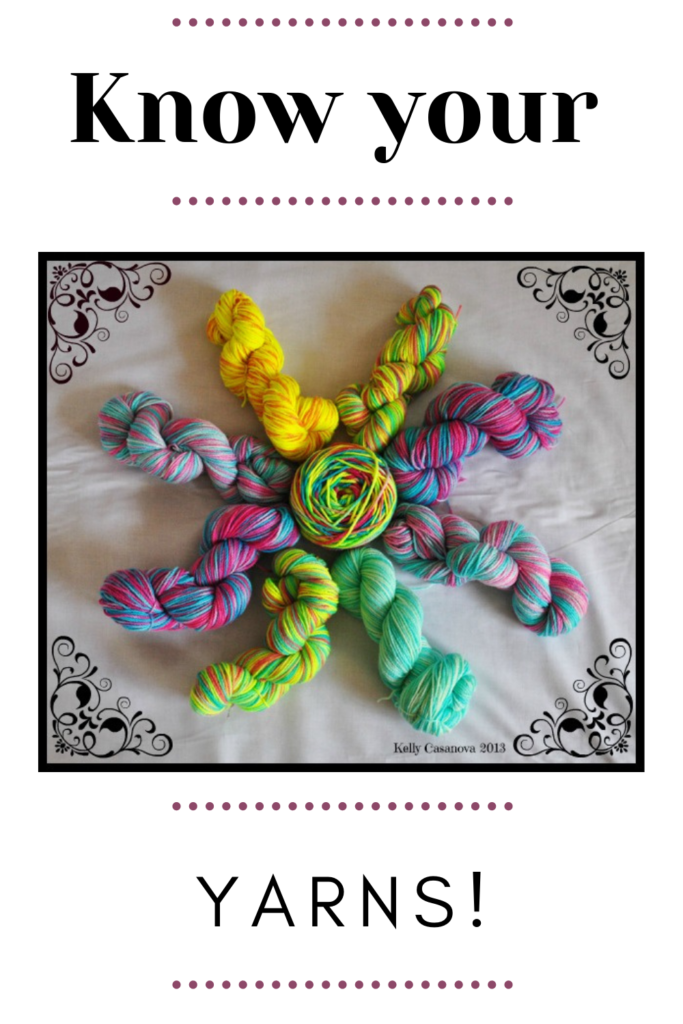
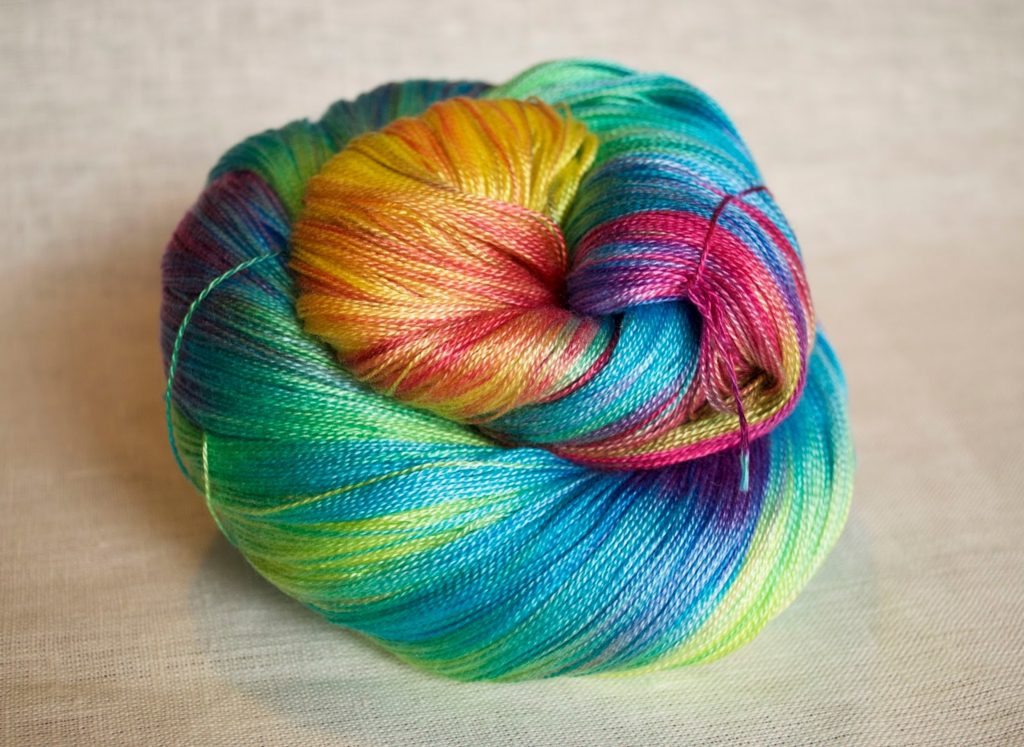
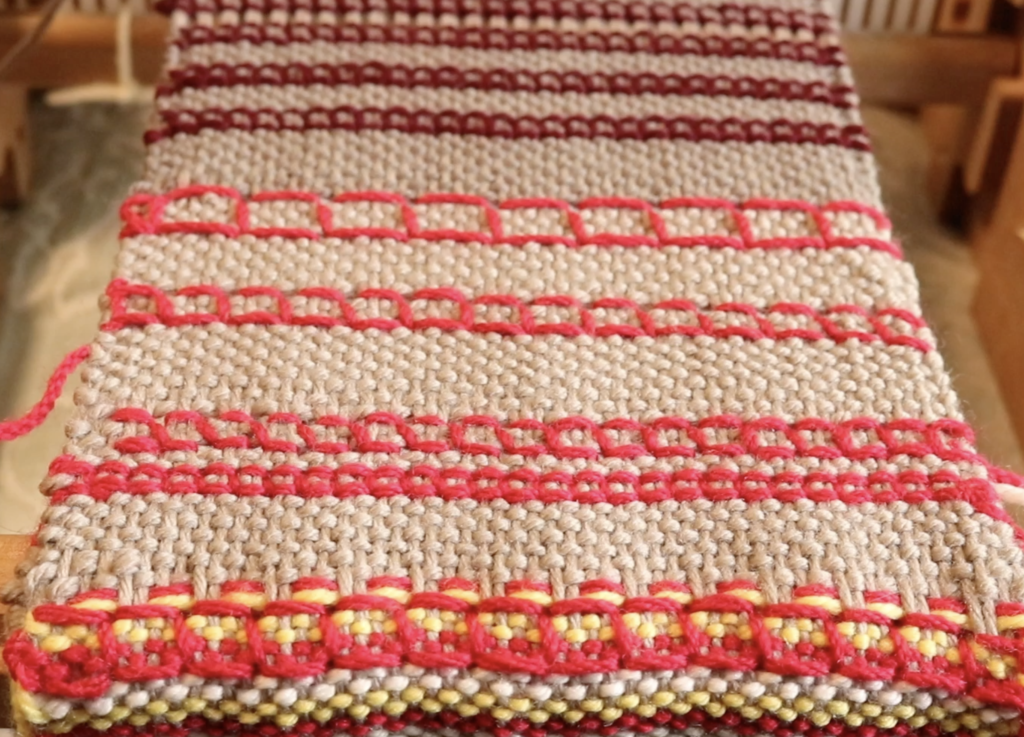
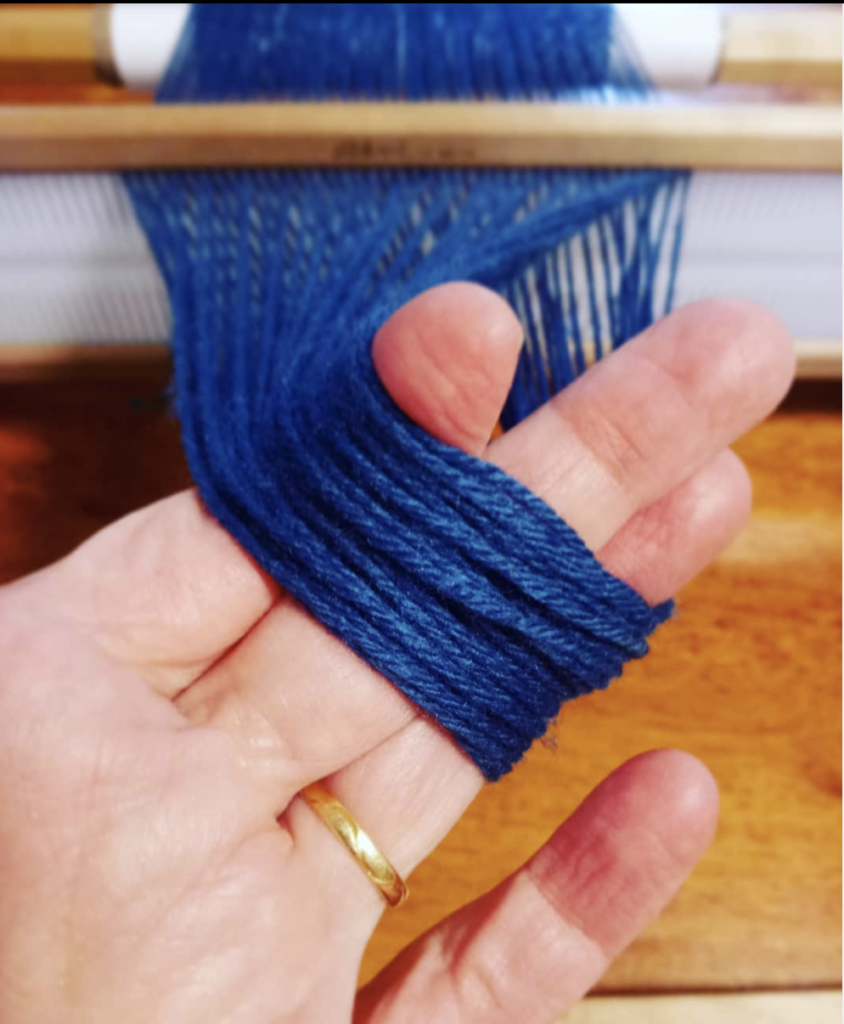
10. Yarn

We’re not going to be able to achieve much with our looms and equipment unless we have the yarn to play with! Many of you will have come to weaving from knitting and crochet and will already have a healthy stash to delve into. Knitting yarns are great for beginning weaving.

For those of you with no stash, don’t worry, just start out simple. Don’t go out and buy all the yarns – plan your project and just get the yarn you need to begin with. Or weave a sampler with small amounts of yarn.

But wait, you say! I have no idea where to start with yarn. You’re not alone in that, but relax, I have created resources to help you with that:

Choosing and using yarns in weaving

3 Yarns beginners should avoid

Which weight of yarn should I choose?

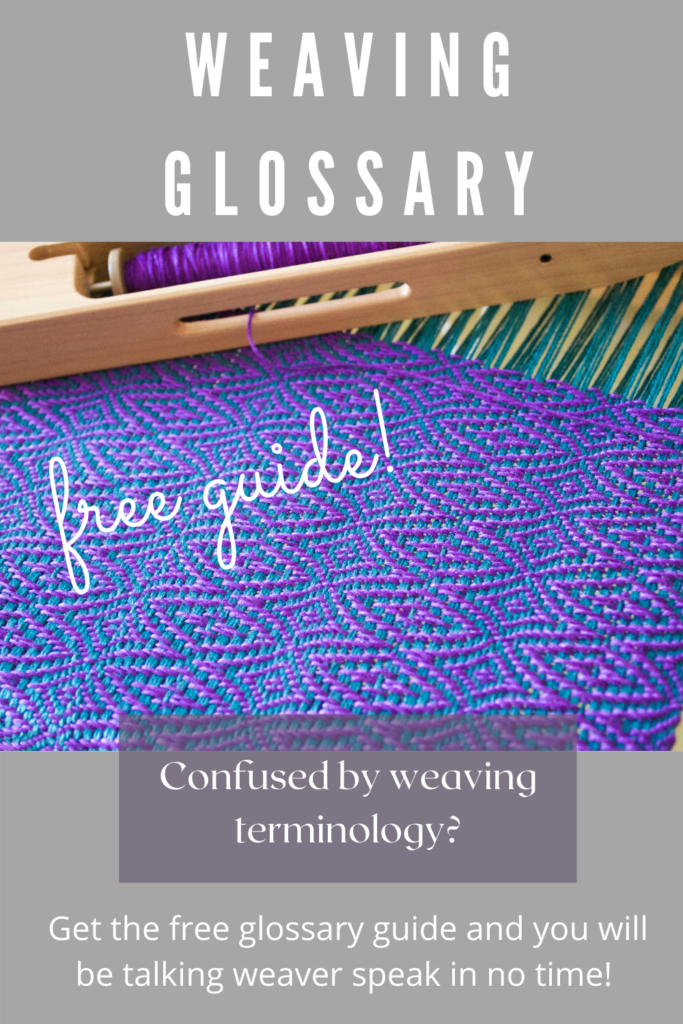
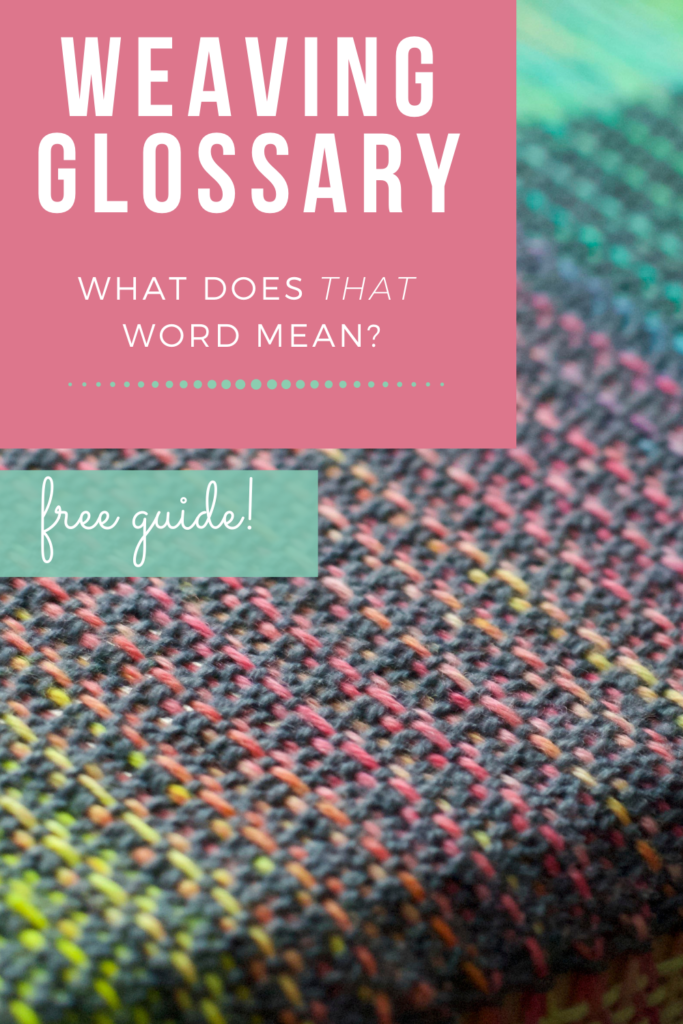
If some of the terminology I’ve used in this article is confusing to you, why not head over and check out my Weaving Glossary? I suggest you bookmark it so that you can refer back to it as much as needed.

Once you have all the tools you need to begin, then it gets really exciting! If you are ready to dive in and get weaving, I recommend you check out my Online Weaving School. You will find classes for all levels, including free and paid classes.

If you are an absolute beginner, you definitely need to enrol in my best selling From Woe to Go! Beginner Rigid Heddle Weaving course.

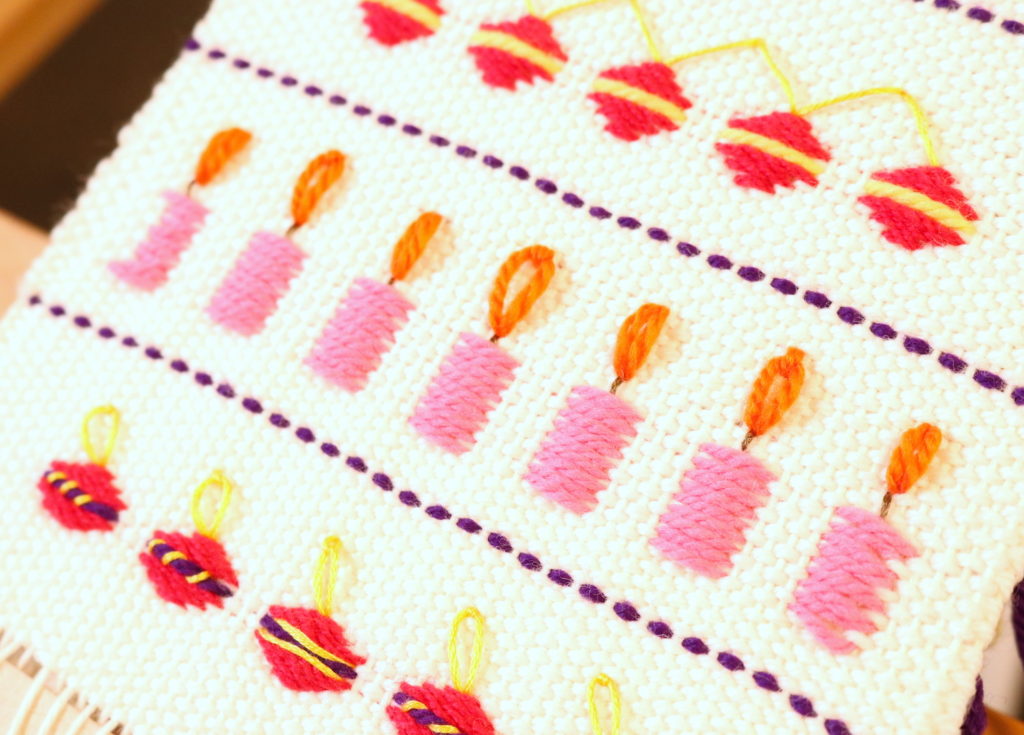
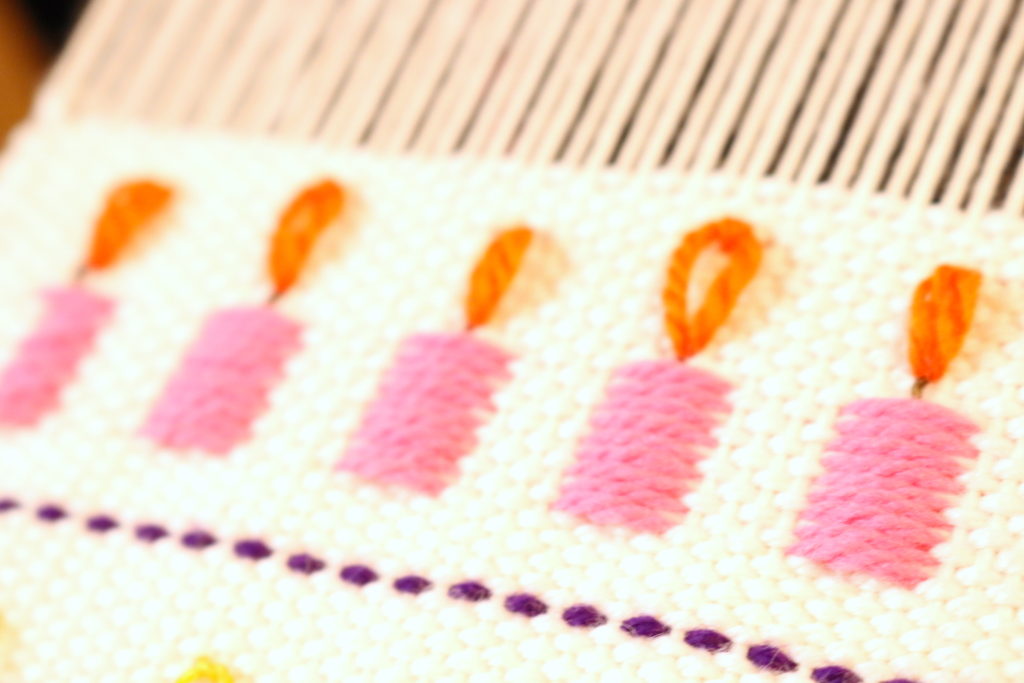
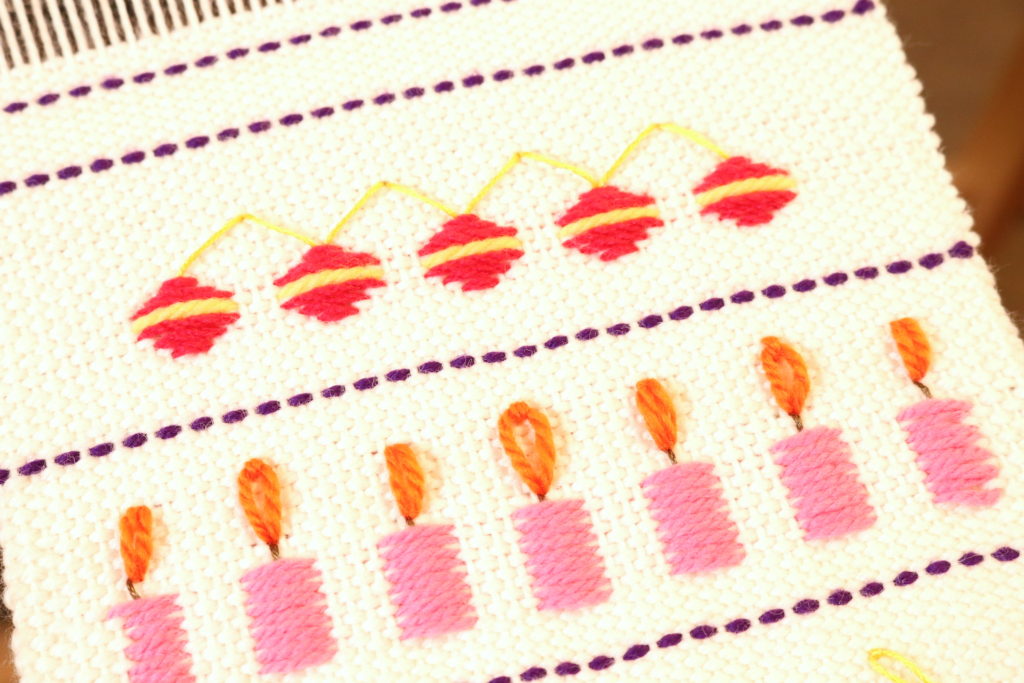
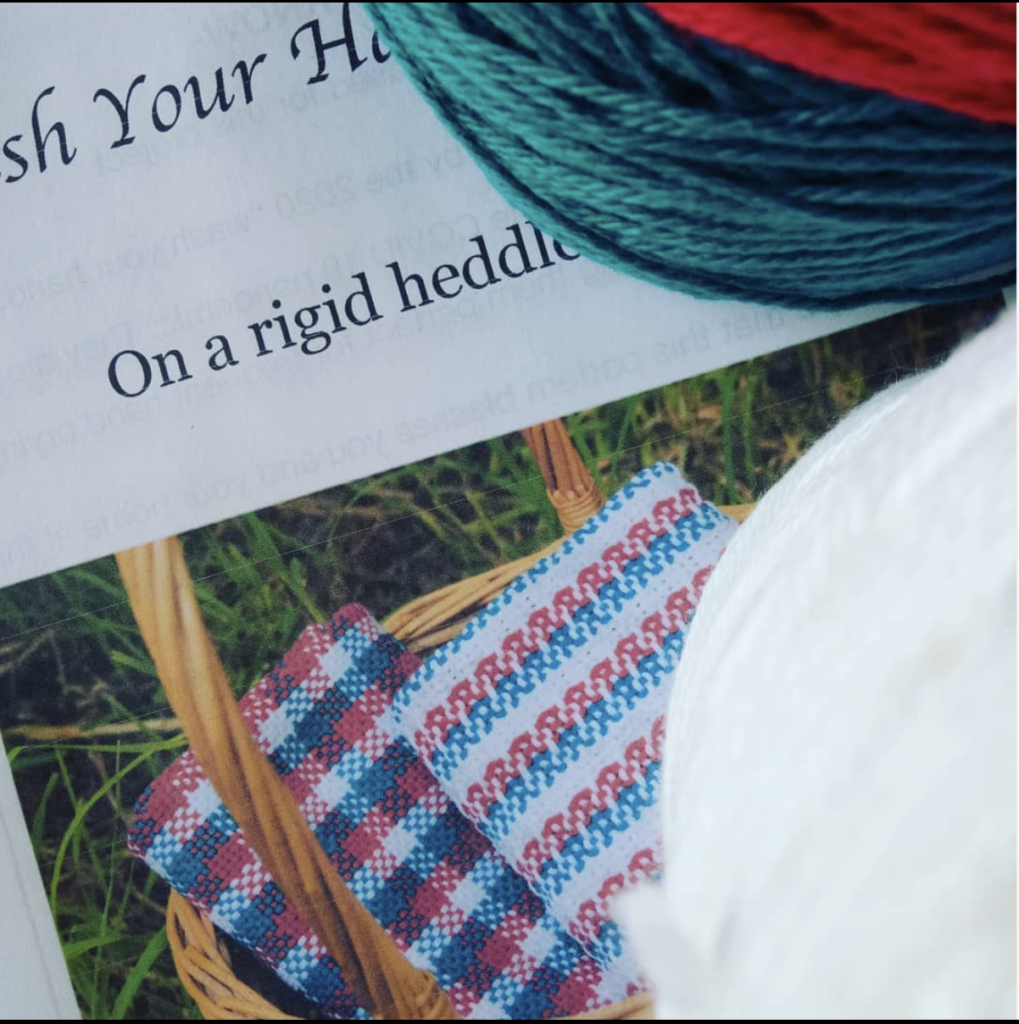
If it’s a free project you’re looking to start out with (or for a second or third project perhaps), have a look at my list of free tutorials here. In particular, I want to recommend a project that has been massively popular this year, the Wash Your Hand Towels.

I hope this article has been useful to you, if you have any questions or comments, leave them down below!

Until next time…

Happy Weaving!

Filed Under: Rigid heddle weaving, Weaving Tagged With: beginner weaving, getting started in weaving, rigid heddle weaving

Troubleshooting loose slot threads

by Kelly 31 Comments

Loose slot threads when weaving on a rigid heddle loom are very common. The fact is that a rigid heddle loom just does not hold the same amount of tension as a floor or table loom.

This means that the rigid heddle weaver can run into a bit of bother when warping up with fine, rigid weaving yarns. An 8/2 cotton is a floor loom weaver’s dream but can be quite a challenge on the rigid heddle.

*This post contains affiliate links. For further information, please view my disclosure policy.

Knitting yarns or slightly thicker weaving yarns with some elasticity work beautifully on a rigid heddle loom, as they don’t need a lot of tension and are very forgiving.

How do I know if my tension is good enough?

This can be a personal preference, but there are certainly a few guidelines for knowing whether your tension is suitable or not:

Too loose

Your warp threads bunch in between weft picks (rows)

You have floats or skipped warp threads often

Your stick shuttle keeps snagging on warp threads as you enter the sheds

Your heddle doesn’t click easily into the up or down shed

Too tight

You struggle to get your heddle/s into the up position

You have warp threads breaking

You feel a lot of resistance when trying to beat

Does this mean that rigid heddle weavers should not weave with weaving yarns? Not at all! There are too many wonderful weaving yarns in a massive variety of colours out there to try! With the right approach and strategies, all yarns can be used successfully.

  1. Getting the warp right

The warping the loom stage is the most crucial time to get that tension as good as you can. Not as tight as you can, necessarily, but even, consistent and firm. When I have a good warping experience, I just know that the project is going to go smoothly.

There are a few key strategies for getting good tension during the warping process. I talk about it in this webinar but I also want to mention some of them here:

  • Have someone help you. Your helper can hold on to the end of the warp, providing great tension, while you focus on standing behind the loom and winding on.
  • Pack the back beam as you roll on. You can use cardboard or wooden sticks/ separators, a roll of thick paper, a blind or a drawer liner. My personal favourite here is the roll of paper which you can cut to size if needed. 125 gsm is a good weight.
  • For a wider warp, use more than one warping peg. This helps distribute the threads over the width of the loom in a more practical way and is more economical, as threads don’t have to travel as far to loop around just one peg.
  • Take your time. Extra time spent in warping is well worth the investment. Remember – good warp = happy weaving experience 😄
  • Pay particular attention to the middle of the warp while rolling on, particularly if warping independently. The middle is the most likely place to lose tension and get saggy threads.

2. Consider a shorter warp

A rigid heddle loom can take quite a lot of length in a warp, but I haven’t found a long warp to be best practice. If I have the opportunity, I will break a warp into smaller increments where possible.

This doesn’t bother me, because the rigid heddle is so quick to warp for more simple projects, so it doesn’t take much extra time. I find that the longer my warp on the rigid heddle, the harder it is to keep a good tension for the duration of the warp.

3. The tie on

The tying on step is also important for your overall tension. Whether you tie directly on to the apron rod (as I do 99% of the time) or lash on, this step is another opportunity to “get it right” before beginning weaving.

Once again, I don’t aim for really tight tension when tying on, but I do aim for the best consistency I can manage. This means going over the tied on threads once, twice, thrice if needed so that they all feel about the same.

I gauge this tension by bouncing my hand across the warp (like a trampoline!) Any bunch of threads that feel much looser than others will get a re-tighten.

4. Know your yarns

There are certain threads that are harder to tension due to their inelastic structure. I already mentioned 8/2 cotton, but many plant based or cellulose fibres (cotton, linen, hemp, etc) are quite rigid and easier to weave with a higher level of tension. Animal fibres or protein fibres (wool, alpaca, etc) generally have a little more stretch.

There are certain threads that are harder to tension due to their inelastic structure. I already mentioned 8/2 cotton, but many plant based or cellulose fibres (cotton, linen, hemp, etc) are quite rigid and easier to weave with a higher level of tension. Animal fibres or protein fibres (wool, alpaca, etc) generally have a little more stretch.

The amount of twist, number of ply and thickness or weight can also effect how rigid a yarn is. It helps to know your yarns – to sample yarns you’r unsure of and accustom yourself to all their particulars.

If you need a little more guidance with yarns, I have some resources that will help:

Choosing and using yarns in weaving

What is a superwash wool yarn?

3 yarns beginner weavers should never use!

5. Stuff it!

Packing, stuffing and wedging your back and front beams will always help with tension. If, despite your best efforts, your warp is just not tensioned well enough then start packing! You can use stiff paper, cardboard, sticks (either separators or pick up sticks) or whatever else you can come up with that works, to wedge under or between your warp at the beams.

When advancing your warp, start packing the front beam. This will prevent the knots from the apron rod from sticking into your weaving as it rolls around them beam (which can damage or distort your weaving and mess with your tension) and provide overall better tension each time you advance.

You can insert a pick up stick or something similar into a shed that is giving you particular trouble (usually the down shed) and slide it to the back beam. Push it right back so that it becomes wedged between the thread layers and tightens that shed for you.

You can also wedge something directly under the warp at the back beam to increase overall tension. To see this in action, watch this video, which also includes additional tips for working with fine threads:

6. One sided looseness

Perhaps your loose tension problem is at the selvedge? To be more specific, one selvedge is fine while the other is loose? You end up with neat edges on one side and not so great edges on the opposite side.

If you want generally to improve the neatness of your edges, check out this post for more resources.

One thing you can try in this instance is to begin and finish threading in a hole. When we thread for plain weave, we usually thread one thread in a hole, one in a slot, and so on. Most of the time we are threading an even number of threads.

But for this technique, we thread an uneven number of ends on purpose, so that the last thread gets threaded through a hole. The reasoning behind this technique is twofold. Firstly, the threads are threaded in holes, which hold better tension than the slots. Secondly, the outermost threads will be under the same or similar tension (both being in holes) so the results of your woven edges should be more similar looking.

If that sounds confusing, check out this video where I show you how to thread both selvedge threads in holes and you will see how simple it is:

7. Warping in down shed

As a disclaimer, I have not tried this technique, I have only heard about it. The idea is that it’s the down (slot) sheds that have looser tension, so warping your loom with the heddle in the down shed potentially tightens the slot thread tension. If you decide to give this a go, I would be interested to know how it turns out for you!

I hope this article was useful to you. As always, questions and comments are welcome, please leave them down below! ⤵

Until next time…

Happy Weaving!

Filed Under: Free tutorial, Rigid heddle weaving, Tutorials, Weaving, Yarn Tagged With: better tension, loose warp threads, rigid heddle weaving, rigid heddle weaving tutorial, troubleshooting

Baubles and Candles on a rigid heddle loom

by Kelly 11 Comments

With Christmas fast approaching, I wanted to gift you all with something fun and achievable, as well as having a festive theme.

I came up with some simple baubles and candles that I’m confident is suitable for any level of rigid heddle weaver.

This project is very decorative and better suited to low wash items.

*This post contains affiliate links. For more information, please see my disclosure policy.

For the project, I just wove a sampler to illustrate the patterns, but you can use the designs however you please.

What you will need:

A rigid heddle loom (any size is fine if you just want to weave the sample.

A 7.5 dent heddle

A threading/reed hook

A stick shuttle wider than the width of your weaving

A pick up stick wider than the width of your weaving

A tapestry needle

Yarn options:

For my warp I used a light worsted/dk weight wool in white. I used this same yarn for my plain weave. The same yarn, but in different colours was used for the pattern weft. Please see the video for colours used.

For embellishments, I used small amounts of DMC embroidery floss.

Sampler Specifications:

If you wanted to weave a sampler just like mine, here are the basic measurements.

Number of ends: 64 (32 slots)

Approximate width on loom: 8″

Sett: 7.5

Total warp length: 35″

The baubles and candles use the same overshot weaving technique as my reindeer, snowmen, gift boxes and winter trees.

There is a pattern weft that forms the picture or design, and in between every pattern pick is a plain weave pick (either an up or a down shed).

Weaving Instructions:

The Baubles –

I left a border either side of my designs in order to centre them and make sure that none were inadvertently cut in half! I left 6 threads on each side. This is optional, and you an adjust the border threads to suit.

I’m not including the border threads in the weaving steps, but if you watch the video you won’t have any trouble following along with these instructions.

Remember that you need to weave a plain weave row in between every pattern weft.

Step 1. 6 up, 2 down, *7 up, 2 down, repeat from * (7 up, 2 down for the rest of the way across)

Step 2. *5 up, 4 down, repeat from *

Step 3. 4 up, 6 down, *3 up, 6 down, repeat from *

Step 4. Repeat row 3, with a contrast colour

Step 5. Repeat row 3, with the original colour

Step 6. *5 up, 4 down, repeat from *

Step 7. Repeat row 1

The Candles:

For the candles, I left a border either side of 5 threads instead of 6, to work in better with the required calculations for the design.

Step 1. *4 down, 4 up, repeat from *

Step 2. Repeat row 1, alternating plain weave rows with pattern rows.

All of these details are available in a handy PDF for you to print out. You can download and print that right here:

Baubles-and-CandlesDownload

And you will want to watch the video and follow along with the instructions. You will find the free and detailed video here:

I hope you enjoy this project! Thank you all for your AMAZING support this year!

I wish you all a very Merry Christmas! 🎄

Until next time…

Happy Weaving!

Filed Under: Free Pattern, Free tutorial, Inspiration, Rigid heddle weaving, Rigid Heddle Weaving Patterns, Tutorials, Weaving Tagged With: baubles, candles, christmas, free tutorial, rigid heddle loom, rigid heddle weaving, rigid heddle weaving patterns, rigid heddle weaving tutorial

Weaving Glossary: Essential Terms Every Weaver Should Know

by Kelly 11 Comments

Starting something new can feel overwhelming—especially when it seems like everyone is speaking a different language! Weaving is no exception, with all its unique terms and jargon.

The good news? It won’t take long before these words become second nature. But in the meantime, having a quick reference guide is a lifesaver for those moments when you think, Wait… what does that mean again? That’s exactly why this weaving glossary is here—to help you feel more confident at the loom, one term at a time!

This simple guide is arranged in alphabetical order.

Beat – The action of pressing the weft threads into place. For a rigid heddle loom, this action is performed with the heddle/reed.

Closed shed – No shafts are engaged. In rigid heddle weaving, the heddle would be in neutral. There is no space to weave through. See also “shed”.

Direct warp– Common with rigid heddle looms, a warping peg is used to make your warp by drawing threads through the heddle/reed and looping them around the peg.

Draw in– The amount that your weaving decreases on the loom. It is expected that you will have at least some draw in and we calculate for that in the project planning stage.

Ends per inch (epi)– The number of warp threads you have in an inch.

Heddle– In rigid heddle weaving, the terms “heddle” and “reed” are often used interchangeably. For a rigid heddle loom (RHL) the heddle performs multiple functions. The threading of it allows the manipulation of sheds by placing it in the up or down position. It also spaces the warp threads and is used to beat the weaving.

  • In floor loom weaving a heddle is a single, detached texsolv cord or metal loop that is positioned on a shaft. It has a hole in the middle, through which the yarn is threaded.

Indirect warp – The warp is made on a warping board or mill and then taken to the loom.

Floating selvedges– An extra warp thread on either side of your weaving that is threaded in a slot and weighted over the back of the loom. Floating selvedges are not necessary for plain weave but are invaluable for other weaving structures where your weft thread may not always wrap around the outer most warp threads.

Open shed – Shafts or heddles are engaged. In rigid heddle weaving, an example would be that the heddle is in the up or down position – there is an opening to weave through. See also “shed”.

Pick– A weft row

Pick up stick – A smooth, flat stick used to pick up weft or warp threads to create patterning by creating additional sheds or lifting additional threads.

Plain weave– A weave structure with a balanced one over, one under interlacement of warp and weft threads.

Reed hook- Used to thread or “sley” the reed. In rigid heddle weaving, it is used to thread the slots during direct warping.

Selvedge– The edges of the woven fabric, or during weaving, the edge threads

Sett- The number of warp threads in an inch. An easy way to think of it is how close together or far apart the warp threads are.

Shed– the space or gap created for the weft shuttle to enter into. In RH weaving, this happens when the heddle is either raised or lowered ie. shed one and shed two.

Shot- Another name for pick or weft row.

Sley- Threading the warp threads through the heddle/reed. In multi shaft weaving, sleying refers to threading the reed. See also “open shed” and “closed shed”.

Tabby- another name for plain weave, but particularly used when the plain weave is used to create structure in the fabric in between pattern rows. A classic example is the weave structure overshot.

Threading hook– Used to thread the holes in the rigid heddle.

Thrums- loom waste, or amount of thread left over from the loom when the project is finished.

Warp faced– the warp threads are dominant in the weaving. This is not a balanced weave. A good example is inkle weaving, where most of what you see in the end weaving is the colour of the warp.

Weft faced– the weft threads are dominant in the weaving. Not a balanced weave. A good example is krokbragd.

Wet finish- The wash process at the end of the weaving that completes the project by allowing yarn to absorb water in order to bloom and settle into place.

This weaving glossary is taken from my super helpful e-booklet, The Weaver’s Toolkit.

I wrote this 22 page toolkit to provide weavers of all levels with a handy reference guide. It is beautifully designed and can be viewed on your screen or printed out.

Included in the guide are:

*Warp and weft calculations sheets

*Project record sheet

*Yarn conversion sheets

*Sett explanations

*Recommended tools

*Measurement conversion sheets

*Size guides for woven pieces

You can find the Weaver’s Toolkit in my design store for a very affordable price.

Until next time…

Happy Weaving!

Filed Under: Rigid heddle weaving, Weaving Tagged With: glossary, weaving glossary

Tips for weaving overshot

by Kelly 9 Comments

One of the great things about having been a blogger for 12 years (did I actually just admit that?!) is that you occasionally get to look back and see how very far you’ve come.

Over three years ago, when my David Louet floor loom was still somewhat new to me, I wrote this post on overshot. If you read it, you will discover that my initial relationship with overshot was not a very positive one.

This post contains affiliate links. For more information please see my disclosure policy.

Back then, I was a little harder on myself as a learning weaver. By now, I’ve realised that weaving, just like life, is a journey that has a beginning but no end. Back then, I thought that my ultimate goal was to be a “master weaver”.

Honestly, I don’t even really know what that means but it no longer matters to me. I just want to be the best weaver I can be, but even more importantly, to continue to be fulfilled, challenged and rewarded by doing it.

Hang on, am I here to talk about overshot or not? Yes, I am!

The happy ending to the initial overshot sob story is that I can weave overshot now. Quite well, in fact! And I also teach it. And I happen to love it, very, very much. Don’t you love a happy ending?

I don’t think there was any particular moment where I thought to myself “I can weave overshot now!” I didn’t even weave any overshot for quite some time after that initial attempt. But slowly it tempted me back, and we started over. It was just a matter of sticking with it, employing some specific techniques and practice, practice, practice until it feels like an old friend.

My love of overshot has only increased with my more recent discovery of American Coverlets. I loved the look of the coverlets and the history behind them before I realised that so many of them were woven in the wonderfully humble 4 shaft overshot.

I’ve put a lot of research time into coverlets this year and have made it a big weaving goal of mine to weave my first coverlet, which is quite an undertaking, but I relish the thought.

I’ve also spent a lot of time actually weaving overshot this year. I released the very successful Overshot on a Rigid Heddle Loom class not long ago.

I’ve just completed this magnificent piece on my floor loom for my brand new Overshot on a Floor Loom class.

Incidentally, this photo is now one of my most popular posts on Instagram! I guess other people love it as much as I do.

Now that I have quite a lot of experience weaving overshot, I want to share my best overshot tips with you in hope that you too will fall in love with this wonderful weave structure.

Tip 1 – Take the time to sample

I know, I know, sampling takes time and yarn, it’s true. But it teaches you so, so much. It can also be more economical, as you can test your yarns out for suitability before committing to a larger project. Trust me, sampling is so well worth the time!

Tip 2 – Use appropriately sized yarns

To weave overshot you need a warp yarn, a tabby yarn and a pattern weft yarn. Using the same yarn for warp and tabby works perfectly. For the pattern weft, I like to use a yarn that is twice the size of the tabby/warp yarn. I have experimented with using doubled strands of tabby/warp yarn in a contrasting colour, but it just doesn’t look as good. A thicker pattern yarn is the way to go.

As an example, my current favourite yarn combinations for weaving overshot are:

Warp – 8/2 cotton

Tabby – 8/2 cotton

Pattern weft- fingering weight wool

There are certainly other combinations you can use, and once again, I recommend sampling to find what you love.

Tip 3 – Consider the scale of the pattern

What will the size of your item be? A miniature overshot pattern may get lost in a blanket, but may be perfect for a scarf. As a general rule, a good way to estimate the size of one repeat of your pattern just by looking at the draft is to see how many repeats are in one threading repeat. Also consider the thickness of your yarns and the sett you intend to weave.

Just to give you an idea, my current project is woven at 20 ends per inch with 8/2 cotton for warp and tabby and fingering weight wool for the pattern weft. The weaving draft has 50 threads in one threading repeat. My design repeats on the loom are around 2.5″ wide and just under 5″ long, which is a great size for the 30″ x 99″ throw I’m weaving.

Tip 4 – Give your weft picks plenty of room

I throw my picks gently to avoid drag on the selvedges and therefore preventing excessive draw in. I give a generous angle to the weft pick and keep it soft at the edges. I do adjust the picks at the edges before beating when necessary, but mostly I prefer to leave them alone and let them settle into place on their own.

Tip 5 – Floating selvedges are a must!

This is a non negotiable for overshot if you want neat edges and less headaches! You get used to using floating selvedges very quickly, so don’t stress if you have no experience with them.

Tip 6 – Don’t twist weft threads

This is another selvedges tip. I’ve experimented with crossing the two weft yarns at the selvedge to see whether it gives a neater edge, but it doesn’t, at least for me. So, instead of twisting the two wefts at each selvedge when throwing a new pick, I just let them follow one another sequentially and my edges are much neater that way.

Tip 7 – Will the pattern weft bloom?

Besides the thickness of the pattern weft yarn, you will also want to consider what kind of bloom it may have after wet finishing. For example, I know that my fingering weight wool blooms beautifully, whereas a cotton of the same size would not bloom in the same way. I very much like the contrast of the 8/2 cotton background with the plump wool pattern weft.

I’m going to sound like a broken record, but once again, a sample will show you everything you need to know about how your yarn will behave as a finished piece.

Tip 8 – Beware running colours

I’m often surprised by the potential of yarns to leach dye in the wet finish process. I’ve had certain yarns that I’ve used frequently that will leach dye sometimes and not others.

This is a particular problem if your colours and white on red or navy on white – you want to preserve that white and not have it come out of the wash as a pink or light blue!

The best way to avoid this is through vigilance, especially in the first 10-15 minutes of your woven piece making contact with water. If you see dye beginning to run, take it out of the warm wash and rinse in cold water until the water runs clear. Place back in the warm water and maintain your watch on it. Repeat the rinsing process if needed.

Tip 9 – Set up the treadles ergonomically

There are 6 treadles needed for overshot, even though you weave on 4 shafts. The two extra treadles are for the tabby weave. I always set up my pattern treadles in the centre of the loom – two on the left and two on the right. Then I set up a “left” tabby and a “right” tabby treadle. To do this on my 8 shaft loom I leave a gap between the pattern treadles and the tabby treadles so that my feet can “see” and differentiate between a pattern and tabby treadle.

Tip 10 – Advance the warp often

I like to advance little and often. You will find your own preference or “sweet spot” for weaving, but I find that with overshot I advance a lot more frequently at a much smaller amount than I do usually.

Tip 11 – Experiment with the beat

The firmness of beat will depend on a few things. Your chosen yarns, the weave structure, the width of the project and the tension your warp is under are all important considerations. I let the project dictate.

An example of this is that I wove an overshot sampler right before Is started my main project (the throw). It was a narrow warp (around 8″) and a different overshot threading and treadling than I’m using for the project.

I found that the sampler required a light beat, where I was pushing or placing the weft into position.

But for my throw project, I am beating harder and sometimes having to beat twice. Because of the width of the project, I need to be careful that I’m beating evenly, and that is easier to do if I’m beating more firmly.

Tip 12 – To temple or not to temple?

I personally do not use a temple. Some weavers will say they won’t weave without one. I’ve tried using a temple on many of my projects, particularly if I’m getting broken edge warp threads (signs of tension problems and too much draw in). But I will avoid using one wherever I can get away with it, and I don’t use one for weaving overshot.

I find that if I’m careful with weft tension and warping evenly, I do not get excessive draw in. It is something I’m constantly aware of while weaving and remind myself of tip 4 so that my weft picks are not pulling in at the edges.

I hope these tips have been helpful to you! If you are interested in overshot, here are some additional resources for you to check out:

Overshot on a rigid heddle loom class

Overshot on a floor loom class

Talking overshot (free video)

The Handweaver’s Pattern Directory, Ann Dixon

A Handweaver’s Pattern Book, Marguerite Davison

Next Steps in Weaving, Pattie Graver

Miniature Overshot Designs, Bertha Graysons Hayes (as a disclaimer, I do not own this book yet, but have heard very good things about it).

Until next time…

Happy Weaving!

Filed Under: 4 shaft weaving, Books, Floor Loom Weaving, Inspiration, Online Weaving School, Overshot, Weaving Tagged With: weaving tips

Weaver’s Gift Guide 2020

by Kelly 6 Comments

2020 has been a pretty rough year for most of us. I am so looking forward to celebrating Christmas and enjoying the festive season!

Our family of 6 will be reuniting to celebrate Christmas together after being separated from our son due to COVID lockdown for most of this year. I can’t wait for that!

One thing that 7 months of lockdown prompted me to do was to buy all those weaving books (ahem, OK, they weren’t just weaving books) I had always wanted. I don’t feel the need to tell you how many books have landed on my doorstep this year, but lets just say that I’m a lot more challenged for bookshelf space now than I was at the start of the year!

*This post contains affiliate links. For further information, check out my disclosure policy here.

Books make the most fabulous gifts though, so I’m going to be including a few of my personal favourites in this 2020 Weaver’s Gift Guide.

If you’re looking for fictional books to dive into (heads up, I’m a big classics fan!) you can find a list of suggestions in the Book Lovers section of my Amazon Shop.

If you need further inspiration, why not also check out last year’s Weaver’s Gift Guide?

Without further ado, let us launch into the gift guide! Items are in no particular order 😉

  1. Ashford Sampleit Loom

I have used my Sampleit a LOT this year, in fact it has rarely been without a warp on it’s sweet little frame. I have found it so perfect for not only sampling (which it is absolutely perfectly sized for) but also for weaving smaller projects. Would you believe that my Rainbow Lap Blanket was woven entirely on my 10″ Sampleit?!

Another thing I love about my Sampleit is that it’s so small and light it hangs on some hooks mounted on the wall when it’s not in use. I hang it up whether it has a warp on it or not. Easy and efficient storage!

I use mine without a stand, but stands are available.

A little loom is a great way for a new weaver to dip their toes into the weaving world without making a big financial investment.

The Ashford Sampleit comes in two sizes – a 10″ and a 16″.

2. Lacis Cards

I just started card weaving this year and I must admit I’m pretty hooked! I use my inkle loom to weave bands with cards, but rigid heddle looms and body tensioning can work too. Card weaving is so cool and there are so many variations on patterns that you can weave – I’ve only just scratched the surface and look forward to doing much more. The Lacis cards are really great – they are durable, have a light, shiny coating that allows easy turning of the cards, they are a good size for your hands and the holes are marked with A, B, C and D to help you keep track during threading and turning.

Another great card weaving resource is Candace Crockett’s book Card Weaving. Candace puts her instructions in laymen’s terms so they are really easy to follow. It’s a great book to start out card weaving with. The book + a pack of cards = a wonderful weaving gift!

3. Fringe Twister

Many newer and seasoned weavers would appreciate the gift of a fringe twister. If you have been twisting fringes by hand (or know a weaver who has) a fringe twister is an absolute game changer!

I own the LeClerc fringe twister with 4 clips. The more clips you have, the more fringe you can twist at once. I’ve had my twister for many years now and it is in constant use. It still functions just like new.

4. Rosie’s Flexible Tablet Holder for Loom

A little disclaimer here – I do not own one of these. But as soon as I saw it, I knew I had to include it in this year’s gift guide. Why?

Because I knew it would be the perfect thing for so many of my students! Many students watch my classes on their iPad or tablet and actually follow along with instructions whilst seated at the loom.

This tablet holder can attach directly to your loom or table, and it has a flexible arm so that you can get the positioning of the tablet just right.

It’s also surprisingly affordable for such a task specific tool. I love it!

The Smart Phone Holder is also available.

5. Clover Jumbo Bent Tip Tapestry Needles

Ok, I’m a weirdo, but seriously, these needles have changed my life! At least when it comes to hemstitching. I’ve written about these needles previously, but for a quick re-cap, I love them because:

  • They have a coating that is just slippery enough. They glide through hand woven fabric like they were born to do it.
  • The bent tip makes them ergonomically wonderful to use – less stress on your hands and wrists.
  • They are a great size for holding and using.
  • They are cheap to buy/
  • They come in a 2 pack, just in case you lose one, which is unlikely because they are gold.
  • Did I mention they are gold?! 🤩

6. Weaving Books

It’s hard to know where to start with books, as the weaving world has been SO blessed with an abundance of excellent weaving books. Here are just a few of the books that are in my personal library:

Rigid Heddle Weaving:

The Weaver’s Idea Book, Jane Patrick

Inkle Weaving:

The Weaver’s Inkle Pattern Directory, Anne Dixon

Multi Shaft Weaving:

The Handweaver’s Pattern Directory, Anne Dixon

Card Weaving:

Card Weaving, Candace Crockett

Tapestry:

Tapestry Weaving, Kirsten Glasbrook

The Art of Tapestry Weaving, Rebecca Mezoff

7. Yarn!

Once again, there are just so many choices for weavers when it comes to yarn. But if you’re looking for gifts for weavers, here are a few of my favourites:

Maurice Brassard 8/2 cotton

Maurice Brassard 8/2 cottolin

Maurice Brassard 8/2 tencel

Maurice Brassard 8/2 bamboo

You may have noticed I’m a bit of a Maurice Brassard fan! Their yarns are affordable, reliable and beautiful so I use them a lot.

8/2 tencel that I hand dyed

8. Laptop and iPad Skins

Well, if we’re going to use tech we might as well make it look good, and what better way than to slap some beautiful weaving on it?

My Society6 store has a huge range of printed weaving themed items, from coffee mugs to doormats, tote bags to greeting card, face masks to bath mats. It’s crazy just how many different items are available in my shop there, take a look!

9. Dressmaker’s Shears

My dressmaker’s shears are one of my most valued tools in my weaving studio. That feeling of finishing your weaving and cutting the warp off with beautifully sharp shears is just wonderful. Using dull scissors can be a huge frustration when you are cutting yarn all the time. And if you happen to sew with your hand woven fabric, a good pair of dressmaking shears is an absolute must.

In my opinion it is worth spending a little more on a good pair. I have had my Stag 9.5″ dressmaking shears for around 10 years. Strangely, this brand does not seem to be readily available nowadays, but I’ve read some rave reviews on Kai shears.

I simply have my shears sharpened every 2 – 3 years and they work perfectly. Sharpening only costs around $10AUD, so it’s a cheap way to maintain a sharp edge.

10. Tape Measures

Most days you will see me with a tape measure slung around my neck, and if not, it’s never far away. I have an assortment of tape measures so that I always have quick access. My tape measures are all inch plus metric measurements and I use both at various times.

You can go with the standard, basic tape measure or something cute and novel. I have both!

Basic tape measures.

Cute tape measures

11. Last, but not least, I couldn’t finish the Gift Guide without mentioning my Online Weaving School. Perhaps it’s time to give yourself the gift of weaving through the huge number of classes available. If you want to dive right in, a membership is the perfect option. Or, if you’re dipping your toes in, you may want to purchase single classes. The choice is yours!

Here is what students are saying:

“I love, love, love my gold class membership! I love that I have access to all the wonderful classes any time I want to watch them. Kelly is a fabulous teacher. She explains things in such a straightforward and understandable way, learning is much easier. A great bonus is the weaving community that comes with the gold membership. How wonderful to be able to encourage each other.”

Lori

“For the first time, I am seeing exactly how to do the things I keep reading about or see “snippets” of in other videos. Kelly explains and demonstrates each and every step, making it easy and enjoyable to do my weavings. She’s real, and down to earth. She’s not trying to “impress”, or show off her skills like I have seen in other videos. I truly do recommend Kelly Casanova to any and all who wish to enhance their Textile and Fibre Arts.“

Pamela

You can also gift memberships to others, simply contact me for more information.

Well, I certainly hope this Gift Guide has inspired you and something (or somethings) have caught your eye.

Whatever your are doing during this festive season, I pray that you be blessed with peace and joy and surrounded with love ❤️🎄🙏🏻

Until next time…

Happy Weaving!

Filed Under: Gift Guide, Inspiration, Weaving Tagged With: christmas, festive season, gift guide

How to weave Leno on a rigid heddle loom

by Kelly 14 Comments

Leno is a finger controlled weave that gives a lovely airy and lacey look to your weaving.

You can set up Leno on a plain weave threading, as all of the pick up is done at the front of the heddle with a pick up stick and your fingers.

I love that this is a fancy looking but easy to implement technique. Yes, it’s a little slow, but there ain’t nothin’ wrong with that! It can be worked either on an open or closed shed. Today’s tutorial shows you how to work Leno on an open shed.

*This post contains affiliate links. For more information, please read my disclosure policy.

Leno can be used for any project you want an open weave for, but some suggestions are:

Curtains

As a border on a table runner, coupled with plain weave

A bag (my Farmer’s Market Bag pattern is available in my Etsy shop).

For my Leno sample I’m using my Sampleit loom with a 7.5 dent heddle, a worsted weight wool, a stick shuttle and a pick up stick. I didn’t use the full width of my loom, I just wanted a smaller sample.

Leno and plain weave are great friends and I like to combine them for aesthetics. If you don’t plan on using plain weave bands within your Leno, at least start with a few picks of plain weave to begin with as a base.

*Handy Tips:

  1. You will want to advance your warp forward a little more than usual. This is because we are going to be building up warp twist and then making a shed with the pick up stick to pass the shuttle through. If your last row of weaving is too close to the heddle/reed, it will be difficult to find the space to pass the shuttle through.

2. You will want your shuttle to enter from your dominant side. I’m right handed, so I have woven my last pick of plain weave so that the shuttle is on the right of the warp.

3. Your outer most warp thread on the side you’re starting from (in my case, the right) should be in an up position. That doesn’t necessarily mean that your heddle will be in your up position – you will need to try the up and down heddle positions to see which is suitable for that outside warp thread to be up. I placed my heddle in the down position to ensure my outside thread (a slot thread) was up.

Begin by holding the top warp threads aside so that you can see the down shed threads underneath. Take your pick up stick underneath the first thread in the down shed so that sits on top of the stick.

Now release the next warp thread along, which is a top or “up” thread. It will naturally go underneath the pick up stick, which is just what you want.

You now have 2 threads picked up and you may notice that they twist around each other. Dive the pick up stick back down into the warp, holding those top threads out of the way still. Take the point of the stick underneath the next down shed thread so that it sits on top of the stick.

Release the next top thread along, and as before, it naturally springs underneath the stick. At this point you have 2 warp threads on top of the stick and 2 underneath. Dive the stick back down into the warp and repeat the steps, right to the other side.

As you continue your pick up across the warp you should notice that the warp threads are twisted in pairs both below and above the stick. This is how you know that you’re picking up correctly.

When you’ve completed your row of pick up, slide your pick up stick back towards the heddle and leave in place.

Turn the pick up stick on edge and pass your stick shuttle through the shed.

Be sure to fix up and pay attention to your edges, just like you would for straight plain weave. If you need to know more about techniques for weaving neat edges, please watch this video:

Remove the pick up stick and beat. You will feel resistance as a result of the twists being in place, so be gentle and try to beat straight. Remember, this is an airy fabric, we’re not going for densely woven fabric here!

Change to the next shed. I was in the down shed, so now I change to the up shed. Enter the shuttle from the left and pass through the shed, fixing up your edge to weave neatly as before. You will note that the second row of twists that was above your pick up stick when working your pick up has now transferred underneath your new pick.

Beat the new pick, remembering to be gentle and not too firm with your beat. You now have two rows of Leno.

Now you can choose whether you go back and repeat more rows of Leno, or you can do what I’ve done in this photo – alternated bands of plain weave with bands of Leno. Both are very effective, it just depends on the look you’re going for.

Farmer’s Market Bag

If you would like to see a video version of this tutorial, you will find that here:

I hope you enjoyed this tutorial, and if so, please leave me comment to let me know. Also feel free to ask any questions you may have down below, I’m happy to help.

Until next time…

Happy Weaving

Filed Under: Free tutorial, Online Weaving School, Rigid heddle weaving, Rigid Heddle Weaving Patterns, Tutorials, Weaving Tagged With: finger controlled, leno, rigid heddle weaving, rigid heddle weaving tutorial

Italian Hemstitch

by Kelly 4 Comments

You all know that I love hemstitching, right?

I have quite a lot of resources available on the topic, including articles and videos, some of which you can find in this post.

In addition to the basic hemstitch we all know and love, there are variations for an even more visually decorative, but still functional hemstitch.

*This post contains affiliate links. For more information, please see my disclosure policy.

The hemstitch doesn’t have to just be a way to secure your warp threads so that the weft doesn’t unravel when you remove your weaving from the loom. It can also be used within the weaving as a feature.

In the member’s only “How to Hemstitch” series, I have a separate class just to highlight and demonstrate how you can use hemstitch as a feature in your woven piece.

That brings me to today’s topic – the Italian Hemstitch. This is a gorgeous, decorative and functional stitch. It secures your warp ends just like an ordinary hemstitch does, but it stands out as a real feature. Embroidery lovers, this one is right up your alley!

Italian hemstitch looks great either as a single row at each end of your weaving or as rows within the weaving. It can be stitched in a variety of sizes, depending on how large you want it to look. It looks wonderful both from the front and from the back.

I love the way Italian hemstitch looks on a plain weave background, using a contrasting yarn so that it stands out and takes centre stage. You could choose to use a weight of yarn that matches the weight of your warp and weft, or something thicker, or something thinner. Experiment and see what your own preferences are!

For this tutorial I’ve used a light worsted wool for warp, weft and hemstitch, just in different colours. I’m going to be working a 2 x 2 Italian hemstitch.

Start by threading up a tapestry needle with the yarn you want to stitch with. Make the length around 5 times the width of your warp (I like to have a little more rather than run the risk of running out part way through).

I have to take a moment to extoll the virtues of this Clover Jumbo Bent Tip Needle. I used a regular tapestry needle for a long time before I purchased a pair of these needles, and wow, what a world of difference it’s made to my hemstitching! The large size, the coating that slips through your weaving just beautifully, and the bent tip all come together to make it a perfect tool to hemstitch with.

Secure the hemstitch yarn in your weaving, bringing the needle through to the front from the back. You can see one way that I work lock stitch in this free video. I work this about 2 – 3 warp threads in from the edge on the right hand side.

Count 2 warp threads in from the edge (above your last woven pick) and take the needle down through the gap to the back of your weaving.

When you pull the yarn through, there will be a loop around those first two warp threads, right at the top of the fell (where you last wove your weft).

Count across 2 warp threads again, but this time count down 2 weft threads. Bring the needle up from the back through that space.

Here is how this step looks once the needle and thread have been pulled through.

Take the needle and yarn back to the right edge. Now bring the needle up from behind, through the exact same hole that your last stitch came out of. This will make a new loop as you pull the needle through once more.

Pull on this loop to tighten it up a little. That gives us 2 horizontal lines – 2 sides of our box shape. Now we need to make the 3rd line as a vertical to close the box shape.

To get the vertical stroke of thread, we take the needle straight up to the left of those first 2 warp threads and pull through.

Now you can see your first block/box shape. Each box at the very edges of your weaving will be open ended on one side, the rest will be closed.

To continue working the boxes, count off the next 2 warp threads, bring the needle up and pull the needle and yarn through.

Take the needle back to the start of the second set of 2 warp threads and underneath.

Bring the tip of the needle (this is where that bent tip makes your life a whole lot easier!) up 2 weft threads down, in line with the 2 warp threads you have counted off.

Pull yarn through and tighten the loop. Take the needle back to the start of the pair of warp threads and down into the previous stitch’s hole.

Now bring the needle back up (thank you again bent tip needle!) through the hole that the working thread is in and pull through.

Finish off the box shape with a vertical thread again, by taking the needle down to the left of the warp threads just worked. Continue on across the warp and before long you will have something that looks like this:

It may seem a little complicated at first, but it’s really only a couple of steps more to complete than the regular hemstitch, and once you’ve “got it” your needle will fly!

If you would like a detailed, step by step video on how to work the Italian hemstitch, you may want to consider signing up for a membership at my Online Weaving School to access this and other great tutorials and classes.

The Italian Hemstitch class is available to all members of the Online Weaving School. It is a bite sized, technique focused class to further your learning in the wonderful world of weaving!

Thanks for stopping in for a visit today, if you have any questions or comments, please leave them below, I always love to hear from you!

Until next time…

Happy Weaving!

Filed Under: 4 shaft weaving, 8 shaft weaving, Floor Loom Weaving, Free tutorial, Hemstitching, Inspiration, Online Weaving School, Rigid heddle weaving, Tutorials, Weaving Tagged With: hemstitch tutorial, how to hemstitc, Italian hemstitch

Frequent weft colour changes

by Kelly 20 Comments

Changing weft colours frequently in one project usually occurs when you’re weaving stripes, blocks or bands of colour.

Today I’m going to talk about the problems that can spring up and show you three different options you can use when you need to change your weft colours often.

Here are some common questions and confusions surrounding weft changes:

“Should I cut the old colour when introducing a new one? If so, what do I do with the cut tails?”

“Should I not cut the colours, but weave them continuously, swapping shuttles as I go and carrying the colours up the edges?”

You may be wondering about which method is the best?

Well, that all depends on how wide the stripes or each band of colour are going to be. I’ll explain further.

If you are weaving wide bands of colour, it will likely not be practical to carry the yarns up the selvedges as you weave. This will create long floats. Now, floats at the edges can look great as a design feature, but the length does need to be practical. Floats that are too long will get caught or snagged once the woven piece is in use – they will get stretched and end up looking, well, a bit ragged!

Weft floats a design feature in the Candy Store Scarf.

There is no hard and fast rule with what length of float is too long or how wide a stripe should be before deciding on which method is best. But, one example that I use would be, if I’m weaving with light worsted weight yarn and intended to carry the yarn up the side, I wouldn’t make my stripes more than 4 picks wide.

Another example might be that I’m weaving 3 picks of a colour before changing, weaving another 3 picks in a different colour and then going back to the original colour. For this situation, I would choose to keep the yarn colours continuous and carry them up the sides.

Let’s have a look at what the basic method for thicker stripes would be:

Introduce the new colour and leave a tail of a couple of inches on the cut end. Weave that pick and change to the next shed.

Take the cut tail around the edge warp thread and into the new shed, around 3 warp threads deep. Pull down to the back of the warp, making sure that it is nicely arranged at the edge warp thread.

Weave the new pick, and continue to weave until your stripe or band of colour is as thick as you want it to be. Finish the pick on the opposite side to the one you introduced it on.

Cut the yarn, again leaving a tail of a couple of inches. Change to the next shed.

Tuck the tail into the new shed as before.

Bring the new colour in, ensuring the tail is on the opposite side to where you finished the last colour. Continue with the initial steps for each colour change.

Pretty straightforward?

The only thing you need to pay particular attention to here is to alternate the sides that the tails are on to prevent a build up on one side. Leave the excess parts of the tails hanging from the back as you weave (they don’t get in the way) and when your piece is wet finished and dried, cut them close to the fabric, being careful not to cut the fabric itself.

Now let’s go over the two methods you can use when your stripes and thinner or colour changes are more frequent:

In my demonstration I’m using 3 different colours and weaving 2 picks of each colour.

The first technique is to make the colours go around each other at the edges. This ensures that every colour is carried up the edges while it’s not actively in use.

This method does have its drawbacks. I was using 3 weft colours for my stripes and found that, for the picks where all 3 colours were on one side, carrying up the side created bulkiness in the form of a noticeable bump where all the colours meet.

While this method would work well for 2 weft colours, for 3 it is not the method I would naturally choose. I can’t live with those bumps – to me they just stick out like a sore thumb!

So, for my 3 weft colours, this is my preferred method:

Weave the weft colours in the same way but don’t make them go around each other at the edges. Just weave them independently of each other and ignore the colour that you’re not using at the time, let it just sit where it finished off and wait.

When you’re ready to weave a new colour, you can just pick up the colour you want and continue weaving. Obviously, this works best for repetitive colour patterns so that your edge floats look harmonious and continuous.

I find this method gives a very neat and pleasing finish to the edges.

To the left you can see the first method I used of taking the colours around each other. On the right is how the second method looks – much neater, I think!

When you are using a thinner yarn (say an 8/2 or 10/2 cotton) it is much easier to hide what you’re doing at the edges and it won’t be very noticeable in your finished piece. But for thicker yarns, like the light worsted I’ve used here, these techniques are a “must know”.

If you’re interested in exploring these techniques further, I have a detailed video demonstration available in the Weaver’s Knowledge Library. I have put this library of “bite sized” classes together for members of my Online Weaving School. It is a great new space where members can learn new techniques quickly and effectively – and of course, refer back to them over and over. I intend to build up a lot of classes in this library in the coming years.

As an additional resource, you may find this video helpful. It shows how I weave the wefts for log cabin:

Have you tried any of these techniques? Which one do you prefer and why? Let me know in the comments, I love to hear from you!

Until next time…

Happy Weaving!

Filed Under: Colour and Weave, Free tutorial, Online Weaving School, Rigid heddle weaving, Tutorials, Weaving, Yarn Tagged With: colour changes, weaving techniques, weft

All about hemstitching

by Kelly 10 Comments

I learned how to hemstitch early on in my weaving journey and use it now in most of my hand woven pieces.

I love that it is so decorative but entirely practical as well – that suits my tastes perfectly!

There are many things to love about the humble hemstitch, it is easy to learn, it looks lovely, it allows your woven piece to sit really flat once off the loom (great for table linens), it is very strong and secure and it can be used as a feature within your weaving, not exclusively at the start and end of your piece.

This post contains affiliate links. Please see my disclosure policy for further details.

So, what is hemstitching?

It is a way to secure your warp ends in order to remove your weaving from the loom. It is worked by hand, with a tapestry needle and while your piece is still on the loom (not absolutely necessary, but boy, does it make life easier!)

When you remove your piece from the loom, the weaving will naturally begin to unravel (at different rates, according to the yarn and the project). You need to either secure those warp ends on the loom or promptly after removing from the loom.

Do I have to leave a fringe if I hemstitch?

Not necessarily. It is most common to leave some sort of a fringe when you have hemstitched your ends. A twisted fringe looks stunning with hemstitch but a medium to short fringe is also lovely.

But if you don’t want a fringe at all, don’t have a sewing machine and want those ends secure you can hemstitch on the loom, then needle weave the warp ends (or fringe) back up and into the work. I have used this approach for some of my tapestry projects and on these mug rugs. It gives a very neat and attractive finish – it takes a while to weave all those ends in with a needle though!

Let’s get down to the nitty gritty and have a look at how hemstitch works.

You begin by choosing the number of warp ends you want in each bunch and how far into your weaving (how many weft picks) you want each stitch to go.

My go to is a 4/1 hemstitch, which means that there are 4 warp threads in each bunch and I stitch in 1 weft thread deep. There are all different number configurations you can do depending on the effect you want, the project and the thickness of yarn you have used.

In this picture I am working a 3/2 hemstitch. I count off 3 warp threads at a time, and bring the needle up 2 weft picks deep.

Here is a breakdown for how to work hemstitch, step by step. Heddle is in neutral. Ideally, you have left a long tail of weft yarn (around 4 x the width of the project) on the right hand side (left side if you are left handed). Thread this yarn in a tapestry needle.

Remember, in this demonstration I’m doing a 3/2 hemstitch.

  1. Take the tapestry needle underneath the first 3 warp threads.

2. Count up 2 weft threads and bring your needle through the space that aligns with the 3 warp threads you counted in.

3. Pull the full length of the yarn through.

4. Take the needle back to the start of the initial 3 warp threads and underneath, coming up on the left hand side of the 3rd thread.

5. Pull the yarn through, making sure that the needle goes under the tail yarn on the left so that a loop is created. Pull the loop firmly to make your first bunch.

6. Take the needle down in between the first bunch and the next group of 3 warp threads and repeat the steps.

You can see a video of this tutorial here-

I mentioned that hemstitch can also be used decoratively within your weaving, not just as a hem securer.

In this image I have worked adjacent rows of hemstitch on bands on plain weave, leaving a gap between the bands. I’ve then woven in some ric rac and ribbon as a feature. This can give a very pretty and unique look to your woven piece. This demonstration is available in a member’s only class – Hemstitching as a Feature.

Do I hemstitch both ends of the piece in the same way?

Yes and no. You are still using the same hemstitching technique, but when you hemstitch the first end you are stitching underneath the weaving and when you stitch the final end, you stitch on top of the weaving.

In my earlier days of weaving, I would take my loom off the stand, turn it around to face the other direction and then replace it on the stand. That way, I had the weaving facing me in the same way that it does at the start of the piece and I didn’t have to change the way I stitched at all.

These days, I have a different technique for hemstitching the other end that means I don’t have to rotate the loom and is just as fast and easy as the beginning of the piece hemstitch.

I’ve made a video to share with you how I do this. You will see that its not difficult and just as effective:

Does hemstitching only work on certain types of weaving?

I have used hemstitching on all different types of weaving, even tapestry. I’ve used it on my rigid heddle loom, table loom, floor loom and tapestry loom. I haven’t used it with my inkle loom but inkle bands don’t unravel in the same way and the warp threads are so close together that hemstitching would be quite difficult!

Does the type of tapestry needle matter?

You can use any ordinary tapestry needle. A larger one is easier to thread and use. I recently bought some of these Clover bent tip jumbo tapestry needles, and they have been a game changer! They are large and smooth plus the bent tip is just perfect for hemstitching. Plus they are gold, so hopefully I’m less likely to lose them!

I think a lot of new weavers and a bit overwhelmed by the thought of hemstitching, I mean, it does look quite intricate and complicated on the piece.

Hopefully, by breaking the steps down and making these videos, I will convince you to have a go at hemstitching. Maybe you will find that you love it just as much as I do!

Oh, and by the way, I’ve talked today about basic hemstitch but there are variations that are even more decorative. A great resource for this is The Weaver’s Idea Book, which has a whole section dedicated to hemstitch and it’s variations and possible applications.

All this information plus an extra page of tips and links to 3 hemstitching videos is now available in one convenient e-booklet. The Hemstitch Basics Guide can be purchased in my Etsy shop.

Be sure to leave any questions or comments below, I love to hear from you!

Until next time…

Happy Weaving!

Filed Under: Books, Floor Loom Weaving, Free tutorial, Inkle Weaving, Online Weaving School, Rigid heddle weaving, Table loom weaving, Tapestry Weaving, Tutorials, Weaving Tagged With: hemstitch, how to hemstitch

  • « Go to Previous Page
  • Page 1
  • Interim pages omitted …
  • Page 13
  • Page 14
  • Page 15
  • Page 16
  • Page 17
  • Interim pages omitted …
  • Page 25
  • Go to Next Page »

Primary Sidebar

Hand crafted boat shuttles

Categories

Archives

Meta

  • Log in
  • Entries feed
  • Comments feed
  • WordPress.org

Copyright © 2025 Kelly Casanova Weaving Lessons on the Foodie Pro Theme