• Skip to main content
  • Skip to primary sidebar

Kelly Casanova Weaving Lessons

  • Hi! I’m Kelly!
    • Disclosure
  • Online Weaving School Class Index
    • Common account issues
    • Common technical issues
    • What do I get with a membership?
  • New to rigid heddle weaving? Start here!
    • Never heard of the rigid heddle loom?
    • How to weave neat edges on the rigid heddle loom
    • Rigid heddle weaving
    • Rigid Heddle Weaving Patterns
  • Patterns
  • Subscribe

Weaving

What is a heddle rod? Part 2- how to install the rod

by Kelly 4 Comments

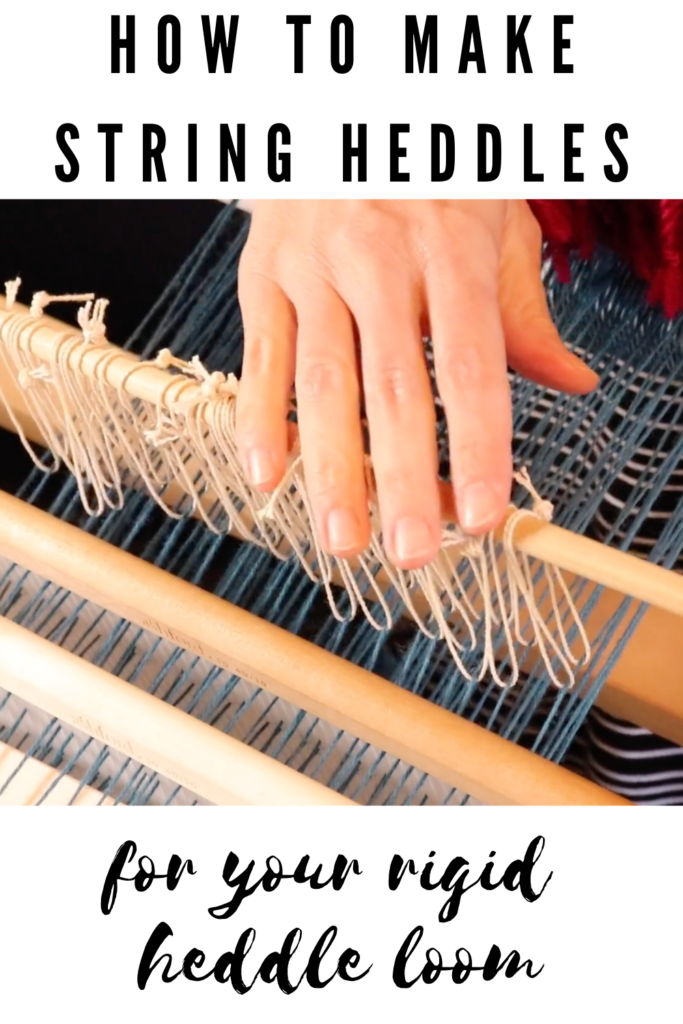
Last week we talked about how invaluable a heddle rod is to the rigid heddle weaver.

I showed you how to make string heddles for the heddle rod. If you missed that post, please click here.

*This post contains affiliate links. For more information, please see my disclosure policy.

Now that we know how to make our own string heddles, we can learn how we use them on a heddle rod.

The actual rod needs to be wider than the width of the piece you’re weaving. It can be either flat or round. It should be fairly lightweight and not so large that it is difficult to pick up. It should be smooth but not slippery.

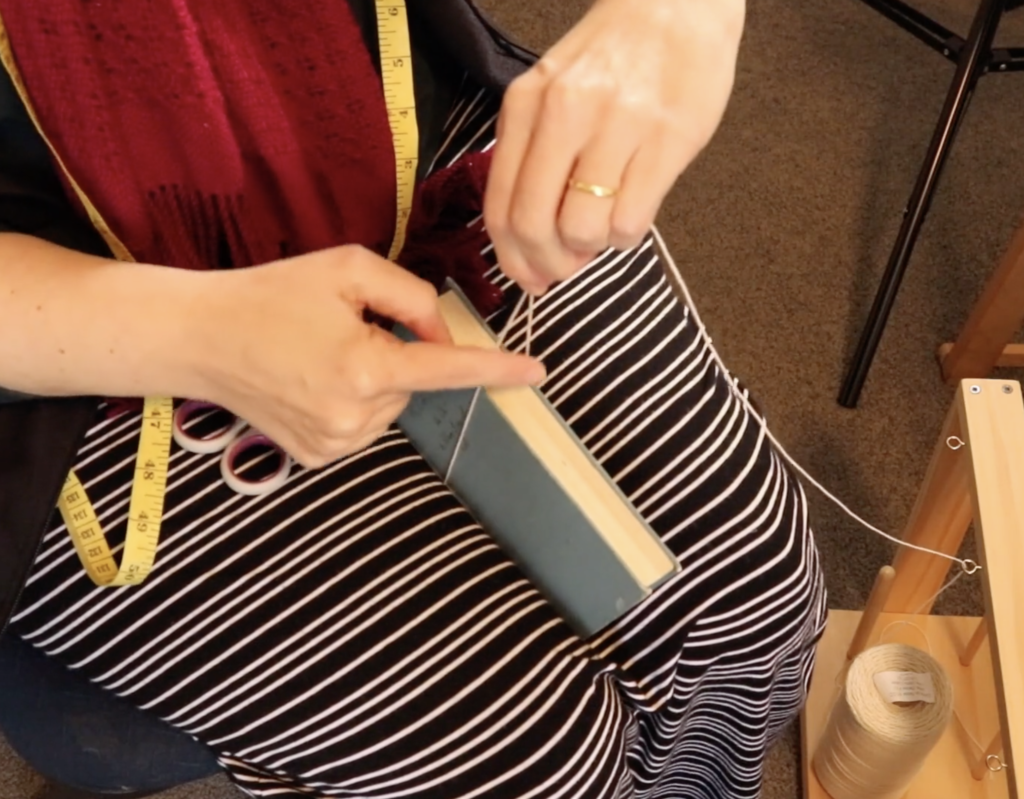
For this tutorial I’m using a smooth but not lacquered wooden dowel measuring 9mm (3/8 of an inch) around. The dowel was purchased at a local hardware store.

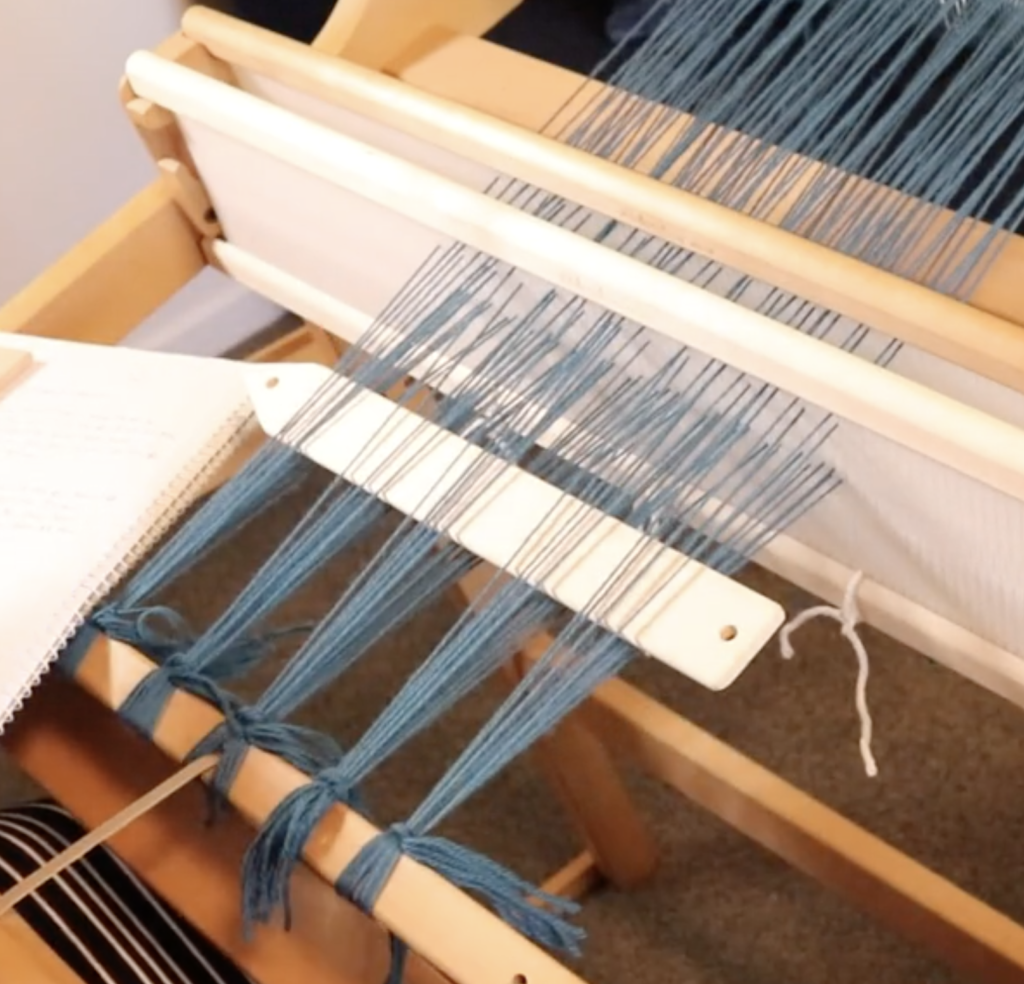
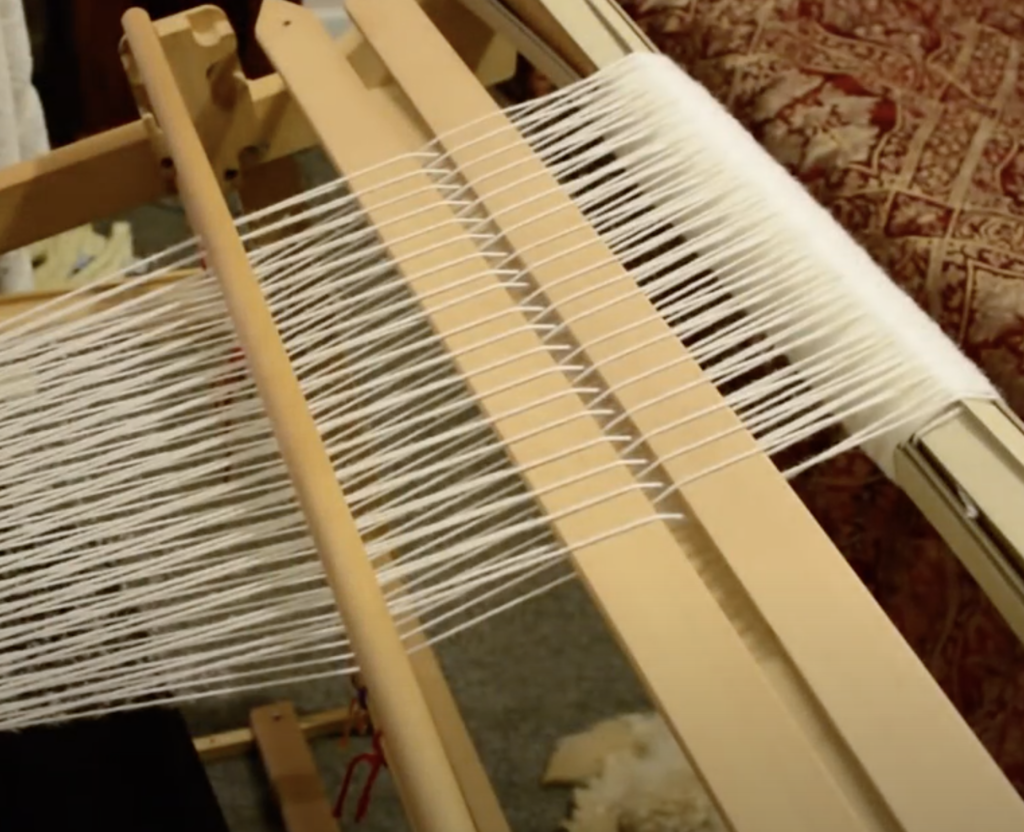
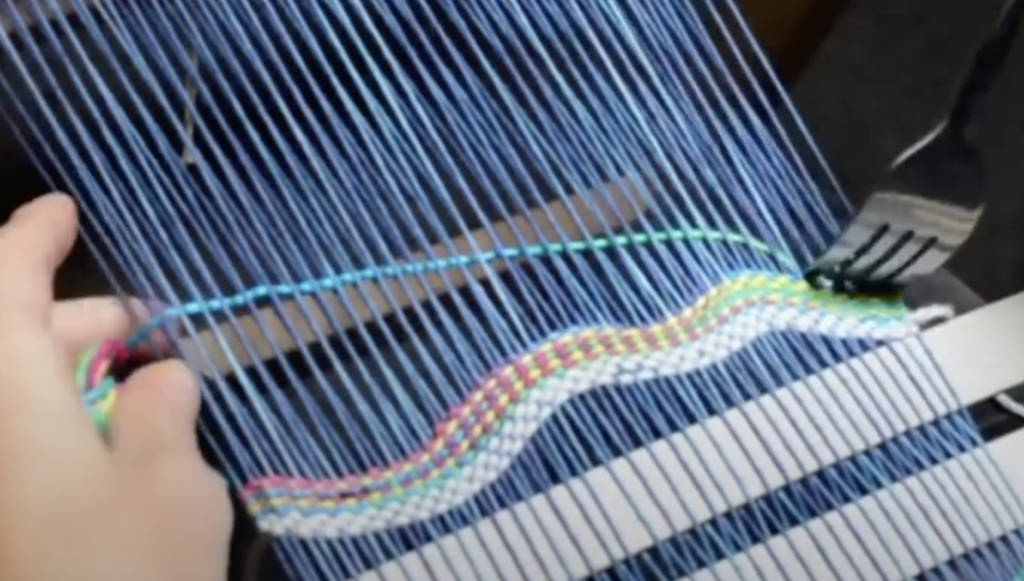
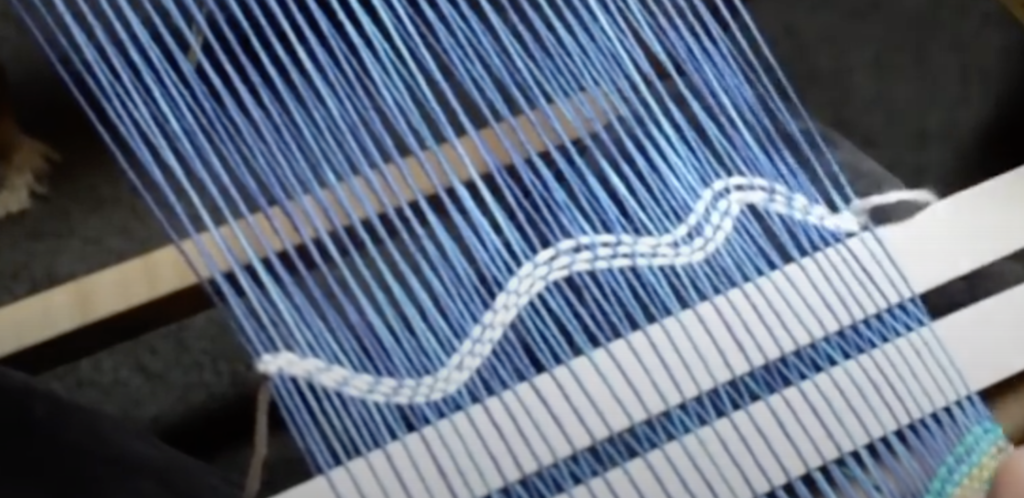
Begin by picking up the threads you want to place on the heddle rod according to the pattern or instructions you’re using. It is easiest to pick up the threads in front of the heddle first using a pick up stick. Make sure your heddle (or if you’re using more than one, heddles) are in the down position. This brings slot threads up, and it’s the slot threads we want to pick up.

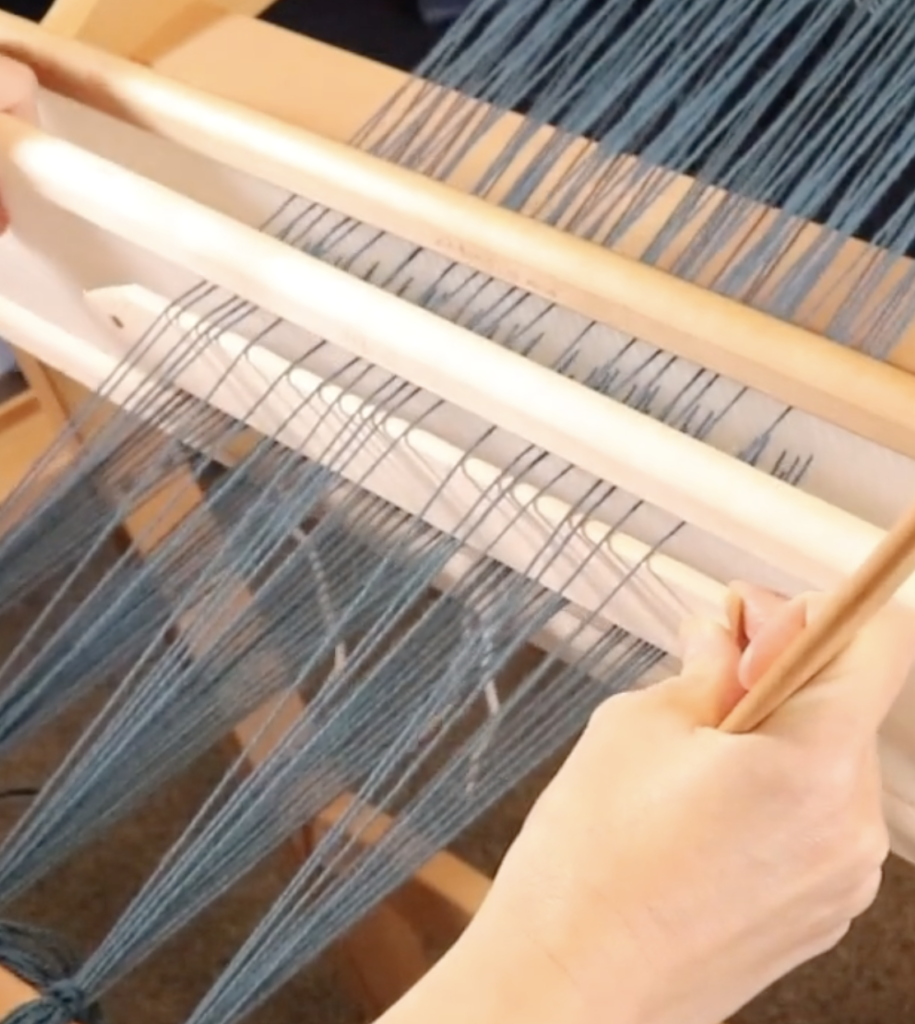
Once your threads are picked up, slide the front stick towards the heddle and place it on it’s edge. This props up the heddle rod threads at the back of the heddle and differentiates them from all the other threads.

Now you can insert another pick up stick (or stick shuttle if you don’t have the extra pick up stick) into the shed that has been created by the propped up threads behind the heddle/s.

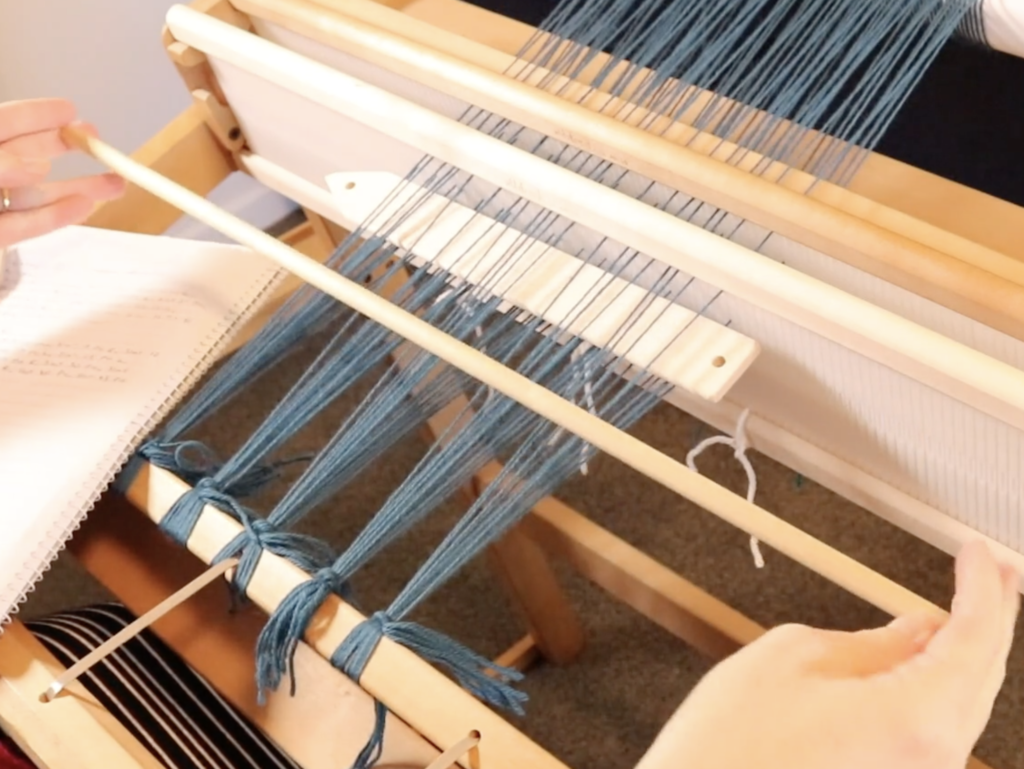
You will need your piece of dowel or whatever you’re using for the heddle rod plus your string heddles handy.

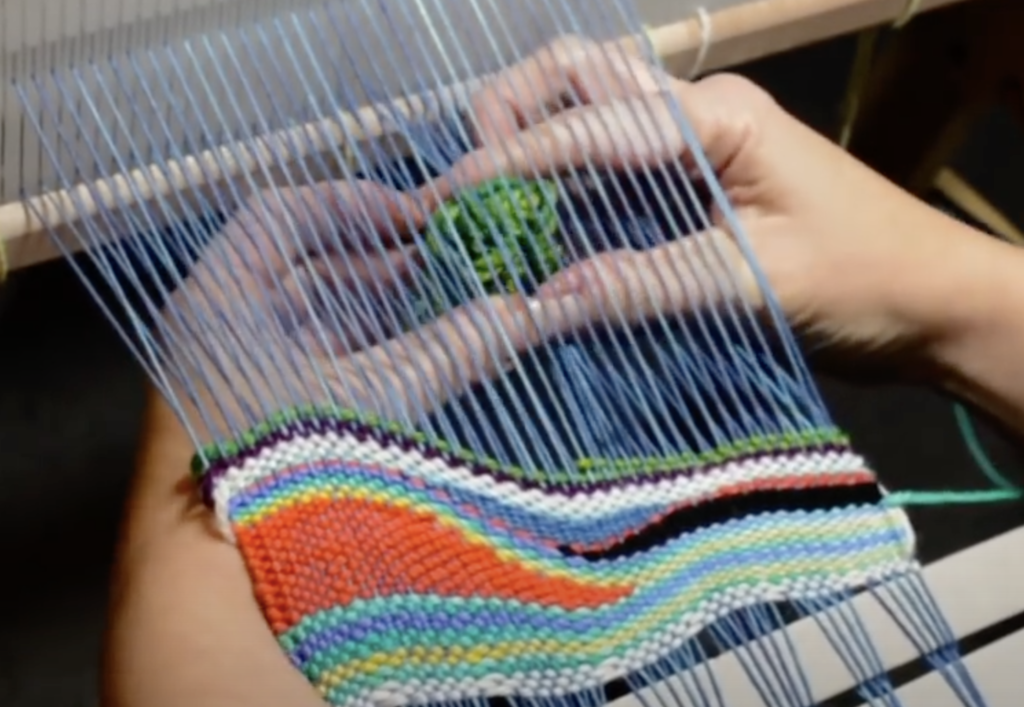
You may find it easier to sit or stand behind the loom for this next part. Working from either right to left (it makes no difference) pick up the threads in order from one side to the other. Keep your pick up stick in place as your visual guide – you can clearly see which threads need to be picked up. Have a string heddle ready at this point.

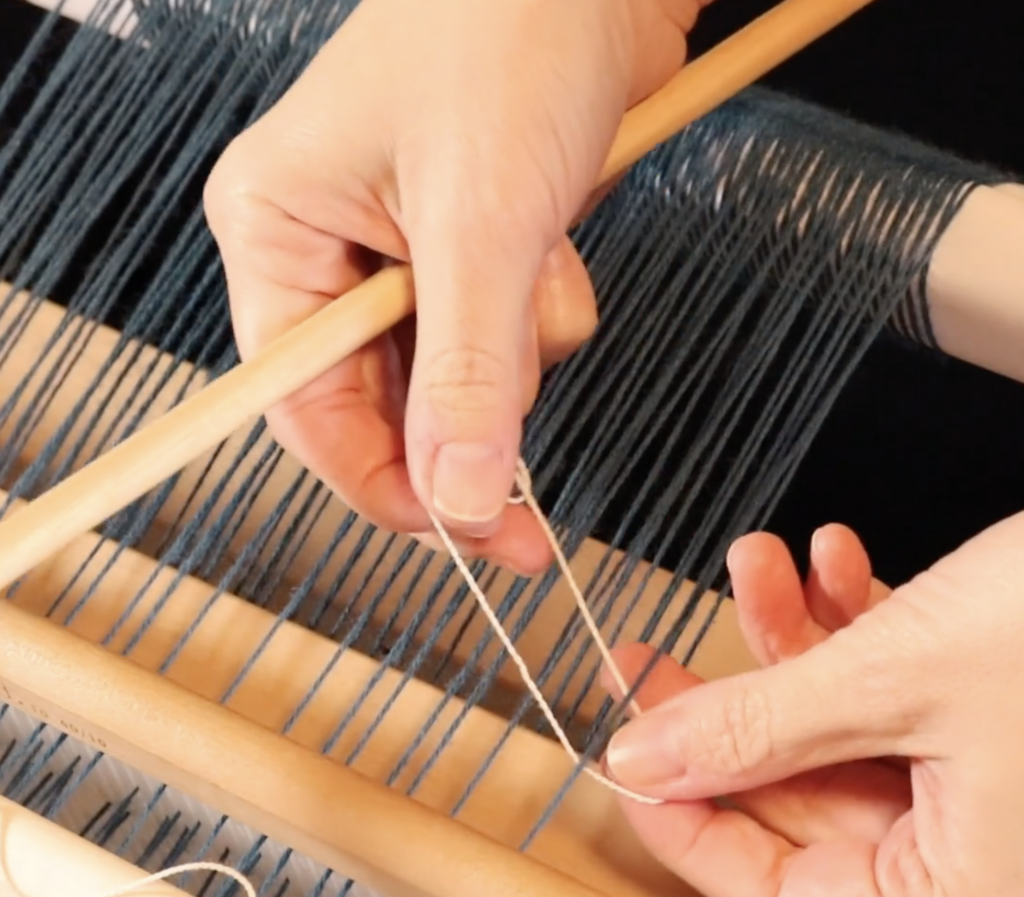
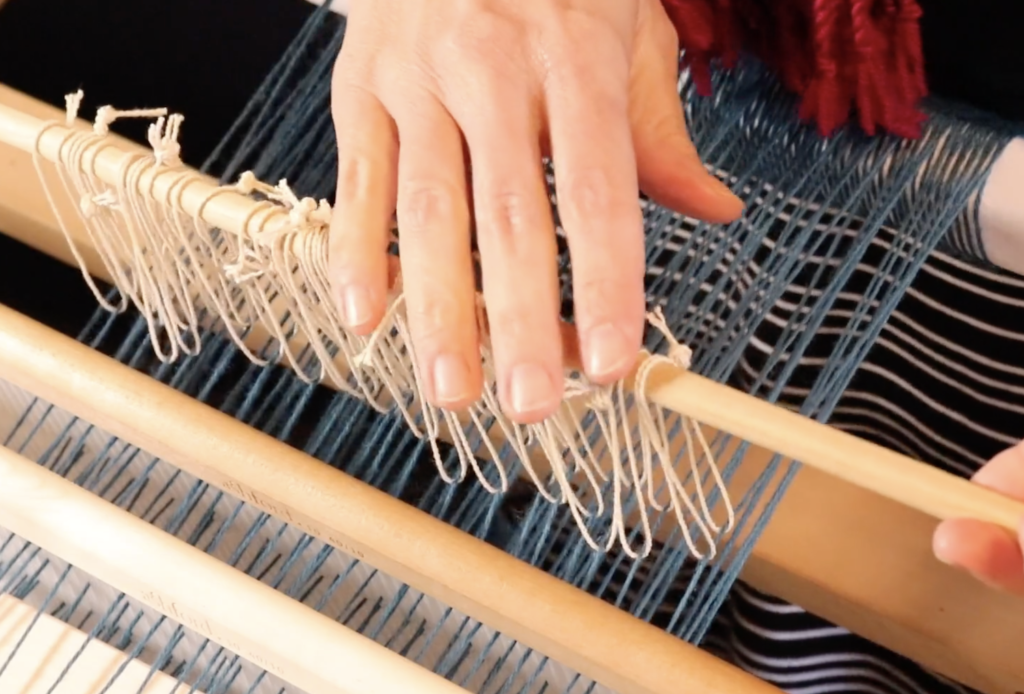
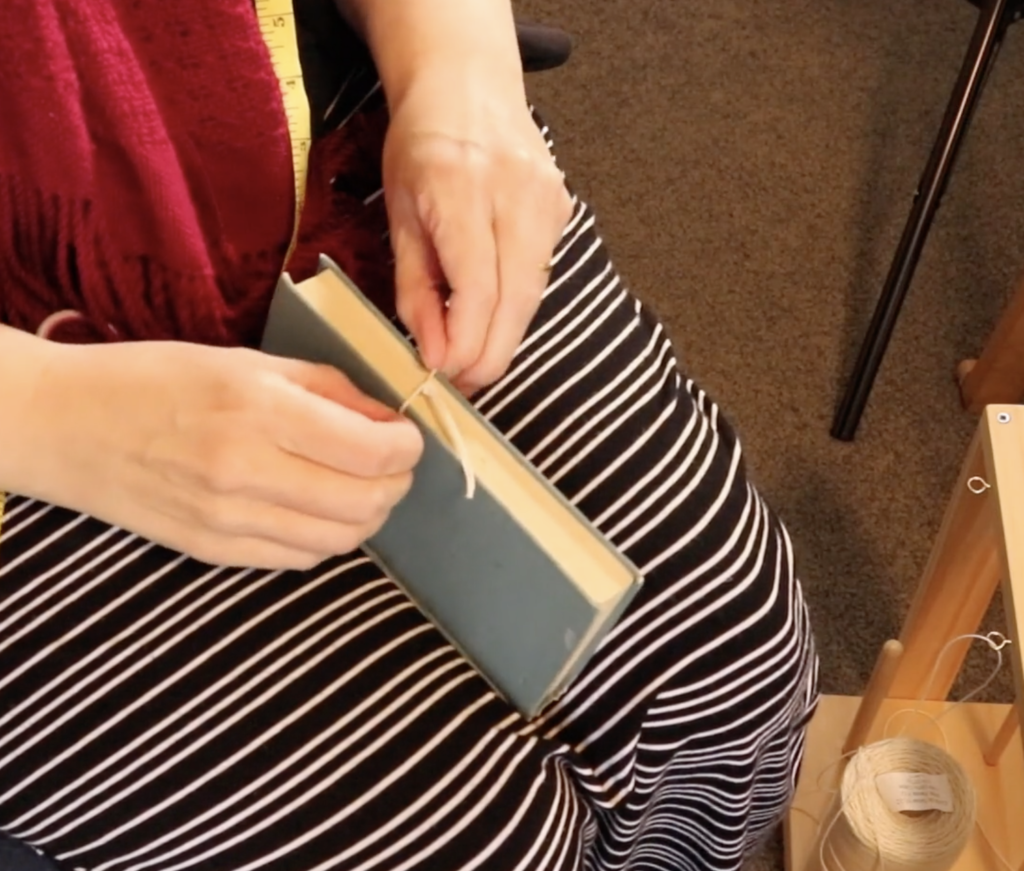
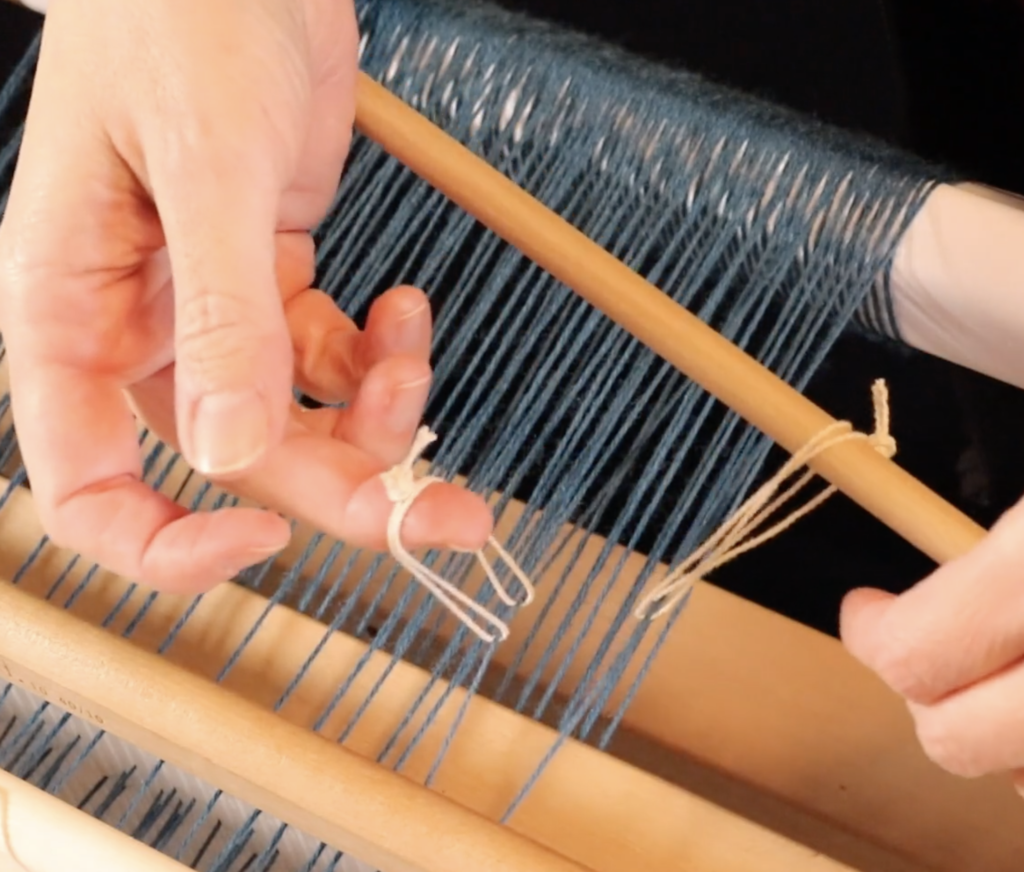
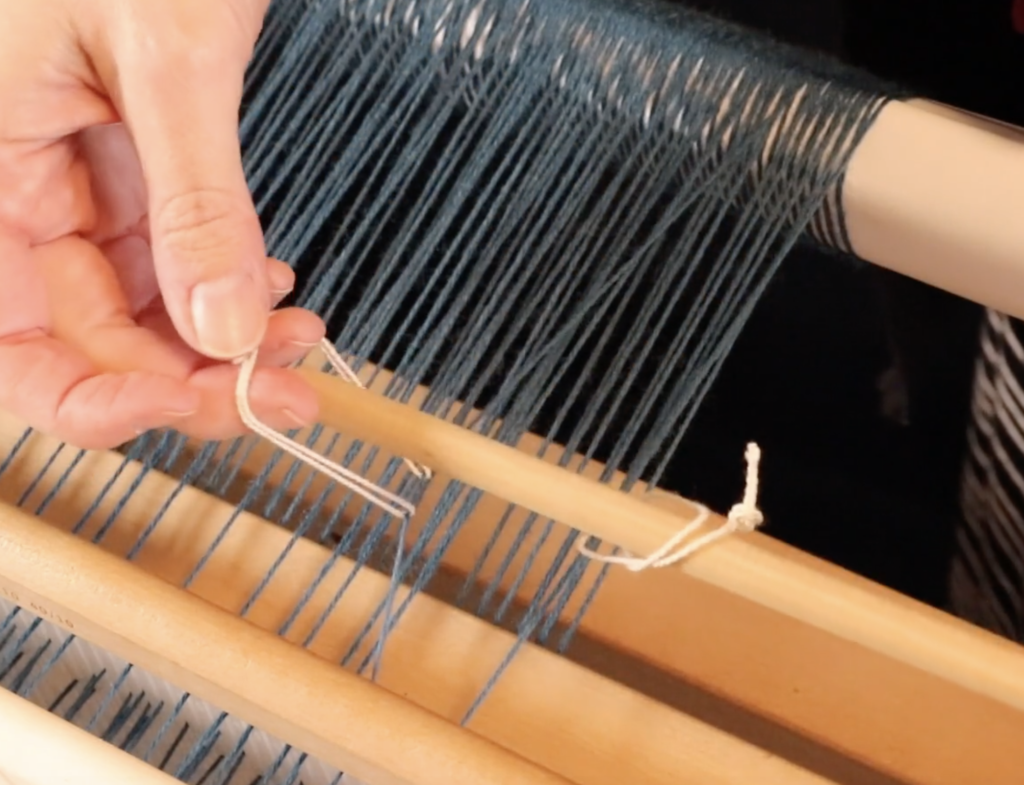
Bring a string heddle underneath the first thread so that it has a loop on either side of the thread. One loop will be smooth, the other will contain the knot. It is very much preferable not to have your knot near the thread. You want to arrange it so that it will sit on top of the heddle rod.

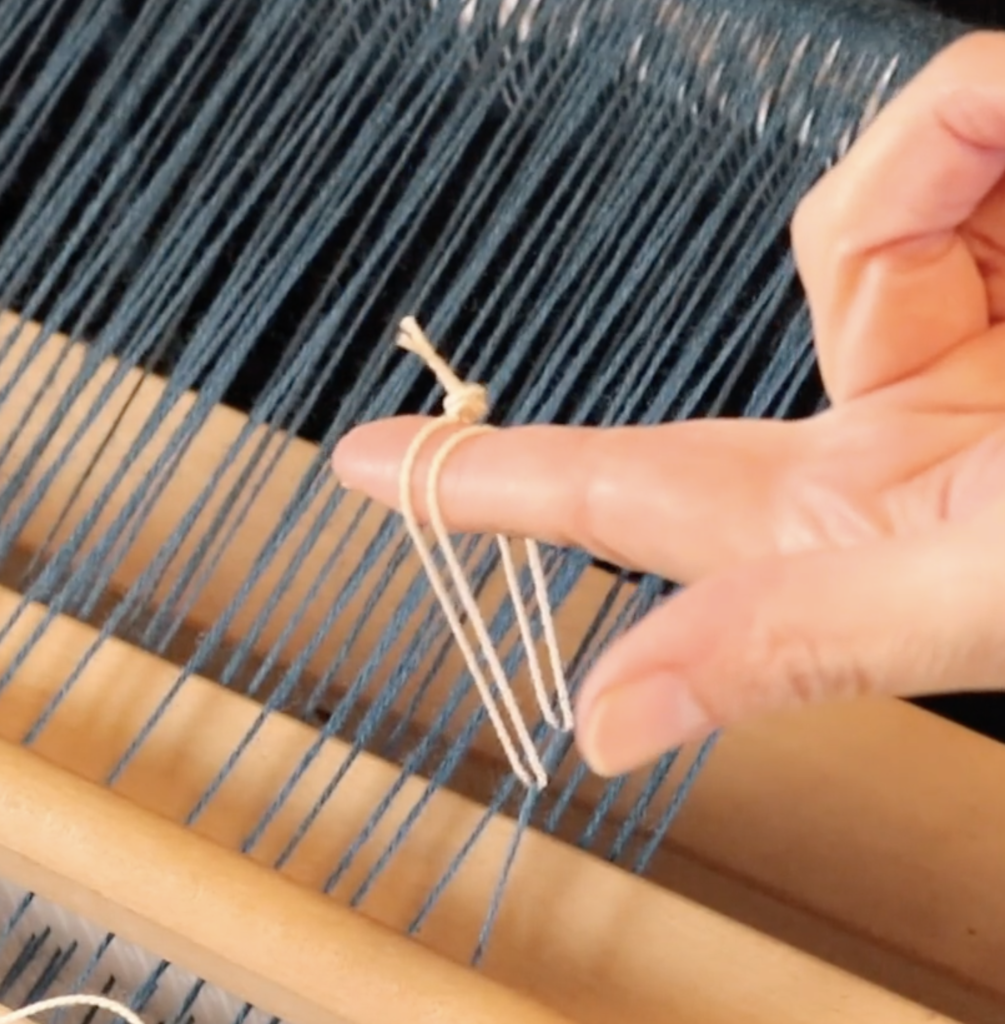
Bring the two loops of the string heddle together at the top. Note how my knot is sitting at the top rather than at the bottom or underneath the warp thread.

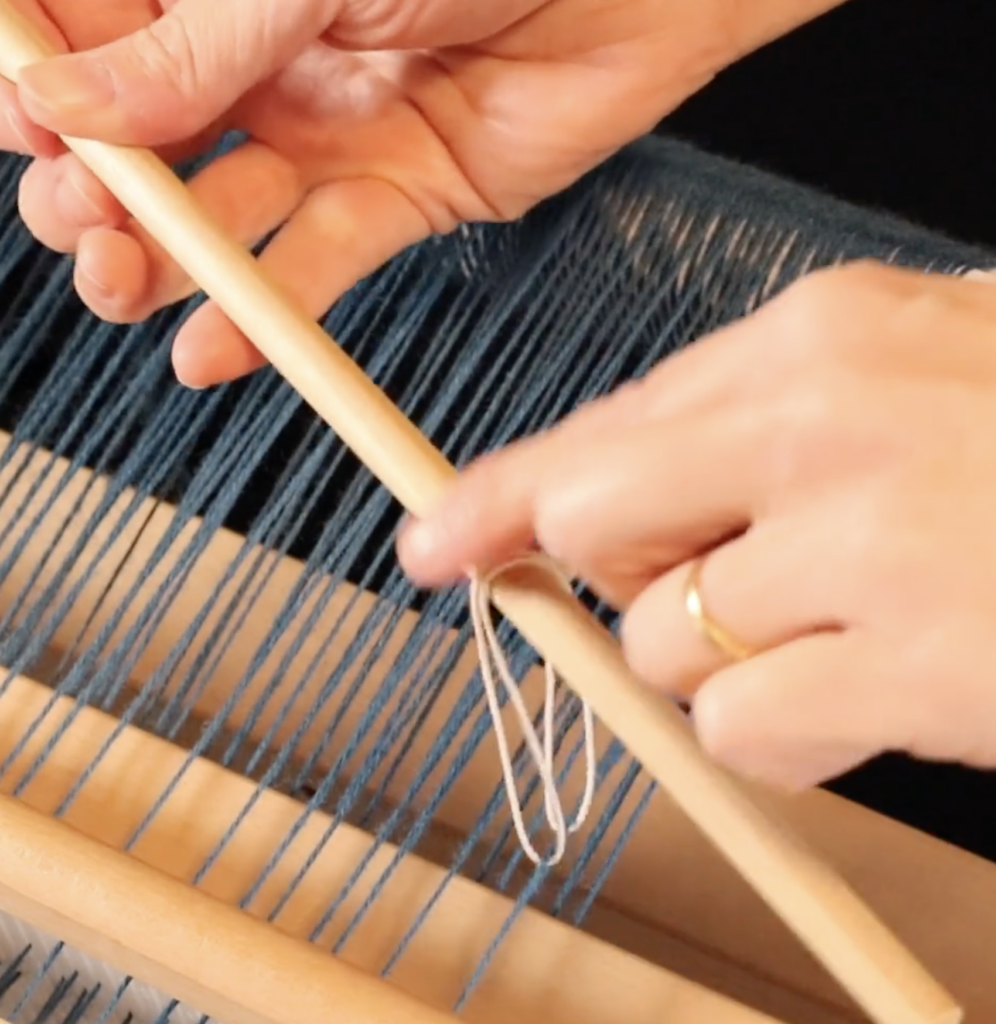
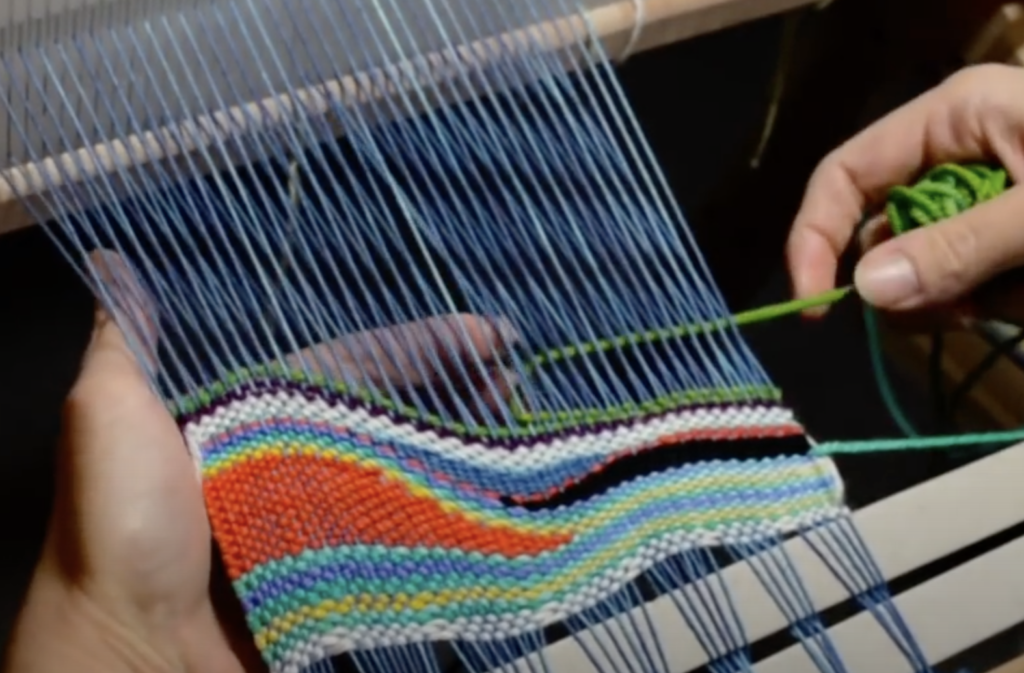
Bring in the heddle rod and slip the loops of the string heddle over it.

Now repeat this step with each warp thread that is sitting on your pick up stick, sliding them onto the heddle rod as you go.

Some of you may like to put the rod down on top of the warp as you organise each string heddle, I like to keep the rod in my left hand while managing the string heddles with my right. It’s a bit fiddly, but I do find it faster. You might need a bit of practice under your belt before you use my approach this though.

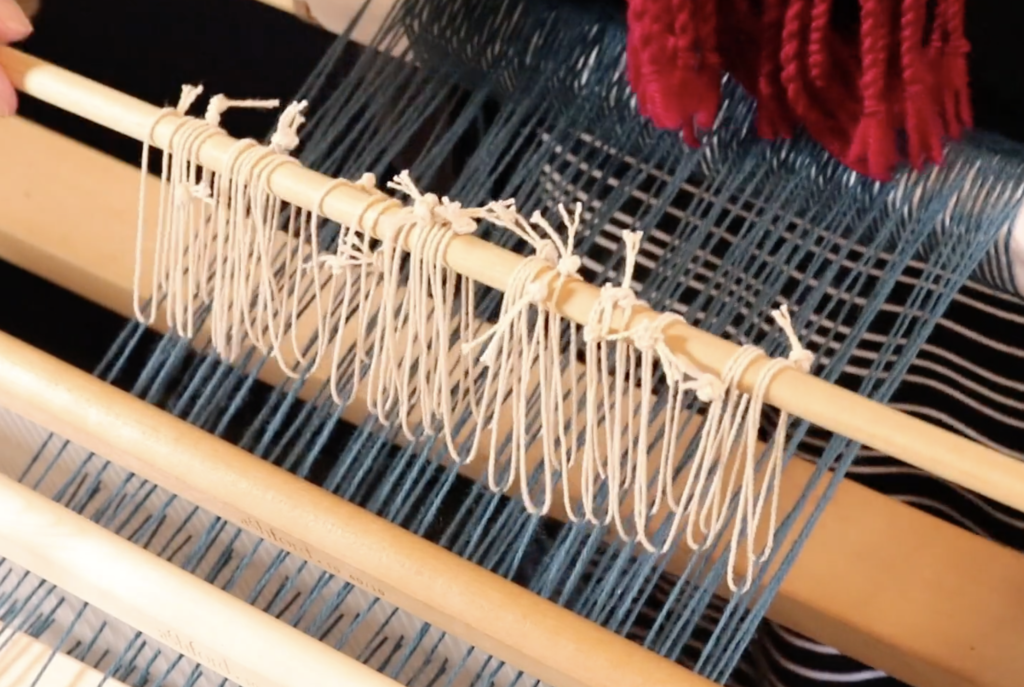
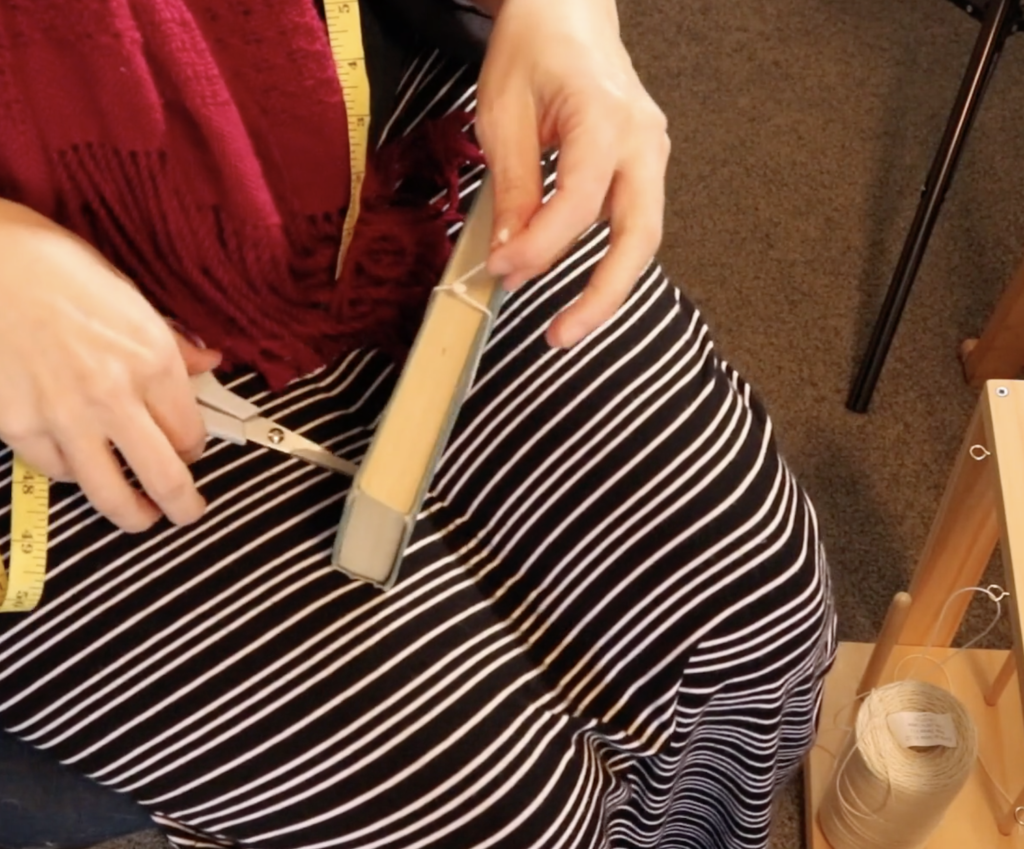
Once you have all your string heddles on the rod, you will want to secure them as it is all too common for that heddle rod to slip and then you lose all your hard work!

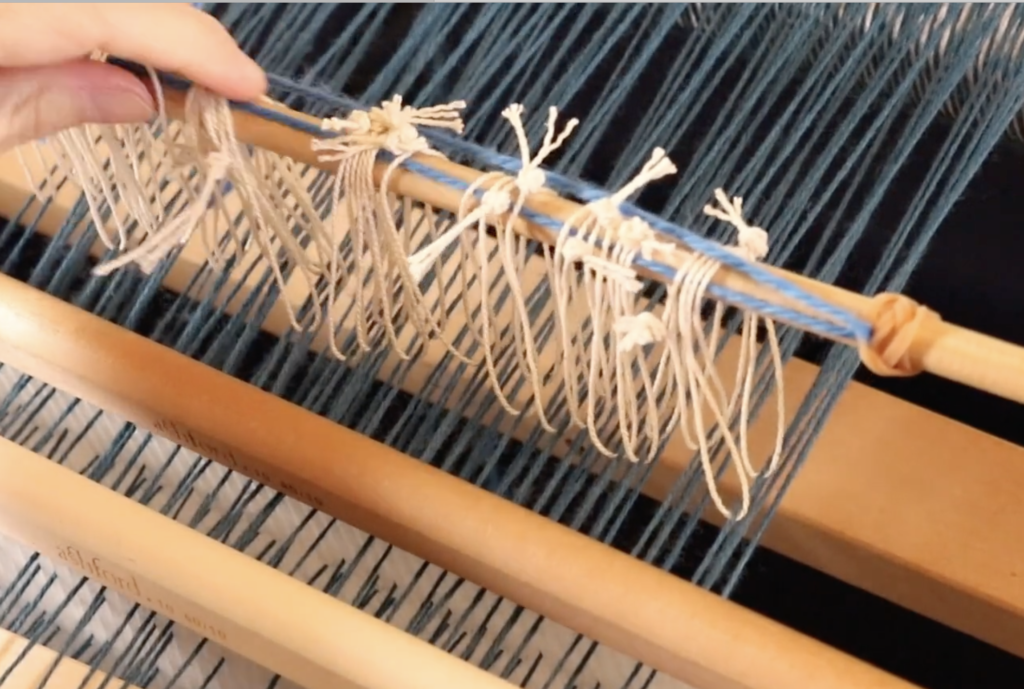
Some weavers like to use some masking or painter’s tape and place it across the top of the heddle rod.

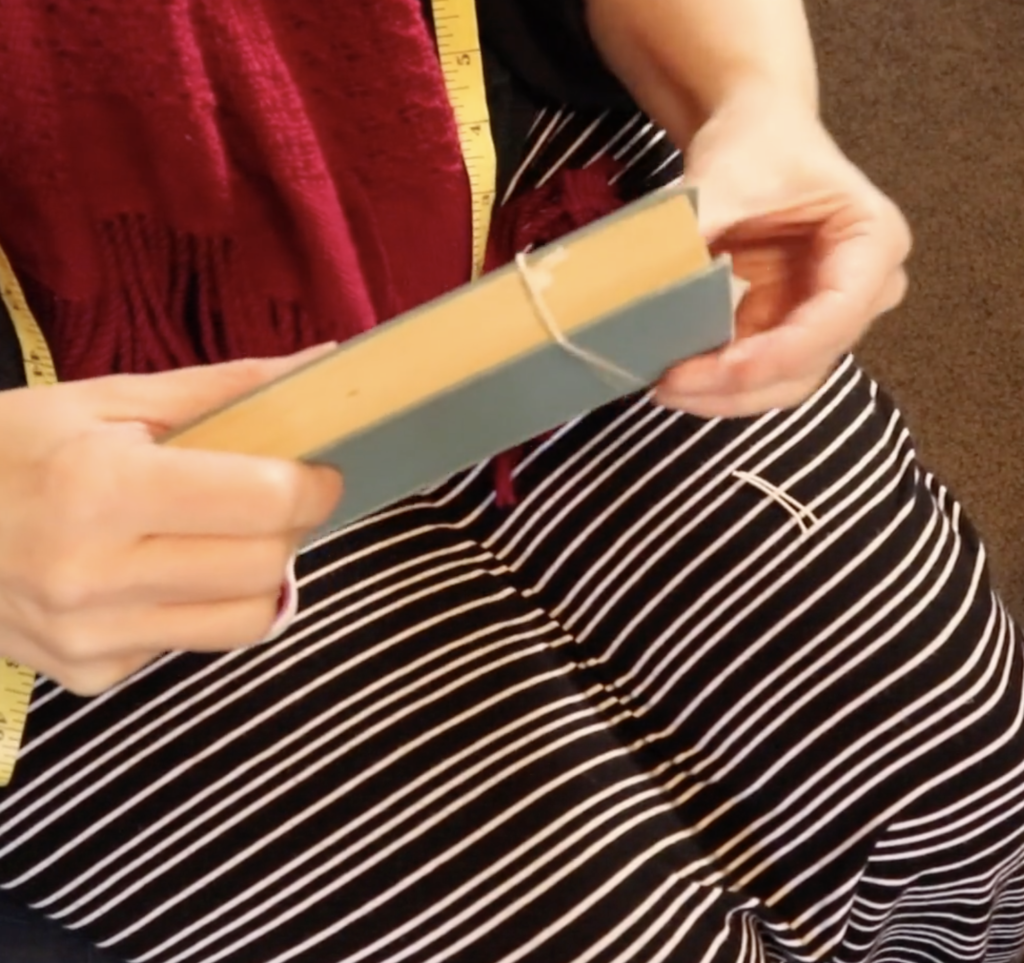
I have a different and perhaps peculiar method, but it sure does work! I place a rubber band on each end of the rod, close to the string heddles.

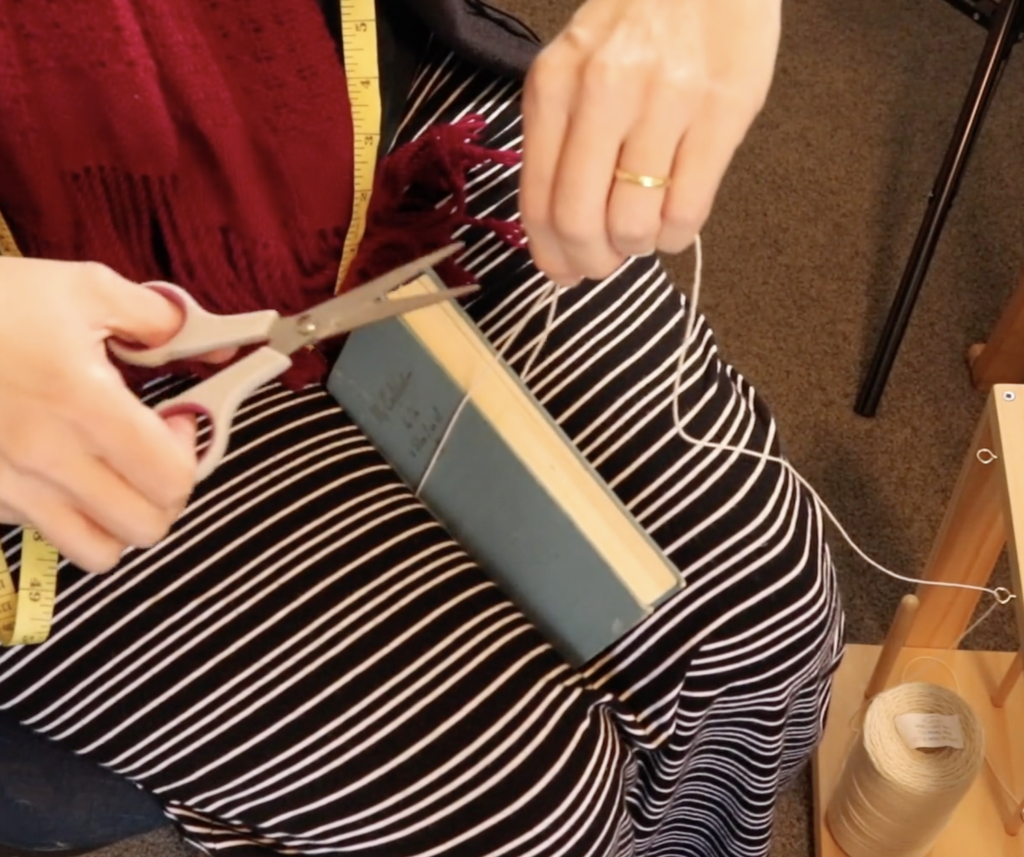
Then I run a piece of waste yarn right through the middle of the string heddles, pulling each end of the waste yarn through a rubber band on each end. Then I pull the cut ends of the waste yarn up and tie a bow.

Using this method, my string heddles don’t move and are completely secure on the rod. And no annoying, sticky tape.

If you want to see a video tutorial of this process, you can watch here-

I have a number of classes that make use of heddle rods:

Converting Drafts to a rigid heddle loom

Overshot on a rigid heddle loom (coming soon)

Pinwheels on a rigid heddle loom

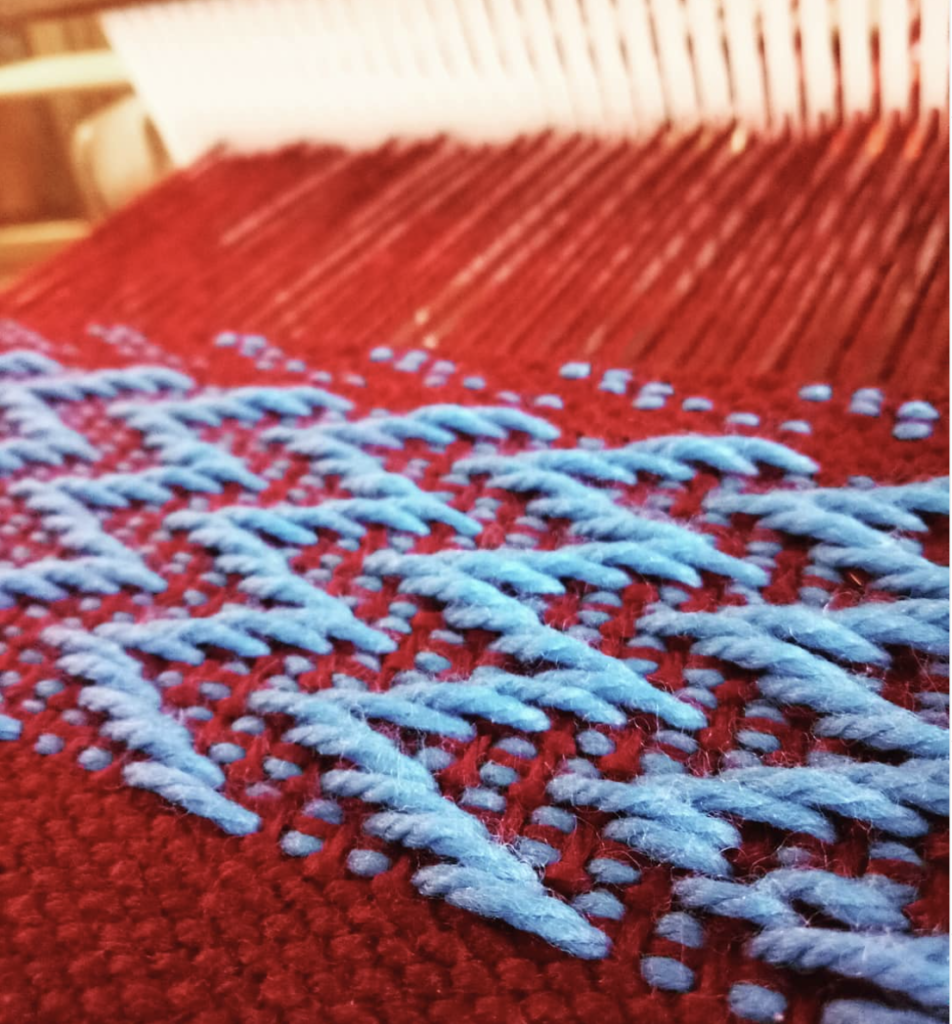
All of my free Krokbragd videos on Youtube are set up with a heddle rod too-

I hope you enjoyed this two part heddle rod series, don’t forget to catch the first post on making string heddles here if you haven’t already.

Be sure to leave any questions or comments below, I love to hear from you.

Until next time…

Happy Weaving!

Filed Under: Free tutorial, Krokbragd, Online Weaving School, Pinwheels, Rigid heddle weaving, Rigid Heddle Weaving Patterns, Tutorials, Weaving Tagged With: heddle rod, rigid heddle weaving, weaving tutorial

What is a heddle rod? Part 1 – how to make string heddles!

by Kelly 3 Comments

Never heard of a heddle rod? If you’re a rigid heddle weaver looking to expand your repertoire of skills by using pick up sticks, a heddle rod is a must learn!

There are lots of lovely patterns you can weave with just one pick up stick, but introducing a second (even 3rd, 4th!) pick up stick opens up so many more pattern possibilities

When you start experimenting with pick up sticks you will discover very quickly that when you are using more than one, the two sticks cannot slide past each other at the back of the warp.

This post contains affiliate links. For further information, please see my disclosure policy.

This leaves the weaver with a conundrum. One of the sticks can be left in place, but the other has to be removed and the threads re-picked up each time you want to weave that pick up stick row. See the picture below for an example.

That can be incredibly tedious, especially when using finer threads or a more complicated pick up pattern.

Luckily for us, there is a relatively quick and easy way to navigate this problem – a heddle rod.

A heddle rod replaces the second pick up stick and sits behind your heddle. The first pick up stick can slide back and forth behind the rod and sit at the back beam when not in use. Hey presto, now you’re weaving a 2 pick up stick pattern with only one stick and a heddle rod!

So, what is a heddle rod exactly?

It can be as simple as a piece of round wooden dowel or a flat, narrow piece of wood. It needs to be wider than the width of the piece you’re weaving and it needs to be smooth but preferably not slippery. The circumference is a personal preference, but not too thick is better – you want it to be light and easy to handle, as you’re going to be lifting it often.

You make string heddles for the rod. These strings, once made, looped around your picked up warp threads, then looped around your rod, will replace the second pick up stick.

One you have your rod installed, you lift the rod each time you want to weave that pattern pick. The string heddles lift up with the rod and in turn, lift up the warp threads they are looped around.

Let’s look at a 2 pick up stick pattern as an example:

Pick up stick 1 sequence – 2 up, 2 down, repeat

Pick up stick 2 sequence – 2 down, 2 up, repeat

Weaving sequence:

  1. Heddle up
  2. Heddle neutral, pick up stick 1 forward, on edge
  3. Heddle up
  4. Heddle in neutral, pick up stick 2 forward, on edge
  5. Repeat

To weave the above sequence with 2 pick up sticks in place would mean that for every 4th pick, you would have to pick up then remove pick up stick 2. Then pick up and remove again the next 4 picks. And that’s no fun!

Here is what your weaving sequence would look like if you left pick up stick 1 in place and installed a heddle rod to replace pick up stick 2:

Weaving Sequence:

  1. Heddle up
  2. Heddle neutral, pick up stick 1 forward, on edge
  3. Heddle up
  4. Heddle in neutral, lift heddle rod
  5. Repeat

Aha! So now our weaving goes much more seamlessly because we are flowing through the weaving sequence instead of having to stop and re-do that second pick up stick all the time.

Now that I’ve sung the praises of the heddle rod highly enough to have convinced you that you really need them in your weaving life, I’m going to show you how to install one.

Today (because this article is already getting long and I don’t want to keep you all day!) I will cover the string heddle component, and next week we will look at the rod and installation component.

To make string heddles, here is what you will need:

  1. A strong yarn suitable for string heddles. I use seine twine (in Australia it’s available here) and find it excellent for two reasons. 1. It is super strong. 2. It doesn’t get fluffy, sticky or static – y (I know, that’s not a word!) all of which will interfere with lifting your warp threads effectively.

2. A pair of scissors. Little scissors are handy for this job, but use what you have.

3. A string heddle template. This comes down to personal preference and how long you want your heddles to be. Too long and they are uncomfortable to lift, too short and they may lift your warp threads when you don’t want them to (for example, when you bring your pick up stick 1 forward) and confuse your shed.

You can use one of your heddle/reeds to measure around as a template, or my preferred method is a hardcover book measures at 10″ around – I like that length for my string heddles.

Something else that is handy but non essential is something to hold the cone of yarn as you wind off yarn to make the string heddles. My warping stand is perfect for this task. If you would like to make a warping stand for a fraction of the price of a store bought one, click here for our free tutorial.

Alright, let’s make some string heddles!

This image has an empty alt attribute; its file name is Screen-Shot-2020-09-03-at-12.34.20-pm-1024x799.png

Take one end of the string heddle yarn and wrap it around your template (remember, I’m using a hardcover book). Bring the ends together at the top of the template.

This image has an empty alt attribute; its file name is Screen-Shot-2020-09-03-at-12.34.52-pm-1024x857.png

Leave a good couple of inches to tie with and cut the end that is feeding from the cone. Be sure not to knot so close to the template that the string heddle is too tight to slide off when you’re done.

This image has an empty alt attribute; its file name is Screen-Shot-2020-09-03-at-12.35.26-pm-1024x871.png

Tie the two cut ends together using an overhand knot, then knot again. With a yarn like seine twine, this makes a really strong knot.

This image has an empty alt attribute; its file name is Screen-Shot-2020-09-03-at-12.35.58-pm-1024x849.png

Once the ends are securely knotted, you can cut the tails a little shorter which will just help to keep things neat and compact on the rod. Don’t cut so close to the knots that you risk them coming undone.

This image has an empty alt attribute; its file name is Screen-Shot-2020-09-03-at-12.36.13-pm-1024x963.png

Slip the completed string heddle off the template.

This image has an empty alt attribute; its file name is Screen-Shot-2020-09-03-at-12.36.37-pm-1024x854.png

There you have it – one completed string heddle! Make as many as you need and keep them somewhere handy for when you need them. The added benefit of using a strong yarn like seine twine is that you will be able to reuse these string heddles for many projects.

The next post will demonstrate how to actually set up the rod and string heddles, but if you can’t wait until then, or if you are more of a visual learner, I’m sure you will find this video most helpful:

If you enjoyed this post, I know you will love my Online Weaving School. With classes for all levels of weaver, there is something for everyone and you can start learning today, in your own time and the comfort of your own home. I hope to see you there!

Questions? I’m all ears! Leave me a comment to continue the discussion or just to let me know that this article was helpful to you 😊

Until next time…

Happy Weaving!

Filed Under: Free tutorial, Rigid heddle weaving, Tutorials, Weaving Tagged With: heddle rod, how to install a heddle rod, how to make string heddles, rigid heddle weaving, rigid heddle weaving tutorial

How to make the most of your membership

by Kelly 2 Comments

Have you ever purchased a gym membership?

Let me guess, when you signed up you imagined yourself on the treadmill or pumping iron regularly. A few days a week, if not every day! You took out a 12 month membership because everybody knows that this will be the clincher – once you’ve paid you have to get your money’s worth!

A gym membership (you thought) was just the motivation you needed to get going and finally get fit and stay fit.

Young woman exercising at the gym with weight

What happened next? One of two things:

  1. The first day you went was great, you felt awesome and on top of the world. Day 2, rolling out of bed early to fit in a session, you didn’t feel so crash hot about the whole thing. Day 3, you decided you really needed that sleep in, but you would definitely get back to the gym tomorrow. That was 6 months ago.

2. You made a plan and started slowly. You decided that 3 sessions a week was realistic for you and that you needed some guidance to start with. You wanted to build gradually towards a good level of fitness, free of injury or exhaustion. 6 months later, you maintain this plan and feel really great about your health and the steps you took to achieve your goals.

All of this is hypothetical of course, especially considering that I myself have never so much as stepped inside a gym – the very notion makes the hairs on the back of my neck stand up. Give me a healthy walk in the fresh air any day!

But I wanted to use the gym analogy today because it coincides pretty well with what I want to say about my Online Weaving School.

What does working out have to do with learning to weave? Quite a bit, actually.

  • Both require a commitment. And not short term, just as you don’t achieve fitness overnight, you don’t become a great weaver overnight.
  • Both take effort and patience.
  • Both involve goals setting and time investment.
  • Both are extremely rewarding and produce wonderful results if all of the above are adhered to.

I will be the first to admit that I absolutely love the fact that memberships in my Weaving School are thriving at currently over 800 students. I’m amazed and so grateful that so many new and seasoned weavers want to learn with me.

But, I have to tell you that the figure of over 800 students is only a vanity metric if most of those students are not actually engaged, making the most of their memberships and learning exciting new techniques.

Because this is not all about how much money I can make from the volume of students I have. That is not why I started all of this (you can read more about my story here and a more recent version here) and it’s not why I work so hard to make my school the best it can be.

The thrill and enjoyment that I get seeing a student have a lightbulb moment, weaving something beautiful or falling hopelessly in love with this craft, is why I do what I do. You really can’t put a price on that.

If you are already a member, please, use the tools that I’ve provided to make your membership the very best learning experience I can provide. Join the membership community, interact with the other students, plan your class list and start working though them.

Know that if you are having trouble, there is support available. Members receive personal support from me when needed, and also from the community of other members.

So, what will you get with a membership?

You will get a HUGE variety of weaving classes to choose from that you can work through in your own time, in your own way. You can stop the videos any time you need to and rewatch again and again. There are countless printable PDF information sheets.

You will get to join a friendly and helpful community of weavers at all different levels. Some are absolute beginners, others have been weaving for years. And they will all cheer you on!

What won’t you get with a membership?

You will not get a babysitter. I don’t mean that to sound harsh, but just like a gym membership, the results are up to you. You will see improvement and success if you put in the time and effort it takes. But you have to show up, have a positive attitude and be ready to learn.

If you are interested in taking out a membership or perhaps checking out one of the free classes available at my weaving school, here are so links for you to have a look at:

Gold Membership

Yearly Membership

Monthly Membership

6 Monthly Membership

Free classes:

Stashbuster Notebook Covers

Kitty Cats on a rigid heddle loom

Waffle Weave for rigid heddle loom

Wave and Zigzag shuttle weaving

Heart wallhanging

Calculating Warp for the rigid heddle loom

Honeycomb on a rigid heddle loom

Cardboard Loom tutorial

Honeybee Cushion

Do you have a membership already? What are your strategies for ensuring you make the most of it? Share in the comments below, I would love to hear from you!

Until next time…

Happy Weaving!

Filed Under: 4 shaft weaving, Floor Loom Weaving, Inspiration, Online Weaving School, Rigid heddle weaving, Tutorials, Weaving Tagged With: learn to weave, membership, online learning, online weaving school

Floor Loom Review – David 2 Louet loom

by Kelly 13 Comments

I’ve had a lot of people ask me to do a review of my David 2 by Louet floor loom.

This post is not sponsored or endorsed by Louet, it’s just an honest review for your own information or research.

I have written about this loom and floor looms in general before, and also about what to expect when your loom arrives, but this article gets into the specifics of the Louet David.

If you purchase a new David in 2024 or after, you will be buying the David 3, not the David 2. The David 2 has been retired. But this is still a very useful review as there are only a couple of minor differences between the 2 and 3.

If you are purchasing a used David, it may well be a David 2 and would be exactly like my floor loom.

I must admit that when I was looking for a floor loom to purchase it was kind of hard to get information on this particular loom. All I really had to go on was a little amount of information on the Louet website.

*This post contains affiliate links. Please see my disclosure policy for further information.

I knew that I wanted something compact enough to fit in the smaller space I had available and due to my lack of experience with floor looms at the time, I wasn’t confident that a second hand, possible fixer upper would be a sensible choice.

One of the reasons that I was interested in the David is because I live in Australia and there are somewhat limited choices when it comes to looms and most have to be custom ordered and imported.

The Schacht Baby Wolf was a very strong contender in my decision making because it was more familiar to me and it was easier to find information on it.

To further complicate the issue, I had never woven on a floor loom (true story!)

Through a good deal of googling, I had found an agent in Sydney who could order a David for me. Not only that, she and her husband delivered the loom in person and brought it into my home, even though they are from another state! Amazing customer service!

I will be going over the loom discussing a few different features and then giving you my opinions on the positives and negatives. There are not many negatives, but maybe the things that I’d like you to think about if you’re considering purchasing the same loom.

The first thing that I do love about this loom is the compact size. I’ve had it in a couple of different positions in my studio, and it’s easy to move and fits a variety of spaces. The weaving width is 90cm (35″) which is a good width for many different projects.

You need a certain amount of space at the front and back of the loom for warping – I think a 1 metre clearance at the front and back of the loom is optimal. You can get away with less, but it may be a little cramped.

The next thing I love about this loom is the quality of make. I can’t fault the quality at all, from the wood, the finishing to all of the pieces that go with it, it’s just beautiful quality and design.

My husband actually put it together for me – I’ll admit that because my brain is not very wired for putting things together and following set written instructions, but my husband is very good at that. He didn’t have any trouble following the directions. It did take quite a few hours to put together, but that is to be expected with a loom of this size and type.

The David loom comes with texsolv heddles and cords. I personally really love texsolv as it is so light and quiet. Metal heddles can be heavy and noisy, but this is a personal preference and not to suggest that one is better than the other.

Treadling on the David is very light and easy. It is not the least bit clunky when treadling because of the spring system and it’s easy on your body. Speaking of treadling, I like the texsolv tie up system which is simple to learn to use and quite quick to tie up. There is no real “tying” up, you just pop the texsolv cord holes over the treadle screw heads and away you go. The texsolv cording is strong so you don’t have to worry about breakage while treadling.

The David has a gliding beater, meaning that your beater is positioned on metal rods. It “glides” back and forth on the rods, so it is level and steady. I’ll admit that it took me a bit of getting used to. The Ashford table loom I had been weaving on previously had an overhead beater, which is loose and swinging.

The gliding beater is not as easy to use in some ways, as it is rigid and set on the tracks of the metal rods. Now that I’ve been using it for a number of years, I am used to it and have found ways to weave most effectively with it. I do think that once you’re accustomed to it, it does result overall in a more even beat.

One thing that really helped was using a small amount of lubrication on the rods. I couldn’t find much information on whether or not this was a good idea, but to me the beater was feeling quite stiff and not so enjoyable to weave with.

So, I applied a very small amount of lubricant with a dry, clean rag. The difference was amazing! I now usually lubricate between projects. The beater now really does feel like it’s gliding. Just be sure to use a non silicon lubricant that won’t build up a residue on the metal rods. I use the Australian made Inox lubricant spray.

Always apply the lubricant to the rag, not directly to the metal.

Another way to work successfully with the gliding beater is to find the right warp tension. Too tight and the beater doesn’t glide as well. Just like on any loom, there is a sweet spot for tension that you discover through experience. I am careful when I advance my warp to advance to the spot that feels right for me – not too far towards the front beam or, once again, the beater will struggle and the look of your weaving will suffer.

I advance in small increments and adjust gently towards a firm tension. I hope that makes sense!

This loom came with a 10 dent reed. I haven’t purchased another reed at this point due to the expense and lack of space to be able to store yet another piece of weaving equipment. When I need to use a different sett, I just adjust the number of threads in my reed to accommodate. I very often weave at 20 epi, so I simply double my ends in the reed.

The reed and beater are removable for warping and threading, as is the front breast beam. This is really handy when you get to the threading stage, as you can get in really close to the heddles to thread which saves my back from days of pain afterwards!

One feature that I’ve found particularly great is the ability to put add or remove heddles to the shafts after warping. With my table loom I have to collapse the castle (the upright part of the loom) and tilt it in order to adjust heddle numbers. Not so practical.

On the David, if I have miscalculated the heddles for my project and I need a few extra all I have to do is unhook the texsolv cords on the top and bottom of the shaft, slide the new heddles on and hook the cords back on.

Another feature I particularly like about this loom is the friction brake. I can be weaving away and when I’m ready to advance my warp all I have to do is lean over the side and pull up the friction brake to release the warp tension. Then I use a handle also on the right hand side to advance my warp forwards.

Louet looms have a built in raddle, which is a unique feature. It means that instead of taking your warp off the warping board and then taking it to a table to lay into a raddle, then tying the raddle onto the loom to begin warping, you just take the warp from the warping board directly to the loom. When you wind on the warp, you can then tension the warp over the top of the loom, which can be quite handy if you are using weights to assist with tensioning.

I usually have to break up my time placing threads in the raddle, as standing for a longer amount of time wreaks havoc on my back!

I hope to eventually purchase a sectional warp beam for my David, as I prefer to warp floor looms with my Sawyer Bee Warping Square.

You receive a pair of lease sticks and some wooden separator sticks with the loom. I have devised my own methods for using the lease sticks, as initially I found it way too fiddle trying to deal with the sticks while warping and threading. I didn’t have the extra pair of hands to hold the sticks steady, so I now use stretchy bands (like the Ashford bands that they call “helping hands”) and these make a huge difference. I also like to use metal rings that open and close through the holes in the ends of the sticks to help keep them together and hold them steady.

I use the wooden warp separators mostly at the front of the loom as I advance my warp. At the back I use a roll of brown craft paper which does an excellent job.

I feel that I have a new appreciation for my David loom since purchasing a much larger floor loom. The David is simple to dress and weave on and so light to treadle.

Those are all the basics of the loom, I could definitely talk about other features but this article is already getting long!

Now, you may be wondering what the cost of this loom is?

Bear in mind that I bought this loom a number of years ago now and inflation is crazy.

At the time of purchase, my loom cost around $4000AUD. That included the cost of importing. That price does not include the extras I needed such as boat shuttles, extra heddles, weaving bench etc.

There are also optional extras available like an extra cloth beam (for longer warps), sectional beam and a Louet weaving bench. I don’t have any of these. I use a piano stool as a weaving bench, it’s much more affordable.

Revolution Fibers in the US list a current price from $4,770USD (at the time of writing this article).

In Australia, you can purchase from Thread Collective at a current price of $6,780AUD.

These prices don’t include shipping and can vary according to the rise and fall of the Australian dollar.

If you would like to know even more about this loom, I have a number of videos that will interest you.

This is my first video review of the Louet David which I filmed a few years ago. You get to see the parts of the loom, although some of the information is different to this article as my opinions may have changed over time:

I also have a demonstration to show how quiet this loom is:

And a fun little video that I made not too long after I purchased the loom. It’s nice for me to look back and see how much faster I weave now!

I hope this article has been informative and interesting for you! If you have any questions, please leave a comment below, I love to hear from you 😊

Until next time…

Happy Weaving!

Filed Under: 8 shaft weaving, Floor Loom Weaving, Weaving Tagged With: floor loom weaving, loom review, louetdavid

Wash Your Hands Towels Photo Gallery

by Kelly 3 Comments

The Wash Your Hands Towels have been such a successful project.

Weavers from all over the world, most of them in some form of lockdown at the time, took up the challenge to weave some beautiful towels.

*This post contains affiliate links. Please see my disclosure policy for further information.

If this is the first time you have come across this project, you can read all about it in this post.

Basically, I wanted to share a free rigid heddle project to help weavers re-focus and occupy themselves in a positive way during the beginning of the pandemic, when none of us really knew what to expect or how it was going to pan out.

When brainstorming for a project, everywhere I turned I was hearing “wash your hands” and that became my inspiration for the towels.

It was also important that the project be easy enough for beginners but lovely enough to interest more seasoned weavers. It was thrilling to see that weavers of all different levels threw themselves so enthusiastically into this project – and that 3 months later towels are still being produced thick and fast!

Almost every day I’m seeing a new set of towels shared on social media. Many of them are so varied and in a myriad of colour ways.

Some weavers have chosen to follow my instructions exactly, others have changed the colours, and some have merely used my towels as inspiration and put their own spin on the design. I love them all!

One of the yarns I recommend for these towels is Sugar n Cream but I’ve also been hearing really good things about I love this Cotton! It’s not readily available here so I haven’t tried it, but from all reports it’s a really lovely yarn and suitable for this project.

I wanted to create another space to showcase at least some of the towels in a gallery:

I hope this gallery of gorgeousness inspires you to weave a set of Wash Your Hands Towels too!

Make sure you visit this post for the printable PDF, materials list and video class links.

This free class is also available at my Online Weaving School.

Until next time…

Happy Weaving!

Filed Under: Free Pattern, Free tutorial, Health and home, Rigid heddle weaving, Rigid Heddle Weaving Patterns, Tutorials, Weaving Tagged With: rigid heddle weaving tutorial, washyourhandstowels

My loom just arrived. Now what?

by Kelly 5 Comments

You have made the big leap and purchased your very first loom! You can hardly contain your excitement and you start to wonder whether it’s normal to have been stalking the delivery guy like you have been!

You are well prepared, you’ve done your research, watched a ton of Youtube videos and read a heap of weaving related articles. You just cannot wait to get your hands on that loom!

*This post contains affiliate links. Please see my disclosure policy for further information.

Am I over exaggerating here? Well, this was me waiting for my first loom to arrive so I’m sure many of you have felt the same.

Depending on the loom that you purchase, it can arrive to your door in any number of ways. I’ll discuss each of the main loom categories so that you know what to expect when your order arrives.

Inkle Loom

My Ashford Inkle Loom arrived with some assembly required. The assembly was very basic and did not require complicated tools to put together.

You need to glue and tap the pegs into place. That glue then needs to be left for 24 hours to completely dry, which is an important step in the future stability of your loom.

Then it’s a simple matter of installing the small pieces of hardware provided (the rubber feet, the tension peg etc).

Ashford do recommend to use a wax or other sealant on the wood of the loom once you have assembled to protect the wood from sun and moisture damage or other stains.

Rigid Heddle Loom

A rigid heddle loom will arrive flat packed in a box. Depending on the company, the loom pieces that are wood may or may not be finished. Ashford rigid heddle looms are not finished, so if you want to wax or lacquer your loom you will need to do that, then let the pieces dry before beginning to assemble.

The knitter’s loom, which I wrote about here, comes with the wood finished and ready to assemble, so that is something to bear in mind.

The length of time to assemble will vary and may depend on your aptitude to follow written instructions. I noticed that Ashford did recently upload this rigid heddle assembly video, which should be a good help to many.

A rigid heddle loom is not too difficult to put together and depending on the size you have purchased, should take 1 – 3 hours (not allowing for glue drying times where applicable).

Tapestry Loom

It’s more difficult to talk about a tapestry loom as there are many different types – some are made of wood and some of metal.

The assembly of my Mirrix Big Sister was a very simple affair as there really are not that many parts. There was no screwing wooden sections together, it was more just placing pipes within other parts and tightening up. So, even if you were challenged by written instructions, you could easily have this type of loom put together in under an hour.

If you are interested in this type of loom, I’ve written a review here.

Table Loom

Table looms will also mostly come flat packed in boxes and the pieces are all finished and ready to assemble. There are a lot more parts to a table loom than a rigid heddle. I remember the first time I bought a table loom, those boxes were very exciting but quite confronting as well!

Luckily for you, if you have purchased or intend to purchase an Ashford table loom, my husband and I have put together two detailed videos that take you step by step through the assembly process.

I have loved to have a video like this for my first table loom assembly, but I’m very happy to think so many new weavers don’t have that same headache and can instead follow our instructions to get it done.

You can watch the first video here:

I recommend that if your table loom has just arrived, set aside a day where you don’t have much happening to put it together. With drying times, you may find it easier to work on it over several days, getting a few steps done on each day.

That makes the process not too overwhelming and tiring. Don’t worry if it takes you a bit of extra time to put together, you will get it done and it will be worth it.

Floor Loom

This is a biggie. Literally! The size of a floor loom means that the pieces are plentiful and large. Floor loom pieces should come finished and ready to assemble. Most of the time they will be flat packed, but not always.

Of course, if you purchase second hand, or are lucky enough to get a floor stock loom from a shop, it will be either fully or partly assembled.

If your floor loom is new and in pieces, it is super helpful to lay out all the pieces in the approximate correct shape of the frame of the loom on the floor. This helps you get a good look at how and where the pieces will go.

Don’t expect to get assembly done quickly, it can easy take several days and you will need a good amount of space where you can leave partly assembled parts and non assembled parts laid out where they won’t be disturbed.

My Louet David was laid out on a carpeted floor in a non foot traffic area of our home, which made it all so much easier and meant that none of that beautiful, smooth wood got scratched or damaged in any way.

General Assembly Tips

  • When your loom arrives and you unbox it, keep all like pieces together (screws of a certain size etc).
  • Using the instructions provided, go through every piece to ensure it is there. Factories can make mistakes, it happens occasionally that a piece will be missing. If that happens, you want to know about it before you begin assembly rather than half way through.

It also means you can contact the company right away and tell them a piece was missing in the beginning. If you find a piece is missing part way through assembly, you can’t be absolutely sure whether you may have lost a small piece yourself. Trust me, it’s worth checking!

  • Lay all the pieces out in a space, if you have the space. This helps you to visualise how the loom will look and gain an understanding of what the parts do.
  • Teamwork is awesome! If you have a spouse or someone else who can assemble the loom with you, that is very helpful. Not only are four hands better than two, two brains are much better than one! It can make all the difference to have another mind at work beside you, to see things from a different angle to you.
  • Take your time. You will only need to put the loom together once, so it’s worth doing it properly and not to rush. You will get to weave on it, you just have to be patient!

Are there any other tips you would add to these? Please share them in the comments for the benefit of other readers. Thank you for your contribution!

Until next time…

Happy Weaving!

Filed Under: All about looms, Inkle Weaving, Rigid heddle weaving, Table loom weaving, Tapestry Weaving, Weaving Tagged With: inkle loom, loom assembly, rigid heddle loom, table loom weaving, tapestry loom, weaving

Free Style Tapestry Weaving on a Rigid Heddle Loom

by Kelly 8 Comments

You know sometimes you do something with absolutely no notion of the possible future repercussions?

That is what happened when I made this freestyle tapestry series. I was really doing it for me, but I decided to turn the camera on and bring my Youtube audience along for the ride.

Since then, the 4 video series has gone viral on Youtube, with one of the videos winging it’s way towards 1 million views! Crazy!

These videos were recorded pre professional lighting and sound equipment. I was using my son’s camera.

This video series on Youtube began after a busy morning, a tired me and a desire to weave something that would be rewarding and yet didn’t take too much brain power.

I was too tired to sit down and calculate a project or go through my stash to see whether I had enough yarn to complete a project.

So instead, I found some bits and pieces of yarns left over from other projects, put a short warp of a fingering weight cotton, hand dyed and left over from a previous project, on my rigid heddle loom (which only took around 20 minutes to do), sat down with my bag of left overs, and just started weaving.

How often do we gift ourselves with this kind of luxury? To weave with no set plan, to invest in the process more so than in the expected outcome? I know that I definitely don’t do this enough!

This kind of weaving is so relaxing and free-ing. It is not a fast way to weave, but when you get in the groove it doesn’t seem to matter how long it takes.

With this kind of weaving we use the basic rules but we bend and stretch them. We say, “I want to do this!”, and we do it. We push the weaving around, we beat it up and down, we put in colour as we go, we use all kinds of yarns. And we love the process.

So, what do you need to get started?

*A rigid heddle loom

Well, a rigid heddle loom is really perfect. It will take care of our 2 sheds and our tension beautifully, so that once warped all we have to think about is the weaving. The heddle goes up, the heddle goes down. Repeat. Simple.

You could do this on a Sampleit or Cricket loom with no problems as you don’t need a wide width – you can make the piece whatever size you wish.

I used a 10 dent heddle for my piece.

You can also weave a piece like this on a simple frame loom or tapestry loom, but using a loom that has the ability to change sheds is really helpful. My Mirrix Big Sister is an example of a tapestry loom with a shedding device.

*A stick shuttle or two.

Using a lot of colours in one project doesn’t lend itself well to stick shuttles, as you would need a lot of them. Therefore, I usually use a couple of stick shuttles and for the rest of the colours I just pass them through with my hands and keep the weft yarn in either butterflies or little balls. Butterflies are neater though. I have a video tutorial on how to make them!

*A threading and reed hook

The reed hook is for pulling threads through the slots of the heddle/reed when you’re warping. The threading hook is to pull the threads through the holes in the heddle/reed when threading the loom after warping. I love and use these Ashford Double Ended Hooks, I have a bunch of them in case I lose any and use them constantly.

*A Tapestry Needle

This is really handy for if you intend to hemstitch your piece and also for needle weaving extra yarn into gappy sections if you want to. A tapestry needle with a bent tip is even better!

*Additional beater

You will need this because we are creating a weft faced weave here, meaning that we want the weft to totally cover the warp. The heddle/reed that we normally use for beating does not push the weft down enough as it is designed more for a balanced weave.

There are a number of options for an additional beater. A large fork works really well. I also have a little tapestry beater that I use. There are “proper” tapestry beaters available as well, but I would only purchase one if I was going to be doing this type of weaving a lot.

What about the warp calculations?

Well, as I pointed out, I didn’t calculate at all, but my warp was around 8 inches wide and 40 inches long.

And the yarns?

A variety of yarns were used, but I did use quite a lot of wool in light worsted/dk weight and also in an aran weight. Some were fingering weight. Some were hand dyed, some were commercial.

I also used some cottons in various weights.

Techniques used:

Mostly this type of weaving is just plain weave (1 pick in the up shed, 1 pick in the down shed, and so on) that is packed down tight.

In some areas I would build up mounds or shapes by taking the weft part of the way through in one shed, change the shed and then take the yarn back the same way I just came in.

For example, I brought the green in from my right in the down shed. Roughly half way across I stopped and took the yarn down through the warp at the back rather than continuing it to the left hand side for a full pick.

I changed into the up shed and took the green back to the left.

This is a classic tapestry technique that allows the weaver to begin building up areas of colour, usually to make shapes.

If you keep ceasing the weft yarn and turning back in the same place each time, you will build a block or straight edged shape. Or, by varying the place in the warp where you turn back the weft, you can taper the shape to make it rounded.

The first and second videos of the series show in detail how this technique is used.

In a number of areas I have used outlining. This is basically putting in a darker weft that either outlines a shape you’ve made or just provides a good contrast between one colour and the outline colour. You can see here that I’ve used some black to outline a green section, and the contrast is very effective:

In some places I combined outlining with needle weaving. Needle weaving allows you get weft yarn into tricky spots. I had created a valley in the middle of my piece, but then I wanted to fill it with a small, highlighted section. I started by outlining a “jewel” shape with my black yarn and a tapestry needle:

Next, I brought in a brightly coloured and highly contrasting hand dyed wool with the needle, and wove that into the space that I had outlined with the black wool:

Needle weaving isn’t the only way to do this, but it’s easy to get exact smaller shapes and sizes within the piece.

If you’re interested to know how the piece actually starts out and how you achieve all those cool curves, the 3rd video restarts another piece in order to show just how it’s done.

And then finally the 4th video has an added bonus of demonstrating how to weave a circle within your piece using a simple template. You can also embellish with embroidery, which I did in some sections of my finished piece. This is easier to do while your weaving is still on the loom.

Due to the huge response from this video series, I decided to make a second freestyle tapestry series for Youtube. This one was inspired by the Van Gogh painting, Starry Night. The video series is filmed mostly in real time and is at a very relaxed, step by step pace.

And, of course you will want to check out the original 4 part video series beginning with part 1:

If you want to get a little more serious or delve into some more traditional techniques for weaving tapestry on your rigid heddle loom, I have an online course that will be just the thing for you.

Some of the topics covered in Tapestry on a rigid heddle Loom include soumak, interlocking, straight lines and how to use a tapestry cartoon. I’m sure you will love it!

Do you have any questions? Have you tried this type of freestyle tapestry weaving? Or do you intend to?

Let me know in the comments below, I love to hear from you!

Until next time…

Happy Weaving!

Filed Under: Free Pattern, Free tutorial, Rigid heddle weaving, Rigid Heddle Weaving Patterns, Tapestry Weaving, Tutorials, Weaving Tagged With: freestyle tapestry, rigid heddle loom, rigid heddle weaving, rigid heddle weaving patterns, rigid heddle weaving tutorial, tapestry weaving

Japanese Journey Masterclass!

by Kelly 10 Comments

The Japanese Journey Masterclass grew from a love of Japanese textiles and a desire to know more about processes and historical fibre arts in Japan.

This idea has been forming in my mind over almost 2 years. I knew that it would not be possible for me to take a physical trip to Japan but I very much wanted to undertake research and combine my previous explorations into Japanese arts with my handweaving.

So I decided that a virtual textile journey to Japan would be the best option to satisfy my fascination and explore ideas. When I mentioned the idea to others in my weaving community, I discovered that many of them were very eager to take the journey also – and so a year ago I began putting together this virtual journey that became a Masterclass!

There are three projects in total to complete in the course, multiple printable PDF’s and extra slide videos that delve into Japan’s textile past.

The first section of the Japanese Journey Masterclass is all about indigo. We talk about the origins and uses of indigo in Japan. Then we use the modern conveniences of indigo powder to make our own indigo vat.

All three project are dyed with indigo, however I do provide alternatives for those who don’t feel ready to venture into indigo dyeing.

Project 1 is the Sashiko Placemats. We begin by weaving the cloth, dyeing it with indigo, embroidering designs onto the cloth using the stunning sashiko (which translates to “little stabs”) techniques, and finally sewing the unique and striking placemats. I know these will become a feature of anyone’s dining table as well as a conversation piece.

Project 2 is the Shibori Pillows. Once again, we begin with weaving the cloth, but this time we learn the art of woven shibori. Shibori is a method of resist dyeing and can be achieved in a variety of ways with a variety of results. For us weavers, we have the additional fun of being able to weave out resist designs into the cloth to use later in the dyeing process.

Project 3 is the Japanese Apron. This is the largest project but very achievable. The simple crossover style of the apron makes it a sewing project that is simple enough for beginners. It is also an elegant and useful finished piece – I intend to use my apron to catch all those pesky fibres that fall onto my clothes while I’m weaving!

What skill level is this course for?

This masterclass is aimed at those who are familiar with and confident with their loom. Although the projects are all plain weave, we do use fine threads, which can present a challenge for newer weavers.

You also need to be familiar with basic sewing on your machine.

Other skills (sashiko embroidery, indigo dyeing) are taught in the class and are intended to build and expand your current skill set.

What do I need to complete this course?

A sense of adventure, first and foremost! Some of the skills you will learn in this course are challenging and take practice. But I know that, with the right attitude you will find it very rewarding to learn these new skills and add to your creative repertoire!

What equipment will I need to complete the course?

All the fabric for the three projects can be woven on a rigid heddle loom, as we use the classic and beautiful plain weave for every project. I wove my apron fabric on my floor loom, but this was a matter of practicality so that I could be more time efficient in making the course.

What size does my loom need to be?

I used my 24″ loom but as always, projects can be adapted to suit smaller sized loom. A 15″ or larger is preferable though.

What other things will I need?

A full materials list will be available upon purchase of the course. However, to complete all the projects you will probably need to purchase some extra tools. Dyeing equipment, embroidery hoops (optional), sashiko supplies and things of that nature will be needed. I’ve tried to provide affordable options and sources for additional equipment where needed.

Will I need a sewing machine and serger?

A sewing machine – yes. Every project is sewn together on a machine. Basic sewing skills are needed.

A serger – I consider this a luxury item – if have one, brilliant, if you don’t, you will get by. You will need a way to secure raw edges of hand woven cloth, you can do that with a zig zag stitch on a sewing machine though.

The course includes almost 8 hours of video content and 6 printable PDF’s.

You can complete the projects in whatever order you please, though I do recommend that you work through them in order to build those skills as you go and follow the lessons with ease.

I am so very pleased to announce that this course is fully closed captioned. This is part of my commitment to make online learning more accessible to the hearing impaired and challenged.

Gold members already have full access to this course as part of their membership.

The course is also available at full price as a single purchase.

To receive a notification of the course opening, ensure you are on my mailing list.

To enrol in the masterclass, please click here.

If you have any questions, I’m more than happy to help, just leave a comment below.

Until next time…

Happy Weaving!

Filed Under: Inspiration, Online Weaving School, Rigid heddle weaving, Weaving Tagged With: Japanese journey masterclass

How to weave more stunning patterns on a rigid heddle loom!

by Kelly 9 Comments

Making patterns on your rigid heddle loom is a very popular topic, particularly among newer weavers who are experimenting to see just what they can achieve on a rigid heddle loom.

*This post contains affiliate links. Please see my disclosure for further information.

Last week I made a tutorial that demonstrated 3 ways to jazz up your plain weave.

This is part two of a tutorial on how to jazz up your plain weave. Part one showed you how to use stripes, dots and dashes, loop pile and butterflies to add some extra pizazz. If you missed part one, please start here and progress on to tutorial two afterwards.

You will need a rigid heddle loom to weave this sampler. In the video, you can see that I’ve used my Sampleit loom.

This downloadable PDF has all the information you need to follow this tutorial in conjunction with the video:

More-Ways-to-jazz-up-plain-weave-part-2-copyDownload

For instructions to part one of the tutorial, don’t forget to check out the first article here.

There are so many simple ways to push past plain weave. As I was weaving the sampler I found it hard to limit the number of techniques so that I didn’t end up making this series a year long!

Part two of the tutorial covers and additional 3 techniques that you can use to make your plain weave more exciting or just for fun to explore.

All of these pattern techniques can be worked on a rigid heddle loom that is already set up for plain weave – that is, every hole and slot is threaded.

  1. Doubled Weft (pictured above).

The first technique is straightforward and simple but gives a very cool effect that really pops against the background, contrast colour.

2. Pick Up Rows (the blue blocks below)

This is such a simple concept. I made a pick up pattern and repeated it over and over (with the blue yarn) and only one pick of plain weave (maroon) in between). What you end up with is towers and dots. I had a very small amount of hand dyed rainbow yarn left, so I threw in just one pick in the middle of all the blue, to break it up and create more interest.

3. Staggered Pick Up (the bright green that actually looks like yellow, pictured above).

This is a 2 pick up stick pattern. In the video, I used just one stick and took it out each time I wanted to pick up the other pattern. But, I wouldn’t recommend that unless you’re only weaving a couple of rows, it’s way too tedious. If you want to weave a larger amount of the staggered pickup, a heddle rod is definitely the way to go! Check out this video for how to do that:

And of course, don’t forget to watch video two so that you can see exactly how I worked these techniques:

If you enjoyed this two part series, you will love my Online Weaving School! With over 60 classes currently available, there really is something for everyone. I would love to see you there!

Until next time…

Happy weaving!

Filed Under: All about looms, Free Pattern, Online Weaving School, Rigid heddle weaving, Rigid Heddle Weaving Patterns, Tutorials, Weaving Tagged With: beyond plain weave, rigid heddle weaving, rigid heddle weaving patterns, rigid heddle weaving tutorial

3 Ways to Jazz up Plain Weave

by Kelly 8 Comments

I love plain weave, I really do. But sometimes I just think that it is so fun to jazz it up with something special!

Today I’m going to show you three ways that you can jazz up your plain weave, and have some fun with it.

I’ve written several other articles on simple things you can do on the loom for major impact. Things like Colour and Weave , Rigid Heddle Patterns for Beginners and techniques for Making Pictures with your Loom.

*This post contains affiliate links.

I’ve structured this lesson as a sampler for those of you who want to follow along with me and weave a sampler of your own. I used my 10″ Sampleit loom, but any rigid heddle loom will do as we’re only weaving an 8″ width.

All of the yarns, calculations and warp details are contained within this printable PDF, so please download that to access all of that information:

3-Ways-to-jazz-up-plain-weave-part-1Download
  1. STRIPES

The first example for the sampler is a pretty easy one, but has many variations that really pack a punch visually – stripes!

My example doesn’t look much like stripes because I was using one weft colour in blue and the other matched the maroon warp – so rather than traditional stripes you can end up with dots, dashes and squiggly lines. Pretty cool!

2. LOOPS

This is a super fun technique that requires a bit of patience but is not hard to do. You use a knitting needle to pull up loops of weft between warp threads. This gives a really interesting and textured look, but also has practical applications, like for wash cloths. I employed this technique as a feature in my Lux Hand Towels pattern.

3. BUTTERFLIES

Admittedly, my first attempt at butterflies looked rather spider like, but the second lot were much better. Whatever the case, this is a fun and unique technique where you use a pick up stick to make extra long floats and then CUT them while on the loom! Pretty wild, huh?

In conjunction with the PDF I have for you here, you will definitely want to check out the corresponding video for a full demonstration of all the techniques. You can view that here:

In the video, quite a few links were mentioned. I’m putting them here so that they are easy for you to find-

Online Weaving School

Sampleit loom

Woe to Go! Beginner Rigid Heddle Weaving class

Neat edges for colour changes video

I hope you really enjoy this little sampler project and that it gets your creative weaving juices flowing over! Which of the three techniques is your favourite? Will you weave a sampler of your own?

Stay tuned, as next week I will have part two of this series ready with even more techniques for jazzing up your plain weave!

Until then…

Happy Weaving!

Filed Under: Free tutorial, Rigid heddle weaving, Rigid Heddle Weaving Patterns, Tutorials, Weaving Tagged With: plain weave, rigid heddle weaving, rigid heddle weaving patterns, rigid heddle weaving tutorial

  • « Go to Previous Page
  • Page 1
  • Interim pages omitted …
  • Page 14
  • Page 15
  • Page 16
  • Page 17
  • Page 18
  • Interim pages omitted …
  • Page 25
  • Go to Next Page »

Primary Sidebar

Hand crafted boat shuttles

Categories

Archives

Meta

  • Log in
  • Entries feed
  • Comments feed
  • WordPress.org

Copyright © 2025 Kelly Casanova Weaving Lessons on the Foodie Pro Theme