• Skip to main content
  • Skip to primary sidebar

Kelly Casanova Weaving Lessons

  • Hi! I’m Kelly!
    • Disclosure
  • Online Weaving School Class Index
    • Common account issues
    • Common technical issues
    • What do I get with a membership?
  • New to rigid heddle weaving? Start here!
    • Never heard of the rigid heddle loom?
    • How to weave neat edges on the rigid heddle loom
    • Rigid heddle weaving
    • Rigid Heddle Weaving Patterns
  • Patterns
  • Subscribe

Weaving

How to weave more stunning patterns on a rigid heddle loom!

by Kelly 9 Comments

Making patterns on your rigid heddle loom is a very popular topic, particularly among newer weavers who are experimenting to see just what they can achieve on a rigid heddle loom.

*This post contains affiliate links. Please see my disclosure for further information.

Last week I made a tutorial that demonstrated 3 ways to jazz up your plain weave.
This is part two of a tutorial on how to jazz up your plain weave. Part one showed you how to use stripes, dots and dashes, loop pile and butterflies to add some extra pizazz. If you missed part one, please start here and progress on to tutorial two afterwards.

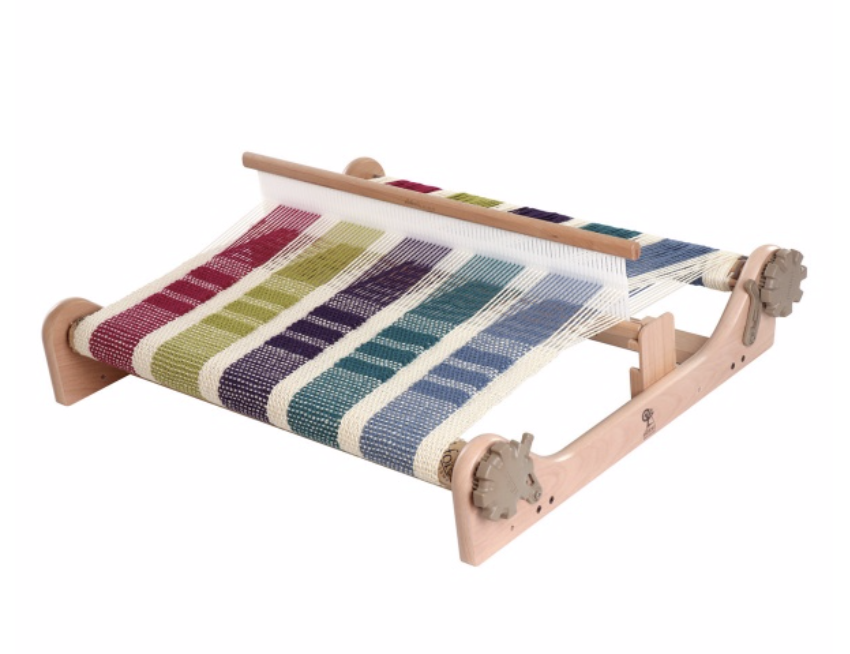
You will need a rigid heddle loom to weave this sampler. In the video, you can see that I’ve used my Sampleit loom.

This downloadable PDF has all the information you need to follow this tutorial in conjunction with the video:

More-Ways-to-jazz-up-plain-weave-part-2-copyDownload

For instructions to part one of the tutorial, don’t forget to check out the first article here.

There are so many simple ways to push past plain weave. As I was weaving the sampler I found it hard to limit the number of techniques so that I didn’t end up making this series a year long!
Part two of the tutorial covers and additional 3 techniques that you can use to make your plain weave more exciting or just for fun to explore.

All of these pattern techniques can be worked on a rigid heddle loom that is already set up for plain weave – that is, every hole and slot is threaded.

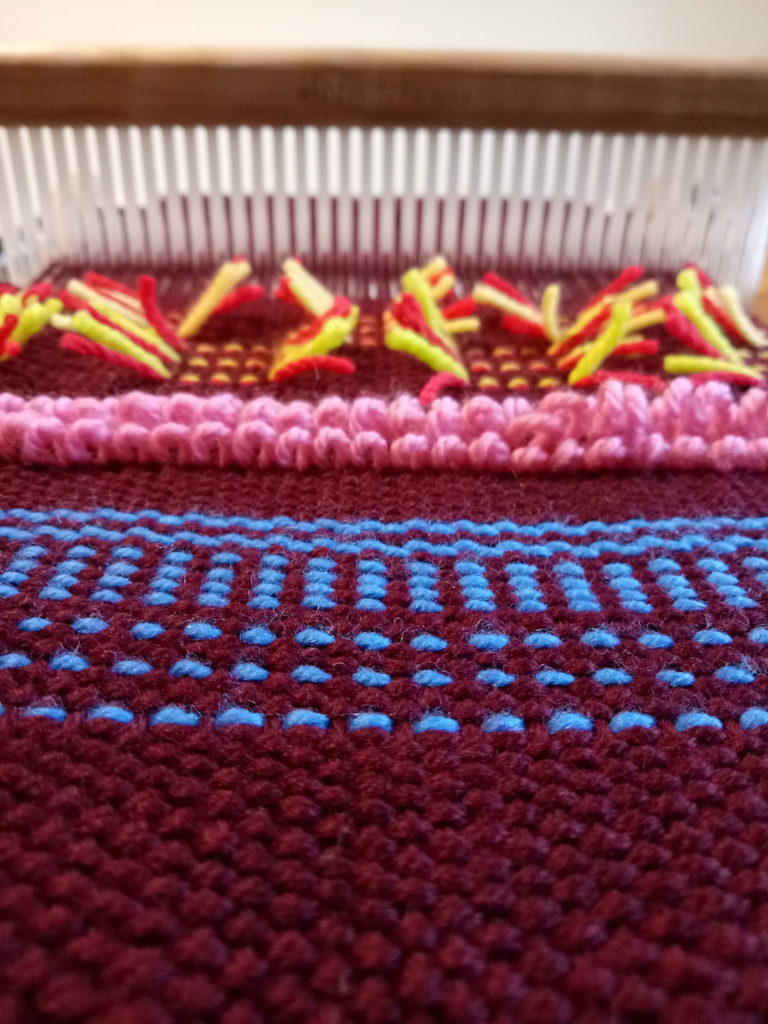
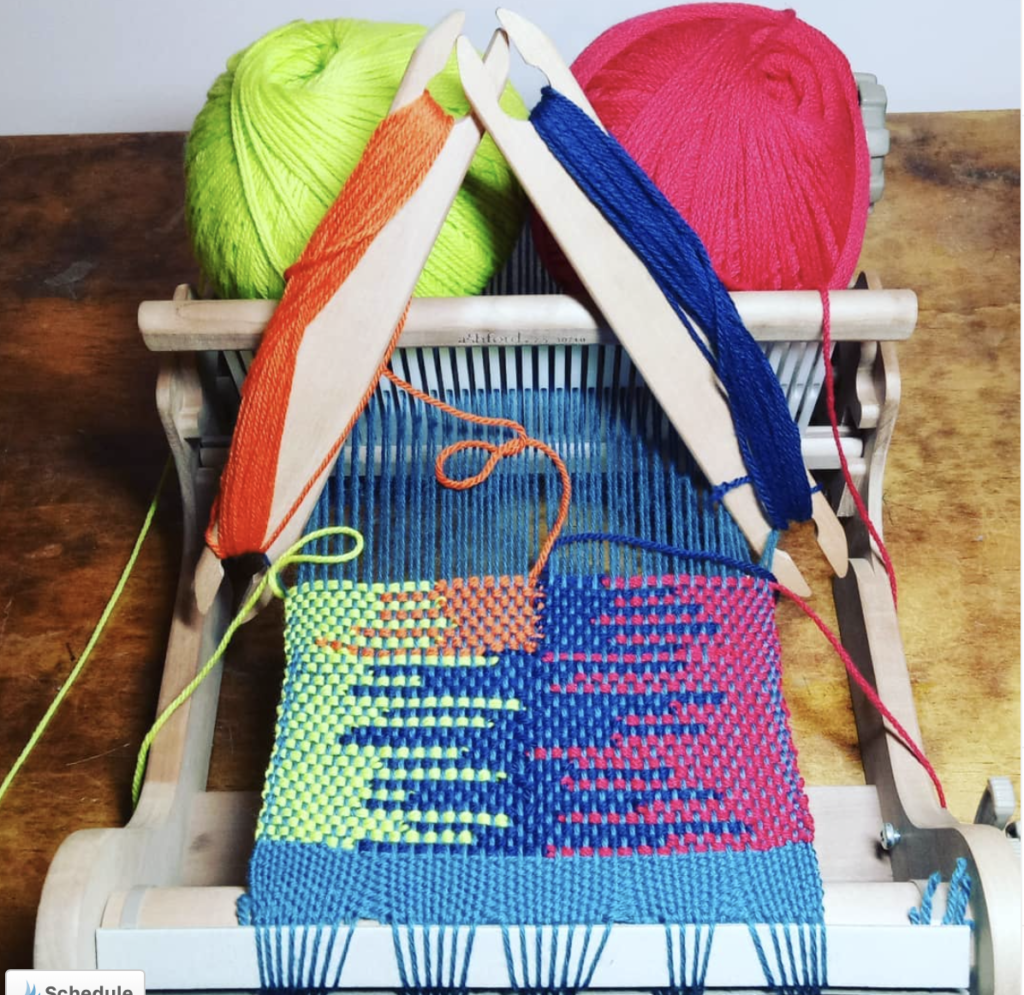
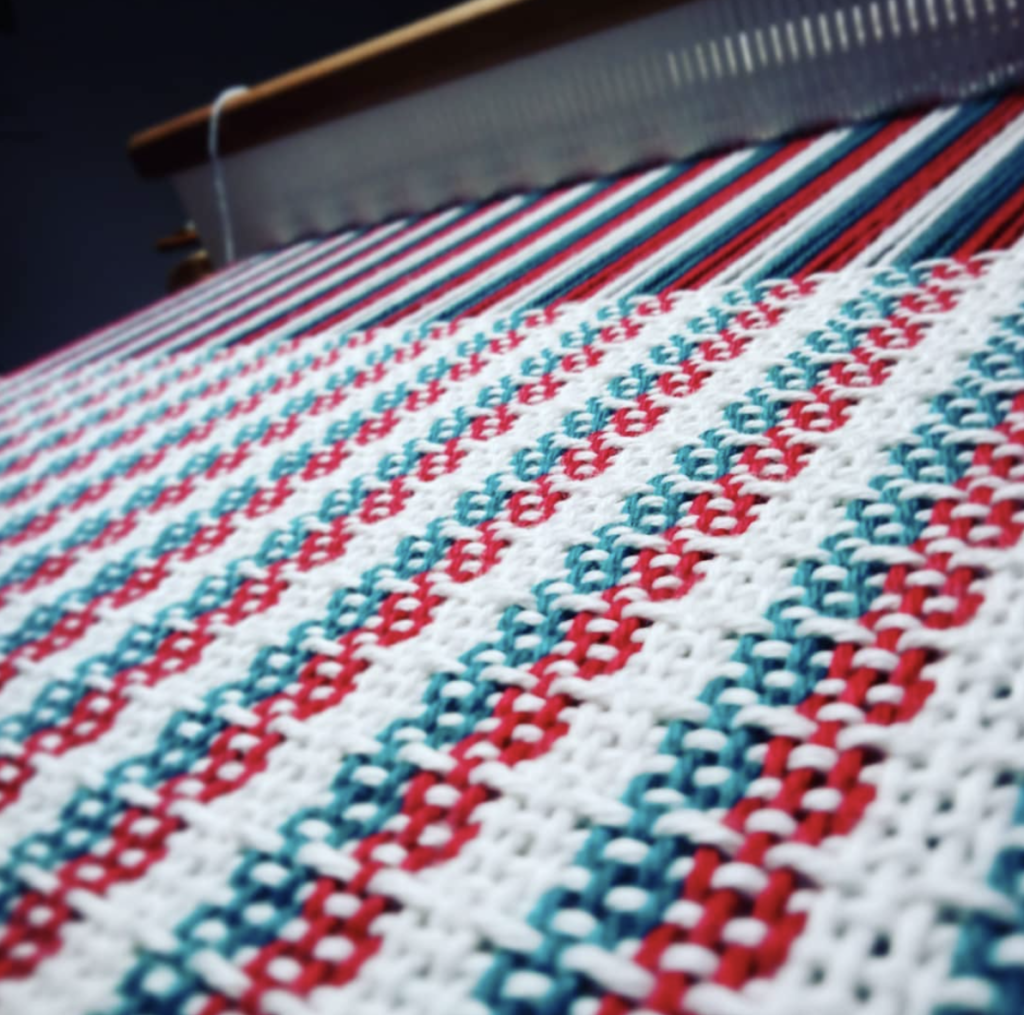
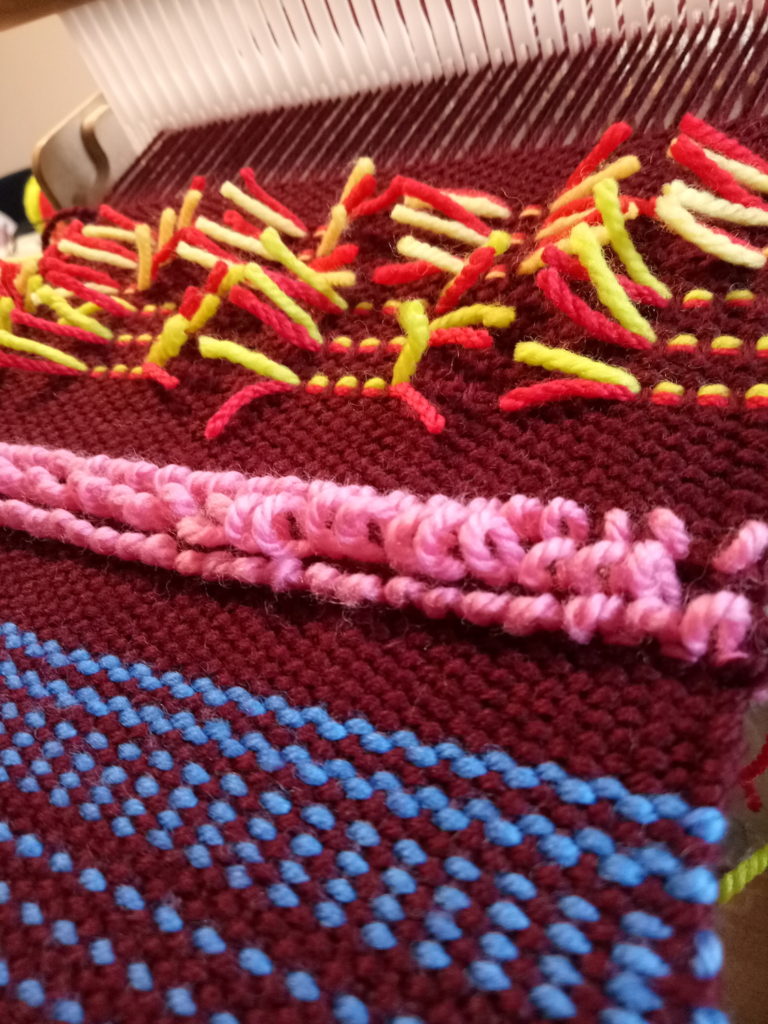
  1. Doubled Weft (pictured above).

The first technique is straightforward and simple but gives a very cool effect that really pops against the background, contrast colour.

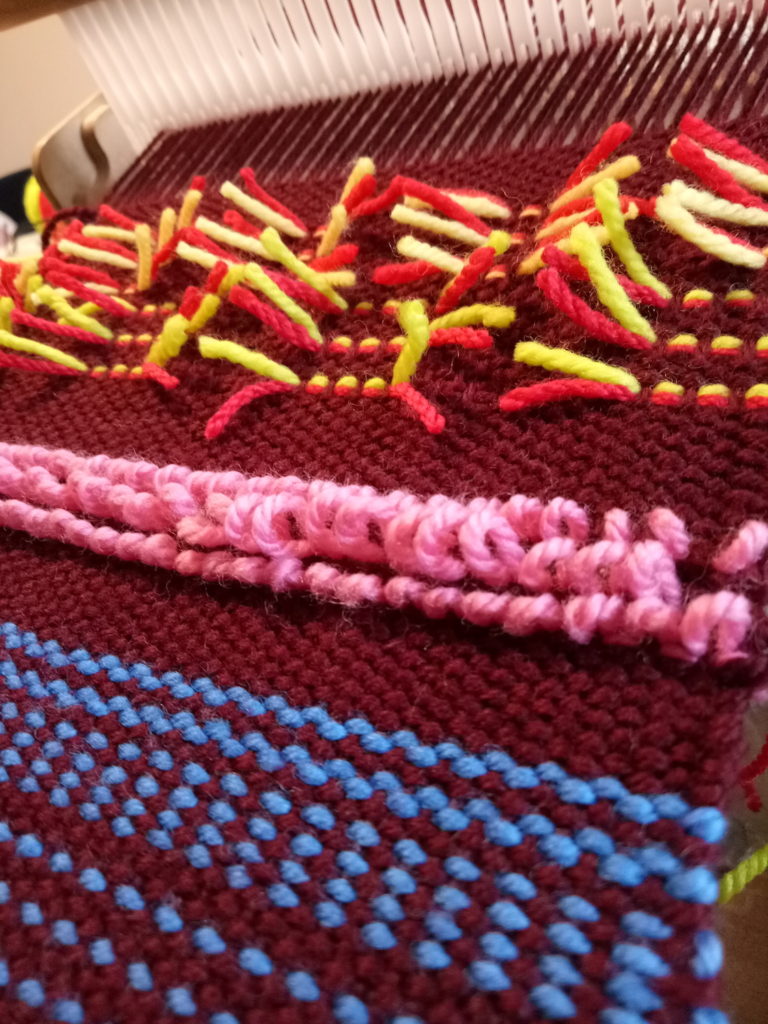
2. Pick Up Rows (the blue blocks below)
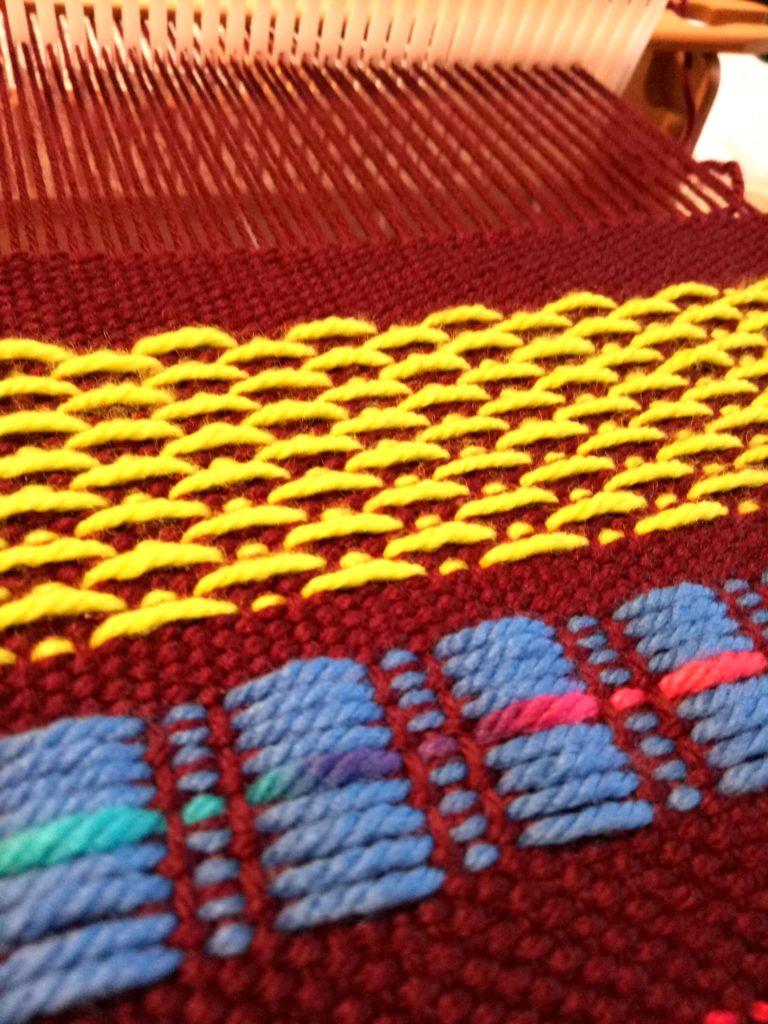
This is such a simple concept. I made a pick up pattern and repeated it over and over (with the blue yarn) and only one pick of plain weave (maroon) in between). What you end up with is towers and dots. I had a very small amount of hand dyed rainbow yarn left, so I threw in just one pick in the middle of all the blue, to break it up and create more interest.

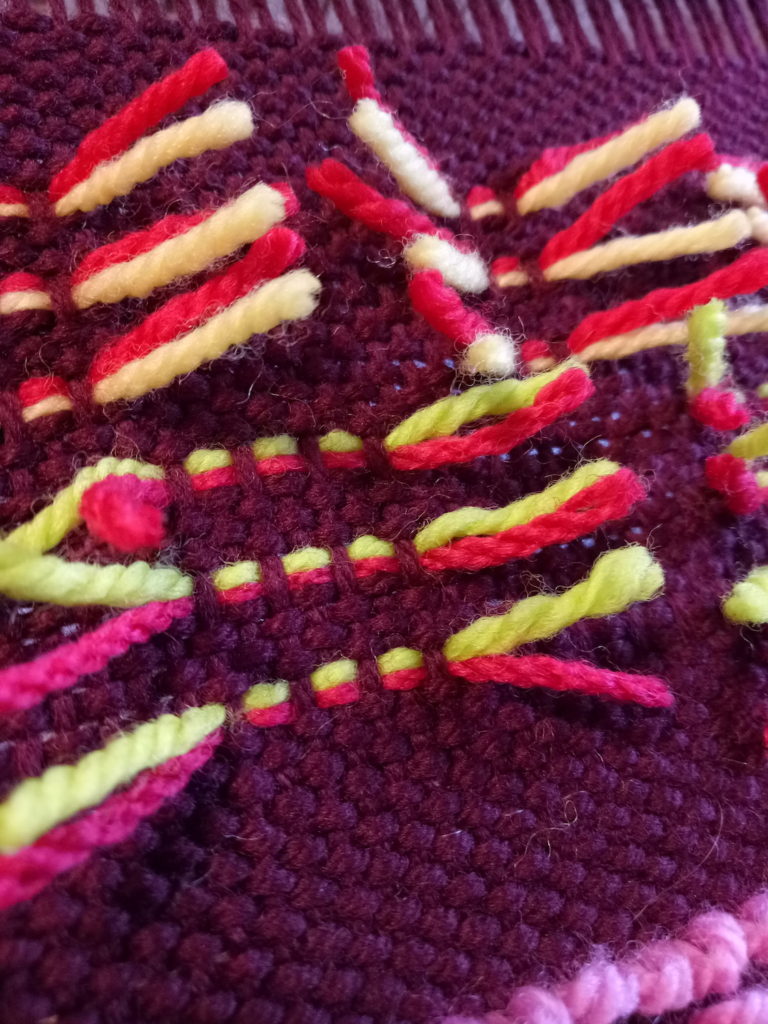
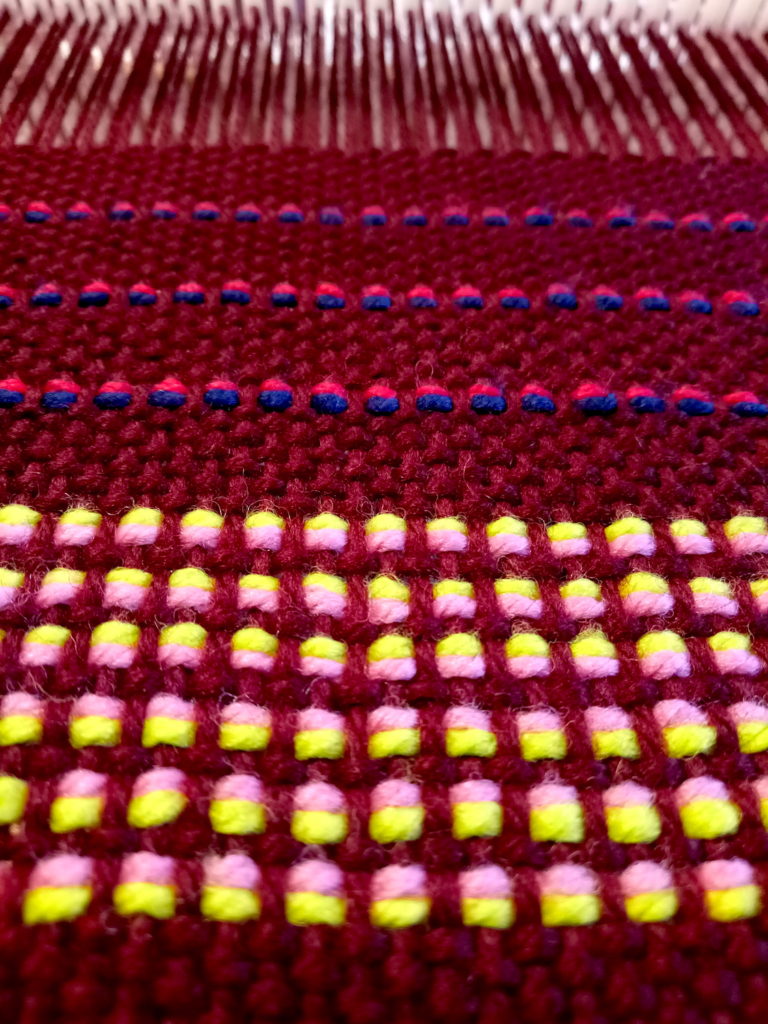
3. Staggered Pick Up (the bright green that actually looks like yellow, pictured above).

This is a 2 pick up stick pattern. In the video, I used just one stick and took it out each time I wanted to pick up the other pattern. But, I wouldn’t recommend that unless you’re only weaving a couple of rows, it’s way too tedious. If you want to weave a larger amount of the staggered pickup, a heddle rod is definitely the way to go! Check out this video for how to do that:

And of course, don’t forget to watch video two so that you can see exactly how I worked these techniques:

If you enjoyed this two part series, you will love my Online Weaving School! With over 60 classes currently available, there really is something for everyone. I would love to see you there!

Until next time…

Happy weaving!

Filed Under: All about looms, Free Pattern, Online Weaving School, Rigid heddle weaving, Rigid Heddle Weaving Patterns, Tutorials, Weaving Tagged With: beyond plain weave, rigid heddle weaving, rigid heddle weaving patterns, rigid heddle weaving tutorial

3 Ways to Jazz up Plain Weave

by Kelly 8 Comments

I love plain weave, I really do. But sometimes I just think that it is so fun to jazz it up with something special!

Today I’m going to show you three ways that you can jazz up your plain weave, and have some fun with it.

I’ve written several other articles on simple things you can do on the loom for major impact. Things like Colour and Weave , Rigid Heddle Patterns for Beginners and techniques for Making Pictures with your Loom.

*This post contains affiliate links.

I’ve structured this lesson as a sampler for those of you who want to follow along with me and weave a sampler of your own. I used my 10″ Sampleit loom, but any rigid heddle loom will do as we’re only weaving an 8″ width.

All of the yarns, calculations and warp details are contained within this printable PDF, so please download that to access all of that information:

3-Ways-to-jazz-up-plain-weave-part-1Download
  1. STRIPES

The first example for the sampler is a pretty easy one, but has many variations that really pack a punch visually – stripes!

My example doesn’t look much like stripes because I was using one weft colour in blue and the other matched the maroon warp – so rather than traditional stripes you can end up with dots, dashes and squiggly lines. Pretty cool!

2. LOOPS

This is a super fun technique that requires a bit of patience but is not hard to do. You use a knitting needle to pull up loops of weft between warp threads. This gives a really interesting and textured look, but also has practical applications, like for wash cloths. I employed this technique as a feature in my Lux Hand Towels pattern.

3. BUTTERFLIES

Admittedly, my first attempt at butterflies looked rather spider like, but the second lot were much better. Whatever the case, this is a fun and unique technique where you use a pick up stick to make extra long floats and then CUT them while on the loom! Pretty wild, huh?

In conjunction with the PDF I have for you here, you will definitely want to check out the corresponding video for a full demonstration of all the techniques. You can view that here:

In the video, quite a few links were mentioned. I’m putting them here so that they are easy for you to find-

Online Weaving School

Sampleit loom

Woe to Go! Beginner Rigid Heddle Weaving class

Neat edges for colour changes video

I hope you really enjoy this little sampler project and that it gets your creative weaving juices flowing over! Which of the three techniques is your favourite? Will you weave a sampler of your own?

Stay tuned, as next week I will have part two of this series ready with even more techniques for jazzing up your plain weave!

Until then…

Happy Weaving!
Filed Under: Free tutorial, Rigid heddle weaving, Rigid Heddle Weaving Patterns, Tutorials, Weaving Tagged With: plain weave, rigid heddle weaving, rigid heddle weaving patterns, rigid heddle weaving tutorial

How is a knitter’s loom different to a rigid heddle loom?

by Kelly 41 Comments

As you probably already know, I’m a big fan of Ashford looms, I have four of them myself. I have found their looms to be reliable, easy to obtain, excellent learning tools and affordably priced.

Ashford make a variety of looms including the rigid heddle, knitter’s loom, inkle looms, table looms and floor looms. They also make a big range of weaving tools, yarns and accessories, as well as all their other supplies for fibre artists.

*This post contains affiliate links. Please see my disclosure for more details.

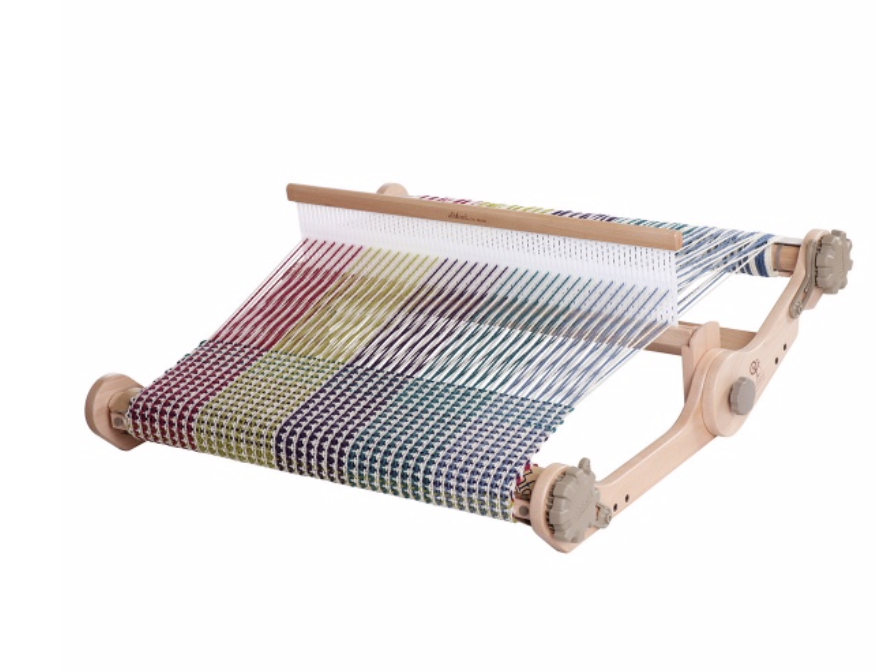
Ashford rigid heddle loom, photo courtesy of Ashford website.

I also love that the Ashford factory is based in New Zealand, my second favourite country (after Australia, of course!) and all the wood used is sourced from there too.

But today I want to focus on two of their looms that are very popular but also cause some confusion among new weavers – the knitter’s loom and the rigid heddle loom.

If you’re interested in knowing more about looms prior to purchasing, or just out of interest, I have a list of articles and videos that will be a big help to you.

Ashford Knitter’s loom, photo courtesy of Ashford website.

Having never actually used a knitter’s loom myself, I knew it was time to call in some expert knowledge on the subject, and who better to answer my questions than Kate Sherratt from Ashford.

Kate was very generous in not only answering my questions but in giving me extra information for all of us to learn from. Let’s start with a little history of the rigid heddle and knitter’s looms:

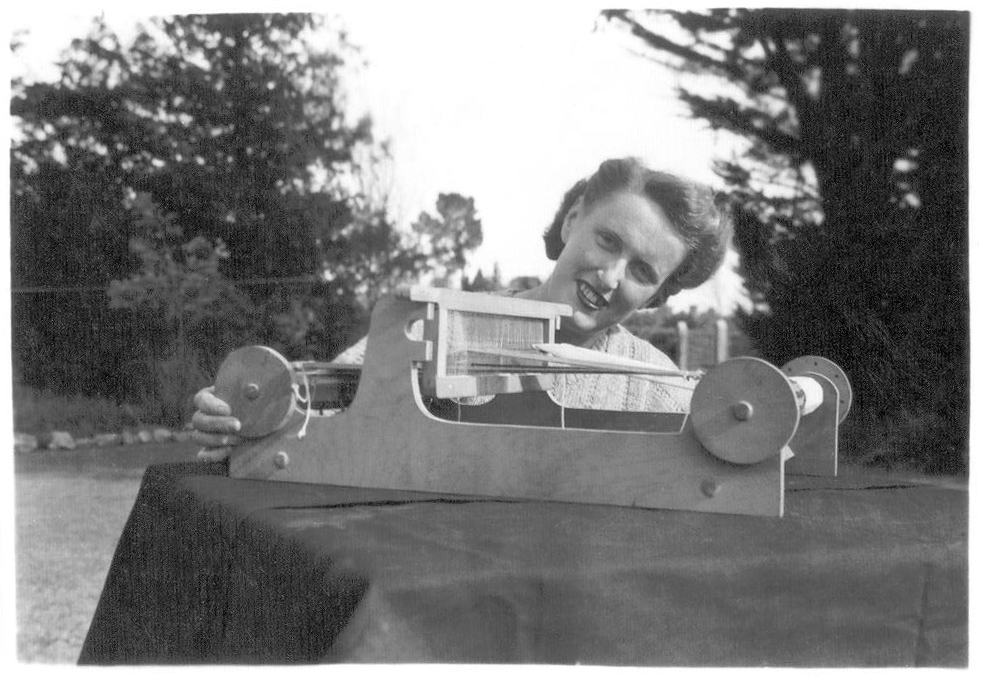
Ashford’s have been making Rigid Heddle looms for over 70 years. Pictured below is Richard Ashford’s mother, Joy with one of their early looms.

The Knitters looms are a more recent addition and were introduced in 2005. These looms are a type of rigid heddle loom but with some differences.

One of the aims of the knitters loom was to change the mindset that you can only weave with weaving specific yarns. It paved the way for knitters, who already had a healthy stash of knitting yarn, to ease seamlessly into weaving and continue to utilise the yarn they already knew and loved.

The release of the knitter’s loom brought a whole new wave of crafters and fibre artists into the weaving world. It had features that were very attractive to the brand new weaver who wanted to get up and weaving really fast.

It folded with weaving in place, it was lighter and more compact than previous rigid heddle looms, it had the factory lacquer finish and it was assembled.

So, which loom is the right one for you?

Ashford now make three types of rigid heddle looms – The Standard Rigid Heddle looms (RH), the Knitters looms (KL) and the SampleIt looms (SL).

Kate points our that all these looms are exactly the same in the way they function – you warp and weave on them in the same way.

The difference comes down to personal preference:

What size do you prefer? What do you intend to weave the most?

How much money do you want to spend? 

How much space do you have? 

Will you want your loom to be as portable as possible? 

Let’s take a look at the differences between the three types:

RH come in four weaving widths 40cm (16″), 60cm (24″), 80cm (32″) and 120cm (48″).

KL come in three weaving widths 30cm (12″), 50cm (20″) and 70cm (28″)

SL come in two weaving widths 25cm (10″) and 40cm (16)

KL come assembled and have a factory lacquered finish and include a carry bag, making it very convenient to take to a class or outing.

RH come kitset and unfinished timber. This means you need to do your own lacquering, painting or waxing and assembling.

SL come kitset and unfinished.

KL fold in half for storage and transportation, can fold with weaving in place. Are made of the lighter timber.

RH are made of thicker more solid timber and do not fold.

SL are smaller, lighter and more compact – the most prominent difference is the depth of the loom – which will only effect the weaving when using non elastic yarns like cotton.

RH have more accessories available – the freedom roller, the table stand, and the warping pegs are exclusive for the standard rigid heddle looms.

What these three looms have in common:

6 different dpi reeds are available for all.

Vari dent reeds are available for all.

Stands are available for all.

They all can be warped the same.

They all can be woven on the same ways.

They all are affordable. 

They all work extremely well, are well designed and do what they are supposed to do.

I also had some specific questions for Kate. These are things I am often asked by students.

*Can you use two heddles on a knitter’s loom?

All our rigid heddle looms come standard with the double heddle sideposts – as far as using three heddles go, I cannot personally comment as I have not tried it myself but I have seen people using three heddles on all our rigid heddle looms – including the SampleIts (see Amy McKnight’s recent posts).

I will also add here that I have several classes available on using more than one heddle. The most popular classes are Three Heddle Adventures and Weaving with Two Heddles

* Students have told me they have trouble when weaving the down shed on their knitter’s loom. They say that the heddle slips out of place.

On the Knitters loom the reed is held in the bottom position by the warp tension. It does not click into place or stay there when there is no warp on it, it is not supposed to. (the standard rigid heddle reed does not either, it only hangs from the upper rail, and as the KL has to fold the rails needed to be different).

*Students have also mentioned that they need to angle the back of the knitter’s loom in order to weave. Can you explain this?

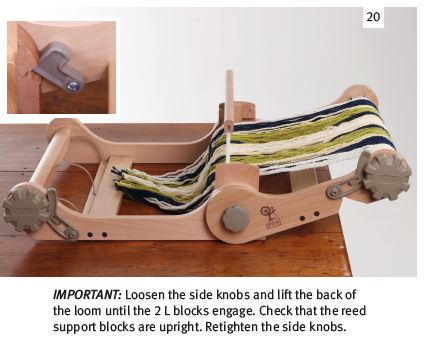
See the attached snippet from the Learn to Weave on the Knitters loom booklet (that comes with the loom)  – the design of the loom, so it could fold etc, requires the back half of the loom to be angled up when weaving. This is probably the number one issue people have when starting out “help I have no shed” – to which the simple answer is lift the back up into the correct position. 

     *Are the heddle positions the same on each loom?   

   The heddle position are actually the same on all the looms – the distance is the same from the top to the bottom and to the neutral positions – it has to be the same as our reeds (the distance from the top rail to the eye and to the bottom rail) are all the same. And the sheds are the same…..

*How long a warp can you fit on each of these looms?

This does depend on a few things – yarn type, sett, warp separators etc. The limiting factor is the distance the cross rails are from the rollers – which varies from 7cm to 10cm. So you can fit quite a length!

*Is there anything else you think is important that people know about the looms?

You can do the same things on all the looms – there is not one that performs better technically – it really does come down to personal preference – and my personal preference is the good old work horse – the standard rigid heddle.

The question when buying a rigid heddle loom should not be “what can I do on a rigid heddle loom?” it should be what can’t you do!  And although I do have Jack and Katie (and a couple of table looms) – my Rigid heddle looms (of course there are several) hold a special place in my heart – my love of weaving came not only from being taught to weave on a rigid heddle loom but more from all the possibilities there was from a simple piece of equipment – I know it sounds corny but there really are unlimited possibilities! 

I get a little cranky when I here people say “oh you are limited on what you can do on a rigid heddle”  – because really when you control the type of yarn (or fibre) you use, the colour you use, the texture you use, the sett you use, the patterns you create – the limits don’t really come from the loom they come for your imagination. And as 75% of the woven fabric in the world is plain weave – do you really need something else?

3 Colour Clasped Weft – free tutorial

Wise words, thank you Kate!

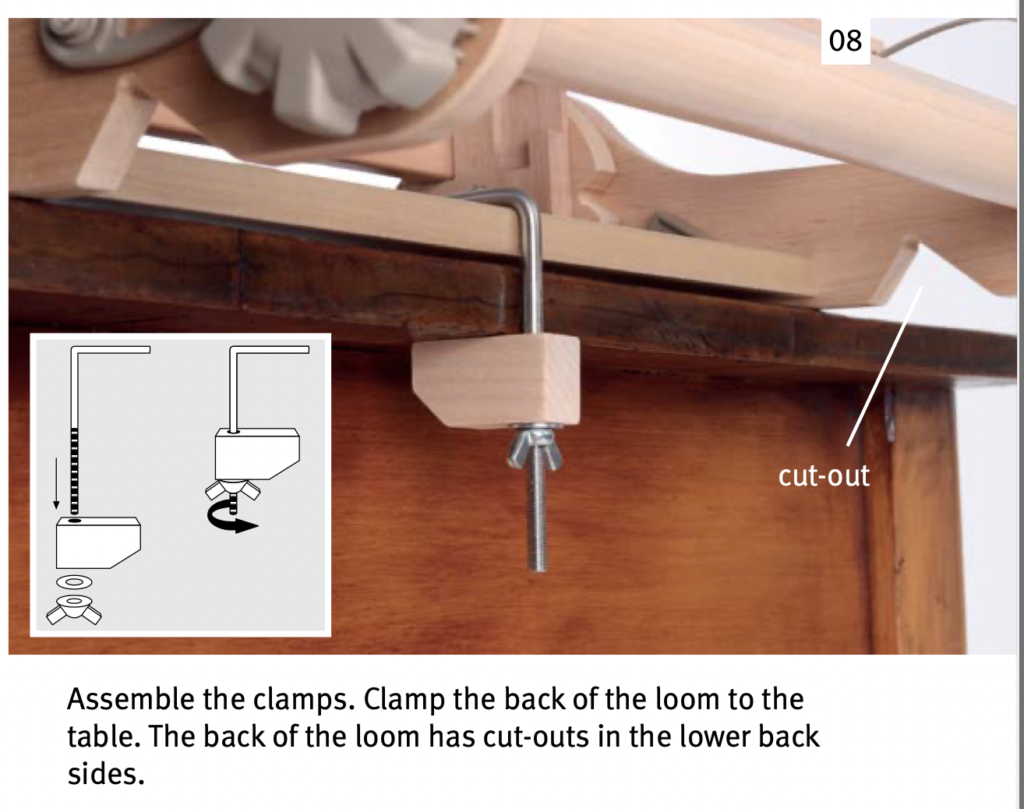
One more thing I want to clear up is how to clamp the knitter’s loom to a table. This can confuse new weavers, because although clamps do come with the knitter’s loom, there are no holes present to insert the clamps into, like there are with other RH looms.

The answer is very simple, as you can see here:

These instructions, and more, are available from the Ashford website.

I hope this post has helped to clear up any confusion and answer some of your burning questions. Of course, you are welcome to leave any additional questions in the comments.

Do you own a knitter’s loom? A rigid heddle loom? A Sampleit? Was it a difficult decision for you? What helped you decide? Let’s keep the conversation going!

Until next time…

Happy Weaving!
Filed Under: All about looms, Inkle Weaving, Reviews, Rigid heddle weaving, Table loom weaving, Weaving Tagged With: ashford, Kate sherratt, knitters loom, rigid heddle loom, sampleit loom, table loom, which loom

What is a superwash wool yarn?

by Kelly 20 Comments

I have talked quite a bit about yarns in weaving recently, but now I would like to get a little more into the specifics of individual yarns. Superwash wool yarn is a somewhat controversial yarn for fibre artists. In this article, I’m going to attempt to outline what superwash woollen yarn is in a factual manner.

I contacted my local, much loved woollen mills (Bendigo Woollen Mills) where I buy a lot of knitting yarn to use in my weaving projects. They were very helpful in explaining how their superwash yarns are treated and in pointing me towards further information to aid my own research. Interestingly, they said that although they offer both treated and untreated yarns, due to customer demand, 80% of their yarns are superwash.

I want to start by pointing out that I think it is very important for each weaver to decide whether they want to use a particular yarn or not, based on their own personal preferences. I have a huge number of students from all over the world and all different backgrounds. I pass no judgement on a weaver’s personal choice and I do not support yarn shaming in any shape or form.

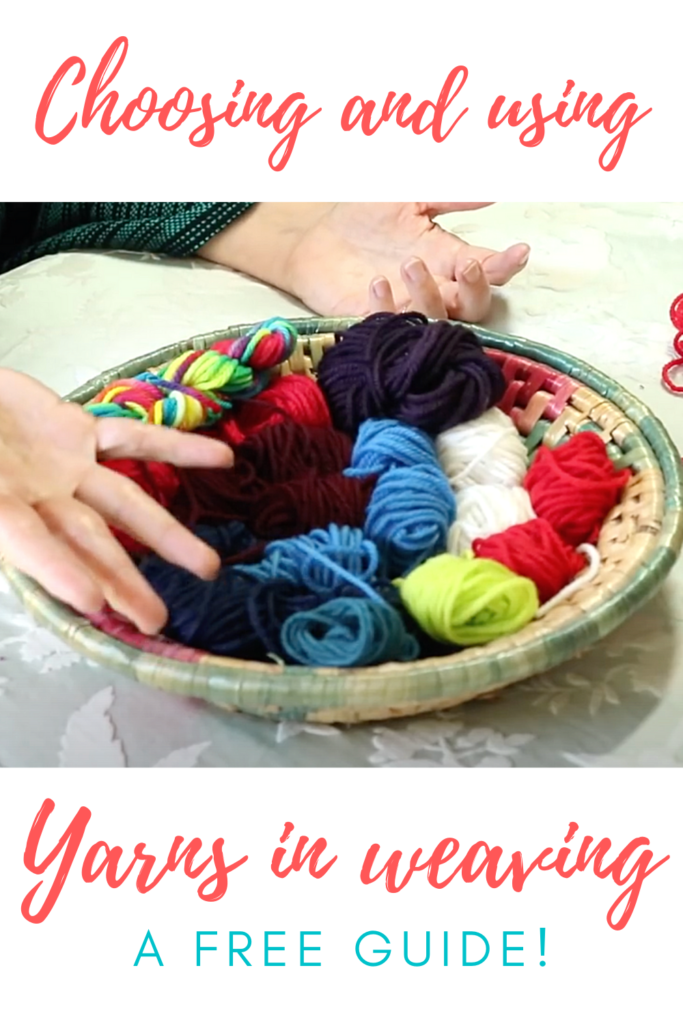
If you’re in the beginner phase, and your head is swimming with confusion in regards to yarn choices, I have some helpful and free resources for you. You can begin by eliminating possibly troublesome yarns, at least for your first few projects, by reading 3 Yarns Beginner Weavers should Never Use! Then move on to the in depth Choosing and Using Yarns in Weaving.

If you’re really baffled about yarn sizes, I have two other resources that will really help you out. The Weaver’s Toolkit is an e-booklet that provides you with yarn conversion charts, recommended heddle sizes and a bunch of other quick reference information. I also have a short class What Do All the Numbers Mean? that will take your through an explanation of what all those numbers on your weaving yarn cone mean and various measuring systems that are industry standards.

Alright, let’s have this superwash discussion.

When you purchase woollen (usually a knitting yarn), if you read the care label instructions, it will either say “hand wash” or “machine washable”. This is how you know whether it’s a superwash yarn or not – machine washable means that it is superwash. And that means that the yarn is treated. Let’s investigate the treatment process further and why the wool is treated in the first place.

We all know that wool is quite hairy and clingy. Woollen yarn just loves to grab onto itself – the surface is scaly and these scales want to be joined as one! This is accentuated in the washing process. If you wash a non superwash wool yarn in hot, soapy water and create some friction, you will end up with felted fabric.

The superwash process removes these outer scales of the yarn with chemicals. The yarn is then coated with a synthetic coating (Hercosett is the industry standard) which smooths the exterior of the yarn. Because the scales are no longer present to interlock with one another, and the additional synthetic coating has been used, it becomes impossible for the yarn to felt in the washing process. It also means that, under the right conditions, a finished woollen piece can be washed in a washing machine (always follow care instructions for temperature specifics and correct steps). The superwash process generally leaves a yarn with a soft, smooth feel.

So, what is all the controversy about? There are a few main issues that some people have with superwash wool.

  1. Environmental impact
  2. Is the treated product still “natural?”
  3. Economic impact

*I need to put in a disclaimer here. This information has been collated from my own internet research. I have tried to only include facts without opinions. Some of the things I’m going to mention here are difficult to talk about with a lot of accuracy as it may not be measurable and also I only have access to information I can find on the internet. If, for example, I mention potentially toxic waste water, I have no way of quantifying what level of toxicity or if the toxicity is actually present. I don’t work in the industry, I don’t have inside information. The intention of this article is just to share information so that weavers can make informed choices when purchasing yarn and do some further research if it’s a concern for you.

Environmental impact:

The superwash process uses large amounts of water. In addition to the quantity of water used, some consumers are concerned that the waste water leaving the yarn processing plants could be toxic.

Then there are the chemicals themselves. Hercosett is a polyamide-epichlorohydrin polymer and some argue that it is a highly dangerous substance, while other sources will state that the chemicals used to create the polymer are toxic, but this doesn’t mean that the end product (the polymer itself) going through the correct chemical process is not safe.

Is the end product still natural?

The end product, in its basic form, is a woollen yarn that has a very fine exterior coating of polymer. As polymers are a type of plastic, some will argue that the yarn itself, following superwash treatment is now a plastic product and no longer natural. I have also seen some insistence that this type of polymer is not a type of plastic. You begin to see what I mean about conflicting information and opinions!

Others will hold the view that the product is still very much wool, it just has an artificial coating that is not actual detectable. This could be seen in the same light as many commercially available textiles in which “sizing” is used. This involves the application of resins (these can come from various sources, including petroleum) to fabric or clothing prior to retailing. Sizing is used to make clothes or fabric hold their shape and look good prior to purchase. This may be a poor example on my part though, because as far as I know, the sizing can be removed when you wash the fabric or clothing prior to use.

Economic impact:

Many woollen yarns are processed off shore for superwash processing. The country of choice in which to have yarn processed is often China as it is cheaper for businesses to send they yarn, have it processed, then have it sent back again. Many countries just don’t have the facilities for this type of processing.

I know that I’ve only covered the basics in this article, and given the differing information and opinions on the use of superwash wool, I’m going to provide a varied list of links from other people’s websites here in case you want to do some further research of your own:

Superwash and its alternatives

What’s Wrong with Washable Wool

The Truth about Superwash Wool

About Superwash Treatment

In Support of our Australian Wool Industry

Is Superwash Yarn Environmentally Sustainable

And of course, if you want to find even more information, then google is your friend.

Thank you for joining me today! I invite comments on this topic, but as it can be a sensitive one, I ask you to keep it a respectful and helpful discussion. Thank you for keeping this a happy and informative space 😊

Until next time…

Happy Weaving!
Filed Under: Weaving, Yarn Tagged With: superwash yarn, yarn, yarn choices

3 Yarns Beginner Weavers should NEVER use!

by Kelly 61 Comments

Choosing the right yarn for the right project can be a huge conundrum for newer weavers. There are so many yarn choices for weaving that it can be very confusing to know where to start.

If you want to know more about the basics of choosing yarns when you’re just starting out, you will want to read this post which includes a couple of super helpful videos where I walk you through some of my stash and the ways I’ve used certain yarns in my weaving.

I usually recommend specific yarns for new weavers to try, based on my experience with which yarns are the most economical, easy going and likely to give consistent, more predictable results.

This post contains affiliate links

But today, I’m going to do the opposite. I’m going to talk about the yarns that a new weaver should not use, and even go so far as to say that a newer weaver should NEVER use these yarns to begin with!

Pretty extreme, huh? Trust me, you will thank me for it!

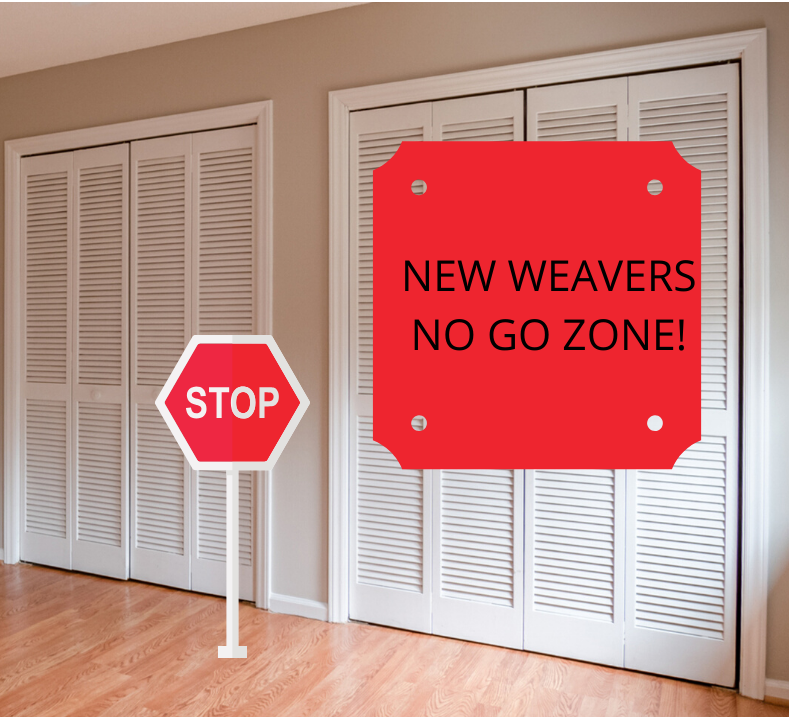
So, how do I know about these three particular yarns that should be locked up and kept in a closet marked with NO GO – NEW WEAVERS NOT PERMITTED?

Because I hear about it all the time! The anguish of a new weaver who unwittingly picked a yarn that “looked pretty” and now is in a terrible anguish, caught in the balance between the idea of cutting the project off the loom prematurely or giving up on weaving altogether because it “doesn’t seem like my thing“.

Friends, it does not have to come to that and I am here to tell you how!

There are three yarns that you should avoid at all cost. Not forever, just to begin with. Later, you will have the experience, know how and possibly patience to deal with these yarns, but to begin with you want to keep it as simple and achievable as possible.

Think of your beginning weeks, months, or however long it takes (remember we all learn at a different pace and that is absolutely fine and normal. If you have any qualms on this note, please take the time to watch the video on Slow Learning down below).

The first few projects at least should be devoted to getting to know your loom. It’s like a honeymoon period, hopefully a happy one! But, if you think of your beginning stages in this way, as the learning phase, it won’t matter so much if you don’t always get amazing results as you will be learning what you need to know.

You’re probably itching to know what these three avoidable yarns are. I won’t keep you in suspense any longer.

  1. Mohair.

I’ve put this one at the top of the list for a reason. Don’t use it if you’re a beginner. I can’t be much more blatant than that. Just don’t do it. You will be sorry.

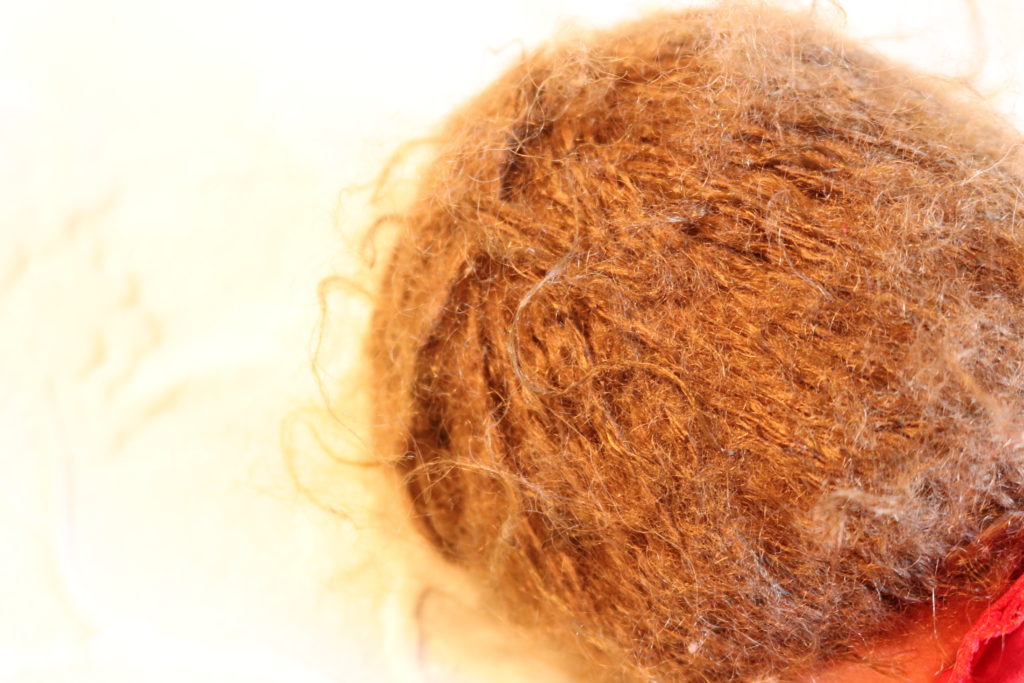
Meet Anna. Why do I have a random doll included in this post? I’ll explain. I made this doll for youngest daughter’s first birthday present, almost 10 years ago. She has stood the test of time pretty well, but is in need of a wig refurbishment. At the time, I was a dollmaker and sold my dolls on Etsy. I made the dolls from all natural materials, so their skin was a lovely soft cotton, they were stuffed with clean, carded wool and I would often use mohair to make wigs or hair. By the way, if you’re interested in a 10 year old tutorial on making a doll similar to this one, I have a two part tutorial here.

The point is, I used to have a huge stock of mohair but have used it all up in dollmaking. So instead of showing you a ball of mohair, I’m going to show you the back of the doll’s head to help illustrate why you should not use mohair as a beginner weaver.

Check out that fluff. Yes, mohair is uber fluffy! See that halo? (This is going to become a recurring theme!) Mohair sticks to itself. Very much. You carefully warp your loom and begin weaving, only to find that you don’t seem to be a able to get a clear shed. Sound familiar? Every. Single. Time. You change sheds, the warp threads stick to each other and you wonder how on earth you are supposed to get your stick shuttle through an either non existent or at the least, very messy shed. It doesn’t make for a fun weaving experience.

2. Fine, rigid threads.

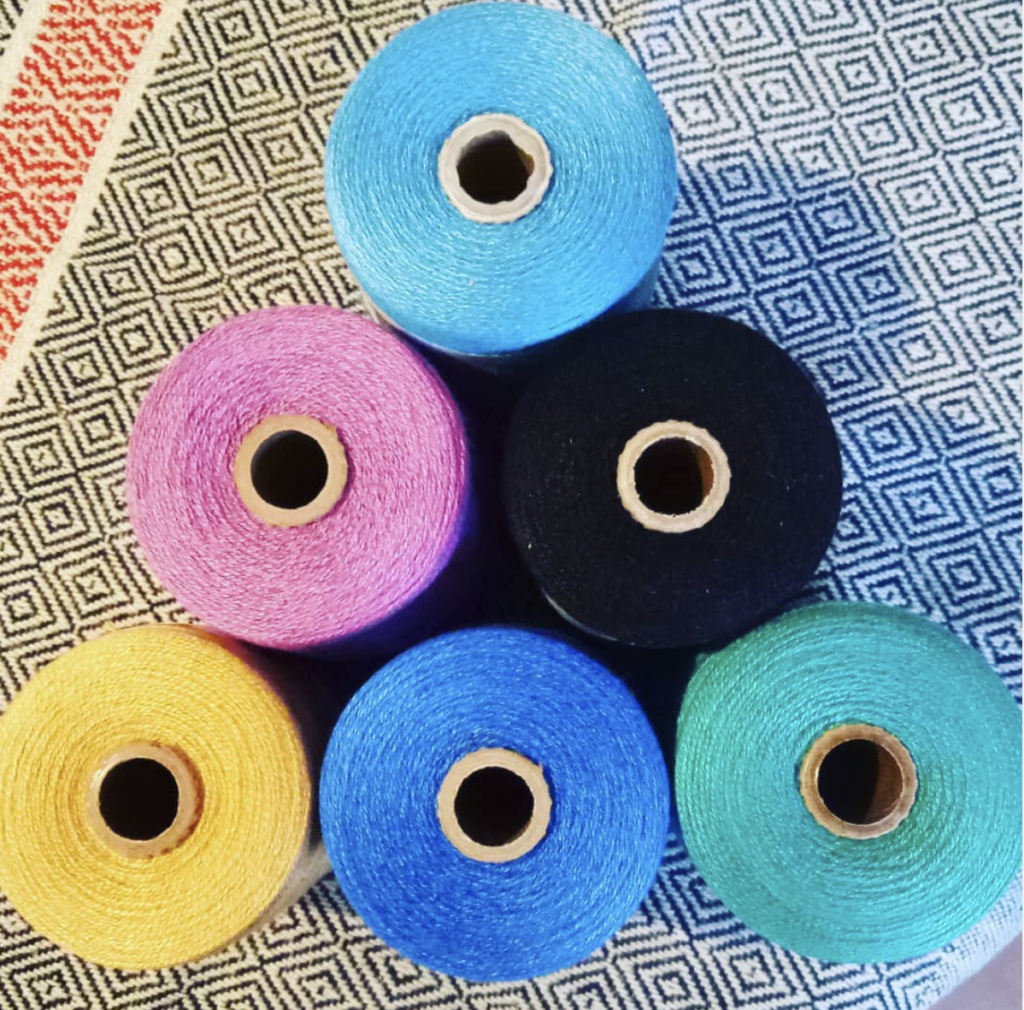
By this I mean a weaving thread like an 8/2 cotton. These types of yarns will usually be sold on a cone rather than in a ball or skein.

Why do I think they’re a bad idea for beginner weavers? Firstly, they will have little to no elasticity. This is a problem for newbies (ahem, and veterans!) because they are difficult to warp with the correct and consistent tension. Which can be really frustrating. Especially on a rigid heddle loom where you can’t achieve as firm a tension as you can on a floor loom. When you’re not familiar with these types of yarn or don’t have much general weaving experience, you don’t want a yarn that won’t stretch a little. Yarns with elasticity (like, say a dk or light worsted wool) are so much easier to warp and work with. They will stretch out and contract back nicely on the loom and for that reason I call them very “forgiving” yarns. They help rather than hinder your warping and weaving process. They will be your newbie friends. The inelastic, thinner yarns can be your friends later.

The second point about these yarns is that they are thin. Which means they take longer to warp. Then they take longer to weave. When you’re just starting out you really want to choose shorter, approachable projects that don’t feel like a year long commitment to finish one item. Thicker yarns will be a huge help in this respect. They weave up quickly and with less problems.

3. Luxury Yarns

There are plenty of yarns that come under this category so I will point out a few specifics.

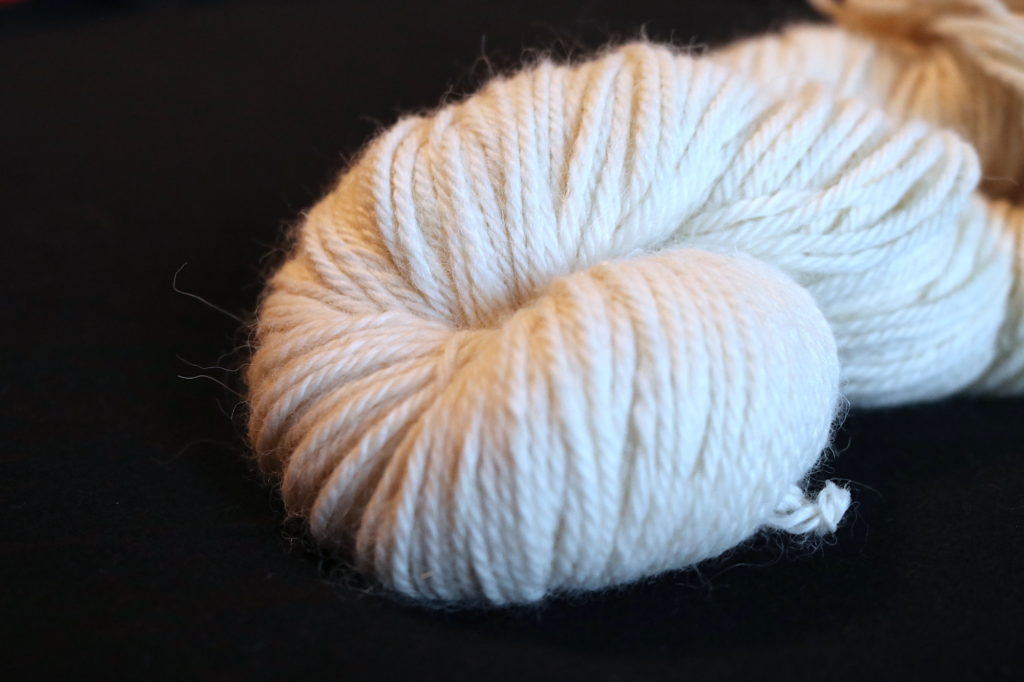
Baby alpaca is a gorgeous, sumptuous yarn. No, it doesn’t come from actual baby alpacas, it is classed and graded as a very fine fibre, and is extremely soft, hence the name. It also has a halo. It’s not fluffy in the same way that mohair is, and it’s not as difficult to weave with. But yes, it will still be a pesky, sticky yarn to weave.

The exact same rule applies here to Angora, possum and some cashmere fibres. Once again, save their scrumptiousness for a little later on.

Ah, silk, beautiful, shiny, luscious silk. I love weaving with it. Now. I didn’t attempt weaving with it until I had a lot of experience under my belt. I mean, have you seen how expensive silk yarn is? 😲 I knew I didn’t want to make that investment unless it was for something really special that I was ready for. Also, the fineness of the 60/2 silk above (similar to sewing thread in thickness) makes it doubly unsuitable for newbies.

Luxury yarns are just that – a luxury. Which means they will have a price tag to match. I’ve heard some newbie weavers say that they couldn’t resist a luxury yarn for their first project. I understand that your first project is a special one, but you need to be a realist about it too. Weaving is a learning curve. Skills like weaving neat edges and achieving good tension take time and are not likely to be perfected in your first project. You are really feeling your way with your first project. If you add the stress of having to make something nice with your very expensive luxury yarn on to the experience of learning to actually use your new loom, it will often be a recipe for disaster.

Let me put it this way: I’ve never heard a new weaver regret that they used inexpensive yarn for their first project. But I’ve had many, many, many messages from people in distress that things are not going according to plan and they spent so much money on the yarn. Save yourself the stress and start out with an inexpensive, light worsted/dk/Aussie 8ply wool.

Now, if I could only find a way to get this message to every new weaver in the world, I think there might be a lot more happy weavers out there.

This post is also available in video format-

So, time to fess up. Have you had a less than positive beginner experiences with one of these three yarns? Let me (and everybody else, just in case someone needs more convincing!) know about it in the comments.

Until next time…

Happy Weaving!
Filed Under: Rigid heddle weaving, Tutorials, Weaving, Yarn Tagged With: beginner weaver, newbie, no go zone, three yarns, weaving yarn, yarn

10 Tips to improve your weaving today

by Kelly 19 Comments

Learning to weave is a real journey and it takes time. There is no magic potion or secret ingredient to becoming a better weaver. It takes persistence, time and dedication.

I’ve written a post addressing these facts already – 5 Steps to Successful Weaving, but today I want to give you some short and simple tips that you can do today to improve your weaving.

*This post contains affiliate links

Let’s launch right in!

  1. Don’t run before you walk.

It’s easy to look too far ahead in your enthusiasm. Enthusiasm is great, in fact, it’s essential, but don’t let it blind you. Start at the level you’re at and work your way up. If you choose something too difficult for your weaving level, you may be setting yourself up for frustration.

2. Don’t choose the best yarn for your first project

The temptation of a gorgeous yarn with a big price tag is real. A beautiful yarn can be the perfect inspiration for a new project. But not as a beginner. And not until you’re confident that the picture you have in your head of your next project is likely to turn out how you want it to. Once again, the frustration will kick in if all doesn’t go as smoothly as you hoped. You have the extra pressure of the yarn price tag hanging over you. Keep the fabulous yarn for when you’re ready.

3. Begin with yarns that have some elasticity

It just makes beginner weaving life so much easier. A yarn with some elasticity (a woollen knitting yarn is perfect) will stretch just enough and is so forgiving that you should not have real issues with tension. Rigid yarns eg. cotton is much harder to tension on a rigid heddle loom. Wool, on the other hand, works with you, rather than you feeling like you’re working with (or for) it.

4. Start with thicker yarns – knitting yarns are perfect.

A thicker yarn (I recommend a light worsted/dk/ Aussie 8 ply) is great to begin with for a couple of reasons. The thickness is usually the perfect match for your standard 7.5 – 8 dent heddle/reed that came with your loom. So, no need to purchase extra sized heddle/reeds right away. It also weaves up much faster, and I think it’s important to make your first few projects very achievable and not be a massive time commitment. This will make you feel better about tackling the next project.

5. Commit regular time intervals to learning by doing

If your loom sits in a cupboard or your garage, guess what? You’re not going to learn how to weave. You’re not going to improve. And you will probably feel bad about it. If you are a busy person (let’s face it, who isn’t?!) then you may even find it beneficial to plan and schedule your weaving time so that it’s enough of a priority that you will weave regularly. I’m of the opinion that it is more beneficial to your learning journey to weave little and often than a big chunk of time occasionally. You’re training your brain to do new things, so consistency is important! Also, if you can have a dedicated space or at least not have to completely pack up everything after every weave session, that will be a great help and motivator.

6. Expect little – you might surprise yourself.

Hope for the best, but don’t place unrealistic expectations on yourself. Learning new skills takes time and patience, there is no way around that. Yes, some will learn quickly and some will take longer and that’s completely normal. If you haven’t seen my Slow Learning video, you should check it out:

7. Record your project information

You’re not being your own best weaving friend if you don’t take the time to record information from your projects to refer back to. You may think you will remember all the details, but chances are you won’t. I learned early on to write things down before, during and after my project. It is so worse the time. It helps you to not repeat annoying mistakes but also allows you to repeat the things that were desirable. My Weaver’s Toolkit downloadable e-booklet is a great help for recording purposes, it includes warping and weaving calculations sheets plus a project record sheet.

8. Sample.

It took me a while to become a true sampling convert. I do it often now. It’s a guaranteed way to know that your project will turn out well. You have to invest a little yarn and time, but it is very satisfying beginning a project with that kind of confidence.

9. Find the right resources for you.

If you need help, find help. The kind of help will be different depending on your needs. You may find weaving books really helpful, (check out my Amazon shop for my favourites) you may want to access some online lessons, or you may be lucky enough to either live near to face to face classes or know someone who weaves already.

10. There is almost always a fix

If you mess up, it’s not the end of the world! Most mistakes can be rectified. You may need to find extra resources when you encounter a problem but that is a positive part of your learning process. I always say that if I hadn’t made so many mistakes I wouldn’t have learned as much as I have. Make sure you’re subscribed to my Youtube channel where I have many, many videos that can help you out of a tricky situation.

11. Do not use sticky yarns if you are a beginner. I repeat, Do not use sticky yarns if you are a beginner!

I know, I said “10 tips” and this is number 11. But I must make this point, it’s that important.

Please! Just don’t do it!! You wouldn’t believe the number of emails I get from students stuck (pun intended) in their project because of a sticky yarn that won’t let them get a clear shed and causes all kinds of angst and hair tearing activity. Even bad language, so I’ve heard.

So, just don’t do it. No fluffy, sticky yarns (just forget all about that mohair for now). Save the stickies for later (if you really want to – I just generally prefer to avoid them!) and plan the project carefully.

If you need more information on choosing appropriate yarns, check out these other articles I’ve written on the topic:

Choosing and Using Yarns in Weaving…

3 Yarns Beginner Weavers should NEVER use!…

What is Superwash Woollen Yarn?…

I hope these tips are useful to you! If you have any questions, please leave me a comment, I love to hear from you.

Until next time…

Happy Weaving!
Filed Under: Inspiration, Online Weaving School, Rigid heddle weaving, Weaving Tagged With: how to weave, learn to weave, rigid heddle weaving, weaving tips

How to deal with warp colour changes

by Kelly 34 Comments

Changing colours in your warp allows you to jazz up your weaving, even if it’s a plain weave project. In this article, I’m going to troubleshoot some of the issues that may arise when you want a colourful or stripey warp when direct warping your rigid heddle loom.

*This post contains affiliate links

I’m specifically speaking to rigid heddle weavers who choose to direct warp today, as these issues either don’t occur or are more simply dealt with when using a warping board, or indirect warping.

The two main issues I want to discuss today are how to most effectively deal with a warp that has a lot of colour changes and what to do when your ends are uneven in number.

If you’re not sure of the difference between direct and indirect warping, I’ll briefly explain.

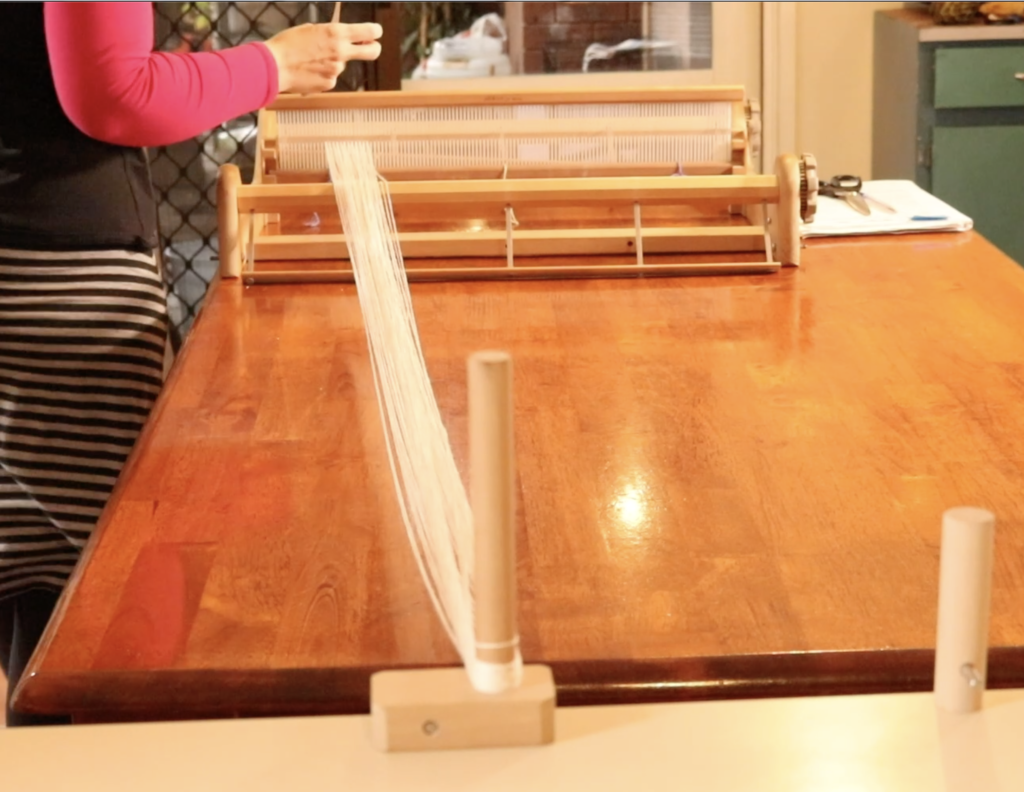
Direct warping your rigid heddle loom involves tying your yarn end onto the apron rod at the back of the loom, taking the yarn through a slot, around a wooden warping peg that is clamped at the desired distance of the warp away, back through the same slot and around the apron rod again. The process then repeats.

In this photo I’m warping a wider warp and am using 2 x pegs in order to spread the warp more evenly and achieve better tension.

I personally love the direct warping method for my rigid heddle loom because it is such a quick and easy process.

Indirect warping is when you make your warp away from the loom, usually on a warping board or warping mill. You then transfer and “dress” the loom with the warp. It takes longer to warp away from the loom, but is necessary for floor and table looms.

If you’re interested in seeing a warping board in action, check out this video:

Let’s talk about the first topic I mentioned, the use of multiple colours in a direct warp. When you want to make a warp with stripes, you will need to warp sections of colour. This usually involves repeating sections of colour in a sequence, so even though you’re changing colours frequently, you are often coming back to a colour you’ve already used. Many weavers ask me the best way to do this – change warp colours frequently.

There are several options.

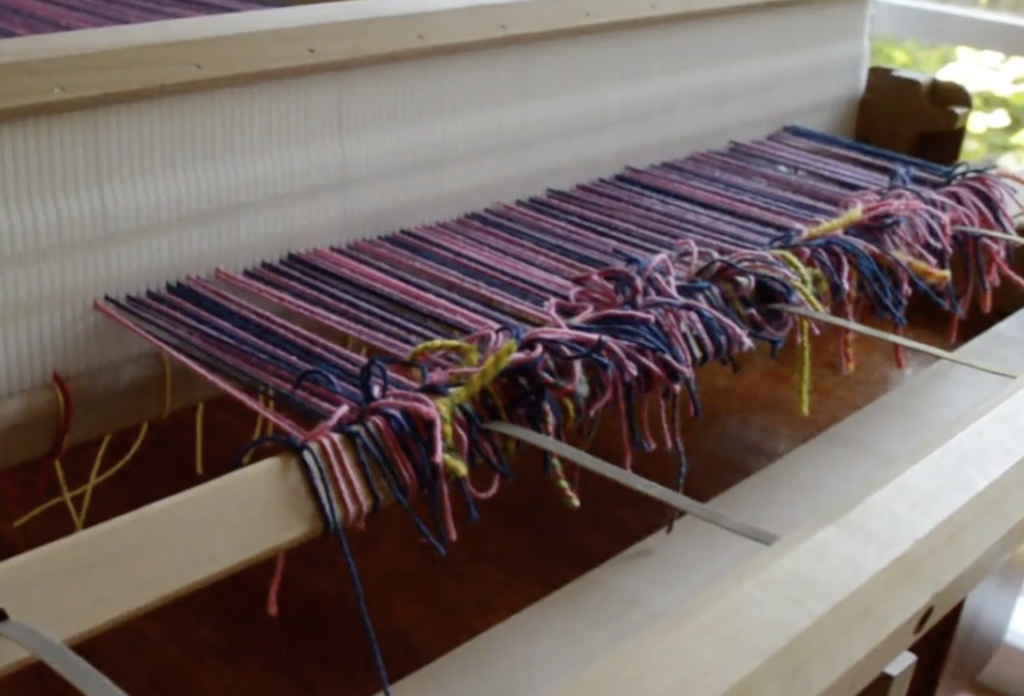
  1. Tie the colours as you need them on to the apron rod, go through the direct warping process, tie on new colours as you need them but don’t cut them off when you’ve finished with one section. Then when you need to repeat a colour, you pick it up where it was last used and continue on.

2. Tie on each colour to the apron rod and then cut and tie it off on the apron rod when you’ve finished that section. Tie on the new colour to the apron rod, then tie off again when finished with that colour. Continue on across the warp.

3. Tie on to the apron rod and begin to warp, when you need to change colours cut the existing colour close to the apron rod and tie on the new yarn to the old yarn, making a firm knot. This way your thread is continuous even though you are changing colours.

I’ll share which is my favourite option and why. Number 2, wins for me, hands down. Some people are surprised to hear this and wonder why I would take the extra time to do all that cutting and tying on rather than choose to run continuous threads.

It’s a fair question and some are still not convinced when I give my reasons, but that’s ok, we’re all different in our preferences and I encourage you to do what suits you the best.

There are two main reasons why I like the tie on/ tie off method. No crossed threads. I don’t like crossed threads behind my heddle. They are messy and can cause issues like holding some threads down when they should be up and messing up my tension by crossing over the back beam in a higgledy piggledy manner – not my style at all! I can’t even show you a photo of what this looks like, as you will never see it on my loom. The second issue, as I mentioned, is the tension – I believe that my tension is compromised when those warp threads are all over the place at the back beam.

Having said all of that, there is one instance where I would consider using method one – if my colour repeats were extremely short. For example, if I was alternating between two colours every 2 ends, then I would look to decrease my warping time by continuous warping.

But I have found that most of my warps have been larger blocks of colour than that, so I always tie on/ tie off.

A perfect example where my favourite method is employed is in my Log Cabin Table Runner class. Yes, there is a lot of tying and cutting, but look at that tension! Another great example where I use the same technique is my free Wash Your Hands Towels project. I’ll readily admit that this method takes a great deal of extra time, but I also declare that the results are worth the trouble. Perhaps it’s because I’m also a floor loom weaver, and dressing the loom takes a really long time, that using the cut and tie method doesn’t feel excessively long to me. I always say to my students that extra time spent in getting a warp right is never time wasted – it will save you time later with mistakes or hiccups and you will be more pleased with the end results. Each tied section on the apron rod is like it’s own little warp with it’s own individual tension. When you come to wind them on as a whole, the tension is quite beautiful! All of those knots are on the apron rod and won’t move or affect your weaving as you advance the warp.

I didn’t tell you my thoughts on method three. I can speak from experience that it’s less than ideal. Firstly, the knots can slip or come apart, yes, even if you do them tightly. If your yarn is even slightly slippery (as in a soft cotton) you will likely have trouble. Secondly, tying yarn pieces together is more fiddly, in my opinion than tying on and off the apron rod. So, although I’ve tried this option, I now avoid it.

Now let’s discuss the second issue that frequently crops up when direct warping your rigid heddle loom, and that is what to do when your ends are uneven in number.

Sometimes you will come across a pattern or warping chart for your rigid heddle loom that may look something like the following colour sequence:

Blue – 12 ends

White – 8 ends

Red – 11 ends

White – 8 ends

Blue – 12 ends

Repeat from the beginning until you have _____ (however many ends the project calls for) ends.

It all looks good until you come to the “red – 11 ends”. 11 is an uneven number and it means that you can’t just make a loop of your thread for the last end, because then you would have 12 ends instead of the 11. Make sense?

The easiest way to get around this problem when direct warping your RHL is to not warp uneven numbers of ends! If you are designing the warp yourself, just ensure that every warp number is even so that you can loop every single thread. It might mean a little mathematical adjustment here and there, but it’s not hard and only requires basic math to figure out (I don’t say this lightly, you’re talking to a mathematics hater here!)

But what if you’re using somebody else’s patterns or instructions (by the way, you will notice that none of my patterns or classes have odd numbered ends 😉). Many patterns might be written for indirect warping, hence the odd numbers. Well, you can still adjust that pattern to custom fit it to your requirements without too much trouble.

Going back to my example colour sequence above, it would be a simple matter of rounding the “11” for red down to 10 or up to 12. Yes, you will have to rejig your initial pattern a little to allow for extra or less ends, but as I said, it’s not all that difficult.

But, if you really want to stick to the original pattern with the odd ends, there is something else you can do with your direct warp. If you warp the single colour end by itself, you will have trouble when it comes time to thread the holes. The hole thread will be missing in the place where you only took that single thread through the slot! This means that you have to use the thread from the slot, then shuffle over other threads in order to make sure all the holes and slots are threaded, thus reducing your warp size and possibly messing up your pattern if it’s meant to be threaded in a particular order. There is another way, but it has it’s own set of problems.

You take your single thread (say we’re doing the red and it’s thread 11) to the warping peg through the slot as normal. When you get to the peg, you cut the thread, leaving some spare to go around the peg and tie off. Tying off loosely with a gap is preferred, so that it comes off the peg easily when you want to wind on the warp. Then, instead of going straight back to the loom, you tie the next colour on to the peg. Following our example, that would be white. Take the white back through the same slot that the red was brought through, then back around the apron rod.

Hold up, what’s the problem with that? Well, if we take the white back from the peg, it then becomes a single. We need 8 ends of white, but now we’re going to end up with uneveness again! Further mathematical adjustments would be required or the warp will not be the width you planned for in initial calculations and once again, the pattern may be off.

You see what I mean? Isn’t it just way more simple to even out all of those numbers and save yourself a big headache? I surely think so, but if you have a different opinion or another workaround for the issue, I’d love for you to set me right by leaving me a comment 😄

OK, weavers, I think that’s quite enough for today, I hope I’ve helped rather than boggled your minds with all this!

If you haven’t already, you may want to check out my Online Weaving School, where there are many classes or memberships to choose from and catering to all different weaving levels. You will also find a range of digital download PDF weaving patterns in my Etsy Shop.

Maybe I should aim for a brief and easy going post next time!

Until then…

Happy Weaving!
Filed Under: Free tutorial, Online Weaving School, Rigid heddle weaving, Weaving Tagged With: color changes, rigid heddle weaving, stripes, warping

Hand woven fabric Yo- Yo tutorial

by Kelly 8 Comments

Many hand weavers these days are keen to sew finished pieces, particularly clothing from their hand woven fabric. This is a wonderful development for any weaving journey, as sewing opens up a vast amount of finished objects the weaver can make.

One side effect of all the sewing with hand woven fabric that is starting to happen is that there will be inevitable leftovers. Sewing, particularly clothing usually requires cutting shapes out of your hand woven, meaning that you will have smaller pieces of “waste” fabric leftover. I say “waste” but it’s only waste if you waste it!
*This post contains affiliate links

There are some fun and exciting projects that can be made even with very small pieces of hand woven fabric. One of these is the lovely Suffolk Puff or as it may be more commonly known these days, especially in America, as the Yo-Yo.

What is a fabric Yo-Yo? It’s a small, gathered circle of fabric, usually covered in the middle by a button or similar. They have been around for quite some time, seemingly dating back as far as the early 1600’s in Suffolk, England.

Suffolk Puffs were made from old clothing, quilts, bed sheets and so on, and given new life when joined together as quilts and cushion covers.

The idea is to gather a small circle of fabric at the outer edge with a running stitch. When gathered, the circle forms a sweet little “puff” that can then either be topped with another, smaller puff or a button can be sewn into the centre.

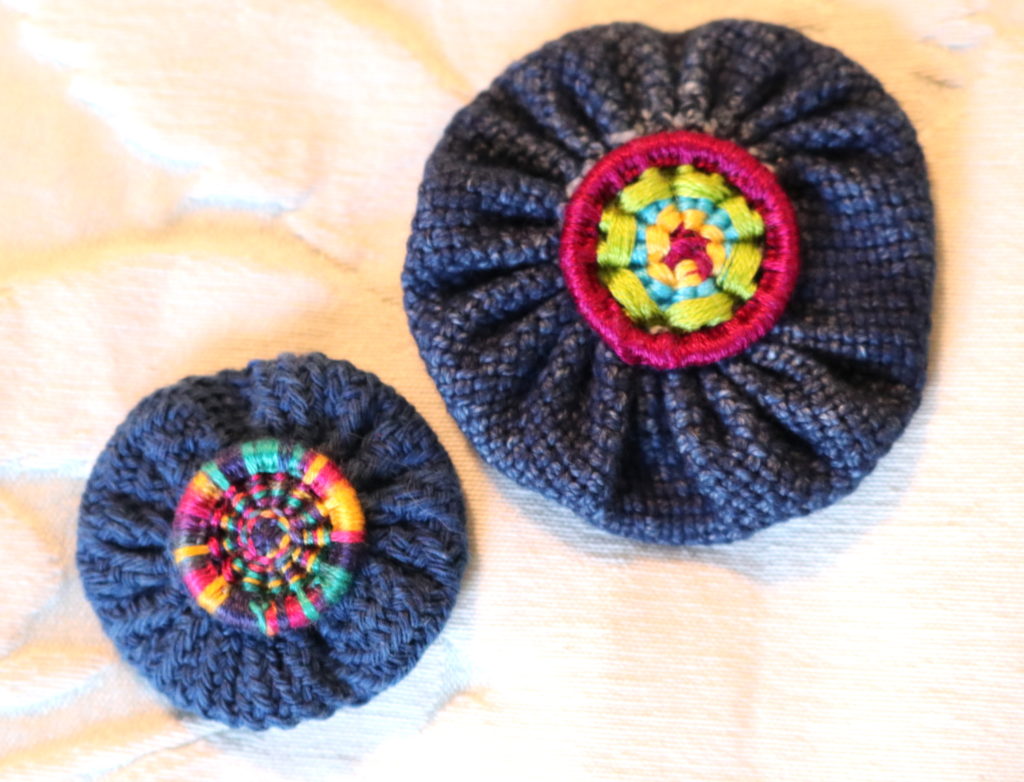
With the finished YoYo you can embellish clothing or bags, sew many of them together as in the days of old, hot glue them on to hair accessories (I’ve done this a lot for my 3 girls) or sew on a brooch backing and wear it as a one of a kind brooch.

Let’s begin with what you will need to sew a YoYo similar to mine.

*A 5 x 5″ square of handwoven (or commercial) fabric

*A 5 x 5″ square of light, fusible interfacing

*Strong sewing thread (I use Gutermann Sew All)

*A sewing needle

*A button to finish with

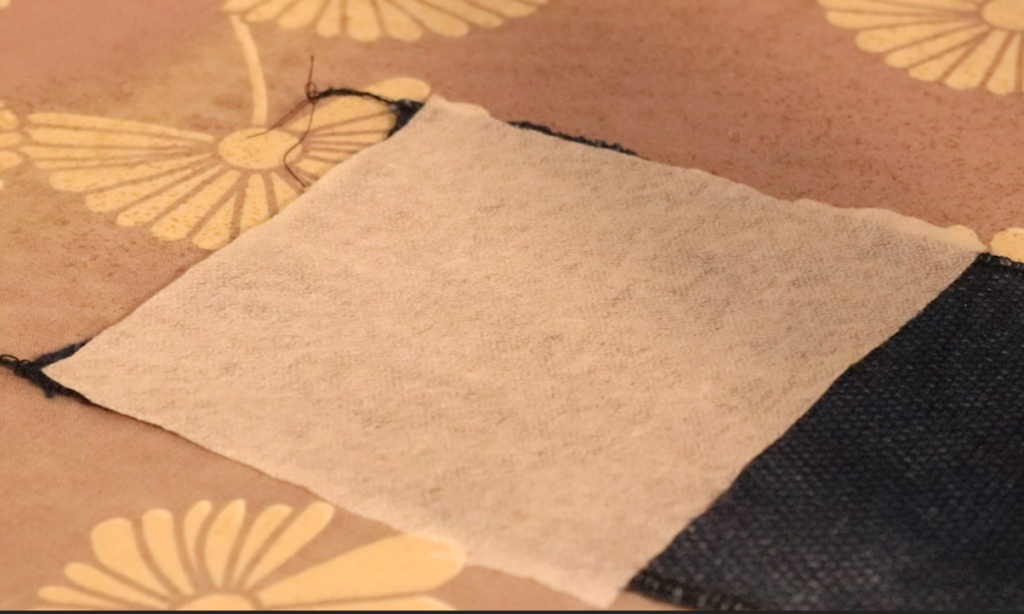
Begin by cutting the fusible interfacing to fit on the fabric piece. My original fabric piece was larger than 5 x 5″, so I place the interfacing on first. Make sure that you have the correct side of interfacing facing the fabric, otherwise you may destroy your iron! Place a pressing cloth over the top of the interfacing for extra protection. Iron it on and allow to cool once properly fused.

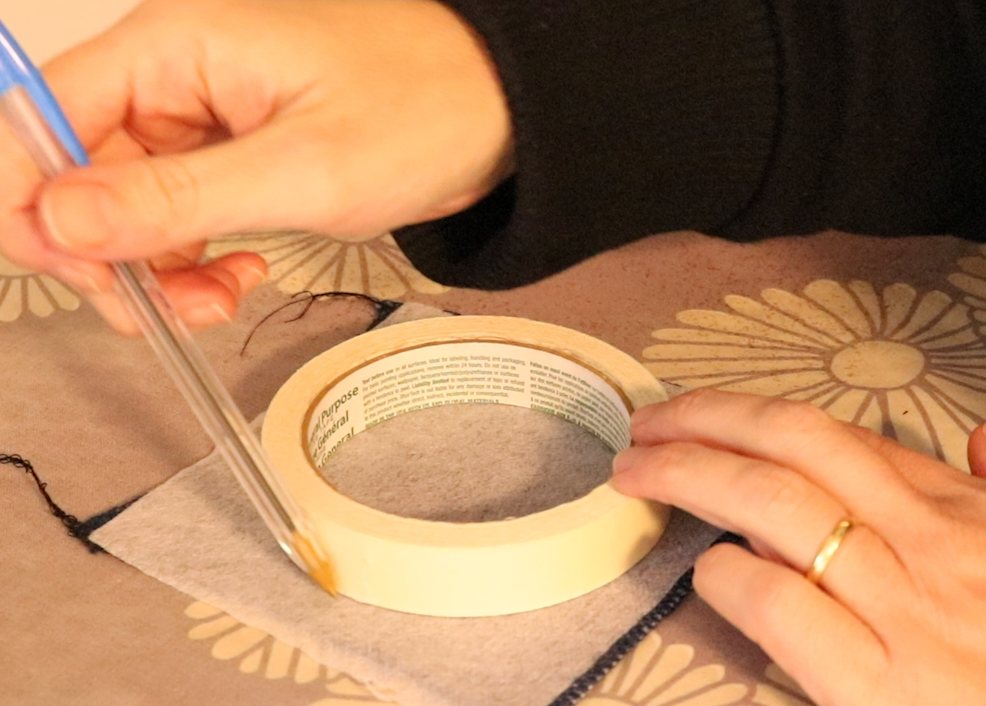
Use an object as a traceable template (I used masking tape) to draw a circle onto your interfacing. It’s fine to use pen, as it only marks the interfacing and will provide a cutting line.

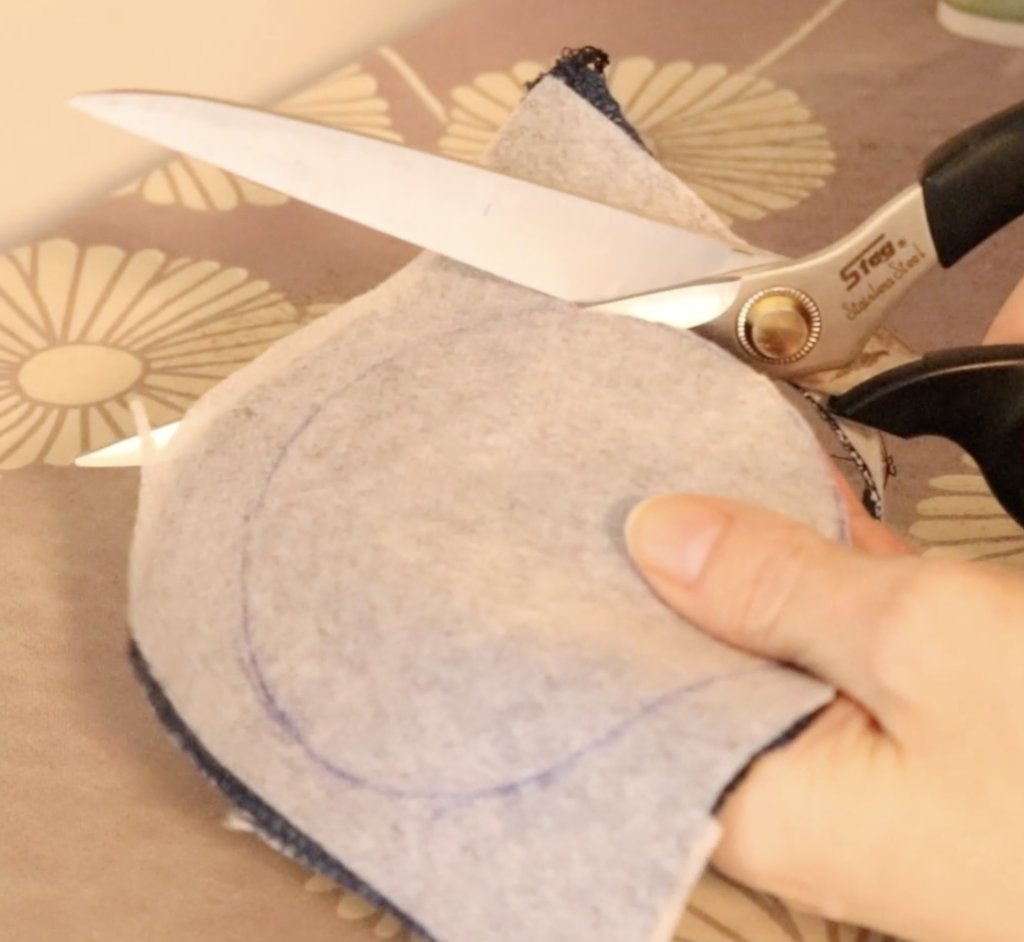
Cut out your circle. Sharp scissors are very handy at this point.

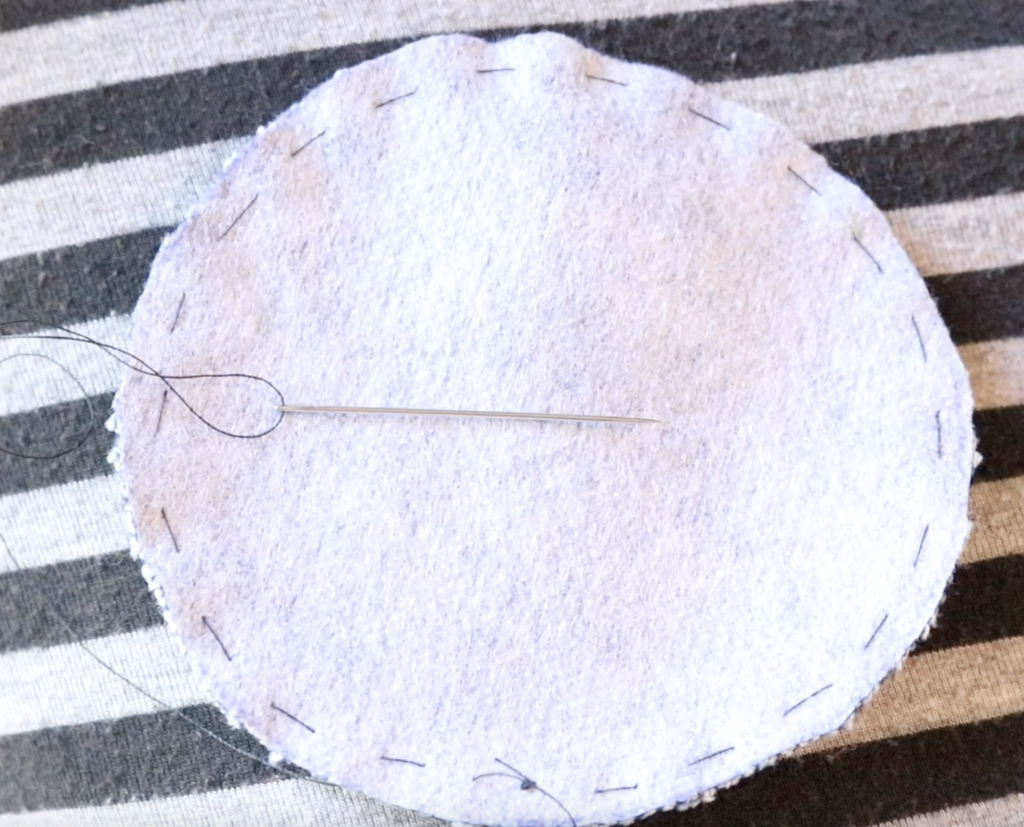
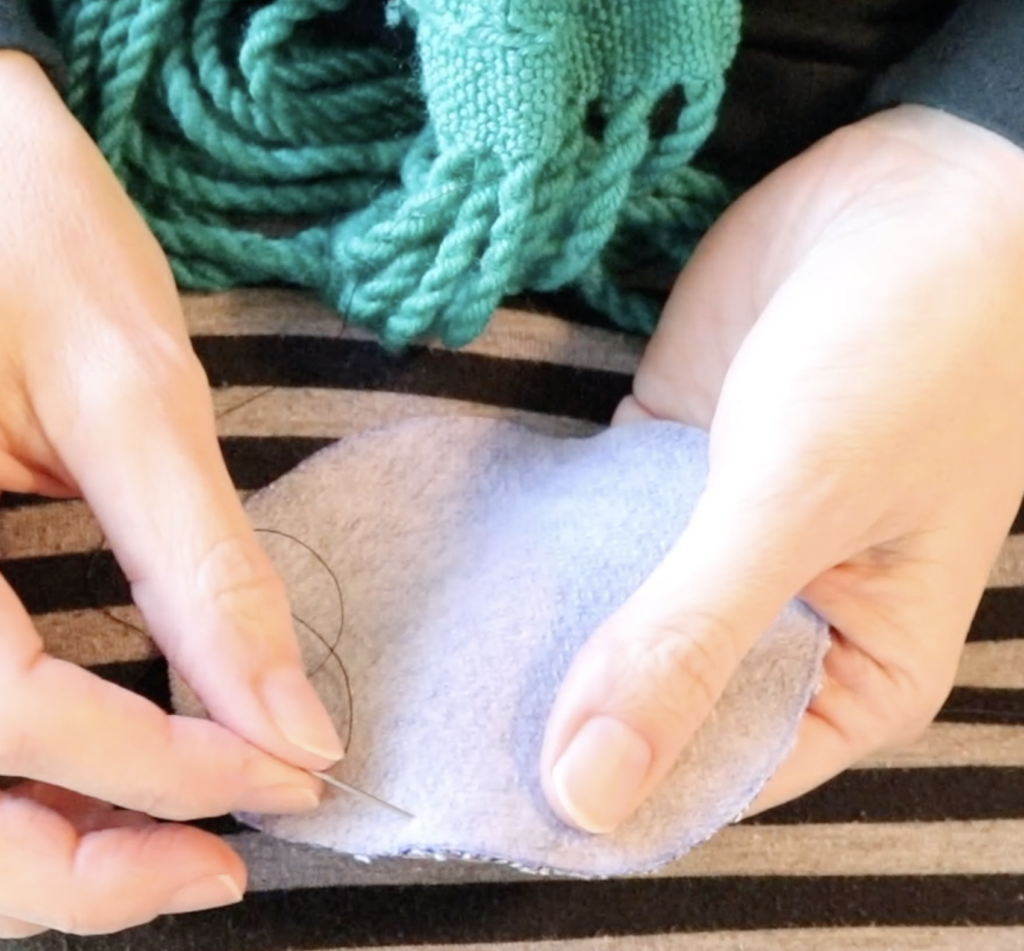
Thread your sewing needle with around a 15″ length of thread and knot the end. Take the needle down through the interfacing side, about 1 centimetre in from the edge.

Stitch a running stitch, making the length of your stitch also around a centimetre in length and maintaining a fairly consistent distance between the stitches.

Continue all the way around the circle.

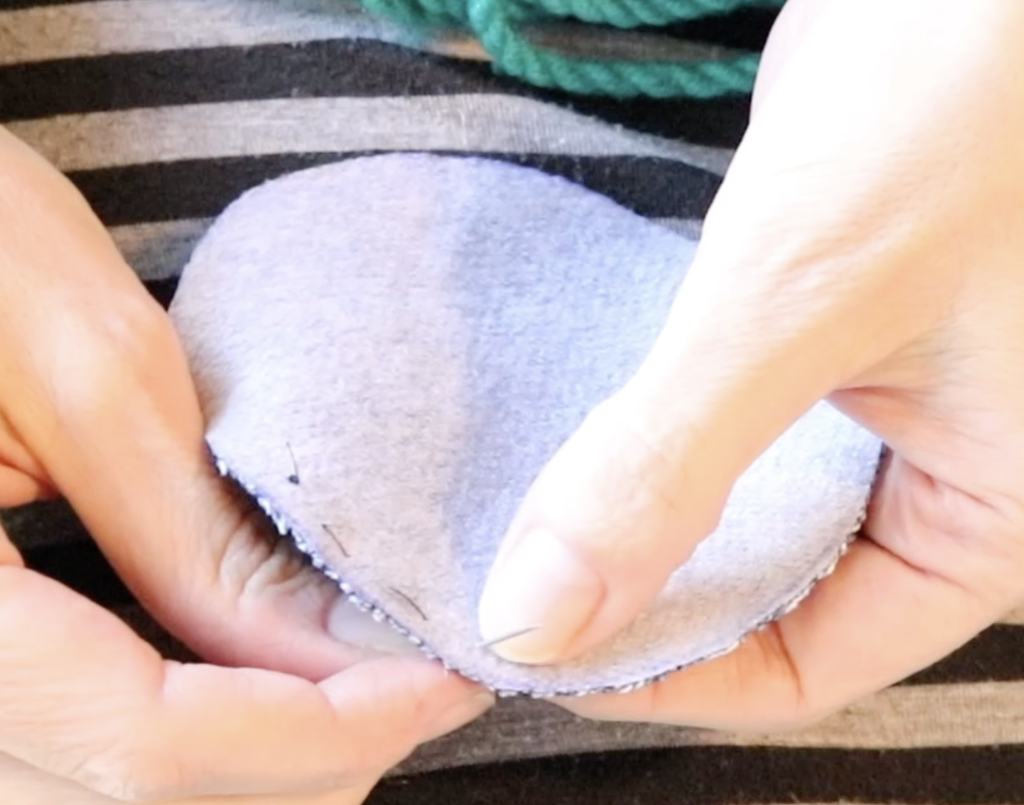
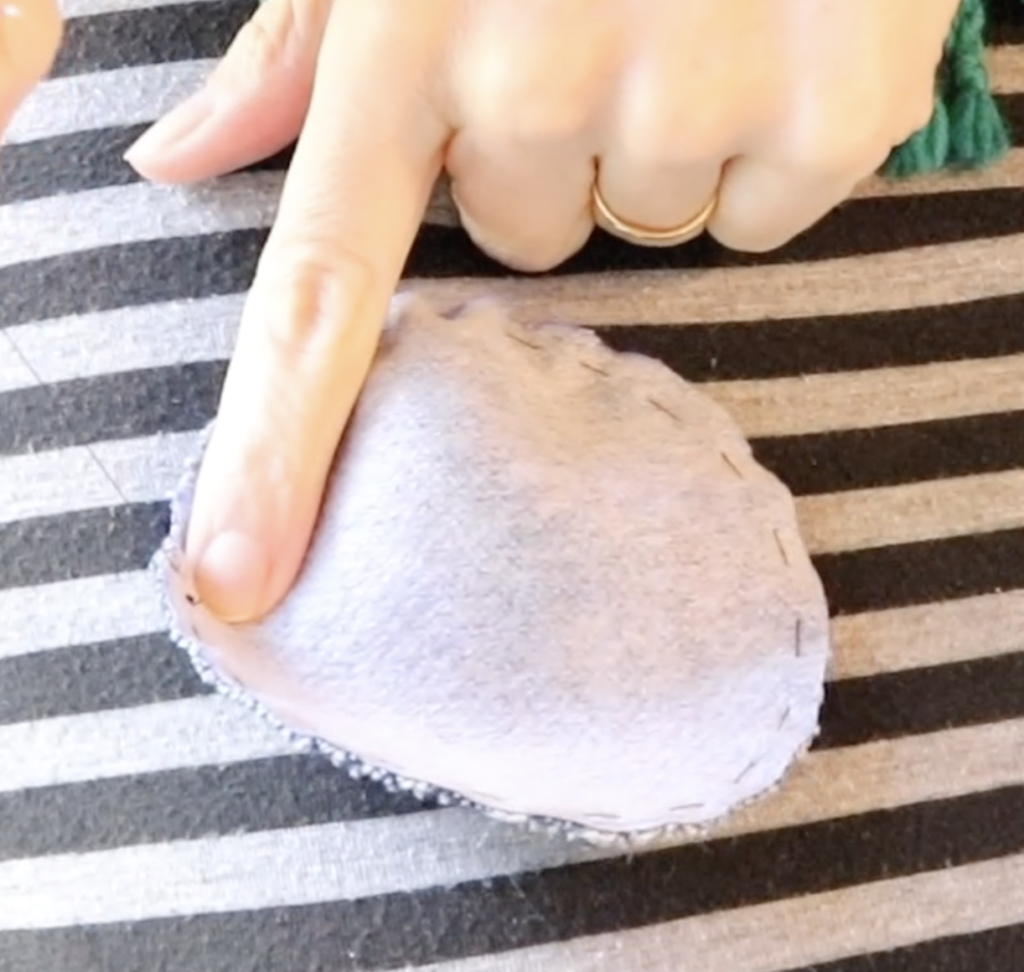
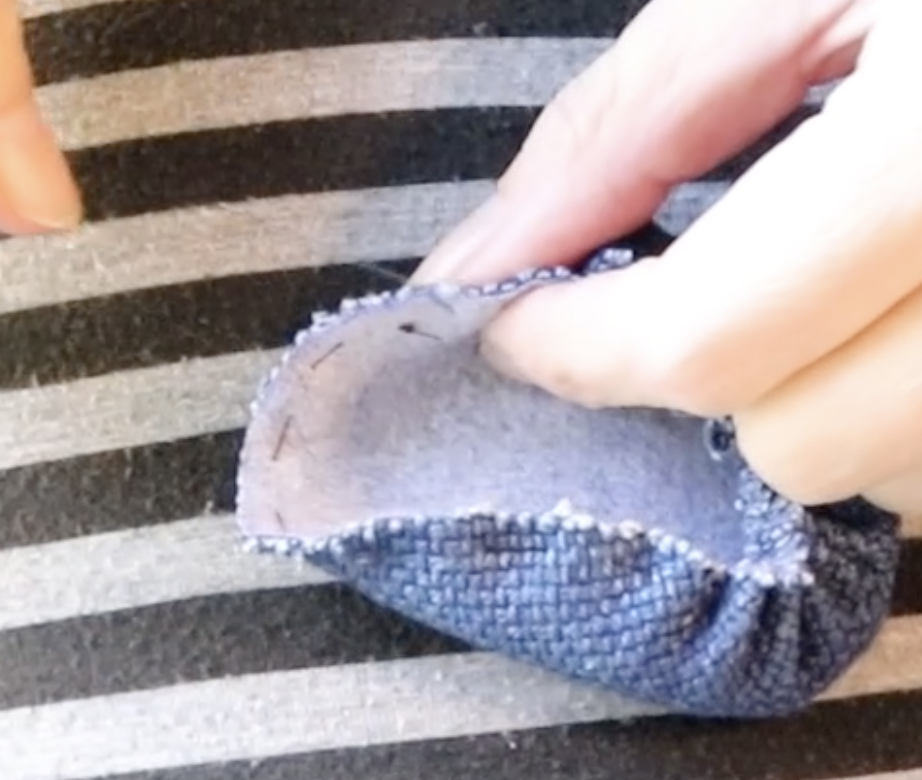
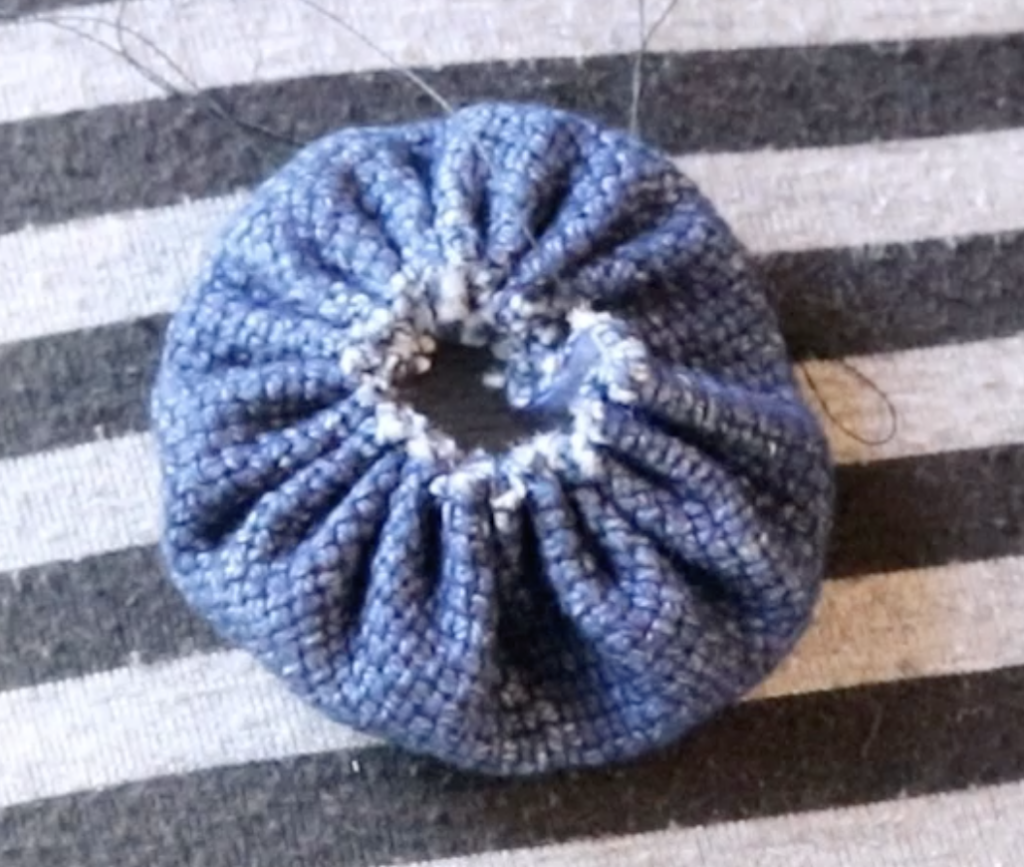
Pull gently on the end of your thread and the fabric will begin to gather up.

Continue gathering until the fabric forms a hole in the centre and can’t gather anymore.

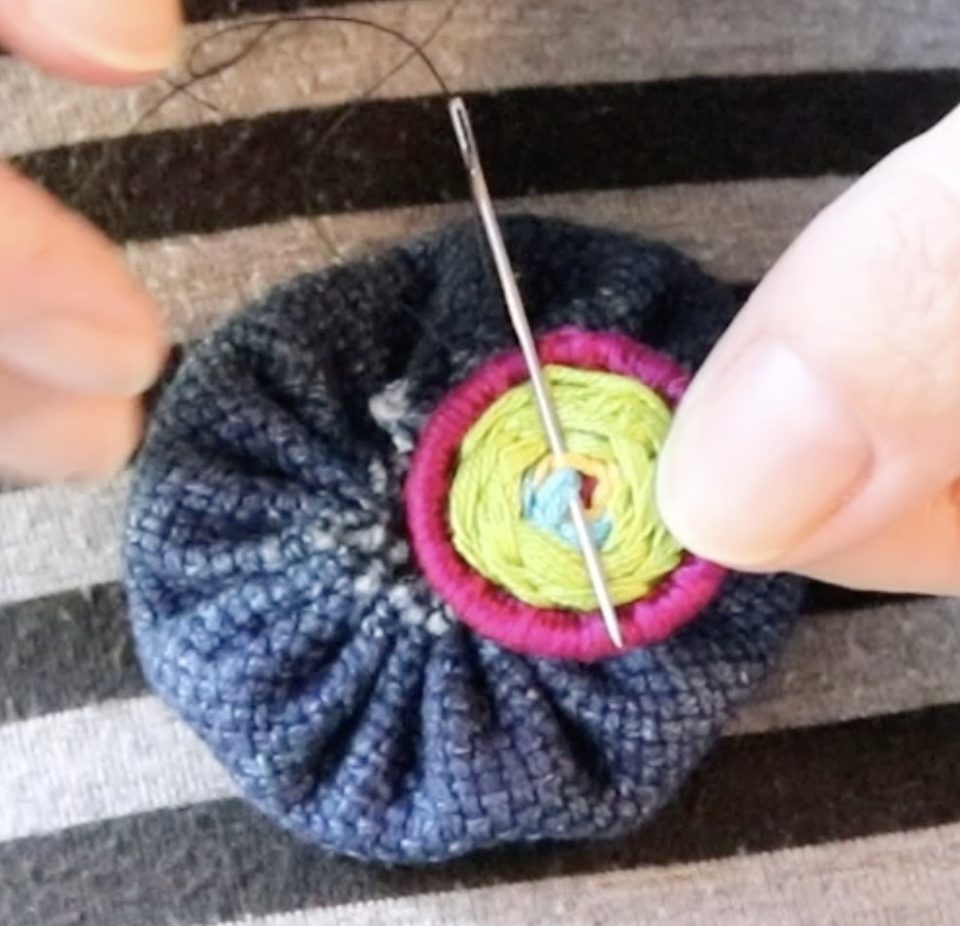
Now you can decide what you will place in the middle. I’m using a Dorset button that I made previously. If you’re interested in learning more about Dorset buttons or making one yourself, I recommend GinaB Silkworks.

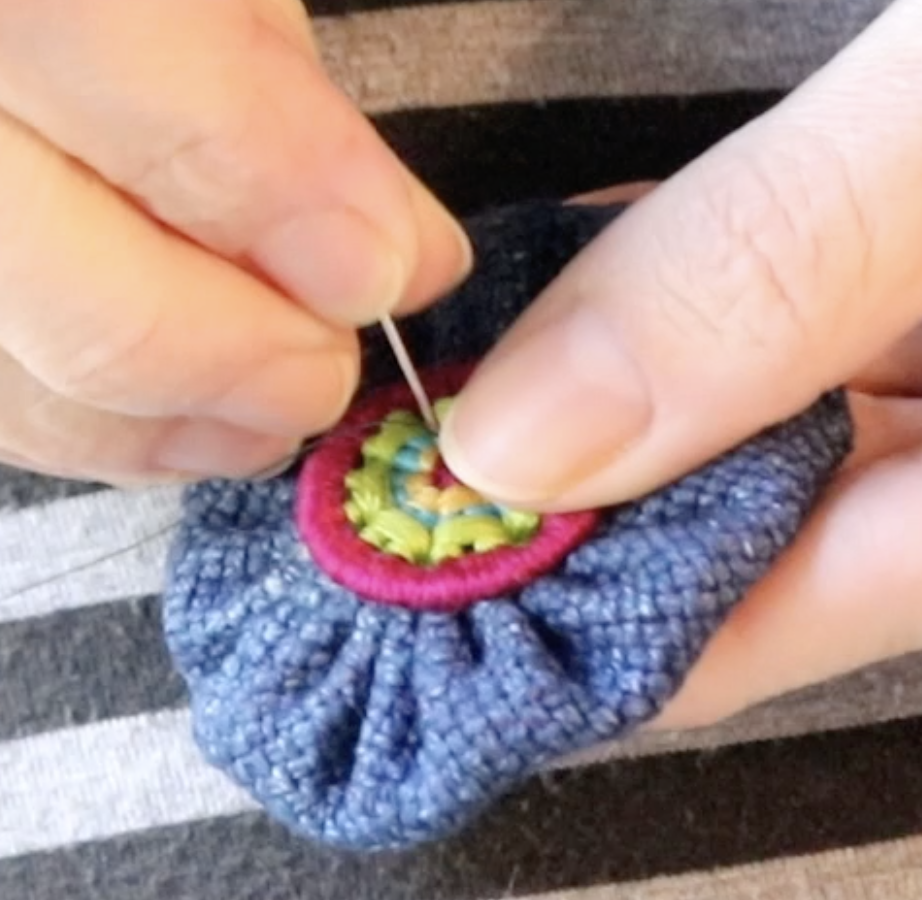
My button is flat backed, so I’m taking my still attached thread through the back of it to begin stitching it on.

Continue to stitch through the button to the back of your puff with small stitches until it’s fully attached and none of the raw edges of your circle hole are showing. Knot off the thread and sink it into the back of the puff where it won’t be seen.

Ta da! What an easy peasy use of scrap fabric! I think these ones should be made into brooches so they can be shown off well.

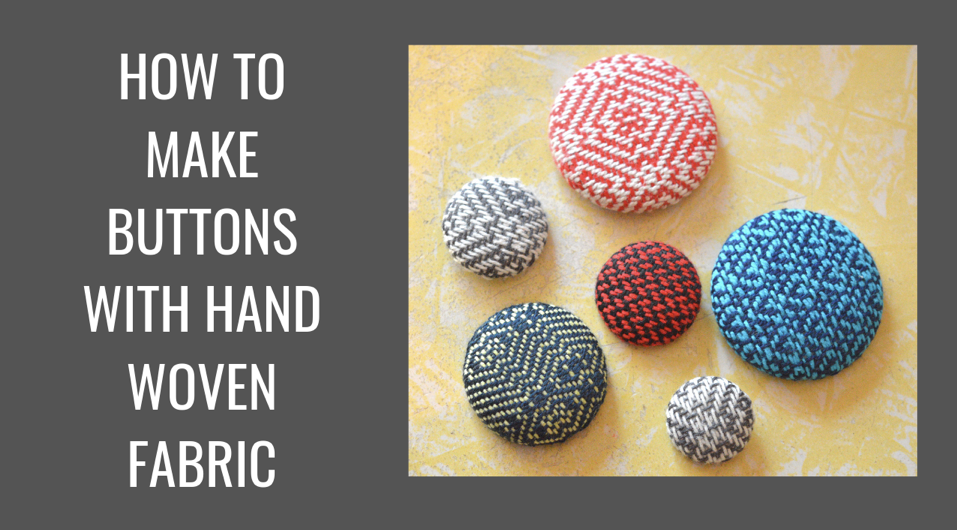
If you are interested in learning how to make buttons with your hand woven fabric, I have a members only class that shows you how to do that.

This tutorial is available in video format here-

What do you think? Do you have any scraps of hand woven that could be used to make a YoYo? And what about the Dorset buttons, are you interested in having a go at those too? Let me know in the comments, I love to hear from you!

Until next time…

Happy Weaving!

Filed Under: Free Pattern, Free tutorial, Rigid heddle weaving, Sewing, Table loom weaving, Tutorials, Weaving Tagged With: tutorial, yoyo

How to show off a multi coloured warp

by Kelly 8 Comments

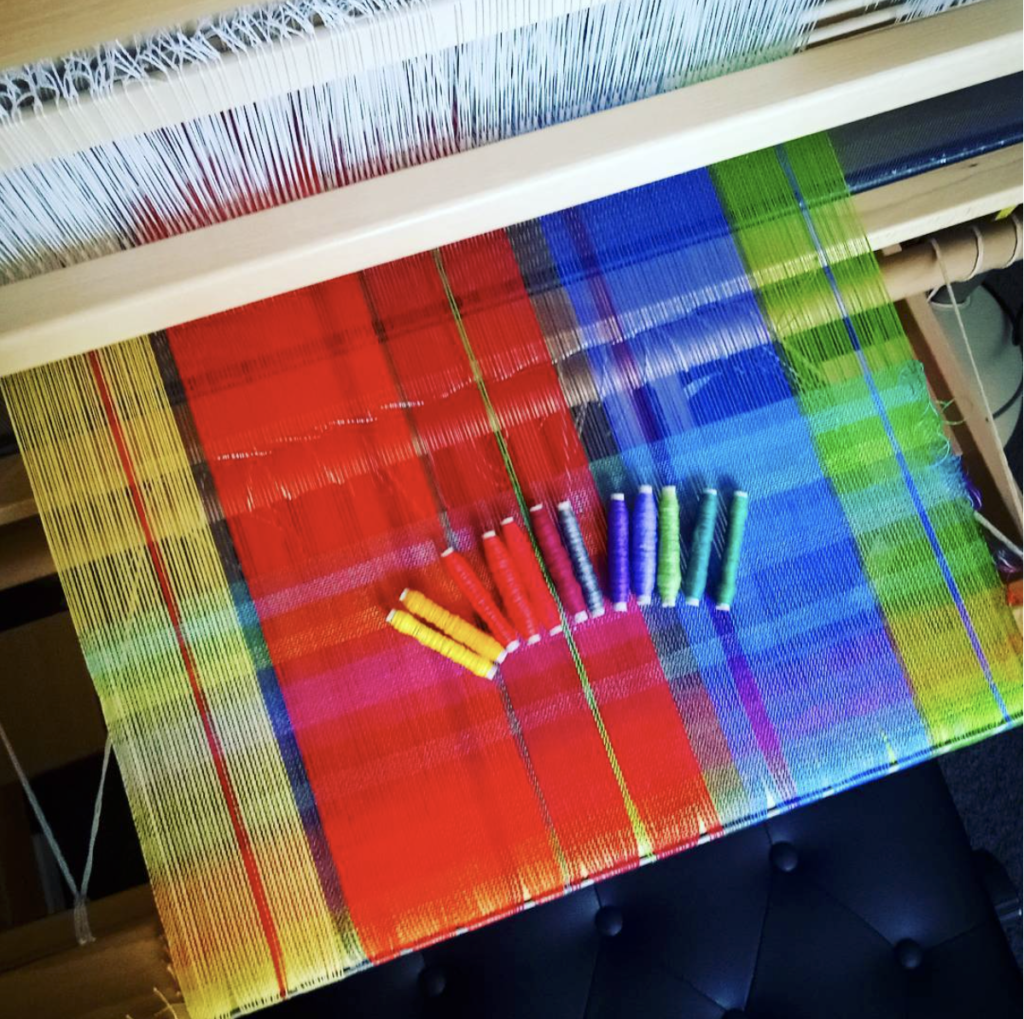
A frequently asked question is “how do I best show off my warp?” and it’s usually asked in relation to having bright colours, lots of colours or a gradient in the warp.

If you have spent a lot of time on your warp to arrange the colours just the way you want to, you certainly don’t want to obscure all that beauty by weaving with an inappropriate weft.

In the planning stages of your warp, you will want to think a lot about how your warp colours will look side by side. There are several ways to visualise this. You can use colouring pencils to just draw and colour in bands of colour next to each other on a blank piece of paper to see if they look pleasing to you.

You can also grab some short lengths of the intended colours in the yarn you are using and twist them together a couple of times. They will twirl around each other and give you an idea of how they will behave side by side.

You can also do a wrapping as I have here, which gives a great visual representation of colours and thicknesses of stripes. I teach you how to do this in my members only Gaining Confidence with Colour class.

It is best that you also plan which weft you will use, but it can be hard to know how different colours and yarns will look on the loom. I highly recommend that you take the time and a little extra yarn to warp up a sampler, which will take all of the guess work out of the project.

In this article, I am sharing some of my samples from my new members only Options for Showing Warp Colours class. The class goes into plenty of detail with yarns used, weaving structures and demonstrations that will give you lots of ideas for your next colourful warp.

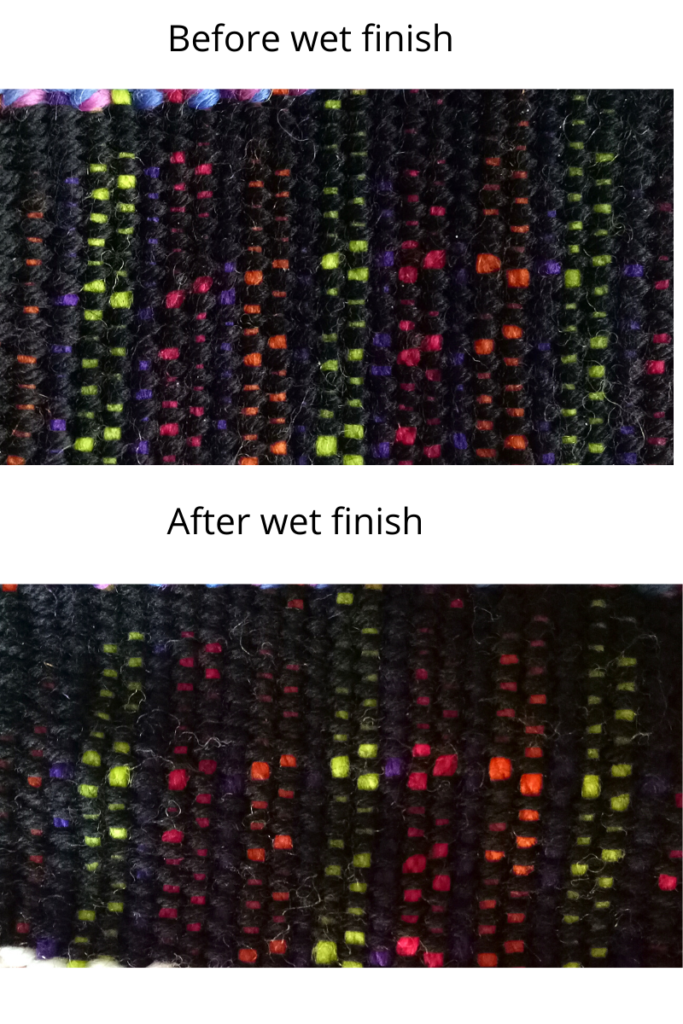
All my samples, excepting one, were woven with woollen yarn but not all in the same thickness. My first sample was a white wool. I particularly wanted to show you how a white weft has the effect of toning bright colours right down. That can be desirable in some circumstances, and not in others. It’s best to know these things before you begin your project to avoid disappointment!

I’ll readily admit that this sample makes me cringe, but perhaps for another weaver it might be just to their taste. Once again, sampling is invaluable in helping to reveal your own personal likes and dislikes. So, while this balanced plain weave sample doesn’t appeal to me in the slightest, that doesn’t mean that I’m against all white wefts!

For my second Wash Your Hands Towel I also used a white weft, but look at the difference! In this case, due to the arrangement of colours in the weft and a lovely pick up pattern, white really makes this towel pop in a way that I love.

The second sample is the opposite of the first in that it uses black as the weft. I didn’t have any black in the same weight as the warp, so I used a lighter weight. I had to be careful to beat gently to avoid obscuring the warp altogether. I don’t often use much black in my weaving, as it tends to be so dominant. It can be perfect when pairing with another solid, contrasting colour and an interesting pattern, but for plain weave, once again, I’m not a fan.

I don’t mind the way the black has little pops of the warp colour, but I do feel that it just wants to take over all those colours I spent time carefully warping!

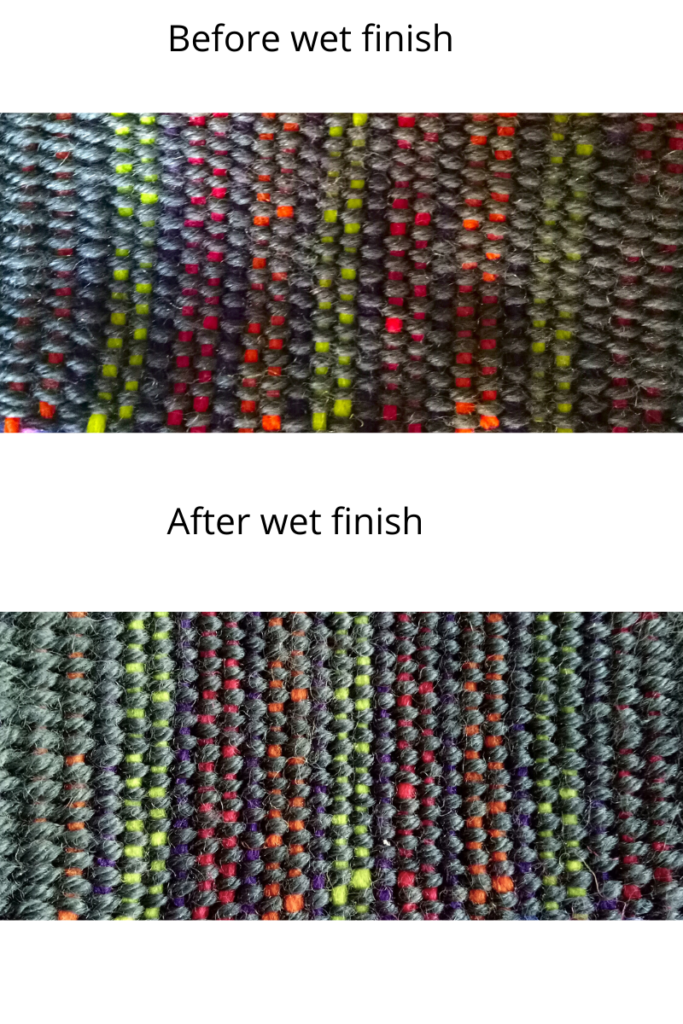
The third sample was a plain weave in dark grey. Dark grey is my preferred option for when I want my warp colours to shine. It seems to harmonise and compliment rather than dominate.

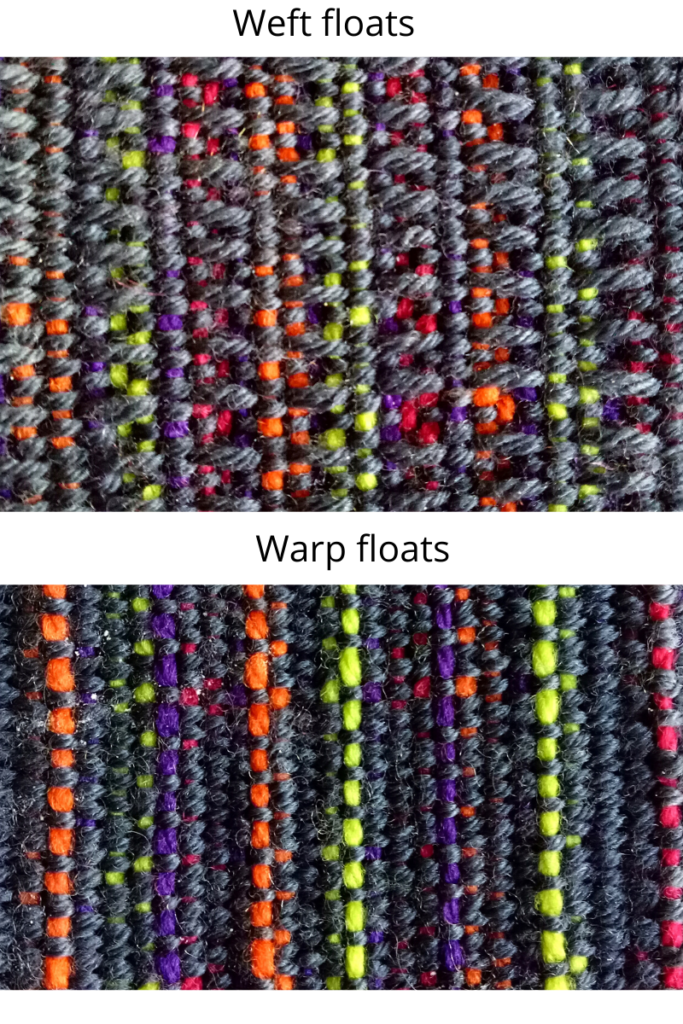
Now on to my favourite option – grey with pick up. This is a total win win situation in my opinion. You have the non obtrusive grey and the openness of the pick up to allow that warp to shine. I find this the most complimentary combination of weft and warp.

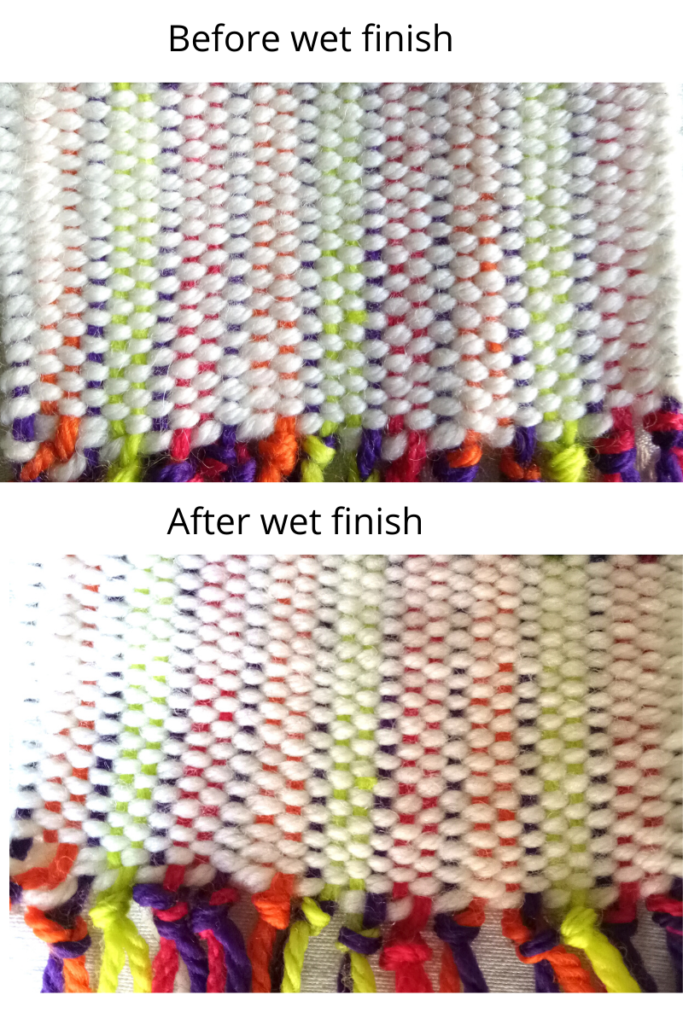
These have both been wet finished.

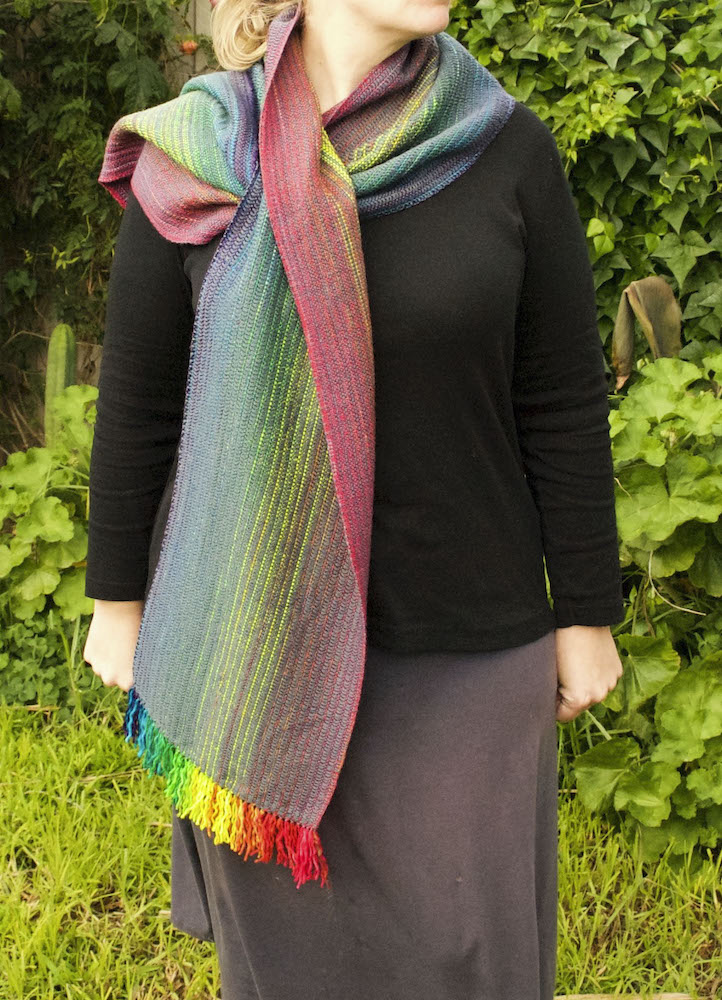
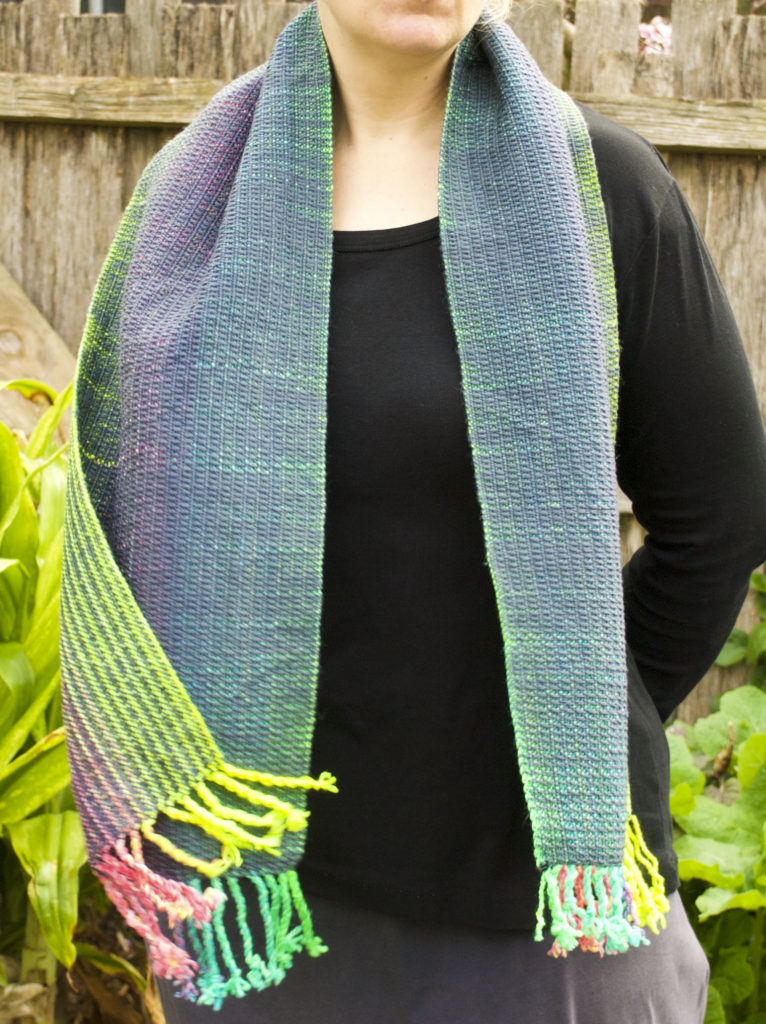
Before I go, I want to show you some of my favourite projects woven with colourful, gradient warps and grey weft in pick up patterns, just to inspire you!

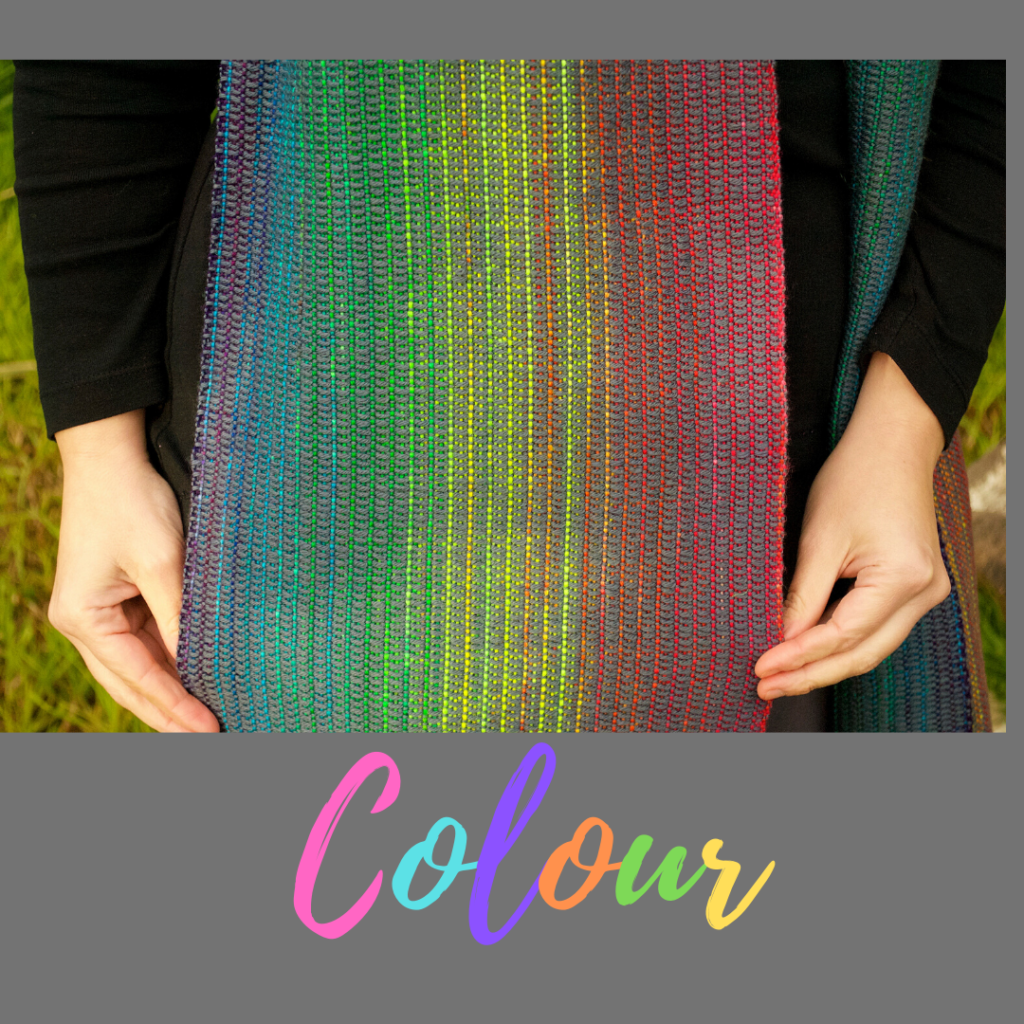
This one is my favourite. It took me a long time to dye that rainbow gradient warp!
Note the reversibility of the design – one side shows weft floats while the other shows warp floats. Pretty cool huh?

I hope this post has helped you to think about ways that you might use wefts to make your warp a stand out. If topics like this are interesting and useful to you, I’m sure you will love my Online Weaving School. There are single classes or memberships available for purchase.

If you are interested to know more about pick up sticks, you will find this article very useful.

As always, if you have any questions or if you enjoyed reading this, please leave me a comment, I love to read them!

Until next time…

Happy Weaving!

Filed Under: Inspiration, Online Weaving School, Rigid heddle weaving, Tutorials, Weaving Tagged With: colour, warping options, weaving advice

The Weaver’s Toolkit for rigid heddle weaving

by Kelly 2 Comments

There is a lot of information available for newer rigid heddle weavers nowadays, not like when I started and almost felt that I was on my own. But the problem that arises when there are so many resources is trying to make sense of them and put them all together. I thought it was time for me to do something about that!

I created the Weaver’s Toolkit e-booklet as a quick reference guide and go – to resource. It is invaluable to newer weavers, but also to seasoned rigid heddle weavers as a way of having important and useful information all together in one place. As with all my content, I’ve packed in as much information as I could for a really affordable price.

Oh, and it’s pretty too! ❤️

The thing that I really love about teaching weaving and having a large online audience is that my people tell me what they need. I hear about the most common weaving difficulties and the problems that plague them the most. And then I get to help by offering advice, links and resources like the Weaver’s Toolkit!

*This post contains an affiliate link

So, let’s have a look at what is actually in this e-booklet.

Available as a digital download from my Etsy shop, the Weaver’s Toolkit is a 22 page e-booklet that covers some really important information and guides.

I wrote the e-booklet for rigid heddle weavers, so all of the information applies to the rigid heddle loom.

I started out with calculation sheets. These are just so important when you’re starting to weave, the mathematics takes a little getting used to, but once you are, you can plan to weave anything. I use these sheets with every single project I weave. Not only for planning purposes, but also as an important record of the project specifics once I’ve finished.

The calculations sheets included in the e-booklet are similar to the free sheets you can find here, but are more detailed and much more attractive to look at!

There is a record sheet aside from the calculations sheet that will help you to properly record all the details from your project to prevent “project amnesia” (it’s not just me that suffers from this condition, right?)

The yarn conversion charts are so useful. Something I’ve found a difficulty as a weaver (and I know many of you do too!) is trying to decipher different yarn names from country to country. The names, the thicknesses, the appropriate uses of the yarn, it can be so confusing! The quick reference sheets in the Weaver’s Toolkit makes it easy.

I have a section on sett, which I thought was really essential to include in the booklet. One you understand how to properly measure your yarn for an appropriate sett, you will completely take the guess work and anxiety out of any project. The yarn will tell you what to do, you just have to know how to listen, and I explain it and give links for additional resources. It’s easy once you know how!

I also have information on tools you need for rigid heddle weaving, what you don’t need, and what could be handy for you to own down the track.

The measurement conversion sheets are another handy guide included, to help you quickly and easily translate patterns or projects into the terms that you personally know and use.

The glossary of weaving terms demystifies common terms used in rigid heddle weaving so that you can look them up whenever you need to and begin to memorise them over time.

Finally, there is a sizing chart for typical projects or items you might want to weave. Things like baby blankets, household linens, and bedding. This will help you to plan for the dimensions needed for many items you will be weaving.

To recap what exactly you get when you purchase the Weaver’s Toolkit, here is a list of topics covered:

*Detailed calculating warp and weft sheets

*Project record sheet

*Knitting yarn conversion chart

*Knitting yarns and the rigid heddle loom chart

*Weaving yarns size and recommendations charts

*Sett explanation and instruction pages

*Rigid Heddle Weaving tools pages

*Measurement conversions sheets

*Glossary of common weaving terms sheets

*Typical project sizing charts

All of this is collated into a digital file which, once downloaded, you can print out and keep as a quick reference guide.

The calculations and record sheets can be printed and used over and over for every weaving project you undertake. I’ve provided calculations sheets with and without artwork, for those who may wish to economise on ink.

The Weaver’s Toolkit is available to purchase, download and print right now by clicking on the link below.

Yes, please take me to the Weaver’s Toolkit…

If you have any questions about the booklet, please leave them in the comments below, I love to hear from you!

Until next time…

Happy Weaving!

Filed Under: Rigid heddle weaving, Weaving Tagged With: ebook, ebooklet, rigidheddleweaving, weavers toolkit, weaving, weaving guide

  • « Go to Previous Page
  • Page 1
  • Interim pages omitted …
  • Page 15
  • Page 16
  • Page 17
  • Page 18
  • Page 19
  • Interim pages omitted …
  • Page 25
  • Go to Next Page »

Primary Sidebar

Hand crafted boat shuttles

Categories

Archives

Meta

  • Log in
  • Entries feed
  • Comments feed
  • WordPress.org

Copyright © 2025 Kelly Casanova Weaving Lessons on the Foodie Pro Theme