• Skip to main content
  • Skip to primary sidebar

Kelly Casanova Weaving Lessons

  • Hi! I’m Kelly!
    • Disclosure
  • Online Weaving School Class Index
    • Common account issues
    • Common technical issues
    • What do I get with a membership?
  • New to rigid heddle weaving? Start here!
    • Never heard of the rigid heddle loom?
    • How to weave neat edges on the rigid heddle loom
    • Rigid heddle weaving
    • Rigid Heddle Weaving Patterns
  • Patterns
  • Subscribe

Weaving

Kelly’s Basic Raisin Bread Recipe

by Kelly 2 Comments

OK, so you can call it raisin bread, fruit bread, or whatever. I don’t mind, I just know that I love to eat this stuff!

It tastes absolutely wonderful on the day of baking, spread with soft butter or as toast on following days. My girls are slightly disgusted that I absolutely love to slather my raisin bread toast with peanut butter, but there you have it šŸ˜‹

Jump to Recipe

I’ve been making this version of raisin bread for years, but most of the time I will call it fruit bread, as I tend to use sultanas rather than raisins.

*This post may contain affiliate links. Please see my disclosure policy for more information.

The beauty of it is you can add whatever dried fruit you like. Dried figs are gorgeous, currants, raisins, sultanas and dried apricots (I recommend dried organic apricots if you can get them, they taste so much better!) all work very well.

You also have the option of playing with the spice levels. Although this recipe only uses a mild dose of ground cinnamon, you can alter this if you are a spice lover and want more flavour. Add in some Christmas spices like nutmeg or other mixed spices if that is more your style!

This recipe makes 2 good sized loaves.

A word about bakeware. I generally bake 6 loaves of bread a week, all at one time. Sometimes they will all be just regular bread, often I do 4 regular and 2 raising bread and this tends to last my family a week.

I have fancy bread tins and non fancy bread tins. To be honest, I don’t find any difference between the two. A tin like this one will not cost you a fortune and will last for many years if you look after it.

My routine for bread tins is that I line them with non stick baking/parchment paper. I reuse these pieces of paper until they are so used that they are breaking apart. I haven’t counted, but I do know that I get many, many reuses from one piece when baking bread. I don’t care if they end up looking all browned and ratty, I conserve them as much as I can so I’m not overusing paper.

Using the paper also means that I don’t wash my bread tins very often and don’t need to.

Kelly’s Basic Fruit Bread Recipe

A simple fruit bread that is delicious fresh or toasted
Print Recipe Pin Recipe
Servings: 2 loaves
Ingredients Method

Ingredients
  

  • 1 kg White flour
  • 2 tsp Dried Instant Yeast
  • 2.5 tsp Salt
  • 2 tsp Cinnamon
  • 2 tbsp Brown sugar
  • 3 tbsp White sugar
  • 2.5 tbsp Melted butter
  • 550 ml Warm milk *More may be needed
  • 1 Large Egg, whisked
  • 1 cup Sultanas *Raisins and other dried fruits may be used

Method
 

  1. Warm the butter and milk together until butter is mostly melted.
  2. Add sultanas to warm liquid and set aside.
  3. Place all dry ingredients together in a large bowl (or the mixing bowl of your stand mixer).
  4. Whisk dry ingredients together briefly until blended.
  5. Add whisked egg to the warm milk and whisk in
  6. Add wet ingredients into dry. You can use the dough hook on your stand mixer, or mix by hand. If mixing my hand, spend a few minutes kneading the dough on a lightly floured bench until smooth.
  7. If your mixture seems too dry, add a little more milk in small amounts until the consistency is better. You don't want a super stiff dough, nor do you want a sloppy dough. Something in between is good!
  8. Place dough in an oiled bowl and cover. Allow to rise until doubled in size – usually this takes around 1.5 hours, depending on the room temperature.
  9. Remove dough from bowl and knead lightly. Cut into 2 equal portions.
  10. Place in lined bread loaf tins or place rounds on lined trays.
  11. Cover and allow to rise once more, this time for around 30 minutes.
  12. Preheat oven. Fan forced 210 celsius (410 Fahrenheit), regular 220 celsius (428 fahrenheit).
  13. After the second rise, slash the loaves and place in oven for 35 minutes. *Please note, this time can vary between ovens.
  14. Remove from oven and tins and place on a cooling rack.
  15. It is best to allow the loaves to cool completely before slicing – if you can wait that long…

You can see me baking this recipe in this video:

I have some other recipes you may be interested in:

Soft and Sweet Bread Rolls

Milk and Honey Bread

No Knead Whole Wheat Bread Recipe

Easy Flat Bread Recipe

Filed Under: Recipes, Weaving Tagged With: raisin bread, recipe, Recipes and food

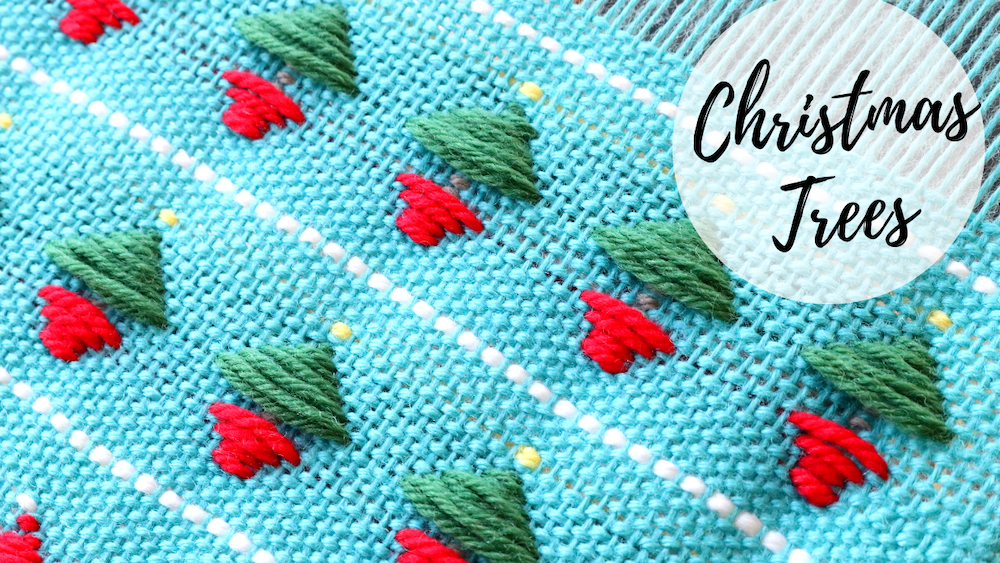
Christmas Trees Weaving Tutorial on a Rigid Heddle Loom

by Kelly 2 Comments

With Christmas just around the corner, my head has begun swimming with festive ideas!

Christmas, as the song goes, “is the most wonderful time of the year” – at least I think so, I love to celebrate the birth of Jesus.

I also love the atmosphere, the colours, the change in mood to one of joy and relaxation. The excitement of finding the right Christmas tree and the wonderful scent of pine filling the house is a real highlight for our family.

You may have previously seen my Winter Trees Tutorial but I thought it was high time we do a good and proper Christmas Tree Tutorial.

*This post contains affiliate links. For further information, please view my disclosure policy.

This tutorial is inspired by the Russian Branoe technique and involves picking up threads with a pick up stick in front of the heddle on a closed shed. We then use a “pattern weft” to build up pattern as we weave through the rows. It’s a lot of fun and you can make some super cool characters and pictures.

The threading for the loom set up is just plain weave, and all patterning is done by picking up warp threads. There is no need for specialist knowledge, just a bit of patience!

You can choose to weave plain Christmas trees, or there is an option to “decorate” your tree at the end of the tutorial.

I used my rigid heddle loom to weave this on, but all you really need is a loom that is capable of tensioning a warp and opening 2 sheds. A frame loom would work, it would just be a bit more work for the weaver

If you find this technique interesting, I have plenty of other resources and tutorials for you to delve into:

Baubles and Candles

Little Trees

Exploring Branoe (Online weaving class)

Gift Boxes

Reindeer

Snowmen

You will find all the materials and instructions for the Christmas Trees in this downloadable, printable PDF. I recommend that you use this PDF in conjunction with the instructional Youtube video for best results. Click on “download” at the bottom of the file.

Christmas-trees-PDFDownload

The free video tutorial is available to view here-

I hope that this tutorial and pattern brings some Christmas cheer into your homes and lives!

Until next time…

Happy Weaving!

Filed Under: Free tutorial, Tutorials, Weaving Tagged With: christmas, christmas trees, weaving tutorial

2 Tips for Rigid Heddle Warping

by Kelly 6 Comments

Warping a rigid heddle loom can be quite daunting when you’re just starting out, but with a little bit of practice and some simple tips to follow, it doesn’t need to be a headache!

I actually love direct warping my rigid heddle loom, I find it so quick and easy compared with indirect warping.

*This post contains affiliate links. For more information, please see my disclosure policy.

What is direct warping?

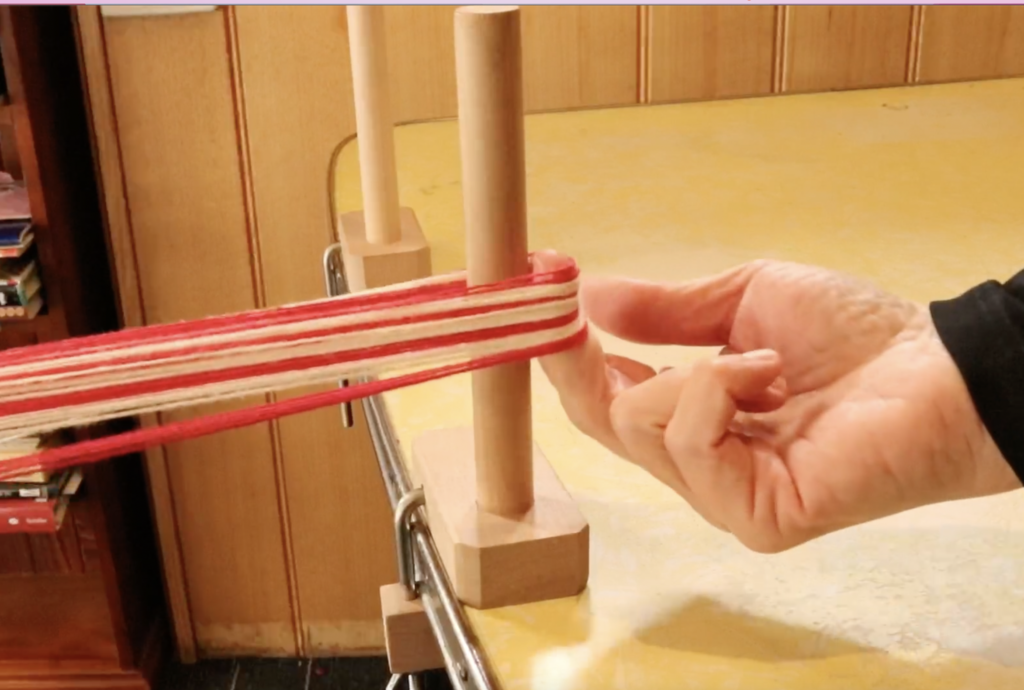
When you purchase a rigid heddle loom, it should come with a warping peg and clamp. This peg will allow you to start making your warp directly on your RH loom, rather than having to make the warp on a warping board or mill first and then transferring to the loom.

You use the peg to measure out and hold your warp, while the other end is tied on or looped to the back apron rod of the loom. The added bonus here is that you save time by doing part, or all (depending on your yarn and project) of your threading at the same time as the warping. Efficiency at it’s best!

While warping a rigid heddle loom is fairly straightforward, like anything new, it will take some getting used to. Today I have 2 tips to share that are easy to learn but will help you to have a more positive warping experience.

Tip 1 : Use more than one peg

Although your loom will only come with one peg and clamp, you can purchase more separately.

Doing this has a couple of benefits.

  • Waste efficiency – If all of your warp threads are travelling to just one central point, some threads will travel further than others. You will find that, when you take all your warp threads off the peg, ready to thread, you will need to cut them all to an equal length for ease of threading and tying on, which creates more waste.
  • Overloaded peg – If your entire warp is on one peg, the peg can get overloaded. This does depend on the width of your warp (number of warp threads) and the thickness of your yarn.

If you don’t want to purchase an additional peg, there are other options. Coat racks can be a perfect solution, and some weavers prefer to use more than 2 pegs, which also works great. If you opt for a coat rack, just ensure that it has straight, smooth pegs, like this one does – otherwise it could be hard to remove your warp from it.

Tip 2 : Be gentle!

This stage of the warping process is not the time to tensioning your warp, ready for weaving. Yes, you want to maintain a consistent tension whilst warping, so that your threads stay fairly even and everything is nice and neat, but the proper warp tensioning will occur in the winding on of the warp.

Winding your warp around the peg/s too tightly can actually be detrimental to the process. This is because the pegs are holding a lot of tension. If the tension increases too much, that carefully clamped peg can come loose, and if you have any experience with this, you know what happens next! šŸ˜†

The peg can come loose with a “ping” and make spaghetti out of your carefully wound warp in a second flat!

Even if your peg manages to stay in place with your warp threads too tightly wound around it, once you are ready to take the warp off to start threading, you may find it difficult to remove from the peg.

Ideally, you should be able to get a couple of fingers inside the warp at all times, this ensures that you’re not winding too tightly around the peg.

An easy way to ensure that you’re warping around the peg with a loose enough tension is to have your yarn feeding off the cone or ball adequately. A cone/warping stand is ideal for cones of yarn, as it allows the yarn to wind off freely.

I also like to use 2 fingers inserted into the loop after pulling it through the slot with the reed hook. Then I simply walk towards the peg, keeping my fingers in the same place. I don’t pull on the warp, but just walk with it, then drop the loop gently over the peg.

I hope these tips make a difference to your warping experience! If you would like to see this post in video format, please view that here-

Until next time…

Happy Weaving!

Filed Under: Warping, Weaving Tagged With: warping, warping tips

Why weaving is more important than ever!

by Kelly 2 Comments

I made a video on this topic during the height of the 2020/21 pandemic, and although it was very relevant to the time period and experience we were all undergoing, it is still very relevant today.

I was inspired to talk about this by watercolour artist, Angela Fehr – a fellow Teachable creator. Although I spend very little time doing watercolour painting these days (thanks to weaving kind of taking over my life!) I am still very inspired by her emails and encouragement.

When certain world events come to the forefront (and we have certainly seen a variety of world events in the past 2 years!) it would be easy to say that something like weaving – a hobby for many of us, a career for some, is not all that important in the grand scheme of things.

I have to disagree by saying that it’s more important than ever. I’m going to talk about the reasons why.

  1. Weaving is a skill

In difficult times, I think it’s those of us who are skilled with our hands and knowledgeable about our craft who will find it easier to be useful. Currently, those of us who sell our woven pieces do so at a luxury level. Our items are priced high, they are unique and special. But, in a time of shortages, recession, or actual depression, the ability to make cloth from yarn could become a valuable and tradable commodity.

In the event of a depression, where no one really has any money, trading or bartering handwoven items could really help your situation.

I’m not saying that I think we’re headed for global financial collapse, but I’m realistic to know that things can change very quickly, and it’s interesting to at least consider ideas for preparedness.

2. Weaving is beautiful

The first thing that attracted me to weaving was the possibility of creating such beautiful items with my hands and some tools. To use beautiful, natural and often locally produced yarns to make unique pieces. To me, weaving is like a beautiful piece of art, it adds something to the world that wasn’t there before, and that has an impact.

In a world that is, on many fronts, increasingly ugly and hostile (been on Facebook lately?) I feel wonderful about quietly sitting at my looms, lovingly preparing warps and projects, and then sharing them with the world.

We can help to bring happiness to others through gifting, selling or otherwise sharing our work and we have the additional joy of being able to help others look through a window into the weaving world. Some of those will be so enamoured by what they see that they too will want to be a part of it. What a privilege to be in a position to share such a gift!

For many of us, the lockdowns allowed us to get to work, weaving beautiful things for others. I wonder if you’ve seen my free projects I put out during that time, in hopes that weavers would bless others by weaving for them?

Wash Your Hands Towels Free Project

The Heart Scarf Free Project

3. The world can be crazy

Am I right?! Things have been noisy and unstable for some time, and there always seems to be something new happening. Amidst all this, many are searching for more peace, less stress. How can weaving help bring peace to our lives?

  • Purpose

I have been in touch with a great deal of new weavers in the past couple of years. Many of them had been wanting to explore weaving for years (some for most of their lives!) but never had the opportunity. Weaving requires focus, patience, often research for a new project or technique. It can take us away from what is happening externally, at least to some degree, and shift from things we can’t control to something we can. It makes us feel like we are doing something positive and useful.

The research, planning, calculations and sourcing of materials that occurs with every new project is very directed and purposeful. All of these processes can be so calming in turbulent times, and that brings me to my next point.

4. Weaving contributes to our own wellbeing

Weaving is an avenue to express our creativity. I firmly believe that everyone is, and in some respects, needs to be creative. This makes complete sense to me, as we are created in God’s image and likeness (Genesis 1:26-27), and God is VERY creative!

It also contributes to our wellbeing through a sense of accomplishment. How rewarding, and amazing it is to take yarn and turn it into something wonderful. It can take a lot of practice, learning and hard work to accomplish weaving goals, but every time we complete a project successfully, we prove to ourselves that we are capable.

Weaving can be very relaxing. The methodical and repetitive actions allow us to get into a “zone” and just enjoy what we’re doing.

5. You are in control

I touched on this a little back at point 3, but now I will expand further. How many things that happen in our lives do we have control over? We can’t prevent war, certain sicknesses, hard times, beyond hoping and praying. But in weaving, we get to make decisions, plan colours and patterns, and predict the outcome.

The project is yours, and that can be quite empowering!

6. Inspiring others

Inspiration is contagious, and although we might not always feel positive and happy, when we share our passions and interests with others, we ignite something that can take off and have a huge impact. When you inspire another person or people, that will often come back to you in waves.

You never really know the impact you could have on a fellow human by inspiring them. It’s not just about inspiring to take up weaving, it’s so much more than that. For someone who has lost hope and feels like giving up on life, to see somebody else living life with joy and passion and being more than willing to pass that on to others, could make all the difference and shift their focus completely.

One of the reasons I think suicide is so tragic is that I can’t help but wonder whether one more day, or a chance encounter, or a new interest could have changed that person’s mind. I’m not trying to oversimplify the tragedy of suicide, I’m well aware of the very complex factors involved – but I know for certain, that one more day can make all the difference.

7. Connection

Even the most introverted of us (šŸ‘‹) can benefit from connection with others. The easiest way to do this is by sharing a common interest. It can be so much fun to share your projects, have discussions and just chat to other like minded folks and be part of a community.

Thanks to the internet, we can connect to others without having to leave home if we don’t want to, or if it’s not possible. Facebook groups are a great way to interact, or if you want more involvement you may want to join private communities. When you purchase a membership to my Online Weaving School, you also gain access to the private member’s group, which is not just a great learning tool, but also a fantastic support network.

If you would like to watch the original video, here it is:

Until next time…

Happy Weaving!

Filed Under: Inspiration, Weaving Tagged With: inspiration, weaving

Best Rigid Heddle Weaving Books (Updated List!)

by Kelly 2 Comments

Are you looking for the best rigid heddle weaving books to inspire your next project or deepen your weaving knowledge? You’re in the right place!

In this post, I’m sharing my favorite books for rigid heddle loom weaving—perfect for beginners through to more advanced weavers. These are the books I return to again and again, and many have helped shape my weaving journey.

šŸ“Œ Pin this post for later so you always have a list of inspiring weaving reads handy!

If you’re lucky enough to have a great local library, it’s worth checking to see if they carry any of these titles. Many weaving guilds also have a library you can borrow from. But if you’re like me and your local options are a bit limited, this list can help you choose the perfect book to add to your personal weaving library.

This post contains affiliate links, which means I may earn a small commission if you click through and make a purchase. I only recommend books I truly love and use myself.

šŸ“š My Favorite Rigid Heddle Weaving Books

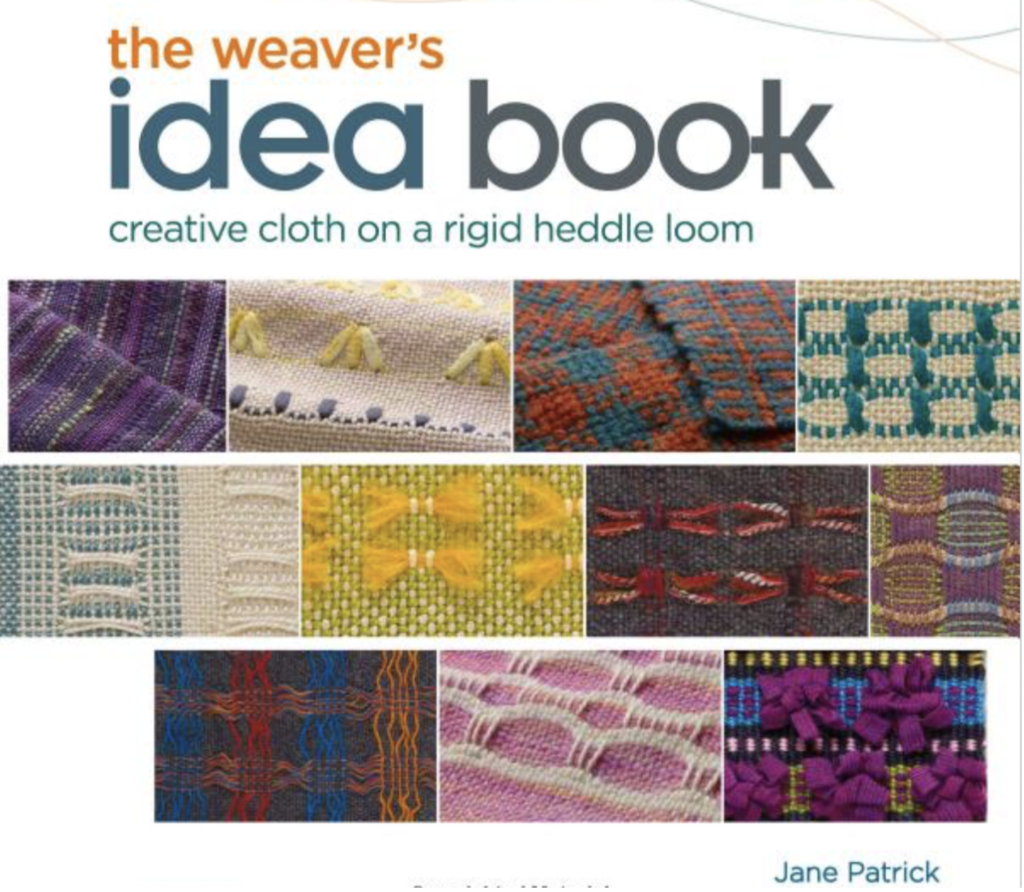
1. The Weaver’s Idea BookĀ by Jane Patrick

If you can only buy one rigid heddle weaving book, let it be this one. This was my very first weaving book, and I still refer to it constantly. It’s packed with inspiration and guidance—ideal for beginners but with plenty to explore as you gain experience.
Spiral-bound for easy reference while weaving, it covers everything from the basics to more advanced textures and techniques. A must-have!

2. Weaving Made EasyĀ by Liz Gipson

This is a beautiful, beginner-friendly book filled with practical advice on setting up your loom and starting your first projects. Liz has a knack for making things simple without talking down to you. The projects are approachable and satisfying for new and seasoned weavers alike.

3. Woven to WearĀ by Marilyn Murphy

If you’re dreaming about turning your handwoven cloth into wearable art, this book is for you. With clear instructions and large, simple garment shapes, it’s beginner-friendly but full of creative inspiration. This book sparked my excitement for sewing with handwoven fabric!

4. Inventive Weaving on a Little LoomĀ by Syne Mitchell

This book is a treasure trove of information and ideas—perfect for curious beginners and growing intermediate weavers. While some sections may feel advanced early on, you’ll appreciate its depth as your skills develop. Topics like weaving with two heddles or more and creating transparencies are covered in detail.

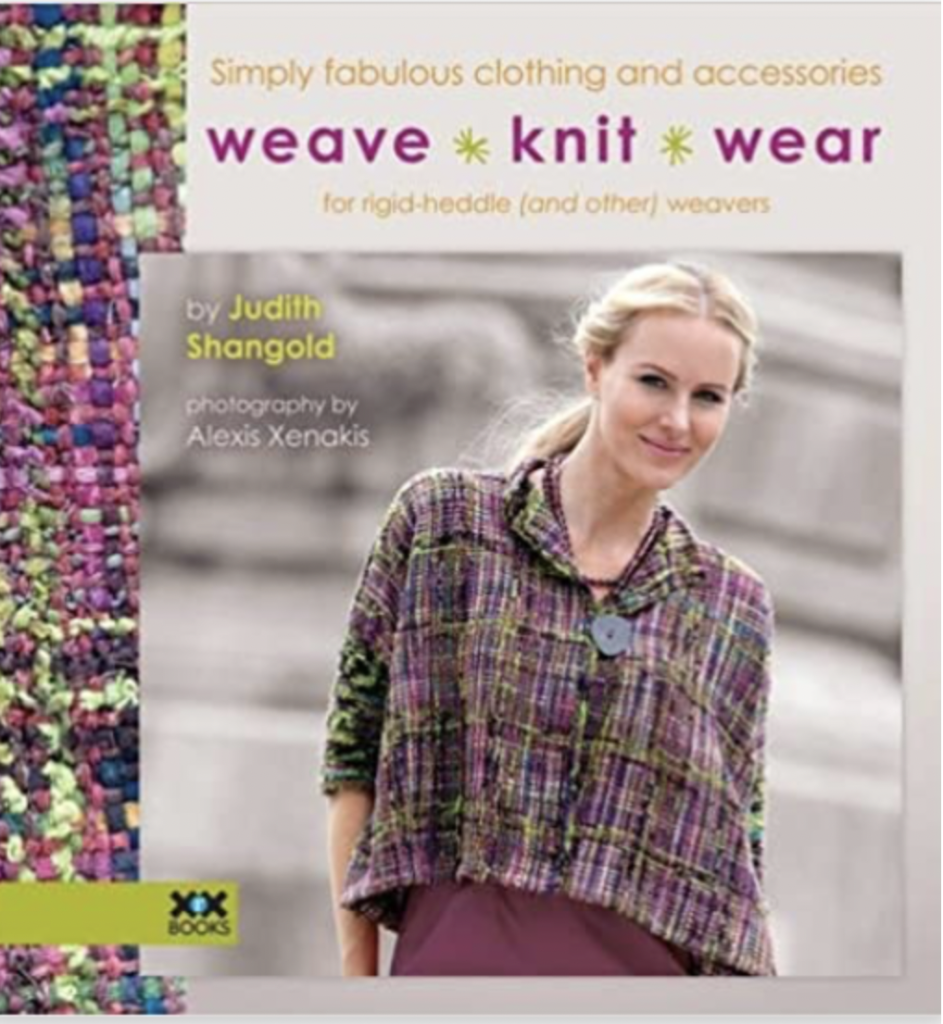
5. Weave, Knit, WearĀ by Judith Shangold

This book opened my eyes to the creative possibilities of rigid heddle weaving combined with knitting and crochet. Judith uses mostly plain weave but brings designs to life with color, texture, and clever garment construction. It’s incredibly inspiring and pushes you to think beyond scarves and tea towels.

Note: This book is now out of print, but you can still get a PDF version by emailing Judith directly via her website—thank you Allison for the tip!

6. Simple Woven GarmentsĀ by Sara Goldberg

If wearable weaving is your thing, you’ll love this book. It features over 20 projects made from colorful, handwoven cloth—each one wearable, customizable, and beginner-friendly. I especially appreciate the tips on adjusting garment sizing for your own fit.

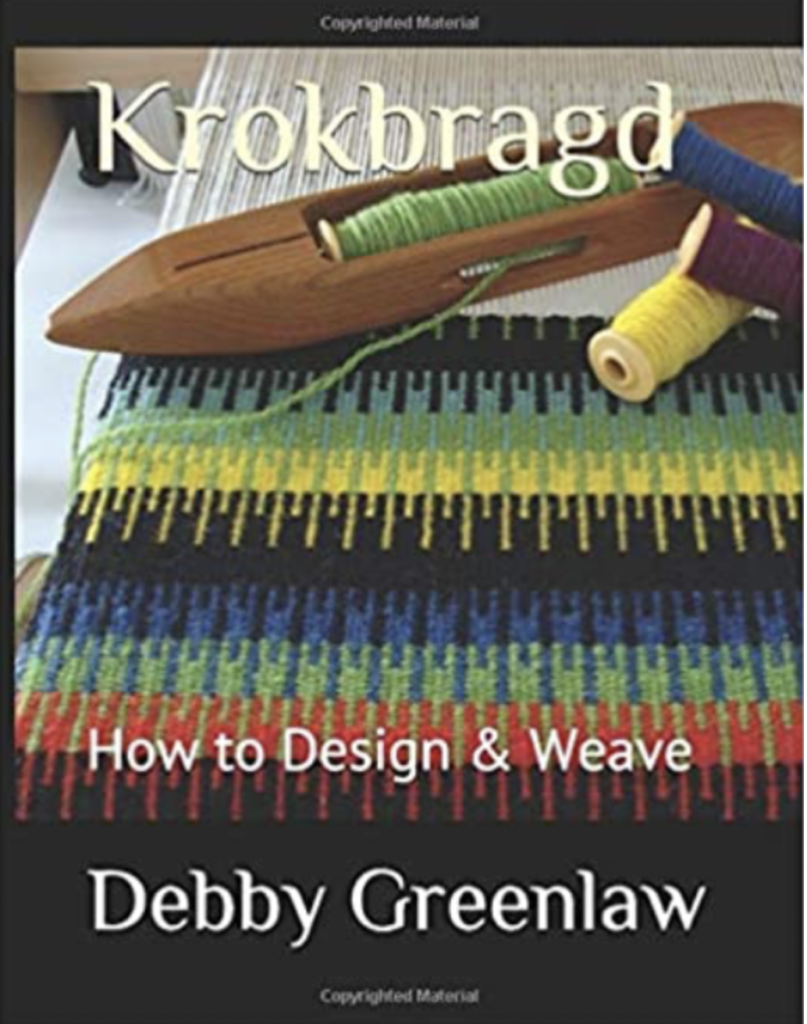
7. Krokbragd: How to Design and WeaveĀ by Debby Greenlaw

This is a brilliant guide for rigid heddle weavers who want to dive into krokbragd, a traditional and richly patterned weave. Debby’s clear explanations make this structure feel approachable, even for first-timers. I wrote a full review of this bookĀ hereĀ if you want to learn more.

Tip: Debby has since releasedĀ Krokbragd Patterns—a fantastic follow-up for more design inspiration!

8. Crazyshot: Creative Weaving for the Rigid Heddle LoomĀ by Myra Wood

If you’re ready to slow down and make something with big visual impact, this book is a must. Myra’s take on overshot-style designs for the rigid heddle loom is beautiful and original. The projects are breathtaking, and she has since released a companion volume,Ā Crazyshot Companion, to keep the inspiration going.

šŸ¤“ Further Resources – To learn more about this overshot style (or “Branoe” for Russian style) I have a playlist on Youtube and also an online class to get you started with the technique.

šŸŽ„ Want to See These Books in Action?

I made a video discussing many of these books in more detail. While it doesn’t include the newer additions to my list, it’s still a great resource if you prefer to watch rather than read šŸ‘‡

šŸ“š Browse My Full Book List

To see all my favorite weaving books in one easy-to-browse place, visit myĀ Amazon shop. You’ll find rigid heddle weaving guides, project books, inspiration for wearable weaving, and more.

ā¤ļø Final Thoughts

Whether you’re just getting started with rigid heddle weaving or looking to expand your skills, these books are truly worth adding to your collection. I hope this list helps you find your next favorite read—and your next great project.

If you’ve read a book you think I should add, let me know in the comments or send me a message. I’m always on the lookout for more weaving inspiration!

If you’re looking for book recommendations for 4 shaft or more weaving, I have you covered!

Until next time…

Happy Weaving!

Filed Under: Books, Rigid heddle weaving, Weaving Tagged With: books, recommended books, rigid heddle weaving, rigid heddle weaving books

Tips for Weaving with Finer Yarns

by Kelly 6 Comments

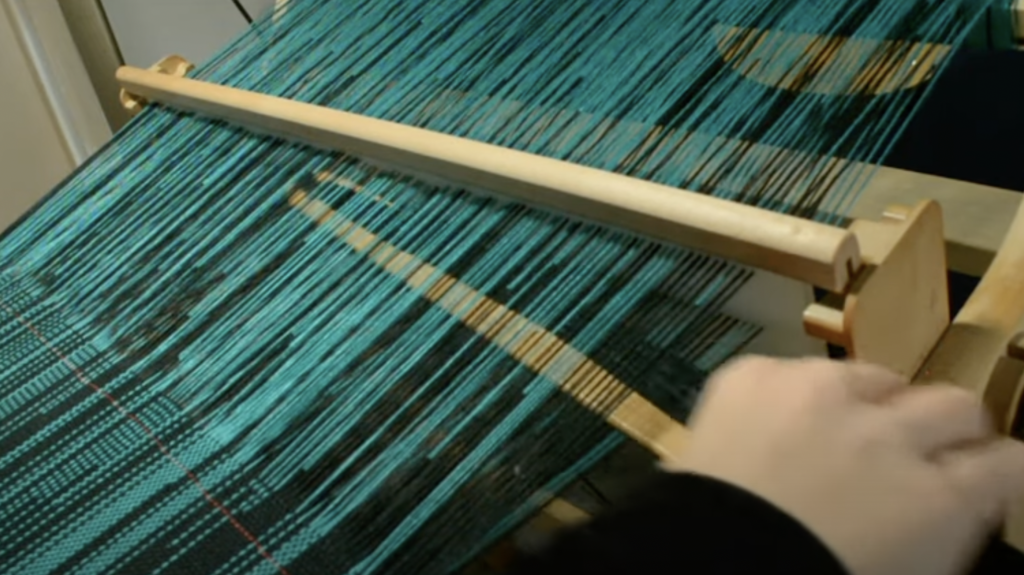
Working with finer threads on a rigid heddle loom can be quite challenging when it comes to adequate tensioning.

Why is this?

A rigid heddle loom does not hold the same amount of tension that a table or floor loom will. Particularly when weaving with thinner and rigid weaving yarns like 8/2 cotton you may encounter some frustrations like the following:

  • Tension too loose, especially in the down shed
  • Sections of warp that are more loosely tensioned than others
  • Single warp thread/s that are more loosely tensioned than others

Now let’s go over some tips that are going to make a big difference when you experience these issues.

Avoid snagging threads with your stick shuttle by using correct technique.

Due to the shape of a stick shuttle (usually with “prongs” on each end) you can accidentally snag a thread or threads when weaving a pick. Snagging will usually result in a saggy thread, as it is stretched and pulled tighter than the other warp threads.

*This post contains affiliate links. For further information please see my disclosure policy.

This can be avoided with correct technique. When entering the shed, I have the stick shuttle on a slight angle upwards initially, and ensure the end of the stick shuttle is touching the plastic part of the heddle.

Entering the shed in this way means that you are utilising the widest part of the shed, giving plenty of space for the stick shuttle. Roughly half way across, I then flatten the shuttle out.

At this point, if the tension is good you can “shoot” the shuttle across the rest of the way and it will slide beautifully on the bottom of the shed to the other side.

What if I have already snagged a thread? šŸ™

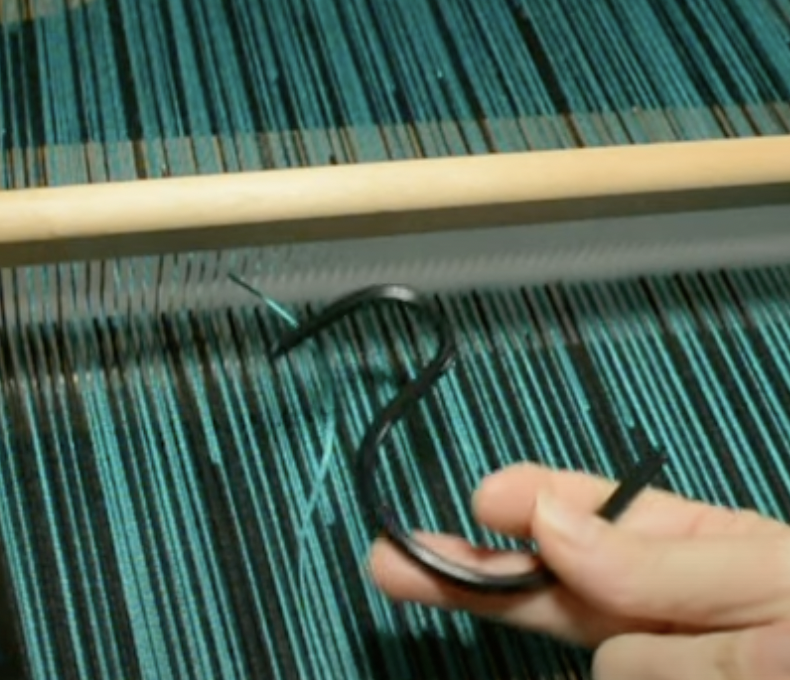
Don’t panic, we can fix this! This is where you will need to make friends with an “S” hook or similar weight. I love “S” hooks because they can be hung over a thread and are an ideal weight. You can pick them up from a hardware store or online.

Locate and isolate the slack thread at the back of the loom.

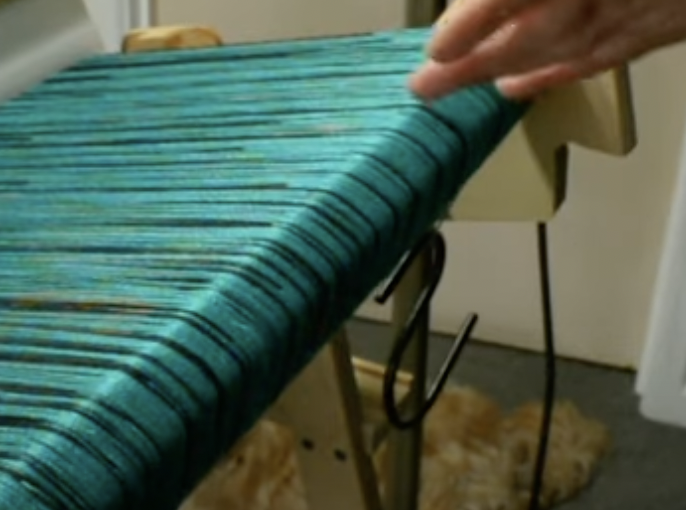
Loop one end of your “S” hook over the slack thread so that it hangs off the back of your loom.

Yes, it’s really that simple.

Weighting general threads.

The weighting of a single thread can be used not just for snagged threads, but in the event that you have one or several threads that are looser than others.

Usually you will only need to take action on a looser thread if it is actually impacting on the quality of your weaving. The 2 main ways this problem will present are:

  • Bunching of the loose thread as you beat your weft. It will show as little vertical lumps as the slack of the warp thread is caught between weft picks. How noticeable this is depends on how loose the warp thread/s are.
  • The thread/s sag out of the shed they should be in, resulting in floats in your weaving.

Dealing with loose sheds.

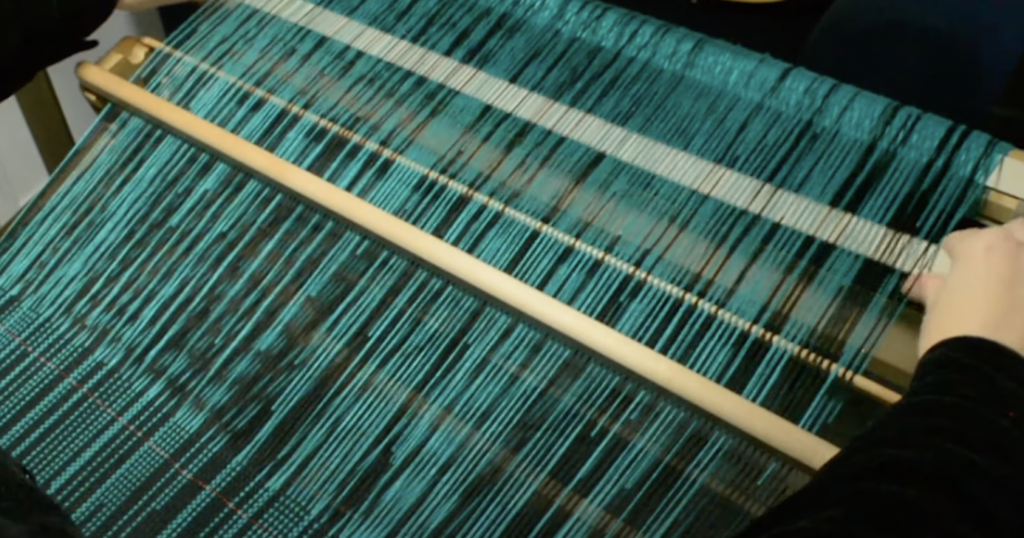
This is one of the biggest issues that the rigid heddle weaver will run into when using finer threads. One shed will always be looser than the other, commonly this happens when you put your heddle in up and find that all your down shed threads (the slot threads) are lacking good tension.

The first step to improving this situation begins in the warping process, make sure that you are using adequate warp separation as you roll it into the back beam. You can use cardboard separators, but my preference is thick brown craft paper on a roll for continuous separation.

To address the problem on the loom though, we can use various forms of tensioning. Here is one that works really well:

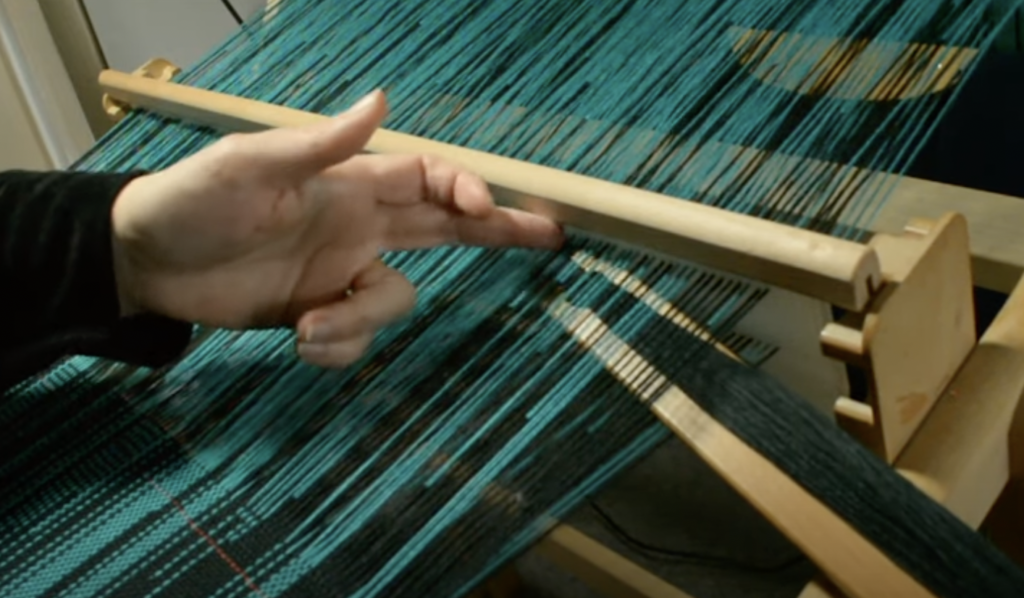
Open a shed by placing your heddle up or down. Insert a pick up stick or spare stick shuttle into the opened up space behind the heddle. Turn the stick on edge to prop the threads up, then insert a cardboard separator or similar into the space behind the pick up stick.

Push the separator right to the back of the loom so that it’s firmly in place, then continue weaving. This separator will need to be repositioned as you advance your warp forward.

Here is another form of wedging to try that helps in a similar way:

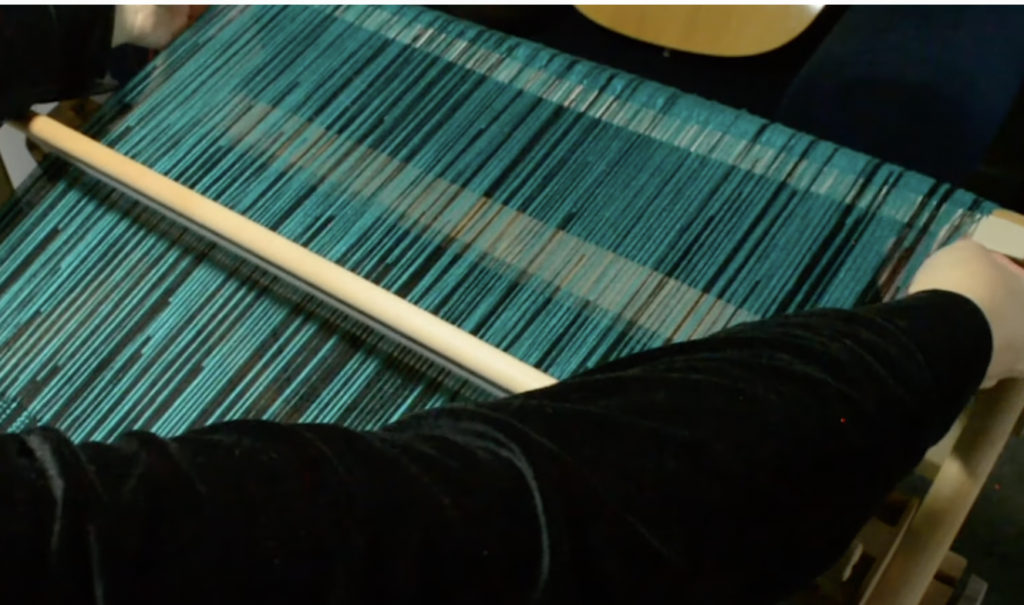
Place your heddle in the neutral position. Use a cardboard separator or similar and take it underneath the whole warp. Wedge it under the threads at the back beam and continue weaving. This will also need to be repositioned as you advance the warp.

What about loose sections?

Sometimes while you are weaving you will be presented with loose sections in the warp. This commonly occurs at the middle of the warp, where it is trickiest to maintain tension while winding on.

If it happens that you have a section of warp that is looser than the rest, then you can employ targeted wedging.

This is just what it sounds like – wedging, but targeting a specific area that really needs it. I have a full video tutorial on Youtube that goes over the technique if you need to see how it works.

Basically, you want to take smaller sections of whatever you’re using for wedging material and place it in the specific areas that need help. I find paper folded up is great because you can really customise the width and thickness according to your needs. Smaller cardboard stick separators or pieces of large ones (I sometimes cut up old ones when they’re not in great condition anymore) can be used for this too.

I hope these ideas are helpful to you and that you give them a try. I think you will be pleasantly surprised with the results.

Until next time…

Happy Weaving!

Filed Under: Weaving

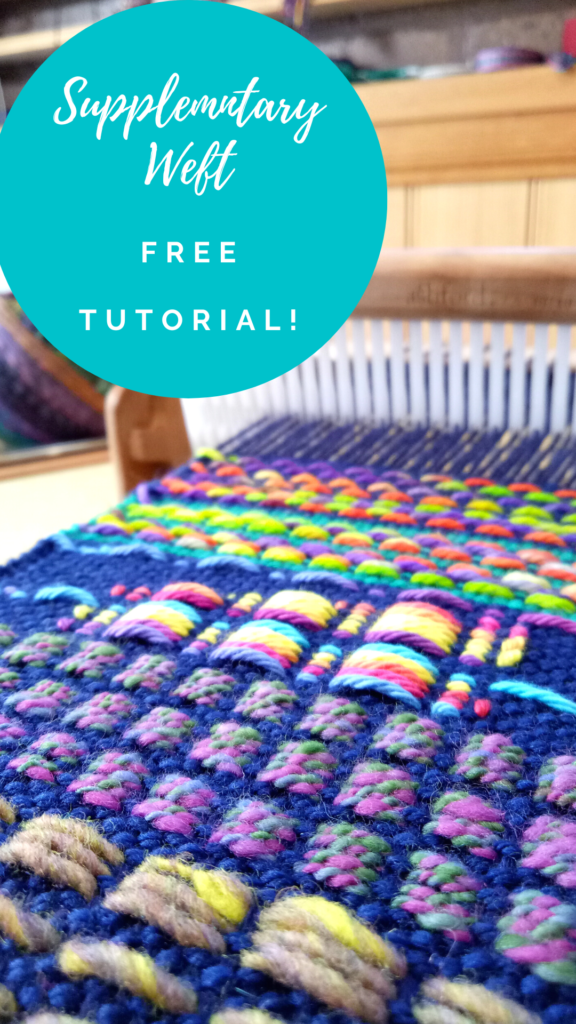
Supplementary Weft Tutorial

by Kelly 16 Comments

What is a supplementary weft?

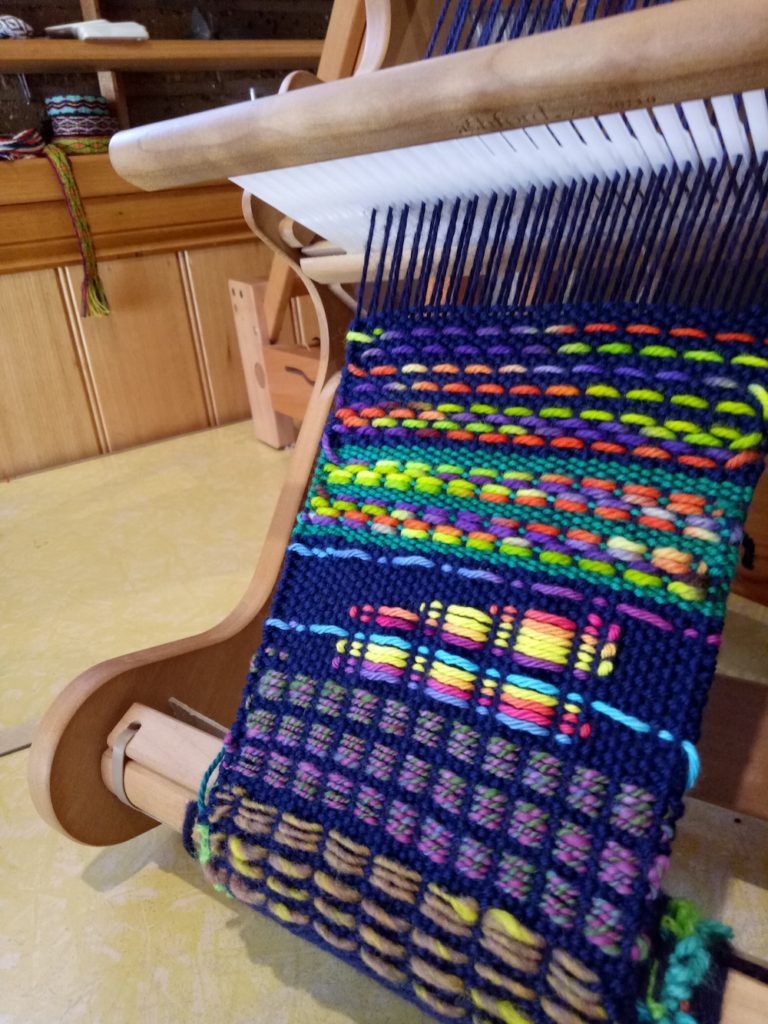
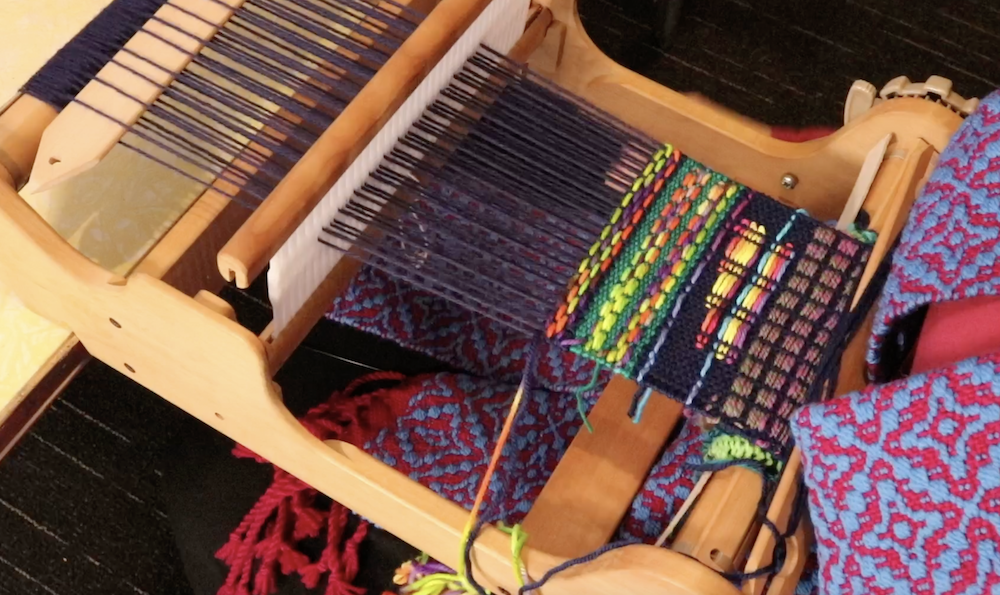
It is simply a weft that is introduced to your weaving, in addition to your regular weft yarn, usually on a plain weave background.

This supplementary weft is often known as a “pattern weft”, which makes sense because it often creates a pattern (think overshot).

A supplementary weft will usually be thicker yarn than the plain weave or tabby yarn, which is normally the same thickness as the warp yarn.

*This post contains affiliate links. For further information, please see my disclosure policy.

This technique is a great way to use a handspun or novelty yarn to really highlight the beauty of the yarn and is also an excellent way to use up leftovers.

A pick up stick is usually used with a supplementary weft – this helps to make a pattern through the use of weft floats.

Using supplementary wefts is a really versatile way to showcase pretty yarn and weave a truly unique piece. I love to design on the loom, trying out different pick ups and different yarns, it’s so much fun and it suits my creative preferences to not have to plan ahead too much.

To weave a sample like I have in the tutorial, you will need the following materials:

  • A rigid heddle loom (I used my Sampleit loom)
  • A 7.5 dent heddle (of course, you can adapt this by using a different sized heddle with a different yarn weight)
  • Threading/reed hook
  • A stick shuttle or several (use one that is the right size for your loom)
  • A pick up stick (again, use the size that is suitable for your loom or the width of warp you have on)
  • Something to separate your warp (cardboard stick separators, thick craft paper on a roll etc)
  • Scissors

Yarn Requirements:

I’m not giving exact yarn amounts, obviously you need more yarn for your warp and tabby (plain weave) than you do for the supplementary weft, but just experiment with what you have.

For my warp I used Bendigo Woollen Mills Luxury 8ply (this is a dk weight wool) in Navy. I used this same yarn for the majority of my tabby.

For supplementary wefts I used Noro, handspun and some of my hand dyed wool and cotton – most of these were around a dk to aran weight.

Sampler size suggestion:
When I warp for a sampler like this one, I like to warp around 8-10 inches in width and at least 30″ in length (total length of warp). For my 7.5 dent heddle this was 47 ends.

Weaving and Pick Up Sequences:
You will find all the information you need to follow the video sampler in this downloadable, printable PDF.

Supplementary-weft-youtube-tutorialDownload

There are three ways to use this tutorial. You can either:

  1. Warp your loom and then follow my examples exactly according to the video and PDF.
  2. Warp your loom and follow some of my examples to gain confidence, then try some of your own designs.
  3. Use my designs as inspiration but go your own way by using the techniques and ideas to create your own unique fabric.

Whatever you decide to do with this tutorial, don’t forget to relax and have fun – that’s what it’s all about!

The 45 minute video tutorial is available here-

As always, comments and questions are very welcome in the section below.

Until next time…

Happy Weaving!

Filed Under: Free tutorial, Inspiration, Rigid heddle weaving, Rigid Heddle Weaving Patterns, Tutorials, Weaving Tagged With: rigid heddle weaving, supplementary weft, weaving tutorial

How to organise string heddle bundles

by Kelly 4 Comments

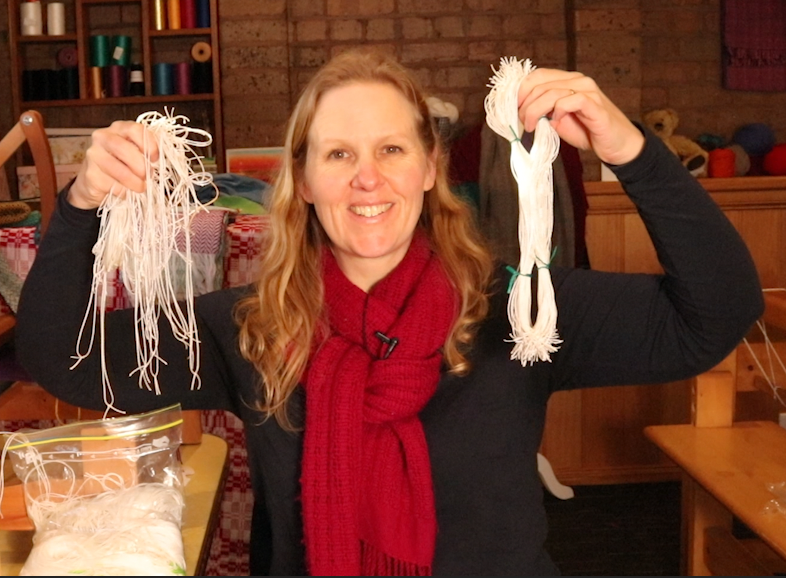
String heddles are commonly made of texsolv nowadays, making them very strong and simple to use.

String heddles will generally arrive tied in neat bundles when you purchase them brand new. These bundles are very orderly and can just be slipped right on to your shafts. They can then be cut apart and ready for use

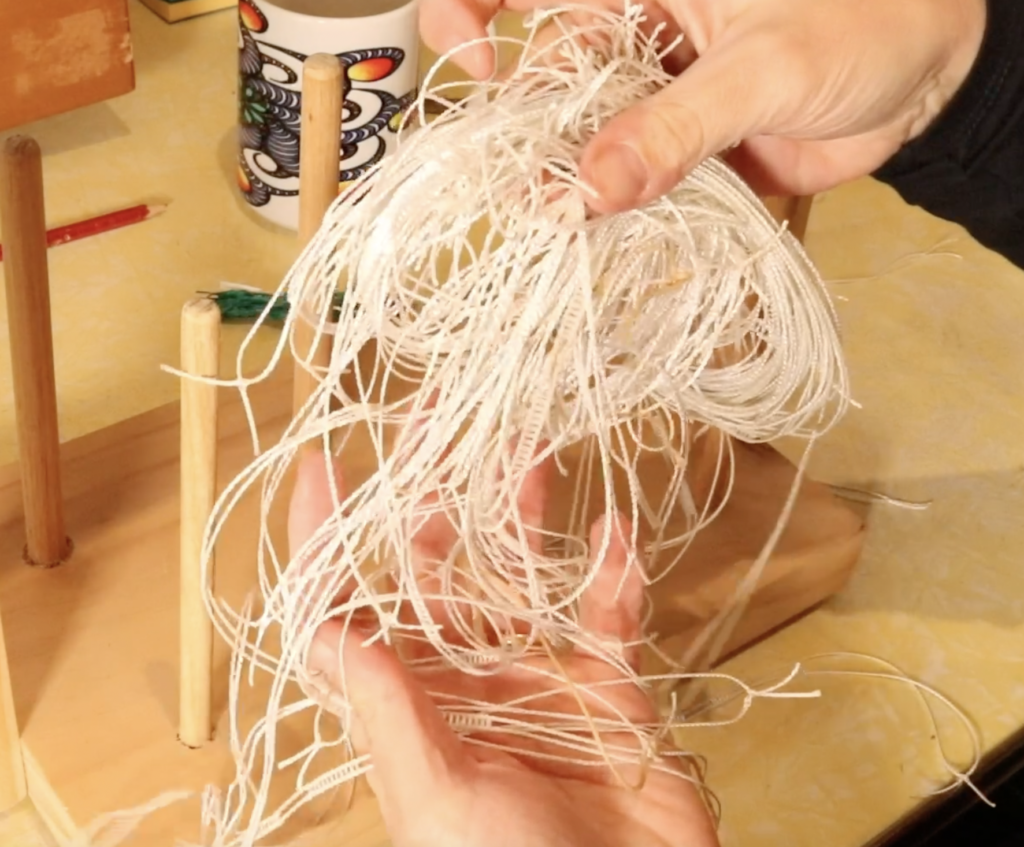
But there are times when your string heddles may be less than organised. I call this “string heddle spaghetti!” Having your string heddles in a pile and out of order is not ideal (not to mention a bit of a time waster) but there is a simple way to get them organised into lovely neat bundles once more.

*This post contains affiliate links. For more information, please see my disclosure policy.

Once you know how to make these bundles, you can continue to use the technique to ensure that your string heddles are always in order and ready to use.

I recently purchased some used string heddles, and many of them arrived packed into a bag singly and without order. Time to make some bundles!

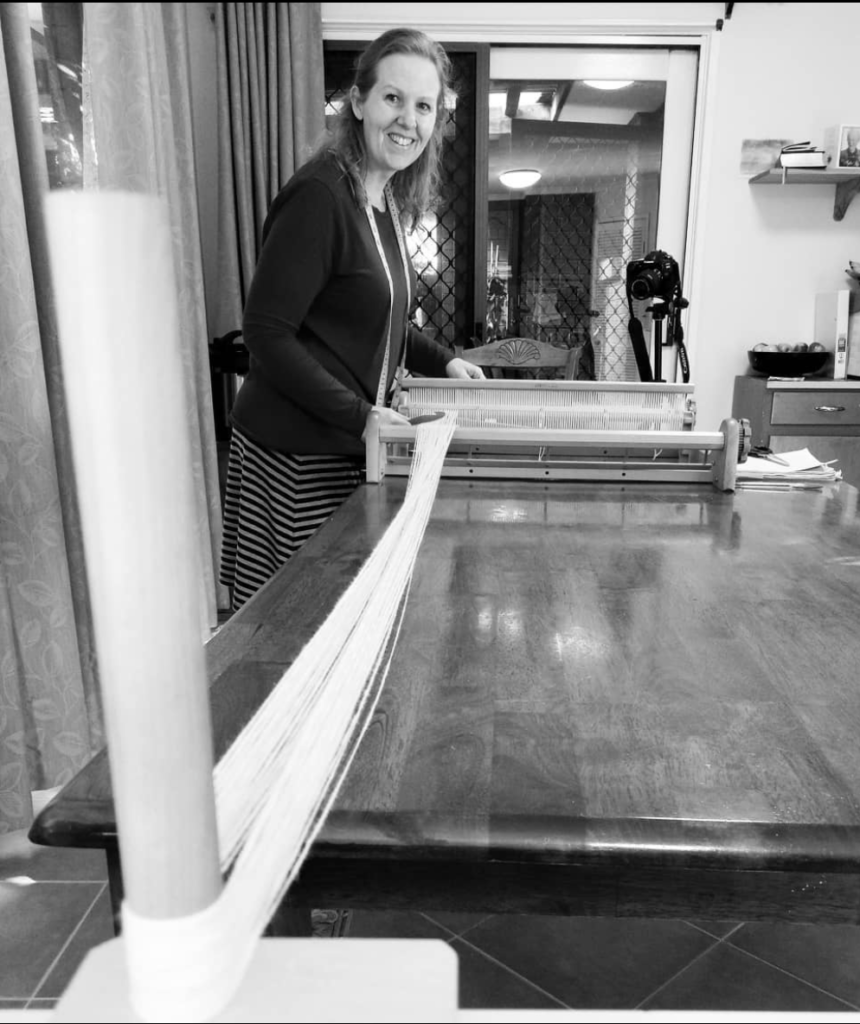
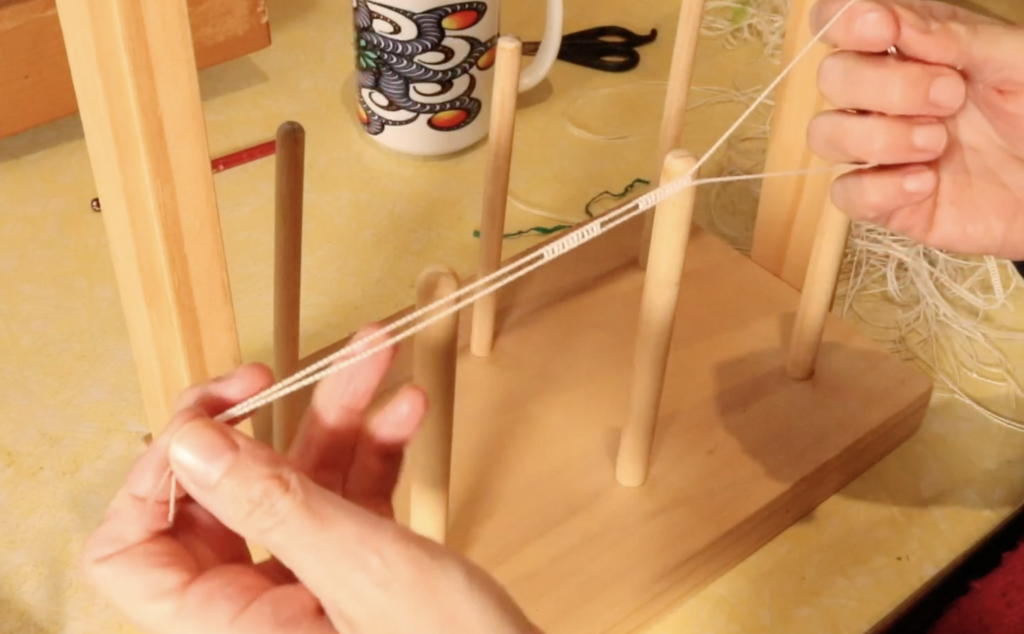
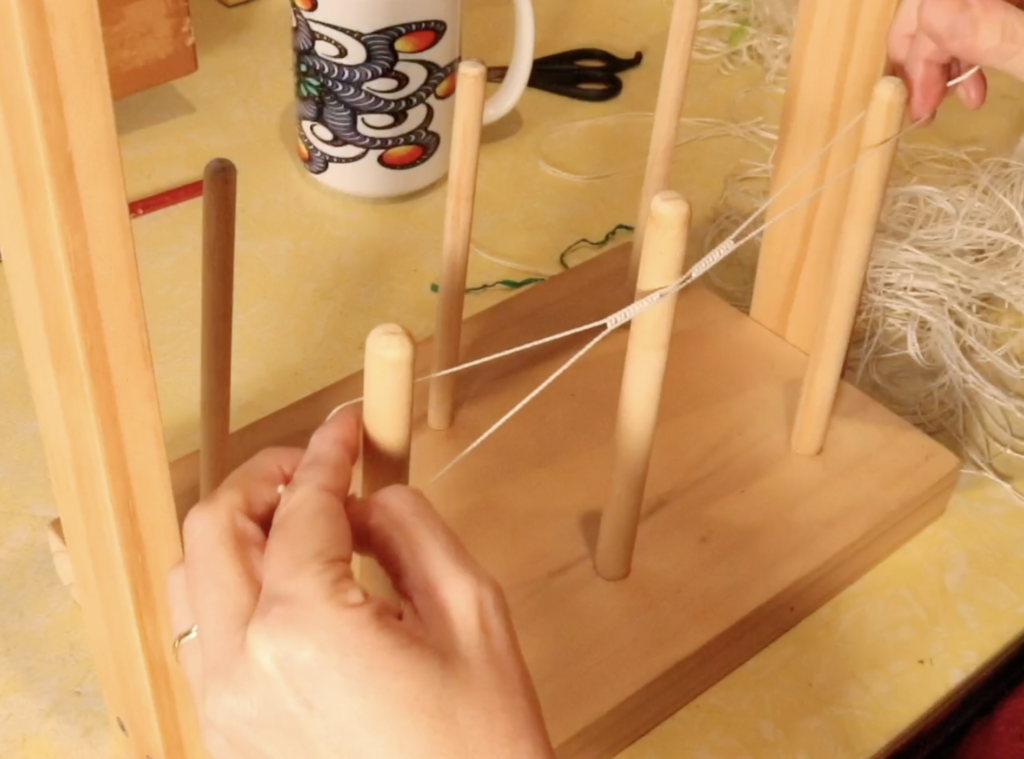
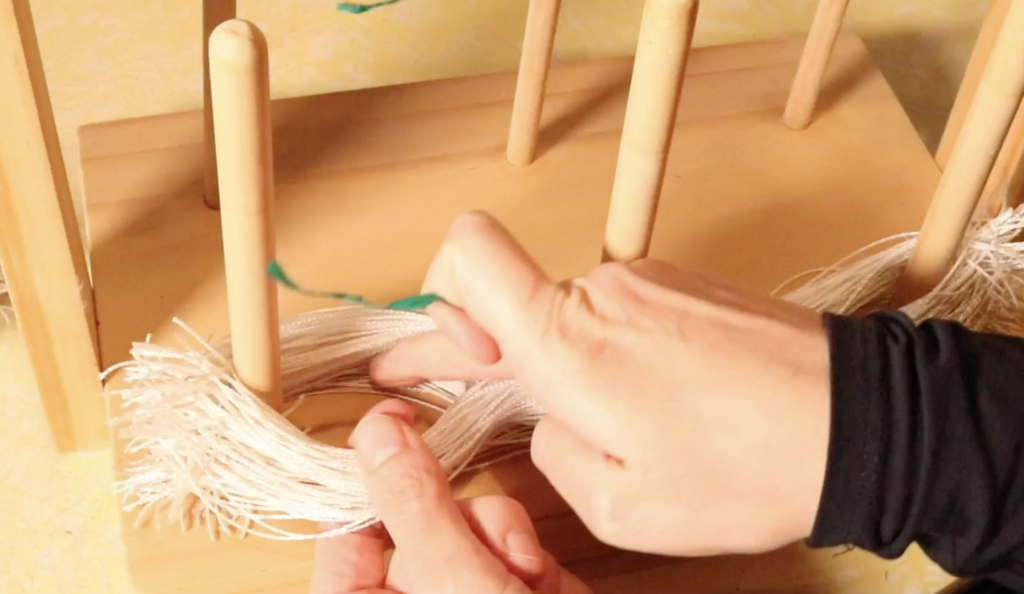
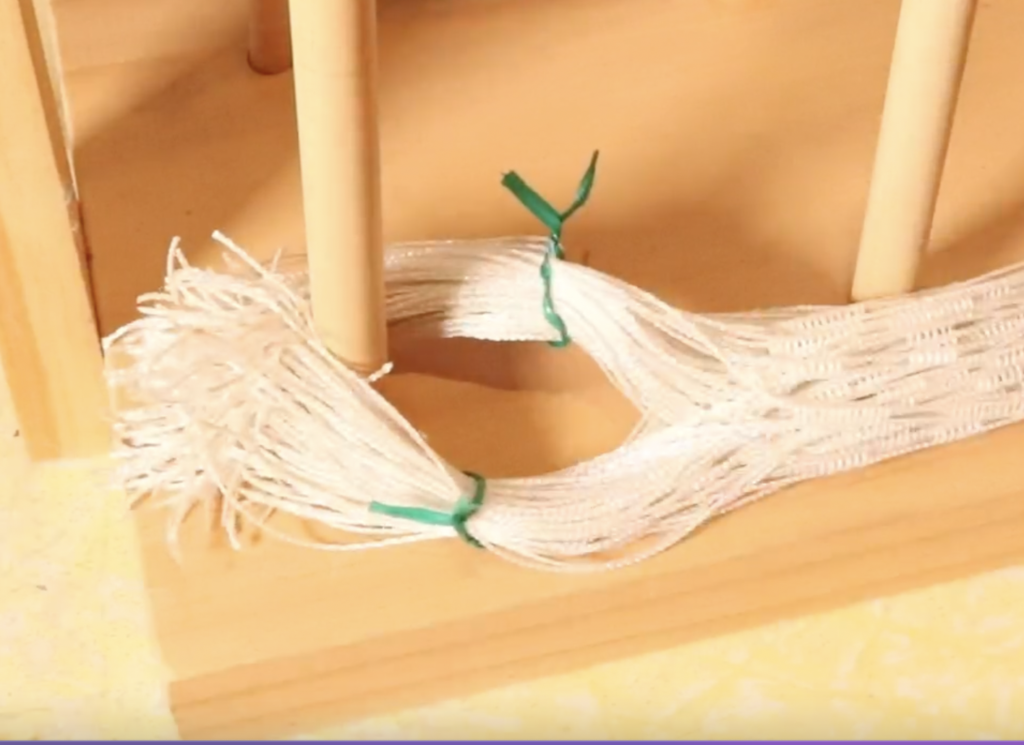
I use my warping stand (if you’re interested in making your own, check out this tutorial). A raddle also works really well if you have one. Two warping pegs, clamped to a table would also work. Even a box with 2 chopsticks is a suitable alternative!

You also need some twisty ties. If they are a different colour to your string heddles, that improves visibility, but if they are the same colour, don’t worry, you can still use them.

If your string heddles are already separated, grab one and have a look at it. There should be 2 large loops on either side that you can hold on to. There should be the eye of the heddle in the middle of these loops. When you hold the loops, you want the whole string heddle to lay flat – no twists!

Keeping the string heddle flat, place one of the looped ends over the left peg (or raddle nail or chopstick).

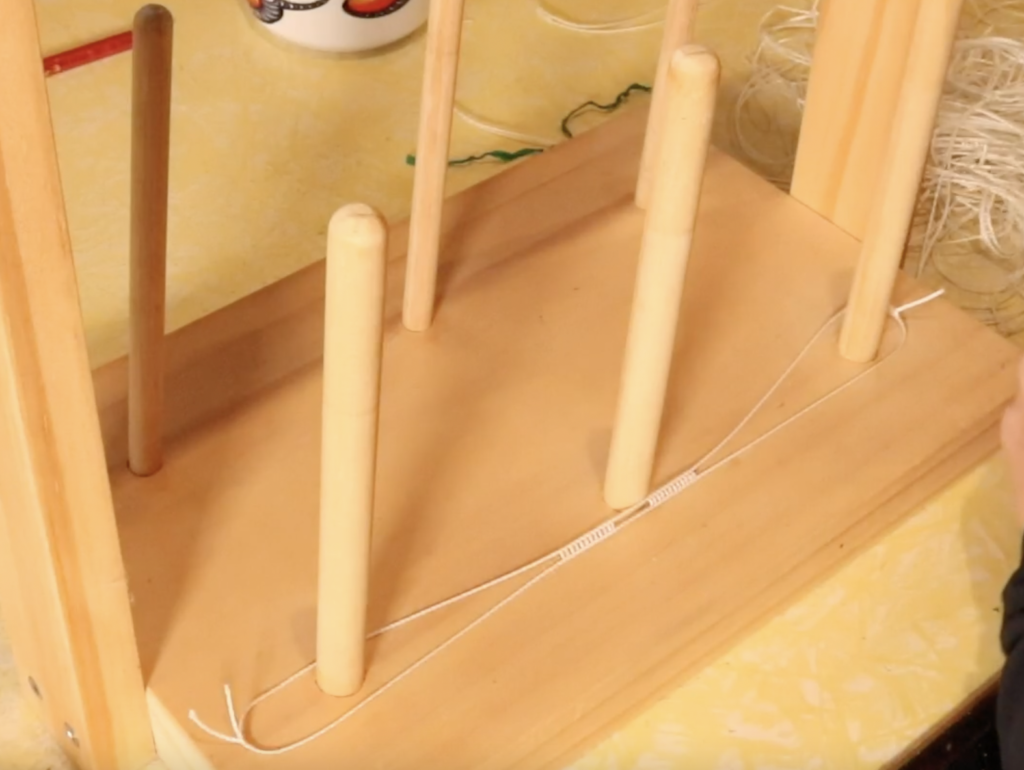
Place the loop at the other end over the right hand peg. If you have a central peg like I do, it doesn’t matter which side of it the eye of the heddle rests against. It is best however, to have it rest on the same side of the central peg for each heddle, to keep the laid out order the same.

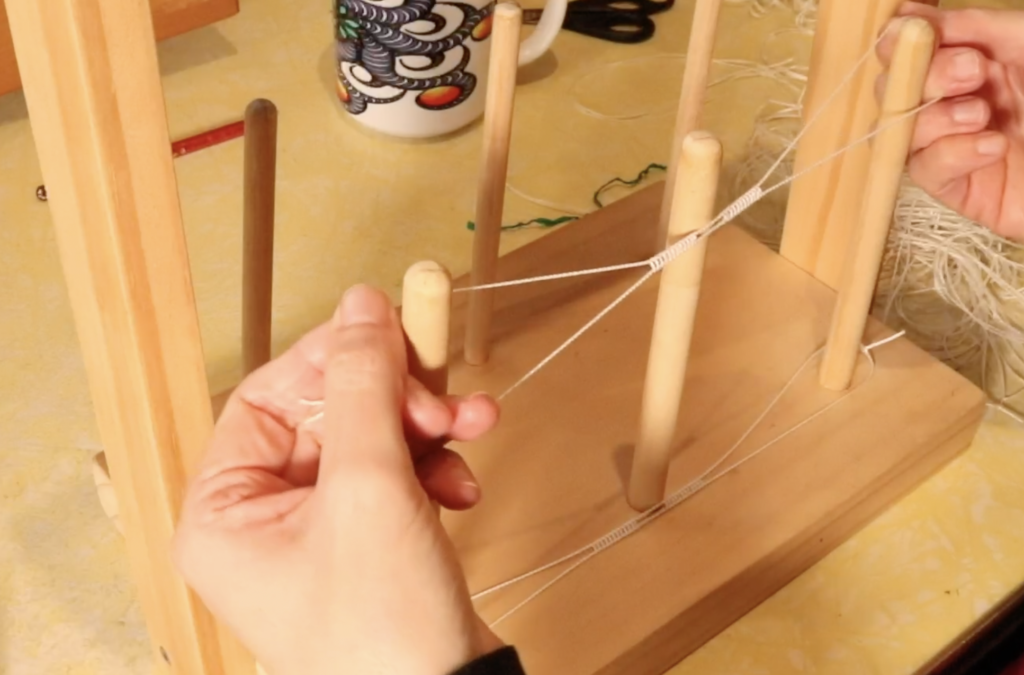
Drop the loops so that the string heddle rests on the base of your pegs.

Grab your next string heddle and repeat the same action of holding the loops and placing them on the pegs. Pretty simple? šŸ‘ I like to keep going until I’ve laid out around 100 heddles.

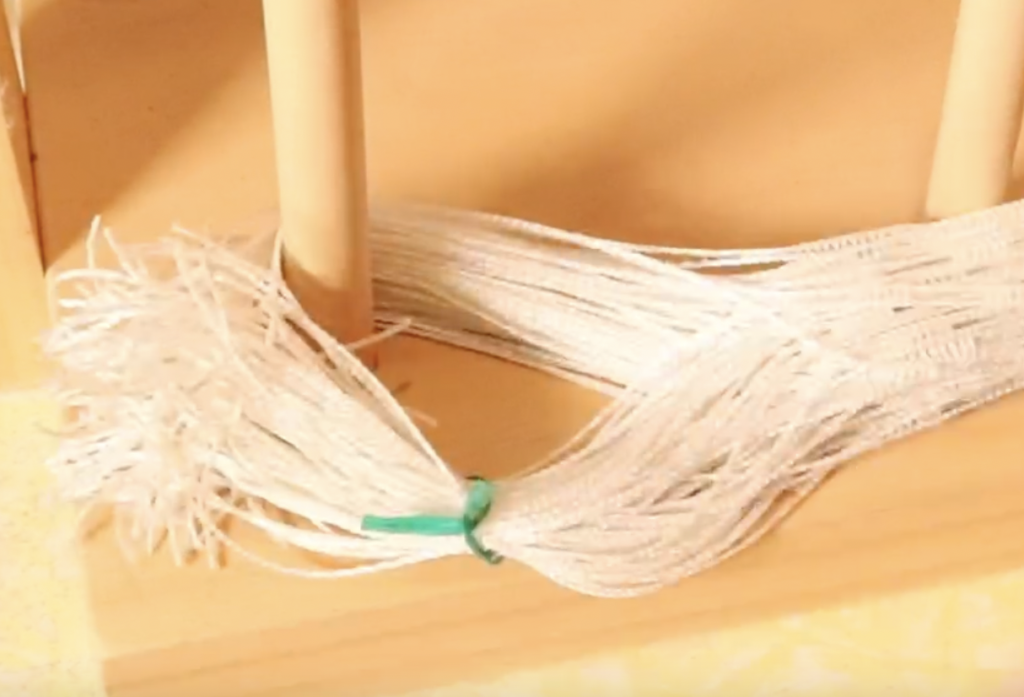
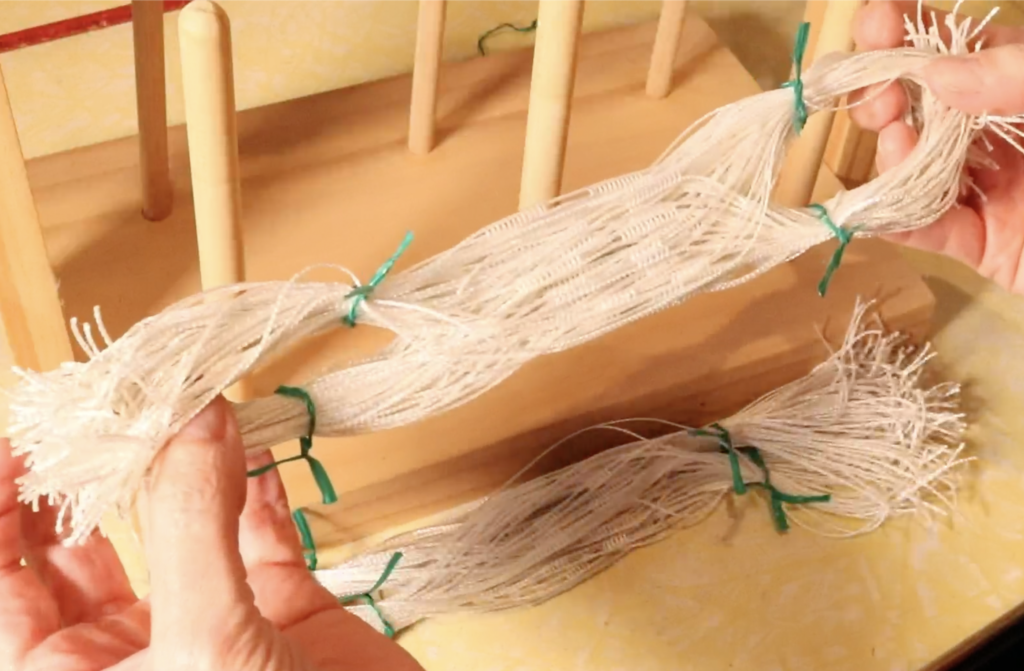
When you have enough to make a bundle, take a twisty tie and take one side of the larger loops on one end of the bundle. Because of the way the heddles are laid out, you will easily be able to see the separated sections.

Take the tie and twist it around this section, twisting the ends of the tie together to secure it.

Take another tie and do the opposite side of the same loop, securing it in the exact same way. Do the same for the loop at the other end of the bundle so that you have 4 ties total.

Slip your bundle off the pegs and it’s ready to use!

If you would like a video tutorial on how to make bundles, check out the one below:

I hope this tutorial was useful to you, please leave your questions or comments down below.

Until next time…

Happy Weaving!

Filed Under: Floor Loom Weaving, Free tutorial, Table loom weaving, Tutorials, Weaving Tagged With: floor loom weaving, string heddles, tutorial

5th Birthday Giveaway!

by Kelly 183 Comments

This month the Online Weaving School turns 5! 🄳

It’s hard to believe that the years have passed so swiftly and that the weaving school has come so far since it’s humble beginnings in 2017.

If you want to find out more about how the weaving school began, you can check out this post or this Youtube video.

Please note, this post contains affiliate links. For more information, please see my disclosure policy.

To celebrate 5 wonderful years of learning, sharing and community, I’m having a giveaway! Are you ready to have some fun? 🄳

I’ve teamed up with Nicky from Thread Collective for some awesome prizes.

Here are the prizes, in no particular order:

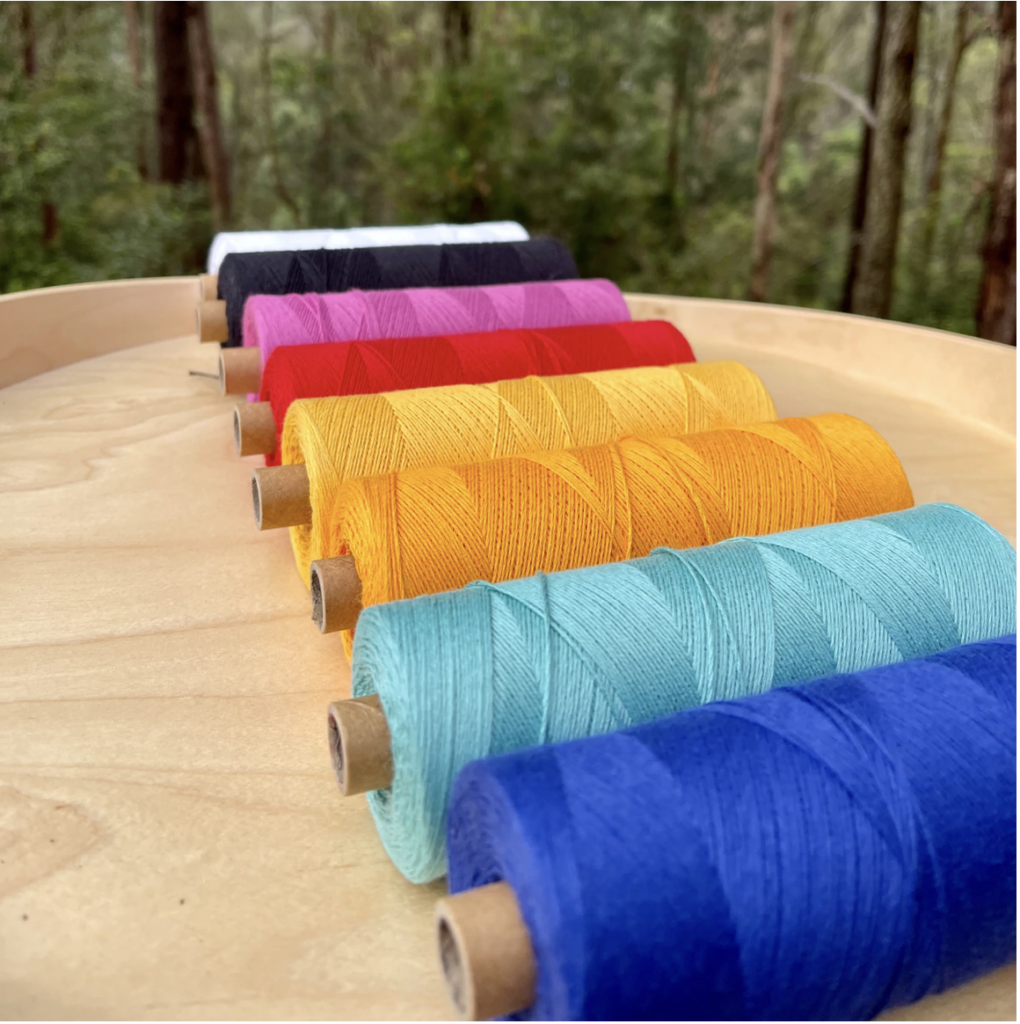
  • $100AUD to spend on Ada Cotton Yarns. These beautiful cotton yarns are Australian grown and come in a range of vivid and happy colours. The winner can choose from Ada Cotton Laceweight or Ada Cotton Sock Yarn (8/4 weight).
  • $100AUD Gift Voucher for the Thread Collective. The winner can choose what to spend the voucher on. You could spend just the voucher amount or you could use the voucher towards a larger purchase, the winner gets to choose.
  • This is a fun one šŸ˜‰ If you purchase a new membership during the month of May, 2022, you instantly go in the draw to win a membership refund. This applies to any membership (and yes, if you’ve already purchased in the month of May you are automatically entered). If the winner purchased a Premium or Basic membership, they would receive a full refund for their first year. A 6 monthly membership would receive a full refund for their first 6 months. And a monthly membership would receive a full refund for their first month.

If you purchase a membership this month, you are still free to enter the other prize draws!

How to enter:

Leave a comment underneath this post (comments posted elsewhere will not be accepted, sorry!) telling me how the Online Weaving School has impacted your life.

Two comments will be selected to win either the Ada Yarns or the Gift Voucher. One winner will be selected to receive the membership refund.

The giveaways will be drawn at the end of the month, May, 2022. Winners will be notified by email.

A big thank you to Nicky from Thread Collective for collaborating on this giveaway! And a massive thank you to all of you who support my work and make the Weaving School possible ā¤ļø

P.S. If your comment does not show up right away, don’t panic! I have comment approval turned on to keep the spammers at bay and sometimes it may take a while for your comment to show.

If you want to see the companion video for this post, please watch here:

*THIS GIVEAWAY HAS NOW CLOSED, THANK YOU TO ALL ENTRANTS.

CONGRATULATIONS TO JOAN, HELEN AND LORI!

Until next time…

Happy Weaving!

Filed Under: Giveaways, Online Weaving School, Weaving Tagged With: birthday, celebration, giveaway, online weaving school

Herringbone on a Rigid Heddle Loom

by Kelly 202 Comments

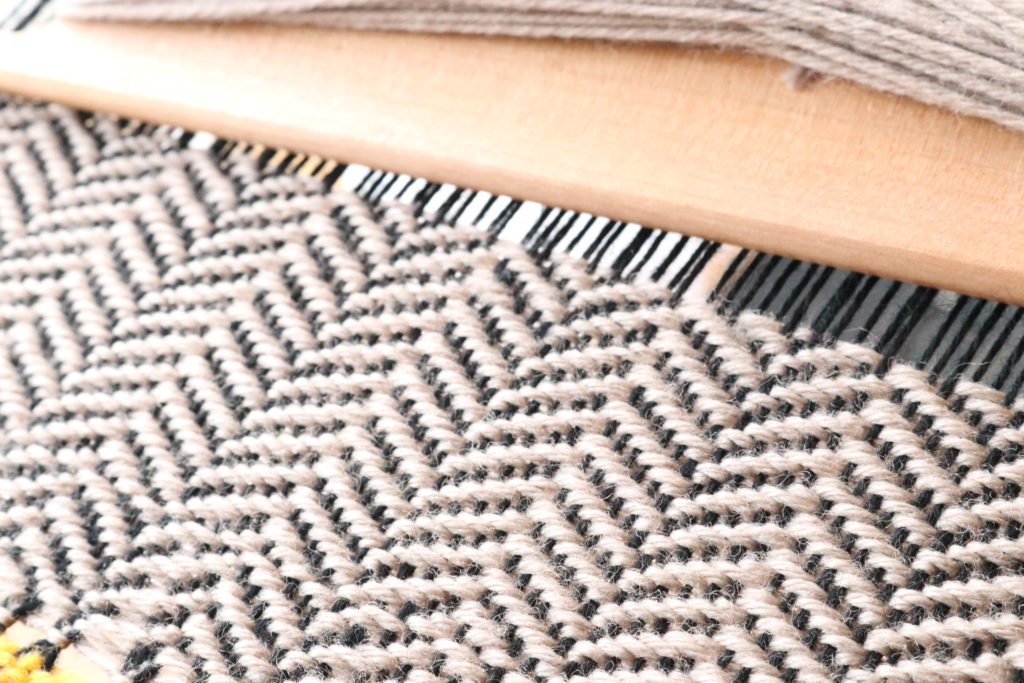
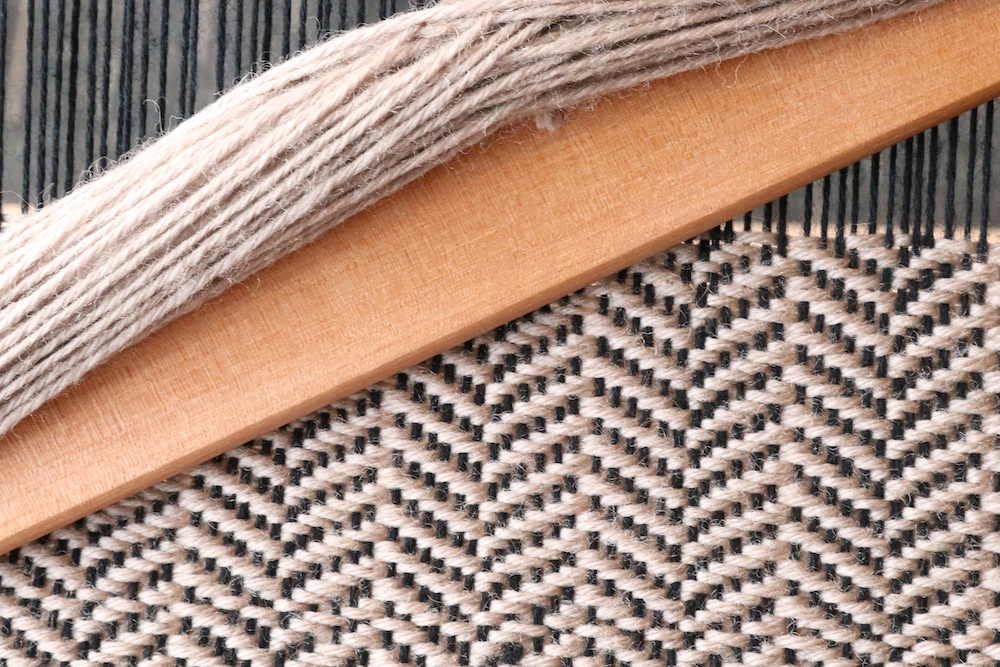
I am really excited to be offering the Herringbone on a Rigid Heddle Loom class!

Not just because herringbone is such an enchanting weave, but also because this class is very unique.

Usually when I release a new class, I focus on a particular technique or means to set up the rigid heddle loom. This presents a problem. I’m always asked how to set up in other ways.

*This post contains affiliate links. Please see my disclosure policy for more information.

For example, if I use a single heddle, heddle rod and pick up stick to weave a particular project, students will ask how to weave it with two heddles. And vice versa.

For this class, I decided to spoil students by providing not just one, but three options for setting up the loom to weave herringbone.

This helps to cater for different learning styles and also differing budgets.

Method one uses two heddles, a pick up stick and a heddle rod.

Method two uses one heddle, 2 heddle rods and a pick up stick.

Method three uses three heddles.

Each method provided has step by step video instructions, visual threading charts and written instructions.

Students will complete a classic herringbone scarf as the class project.

To complete this class you will need:

A rigid heddle loom, 10″ or wider

10 dent heddle (number of heddle required depends on your method choice)

Also, depending on your set up choice, you may need:

Pick up stick

Heddle rod/s

Elastic bands

Tapestry needle

Full yarn requirements will be available upon enrolment.

The class will be available for single purchase, or, if you are a member of the Online Weaving School, this class will be included in your membership. Premium members currently have early access.

Now, for a little fun! As a pre-release celebration, I’m offering two of you the chance to win this class. The winners will be given access to the class upon it’s release shortly.

Here are the entry requirements:

  • You will need to be registered with the Online Weaving School. That way, I can enrol the winners in the class.
  • In the comments section below, tell me whether you would be most interested in method one, two or three to complete the class.

The winners will be announced at the end of this week.

Please note – if you don’t see your comment posted right away, don’t panic, I have to approve all comments first.

*UPDATE – THIS GIVEAWAY HAS NOW ENDED.

CONGRATULATIONS TO THE WINNERS – ERIN MCGANN AND LYETTE MONGEON

Filed Under: Giveaways, Online Weaving School, Rigid heddle weaving, Weaving Tagged With: giveaway, herringbone, rigid heddle weaving

  • « Go to Previous Page
  • Page 1
  • Interim pages omitted …
  • Page 8
  • Page 9
  • Page 10
  • Page 11
  • Page 12
  • Interim pages omitted …
  • Page 25
  • Go to Next Page »

Primary Sidebar

Hand crafted boat shuttles

Categories

Archives

Meta

  • Log in
  • Entries feed
  • Comments feed
  • WordPress.org

Copyright © 2025 Kelly Casanova Weaving Lessons on the Foodie Pro Theme